
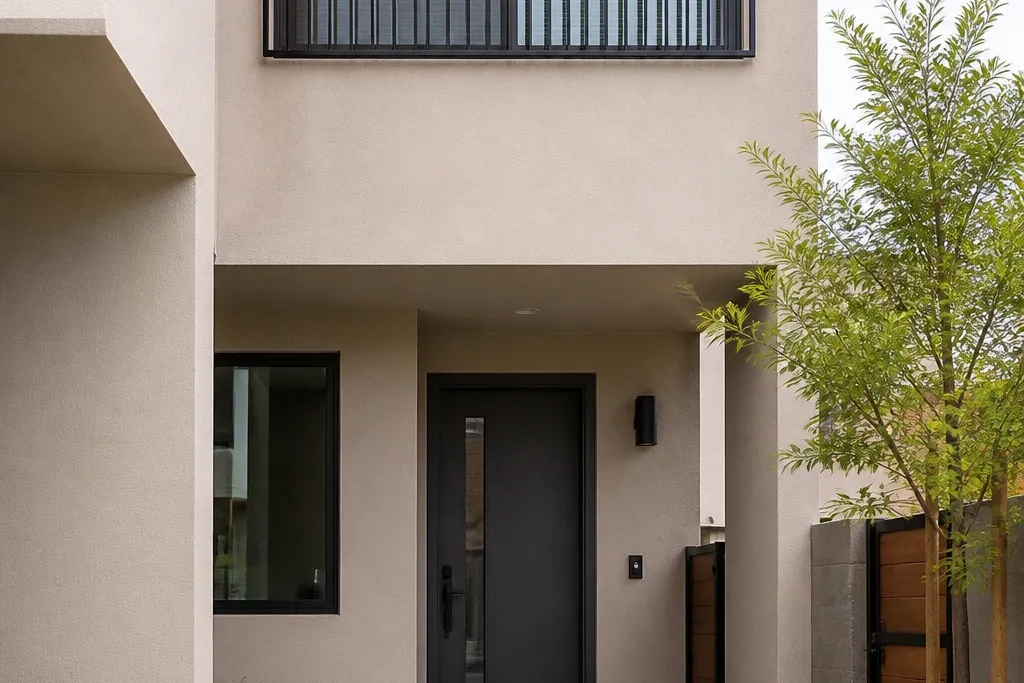
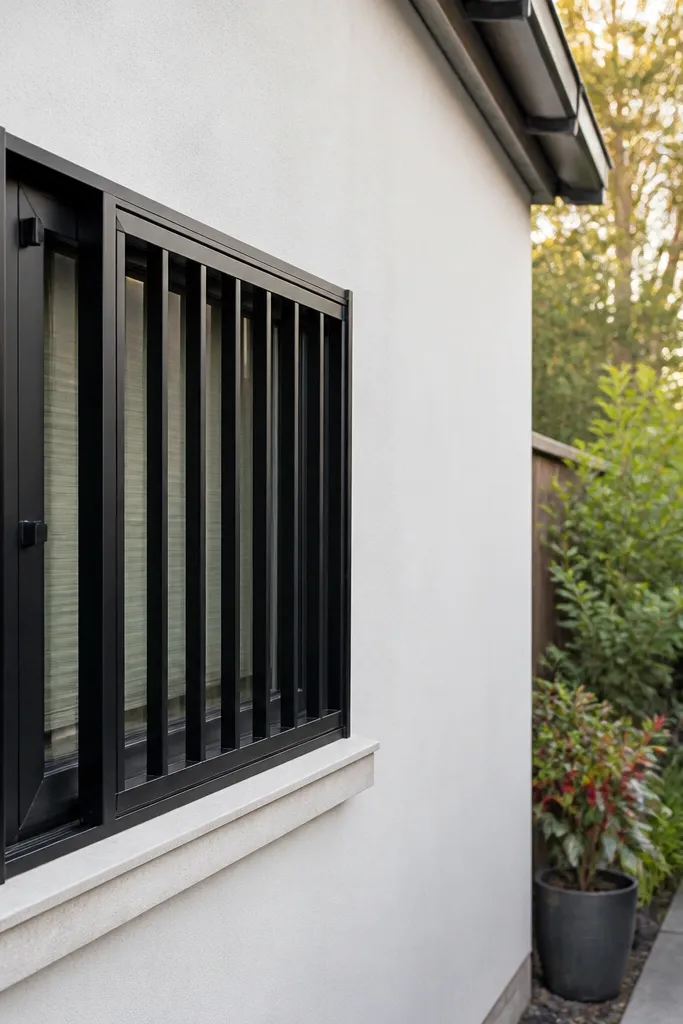
1. Slim Black Tube Frame with Vertical Bar Grid
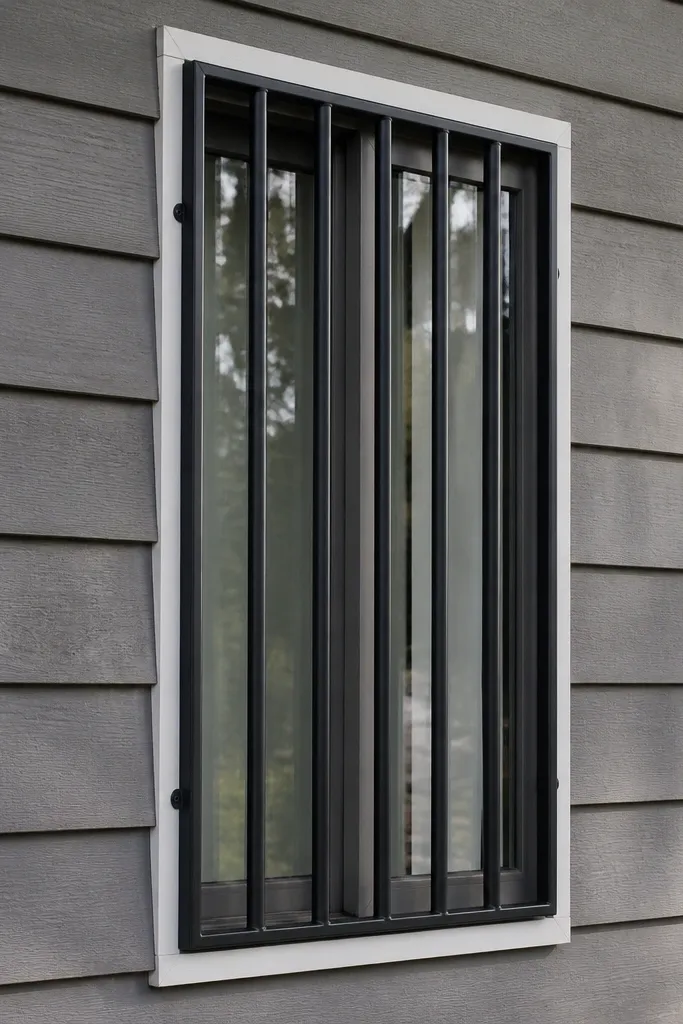
This is the cleanest modern look for small-space sliding window grill ideas because it keeps the lines tight and the view readable. A slim black tube frame makes the grill look like part of the window system, not an add-on. Vertical bars are the best choice when you want airflow and a crisp silhouette from the street. Use 1/2-inch bars or 3/8-inch round stock depending on how narrow your window is, and keep spacing consistent so the grid looks intentional in photos. It suits apartments, row houses, and any window where you want safety without turning the front of the home into a fortress.
Start by measuring the window opening width and height, then add 1 inch total to the frame size so the grill covers the opening cleanly. Cut four lengths of 1-inch square tube or 3/4-inch square tube for the frame, then miter or butt the corners depending on your tools. Mark and weld or bolt the vertical bars across the frame with a spacing gauge set to your target gap (3-4 inches is a good starting point). Test-fit against the window track to confirm clearance for sliding, then prime and top-coat the whole assembly before mounting. Finally, mount the frame with through-bolts and expansion anchors into masonry or with lag screws into studs using a backer plate.
Editor's noteUse a cheap spacing jig made from scrap plywood with cut notches so every bar lands at the same distance.
Skip thisDon’t use random bar spacing — uneven gaps make the whole grill look DIY even if the metal is straight.
2. Matte Bronze Frame with Horizontal Slats and Side Slide Clearance
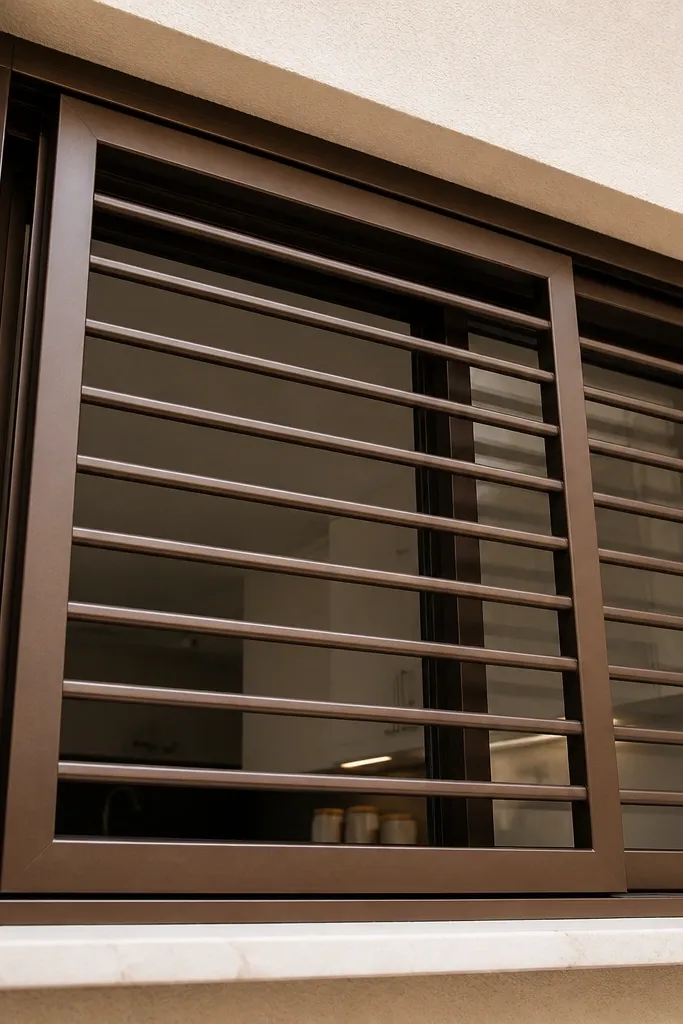
Horizontal slats read modern and soften the harsh look of vertical bars, which is why I like this for narrow windows where vertical grids can feel too heavy. The bronze tone also hides minor weld marks and gives a warmer curb appeal than black. This design works when you keep the slats slim and evenly spaced so you don’t block light more than necessary. It’s also a strong option for people who want airflow but don’t want a full grid look. If your window is close to a wall or you’re worried about finger access, a slat build with clean end caps looks polished and safe.
Build the frame first using 1x1 inch angle or tube, then cut slats from 1/4-inch flat bar. Keep the slats short enough that they don’t interfere with the window’s moving sash; dry-fit the grill to the frame while the window is partially open to confirm clearance. Lay out slats with a spacer strip so the gaps stay consistent; mark them carefully before any welding. After assembly, sand the edges smooth, apply rust-inhibiting primer, and paint with a durable top coat in matte bronze. Mount using corrosion-resistant hardware and keep the grill level so the slats appear straight from the curb.
Editor's noteIf your window track is tight, set the grill back 1/2 inch from the opening using spacers so the sash never kisses the slats.
Skip thisDon’t make slats thick and close together — you’ll lose light and the look turns bulky fast.
3. Powder-Coat Look Gray with Rounded-Edge Bars
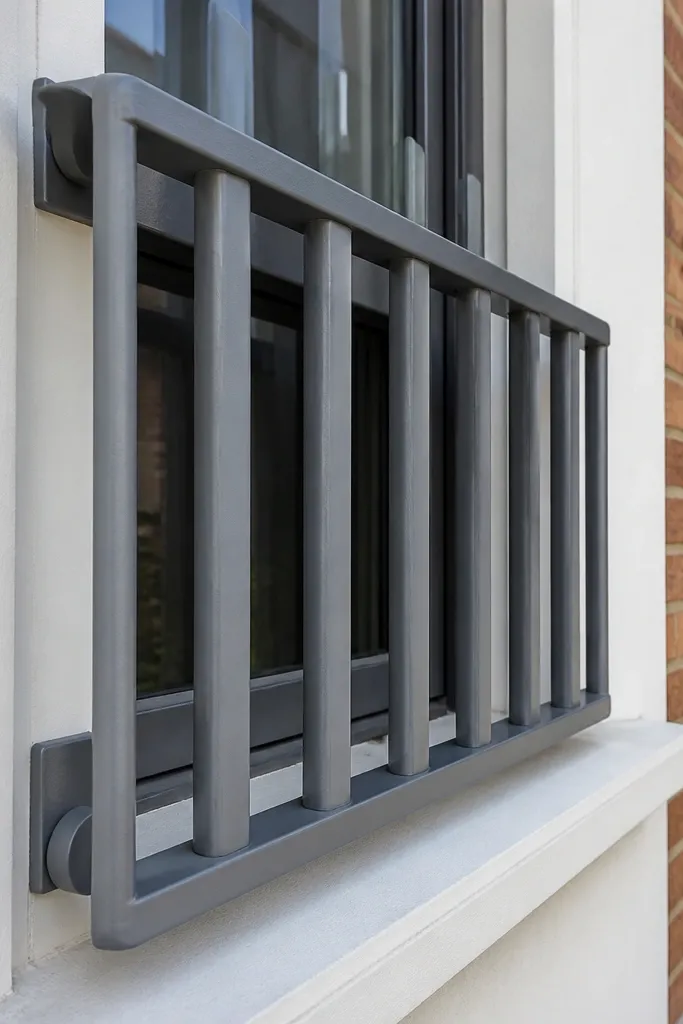
Rounded-edge bars make the whole grill feel calmer and more architectural, especially on small windows where sharp corners catch the eye. The gray finish is also forgiving: it hides tiny surface imperfections while still looking crisp. This style is great if you want the grill to blend with painted trim or modern siding. It’s photogenic because the rounded bars cast subtle shadows, giving depth without extra decoration. Keep the frame slim and the bar ends perfectly finished so the grill looks like a manufactured product.
Choose bar stock with rounded profiles or round the edges yourself using an angle grinder and flap disc. Build a slim rectangular frame from square tube, then weld the bars in a grid with measured spacing. Use a scrap spacer block to keep bars aligned during tack welding. After welding, grind welds flush where they meet the frame so the finish stays smooth. Prime with an adhesion primer, then spray a top coat in a satin/low-sheen gray and let it cure fully before mounting.
Sand weld seams only in the direction of the bar grain so you don’t create visible swirl marks under the paint.
Don’t skip primer — bare metal spots will flash rust through the gray and ruin the clean look.
4. White Frame with Narrow Black Bars for Modern Contrast
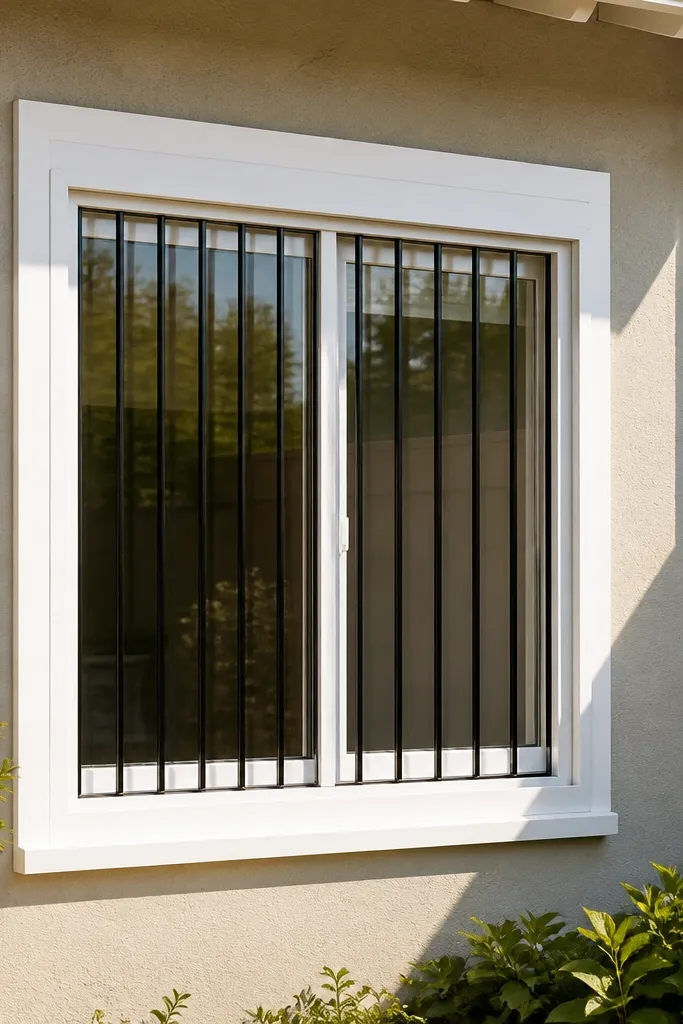
This is a high-contrast look that works on small spaces because it frames the window neatly instead of swallowing it. A white frame makes the grill feel lighter, and the narrow black bars keep safety and visual structure. It’s also great if your trim is white or your home has light siding. The key is keeping bar thickness slim and the frame width tight, so the grid looks airy rather than heavy. This style photographs well because the lines pop and the window area stays the focus.
Start with a white-painted frame plan: use 3/4-inch square tube for a slim border and cut it to cover the opening with a small overlap. Weld or bolt narrow bars (around 3/8-inch round or 1/4-inch flat) across the frame with consistent spacing. Build a simple jig so each bar sits at the same distance from the frame edge; accuracy matters more than fancy design here. Sand, prime, and paint the frame white using a durable outdoor enamel or metal top coat. Paint bars black separately if you want the clean two-tone effect, then mount with exterior screws and anchors.
Editor's noteMask the frame edges before painting the bars so you get sharp lines where black meets white.
Skip thisDon’t paint everything one flat color — you’ll lose the modern contrast that makes this look feel intentional.
5. Staggered Diamond Grid with Slim Frame
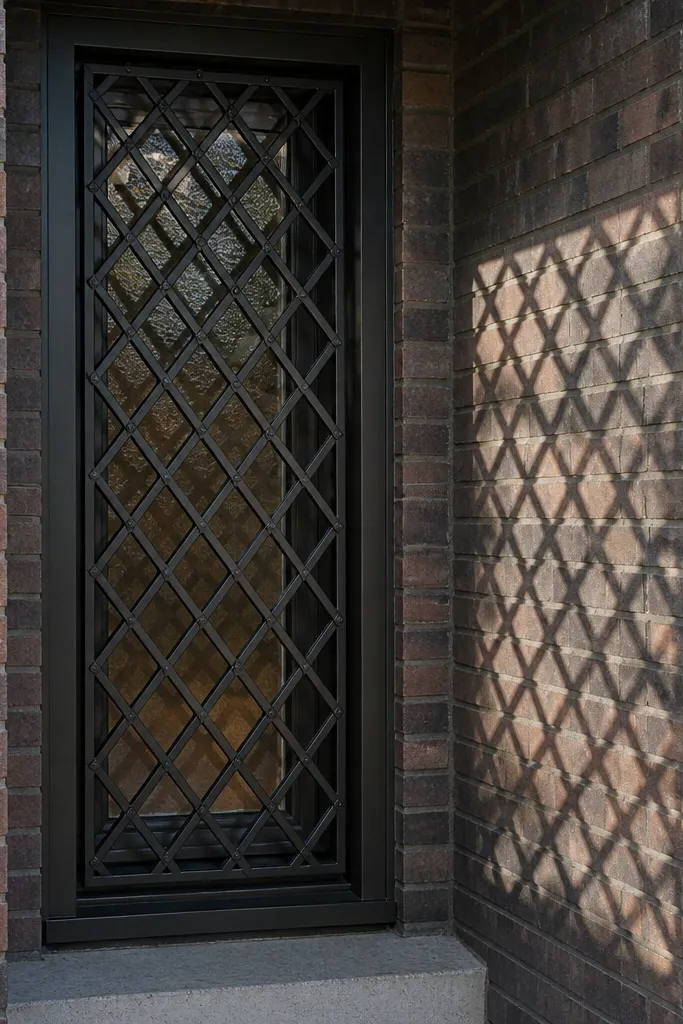
A diamond pattern looks more decorative than a basic grid, but it still reads modern when the frame is slim and the diamonds are consistent. This style is photogenic because the pattern creates a checker-like shadow effect that shows up even in overcast light. It also lets you keep bar material relatively slim while covering the window securely. For small spaces, the diamond grid can feel less blocky than verticals because the pattern distributes visually. If you want something that looks custom without adding clutter, this is the move.
Make the frame from square tube sized to your opening with a 1/2-1 inch overlap. Cut two sets of bars for the diamond pattern, then orient them to create 45-degree crossings. Lay everything on a flat surface and tack-weld intersections so the pattern stays square before finishing welds. Keep the diamond opening size consistent — around 2-3 inches is a good visual and safety target for many homes. After assembly, sand the welds, prime, and paint with a smooth top coat; mount using a level frame and corrosion-resistant anchors.
Use a chalk line and a single reference corner to keep the diamond grid square — a 1/8-inch drift ruins the look.
Don’t cross bars randomly — crooked diamonds scream DIY even with a perfect paint job.
6. Arched Top Bar Accent Over a Straight Grid
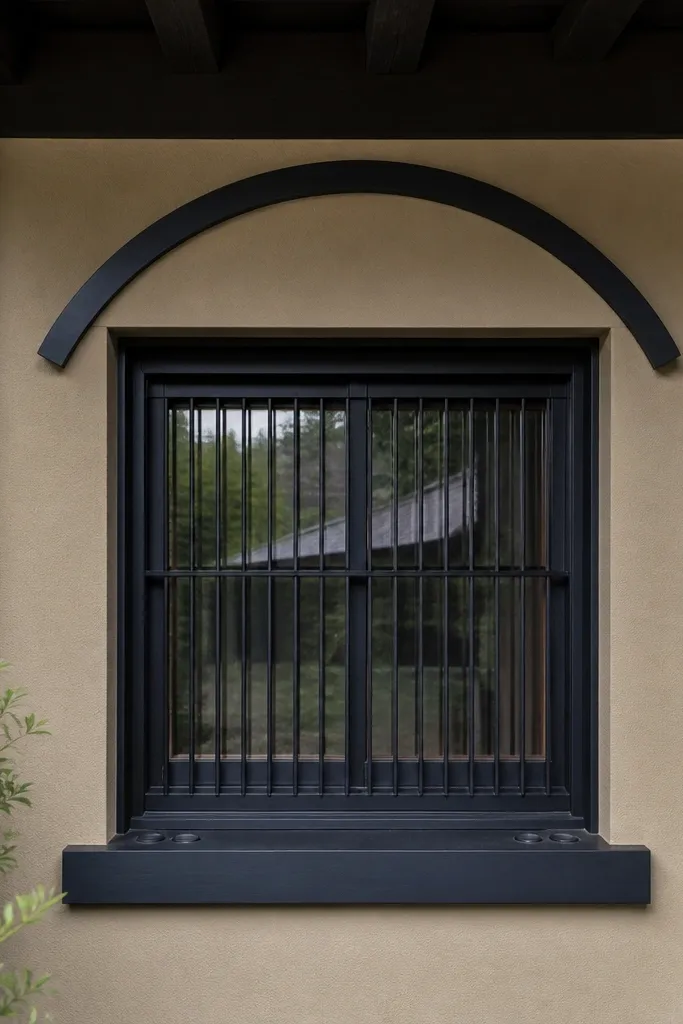
If your home has any traditional trim, an arched top rail makes the grill look like it belongs there. The trick for small-space sliding window grill ideas is to keep the grid straight and only arc the top accent, so you get a decorative hint without making the whole thing bulky. This style gives you a focal shape that reads well from the street, especially on front doors and narrow side windows. Use a slim frame and keep the arc subtle — big arches dominate the window. It’s a good choice when you want modern safety but your architecture leans classic.
Build a straight rectangular frame, then create an arched top rail from bent tube or a pre-cut arc section. Weld the arched rail to the side uprights and keep the corners smooth so the paint finish stays clean. Fill the grid with vertical bars set to your spacing target (3-4 inches is a good start). Dry-fit the assembly with the sash in motion to confirm the arc doesn’t hit the track area. Sand, prime, and top coat in a matte finish to make the arc look smooth; mount with anchors or into studs depending on your wall.
Editor's noteTest the arc template on cardboard first so you can dial in the height before you bend metal.
Skip thisDon’t make the arch too tall — it blocks light and makes a small window look smaller.
7. Two-Panel Sliding Grill Track for Quick Access
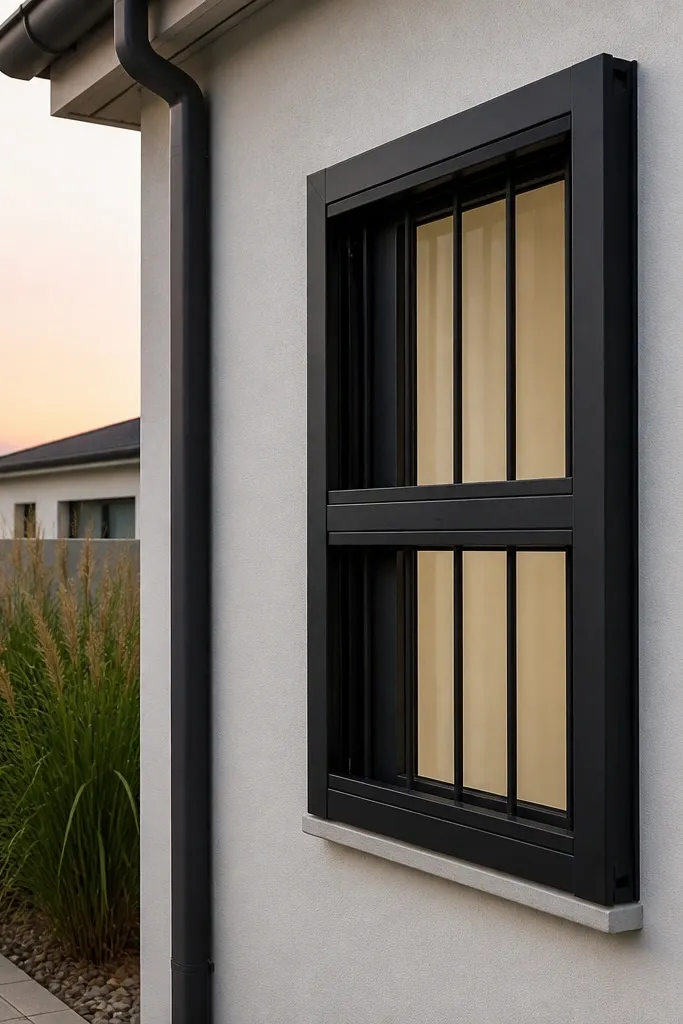
This one is for people who want the safety of a grill but hate the idea of a fixed barrier. A two-panel sliding grill on a side track keeps the window protected while still letting you open the grill for cleaning or emergency access. For small homes, it looks sleek when the track is hidden behind a slim frame cover. You get a clean front face and less visual clutter than a swinging gate. The look is modern because the panels align in a straight plane and the hardware is minimal.
Start by building a main outer frame that mounts to the wall with a 1-2 inch overlap over the window opening. Install a side track channel (metal U-channel) on the frame so the grill panels slide without rubbing the window. Build two grill panels with matching frames and a vertical bar grid pattern so the seam is tight when closed. Add small roller wheels or sliding guides rated for outdoor use, then test with the panels fully closed and partially open while watching for clearance to the sash. Finish with primer and top coat, then mount the full assembly and adjust track screws until movement is smooth.
Add a rubber bumper strip where the panels meet so the seam closes quietly and stays aligned.
Don’t rely on thin hardware for the track — flimsy channels twist and the sliding panels jam.
8. Removable Hinged Grill with Magnetic Catch
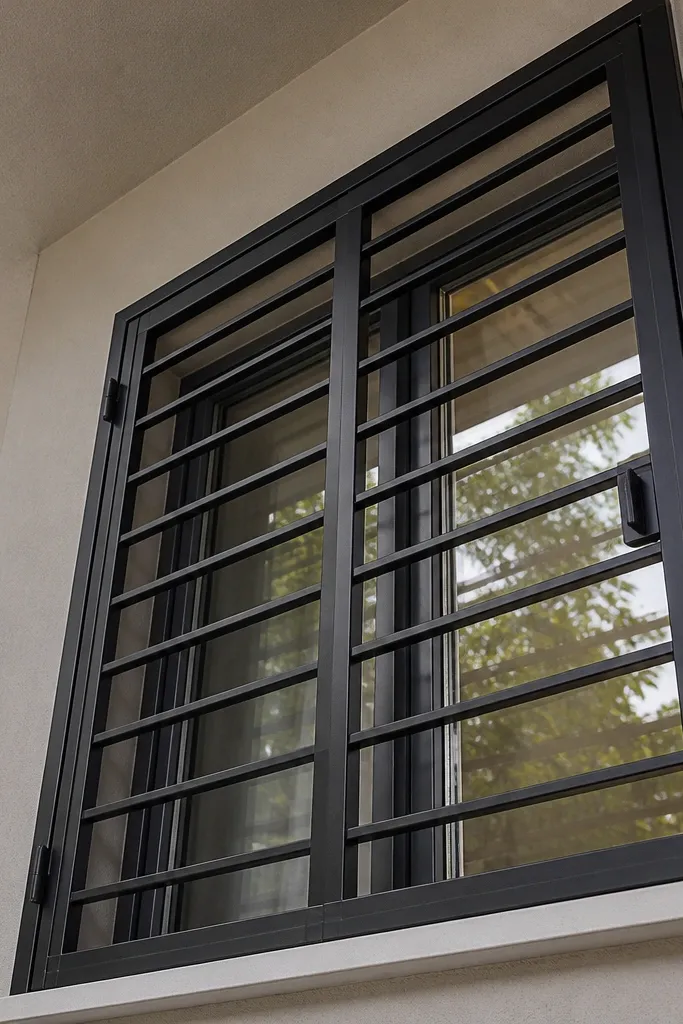
A hinged grill with a magnetic catch is a practical aesthetic upgrade because it looks like a real product, not a permanent cage. You get full access for cleaning and you can remove the grill in minutes if you ever need the window clear. It’s ideal for small homes where you’re constantly opening windows for air. The trick is to hide the hinges and use a clean latch line so the front stays flat and modern. This style is also great for side windows where you need to reach the sash quickly.
Build a flat grill frame from square tube and attach vertical bars with consistent spacing. Install two concealed hinges on the back side of the frame and align them so the grill opens outward without hitting trim. Mount a matching strike plate or latch receiver on the window frame or wall surface. Add a magnetic catch rated for outdoor use and test the hold force with the grill fully closed. Finish everything with primer and paint, then mount and adjust hinge positions until the latch lines up with no gaps.
Editor's noteUse hinge spacers to keep the grill’s front face perfectly flush with the trim when closed.
Skip thisDon’t install the latch too low — the grill will sag over time and the magnet won’t meet cleanly.
9. Geometric Half-Grid with Curved Corner Frame
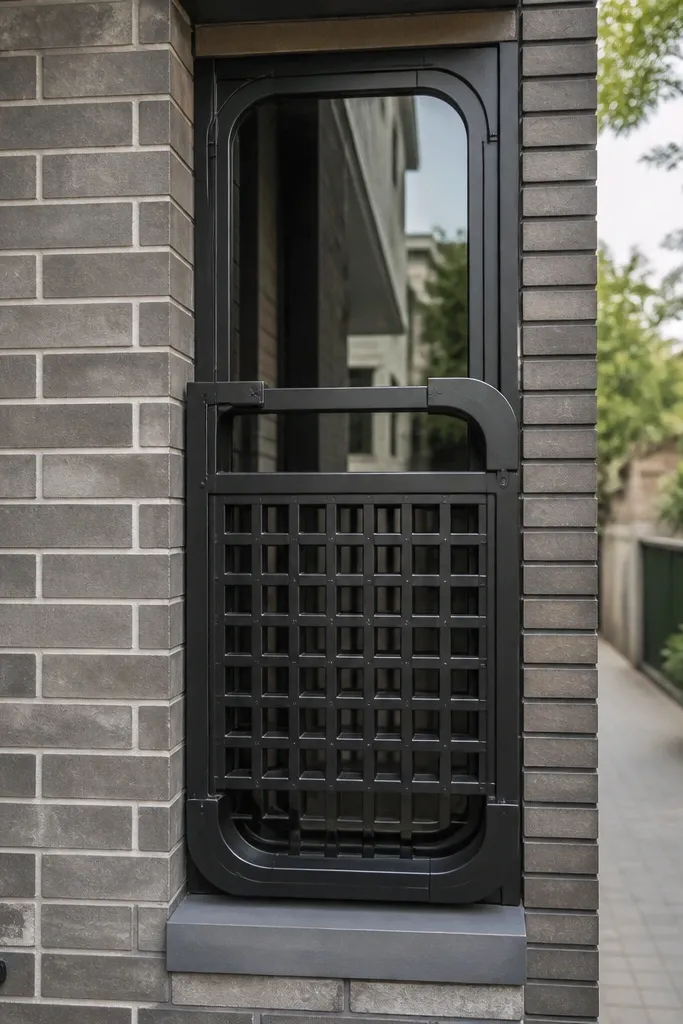
This is a design-forward option for small-space sliding window grill ideas when you want the grill to look like architecture, not hardware. The curved corner frame softens the blocky feel, and the half-grid lets more light through while still protecting the opening. Pick this if your window is near a walkway and you want the grill to look friendly and modern. It’s photogenic because the curved corners catch light differently than straight metal. Keep the geometric section crisp and the rest of the frame clean so the design reads intentionally from the street.
Create a frame with two rounded corners using bent tube or corner blocks shaped to your template. Divide the opening so only the lower or upper half gets the vertical bar grid; use a straight horizontal rail to separate zones. Weld the bars only in the designated half and keep the other half open for light. Dry-fit against the window track to confirm the sliding sash clears the open zone without rubbing. Prime and paint the entire frame, then mount with a level alignment and corrosion-resistant fasteners.
Make a cardboard template of the bar zone so you can set the half-grid height before cutting metal.
Don’t leave the open half too large — the grill can look decorative instead of protective.
10. Stainless-Look Grid with Clear-Coat Finish
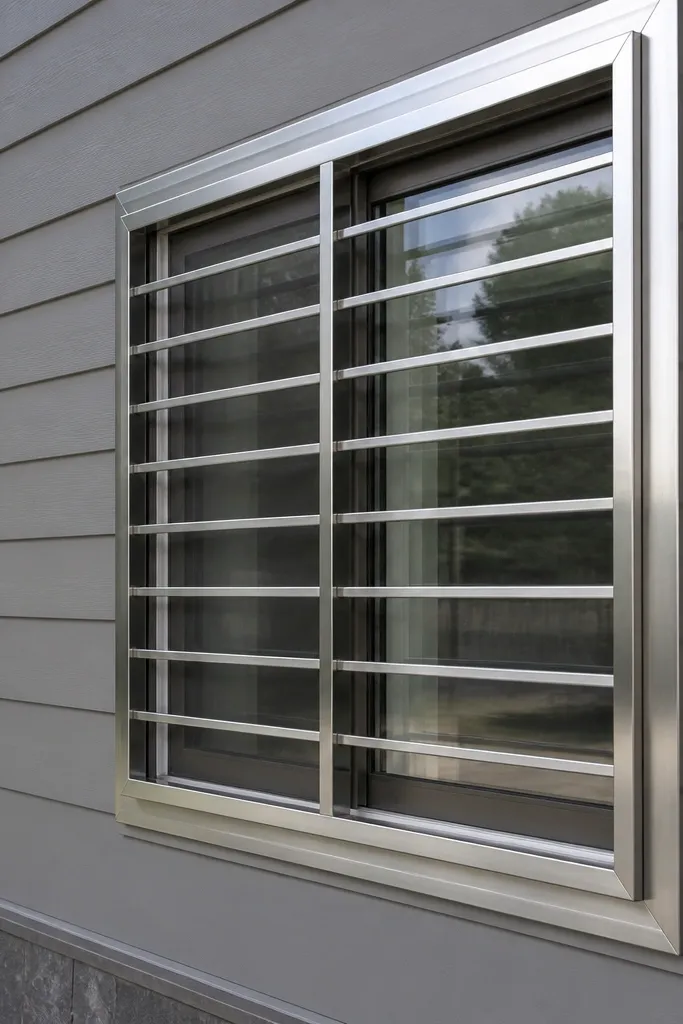
A stainless-look grill feels modern and bright, especially for small homes with gray siding or metal roofing. The key is using a finish that looks like brushed steel from a distance while still resisting weather. This style works best when the frame is clean, the bars are straight, and the spacing is consistent — the “metal” look is unforgiving. It’s photogenic because the grid reflects light and creates a bright pattern around the window. If you want a grill that looks lighter than black, this is the route.
Choose corrosion-resistant bar stock, then build a slim rectangular frame from stainless or coated metal. If you’re using coated metal that’s not true stainless, prep carefully: sand to scuff, clean with degreaser, then apply a metal primer compatible with clear coat. Install the vertical bars with consistent spacing using alignment clamps while tack welding or using bolt plates. Finish with a clear coat made for outdoor metal so the surface keeps its sheen. Mount with stainless hardware and check for clearance with the sliding sash moving fully open and closed.
Brush the metal finish in one direction before clear-coating so the grain reads evenly in photos.
Don’t use random clear coat — cheap clear yellows and dulls the stainless look.
11. Black-and-Wood Accent Frame for Warm Modern
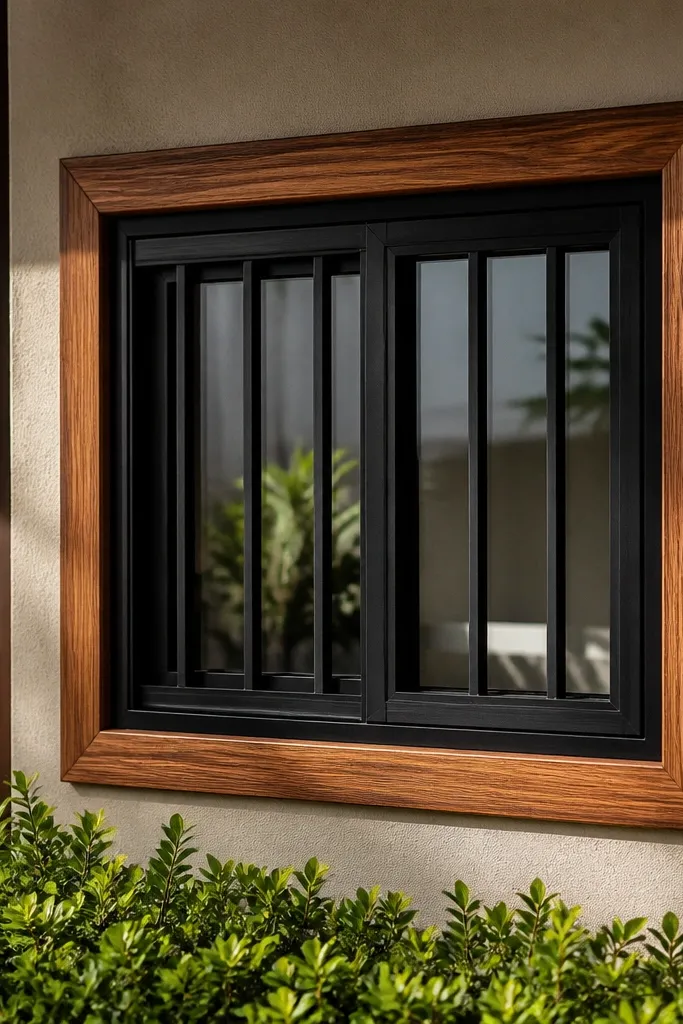
This is the best-looking option if you want small-space sliding window grill ideas to feel less industrial. A black metal grill with a thin wood accent frame gives you warmth and makes the grill blend with interior trim or exterior siding. The wood doesn’t have to be wide — even a 3/4-inch band changes the whole vibe. It’s photogenic because you get contrast: matte black metal plus natural wood grain. Build it clean and it reads like design, not decoration.
Build the metal grill frame first, keeping it slim and modern with vertical bars. Then add a wood trim frame on the inside or around the outer edge using exterior-rated screws and glue made for outdoor use. Seal the wood thoroughly with a stain + clear exterior top coat so it doesn’t warp or crack. Mount the metal frame to the wall, then attach the wood trim so it covers the metal seams. Test the window sliding clearance before final assembly so the wood band doesn’t interfere with the sash movement.
Editor's noteLeave a 1/8-inch gap between wood and metal so wood expansion doesn’t split the finish.
Skip thisDon’t skip sealing — unfinished wood will warp and pull the trim out of alignment.
12. Airy Vertical Lattice with Wide Spacing and Safety Add-On
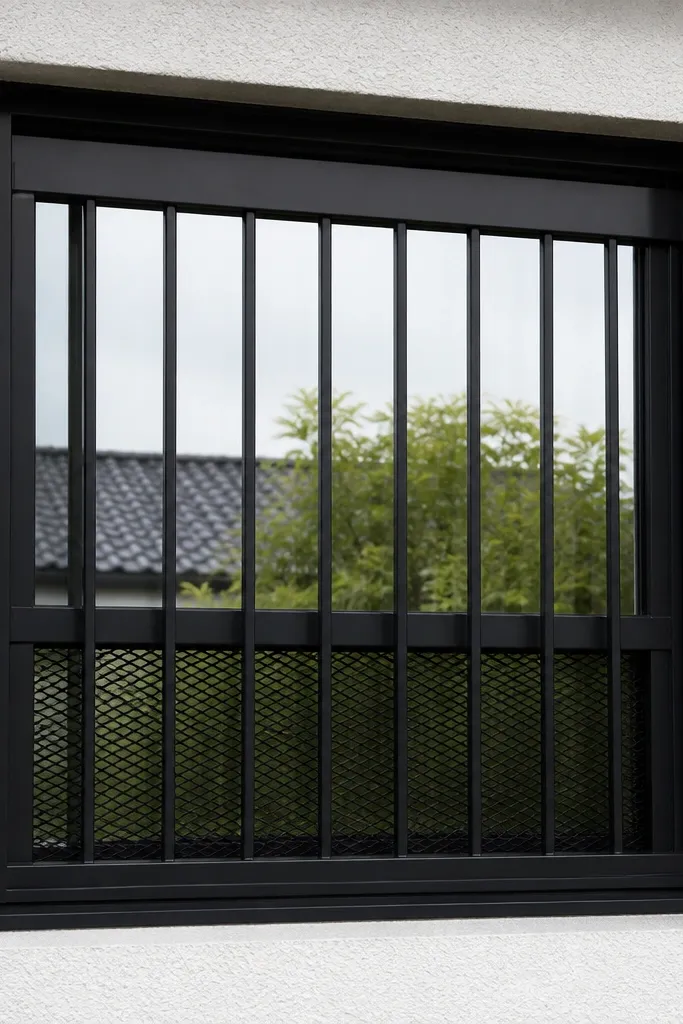
If your main goal is maximum light and a clean look, start with a wider-spaced vertical lattice and add a safety panel where it matters. This design looks airy because the gaps are larger, but you still keep protection by using a denser section on the lower portion or with a secondary mesh behind the bars. For small spaces, light control changes how big the room feels. The look is modern and minimal, and the add-on panel keeps it practical. It’s also a good choice for windows where you want ventilation but don’t want a thick grid blocking everything.
Build a slim frame and weld vertical bars with wider spacing (for example, 4-5 inches) while keeping them perfectly parallel. Add a lower safety panel behind the bars using metal mesh or smaller bars in the bottom 12-18 inches of the window height. Mount the grill with a backer plate if you’re using mesh so it doesn’t sag. Prime and paint the metal parts; if you’re using mesh, paint it too so the back doesn’t look unfinished. Dry-fit with the sash moving to confirm the denser lower section still clears the track.
Editor's noteUse a removable interior mesh panel if you want easier cleaning and future upgrades.
Skip thisDon’t make the whole grid wide open — it looks airy but it fails the safety goal.
13. Modular Square Grid with Hidden Fasteners
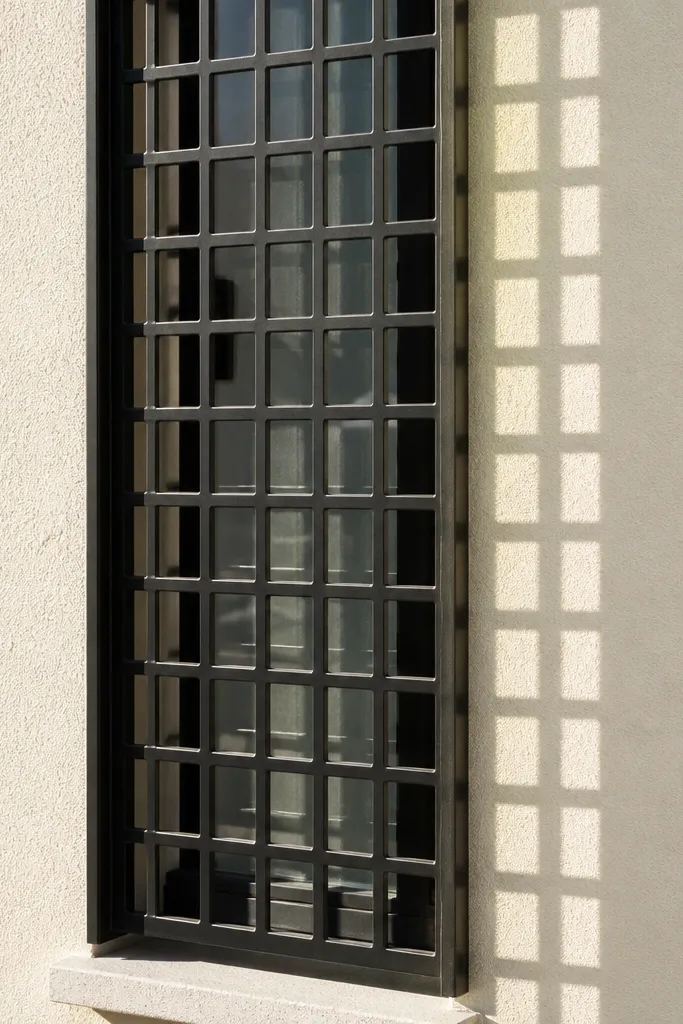
A square grid looks sharp and modern, and hidden fasteners make it look like it came from a shop instead of a hardware run. This style is especially photogenic because the grid lines create a clean checker effect. It also works well on small windows because the pattern stays tidy even when the window is narrow. The secret is building the grid as a module that bolts from behind, so the front face stays smooth. If you hate seeing screw heads on the street-facing side, this is your option.
Create a frame using square tube and weld a grid of square openings using two sets of bars or flat stock. Keep the grid size consistent (for example, 3x3 inches openings) and align everything using a flat work surface. Drill and tap hidden mounting points on the back of the frame so you can attach it to the wall without front hardware. Prime and paint the entire assembly, then mount it using bolts from behind or through the wall into anchors. Check full sliding clearance with the window open and closed to confirm nothing catches at the corners.
Editor's noteUse a sacrificial backing board under the grid during welding so the openings stay square as the metal heats and moves.
Skip thisDon’t weld the grid directly onto the mounting surface — it warps and the front ends up twisted.
14. Powder-Coat Style White with Narrow Vertical + Thin Top Rail
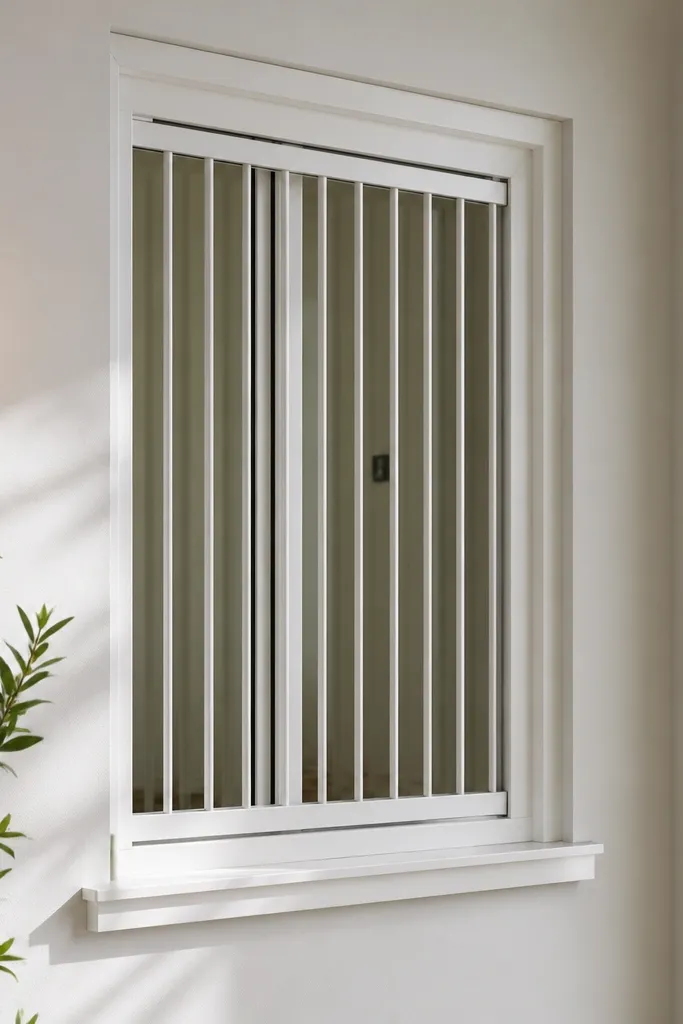
This is the “clean trim” look that makes small-space sliding window grill ideas feel built-in. Bright white also makes the grill less visually heavy, which matters when your window is close to furniture or a hallway. The narrow vertical bars keep the pattern delicate, and a thin top rail makes the whole piece look finished. It’s a great choice when you want the grill to disappear into painted surfaces but still look crisp in daylight. Keep the finish smooth so it reads like powder coat, not brush paint.
Use a slim frame, then cut narrow vertical bars and weld them to a top and bottom rail first for alignment. Keep the bar ends flush to the frame face so the grid looks crisp. Prime the metal with a high-adhesion primer, then spray a white top coat made for metal outdoors. If you can, spray in light passes and let it flash between coats to avoid drips. Mount with anchors into masonry or into studs, and leave a small clearance gap so the grill doesn’t scrape the window frame during sliding.
Editor's noteAdd a 1/2-inch drip edge at the bottom rail by bending a small lip so water runs off instead of pooling.
Skip thisDon’t use thick brush strokes — white grills show every ripple under sun and camera flash.
15. Two-Tone Frame with Inner Black Grid and Outer Woodgrain Wrap
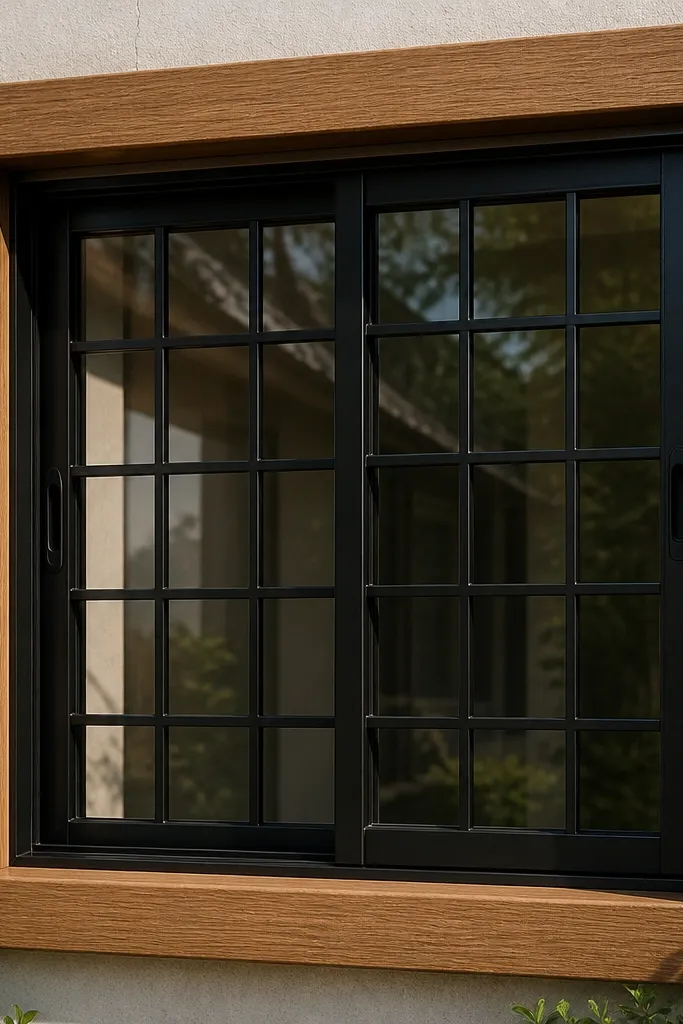
This one looks custom because it treats the grill like a window accessory, not a barrier. The outer woodgrain wrap adds warmth and hides the raw edges where metal meets mounting surfaces. Inside, the black grid keeps safety and adds modern contrast. For small homes, this reduces the “metal box” feeling and makes the grill blend with trim. It also photographs well because the woodgrain texture adds depth without extra decoration. Choose this if your exterior has wood siding, faux wood trim, or a warm interior palette.
Build the inner grill frame and weld the vertical bars with consistent spacing. Then create an outer frame ring from thin exterior-rated boards or composite trim that can handle weather and won’t warp. Seal or finish the woodgrain wrap with an exterior clear coat so it stays smooth and doesn’t peel. Mount the metal grill first to the wall, then attach the outer wrap so it covers screw heads and seam lines. Confirm sliding clearance before adding the wrap, since thickness changes can make the sash hit.
Editor's noteUse stainless countersunk screws for the outer wrap so the surface stays flat and you don’t see bumps.
Skip thisDon’t mount the outer wrap directly to the moving window frame — thickness changes will cause rubbing.



