
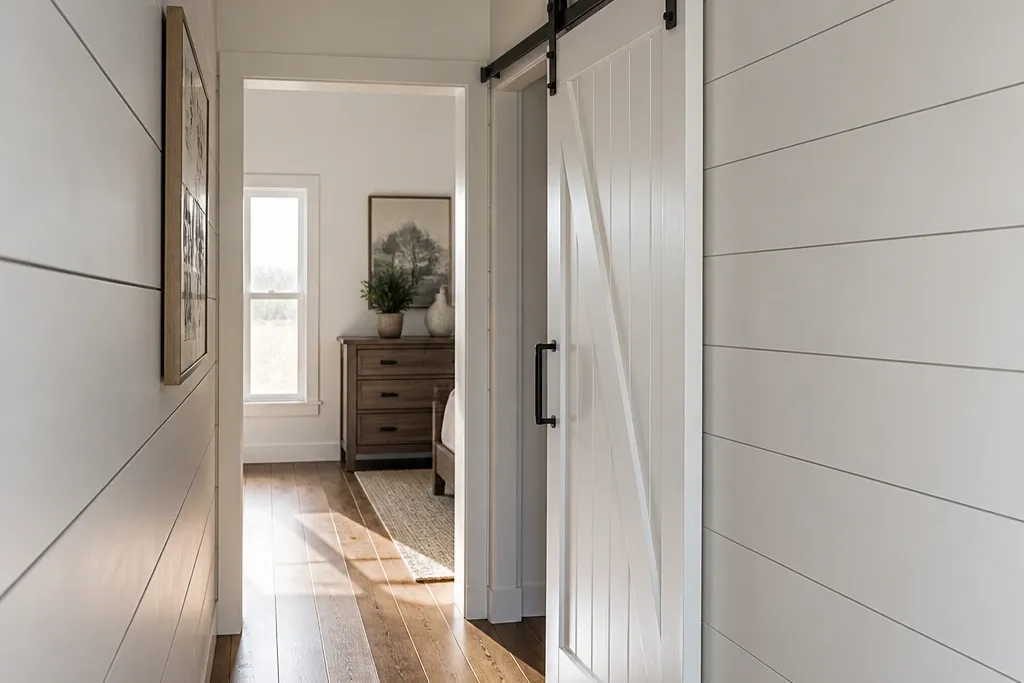
1. White Shiplap Barn Door with Matte Black Rail
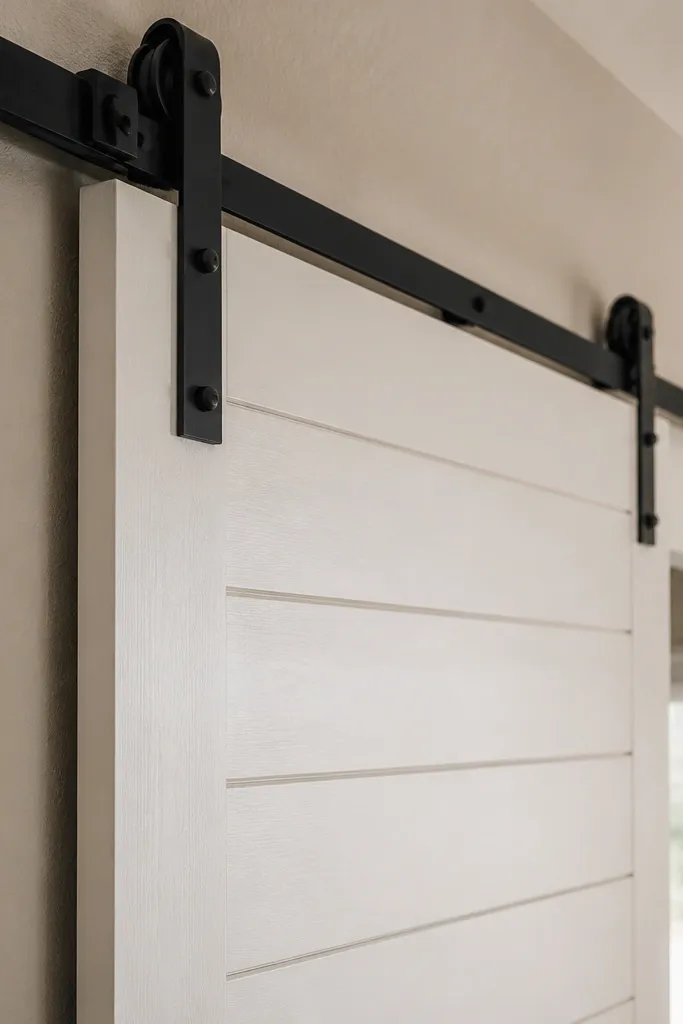
This look works because the door panel reads architectural, not temporary. Shiplap gives you crisp lines that catch light, and the all-white finish makes the space feel bigger even when the opening is tight. Matte black hardware adds contrast without looking heavy, especially if the wall is light-colored. It’s a great option for small hallways and laundry entryways where you want privacy and a clean, modern farmhouse vibe. Plan on a solid panel if the door is for a closet or bathroom.
First, build or buy a shiplap-style door panel and frame it with a simple wood rectangle so it stays square. Then mount a matte black barn rail at least 2-3 inches above the opening so the door doesn’t brush the top trim when it slides. Use two heavy-duty brackets anchored into studs or a structural backing board, and keep the rail perfectly level. Finally, hang the door with a top-mount wheel set, add a floor guide at the bottom corner, and paint or seal the door edges so they match the face.
Use a straight 2x4 level as a temporary straightedge across the opening so your rail sits true while you drill.
Skipping floor guidance is the fastest way to get a door that sways and rubs the trim.
2. Natural Oak Slat Door with Clear Finish
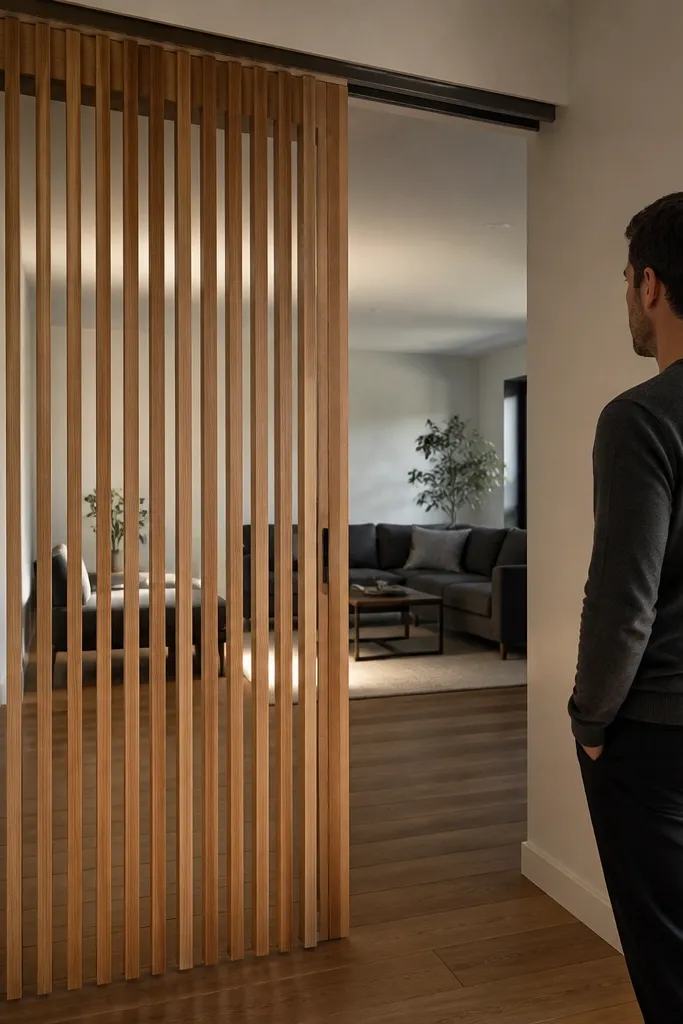
Slat doors look great in small spaces because they add texture without making the room feel boxed in. Clear or satin finishes on oak keep the grain visible, which photographs well from both angles. The gaps also reduce visual bulk — you still get separation, but the hallway or living area feels more open. This option is best for office nooks, pantry entries, or a laundry pass-through where you don’t need full blackout privacy. It’s also a strong choice if you want airflow for a room with a little humidity.
Start by creating a door frame from straight 1x3 or 1x4 boards, then attach evenly spaced slats with consistent gaps (aim for about 1/2 inch between slats). Sand the entire assembly smooth, then apply a clear wood finish with at least two coats so the slats don’t look dry. Mount a slim barn rail with top wheels so the door slides without scraping the slat edges. Install a bottom guide that keeps the door in plane, then add a soft-close bumper on the rail so the door stops gently.
Pre-sand slats to the same thickness and use a spacer strip to keep every gap identical.
Using too-wide slat gaps can make the door look unfinished and weak, especially in photos.
3. Dark Walnut Flat Panel with Hidden Track
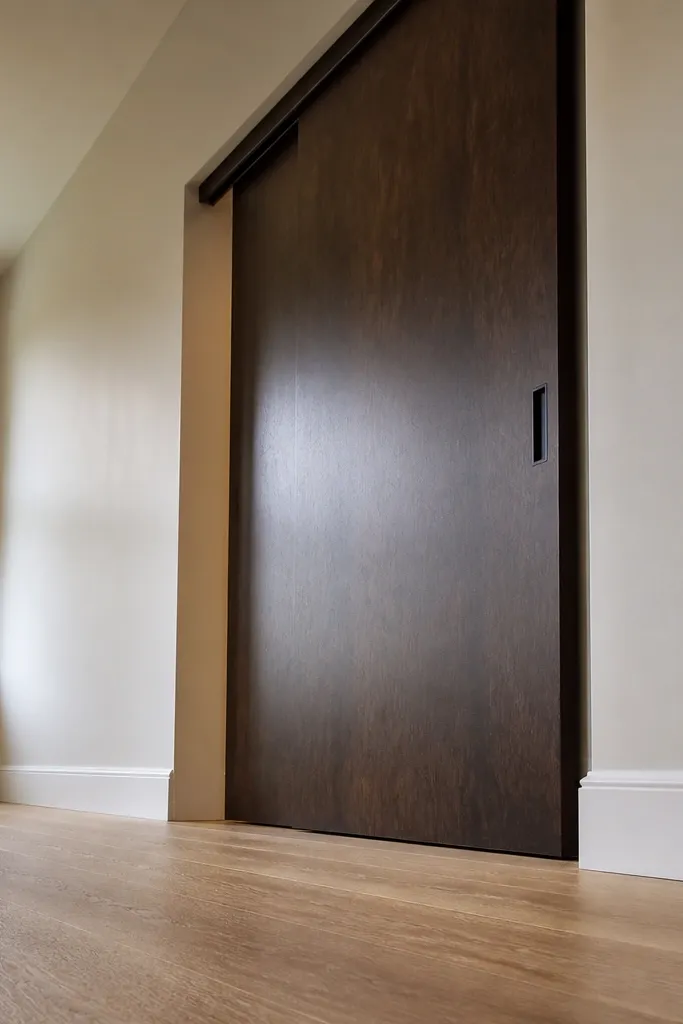
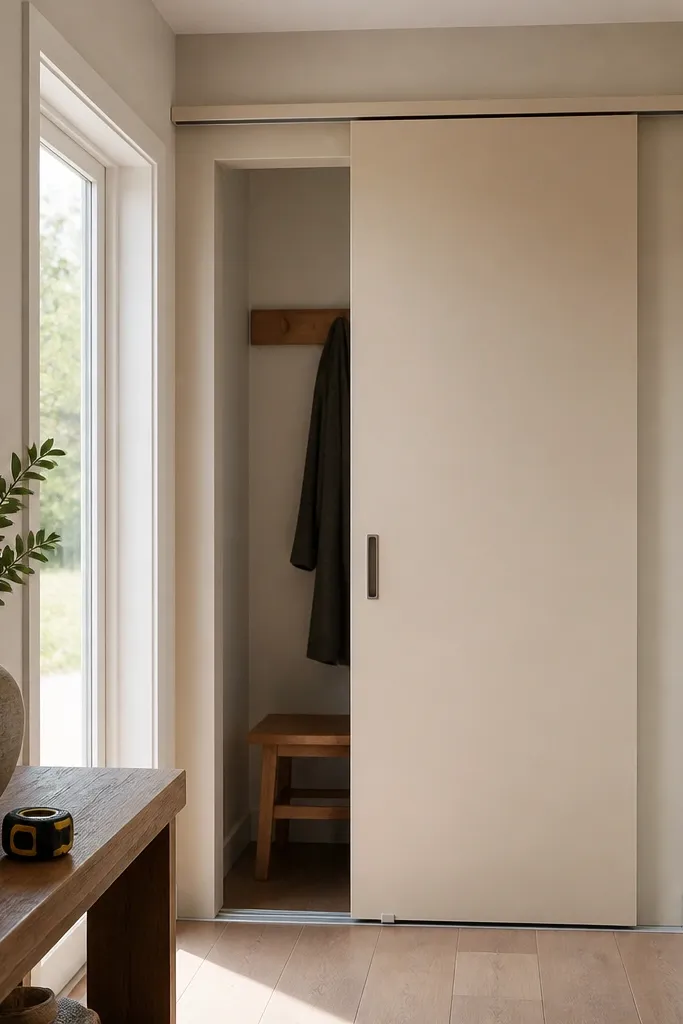
If you want small-space sliding door solutions that look built-in, go flat panel with a hidden or low-profile track. A dark walnut stain makes the door read like furniture, not a renovation project, and it hides small scuffs better than light finishes. The clean face is what makes it photogenic: fewer grooves, fewer visual interruptions. This works best for closets, office doors, and small bathrooms where you want a sleek look and minimal hardware showing. It also pairs well with modern baseboards and simple trim.
Editor's noteRun a test slide before final tightening — hidden tracks punish misalignment.
First, use a flat-core door or build a framed panel with plywood faces so it stays straight. Stain with a walnut tone, then seal with a satin topcoat so the finish doesn’t shine too much under overhead lights. For the track, install the rail high enough that the door clears the trim, then use a low-profile top hanger system that tucks behind a trim board or header. Add a floor guide to keep the bottom edge stable, and install a magnetic or latch-style stop so the door lands in the same spot every time.
Skip thisMounting the track too low makes the door scrape even if the top looks fine.
4. Reclaimed Barn Door with Black Steel X Bracing
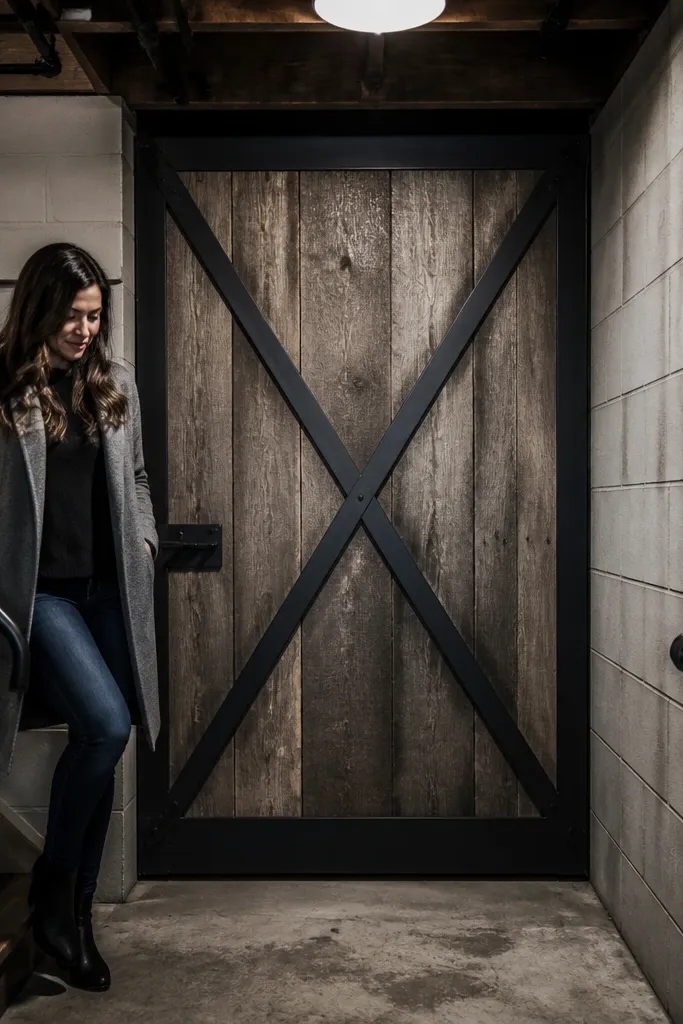
Reclaimed boards plus black steel bracing gives you that “statement” look without needing extra wall space. The irregular wood tones add depth in photos, while the X braces create a strong graphic line that reads well from a distance. It’s perfect for a dining room entry or a basement stair landing where you want the sliding door to look like a design choice. Use this when you want the door to be the visual anchor in a small hallway. It also hides minor wall imperfections because the door texture draws attention.
Editor's noteUse washers under every bolt head — reclaimed wood can crush if you tighten straight into boards.
Start with a reclaimed-wood door panel or build from reclaimed boards on a frame so the size stays consistent. Square up the door with diagonal bracing blocks, then add black steel X straps on the face using through-bolts and washers. Sand only enough to remove sharp splinters, then apply a matte clear coat so the wood color doesn’t turn muddy. Mount a black barn rail and hang with heavy-duty top rollers, then install a bottom guide. Finish by adding door stop hardware on the wall so it closes with consistent alignment.
Skip thisSkipping a square-up step leads to a door that binds even if the track is level.
5. Two-Tone Door: Cream Frame with Natural Alder Panels
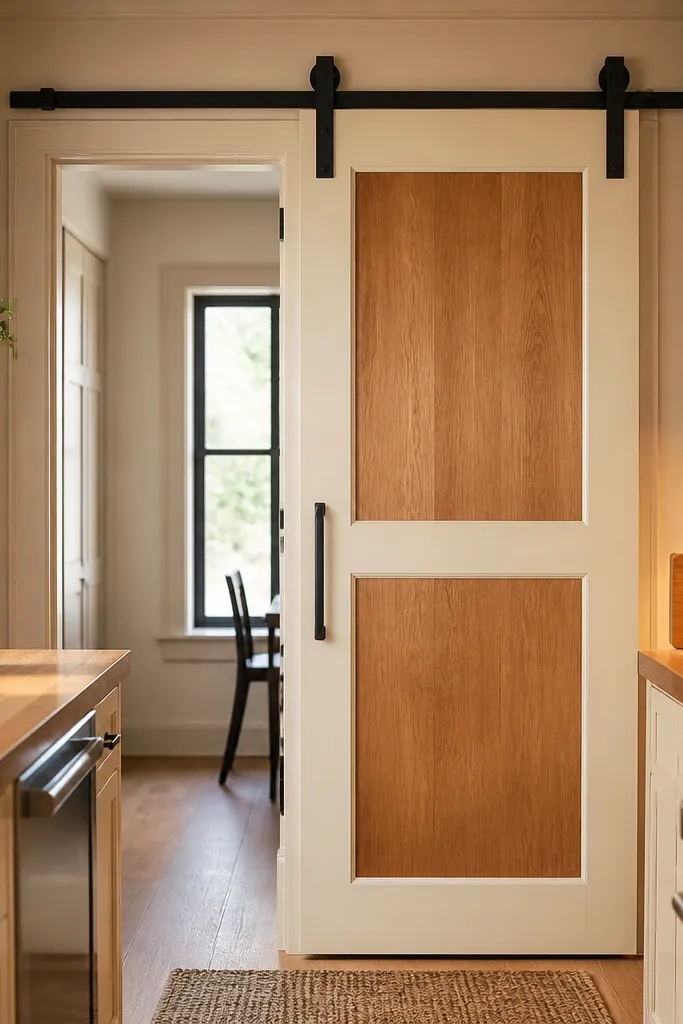
Two-tone doors look expensive because the eye reads the frame first, then the panel, which gives depth in tight spaces. The cream frame brightens the area, while natural alder panels add warmth and texture. This works especially well in small kitchens where white walls can feel flat and you need a little contrast without going dark. It’s also a smart choice for renters because you can keep hardware neutral and focus on the door finish. Plan for a solid or framed panel door for closet or pantry privacy.
Editor's noteTape off panel edges before painting the frame so you get a crisp line instead of a wobbly border.
Build a framed door using a cream-painted perimeter frame and natural wood panel inserts. Sand, prime, and paint the frame with a durable trim paint; then stain or clear-coat the panel inserts to match your floor tone. Install a top-mount barn rail with a finish-matched black or brushed nickel track and wheels. Hang the door, then add a bottom guide at the opposite corner from the handle side to prevent swinging. Finally, add a small magnetic latch or a surface bolt stop so the door closes flush every time.
Skip thisPainting over raw wood without primer causes uneven sheen that looks messy in close-up photos.
6. Matte Black Steel Door Panel with Wood Handle
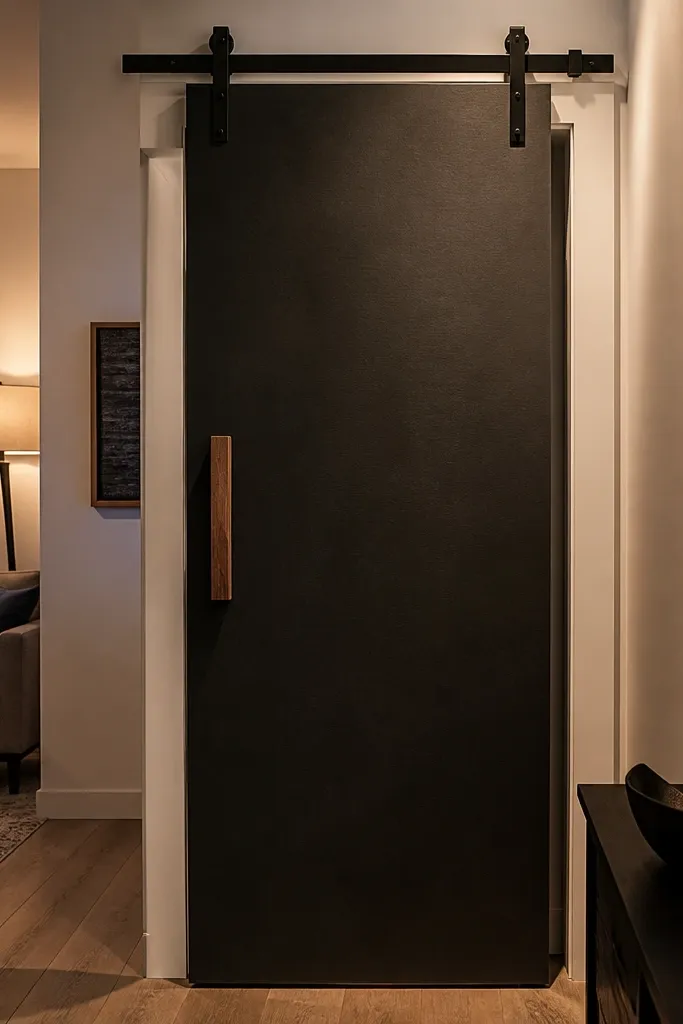
For small spaces that need a hard, modern look, a matte black steel-style panel reads sleek and doesn’t visually expand the room. It’s also durable — scuffs don’t show as easily as on light painted wood. Pairing black hardware with a warm wood handle makes the door feel intentional instead of industrial-only. This is great for entry closets, mudroom storage, or a small utility room where the door gets daily use. If you want photogenic contrast against light walls, this one delivers immediately.
Start with a steel-look door panel or a DIY panel made from thin metal sheet over a rigid backer. Seal and prime the panel properly, then apply matte black paint rated for metal so it doesn’t chip. Install a top rail with heavy-duty rollers, and use a bottom guide to stop lateral movement. Mount a simple wood handle block at a comfortable height, then add a wall stop so the panel lands in the same closed position. Finish by checking clearance at the floor after the door is hung — steel panels need consistent spacing to avoid scraping.
Use rubber isolators between hardware and the door panel to reduce rattling on hard surfaces.
Relying on magnetic latches alone — you need a physical stop so the door doesn’t creep.
7. Cottage Window Insert Sliding Barn Door
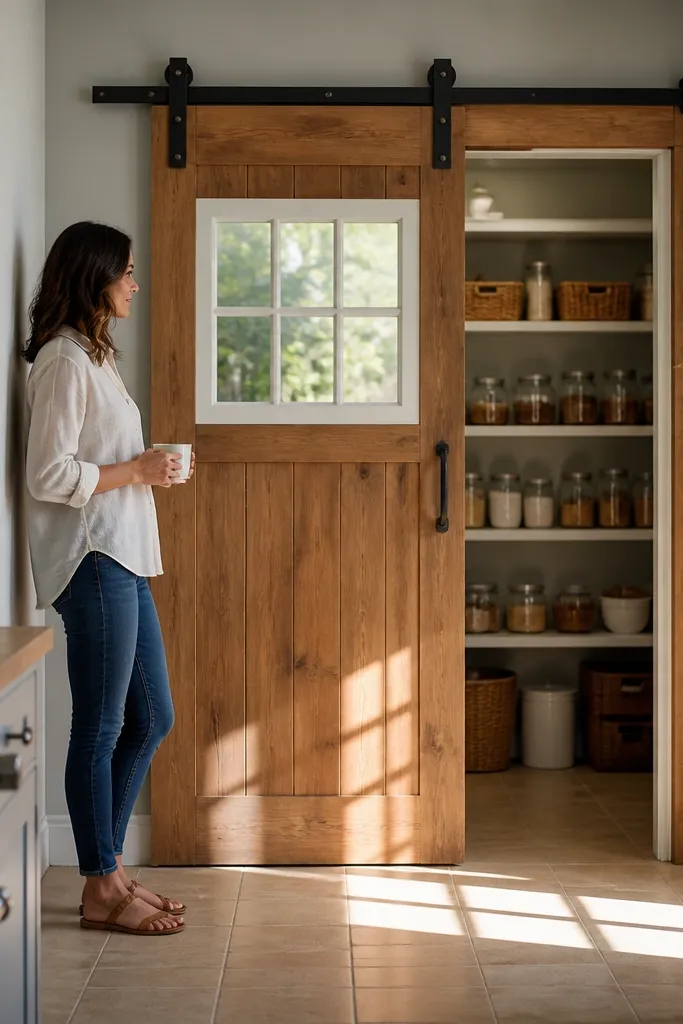
A window insert makes a small-space sliding door feel lighter and more decorative. Even a small rectangular window adds interest and lets light move between rooms, which matters in tight hallways. This look works best with warm wood tones, white trim, and black or bronze hardware. It’s ideal for a pantry door, a laundry room entry, or a bedroom closet door where you want a little visual charm without giving up separation. Use tempered or acrylic glazing so the window is safe and clean-looking.
Editor's noteChoose frosted or textured glazing if the window is near a bathroom or closet for privacy.
Build a framed door from wood, then cut an opening for the window insert at about 18-24 inches from the floor for a balanced look. Install the glazing with a frame trim around it, then sand and finish the door so the window trim matches the rest. Mount the rail high enough to clear the window trim and keep the door moving smoothly. Hang the door with top rollers and add a bottom guide. Seal all edges around the glazing so moisture doesn’t creep in, especially in laundry or bathroom use.
Skip thisUsing thin, wobbly glazing strips — they warp and look bad fast.
8. Rustic Chevron Plank Door with Brass Hardware
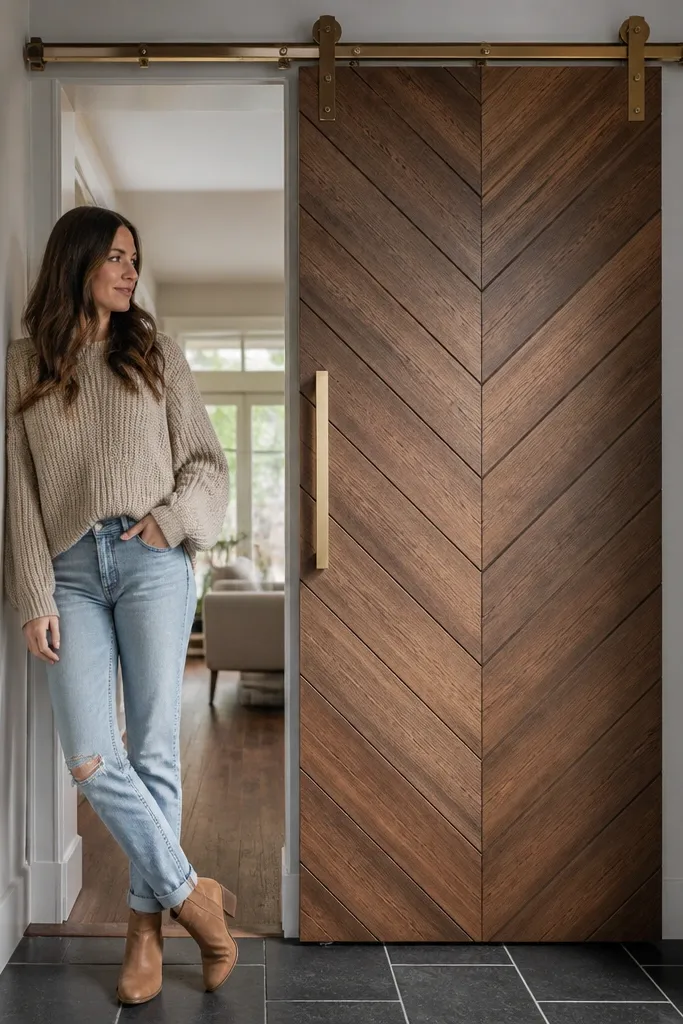
Chevron planks look bold because they create a directional pattern that photographs well even in narrow hallways. Warm brass hardware softens the rustic look and makes the door feel like it belongs in a styled room. This idea works when you want the sliding door to be the centerpiece, especially in entryways where people see it from the side. It also helps hide minor plank inconsistencies because the pattern draws the eye. Use it for closets or pantry doors where you want personality and solid closure.
Editor's noteDry-fit the chevron layout on a flat surface before attaching — it saves hours of rework.
Build a door frame first, then attach chevron planks on top of it with consistent spacing. Keep the chevron angle consistent across the entire door so it doesn’t look accidental. Stain with a medium brown tone, then seal with a satin finish to keep reflections controlled. Mount a brass rail and hang with rollers that match the rail weight rating. Add a floor guide, then install a pull handle so you can open the door without grabbing the bottom edge.
Skip thisSkipping sanding between plank rows — raised edges catch light and look uneven.
9. Vertical Slat Privacy Door with Fabric-Lined Back
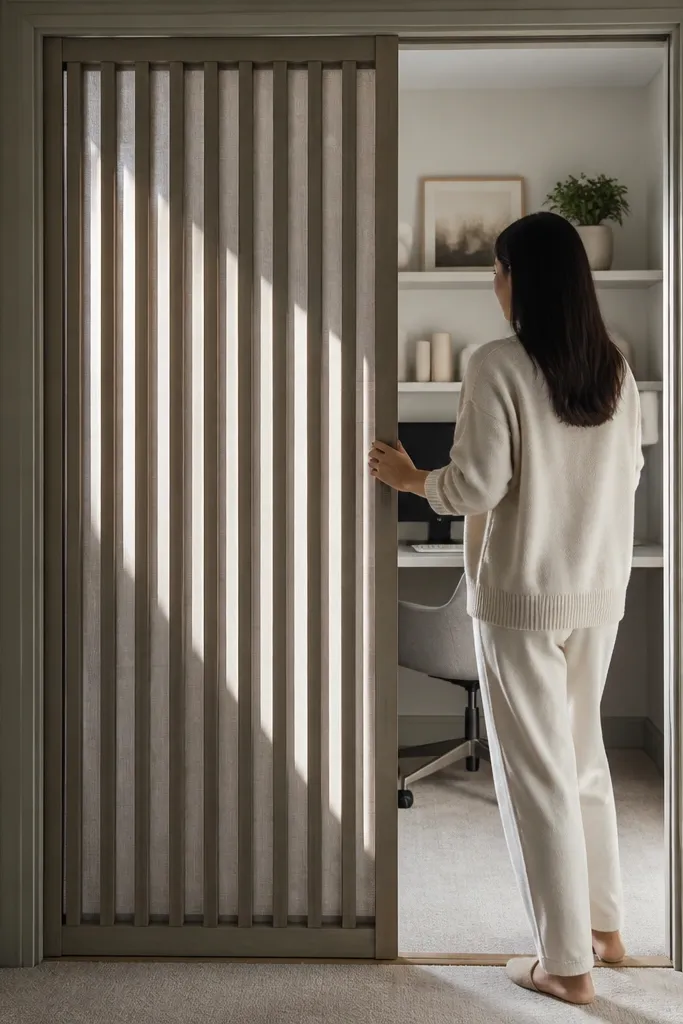
This is a smart compromise for small spaces: you get the airy look of slats, but privacy feels real because of a fabric-lined backing. The vertical lines also make ceilings feel taller in a narrow room. Use it for a bedroom closet, a home office entrance, or a small bathroom where you want light without full visibility. The door looks clean from the outside, while the interior backing keeps the slat gaps from feeling exposed. Finish the wood in a neutral tone like driftwood or warm gray.
Editor's noteUse a medium-weight upholstery fabric in a neutral color so it doesn’t show through the slats in bright light.
Build a framed door with vertical slats, leaving even gaps (about 1/2 inch). Cut a fabric panel sized to cover the inside face and attach it to the backer with a staple gun or small screws. Sand and finish the slats, then seal the frame edges so the fabric doesn’t pick up moisture. Install a top rail and hang with quiet rollers, then add a bottom guide for alignment. Add a soft-close bumper so the door stops gently and doesn’t flutter on impact.
Skip thisLeaving fabric loose — it will sag and look messy when the door moves.
10. Faux Panel Cabinet Door with White Oak Edge Detail
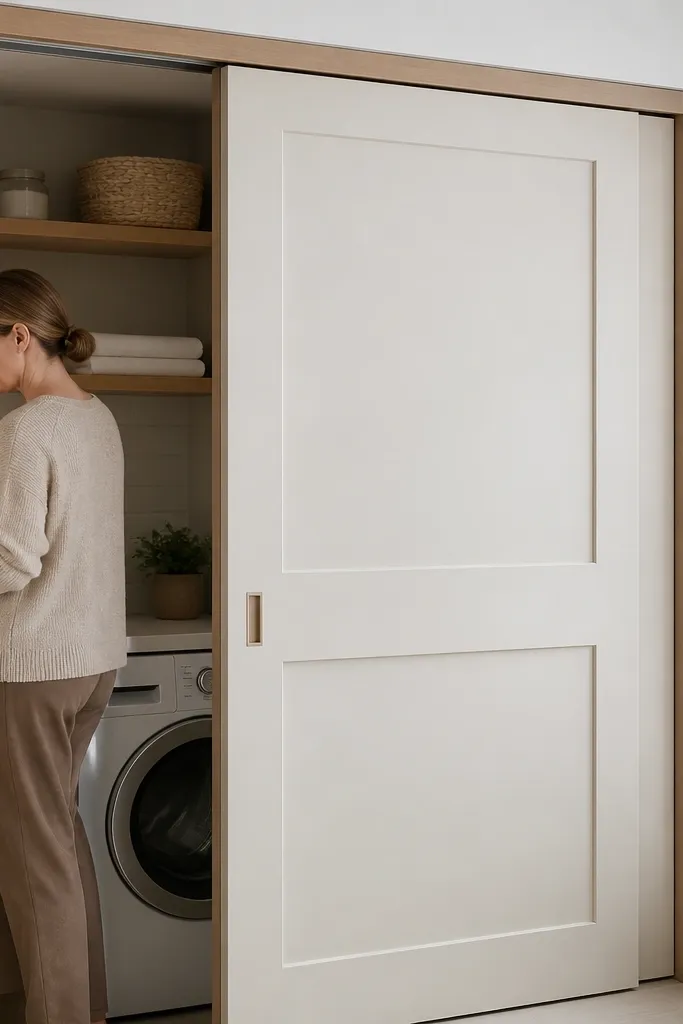
This one reads like built-in cabinetry, which is exactly what you want in small-space sliding door solutions. Faux panels give you depth, and the white oak edge detail adds a warm border that photographs cleanly. The door looks refined even with minimal wall space because the design is on the door face, not the surrounding area. It works well for closets, pantry doors, and laundry cabinets where you want storage and a polished look. Keep the hardware minimal and match finishes to your cabinet pulls.
Start with a flat door base, then add recessed panel molding on the face using thin MDF or wood strips. Frame the perimeter with white oak trim so the edges look crisp. Stain or clear-coat the oak edges and paint the recessed panels in a matching off-white. Mount the track high and level, using a top hanger system with a bottom guide. Install a simple bar pull on the door face and add a door stop so the panel sits flush when closed.
Use a brad nailer for molding — it keeps panel edges tight and reduces visible gaps.
Using thick molding that makes the door look bulky in photos.
11. Clear Acrylic Sliding Door with Black Frame for Light Control
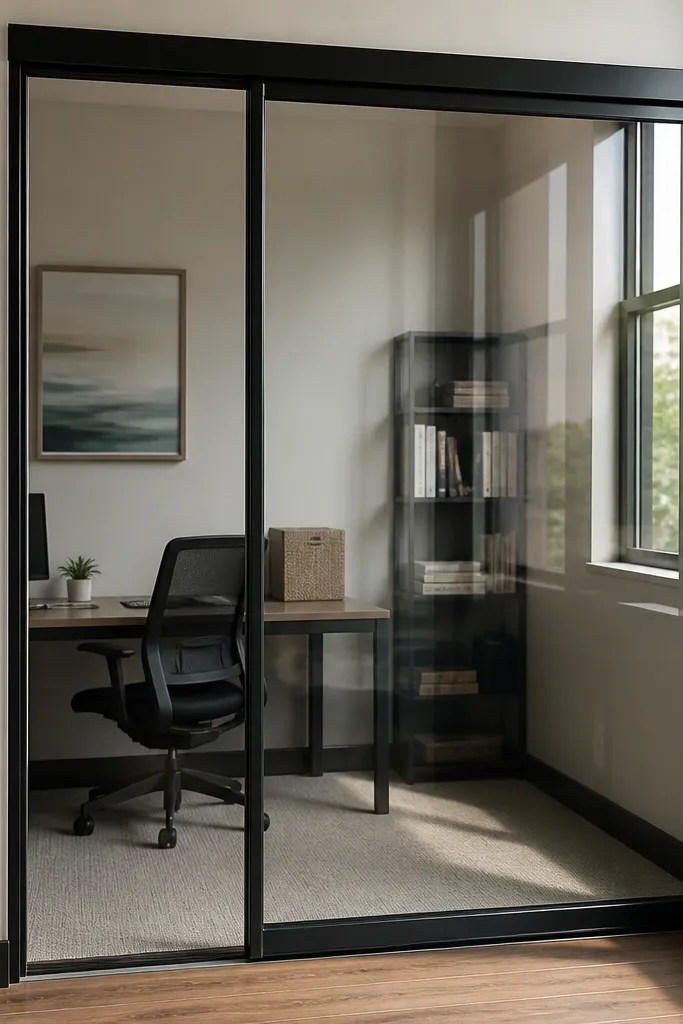
A clear acrylic door makes a small room feel bigger because the door doesn’t visually block light. When you frame it in black, it still looks intentional, not like a temporary partition. This is a strong choice for a small office alcove, a craft room, or a pantry entrance where you want separation but don’t want the hallway to darken. It also photographs well because reflections stay controlled when the frame is clean and the track is slim. Use it when you can live with partial visibility.
Build a rigid frame from square black-painted wood or metal angle and leave enough clearance so acrylic doesn’t rub. Mount the clear panel into the frame using clamps or gaskets designed for acrylic so it doesn’t crack. Install a slim black rail and top rollers that match the panel’s weight. Add a bottom guide to prevent the acrylic from swinging, and install a wall stop so it closes consistently. Clean edges carefully and check for any sharp contact points before using.
Use rubber gaskets around acrylic so it moves slightly with temperature changes instead of stressing the panel.
Over-tightening acrylic in the frame — it leads to cracks.
12. Barn Door on a Curved Track for Tight Corners
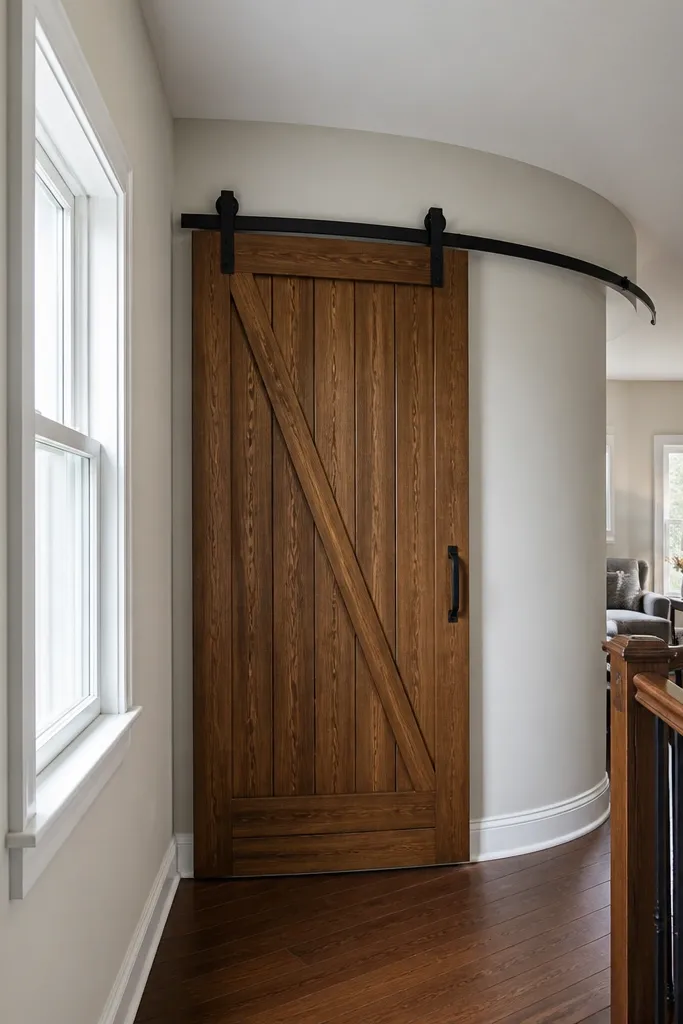
When your room has a corner that steals your straight track space, a curved track solves the problem and still looks like a design choice. The door follows the corner instead of forcing you to carve out a long, empty run. This is best for narrow hallways where the wall layout prevents a standard straight rail mount. The look is modern and sculptural, especially with a simple, solid door panel in a neutral finish. Keep the panel clean and the hardware finish consistent so the curve looks deliberate.
Measure the corner radius and choose a curved track kit sized for your door weight and panel thickness. Build or use a solid door panel that stays rigid — warped panels make curved tracks bind. Mount the straight sections first, then align the curved portion so the rail is smooth and level. Hang the door with rollers rated for curved tracks, and install a bottom guide that matches the door’s arc. Finally, add door stops at both ends of travel so the panel doesn’t drift.
Mark the roller travel path on masking tape before drilling — it prevents bracket placement mistakes.
Trying to force a warped panel onto a curved rail — it will wobble and jam.
13. Two-Slide Bifold Look: Double Barn Doors on One Track
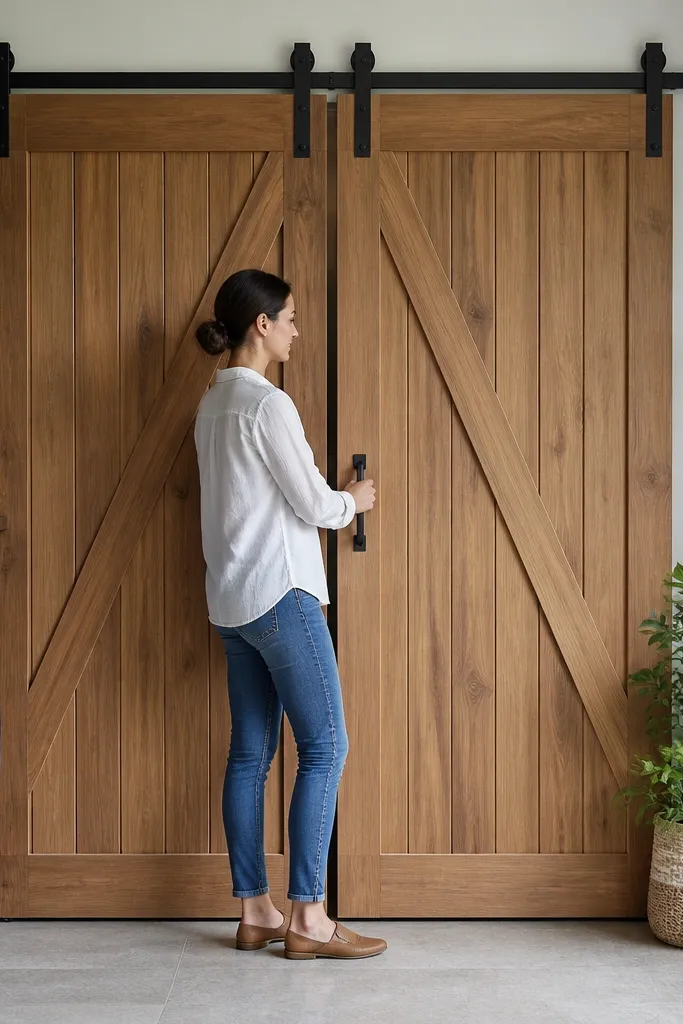
If one sliding door doesn’t cover the opening cleanly in a small space, two panels can be the prettier fix. Double barn doors split the travel so each panel uses less track length, and the center meeting line looks intentional. This setup is great for wider openings like laundry entries, kitchen pantries, or closets that need more coverage than a single panel. The visual payoff is symmetrical — it photographs like a custom installation. Use solid wood panels for a real closed look and better privacy.
Start by choosing two matching door panels and a track system designed for double sliding doors, not a single-door kit. Install the main rail high and level, then mount the hangers so each door panel aligns to meet in the center. Add floor guides at the bottom corners to keep the meeting line straight as the doors slide. Install center stop hardware so both panels land at the same time without one hitting first. Finish by adding simple pulls on both panels and sealing door edges so the meeting seam stays clean.
Use a center stop bumper and a soft-close kit — double doors can slam if you skip it.
Using random single-door hardware — the alignment requirements are tighter for two panels.
14. Sliding Barn Door with Screen Insert for Ventilation
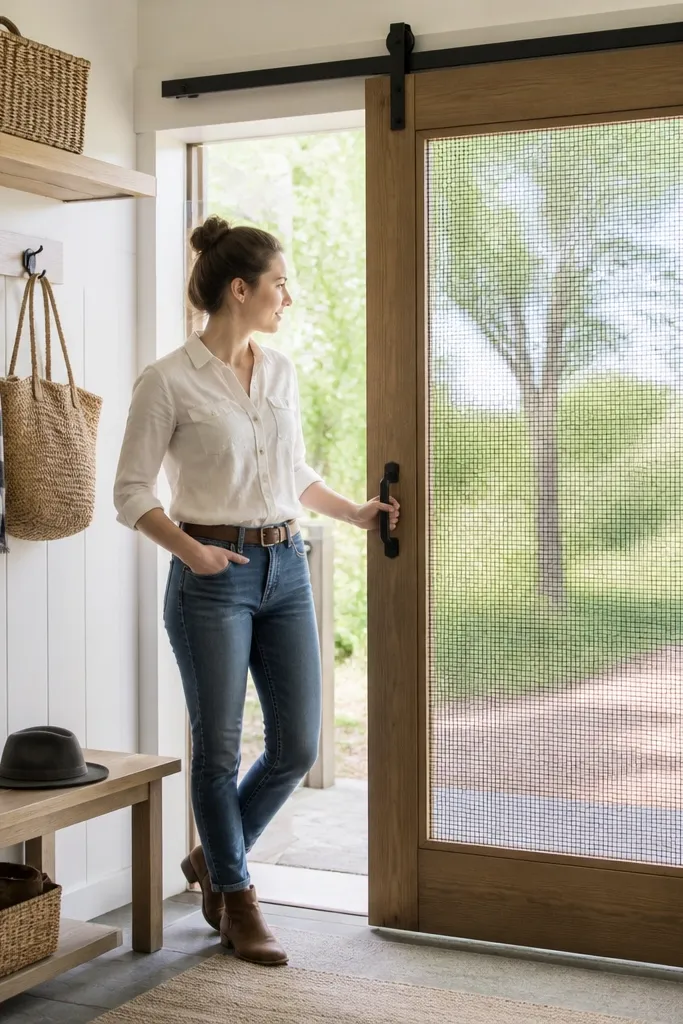
A screen insert door looks light and breezy while still giving you a “closed” front. It’s perfect for a mudroom where you want airflow, a small workshop entry, or a pantry that needs ventilation. The mesh texture also adds a pattern that looks good in photos, especially against solid walls. Use this when you don’t need full privacy — you get separation plus airflow. Finish the wood frame in a warm stain and keep the hardware simple so the screen stays the hero.
Editor's noteChoose a tighter mesh screen so it reads as a clean grid, not a loose net.
Build a framed door panel, then cut an opening for the screen insert. Install a tight-fitting screen using a frame trim so it doesn’t rattle, and secure it from behind so you don’t see screw heads on the front. Sand and finish the wood frame, then mount the door on a standard barn rail with top rollers rated for your door weight. Add a bottom guide so the screen insert doesn’t get dragged during movement. Install a wall stop and a soft-close bumper so the door lands gently without bending the screen frame.
Skip thisLeaving the screen frame unfinished — it will warp and show gaps quickly.
15. Shaker-Style Sliding Barn Door with Matching Trim Header
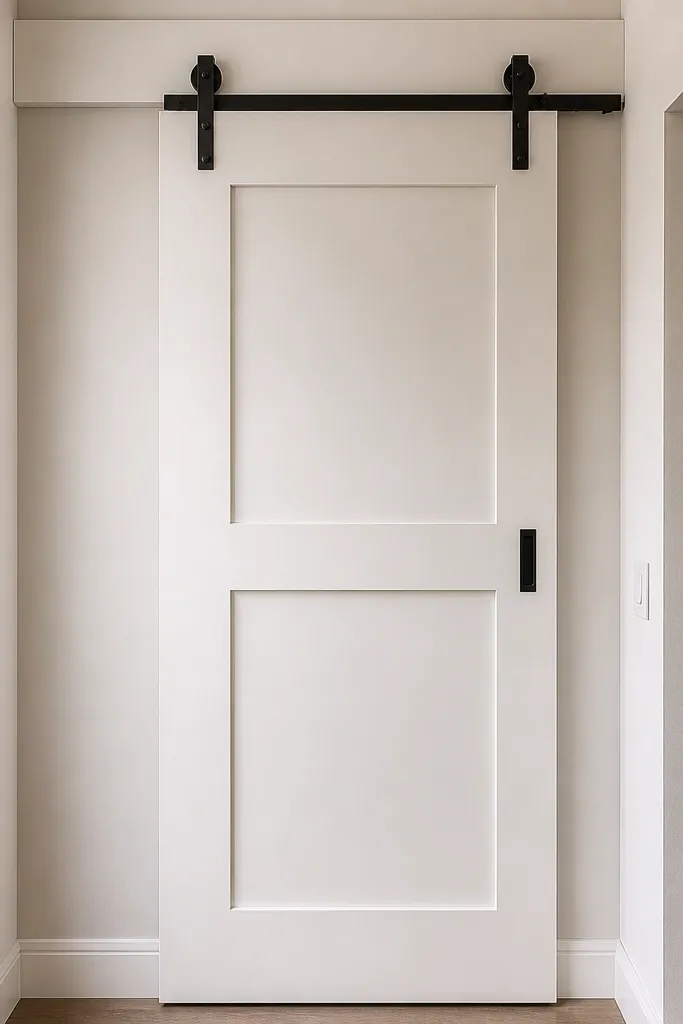
Shaker-style doors look calm and high-end, and the matching trim header makes the whole setup blend into your wall instead of sticking out. In small spaces, that blend matters — your eye needs a clean line to rest on. The recessed panel look also hides minor surface imperfections from DIY builds. This is a great option for bedrooms, bathrooms, and closet doors where you want the sliding door to look like it belongs with the rest of the trim. Pair it with a black track for contrast or brushed nickel if your fixtures are lighter.
Editor's notePre-drill into studs and use long screws — header boards alone won’t hold the rail securely.
Build a shaker panel door with a simple frame and recessed center panels using 1x2 or 1x3 rails and stiles. Install a trim header board across the top area where the track mounts, then mount the rail to studs behind the header. Hang the door with top wheels and add a bottom guide aligned to the center of the door thickness. Paint or stain to match your trim, then seal the door edges and panel recesses so the finish stays uniform. Add a latch or stop hardware so the door closes flush and doesn’t drift.
Skip thisMounting the header after the track — you’ll lose alignment and the door will look crooked.



