
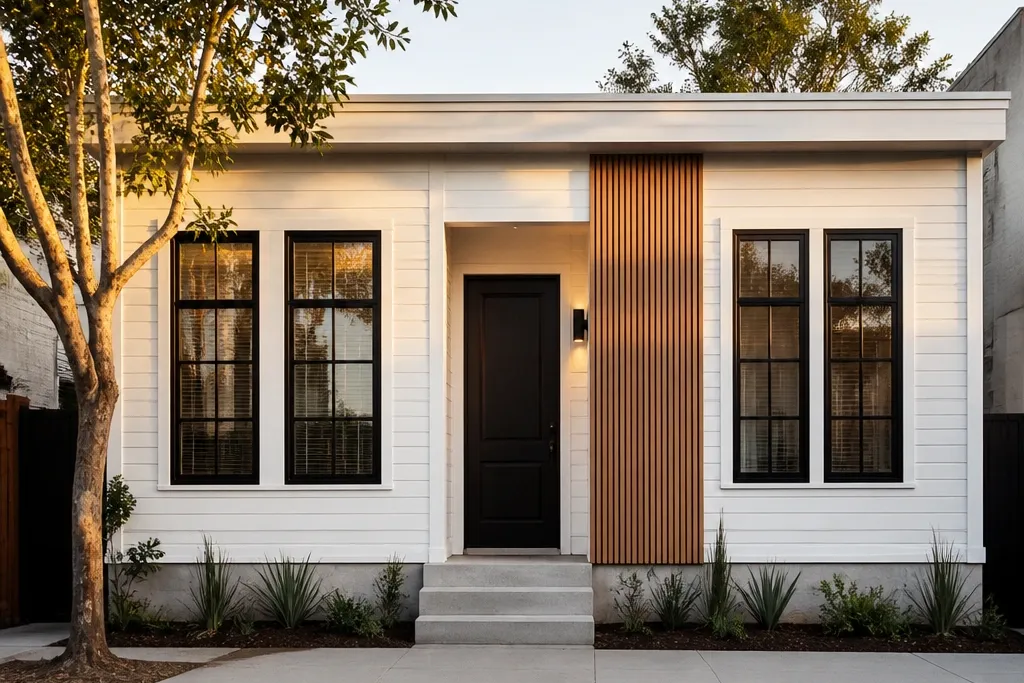
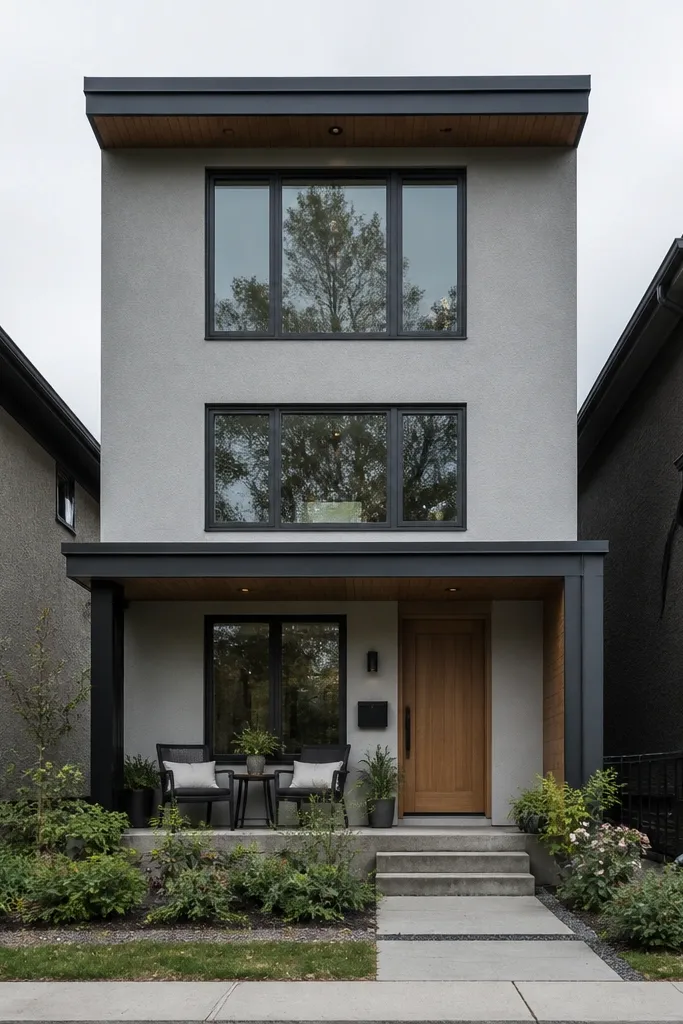
1. Vertical wood slat panel beside the entry
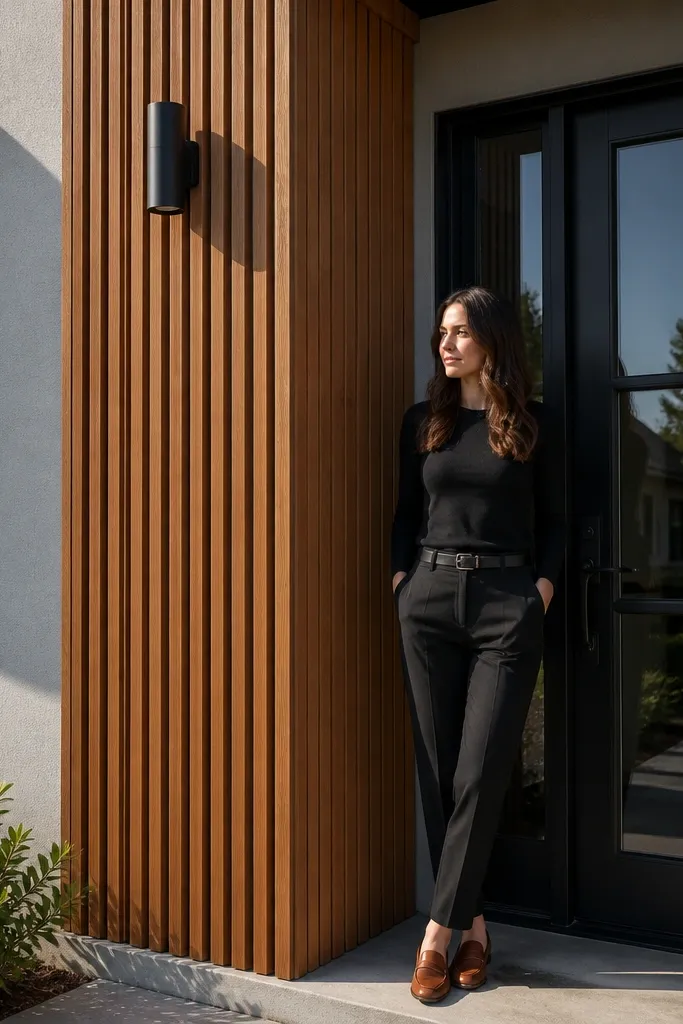
This looks modern because the slats create a tall, directional line where your eye needs a “handle.” Place the slat panel on the entry side so the façade feels intentional even on a narrow frontage. Use clear or lightly tinted exterior stain so the grain stays warm against the cooler paint tones. Keep the rest of the wall simple — one siding color, clean trim lines — so the slats stay the star. This is a solid DIY project because you’re installing a framed panel you can weatherproof like a small exterior feature.
Start by finding the rough entry bay width you want to emphasize, usually 2 to 3 feet wide on small houses. Build a simple rectangle frame with exterior-rated 2x2s or 1x3s, then fasten vertical slats (about 1x2 or 1x3) with equal gaps, typically 1/4 inch. Install flashing tape at the top edge and use exterior sealant at the bottom seam before you set trim caps around the perimeter. Prime and finish the slats and trim with an exterior system made for your climate, then check that the door swing clears the new panel.
Use pre-finished slats or stain after installation so the edges don’t soak unevenly.
Don’t let slat gaps vary — it makes the whole façade read sloppy from the street.
2. Dark-stained board and batten entry wall
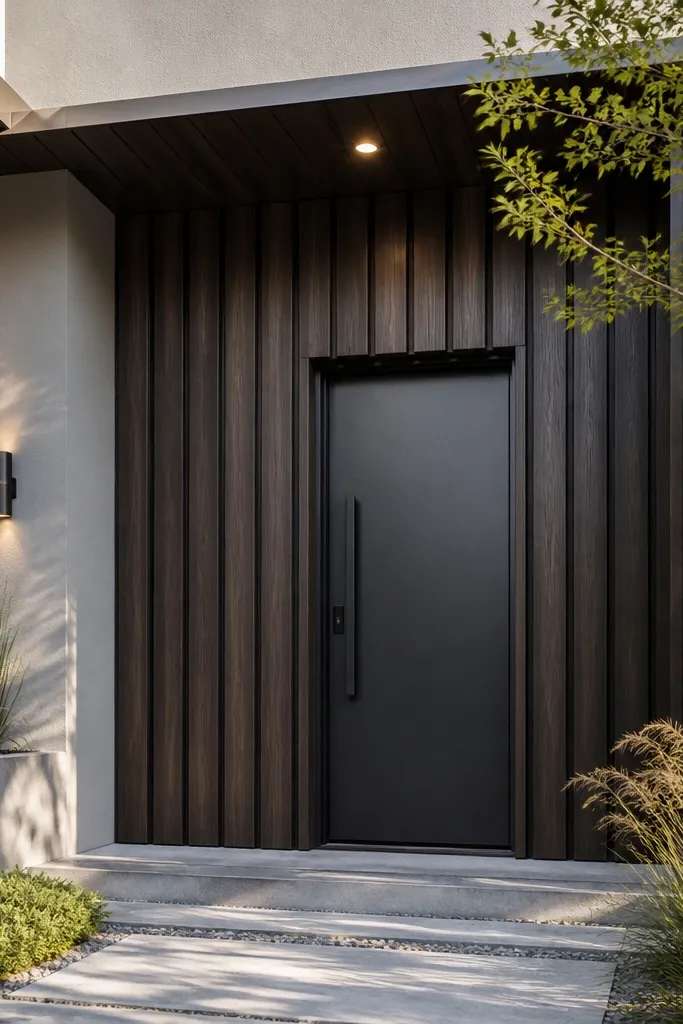
Board and batten works on small-space facades because it creates rhythm without adding clutter. A dark stain on the entry wall pulls attention to the door and makes the rest of the façade look cleaner by comparison. Keep the batten spacing consistent so the vertical lines stay sharp. Add a simple modern door with a slender glass insert or sidelights to keep it bright and modern. This option is great when your house has a plain front wall and you want a high-impact focal area in one build zone.
Choose a section size that covers the door opening plus a little breathing room, typically 4 to 6 feet wide. Install a flat base layer using exterior plywood or directly over sheathing if you already have a solid substrate, then mark batten lines with a chalk string. Fasten battens (commonly 1x2) vertically over the base, spacing them evenly with 1/4 to 3/8 inch gaps. Finish by adding a casing around the door and a cap trim at the top, then seal all horizontal joints to prevent water intrusion.
Editor's notePaint or stain the battens and casing as one system so the sheen level matches across the façade.
Skip thisSkip thin, flexy battens — they warp and your gaps drift.
3. Two-tone stucco with a clean trim band
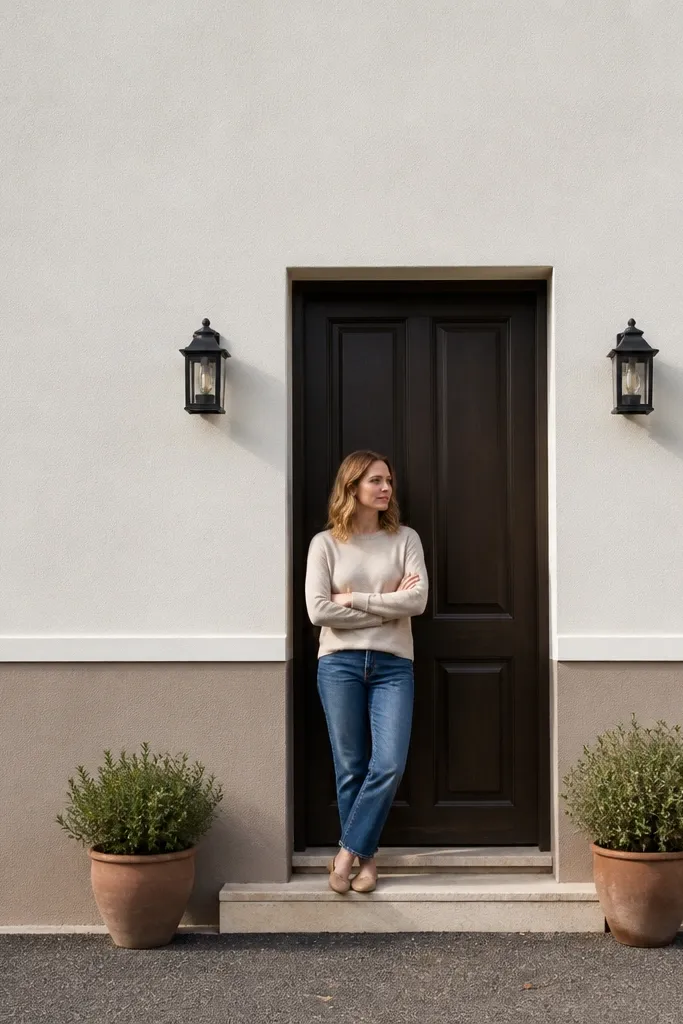
Two-tone stucco looks modern because it uses negative space and a single crisp boundary line. On small façades, a mid-height band visually “organizes” the elevation so it doesn’t feel like random patches of color. Pick one light body color and one deeper tone for the band, then keep trim white or near-white for clarity. The best part is it’s mostly paint and a trim band — you get a big look with less demolition. This is a good move if your siding is already in decent shape and you just need structure and contrast.
Start by power washing and repairing stucco cracks or dents so paint adheres cleanly. Tape a level line where your band will sit, usually around the midpoint of the window height, and apply primer rated for stucco. Use exterior caulk to fill tape-line edges and brush-cut any texture inconsistencies. Install a thin trim band only if your stucco surface is uneven; otherwise, paint the band with a smooth roller and keep the line razor-straight. Finish with consistent caulk and paint around window casing edges so the boundary line stays clean.
Use a light gray band color instead of pure dark — it reads modern but doesn’t swallow the façade in daylight.
Don’t paint over chalky stucco without bonding primer; the boundary line will look uneven fast.
4. Crisp horizontal fiber-cement siding with a vertical porch column
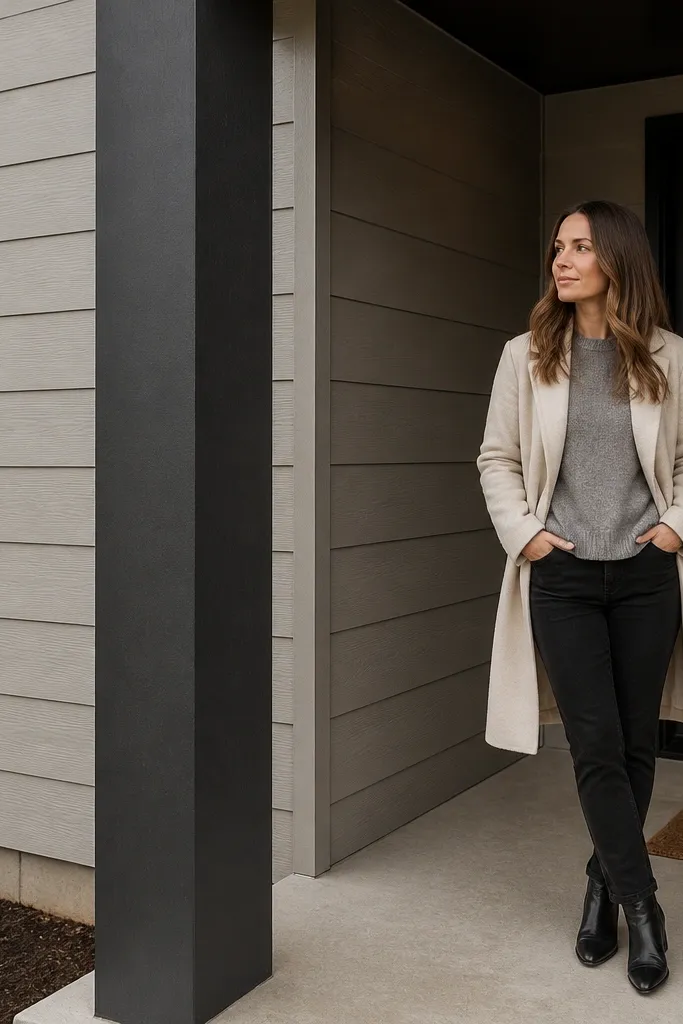
Horizontal siding alone can feel a little “suburban” on small houses. Add one vertical porch column or entry tower element and the façade becomes balanced and modern. Keep the siding color light and choose a darker column finish so it reads like a designed frame around the entry. This is photogenic because the shadows fall in clean bands from the siding texture and the column’s straight edges. It also helps when your front door sits slightly off-center — the column pulls the eye back to the entry.
Install fiber-cement panels horizontally with the manufacturer’s recommended overlap and fasteners. Choose a column size that looks intentional, often 8x8 inches to 12x12 inches for a small entry — larger columns can dominate. Build the column with exterior-rated plywood and wrap with cement board or trim panels, then add a simple base and cap trim at top. Align the column’s top with the door surround trim so your elevation feels designed, not assembled.
Editor's noteUse a consistent reveal width at panel edges; modern looks depend on repeatable spacing.
Skip thisDon’t mix panel directions on the entry section; random vertical cuts make the façade feel busy.
5. Window stack with a matte black frame grid
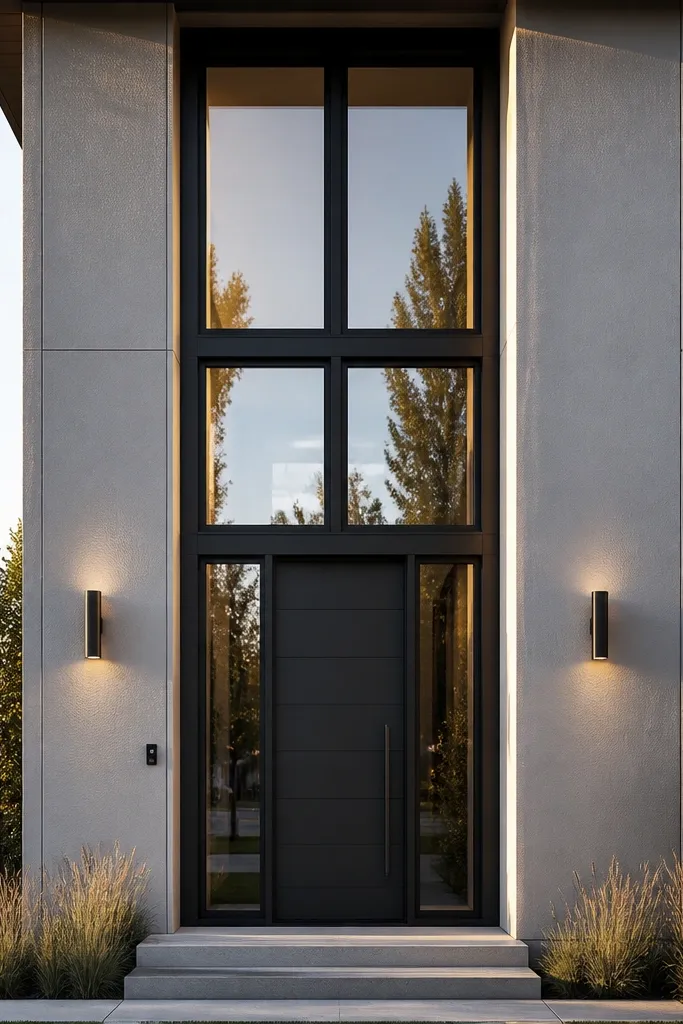
A window stack makes a small-space single story facade look taller without changing the house footprint. Matte black frames give you a clean grid effect that reads modern, especially when paired with white or light gray walls. This works best when you can align the stack vertically with the door — even small misalignment looks messy. Keep muntins minimal: either full-lite windows with slim frames or one grid layout that repeats once. The result is a façade that photographs well because lines are crisp and shadows are controlled.
Measure the existing window openings and confirm you can install tall units without structural changes. Order windows with a consistent frame color and width, then dry-fit to confirm reveals. Install with proper flashing tape at the sill and jambs, then shim to keep the stack plumb and evenly spaced. Finish by adding simple casing trim with tight corners and sealant at each seam. Paint or stain the surrounding trim to match the frame contrast so the window grid looks intentional.
Shoot for equal spacing between window edges and trim — the brain reads symmetry even if the house is narrow.
Avoid mixing frame finishes like glossy and matte; it looks cheap in photos.
6. Minimal entry porch with a flat overhang and slatted screen
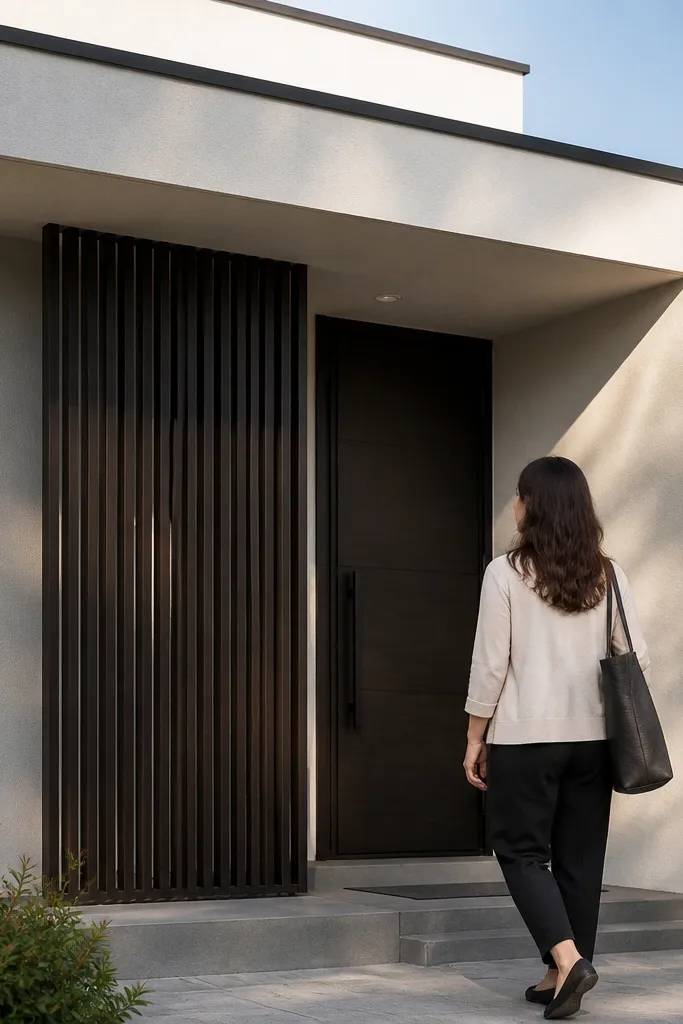
A flat overhang plus a slatted screen makes the façade feel architectural. The overhang adds a strong horizontal line, while the slats add vertical texture without turning into a full fence. This is perfect for small lots because it concentrates design at the entry instead of spreading it across the entire wall. Choose a light wall color and match the screen to your window frames for a unified look. It also improves curb appeal by giving the entry a shadow line that reads in daylight and at night.
Build the porch framing with a clear span that matches your door width plus 6 to 12 inches on each side, then install a weatherproof roof layer with drip edge. Create a slatted screen panel on a simple frame — exterior-grade 1x3 slats with 1/4 inch gaps is a good starting point. Mount the screen under the overhang so it stays protected from direct rain. Finish with exterior paint or stain and add a recessed or wall sconce light to highlight the screen texture.
Editor's noteUse a screen angle or spacing that lets air move — it keeps moisture from trapping behind the slats.
Skip thisDon’t run the screen flush to the roof — leave a small drainage gap so water doesn’t stain the slats.
7. Board-and-batten wrap that stops at the window line
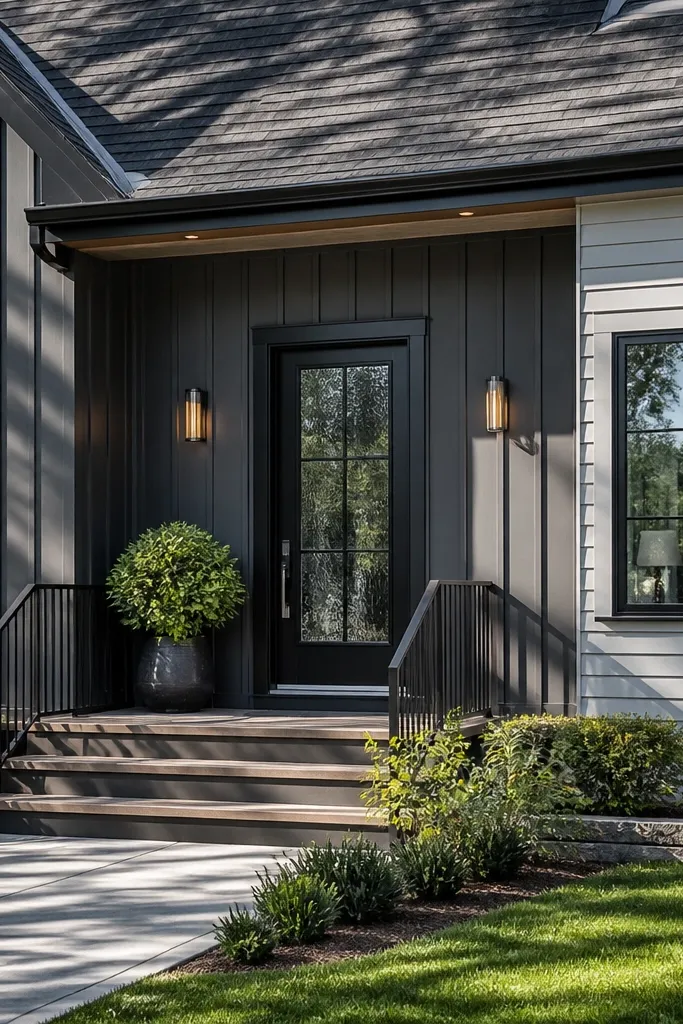
Wrapping a board-and-batten feature a short distance around the corner makes the façade look larger. The key detail is stopping the wrap at the window line instead of continuing down the whole side. That stop point creates a clean edge and keeps the modern look tight. This idea works when your front wall is narrow but your side wall is visible from the driveway. Use a consistent dark paint or stain so the wrap reads as one designed element, not a random patch.
Pick a wrap depth of about 3 to 5 feet from the front corner so it stays “small-space friendly.” Install the board-and-batten feature on one face first, then continue onto the side wall with the same vertical layout. Align the top of the feature with the window head and use a corner trim piece to keep the transition crisp. Seal all joints at the wrap edge and add casing trim around windows so the board spacing doesn’t get broken by messy cuts.
Editor's notePlan your batten layout to avoid ending battens in the middle of window reveals; keep full battens where possible.
Skip thisAvoid wrapping too far — if it covers half the house, it stops reading modern and starts reading decorative.
8. Light siding + dark trim frames with a centered door
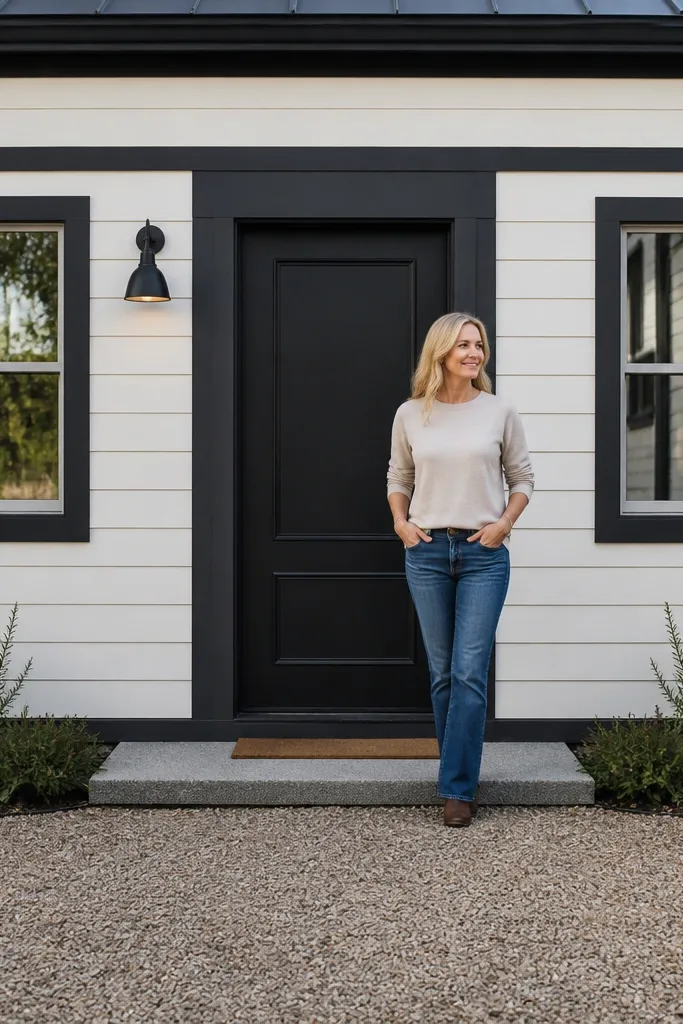
This is the fastest modern read for small façades: frame everything in the same dark trim color. You get a clean rectangle grid that looks designed even if your house footprint is simple. Center the door if you can, or at least center the main window grouping relative to the door — that alignment makes the façade feel intentional. Use light siding so the dark trim doesn’t disappear in daylight. It’s also easy to photograph because the contrast creates sharp edges and strong shadows.
Choose a trim color like matte black or deep charcoal and confirm it matches your door hardware finish. Install or rebuild window casing trim as rectangular frames, keeping the trim thickness consistent. If your windows are already cased, repaint the trim and add thin exterior corner blocks to sharpen the lines. Wrap the door opening with a simple surround of trim boards, then add a top lintel piece that matches the window frame width. Seal behind trim at the edges and caulk all joints for straight, clean lines.
Editor's noteUse painter’s tape as a guide for paint lines on existing trim — it keeps the edges crisp without redoing everything.
Skip thisDon’t mix trim widths on the same façade; the grid will look sloppy.
9. Stone-look base band with clean vertical siding above
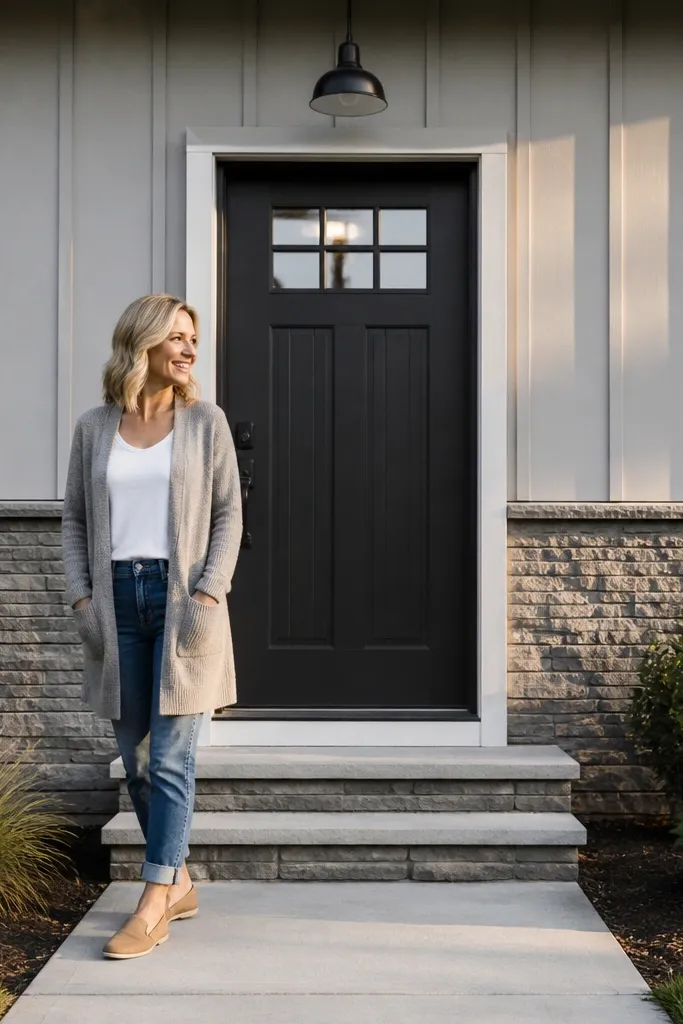
A stone-look base band grounds the house and makes the upper façade feel lighter. On small single story modern facades, the base band also hides landscaping imperfections because it visually anchors the elevation. Choose a band height of about 24 to 36 inches so it feels proportional. Keep the upper wall simple with vertical siding or smooth stucco so you don’t stack too many textures. This is a good DIY option if you want a material change without rebuilding the whole front wall.
Start by planning the band height and marking a level line across the façade. Install a weather-resistant barrier and attach cement board or a suitable substrate for the stone-look panels, then use the manufacturer’s recommended thinset or adhesive system. Trim the edges with corner pieces so the base band looks continuous. Finish by installing the upper siding or painting stucco above the band, then add matching trim at the top edge of the stone panels. Seal the perimeter and check that water can drain away from the base.
Editor's noteDry-lay the stone panels first so your largest pieces land near the corners and under the windows.
Skip thisDon’t leave a rough top edge — the band line is what makes the modern look.
10. White stucco with a shadow-line reveal around the door
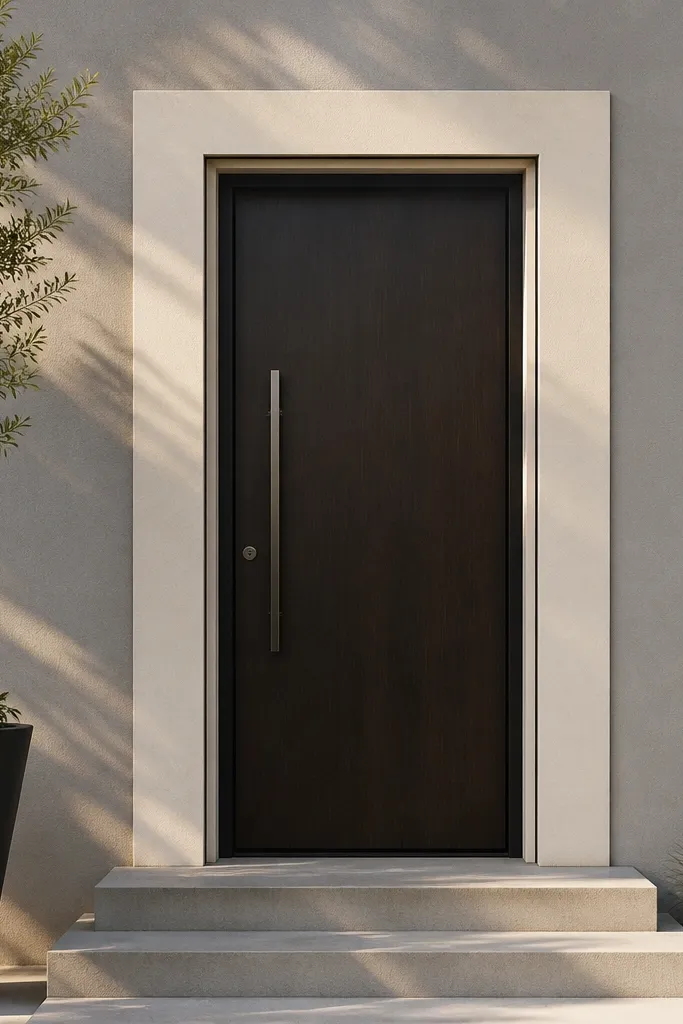
A shadow-line reveal makes stucco look modern because it creates a thin, deliberate gap that catches light. This style reads clean in close photos and wide street shots because the door surround looks like it’s floating slightly. Keep the stucco body white or off-white, then use a dark door with minimal hardware. The reveal also helps hide tiny surface imperfections around the opening. If you’re working with stucco or smooth surfaces, this is one of the most dramatic upgrades for the money.
Mark the door surround outline on the stucco and install a trim substrate where the reveal will attach. Use a trim system that includes a shadow gap profile or create one with spacer blocks and a flat trim cap — keep the gap consistent, around 1/4 inch. Apply flashing tape at the top and sides of the opening before final trim installation. Caulk the backer seams carefully, then paint the surround the same color as your trim for a crisp boundary. Finish with a clean threshold detail so water doesn’t wick into the reveal area.
Editor's noteUse a level laser for the surround — a 1/4 inch tilt shows instantly once the reveal casts a shadow.
Skip thisDon’t over-caulk the reveal gap; messy caulk makes the shadow line look dirty.
11. Soffit beam look using exposed 2x6 trim under the entry
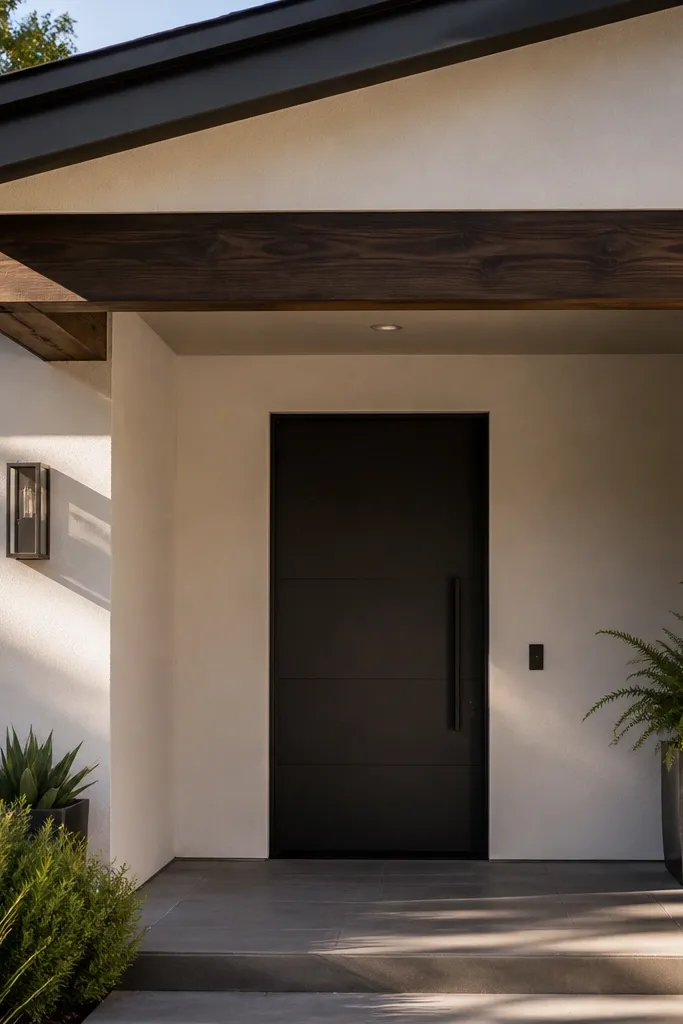
Exposed beam trim gives you modern character even when you can’t change the roofline. On small-space single story modern house facades, the beam draws a strong horizontal line and frames the entry like a porch set piece. Choose a dark finish for the beam so it contrasts with light siding or stucco. This also hides small gaps in soffit trim because you’re adding a defined element under the overhang. The result is a façade that looks designed from the driveway.
Decide your beam placement under the entry overhang, typically 8 to 12 inches below the roof edge. Cut 2x6 trim pieces to length and install a ledger board first so the beam bottoms stay level. Fasten the beam to the ledger with exterior screws and add side blocking if needed to prevent vibration. Add simple end caps at the beam ends, then paint or stain the full assembly after installation. Finish by adding matching trim around the entry door opening so the beam doesn’t feel like an add-on.
Editor's notePre-drill and use countersunk exterior screws so the beam stays flat and doesn’t show dimples under paint.
Skip thisDon’t place the beam too high — if it sits near the roof edge, it reads like a patch, not a design feature.
12. Two window bays with a shared vertical mullion
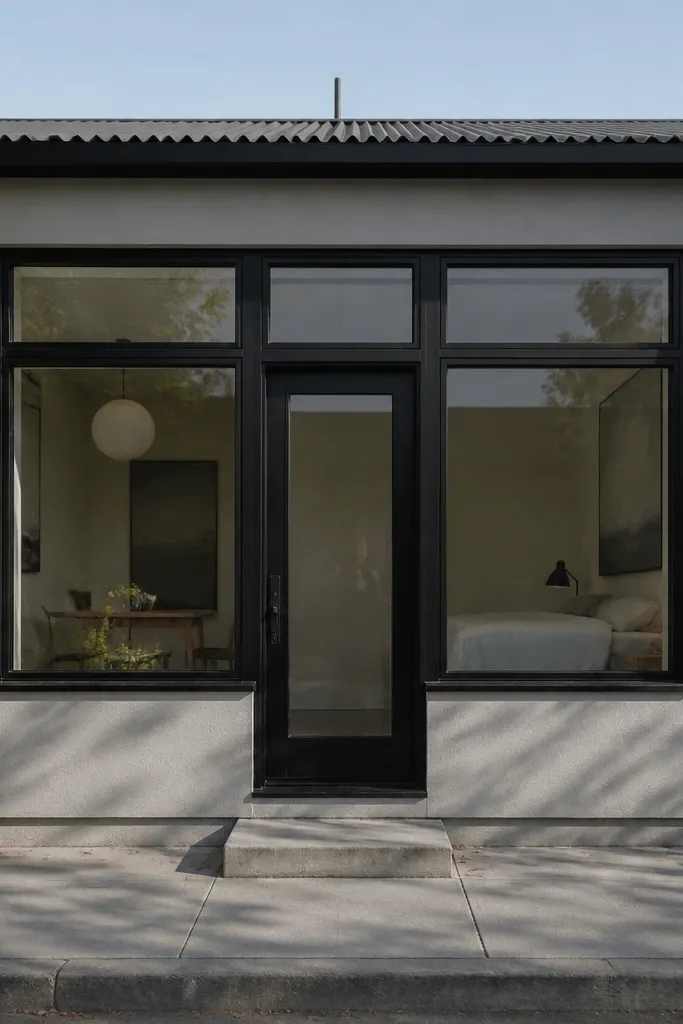
This idea creates a “single composition” using multiple windows, which is exactly what small façades need. By sharing one vertical mullion, your eyes read one structured grouping instead of two separate openings. It’s also a clean way to handle asymmetry — for example, if one room needs a window and the other needs a glass door. Use slim, dark mullions and keep the trim simple. The modern look comes from the repeated vertical line and the consistent alignment of window heads.
Measure the two window openings and plan a mullion width that matches the frame thickness you want, usually 3 to 5 inches. Install or replace the windows so the mullion line lines up vertically from top to bottom. Add a continuous vertical trim cover over the seam between windows, then wrap the whole grouping with a shared casing frame. Keep the casing thickness consistent on the left and right sides so the composition reads balanced. Seal around the perimeter and caulk trim joints for a tight finish.
Use a single window frame color across both openings so the mullion looks intentional instead of decorative.
Avoid mismatched window heights — if one sits higher, the shared mullion looks wrong.
13. Modern chimney wrap with matching cladding panels
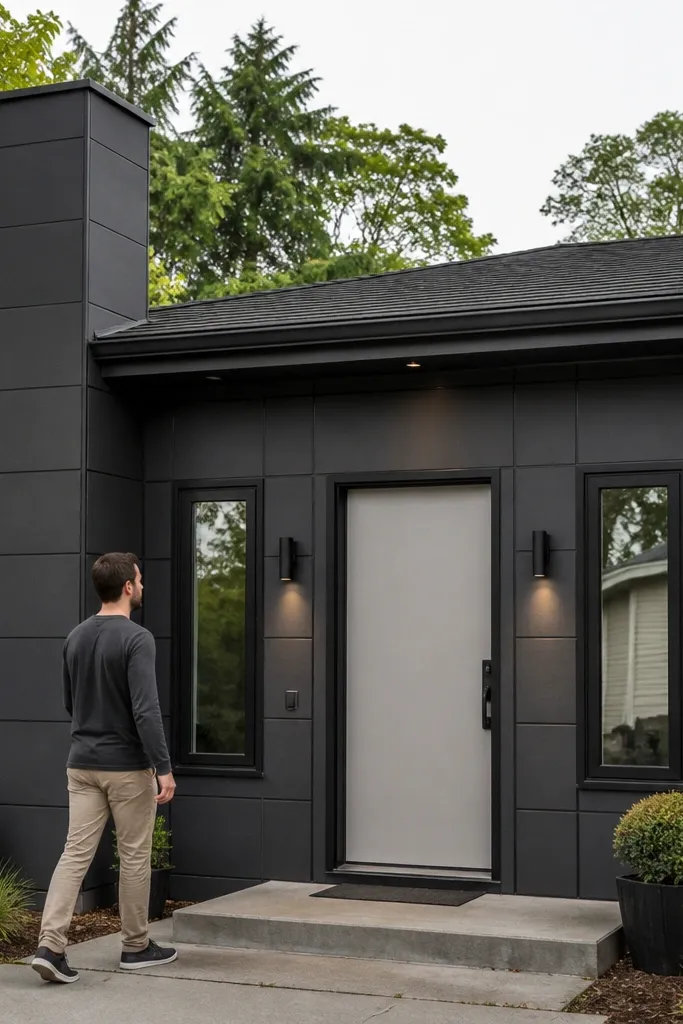
A chimney can ruin the clean look of a modern façade because it breaks the surface rhythm. Wrap it in the same cladding system you use on your main feature wall and you remove that visual interruption. This works especially well on small-space single story modern house facades where the chimney is close to the front elevation. Choose a cladding material that tolerates heat and weather, and match the color to your feature wall so it reads like one designed plane. It’s a high-impact edit because it turns an awkward element into part of the façade composition.
Check what the chimney is made of and choose a safe exterior system rated for that surface and local codes. Install a weather-resistant base and metal flashing where the cladding transitions, then attach panels with corrosion-resistant fasteners. Use corner trim pieces at all edges so the wrap lines stay straight. Paint or finish the wrap to match your feature wall, then align siding courses so seams land neatly around the chimney. Finish by sealing all perimeter joints with exterior-rated sealant and inspecting for any gaps near flashing.
Editor's notePlan your panel seams so they land at natural edges like window corners, not in the middle of the chimney face.
Skip thisDon’t paint over loose masonry or failing mortar — cladding won’t fix that surface problem.
14. Centered black door with tall sidelights and minimal casing
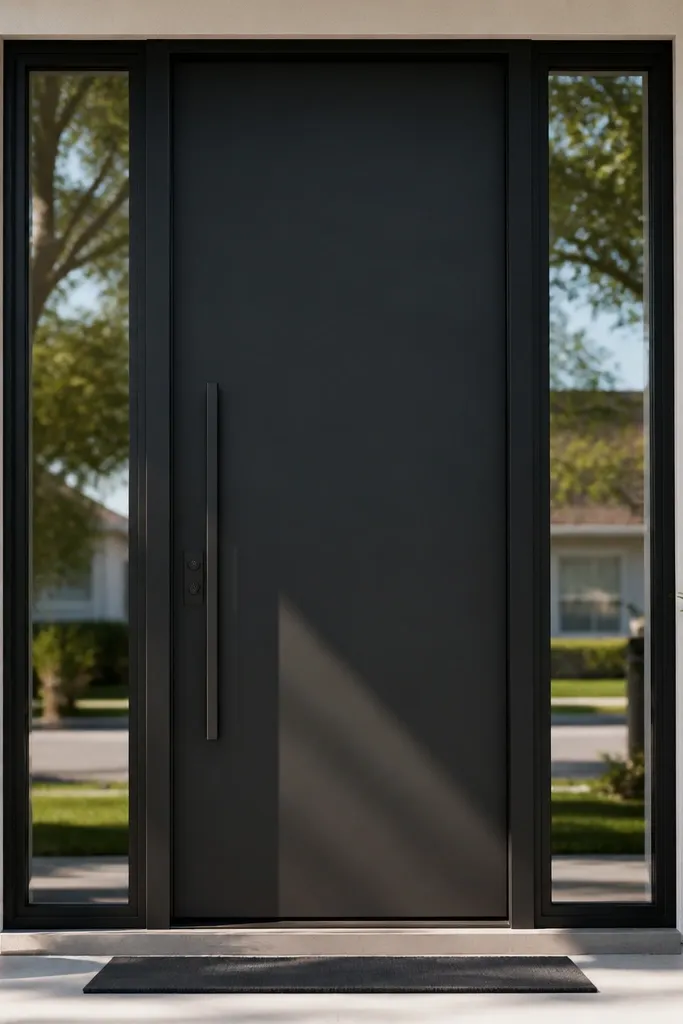
Tall sidelights make a small façade feel taller and more open, and the centered door keeps the elevation calm. Minimal casing keeps the lines modern instead of ornate. Choose a door color like black or deep espresso and keep the sidelights' frames the same color for a unified look. This idea is especially good when your windows are small; the sidelights bring scale to the entry. It also photographs well because the glass reflects sky and light, giving depth without extra trim.
Select sidelights that match the door height and create a clean vertical ratio, usually sidelights that rise most of the way to the door top. Install the door and sidelights as a unit or plan the rough opening carefully so the framing is straight. Use flashing tape at sill and jambs, then shim until the door is plumb and the sidelights sit evenly. Keep casing trim slim, around 1 to 2 inches, and install a simple top lintel piece that matches the casing width. Seal all seams and caulk the trim edges, then finish with a single paint color for the casing and frames.
Editor's noteChoose a frosted or lightly tinted glass only if you need privacy; clear glass looks more modern in daylight.
Skip thisDon’t add decorative mullion bars unless you repeat the same grid in your other windows.
15. Horizontal metal screen panels above a simple entry
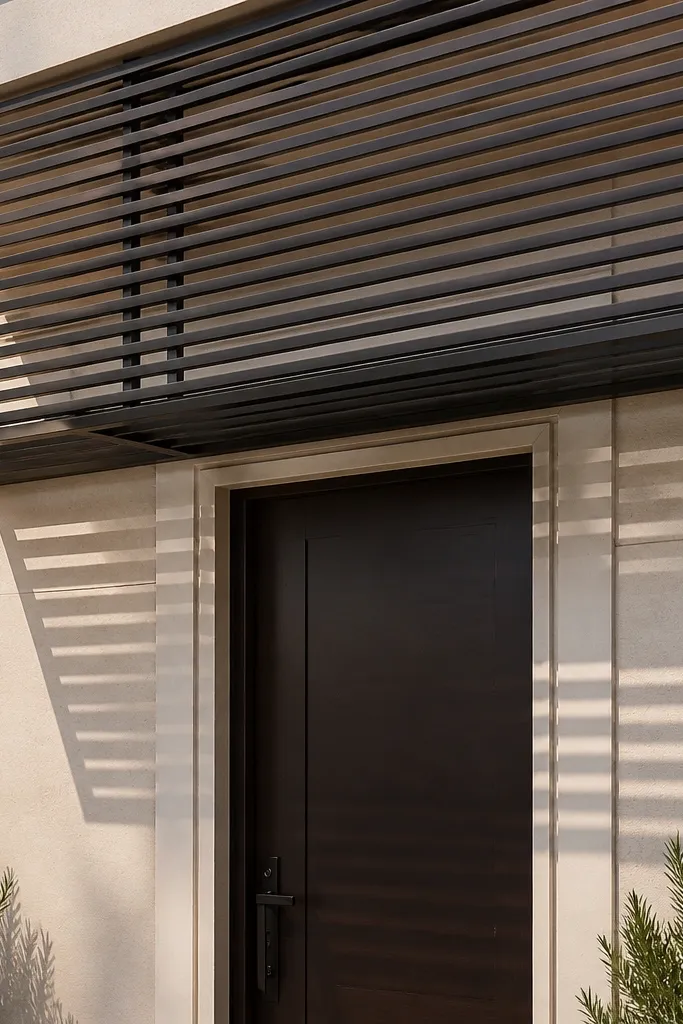
Horizontal metal screens read modern because they create a crisp texture and controlled shadows. Put the screen above the door or along a small window bay so the façade gains depth without adding heavy bulk. A matte finish in bronze, dark gray, or black makes the screen look intentional and less “crafty.” This works well on small-space single story modern house facades because the screen can be narrow and still make an impact. It’s also great for hiding an area behind it, like a vent or a partial privacy window.
Measure the span above the entry and fabricate or order a screen panel sized to leave even gaps, usually 1/4 inch around the frame. Build a simple mounting frame from exterior aluminum or treated lumber with a level ledger. Install flashing where the screen meets the wall, then attach the screen with corrosion-resistant hardware. Keep the mounting points hidden behind trim so the look stays clean. Prime and paint any wood parts, and check that the screen doesn’t block drainage pathways at the entry roof edge.
Editor's noteUse a screen with consistent spacing so the shadow pattern stays even in photos.
Skip thisAvoid shiny reflective metal; it can look harsh and cheap under direct sun.



