
1. Floating plywood shoe ledge with hidden French cleat
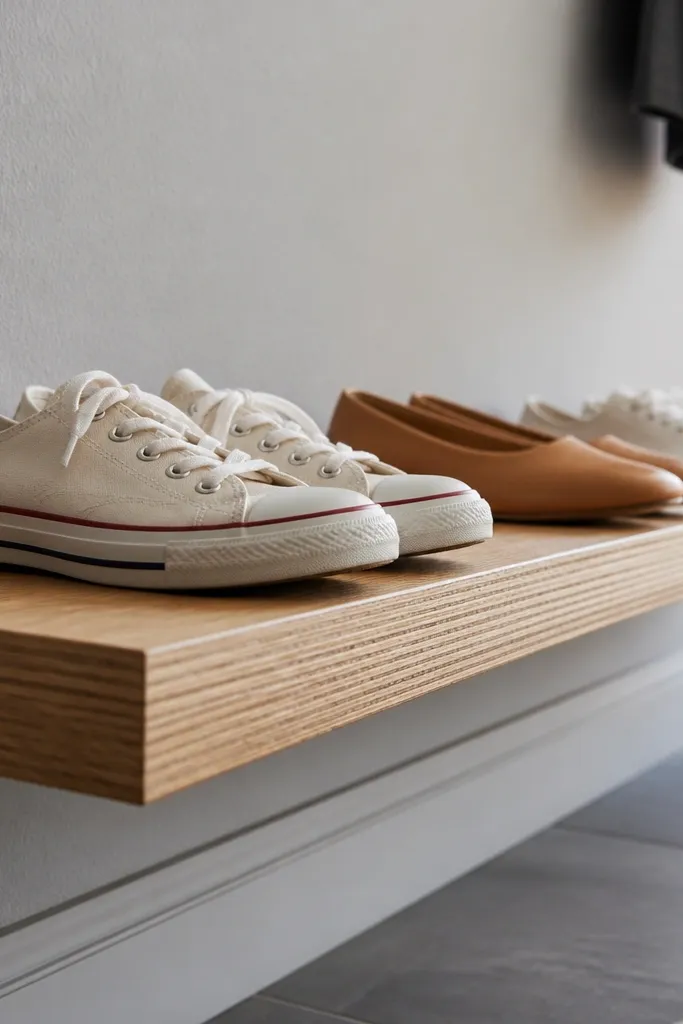
This design looks sharp because it reads like a wall shelf, not a shoe bin. A floating plywood ledge keeps shoes aligned and visible while the “support” disappears into the cleat behind the board. It’s ideal when your entry has narrow floor space and you want the wall to do the work. Use it for sneakers, flats, and low boots — the toe area stays easy to grab and the rack doesn’t visually clutter your hallway. The look is all about crisp edges, consistent finish, and a back edge that hides dirt and scuffs.
Start by cutting a rigid plywood shelf, 3/4 in thick, at 10 in deep and whatever width fits your wall run. Build a French cleat: rip a 1x3 into two matching halves, one mounted to the wall studs horizontally and the other screwed to the back of the shelf so the shelf locks on level. Set tier height by your shoes: mark 7-8 in between shelf top surfaces for most pairs. Seal the plywood edges, then stain or paint the face, and add a clear topcoat so it wipes clean. Finally, mount the cleat halves, hang the first shelf, then measure from its top to install the next cleat for the second tier.
Editor's noteUse a scrap block as a spacer when you screw the shelf to the cleat so every tier spacing stays identical.
Skip thisAvoid thin MDF shelves — they dent fast and look sad after a few months of shoe scuffs.
2. Slim vertical slat shoe rack cabinet with open front
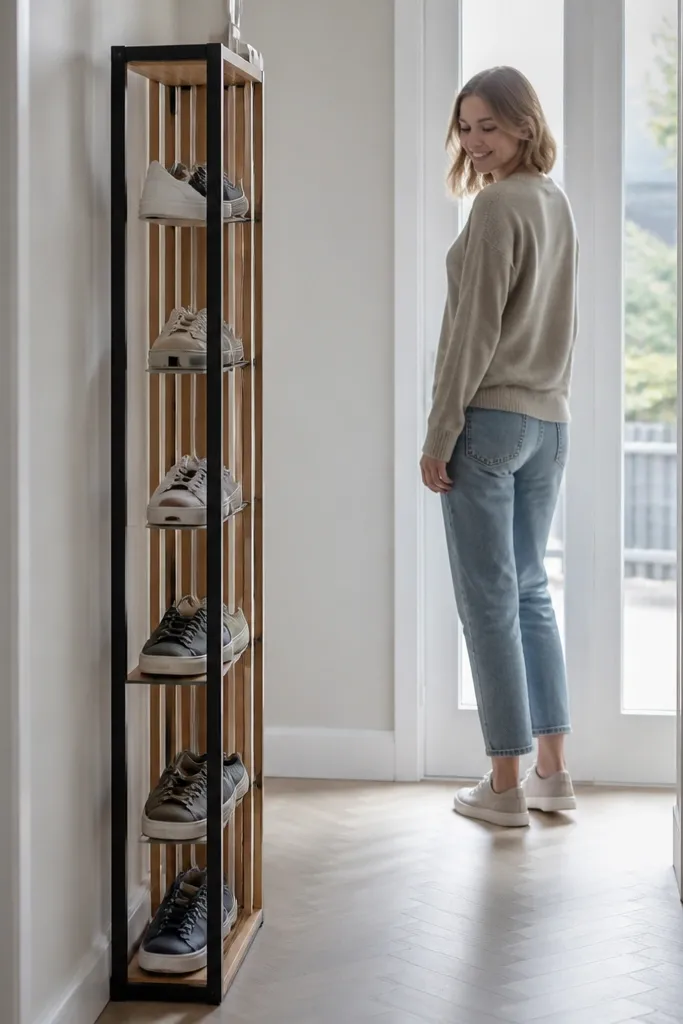
If you want the most “designed” look in a tight space, build a tall, narrow cabinet with vertical slats. Slats create airflow, so the rack doesn’t trap odor, and the open front keeps shoes from looking like stored clutter. This is perfect for apartments where the only wall you have is a narrow strip near the door. The slat layout also lets you store shoes at slight angles so toes face outward and you can grab pairs quickly. It’s photogenic because the grid pattern looks intentional and the cabinet shape makes your entry look finished.
Frame the cabinet box from 1x2 lumber or 3/4 in plywood strips, keeping depth around 10-12 in. Cut side panels and a back panel, then attach a vertical slat grid so each compartment is about 3-4 in wide — wide enough for most adult shoes. Install two horizontal rails inside to support slats and keep the structure stiff. Finish by sanding smooth, then stain or paint the cabinet and slats for a uniform color. Mount it to studs with a top anti-tip strap so the tall piece doesn’t tilt when loaded.
Editor's notePaint the inside faces the same color as the exterior so any shoe shadow still looks cohesive in photos.
Skip thisDon’t make slats too far apart or shoes will tip forward and look messy.
3. Reclaimed pallet shoe rack with diagonal side braces
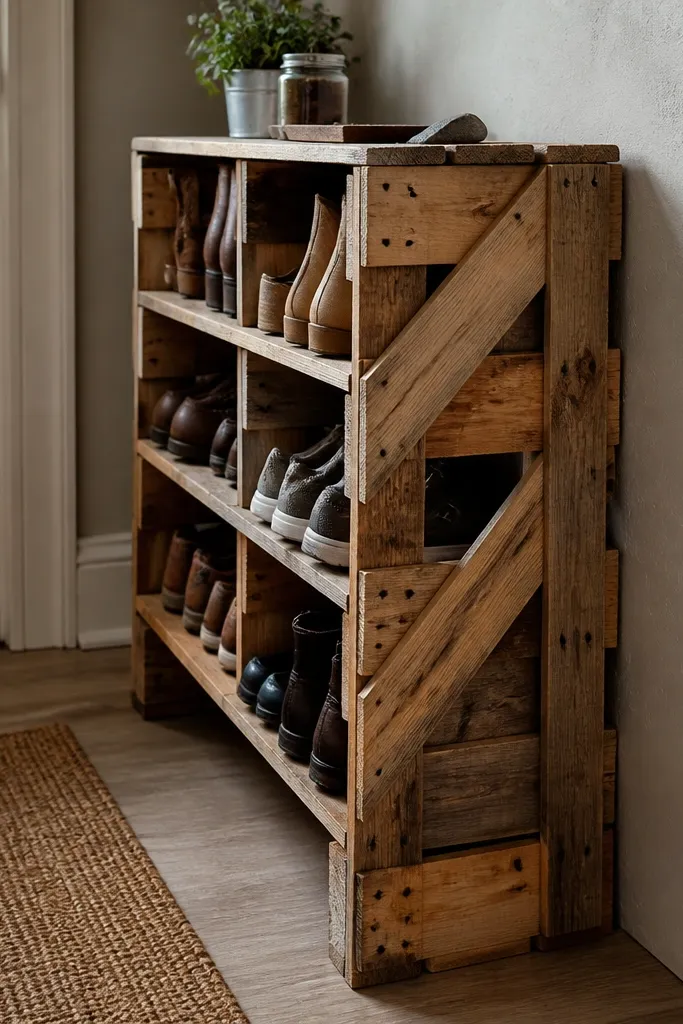
Pallet wood brings instant texture, but it only looks good if you control the geometry. This version uses diagonal braces on the sides to keep the pallet frame from wobbling and to give the rack a strong, graphic look. The open pallet compartments make it easy to slip shoes in and out without bending, and the diagonal structure keeps the whole piece from looking like a random stack. It works best as a statement in a mudroom corner or near a back door where you want a rugged aesthetic. With a good seal and edge finishing, it stays wipeable and doesn’t splinter under daily use.
Disassemble a pallet carefully and select boards with similar thickness, then cut them into a rectangular frame sized for your space — 24-36 in wide is manageable. Rebuild the frame and attach diagonal braces using pocket screws or countersunk screws so the rack stays square. Add horizontal crosspieces as shelf supports and keep compartments shallow enough for toe-forward storage. Sand to remove splinters, then seal with a wood hardener followed by polyurethane or a marine varnish for tougher scuffs. Finish by adding rubber feet underneath and a wall anchor for safety.
Use a clear satin topcoat instead of high gloss so the wood texture still shows but scuffs wipe off easily.
Skip “rough pallet” sanding — splinters show up fast and ruin the look.
4. Wrought-iron look shoe rack with DIY pipe shelves
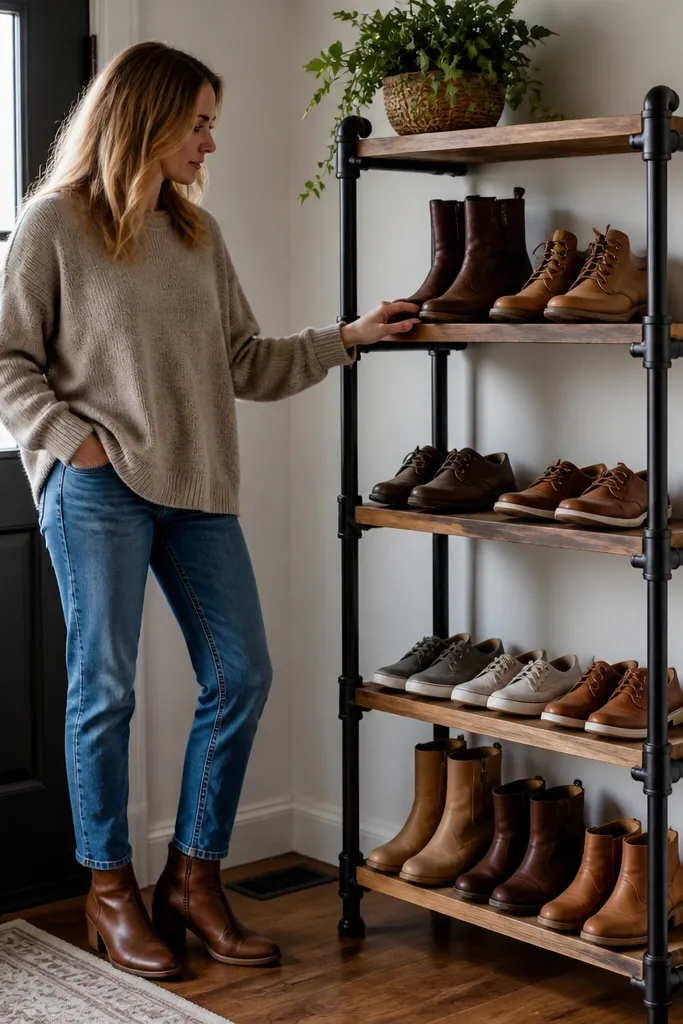
This one looks like something you’d buy, because the black pipe frame gives clean industrial lines. It’s also practical: the shelves sit at a comfortable height and the open framework makes it easy to dust. For small spaces, the key is keeping the footprint narrow and using shelves that are thick enough to avoid sag. Shoes stay visible and organized, and the metal frame makes the rack feel intentional rather than bulky. It’s a great choice if your entry has black hardware, light walls, or modern decor.
Build a frame using 1/2 in black steel pipe fittings and cut pipe to match your height. Mount two to three wooden shelves, 10-12 in deep, using flanges so shelves sit level and don’t rotate. Use a shelf thickness of 3/4-1 in for stiffness and sand corners before finishing. Paint the pipe with a high-heat metal primer plus matte black topcoat, then seal the wood with a water-resistant clear finish. Finally, anchor the frame to studs or install a wall cleat behind the rack for stability.
Editor's notePre-drill shelf mounting holes and countersink screws so the shelf surface stays smooth and photo-ready.
Skip thisDon’t skip primer on the pipe or you’ll get chips and rust spots in high-touch areas.
5. Wardrobe-style shoe rack with curtain front
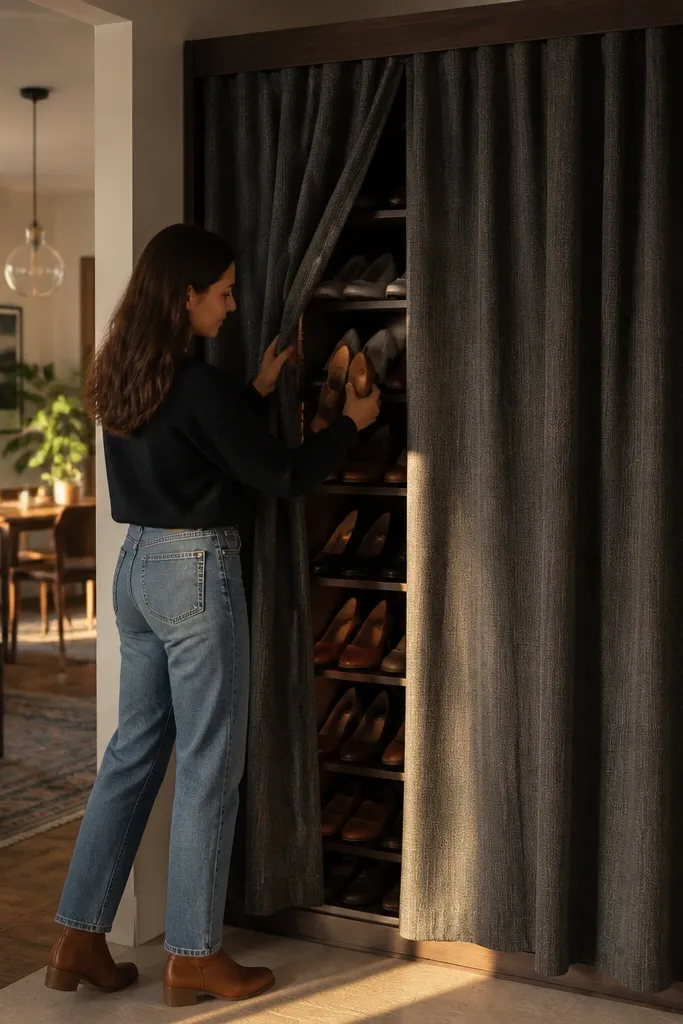
A curtain front is the fastest way to make shoe storage look clean when your space is visible from the living room. The rack can be open inside, but the fabric hides the messy part — laces, soles, and mismatched pairs. This design is especially good for small studios where the entry blends into the main room. The visual trick is a tall, slim cabinet or cubby system with a fabric panel that drapes smoothly. It looks soft and intentional, and you still get airflow compared to a fully sealed cabinet.
Build a narrow cubby frame from 1x2 lumber, depth 10-12 in, with shelves spaced for shoe types (7-9 in between shelf tops). Attach a simple track at the top: a curtain rod or a small rail mounted to studs. Install a fabric curtain made from medium-weight cotton canvas or cotton-poly, with a hem that hangs straight and doesn’t pool on the floor. Add a baseboard or skirt panel so the bottom looks finished even when the curtain shifts. Finish the wood with paint or stain, then wash and iron the curtain before hanging.
Use magnetic or snap closures at the sides so the curtain doesn’t blow open and reveal shoes.
Skip thin, see-through fabric — it shows every shoe profile and defeats the whole point.
6. Corner triangle shoe rack using angled shelves
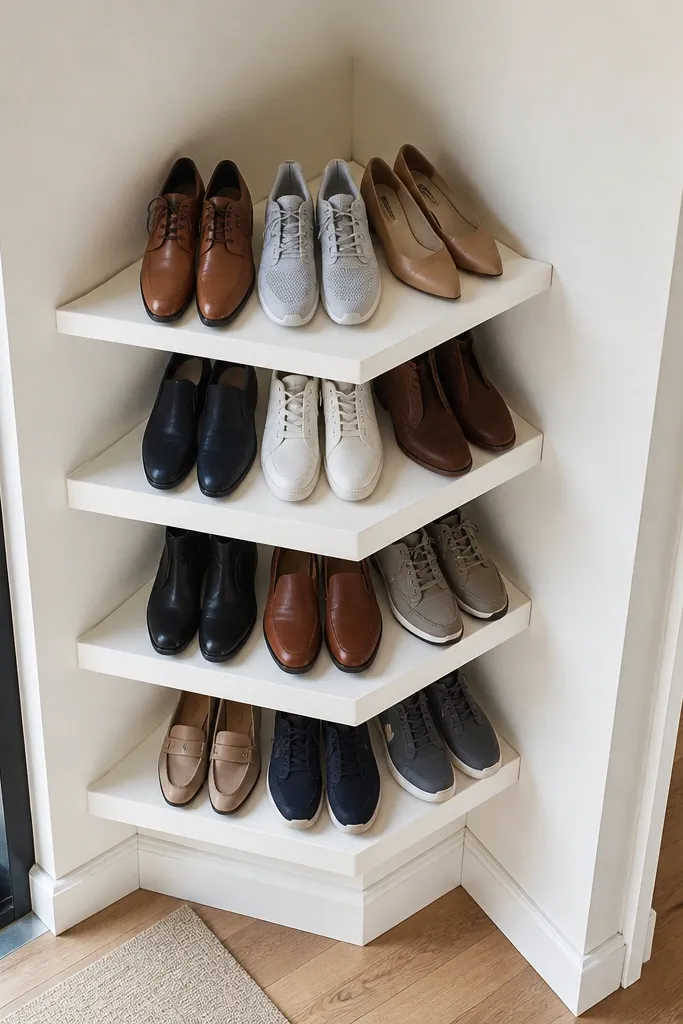
Corners are dead space, but they’re also where small-space shoe rack ideas can shine. This triangle rack fits where a straight shelf won’t, and angled shelves keep shoes from falling forward. The look is modern and architectural because the triangle shape creates a strong silhouette. It works well in entry nooks, hall corners, and beside a closet door. You can store multiple pairs without blocking the walkway, and the angled shelves make toes face the opening so grabbing is quick.
Measure your corner and cut a right-triangle frame from 3/4 in plywood, with each shelf built as a trapezoid that matches the triangle geometry. Keep depth along the outer edges at 10-12 in, then reduce the inner edge depth so the shelf doesn’t block the corner. Install a back panel or add diagonal braces so the triangle doesn’t rack. Screw shelves into the frame using pocket holes or countersunk screws for clean faces. Sand, then paint or stain with a topcoat that wipes clean.
Editor's noteDry-fit every shelf before finishing — triangle builds show mistakes fast once paint goes on.
Skip thisAvoid open framing with no back support; shoes will push the shelves out of square.
7. Over-the-door shoe rack with DIY wood side rails
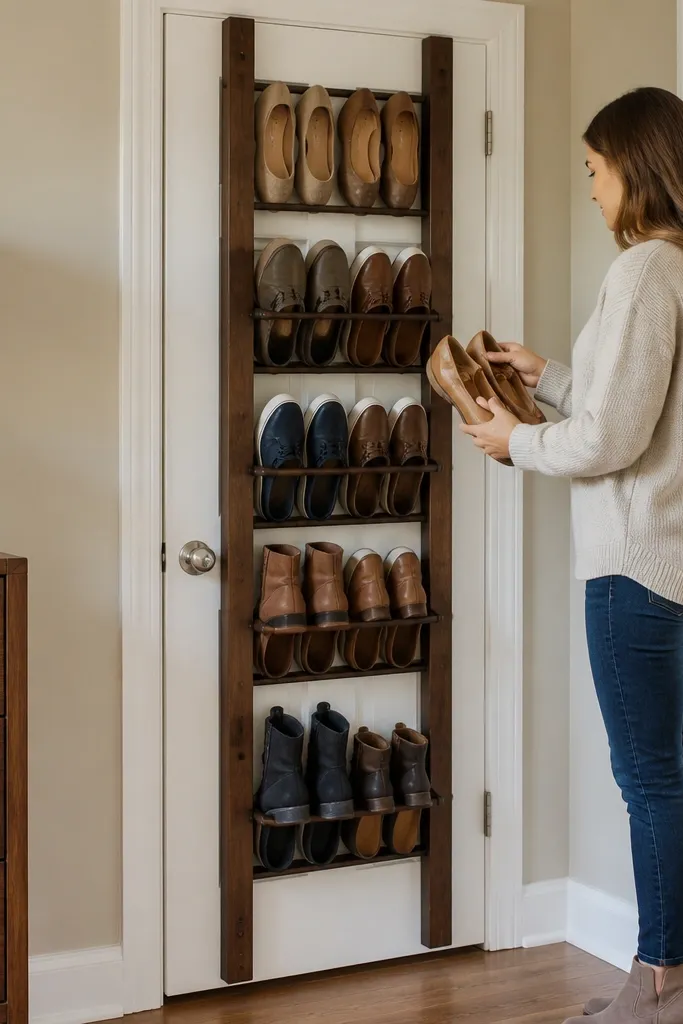
Most over-the-door racks look flimsy, but adding wood side rails makes it look intentional and sturdier. This design keeps shoes up off the floor while using a door space that’s usually wasted. The aesthetic comes from matching wood color with your trim or using a dark stain against light walls. It’s best for closets, laundry doors, and bedrooms where the door swings into a small entry zone. The tiers are visible but controlled, so it looks like storage rather than clutter.
Choose a door with enough clearance, then build two wood side rails that mount with straps or hooks rated for the load. Use 1x4 or 3/4 in plywood strips for rails, and attach tier supports inside at a 7-9 in spacing. Add slats or shallow shelves, about 8-10 in deep, so shoes sit toe-out and don’t jam. Sand and finish the rails with stain or paint, then seal to prevent scuff absorption. Hang the rack on the door hardware and verify it clears door handles and trim.
Editor's noteUse rubber edge trim on the inside contact points so it doesn’t scratch the door and looks cleaner.
Skip thisDon’t overload it with heavy boots — the door mount needs real load discipline.
8. Ladder shelf shoe rack with staggered tiers
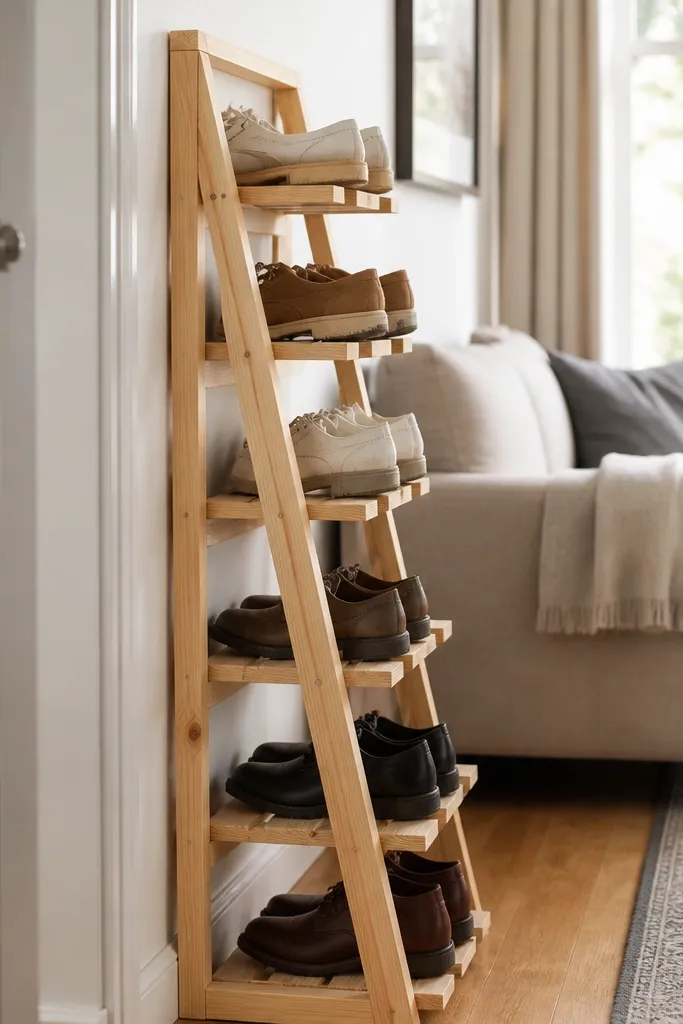
A ladder shelf silhouette makes shoe storage look like furniture, not a utility item. Staggered tiers create a rhythm that looks good from the doorway, and the open sides help the rack feel lighter in a small room. This works when you want a tall rack that doesn’t take much width, like next to a couch or in a narrow hall. The look is all about uniform spacing and consistent finish on each rung. It also makes it easy to separate shoe types visually.
Build two vertical side rails from 1x3 or 2x2 lumber, spaced 14-18 in apart depending on your widest shoe. Cut rungs as shelf supports, then attach at 7-9 in intervals, keeping shelves shallow at 8-10 in deep. Stagger the shelf pieces so toes face outward in alternating rows. Add a back support rail or diagonal braces so the ladder doesn’t rack. Sand, then stain the wood and apply a clear matte topcoat for a clean, wipeable surface.
Editor's notePre-stain the wood before assembly if you want fewer missed spots around joints.
Skip thisAvoid thin rungs without bracing; they flex and shoes slide off.
9. Cabinet with glass-front top and closed shoe base
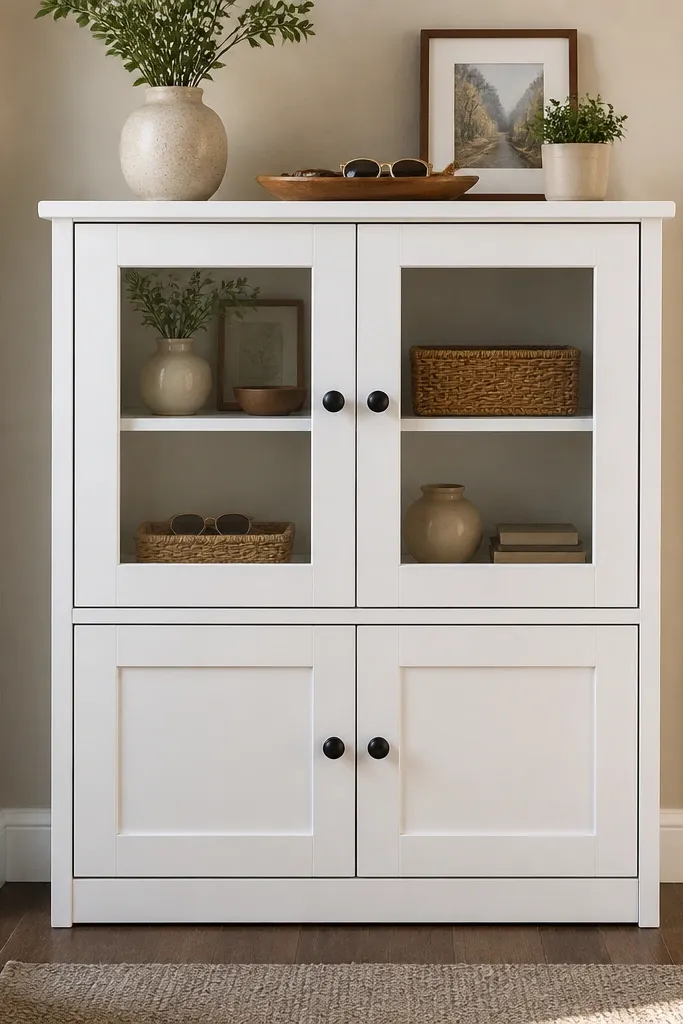
This is a clean-entry trick: keep the top looking decorative and the shoes hidden below. The glass-front top gives you a “furniture” look, while the closed base prevents the visual chaos of mismatched pairs. It’s ideal if your entry is visible from a hallway or living room and you hate open shoe racks. The design is photogenic because the top reads like a display cabinet, and the bottom stays calm. You can store shoe accessories up top or keep seasonal items behind the glass.
Build a base cabinet from plywood, depth 12-14 in, with doors or a simple closed front. Add internal shelves for shoes at 7-9 in spacing, then build a top compartment with glass panels mounted in a frame. Use 1/4 in glass and secure it with silicone glazing points for safety. Finish with paint or stain, then add a top rail for a crisp edge. Install hinges and magnetic catches so the closed doors stay aligned and don’t sag.
Use soft-close hinges if you want the cabinet to look high-end in motion and photos.
Don’t put shoes behind glass; it looks cluttered fast and shows scuffs.
10. Pegboard shoe rack with removable baskets
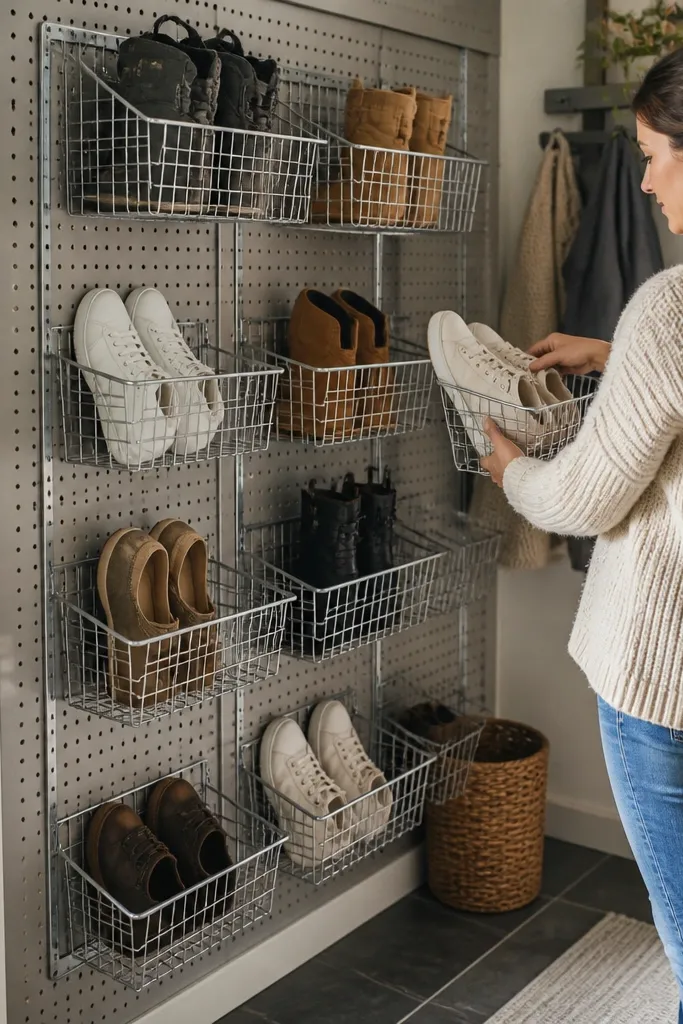
Pegboard makes shoe storage look like a design wall, not a closet fix. The removable baskets keep shoes contained, while the pegboard grid makes the whole setup look tidy and customizable. This works in small entryways where you want flexibility — you can move baskets as your shoe rotation changes. It also photographs well because the grid pattern is clean and the baskets create consistent shapes. If you’re building in a rental, pegboard is also the easiest way to keep things reversible with minimal damage.
Mount pegboard on a wall with proper anchors into studs, then cut a frame trim if you want it to look built-in. Hang wire baskets or shallow wooden baskets on the pegboard hooks, spacing rows so each basket holds one pair. Keep basket depth around 10 in and shelf-to-shelf height around 8 in for most shoes. Paint the pegboard and frame the same color as your wall trim so it blends, or go bold with matte black for contrast. Add a bottom board or shelf for a finished look and to catch small debris.
Editor's noteLabel the baskets with small removable tags on the inside so you keep pairs separated without clutter on the front.
Skip thisAvoid hanging baskets too low; shoes drag and baskets collect dirt along the floor.
11. DIY built-in shoe bench with lift-top storage
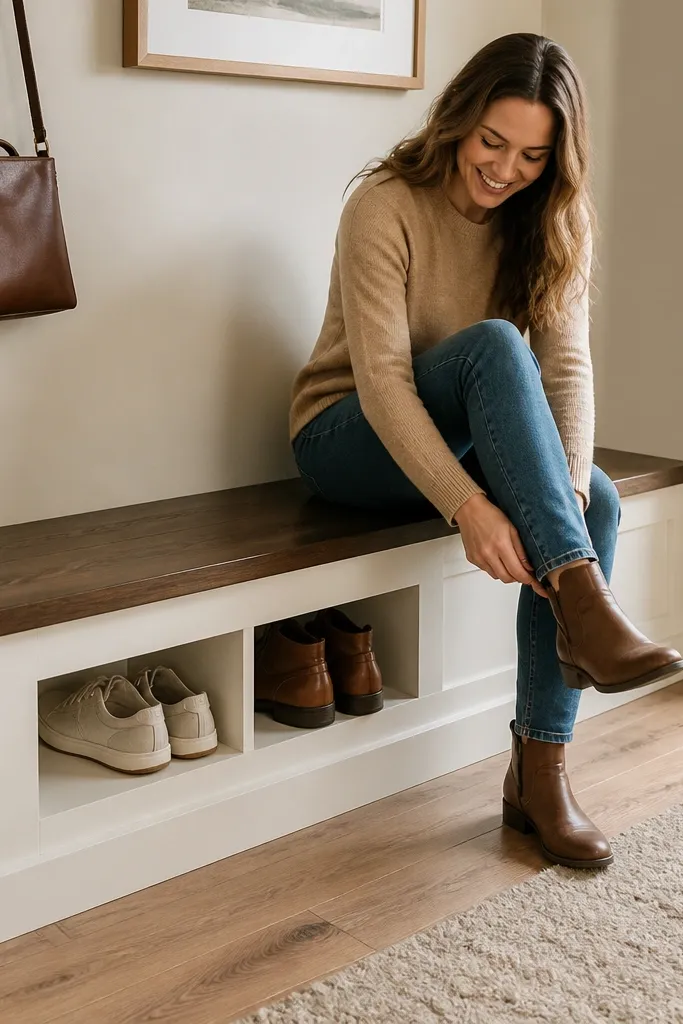
A shoe bench is the most satisfying small-space upgrade because it does two jobs: seating and hidden storage. Lift-top compartments keep shoes out of sight, and the closed lid makes the area look clean even when you kick off shoes quickly. This is great for small entries where you need a spot to sit while tying shoes. The look is furniture-grade if you keep the lines straight and use upholstery or a smooth painted finish. The storage is also easy to maintain because you can clean the base without moving the whole rack.
Build a bench frame from 2x2 or 1x4 lumber, sized to your wall — 48-60 in long is common in small entries. Set the top height around 18 in for comfortable sitting, then create lift lids using piano hinges or gas struts if you want smoother opening. Inside, add fixed shelves or dividers so each compartment is about 7-9 in tall and 10-12 in deep. Use plywood for the interior and line it with a washable fabric or paint that wipes clean. Finish the top with a cushion or a thick foam seat and fabric, then add a magnetic catch so lids close firmly.
Add a thin ventilation gap on the back panel with a small vent strip so shoes don’t trap moisture.
Don’t use soft, thin foam on top — it collapses and makes the bench look worn quickly.
12. Turntable shoe rack with rotating tiers
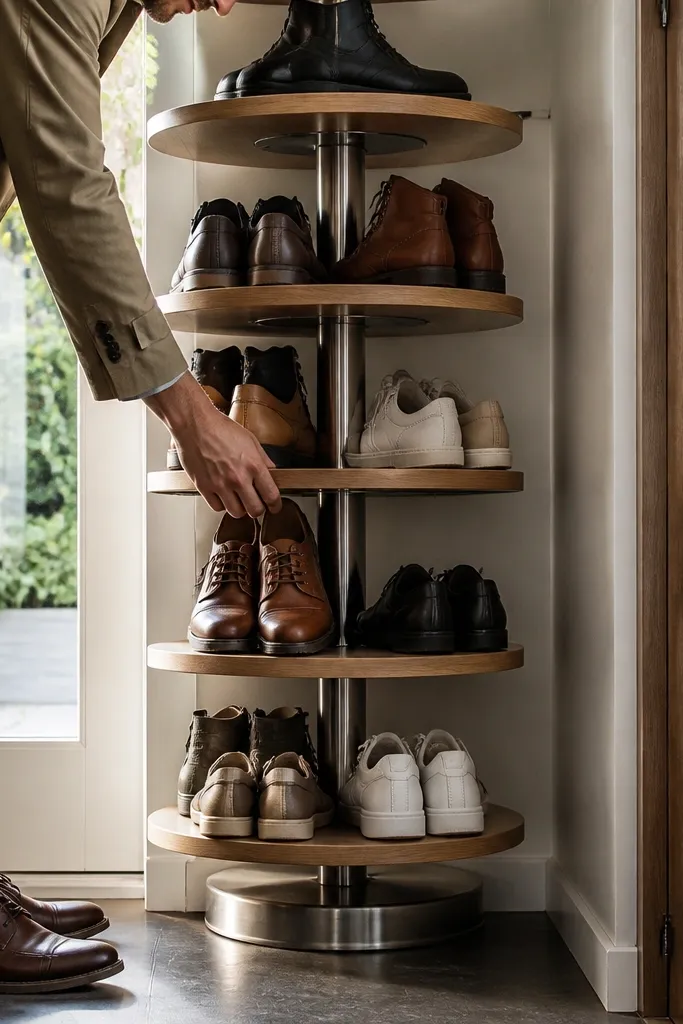
A rotating rack is a small-space superpower because it keeps pairs accessible without pulling the whole rack out. The look is sleek and sculptural, especially if you use a central metal spindle and matching shelves. It’s best for narrow areas where you can spare a compact footprint but can’t fit a long linear rack. You can store several pairs, and each pair faces the opening as you rotate. This design also stays tidy because shoes don’t spill forward or sideways.
Start with a circular base plate, 18-24 in diameter, and a central spindle or lazy susan bearing. Build 3-4 shallow shelf platforms from plywood, each about 8-10 in deep, and attach them to the rotating mechanism at different heights. Set tier spacing around 7-9 in so shoes sit upright. Seal and finish shelves with a durable clear coat, then add a stop so the rack doesn’t spin endlessly. Mount or anchor the base so it doesn’t slide on tile or wood floors.
Use a non-slip mat under the base and add felt pads at shelf contact points to prevent rattling.
Avoid overloading shelves; rotating storage fails when the center bearing is stressed.
13. Stair-step shoe rack with bookcase-style face
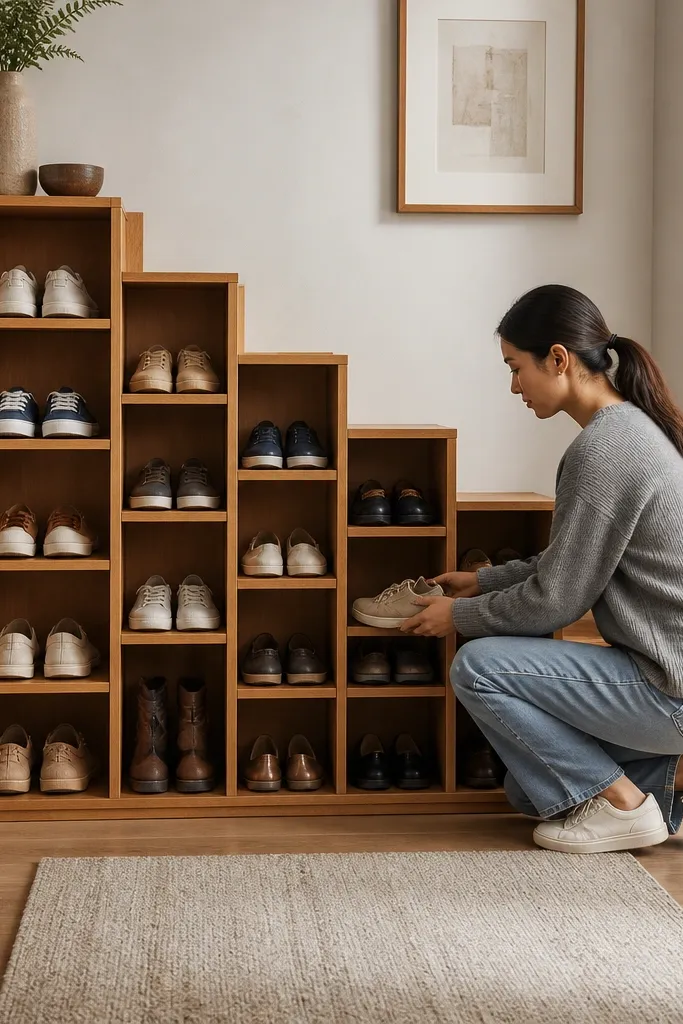
Stair-step storage looks good because it creates a clean, repeating pattern instead of empty vertical slots. The stepped tiers give you visual variety and let you store different shoe heights without forcing everything into identical compartments. This is perfect for a narrow wall where a tall rack would feel too heavy. You get easy toe access and a front face that looks like furniture, especially when you frame the edges like a bookcase. It’s also forgiving for DIY because you can adjust shelf dimensions as you measure your shoe types.
Build a rectangular frame, depth 10-12 in, then cut shelves in stair-step sizes that match your shoe heights. For most shoes, set each step rise so the effective compartment height is 7-9 in. Use side panels and a back panel to keep it square, then screw shelves in from the sides for clean front faces. Finish with paint or stain, and add a thin trim strip around the perimeter for a cabinet look. Anchor the frame to studs if it’s taller than 30 in.
Editor's noteCut a test shelf first and place one real shoe on it before committing to the whole layout.
Skip thisDon’t make the steps too shallow or shoes will slide out and the rack will look messy.
14. Magnetic wall shoe rack with thin metal rails
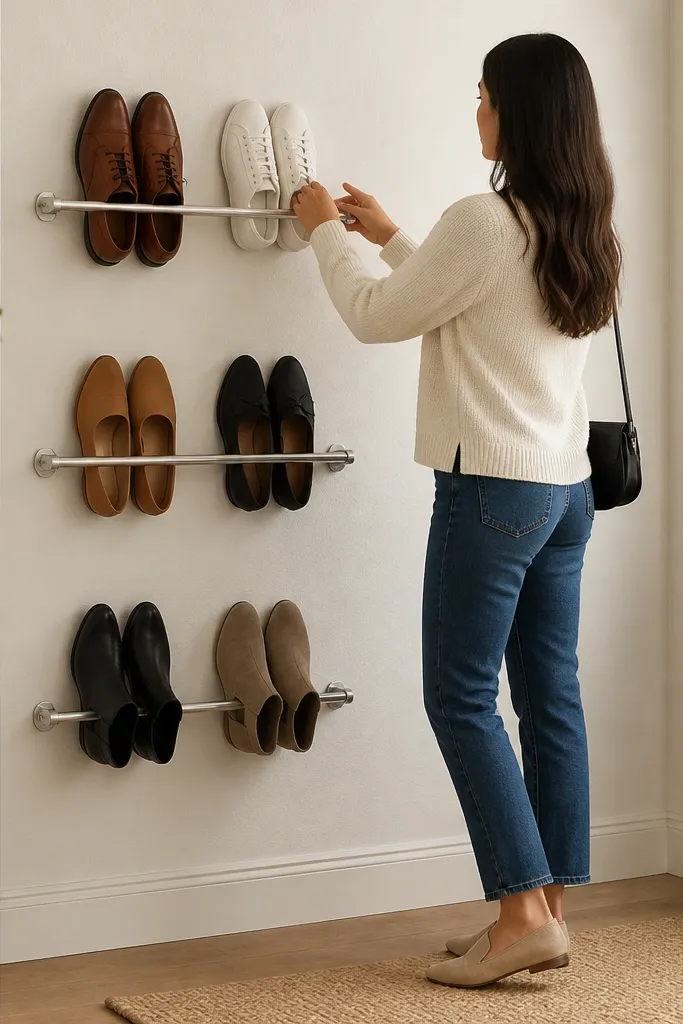
This is the cleanest look when you want almost no visible hardware in a small entry. Thin metal rails mounted to a wall hold shoes with magnetic strips or removable brackets, so the front stays uncluttered. It’s best for lightweight shoes and sneaker storage where you can keep weight moderate. Visually, the rails create a minimalist line, and the shoes appear “organized by alignment.” If your decor is modern or you hate bulky racks, this one reads intentional.
Mount slim metal rails into studs with screws, keeping rail spacing aligned with your shoe widths plus about 1/2 in. Add magnetic strips or removable brackets that attach to the shoe outsole or to a thin base plate you add to each pair. Keep rail depth minimal so the rack doesn’t stick into the walkway. Finish the rails with matte black or brushed steel look paint and seal them so they wipe clean. Test with a full pair before installing the final rails so the shoe sits stable and doesn’t tilt.
Editor's noteUse a template made from cardboard for rail spacing so every pair lines up the same way.
Skip thisAvoid this approach for heavy boots — magnets and thin rails won’t stay stable under load.
15. Bamboo slat shoe rack with woven drawer base
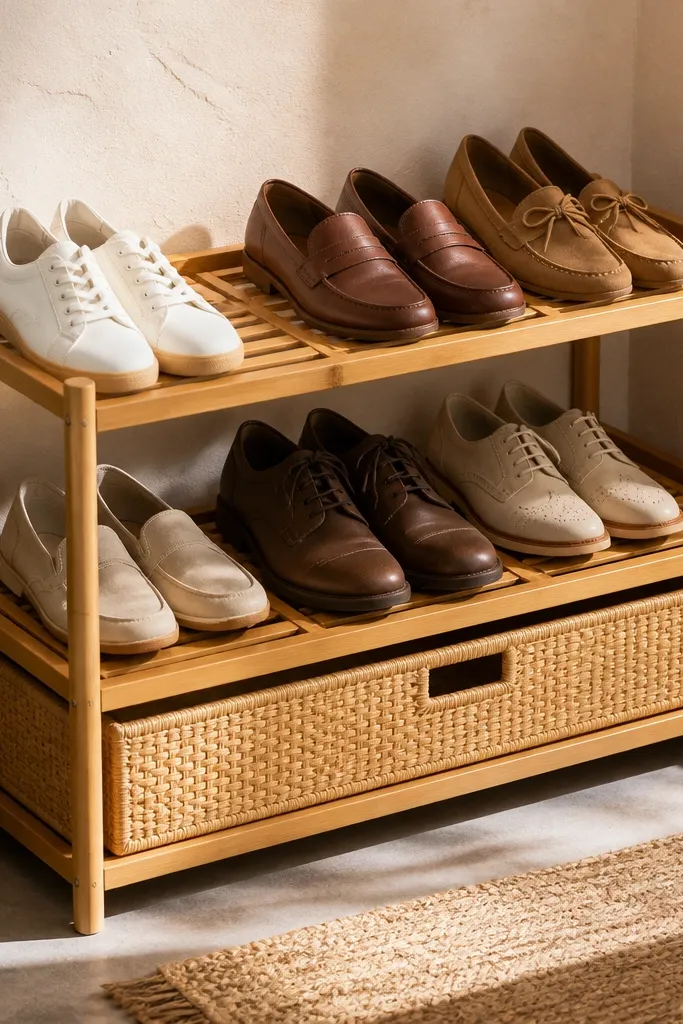
Bamboo slats look airy and warm, which makes them great for small spaces where you don’t want dark storage to swallow the room. The woven drawer base hides small items like shoe polish, insoles, and socks, so the rack doesn’t turn into a clutter magnet. The slat top and open middle keep shoes from looking boxed-in, and the consistent slat spacing makes it photogenic from multiple angles. This style works especially well in entryways with light wood, neutral walls, or natural textures. It’s a good DIY choice because bamboo slats are forgiving to cut and easy to finish.
Build a simple frame from plywood or 2x2 lumber, depth 10-12 in and width based on your wall. Attach bamboo slats across the top and middle as shelf surfaces, spacing them tightly enough that heels don’t slip through. Add a drawer base under the shoe area using a slide or a simple pull-out frame, sized for small accessories. Seal bamboo with a clear protective coat so it resists scuffs and moisture. Assemble with screws and wood glue, then sand any rough edges and finish the frame to match the slats.
Use a satin clear coat — it keeps bamboo looking natural instead of plastic-shiny.
Don’t skip sealing bamboo edges; they drink moisture and show wear faster.
16. Recessed shoe rack behind a shallow wall panel
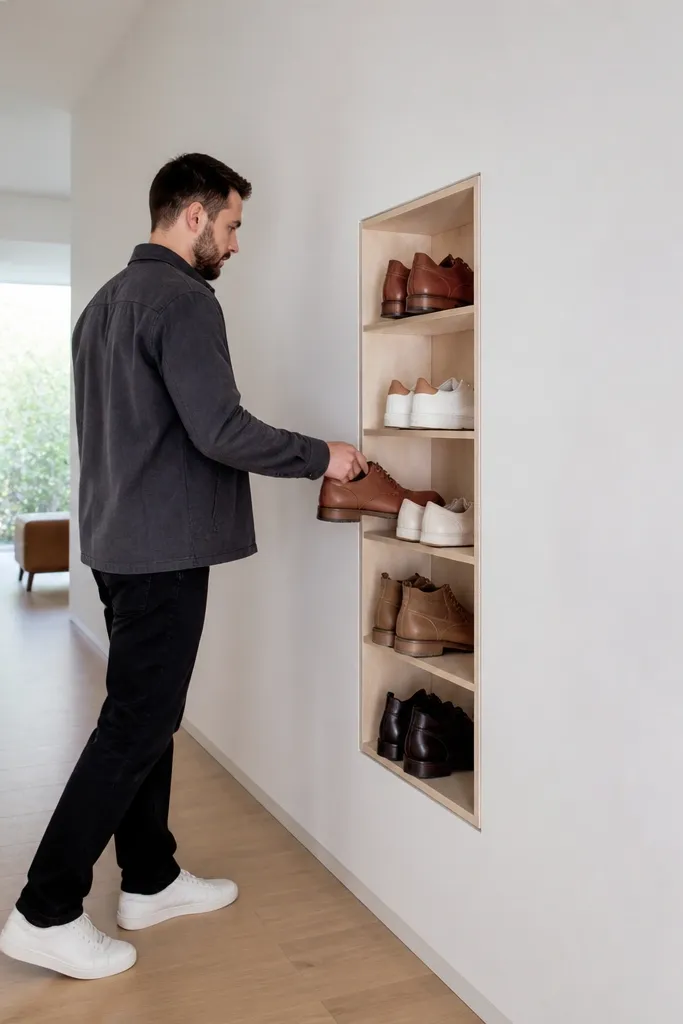
A recessed rack looks built-in because it sits flush with the wall. That means it doesn’t visually take up space, and it keeps the entryway line clean. This is the move if you have drywall access and want a high-end look without buying furniture. The compartments can be shallow and still work because the wall cavity holds the depth, letting you keep your hallway narrow. It’s also one of the most photogenic options because there’s almost no “rack” silhouette — just a neat row of tiers.
Pick a wall section where you can cut a shallow cavity, usually 4-6 in deep, and confirm you won’t hit plumbing or wiring. Frame the opening with 2x2 studs and add a back panel, then install shelves using 3/4 in plywood. Set tier heights based on your shoes: 7 in for flats/sneakers, 9 in if you store taller pairs. Close the face with a trim frame and paint to match the wall, then add a toe-kick lip so shoes don’t slip behind. Anchor the shelves to the framing and add a small cleanout access panel if you need future repairs.
Editor's noteUse a satin paint on the interior panel so scuffs wipe without showing glossy marks.
Skip thisDon’t cram compartments too tight — recessed storage that forces shoes sideways looks chaotic fast.
17. Hanging shoe rack with vertical fabric pockets and wooden dowel
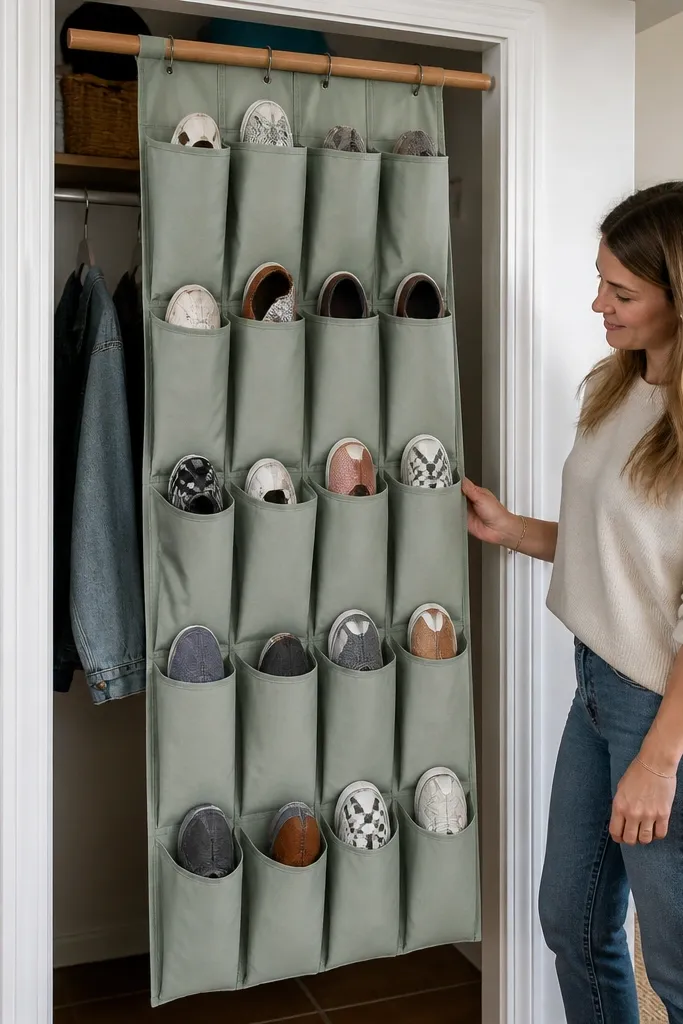
Fabric pockets can look cheap, but the look changes completely when you use a rigid top bar and match the fabric color to the room. This design hangs from a wooden dowel or ceiling track, keeping shoes off the floor and making the entry feel lighter. It’s best for small spaces where wall mounting is tricky and you want a soft, clean visual. The pockets keep each shoe separated, and the rigid top bar makes the rows straight for a tidy look in photos. You can also store slipper pairs and kids shoes in a smaller pocket layout.
Choose a fabric with structure, like cotton canvas or heavy cotton-poly, and cut pocket panels in consistent widths for your shoes. Sew pockets with reinforced seams and add a top channel for a wooden dowel, sized to span your entry door frame or wall brackets. Mount two brackets at the ceiling or wall ends, then hang the dowel so the rack clears the floor by 1-2 in. Keep pocket depth around 10 in so shoes sit without folding. Finish the dowel with stain and a clear topcoat, then iron and hang the organizer straight before using.
Editor's noteMeasure pocket width using your widest shoe plus 1/2 in so laces don’t snag at the opening.
Skip thisAvoid stretchy or thin fabric — pockets sag and the whole rack turns uneven.
18. Two-tone shoe rack with picture-frame trim
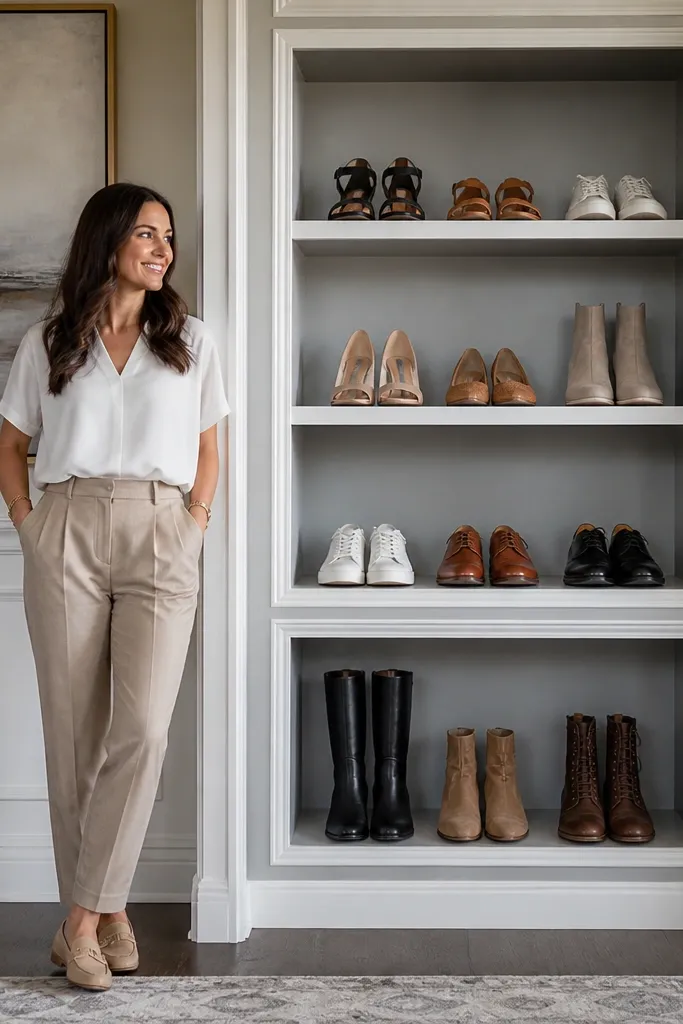
Two-tone paint with picture-frame trim turns a plain shoe rack into something that looks like built-in furniture. The trick is to use one color for the main body and a contrasting trim color for the perimeter and shelf edges. This makes the rack look crisp even when shoes are stored inside. It’s great for modern homes where you want storage that matches the clean lines of cabinetry. The front reads like a series of framed panels, which is exactly what makes it photogenic from a doorway angle.
Build a small cabinet frame from 3/4 in plywood, depth 10-12 in, with internal shelves at 7-9 in spacing. Add trim strips around the front edges and shelf edges so you get a framed look; cut mitered corners for clean lines. Prime everything, then paint the body one color and the trim another, letting each coat cure fully for sharp borders. Add a back panel for rigidity and install a door or open top depending on your preference for hidden storage. Sand lightly between coats if your finish is going to be smooth and glossy.
Use painter’s tape for crisp lines, but press it down firmly and remove it while paint is still slightly soft.
Don’t rush drying time — thick paint smears tape edges and ruins the frame look.
19. Slim steel and wood bench-style shoe rack
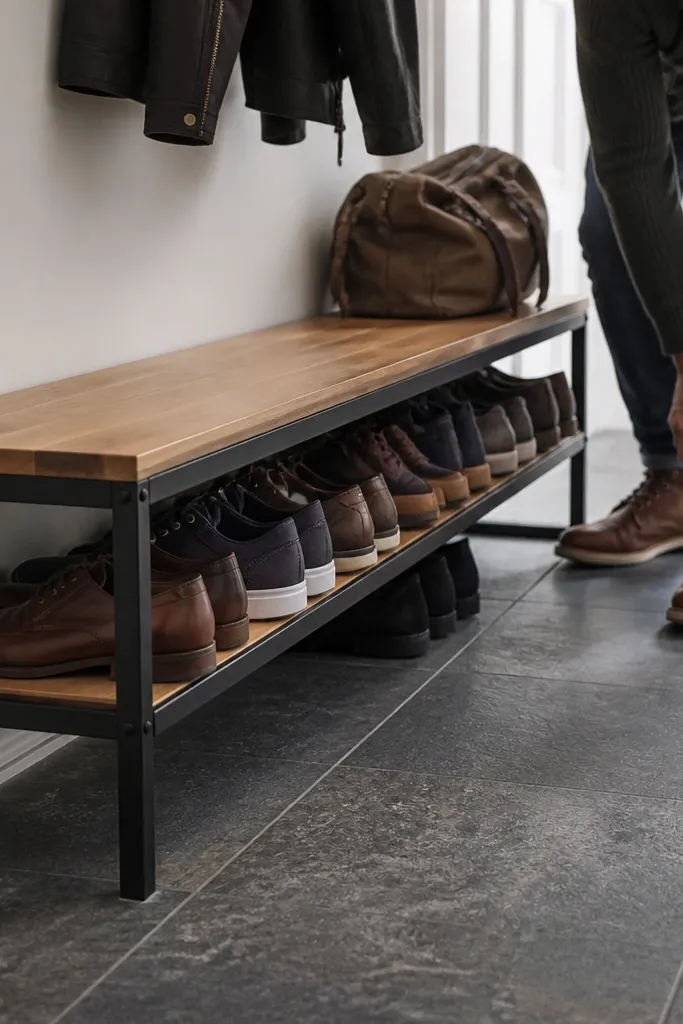
A bench-style rack looks intentional because it has a “top surface” even if it’s only a shelf. Using a slim steel frame keeps the footprint tight and gives a crisp silhouette. The shelves can be wood for warmth and easy scuff wiping. This is ideal for hallways where you want shoes stored low and you want a surface for a tray, umbrella, or small decor. It’s photogenic because the metal frame creates straight lines and the wood shelves add texture.
Build or buy a simple steel frame with rectangular legs sized for your space, then add two shelves made from 3/4 in wood boards. Keep shelf depth around 10-12 in and set the lower shelf height around 10-12 in from the floor, with the upper shelf 18-20 in above the floor. Secure shelves with shelf brackets or through-bolts so they don’t shift. Sand wood smooth, then stain and seal with a clear protective topcoat. Anchor the frame to studs if it’s longer than 36 in or if you store multiple pairs.
Editor's noteAdd small rubber pads under feet so it doesn’t slide and so the rack looks stable in use.
Skip thisAvoid glossy wood finishes — they show scuffs and shoe marks more than satin.
20. Turned-wood dowel shoe rack with angled toe stands
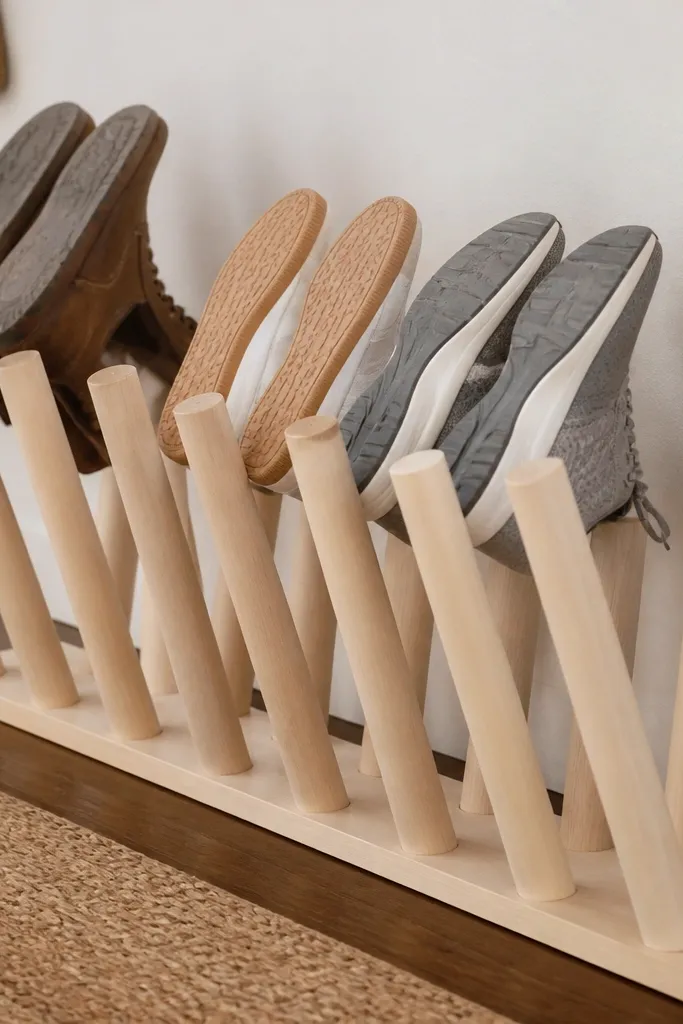
This design looks like a minimalist sculpture because it uses dowels as the “support points” instead of flat shelves. Angled toe stands keep shoes upright and visible while leaving the area around them open. It’s great for small spaces where you want airflow and a light visual footprint. The dowel look also matches natural decor and adds warmth without bulk. Build it with consistent angles and spacing and you get that clean, gallery-like organization.
Cut dowels to create toe stands and back supports, then decide your angle by dry-fitting one shoe. Build a base frame from plywood or 2x2 lumber, depth 10-12 in, and attach dowel supports in rows. Space supports so each shoe heel has a stable contact point and each pair doesn’t touch the next. Sand and finish dowels with stain and clear topcoat, then seal the base frame for easy cleaning. Anchor the base frame so the angled stands don’t tip when you lift shoes out.
Editor's noteMake a cardboard template for the shoe footprint and use it to set dowel spacing before cutting everything.
Skip thisAvoid random angles — inconsistent dowel positions make the rack look messy even if it’s functional.



