
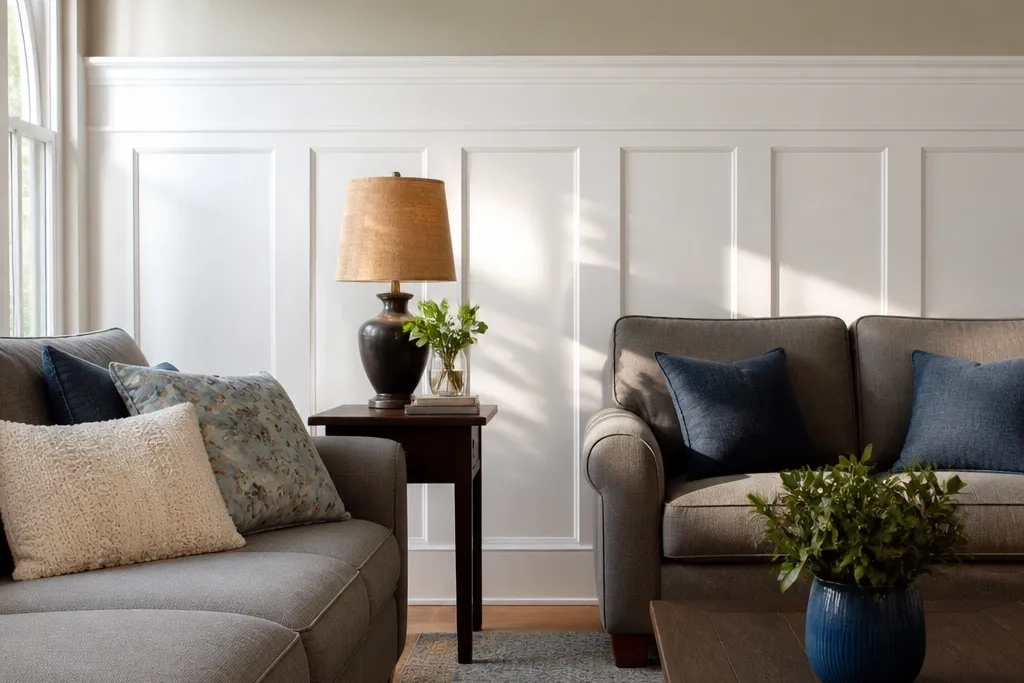

1. Classic chair-rail panels with 1x3 frames
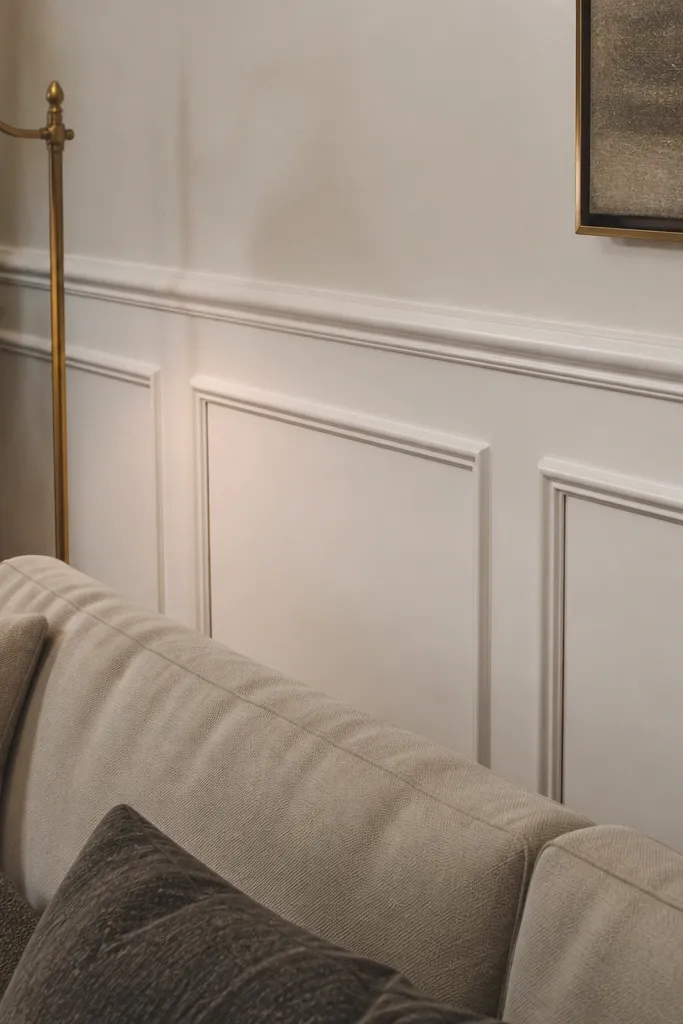
This is the cleanest small-space wainscoting idea when you want “built-in” vibes without visual clutter. The 1x3 frame gives you a crisp border around flat rectangles, so the wall gets depth without turning into a busy pattern. Paint it all in one light color with slightly different sheens — trim semi-gloss, panels eggshell. It works especially well on one main wall where the sofa faces, because the horizontal chair rail anchors the whole room.
Measure your wall width and decide your panel grid so the outer panels aren’t tiny. Mark a level line for the chair rail at 48-52 inches from the floor, then snap a straight reference line. Cut stiles and top/bottom rails from 1x3 primed boards, glue and nail them to the wall, and keep panel rectangles consistent by using a spacer block. Fill nail holes, sand flush, then prime and paint with two-sheen separation for the trim and panels.
Editor's noteUse a 1/8-inch spacer between trim pieces so your panel lines look even after paint build-up.
Skip thisDon’t skip filling and sanding the frame edges — raised joints look sloppy once the wall is lit.
2. Tall panel wainscoting for 9-foot ceilings
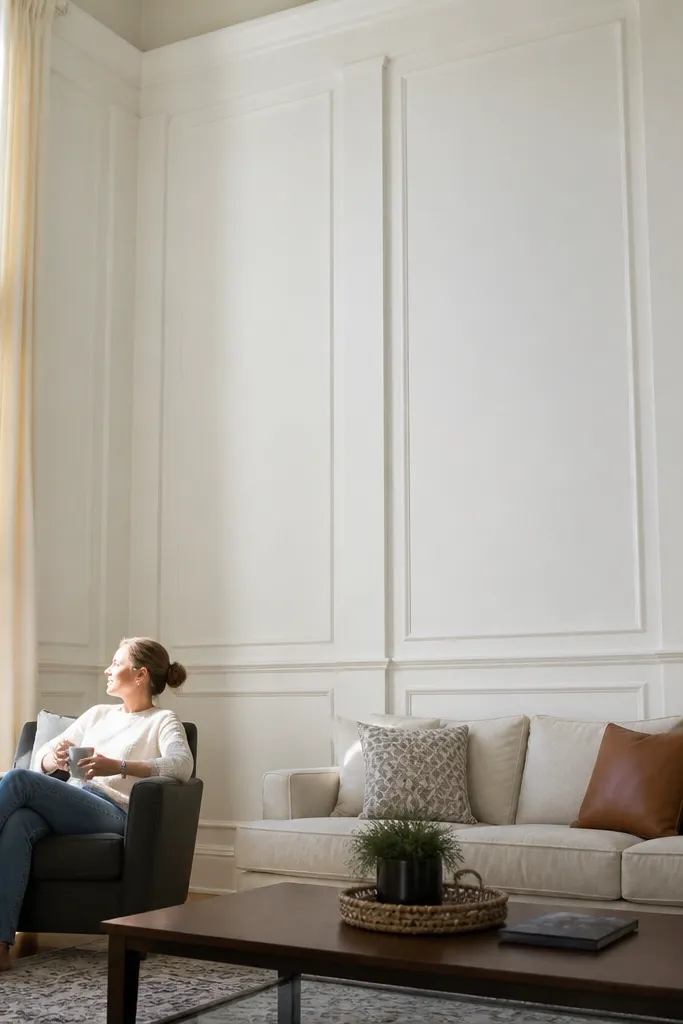
If your living room has a 9-foot ceiling, tall panels make it feel taller instead of chopping it up. The look is dramatic but still small-space friendly because you keep one strong rail line and repeat the same rectangle shape vertically. Go for slightly wider panels and fewer vertical divisions so the wall doesn’t look busy. This one photographs well because the recesses catch light along the trim.
Set your top rail line at about 60 inches from the floor, then build rectangular panels that stack evenly between the floor and that rail. Use 1x4 for the outer frames and 1x2 for the stiles if you want a lighter, less chunky look. Layout matters: start from the center of the wall and work outward so the outer panels land at least 12 inches wide. Install with construction adhesive plus brad nails, then fill, sand, prime, and paint in a trim color that contrasts your wall color.
Editor's noteKeep panel widths within 12-18 inches for small rooms — too narrow makes the pattern feel like wallpaper.
Skip thisAvoid adding a second horizontal rail — it crushes the vertical feel in tight rooms.
3. Shiplap-style vertical planks with a horizontal rail
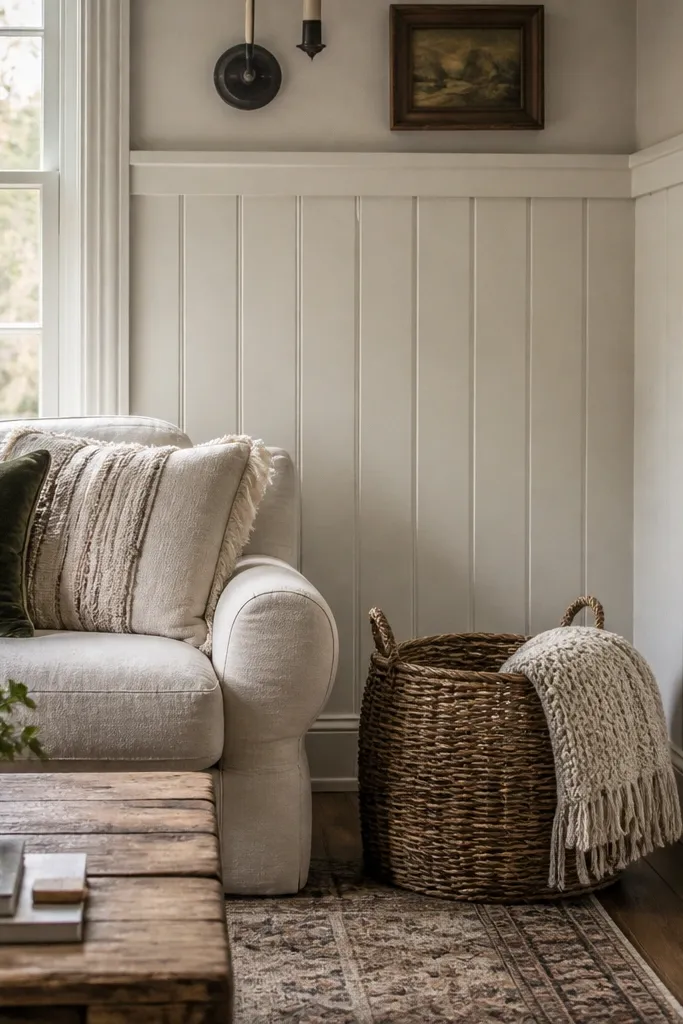
This gives you the cozy farmhouse texture look, but controlled enough to feel modern. Vertical planks add height visually, which is exactly what small rooms need. The horizontal rail prevents the whole thing from becoming random wood slats, and it keeps the eye anchored around seating height. It’s a great pick if you want warmth without dark stain — paint the planks crisp white and keep the rail slightly off-white.
Choose 1/4-inch MDF or primed pine for thin planks and mark a level rail line at 48-50 inches. Install a backing strip or directly glue to the wall where possible, then nail planks vertically starting from the center. Use a consistent gap, like 1/8-inch, with spacers so the lines stay uniform. Finish by caulking the rail edges, filling nail holes, sanding, then priming and painting with at least two coats on the planks.
Use a caulk line only at frame-to-wall transitions; don’t smear caulk into the plank grooves.
Don’t skip a level starter board — if the first vertical line is off, the rest will look crooked.
4. Square-grid wainscoting with 2x2 inch blocks
This is the most “pattern-on-purpose” option in the list. Small square blocks create a strong grid that reads as custom millwork, and it looks great even in tight rooms because the recesses create depth. Keep the blocks small but not microscopic — the goal is crisp geometry, not a checkerboard. Use a slightly darker panel color than the frame for maximum contrast under living-room lighting.
Build a top rail first at 50-54 inches from the floor and frame the outer perimeter with 1x3 boards. Then install vertical stiles and horizontal rails to create equal compartments. For 2x2 inch blocks, cut consistent spacers and use them as gauges while you glue and nail each block into place. Fill seams, sand flush, prime all surfaces, then paint panels and frames in two colors with matching sheen.
Cut blocks from the same board batch to keep thickness identical across the wall.
Avoid mixing board widths — tiny thickness differences make the grid look warped.
5. Board-and-batten wainscoting with a wide center batten
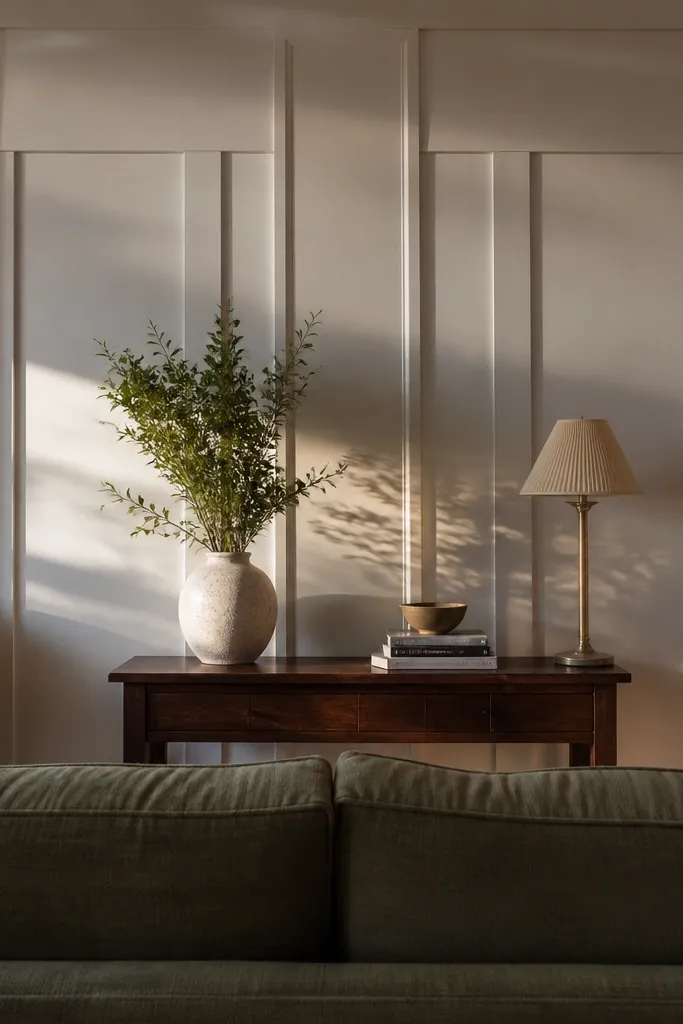
This is a smart way to add character without filling the entire wall with lots of lines. The wide center batten creates a focal stripe, and the surrounding narrower battens keep the look balanced. It’s especially flattering on one wall behind a sofa or media console because it pulls attention to the center. Paint the battens and frame in satin and keep the panel field in eggshell for a clean photo finish.
Start with a perimeter frame using 1x3 material, then set your chair rail at 48-52 inches. Add horizontal backing boards for the panel field so battens land straight. Install narrow battens spaced evenly on both sides of a single wider center batten, using a spacer jig to keep gaps consistent. Finish by caulking along batten edges, filling nail holes, sanding, priming, and painting two-sheen layers.
Use a spacer jig made from scrap 3/8-inch board so your batten gaps match every time.
Don’t rely on eyeballing spacing — uneven gaps show immediately in small rooms.
6. Inset arch-top panels in the corners only
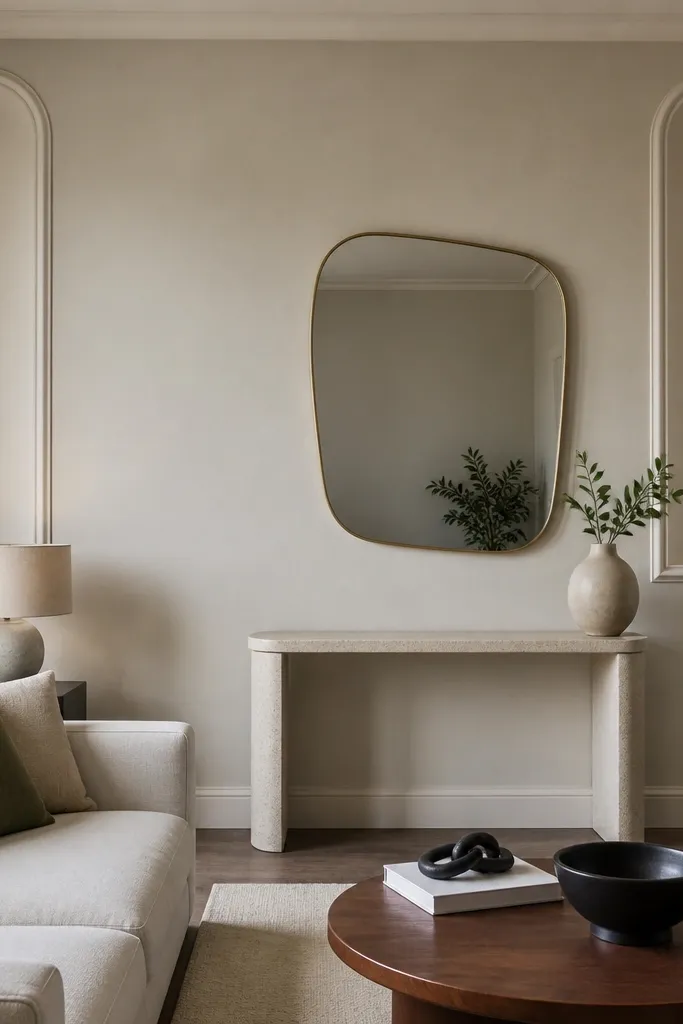
If you want a designer detail without turning the whole wall into a theme, do arches only in the corners. The arch tops add softness and interest, while the center stays simple so you don’t shrink the room visually. This looks especially good in small living rooms with rounded decor elements like a curved mirror or rounded lamp base. Keep the arches shallow so they don’t look like a ceiling medallion.
Install a chair rail at 50 inches and frame the lower wall with 1x3 boards. In each corner, mark a panel rectangle and then mark the arch curve using a radius template cut from cardboard. Cut the curved top pieces from MDF, glue and nail them to the frame, then add vertical side stiles. Fill, sand, prime, and paint with the frame in semi-gloss and the recess in eggshell or flat.
Editor's noteMake the arch template once and trace it onto both corners — symmetry matters more than you think.
Skip thisDon’t make the arch too tall — it competes with the chair rail and gets visually cramped.
7. Raised panel look using MDF sheets and bead trim
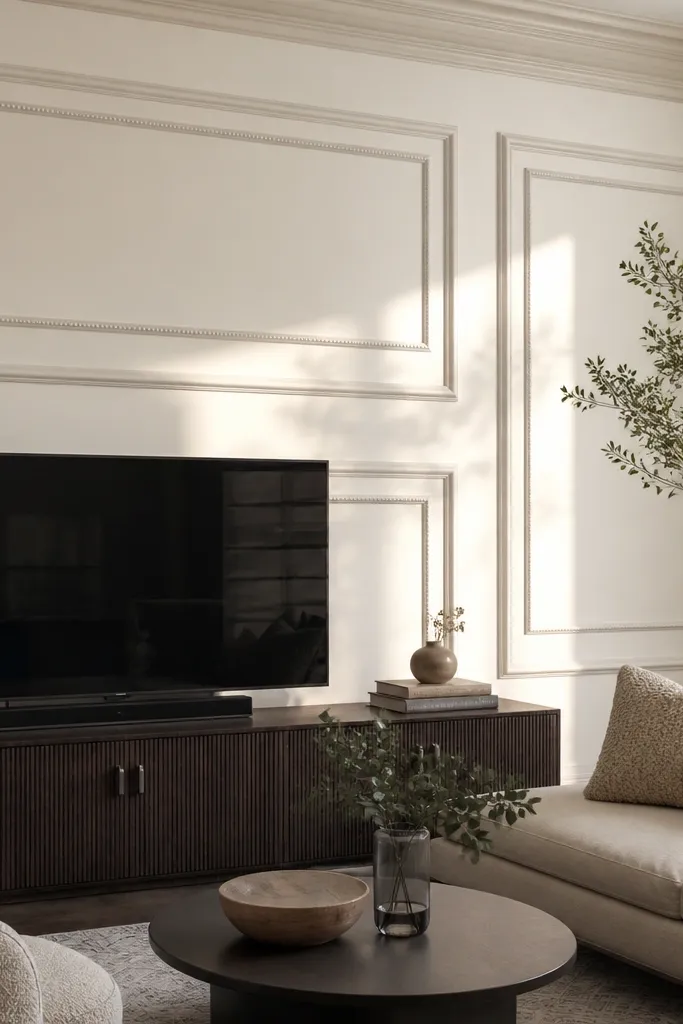
This one mimics classic raised-panel molding without expensive carpentry. Instead of complex router profiles, you create the “raised” feel with layered MDF rectangles and bead trim around the perimeter. It’s clean, photogenic, and perfect for small spaces because the pattern stays orderly. Use a paint color slightly warmer than your walls for the bead trim so it catches light.
Cut large MDF rectangles for the panel fields and mount them onto the wall or onto a backer frame. Install perimeter trim and then add bead trim around each panel edge for definition. Keep panel spacing consistent by using a spacer ruler and marking every line before you cut. Fill joints where MDF meets trim, sand flush, prime everything, then paint with two sheen levels to separate the layers.
Editor's noteSeal MDF cut edges with primer before assembly if you can — it prevents edge fuzz showing through paint.
Skip thisAvoid skipping backer support — thin MDF alone can flex and crack caulk lines.
8. French-inspired vertical panels with thin mullions
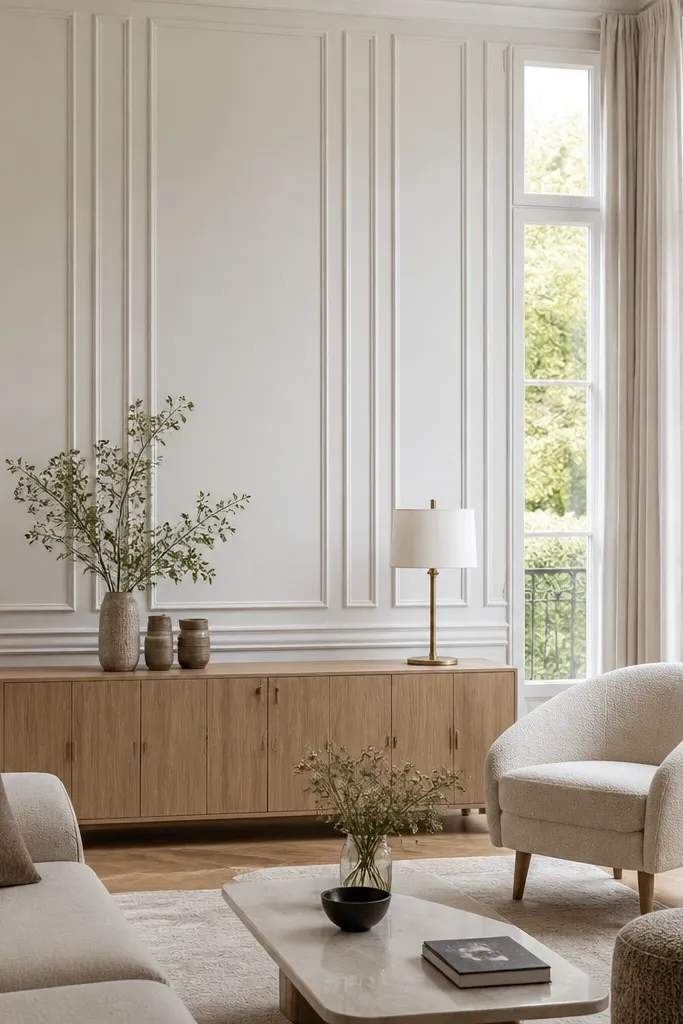
This look leans formal but stays small-space friendly because the divisions are thin and controlled. Thin mullions make the wall feel more detailed without becoming heavy. If your living room has tall windows or tall furniture, this trim echoes that vertical rhythm. Paint mullions and rails in a crisp white and keep the panel field slightly warmer to avoid stark contrast that looks harsh indoors.
Set your chair rail at 48-54 inches and frame the perimeter with 1x3 boards. Install vertical mullions using 1x2 or 1x1.5 primed strips, spacing them evenly across each panel bay. Add horizontal rails within bays to create rectangles, keeping the same proportions across the wall. Nail, glue, fill, sand, prime, and paint; caulk only the trim edges where you need a smooth line.
Editor's notePre-cut a mullion spacing guide so every vertical line lands at the same width.
Skip thisDon’t use thick trim for mullions — it makes small walls feel boxed in.
9. No-rail wainscoting with floating picture-frame panels
This is for small rooms that already have a busy focal wall and need wainscoting without a big horizontal bar. Floating picture-frame panels give texture while letting the eye move freely. The trick is anchoring the panel grid to a subtle perimeter border, not a chair rail. It’s also a good choice if your wall has a lot of artwork or wall sconces at mid-height.
Mark a rectangle grid on the wall using painter’s tape so you can adjust panel sizes before cutting. Install a thin perimeter border with 1x2 or 3/4-inch trim and leave the center as recessed panel fields. Use spacers to keep panel frames even, then glue and nail the border frames and individual rectangles. Fill joints, sand, prime, and paint the frames in semi-gloss and the recessed fields in eggshell.
Use a level and a laser line for the perimeter border — small misalignments are obvious with no chair rail to hide them.
Avoid oversized panels — big rectangles can make a small room feel even flatter.
10. Wainscoting with a single diagonal panel on the main wall
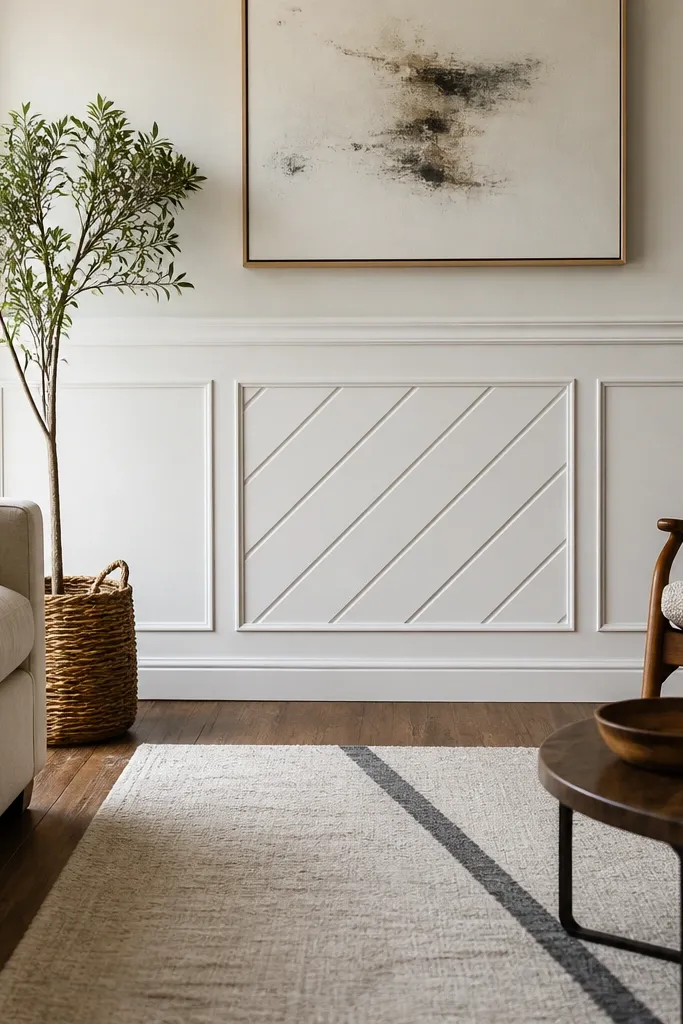
This is the one that makes your living room look designed, not copied. The diagonal accent adds motion and breaks up the strict grid, which keeps small spaces from feeling stiff. Use it sparingly: one diagonal panel in the center bay under the chair rail is enough. This works best when your decor has one diagonal element too, like a rug pattern or a leaning floor lamp.
Build standard rectangular panel wainscoting with a chair rail at 50-54 inches and framed perimeter. Choose the center bay and cut a diagonal panel insert so it splits from top-left to bottom-right (or the opposite direction for symmetry). Frame the diagonal with thin trim strips, then recess the diagonal field with a separate panel piece. Fill, sand, prime, and paint with a two-color plan so the diagonal reads as a single shape.
Mask off the diagonal lines carefully before caulking — clean paint edges look better than heavy caulk seams.
Don’t add diagonal accents in multiple bays — it gets visually loud fast in small rooms.
11. Rattan-friendly wainscoting with a warm wood panel field
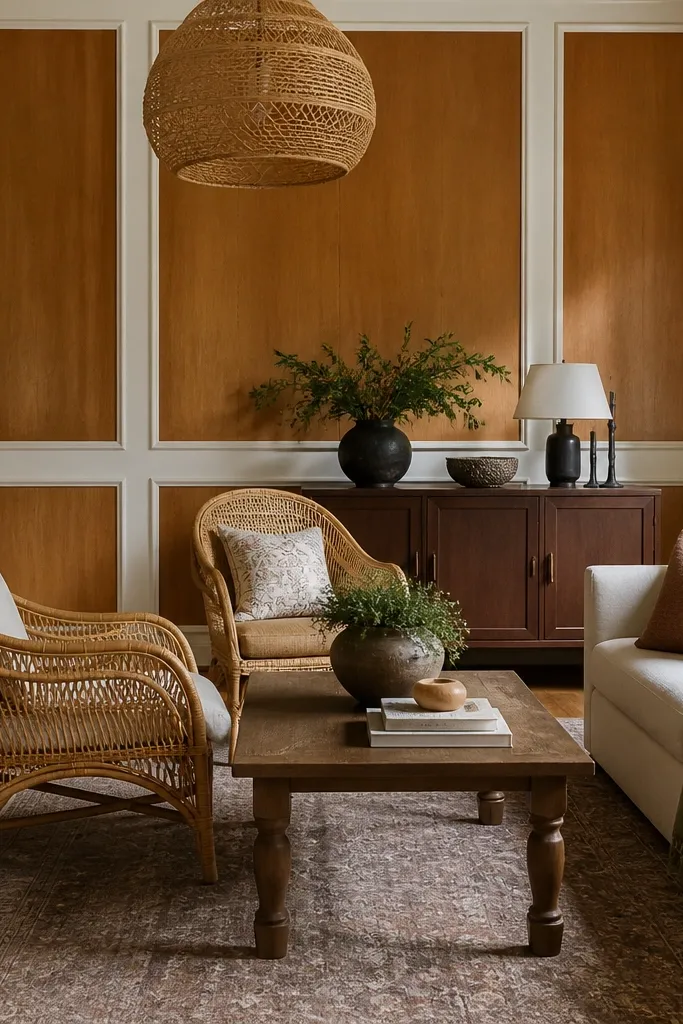
If your living room has rattan, light wood furniture, or natural textiles, this combo makes everything look pulled together. The idea is to paint the trim but keep the recessed panel field in a warm stained finish, so the wall feels grounded instead of sterile. It’s photogenic because the stain catches light differently than paint. Keep the stain color medium — too dark shrinks the space.
Install chair rail and perimeter frames using primed boards, but build the recessed panel fields from plywood or smooth pine. Sand panel fields to 150-180 grit so stain is even, then apply a wood conditioner if you’re using pine. Use a satin clear topcoat for durability in living rooms. Assemble the panel field pieces into the trim grid, then finish by painting the trim in semi-gloss and sealing stained recesses with the same sheen.
Test your stain on the same board scrap and dry it fully before you decide — pine shifts shade as it dries.
Avoid glossy topcoat — it reflects room lights and can make small spaces look harsher.
12. Two-tone wainscoting with dark frame and light recess
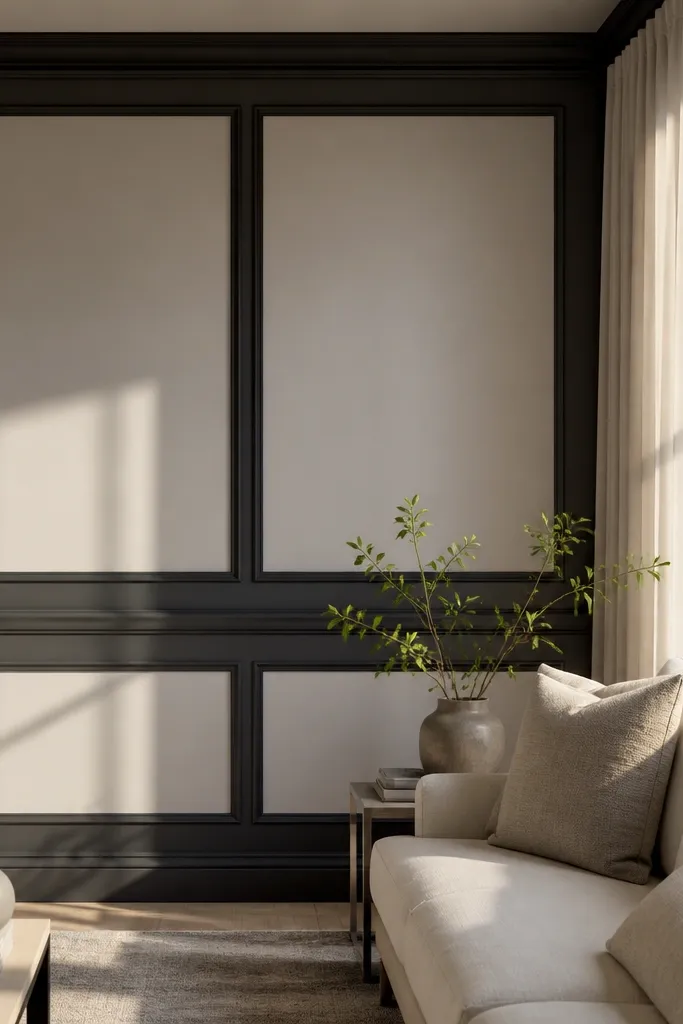
Two-tone is the fastest way to make small-space wainscoting ideas look intentional. Dark frames create a crisp border, while a lighter recess keeps the wall from feeling heavy. This is especially good in rooms with light floors and warm lighting, because the contrast reads clearly without turning the wall into a block. Use semi-gloss for the dark trim so it looks sharp in photos.
Pick your chair rail height around 48-52 inches, then build the outer frame and panel rectangles with 1x3 or 1x4 trim. Apply primer first to everything, then paint the recessed panel fields in light eggshell. After that cures, tape and paint the frame and chair rail in a deep color in semi-gloss. Remove tape carefully at a consistent tack time and touch up with a small angled brush for clean edges.
Use painter’s tape designed for trim and pull it back on itself at a low angle to prevent paint bridges.
Don’t paint the whole wall dark — keep the recess lighter so the depth stays visible.
13. Mitered corner wainscoting with continuous baseboard line
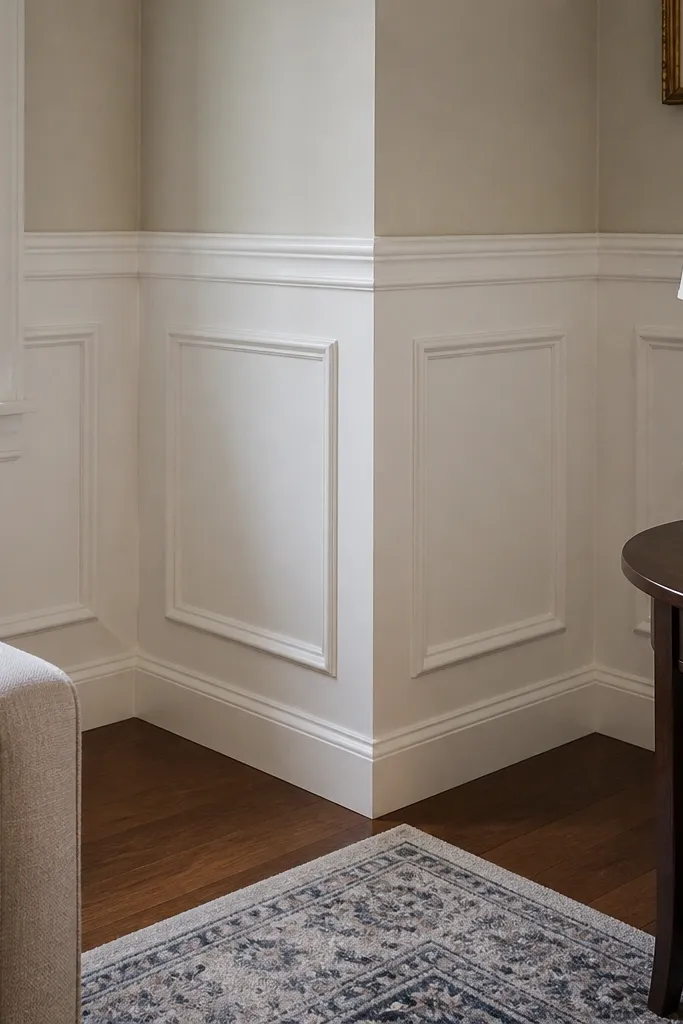
Corners are where DIY wainscoting usually looks homemade. This approach focuses on mitered trim and a continuous baseboard line so the wall reads seamless. It’s perfect for small spaces because there’s less wall to hide sloppy corners — every seam is noticed. The result looks like one continuous millwork system wrapping around the room.
Plan your wainscoting grid to stop at corners with mitered returns. Use a miter saw set to 45 degrees and cut corner pieces from the same board stock for consistent thickness. Keep the baseboard line intact and align the bottom rail of the wainscoting to it so you don’t create a weird step. Glue and nail, then caulk the miter seam lightly and fill nail holes before painting.
Dry-fit corner pieces without glue and mark gaps with pencil — you can fix them before paint makes them obvious.
Avoid stuffing caulk into every gap — too much caulk shrinks and cracks on trim lines.
14. Wainscoting with a built-in shelf rail for decor

If you like styling, this is one of the best small-space wainscoting ideas because it replaces shelf clutter with wall-integrated storage. The shelf rail sits just above the chair rail and gives you a place for framed photos, small candles, or a low tray. It also adds depth without adding furniture footprint. Keep the shelf slim, like 3/4 to 1 inch, so it doesn’t feel like a ledge in a tight room.
Frame the lower panels first with a chair rail at 48-52 inches. Then install a shelf rail board on top of the rail and support it with hidden cleats or tight-spaced brad nails into studs where possible. Use 1x2 or 1x3 for the shelf face and cap it with a thin trim piece so the edge looks finished. Fill joints, prime, paint trim in semi-gloss, and paint panel fields in eggshell.
Editor's noteAttach shelf supports into studs or use proper wall anchors — a shelf that’s only glued will sag.
Skip thisDon’t make the shelf too deep — deeper shelves steal visual space and collect dust.
15. Shadowbox wainscoting with 3/4-inch recess depth
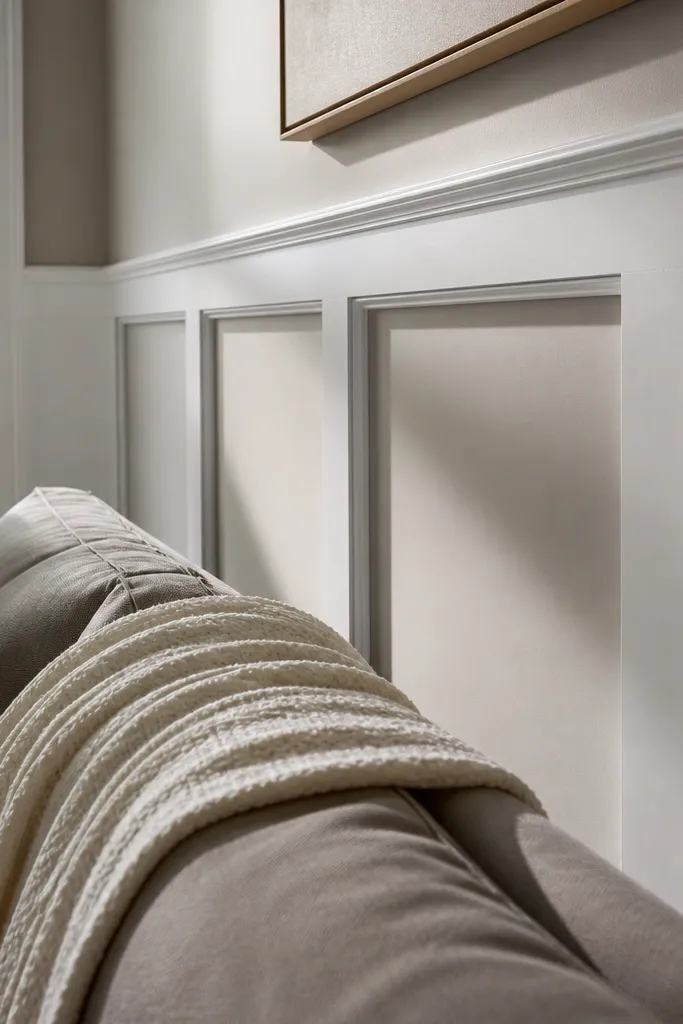
Shadowbox-style wainscoting looks like it has real depth because the recess is bigger than typical flat panels. That 3/4-inch depth makes the wall catch light and gives the room a custom-built feel. It’s great for small spaces because the depth makes the wall feel less flat, and the grid still stays simple. Use a slightly different panel color than the wall so the recess reads under warm bulbs.
Build a perimeter frame and chair rail at 50-54 inches, then create a backer layer for the recess using 3/4-inch strips or MDF. Install the outer frame first, then glue and nail the backer so each panel recess is uniform. Add front trim strips to create the shadowbox edge, keeping the reveal consistent across the wall. Fill nail holes and seams, prime, and paint; use satin for the recess edge and eggshell for the recessed field.
Measure your reveal once and write it on painter’s tape on the wall — it prevents drift across panels.
Avoid rushing the backer alignment — crooked recess boxes are hard to fix after paint.
16. Rounded-top panel inserts for a soft, modern look
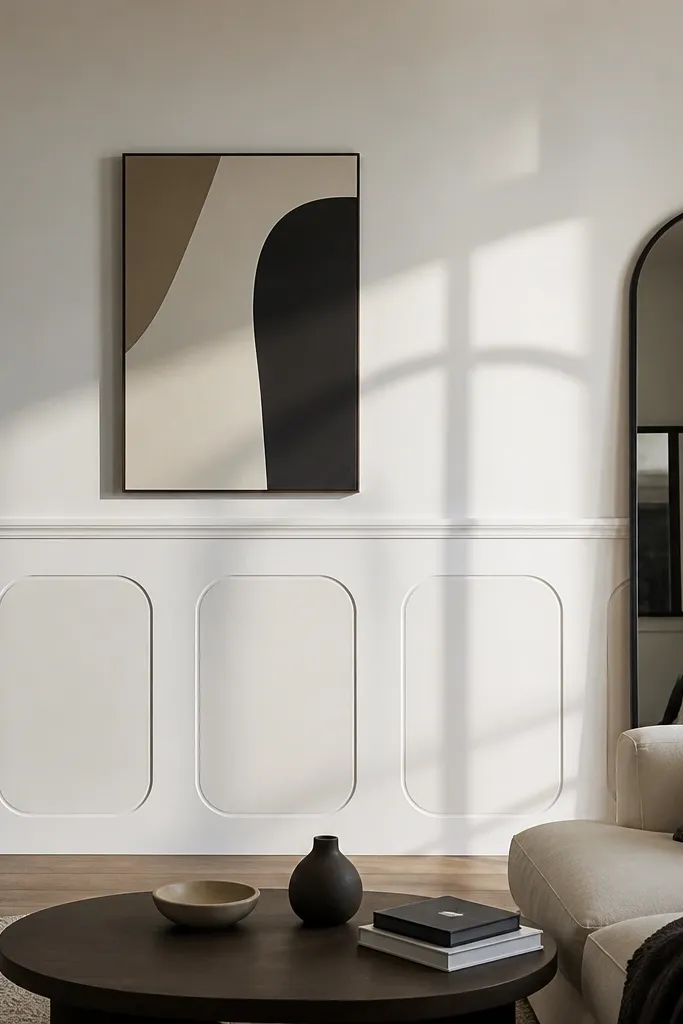
Rounded-top inserts feel softer than classic rectangles, and they look great in small living rooms because they avoid hard corners in the visual field. This is a modern twist that still reads like millwork. Use it on a single wall to keep the pattern from competing with furniture shapes. Paint the rounded inserts in a slightly deeper tone than the wall for definition without going too dark.
Install chair rail and perimeter frames at 48-54 inches, then lay out standard rectangle bays. For each top edge, cut curved inserts from MDF using a radius template so the curve matches across bays. Glue and nail the inserts onto the panel field, then add trim around the outside edges to frame the curve. Fill, sand, prime, and paint with a two-tone plan: trim in semi-gloss, panel fields in eggshell.
Editor's noteUse the same radius template for every bay so the curves look intentional, not random.
Skip thisDon’t make the curve extreme — subtle rounds look expensive; extreme ones look DIY.
17. Painted linen-look panel fields with simple frames
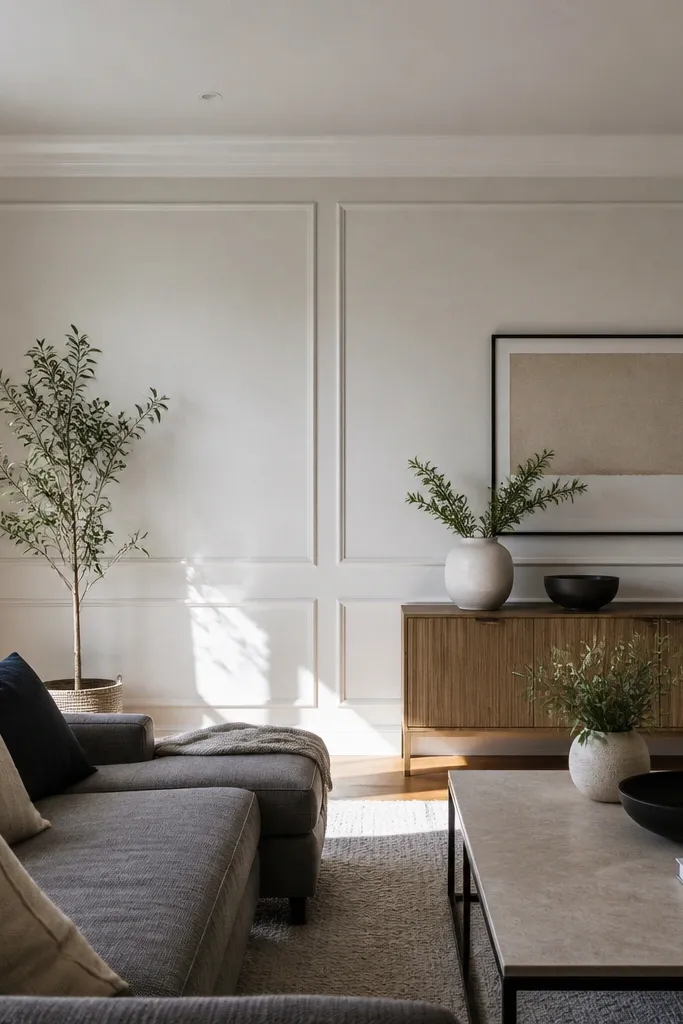
If you want wainscoting that’s photogenic even from across the room, texture is your friend. This uses simple framed rectangles, but the panel field has a soft linen-like texture so it catches light differently than smooth paint. In small spaces, texture adds dimension without adding more lines. It’s a good choice if your room has flat, matte walls and you want a richer look.
Build your frame grid first with 1x3 boards and a chair rail at 48-52 inches. Apply a thin base coat to the panel fields, then use a small texture roller or a knockdown technique to create a linen-like surface. Let it cure fully before painting the texture color so it doesn’t smear. Prime, then topcoat the textured fields in eggshell; paint the frames in semi-gloss for contrast.
Editor's noteDo a test panel on a scrap board — texture roller pressure changes the look a lot.
Skip thisDon’t use heavy texture paste — it can crack around trim edges.
18. Half-wall wainscoting with a full-height mirror frame
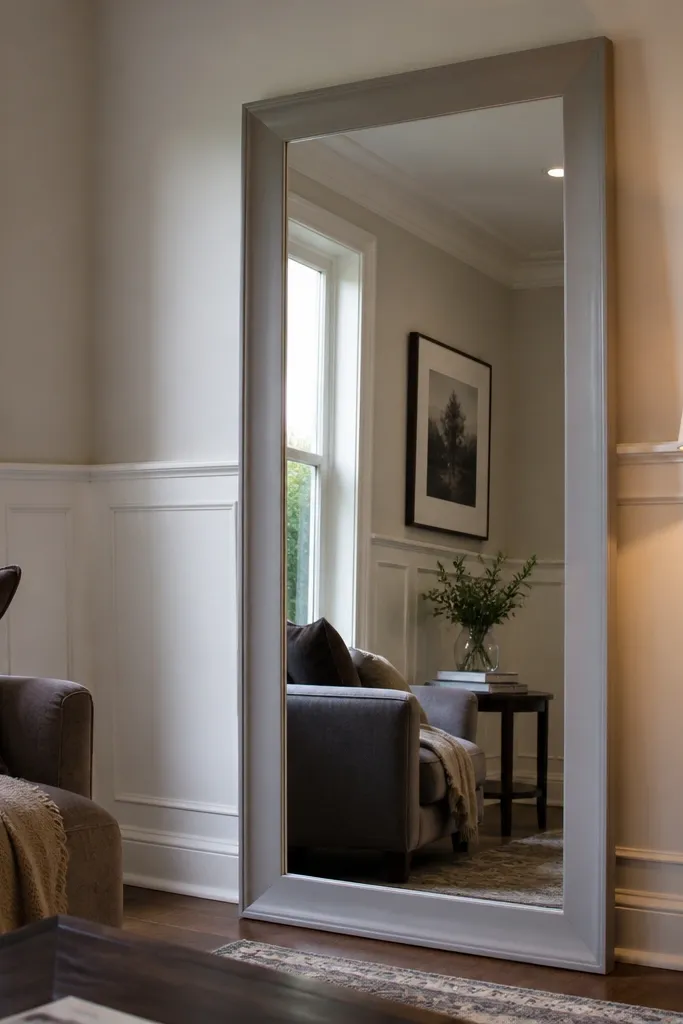
This is the trick for small rooms that need both style and function. Half-wall wainscoting gives you the classic look, and framing a mirror with matching trim makes the wall feel taller and more architectural. The mirror also bounces light, which matters in small living rooms. Keep the wainscoting height around 36-42 inches and then let the mirror frame rise higher to pull the eye upward.
Install a bottom rail and chair rail around 36-42 inches total panel height, using simple rectangular bays. Mount the mirror on a backing board and frame it with the same 1x3 trim as the wainscoting so the lines align. Use shims behind the mirror mounting points so it sits perfectly level with the top rail. Caulk and fill around the mirror frame, then prime and paint trim in semi-gloss.
Editor's noteAlign the mirror frame so its edges land on the same grid lines as your wainscoting panels.
Skip thisAvoid centering the mirror without checking furniture sightlines — eye level matters more than symmetry.
19. Ceiling-to-chair rail vertical board panels with a base rail

This gives maximum height illusion by letting vertical lines travel upward. You still get wainscoting style because the panels are organized and framed, but the vertical board runs keep the room from feeling boxed in. It works best in narrow living rooms where one wall is longer and you need that extra vertical pull. Paint the boards the same color as trim and keep the wall color slightly different for clean separation.
Pick your chair rail height at 50-54 inches, then install a base rail near 36 inches if you want a framed band. Add vertical boards from the base rail area up to near the ceiling, spacing them evenly with 1/8-inch gaps. Use 1x2 boards for the verticals so it doesn’t look bulky. Frame the bottom with a clean horizontal rail, then fill seams, sand, prime, and paint in two colors and two sheens.
Use a laser level to place the first vertical board — every other spacing depends on that starter line.
Don’t run verticals too thick — wide boards swallow small wall space.
20. Herringbone panel field under a simple chair rail

Herringbone looks custom and architectural, and it’s one of the best ways to make small-space wainscoting ideas feel like a statement without covering the whole wall in busy trim. The pattern is contained to the panel field under a simple chair rail, so the room stays balanced. Choose a light wood tone or paint the herringbone in a slightly different shade than the wall for depth. This works beautifully behind a sofa because it adds texture where your eyes land.
Build a standard outer frame and chair rail at 48-52 inches. For the herringbone field, cut thin strips like 1/4-inch MDF or primed wood strips and glue them onto a backing panel in a 45-degree zigzag. Keep the strip width consistent and use a spacer jig for the gap. Once the pattern is set, add trim around the field, fill edges, sand, prime, and paint with trim semi-gloss and panel field eggshell.
Label your strip pieces as you cut them so the grain or texture direction stays consistent in every line.
Avoid making the herringbone too large — bigger diamonds feel heavy in small rooms.



