
1. One-Post-per-Span Clear Panels

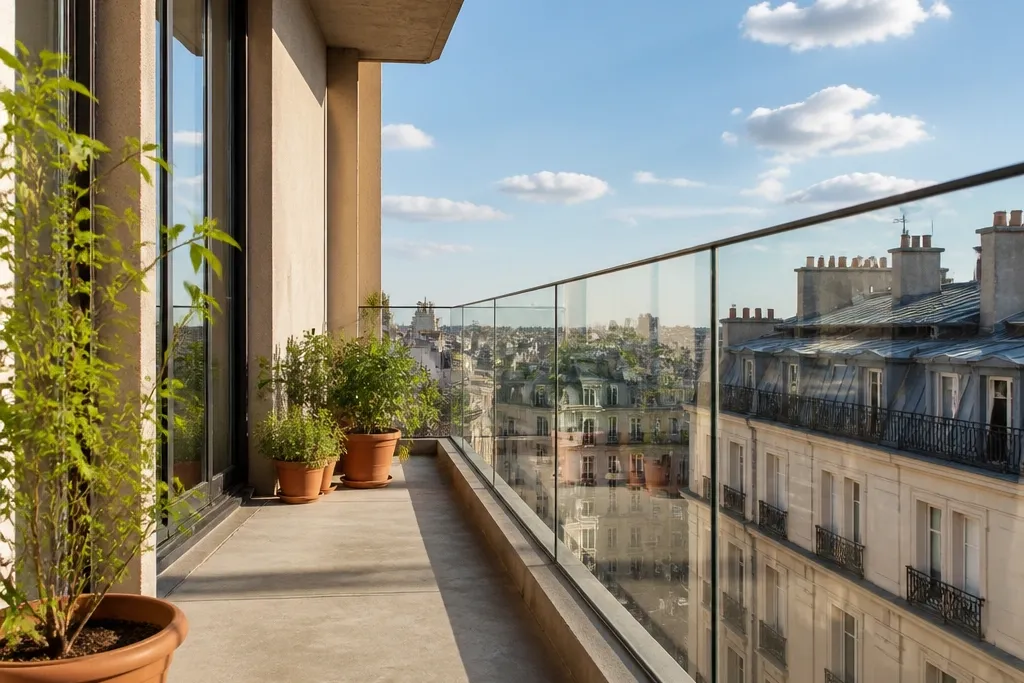
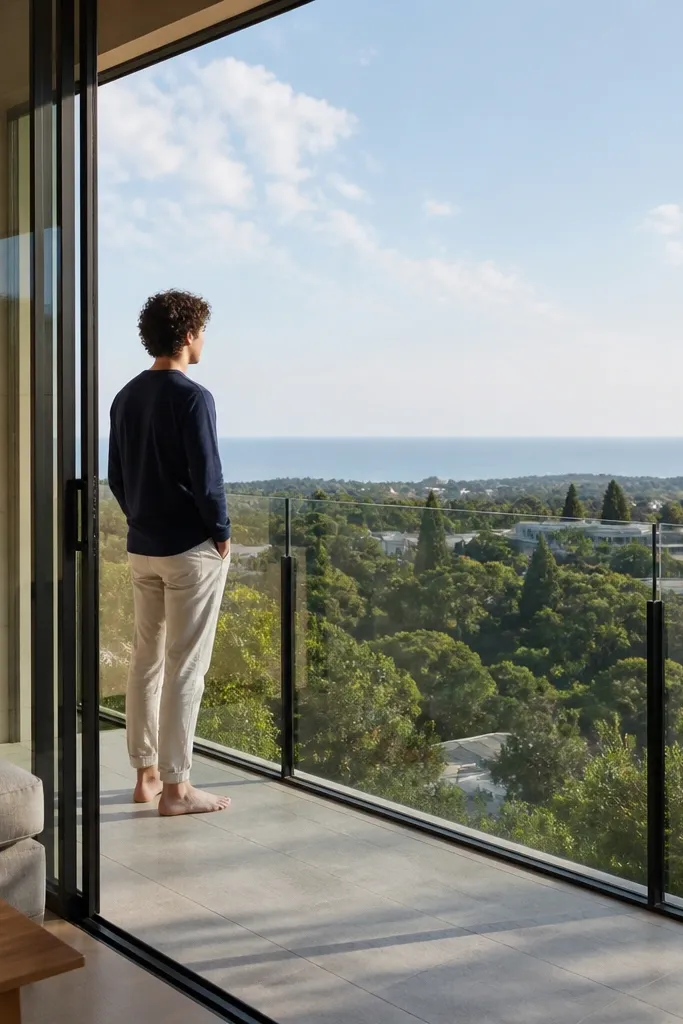
Start by marking your post spacing along the balcony top edge so each glass panel lands square to the deck. Install the slim posts first using a base plate or surface bracket rated for tempered glass systems, then confirm plumb with a level across both directions. Set the glass panels into the clamps with proper gasket strips, tighten evenly, and finish by capping the top rail (or adding a thin top cap) so the line stays straight. Finally, run a finger across edges to confirm there are no sharp corners and check that the panels don’t rattle.
This is the cleanest look for a small-space glass balcony railing because it minimizes interruptions. One-post-per-span layouts keep the top line continuous, so your eye reads the whole railing as a single horizontal strip instead of a fence. Use clear, low-iron tempered glass for the “invisible” effect, then match the hardware finish to your balcony door frame or window trim. The result is airy but still solid, because the hardware is doing the structural work while the glass stays the visual star.
Skip thisDon’t “eyeball” panel alignment; even small misalignment makes glass clamps look crooked.
Editor's noteUse a laser level for the post height — a 1/8 in mismatch shows up immediately on glass.
2. Continuous Top Rail with Side Clamp Glass
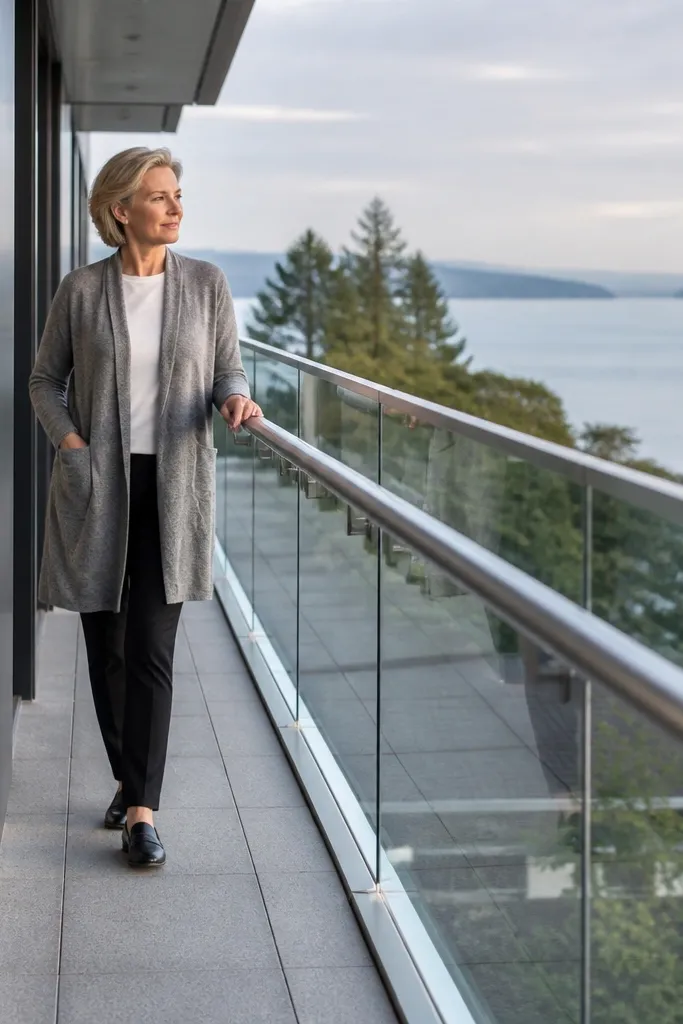
Install the top rail first by locating joists or structural members under the decking, then fasten with rated brackets at a consistent spacing. After the top rail is solid, mount the side clamp units at each panel edge, keeping their height consistent. Slide the tempered glass panels into the clamp tracks with silicone or EPDM gaskets, then tighten the clamp screws in alternating order to prevent glass stress. Finish with end caps on both ends so the rail looks finished instead of cut.
A continuous top rail gives you a crisp, architectural line that photographs well, especially on narrow balconies. Side-clamped glass keeps the front face clean, with minimal hardware visible from below. Pick a straight top rail profile and keep it the same finish as your balcony door handle or exterior trim so everything reads intentional. This design works great when you want glass to look “floating” but still want a sturdy, straightforward mounting method.
Skip thisAvoid mixing top-rail and clamp finishes; mismatched metals look messy on glass.
Editor's notePre-fit one clamp and one panel before you mount the full run — it lets you confirm glass depth and spacing.
3. Corner Return Glass Frame for a Clean L-Shape
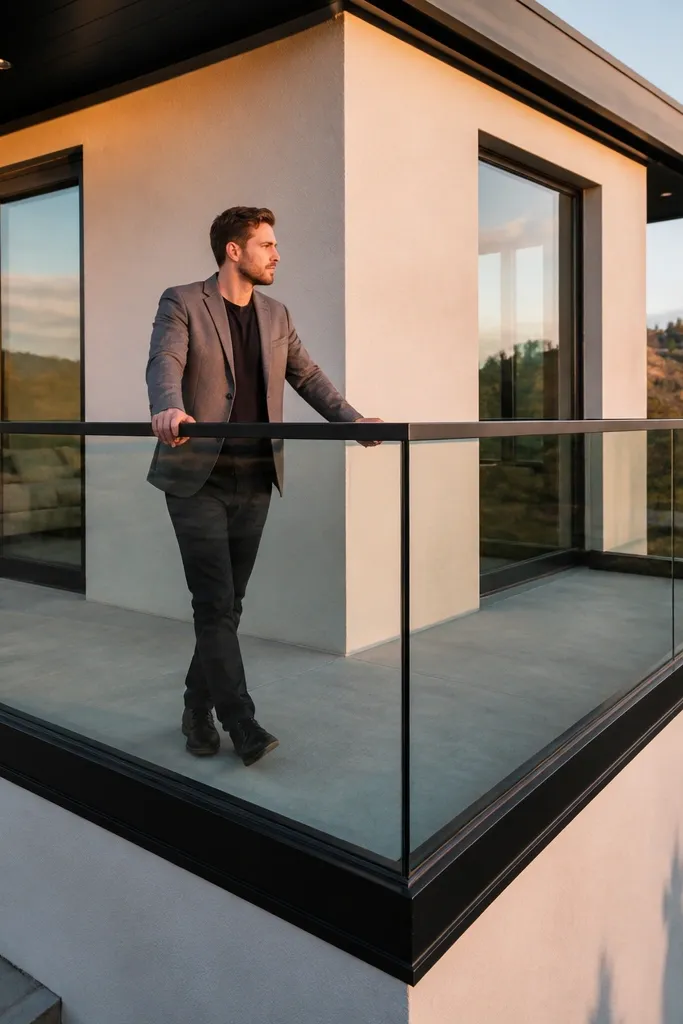
Corners are where small balconies usually look hacked together, so a corner return design is worth it. A corner return frame wraps the railing into an L-shape with a deliberate junction, so you don’t get a weird open gap or two glass edges floating without a plan. The look stays modern because the glass continues visually across the corner, and the hardware is concentrated at the corner only. This design is perfect if your balcony wraps along two walls or you have a corner seat area.
Start by deciding where the corner sits relative to your deck edge lines, then mark the two rail runs using a chalk line. Install corner posts or a corner return bracket first, then build each straight run outward from that reference line. Set the glass panels so the corner junction uses a proper clamp or corner connector plate designed for tempered glass. Seal any exterior gaps with UV-rated exterior silicone and verify the corner glass edges are fully captured by clamps.
Dry-lay the glass panels on the deck before drilling anything so the corner junction looks intentional.
Don’t cut corner returns from random metal pieces; use a glass-rated corner connector.
4. Black Framed Glass with Minimal Vertical Mullions
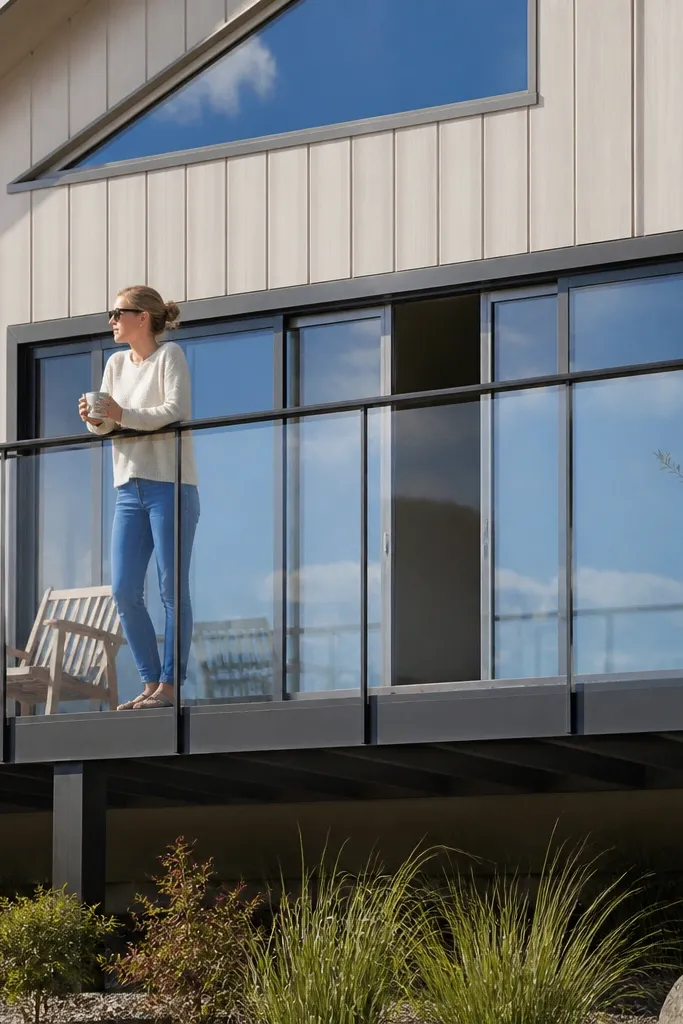
If your balcony has light walls or beige siding, black framing makes the railing read like a crisp design feature instead of a safety barrier. Matte black also hides small installation imperfections better than bright finishes, which matters on DIY. Keep mullions slim and spaced so the glass still dominates the view. This is a strong option for renters and small spaces because it upgrades the look without needing a full balcony remodel.
Choose a black powder-coated aluminum or steel frame system made for glass infill, then lay out your vertical mullion positions. Bolt the base plates to the structural members, not just the surface decking, and keep the frame line level across the run. Install the glass into the frame channels with gaskets, then tighten the retention screws gradually to avoid uneven pressure. Finish by adding end caps and sealing exterior joints with exterior-rated sealant.
Spray-touch up any cut metal edges with matching paint before you mount glass — it prevents rust streaks.
Don’t use shiny black hardware; it reflects sunlight and makes the balcony glarey.
5. Brushed Stainless with Edge-Polished Glass
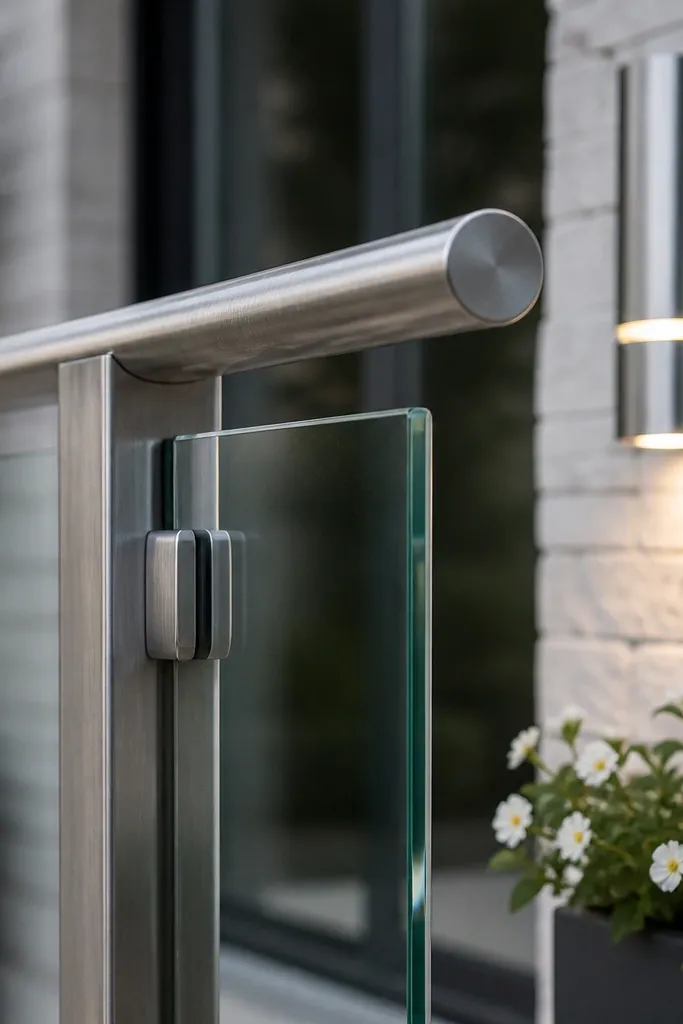
Start by matching your stainless finish to existing hardware so the tone doesn’t fight the rest of the balcony. Install stainless posts or base brackets with anchor bolts rated for your substrate, then add alignment shims under base plates. Set the glass into the clamps using the manufacturer’s gaskets, then tighten screws evenly in a cross pattern. After installation, clean with a stainless-safe cleaner and check that water drains off the bottom edges cleanly.
Brushed stainless steel reads clean and modern, and it stays photogenic even in low light because it doesn’t look mirror-like. Pair it with clear tempered glass and edge-polished finishes so the glass edges catch light without looking rough. This design is best when your balcony already has stainless or brushed metal elements like light fixtures, locks, or outdoor rails. On small balconies, the “less contrast” between hardware and glass helps keep the space feeling open.
Skip thisAvoid mixing stainless and galvanized steel; the color mismatch shows fast.
Editor's noteRinse with clean water after cleaning products — residue shows up as streaks on brushed metal.
6. Sand-Glass Gradient Privacy Panels
Pick a tempered glass panel with a ceramic frit or gradient film designed for safety glass applications. Mark your panel layout and install posts/clamps like a clear-glass system, keeping the top line consistent. Set the gradient side facing outward (or inward) based on who you’re protecting — test your sightlines at eye level before sealing. Seal exterior edges with UV-rated silicone and check for smooth transitions where the pattern ends.
A gradient privacy pattern solves the “small balcony faces the neighbor” problem without turning your railing into a wall. The look is modern because only the lower field gets privacy, while the upper glass stays clear for sky and light. This keeps the balcony airy, and it photographs better than full frosted panels because the top half has depth. Use it on balconies with direct sightlines from windows across the yard or apartment courtyard.
Skip thisDon’t use random window film on tempered panels; it peels and looks uneven.
Editor's noteHold a phone flashlight behind the glass while you plan — you’ll see how the gradient reads at night.
7. Ceramic-Frit Dot Pattern for Soft Texture

Dots give you privacy and texture without blocking all light, and they look good in photos because the pattern breaks up glare. A small-space glass balcony railing becomes less “transparent” where you want it, while still showing the horizon above. Choose a dot density that matches your distance to neighbors — too heavy makes it feel like frosted glass, too light does nothing. This is a great option if you want privacy but still want a modern, airy look.
Order tempered glass infill with a ceramic frit dot pattern sized for balcony railing use. Install your posts or clamps on your measured spacing, then dry-fit one panel to confirm pattern alignment across sections. Set gaskets along the glass edges so the dots don’t get scratched during clamping. Tighten clamps evenly, then wipe off any sealant smears so the dot pattern stays crisp.
Keep pattern scale consistent across the run so your balcony looks designed, not patched.
Avoid mixing two different dot densities; the railing will look uneven at a glance.
8. Clear Glass with Stainless Cable Bottom Guard
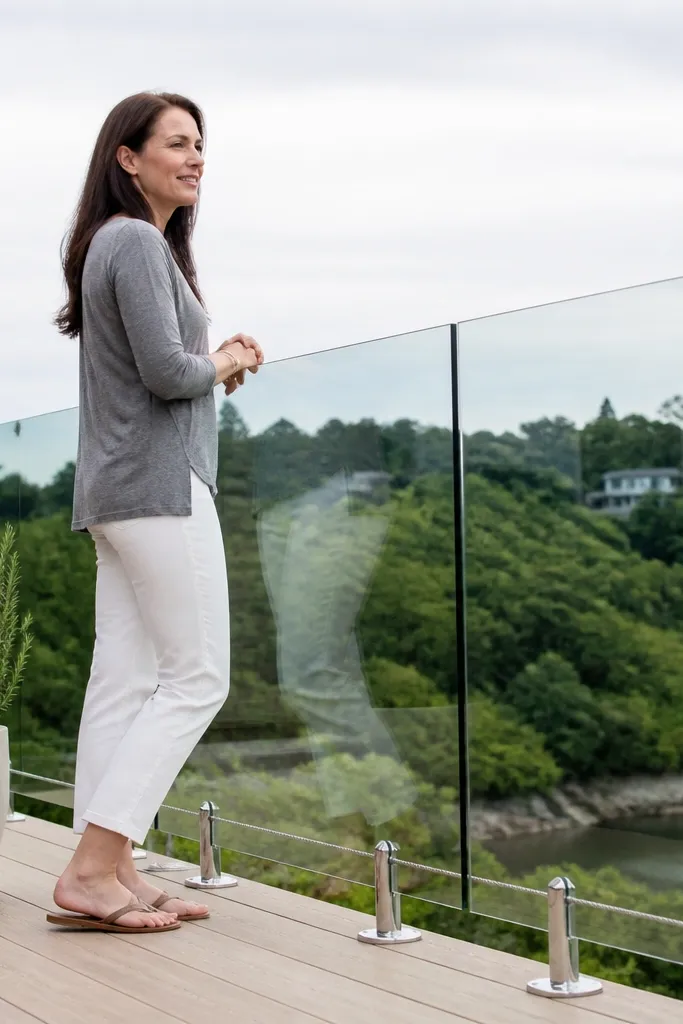
Mount your primary glass posts for the full guard height, then add two cable anchors at the lower zone on each post (or use a continuous bottom rail system made for cables). Install tensioners at one end so you can dial the cable tight after everything is mounted. Run stainless cable through the anchors, tension to remove slack, and secure with cable clamps rated for stainless. Finish by checking for sharp ends and covering clamp areas so nothing catches clothing or hands.
If your local code or your own comfort level wants extra kick protection, a cable bottom guard keeps the look light. The glass remains the main visual, while the cable adds a subtle safety line at shin height. This design also helps with small balconies where you want to avoid bulky lower rails that block light. Use it for balconies with kids, or where you keep planters and want a little extra barrier without adding a heavy metal bar.
Skip thisDon’t overtighten; stainless cable can birdcage or strain anchors.
Editor's noteTension cables after the whole railing is installed — deck movement changes cable slack.
9. Wood-Accent Top Cap with Clear Glass

This is the design that makes glass feel warmer on a small balcony. A wood-accent top cap (teak-look composite or real exterior hardwood) hides the top edge hardware and adds a human, cozy feel without turning the railing into a fence. Pair it with clear glass and slim metal posts so you still get the open-view effect. It’s especially good if your balcony has outdoor furniture in wood tones or neutral fabrics.
Choose an exterior-rated top cap material that won’t cup, like composite decking trim or sealed hardwood with a marine finish. Install metal posts first, then attach a continuous top rail bracket under the wood cap so the cap is supported along the run. Mount the glass panels between posts using gaskets, then slide the wood cap on and fasten it to the bracket from underneath. Seal end grain and add drip edges where water can collect.
Pre-drill and countersink wood cap fasteners so you don’t split the cap near post holes.
Don’t use untreated indoor lumber; it will warp and pull the look out of alignment.
10. Frameless Glass with U-Channel Floor Track
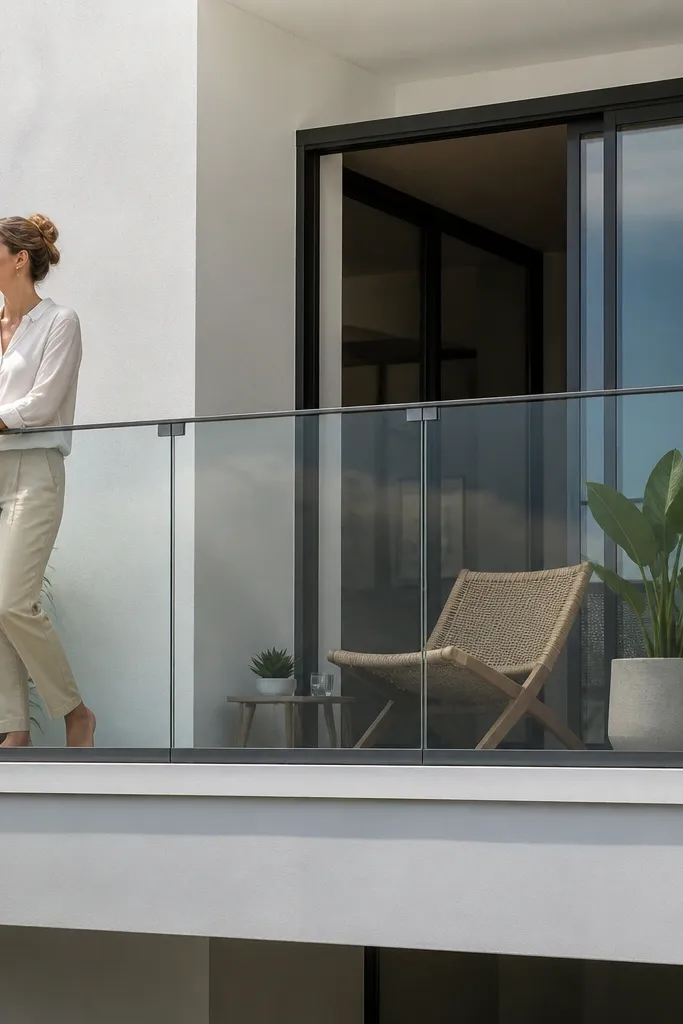
Start by installing a U-channel track along the balcony edge at the correct height, anchored into structural framing. Then install top clamps that capture the glass edges while leaving the front face clean. Set tempered glass panels into the channel with gasket tape, then lock the top clamps in place. Finish by adding end caps on the channel and checking that the glass sits evenly without rocking.
Frameless-looking panels are the most “floating” option for a small-space glass balcony railing, especially when the hardware is mostly hidden at the base and top. The look is sleek because you don’t see vertical frames breaking up the glass. You need the right mounting system — U-channel tracks and top clamps that keep the glass stable are where the design succeeds. This works best on balconies with a solid base surface where you can anchor the channel securely.
Skip thisDon’t mount a “frameless” look on weak anchors; glass will move and the panels will look sloppy.
Editor's noteUse EPDM gasket tape along the channel — it prevents squeaks and protects glass edges.
11. Smoke Tint Glass for a Night-Gloss Look

Choose tempered smoke-tint glass with the same thickness recommended by your mounting hardware system. Install slim posts or clamps on your measured spacing, then dry-fit one panel to confirm the glass sits flush and the tint lines up across sections. Set panels with gaskets and tighten clamps gradually. Finish by cleaning glass edges and checking light reflection from the balcony floor so you don’t end up with a glare hotspot.
Tinted glass changes the whole mood. Smoke tint reads darker, reduces glare, and makes the railing look like a modern glass wall rather than a clear barrier, which looks great on small balconies with lots of sun. The trick is to keep the tint subtle — heavy tint can make the balcony feel closed in, especially when you’re already working with limited square footage. This design is a strong match for balconies with outdoor lighting or evening seating.
Skip thisAvoid mixing clear and smoke panels in the same run; it makes the railing look unfinished.
Editor's noteTest tint in daylight and at dusk — the look changes fast once lights come on.
12. Matte White Frame with Clear Infill
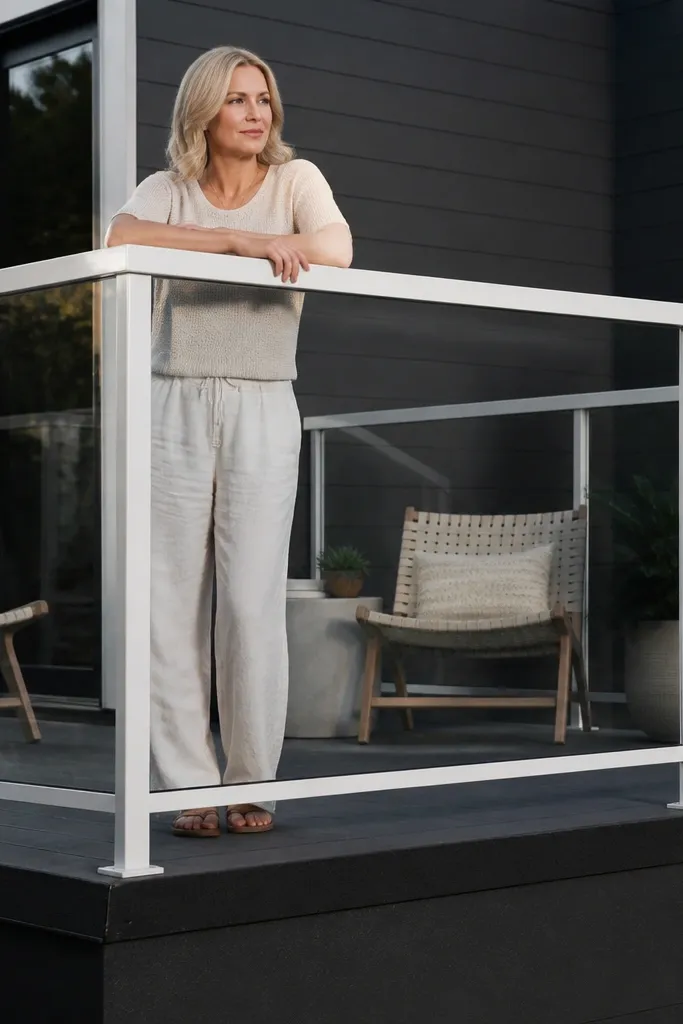
Install posts or a minimal frame system anchored to the structure, then keep the top line level with shims where needed. Mount the clear tempered glass infill into the frame channel with gaskets so the glass doesn’t rattle. Tighten fasteners in order and wipe away any sealant smears immediately so white doesn’t show residue. Add end caps and touch up any scratches on the powder coat before the glass is fully secured.
Matte white makes small-space glass balcony railing look brighter and more open, especially on dark floors or older buildings with heavy-looking exterior metal. The white frame creates a clean graphic line that still lets the view through. Keep the frame minimal so the glass stays dominant, and choose powder-coated finishes that won’t chip on corners. This design is great if you want the railing to match exterior siding, window frames, or patio furniture frames.
Skip thisDon’t use shiny chrome hardware with white; it looks out of place instantly.
Editor's noteUse a matte white touch-up pen for chips — glossy patches scream on white frames.
13. Clear Glass with Brass Accent Line
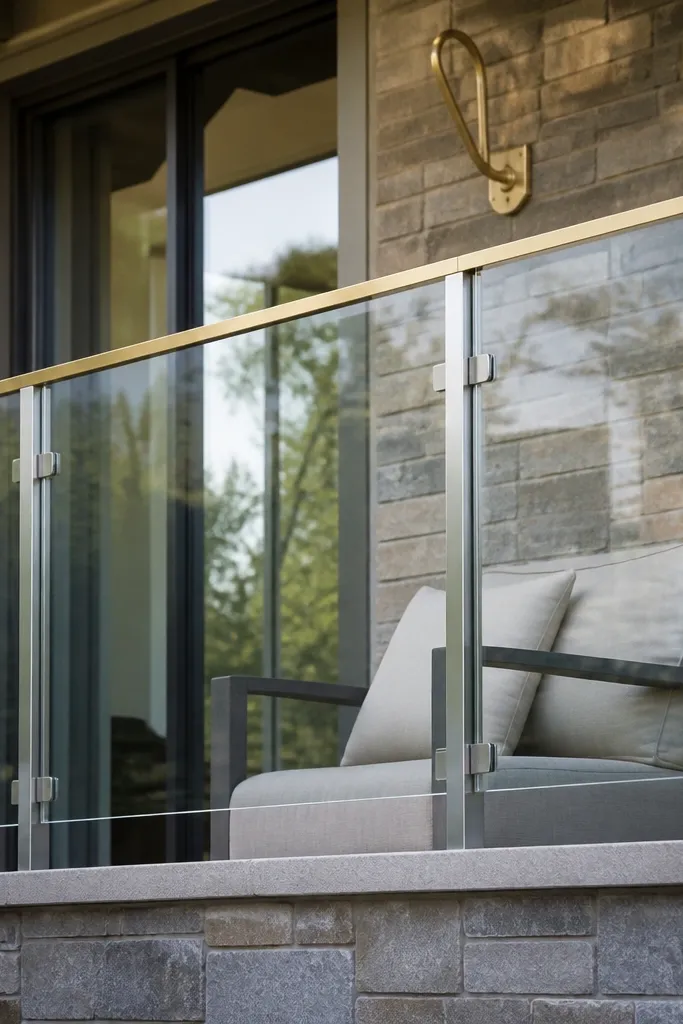
Install your main post system in the correct spacing, then add a thin brass top accent rail bracket over the mounting hardware. Mount tempered glass infill between posts using standard gaskets and clamps, keeping the glass edge aligned to the brass accent line. Attach the brass rail with fasteners into the metal bracket, not into the glass. Finish by sealing any exterior joints and checking that the brass line stays straight from one end to the other.
Brass accents give a small balcony a warmer, more upscale look without adding bulk. The best version is a thin brass line at the top or along the side of the glass frame so the glass still feels airy. Choose satin brass or brushed brass so it doesn’t glare. This design works when your balcony has brass hooks, outdoor lanterns, or warm-toned hardware, and it photographs well because brass catches light while glass stays clean.
Skip thisDon’t run brass all the way down the posts — it looks heavy on a narrow balcony.
Editor's notePick one brass tone and stick to it; warm yellow and rose-gold brass together looks off on small runs.
14. Staggered Panel Heights for a Modern Look
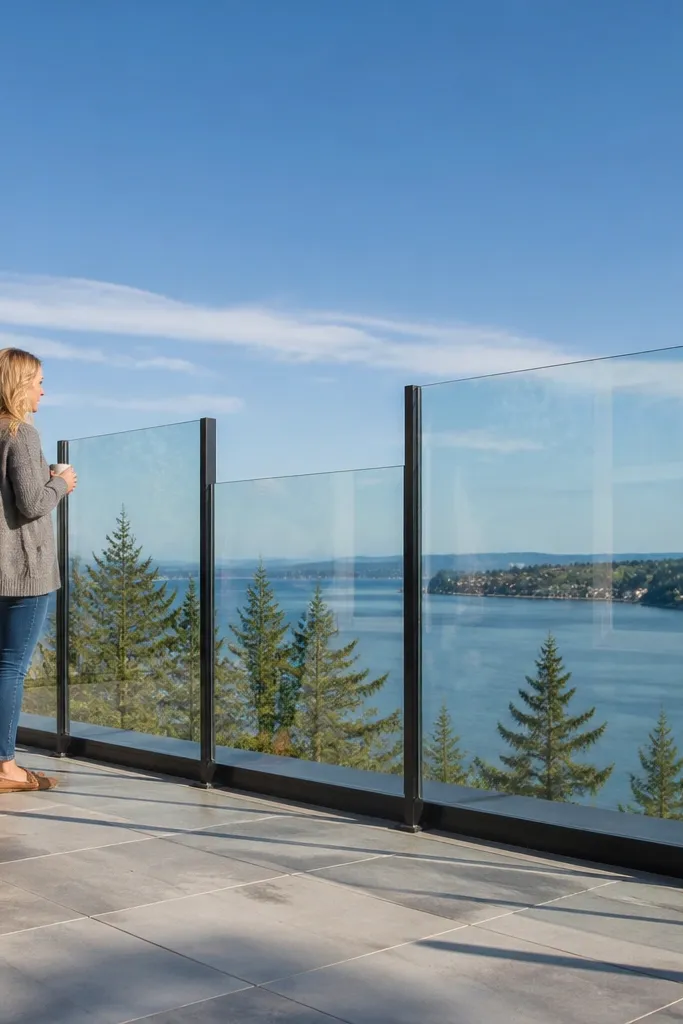
Start by mapping your required guard height and then plan staggered panels so the lowest section still meets the minimum barrier height where it matters. Install posts at your chosen spacing, then attach clamps or top caps that match each panel height. Order tempered glass panels to the exact heights and widths needed for the stagger pattern. Set each panel with gaskets, tighten clamps evenly, and confirm there are no gaps where you can slip a hand through.
Staggered heights is a design move that makes a small balcony feel intentional instead of “standard railing.” You keep guard height compliance by using staggered sections that still maintain the required barrier height at the walking surface, but you vary the glass field so the railing reads like a pattern. The visual payoff is strong because glass reflections break differently at each height. This works best on balconies with a clear view behind the railing where you want the design to look like part of the architecture.
Skip thisDon’t stagger randomly; you need consistent offsets so it reads as design, not a mistake.
Editor's noteUse a cardboard template for each panel height and mark clamp locations before you order glass.
15. Framed Glass with Vertical Accent Strips
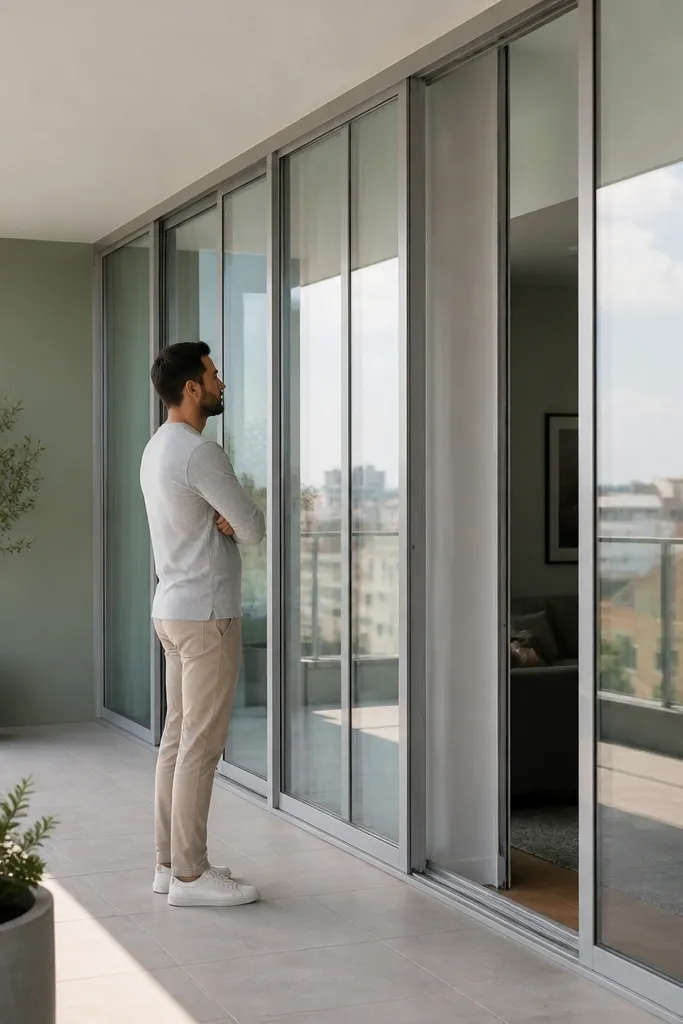
Pick a glass railing frame system that allows infill panels plus internal accent strips, then lay out your vertical accents at even spacing. Install the outer frame posts and top/base rails first, keeping everything level and square. Insert tempered glass infill with gaskets, then attach the vertical accent strips to the frame using small screws and spacers so they don’t warp. Seal exterior joints and wipe the glass clean so you don’t trap sealant haze on the visible panel face.
This one is for people who want glass but still want a bit of structure visually. Slim vertical accent strips inside a minimal frame add rhythm and hide hardware lines that would otherwise be visible on a small balcony. It’s photogenic because it creates a grid-like look without turning the railing into a window wall. Choose accents that match your balcony’s existing metal — brushed stainless, matte black, or bronze — then keep the glass clear so the accents don’t feel heavy.
Skip thisAvoid oversized accent strips; thick strips make the balcony feel narrower.
Editor's noteUse painters tape lines to mark accent strip alignment before drilling — it keeps the grid straight.



