
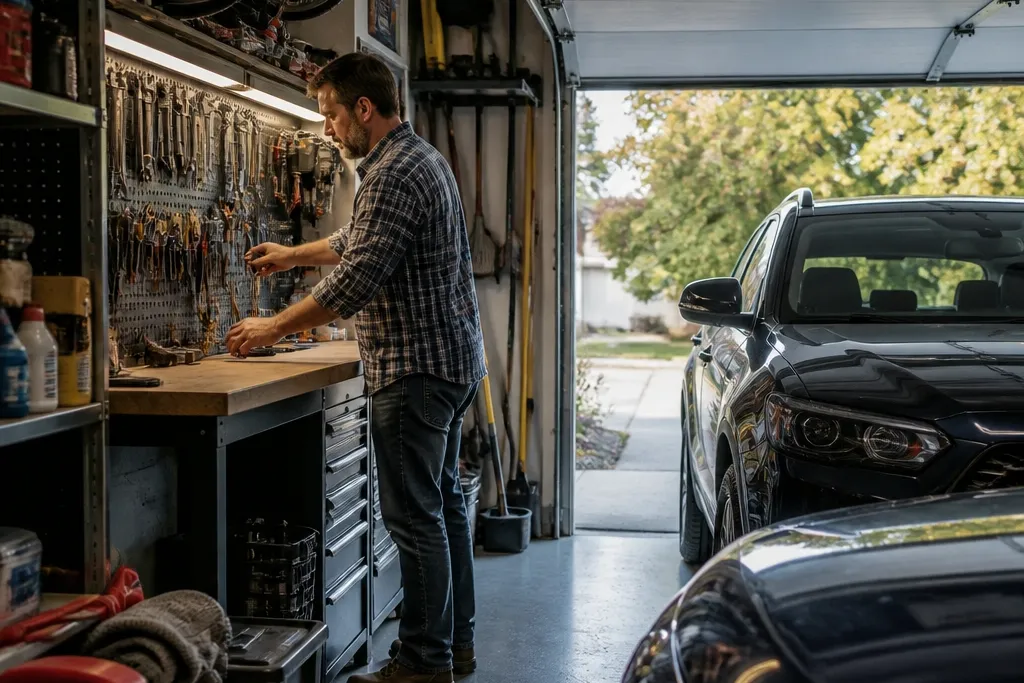
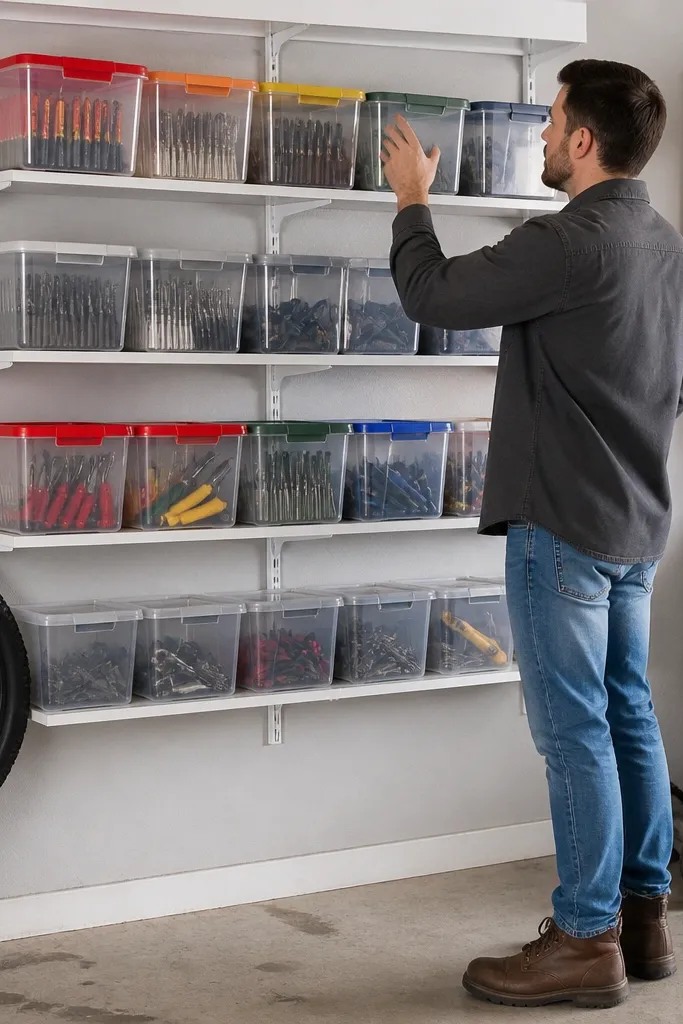
1. Matte-Black Pegboard Tool Wall With Color-Coded Hooks
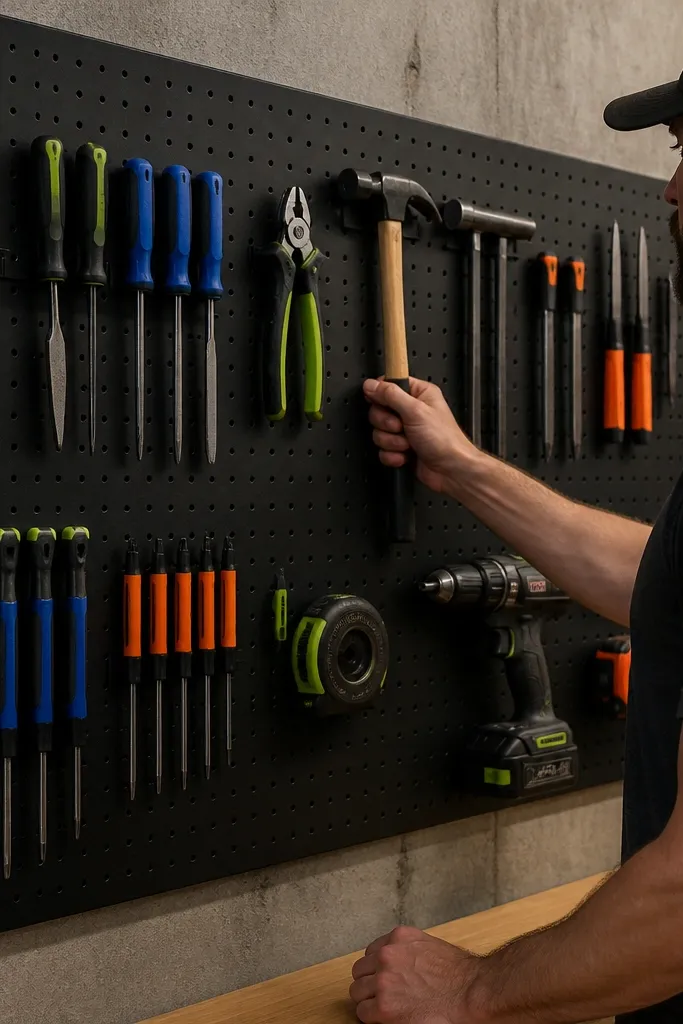
A pegboard wall looks sharp because it turns random tools into a grid. For small-space Garage Organization Ideas, it also keeps tools off the floor and off your workbench, which instantly makes the garage feel bigger. Use matte-black pegboard so the wall doesn’t look shiny or cheap under overhead lights. Pair it with color-coded hook tags and a few clear-front bins for the small stuff that always escapes — bits, blades, and charger cords.
Start by marking your stud locations and choosing a pegboard size that fits one wall section — 4 ft wide is a good target for tight garages. Mount the pegboard using long wood screws into studs, then add a level check before tightening the last screw. Install hooks in rows so tools hang evenly; keep the most-used tools at 40-55 inches. Add two or three clear bins under the pegboard and label them with a label maker so the wall stays tidy after use.
Use plastic hook boots on the ends of hooks so handles don’t scratch and slide as easily.
Don’t mount pegboard only to drywall — it will sag and pull loose after a few months.
2. Clear-Bin Wall Rack for Fast Grab Hardware
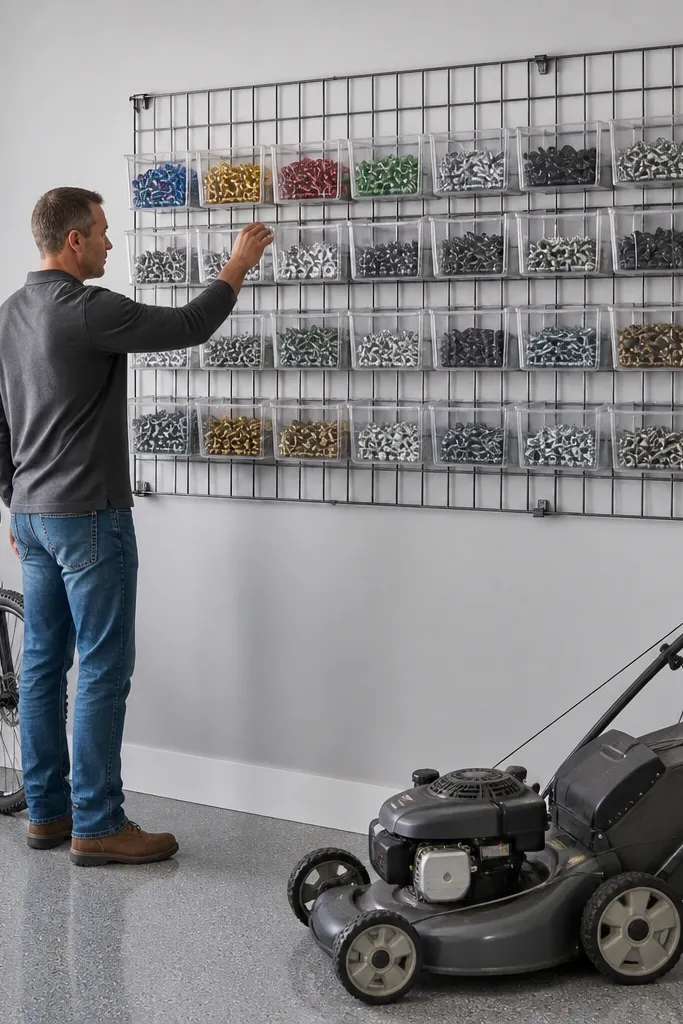
Build the rack with a simple slatwall grid or a metal mounting rail system, then attach identical bin brackets at consistent spacing. Place the bins at two heights: one row at about 36-45 inches for frequent grabs and a second row at 50-60 inches for less-used items. Label each bin with a permanent label on the front, then add a small category icon sticker to speed up returns. Finally, load bins by type, not by brand, so you can find what you need even when you’re tired.
This setup looks clean because the bins show contents, but the wall grid keeps everything aligned. It solves the problem of small parts living in mixed cups that turn into a mess the second you open one. In a small garage, wall-mounted bins keep your floor space open for bikes, a mower, or just turning around. Choose uniform bins with matching lids and a repeating label style so the whole section reads like one system.
Skip thisAvoid putting heavy items in lightweight wall bins — the brackets need to match the load.
Editor's noteKeep bin sizes consistent within each row. Mixed sizes look messy fast.
3. Shallow Slatwall With Hanging Baskets for Summer Gear
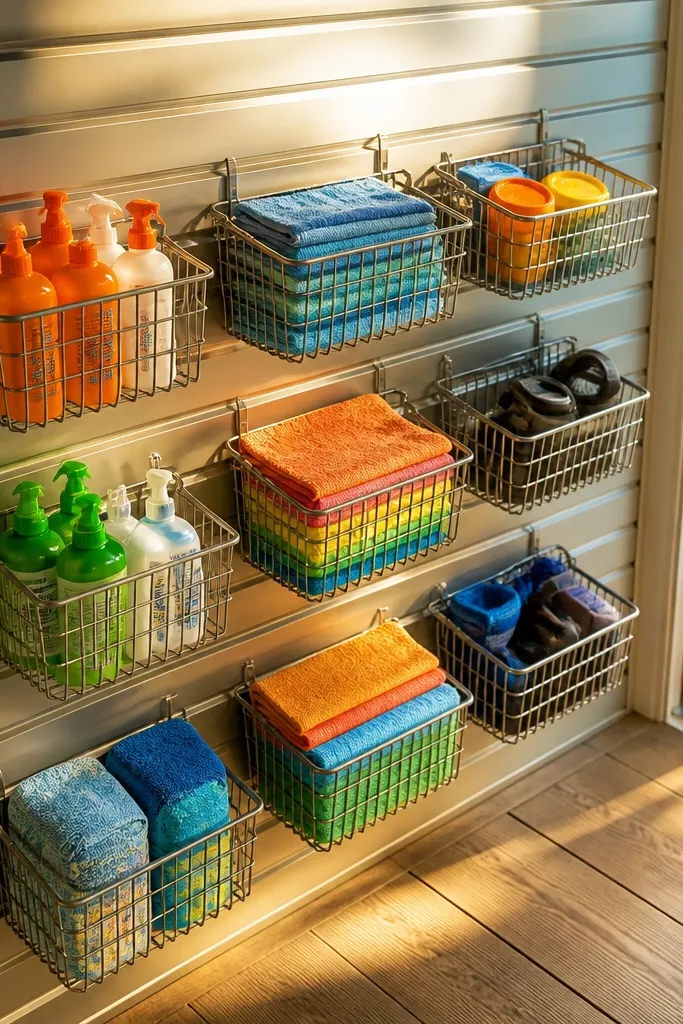
Slatwall with baskets makes seasonal gear look organized without building a big cabinet. It’s a strong choice for small-space Garage Organization Ideas because baskets hide the mess while still letting you see what’s inside from across the garage. The visual win is uniform basket placement and tidy spacing. Use it for things you grab occasionally — sunscreen towels, spare extension cords, car wash mitts, and grilling tools.
Install slatwall on studs so the baskets hold weight. Choose baskets with a consistent width so the wall looks even — 12-14 inches wide is a good start. Hang the top of the baskets at around 60-66 inches so items are reachable without climbing. Add one basket for “spare cords,” one for “car wash,” and one for “summer gloves,” then label each basket front with a label maker.
Add a small adhesive hook inside each basket for cords so they don’t coil into a tangled lump.
Don’t mount slatwall over paneling that has no stud support — the whole thing will pull loose.
4. Flip-Down Wall Shelf for Paint Cans and Spray Bottles
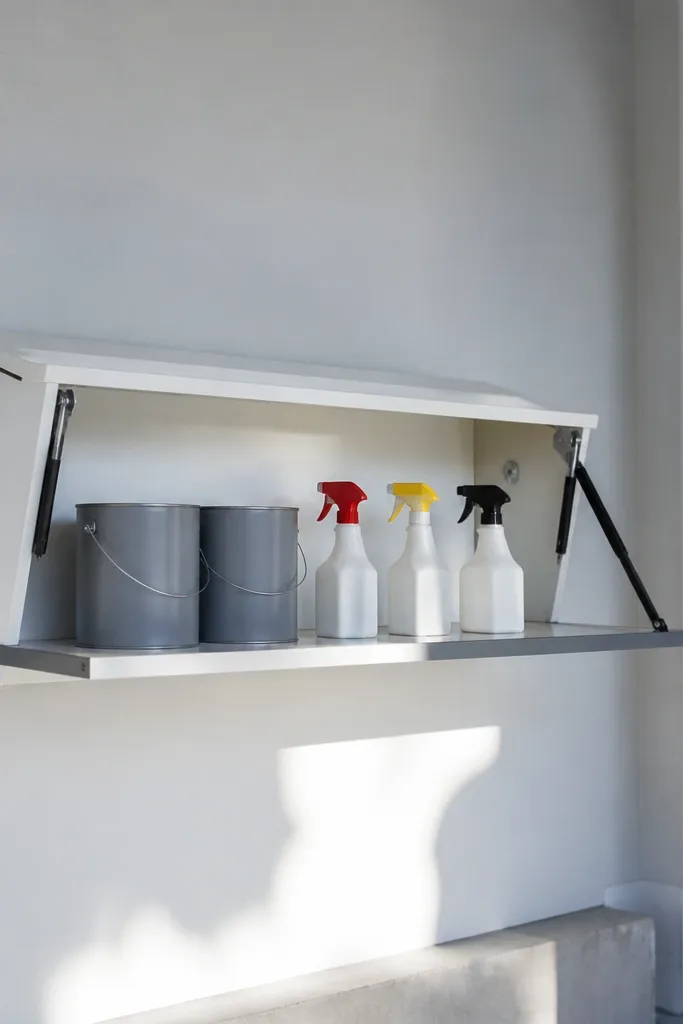
A flip-down shelf makes a small garage look intentional because the storage is hidden until you need it. It works for liquids and spray bottles that otherwise clutter a workbench. The look is clean: when the shelf is up, the wall stays empty and bright; when it’s down, you have a stable landing spot. This is a great fit for garages where you can’t spare drawer space but you do have a usable wall section.
Pick a shelf size around 18-24 inches wide and 10-12 inches deep, then attach it to studs with heavy-duty flip-down brackets rated for the load. Install a small back lip so bottles don’t slide forward. Add a drip tray — a shallow plastic or metal tray — on the shelf surface and fit a removable liner for easy cleaning. Label the shelf area with what goes there and keep only spray bottles and paint tools on that shelf.
Use a removable tray liner so dried residue doesn’t make the shelf look stained.
Skip mounting to studs that aren’t aligned — brackets need straight, solid support.
5. White Melamine Tool Cabinet With Clear Door Panels
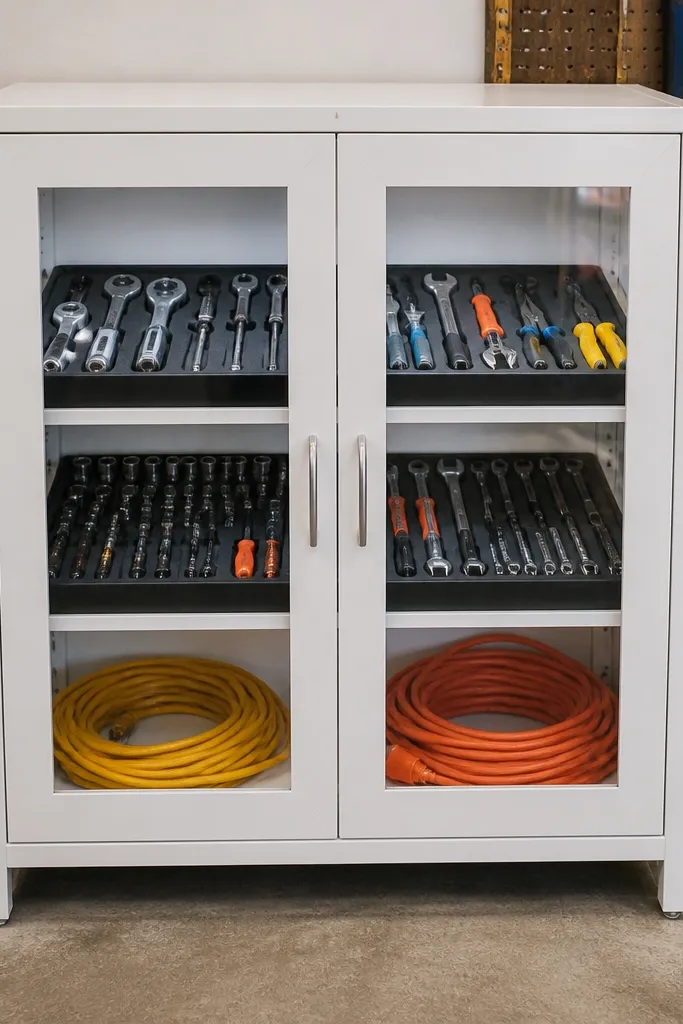
A small cabinet with clear doors looks polished because you can see what’s inside without opening anything. White melamine keeps the garage visually bright, which matters when garages are dim. It also creates a consistent “furniture” look that makes the whole space feel designed. Use it for hand tools, extension cord connectors, and frequently used accessories that you don’t want loose on open shelves.
Build the cabinet with 3/4-inch melamine panels, keeping the depth around 12-16 inches so it doesn’t eat your walkway. Use a simple box frame, then add internal shelves spaced for your tool sizes — 10-12 inches between shelves works well. Install clear acrylic or polycarbonate door inserts on the front for visibility. Add magnetic latches or soft-close hinges, then mount the cabinet to studs with corner brackets for stability.
Add felt pads on shelf edges so metal tools don’t chip the melamine finish.
Don’t use heavy tools on thin shelves without adding support rails inside the cabinet.
6. Drawer-Style Bin Wall for Gloves, Masks, and Small Safety Gear
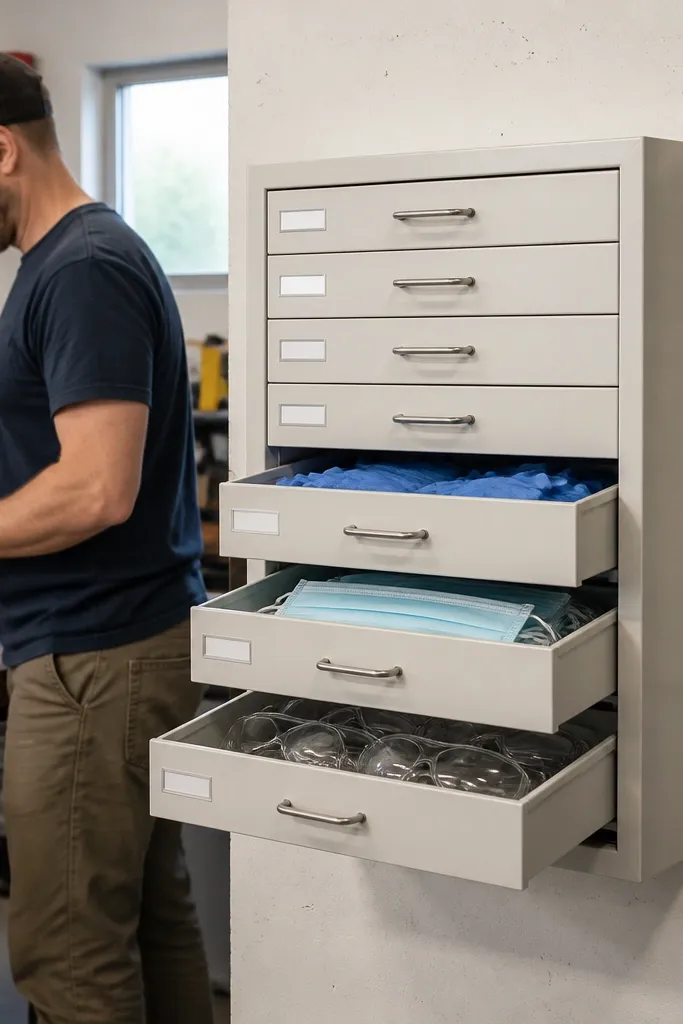
Safety gear always ends up in a random pile unless you give it a dedicated spot. Drawer-style bins look good because the faces create a clean line, and labels make the whole wall readable. In small-space Garage Organization Ideas, this matters because you want the garage to look orderly even when you’re mid-project. Put the drawers next to your workbench so you can grab PPE without searching.
Mount a vertical board to studs, then install small drawer slides or bin brackets that allow each bin to pull out smoothly. Use uniform bin sizes like 6-8 inch wide bins so the faces align. Label each drawer front with a label maker and a simple icon — mask, gloves, ear protection. Load by category, then adjust bin spacing so each drawer opens fully without hitting the bench.
Use magnetic door catches if you’re using a cabinet-style front so drawers don’t creep open.
Avoid mixing bin heights. Uneven drawer fronts look messy fast.
7. Floor-Standing Rolling Tool Cart With Pegboard Side Panel
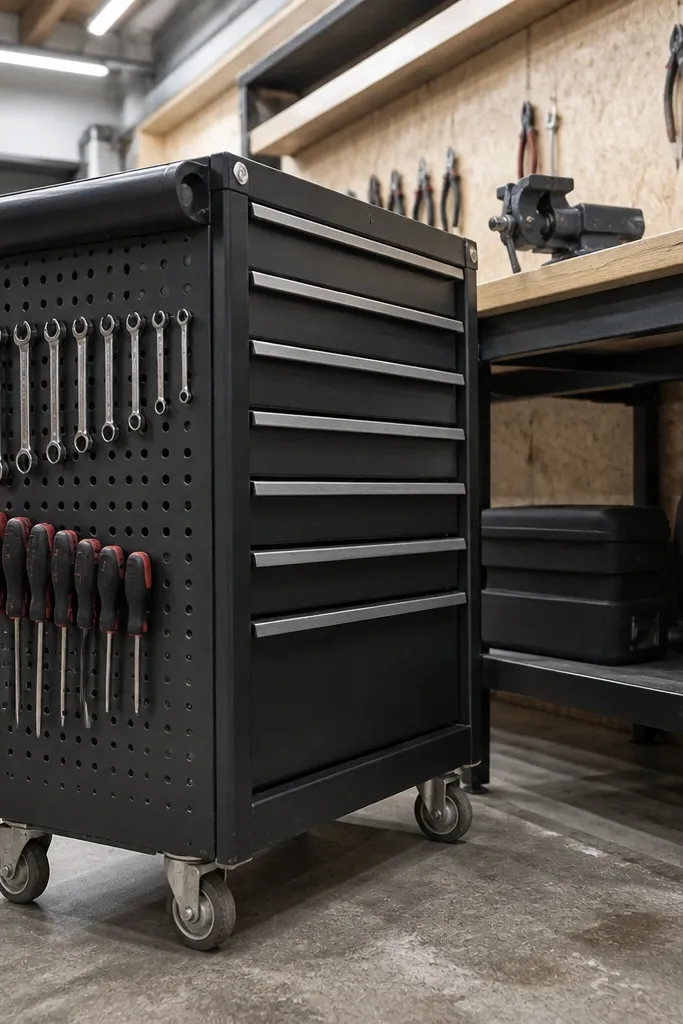
Choose a cart with at least two shelves and a stable top surface. Add a small pegboard panel on the side using standoffs or a frame so it stays flat. Install hooks for the specific tools you want to keep in reach, with the heaviest tools on the lower half. Add a label on the cart top for “currently in use” items, and store everything else in bins on the shelves.
A rolling cart gives you storage you can move out of the way, which is a huge deal in narrow garages. The pegboard side panel makes it look intentional instead of like a generic metal cart with loose hooks. It’s perfect for tools you use in bursts — drills, screwdrivers, wrenches, and bits. The look is clean because everything hangs in a consistent pattern on the side.
Skip thisDon’t overload the top. Keep it for lightweight items only.
Editor's noteUse locking casters so the cart doesn’t drift when you pull tools off the pegboard.
8. Overhead Storage Rails With Rope-Latched Bins
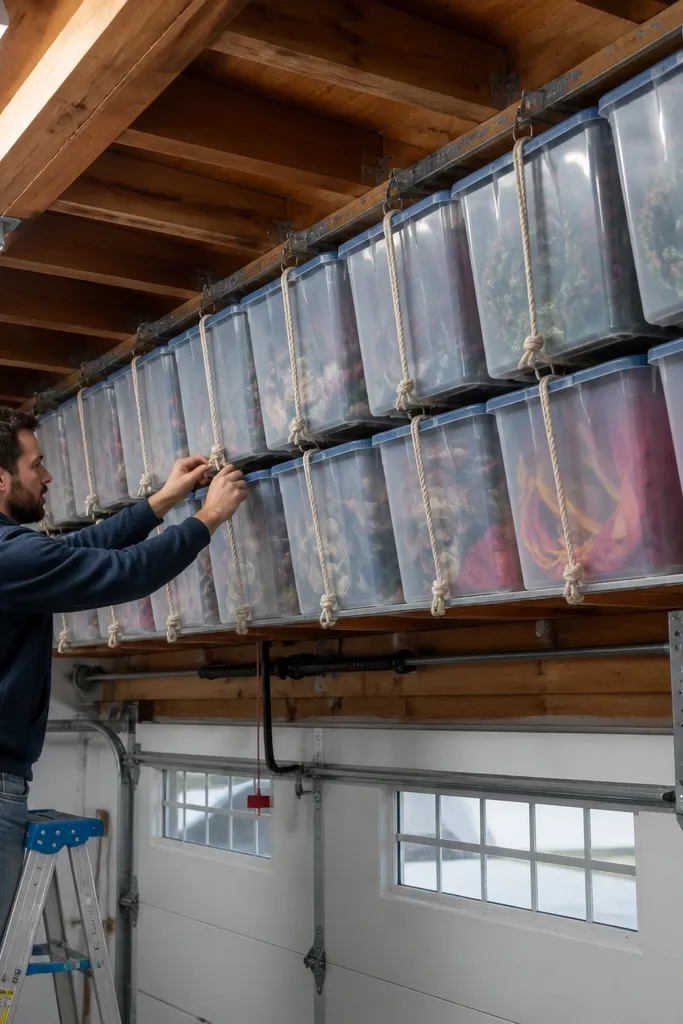
Overhead rails are one of the few ways to add real storage without touching your wall space. The rope-latched bins look tidy because they hang in straight rows and don’t swing as much as open hanging hooks. This setup is great for small-space Garage Organization Ideas when you have a lot of seasonal items — holiday decor, winter gear, extra extension cords. It also keeps the floor clear for parking and movement.
Install ceiling or rafter-mounted rails with proper hardware rated for overhead storage. Use bins with flat sides so they sit evenly on the hangers. Attach rope latches or quick clamps so you can secure the bin and prevent swing. Place the heaviest bins directly above studs or structural members, then label each bin with a large tag.
Add bright tape arrows on the bin fronts so you remember what sits where after winter.
Skip overhead storage over weak drywall or thin ceiling supports.
9. Garage Door Track Side Shelf for Long-Handled Tools
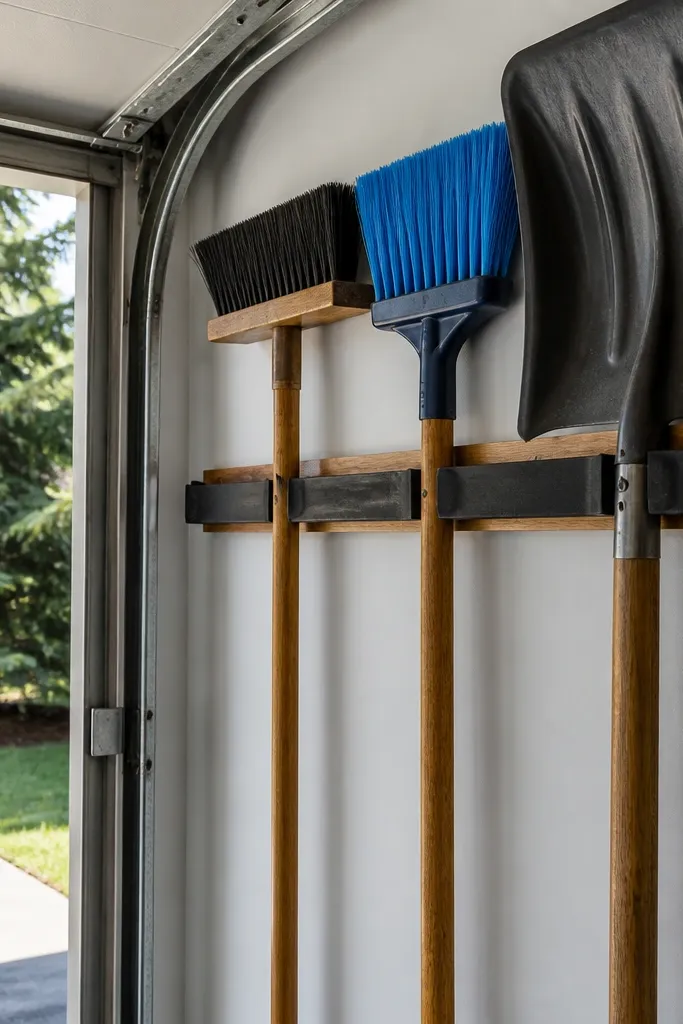
That awkward strip of space beside the garage door is where long-handled tools should live. A narrow shelf keeps rakes, brooms, and shovels upright and off the floor, which makes the garage look cleaner instantly. It’s photogenic because the tools line up like a row instead of leaning randomly. This works best when you have a side wall section that stays visible even when the car is parked.
Measure the clearance next to the door track and build a shelf depth around 6-10 inches so it clears moving parts. Mount brackets into studs at the correct height so handles fit without scraping. Add a simple rail lip to keep tools from sliding. Paint or seal the shelf so it holds up to dust and easy wiping, then label the shelf edge by tool type.
Use rubber edge trim on the lip so tool handles don’t rattle.
Don’t mount the shelf too low or the door operation will hit the handles.
10. Magnetic Strip for Socket Sets and Metal Bits
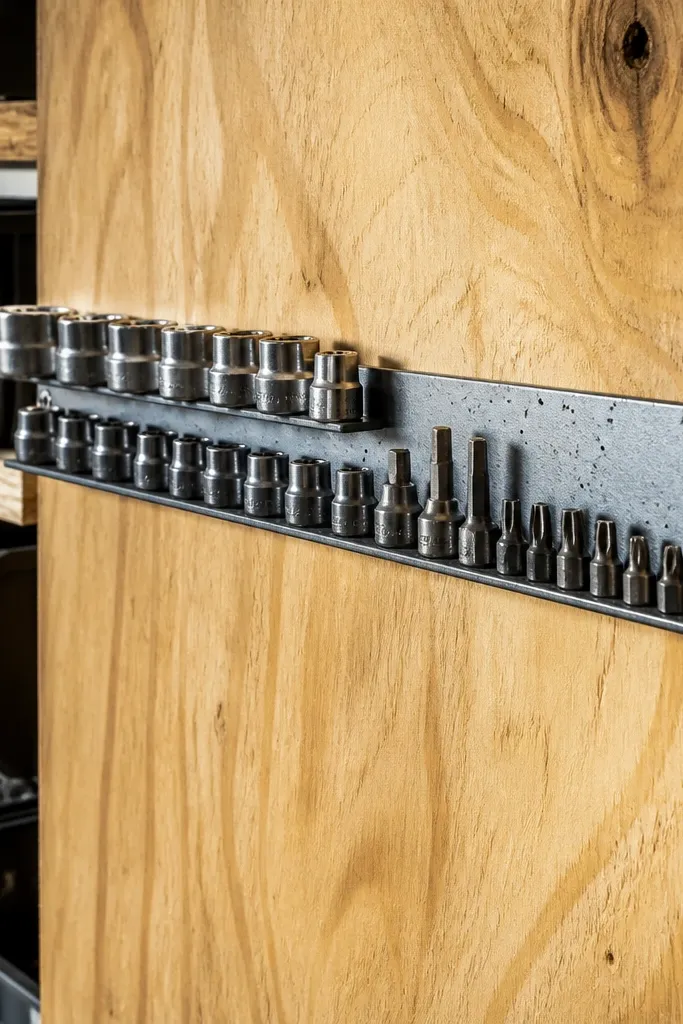
Magnetic storage looks clean when you keep metal pieces in neat rows and add simple labels. It’s a small-space win because you don’t need depth — the strip sits flat. Use it for socket sets, steel bits, and small metal parts that otherwise vanish into drawers. The aesthetic is tight and orderly, especially if you use a single label style and keep the strip height consistent.
Mount a magnetic strip to a plywood backing panel, then screw the panel into studs or into a sturdy backing board. Keep the strip length manageable — 18-36 inches is enough for a tidy row. Sort sockets by size and place them in ascending order. Add a small label near each group so you can grab the right piece fast.
Put the biggest sockets at the bottom so they don’t hide the smaller ones.
Don’t stick magnets directly on painted drywall with no backing — they’ll peel.
11. Stair-Step Shelf for Paint Brushes and Rollers

Build a small stepped frame from 1x lumber or plywood, using three to four steps spaced for common tool sizes. Keep the top step slightly wider for rollers and the lower steps narrower for brushes. Sand edges smooth, then seal with a wipe-on polyurethane so paint splashes don’t soak in. Mount it to studs at about 45 inches so you can grab tools without bending.
A stair-step shelf is one of the best ways to make messy painting supplies look organized. It forces upright storage for brushes and keeps roller covers from getting crushed. The look is especially good because each item has its own “step,” so the wall reads clean. This is a smart project for garages that double as a DIY workspace and need quick access to painting tools.
Skip thisAvoid storing wet brushes directly on wood without a liner or cup.
Editor's noteAdd a removable cup holder for brush handles so dried drips don’t stain the shelf.
12. Recessed Door Organizer for Spares and Cleaners
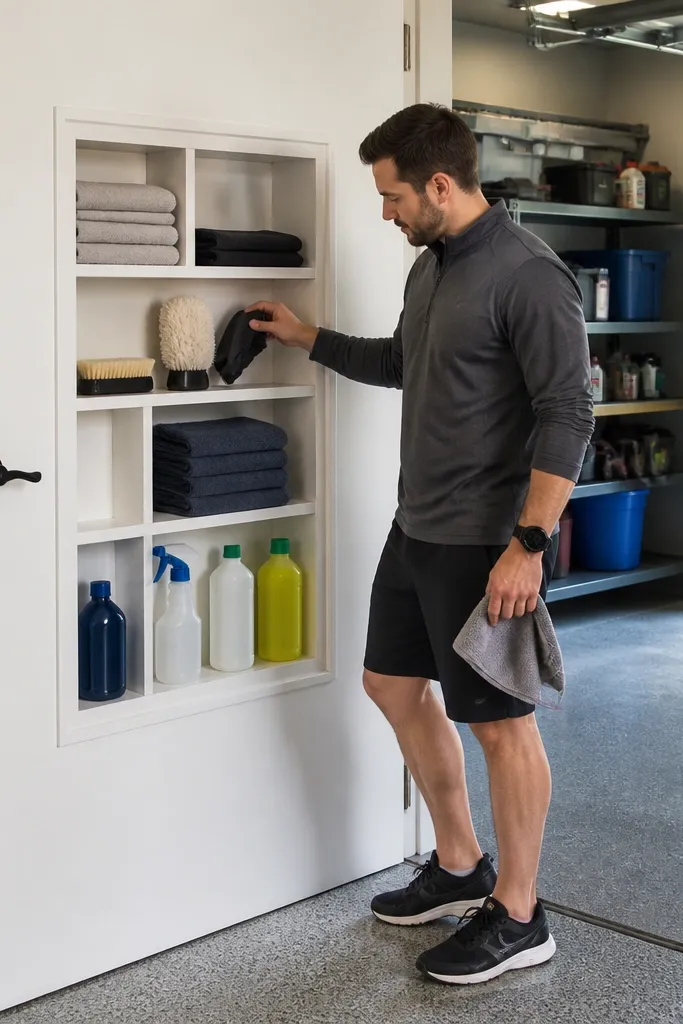
When floor and wall space is tight, the inside of a door becomes prime storage. A recessed organizer panel looks tidy because it creates a flat face with compartments instead of hanging bags. Use it for cleaners, spare rags, car wash accessories, and extra paper towels. The visual payoff is huge: you get storage without cluttering the main garage view.
Measure the door or adjacent panel area and build a shallow organizer panel that sits 1-2 inches inside the frame so it doesn’t interfere with opening. Use a plywood backing with 1x dividers for bins or insert small plastic organizers with screws. Mount it with long screws into the door structure or solid framing. Add labels in a consistent row and keep only compatible items in each section to avoid chemical mixing.
Use clear bins for frequently restocked items so you can see when supplies run low.
Don’t store anything that leaks above open storage without a secondary tray.
13. Corner L-Shaped Workbench Shelf With Matching Bins
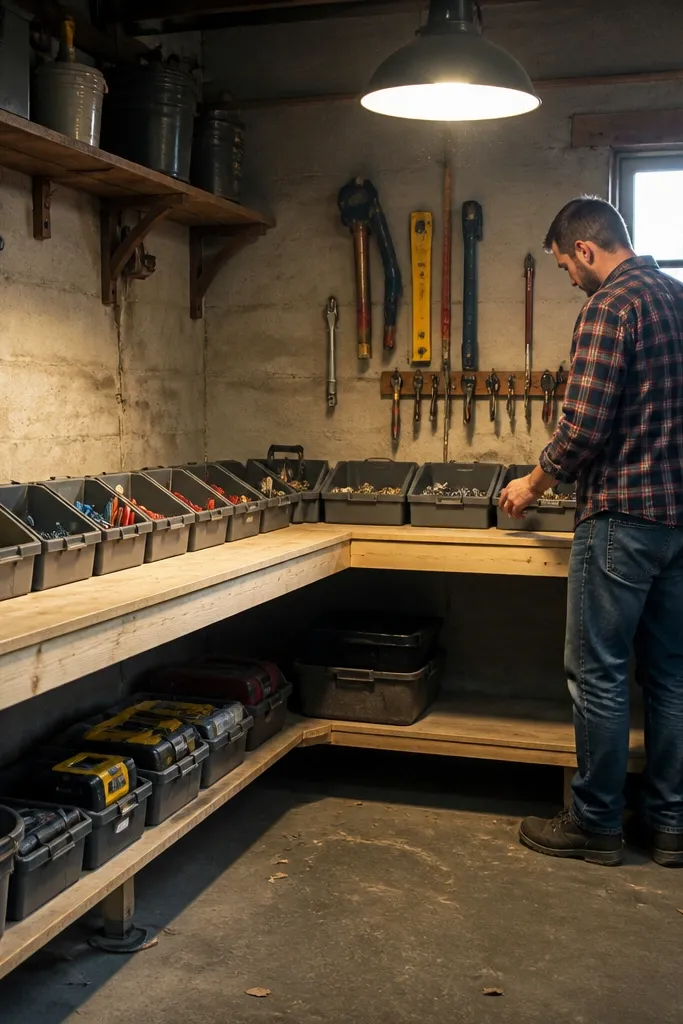
Build an L-shaped shelf from 3/4-inch plywood or melamine panels, with the shorter run around 12 inches and the longer run around 24 inches. Mount the shelf into studs with heavy angle brackets. Add bins to the shelf surface and separate categories by bin color or label. Keep the highest bin for light items and place heavier items on the lower shelf for stability.
Corners are where storage goes to die unless you use an L-shaped shelf. This setup looks good because it frames the corner like furniture and gives you straight edges for labels and bins. It fixes the common small garage problem where the corner becomes a dumping ground for cords and bags. Use matching bins so the corner reads consistent instead of random.
Skip thisAvoid placing heavy tool boxes on the top run without support brackets at both walls.
Editor's noteSeal cut edges with edge banding so humidity and dust don’t rough up the shelf.
14. Pegboard Tool Shadow Box for Small Hand Tools
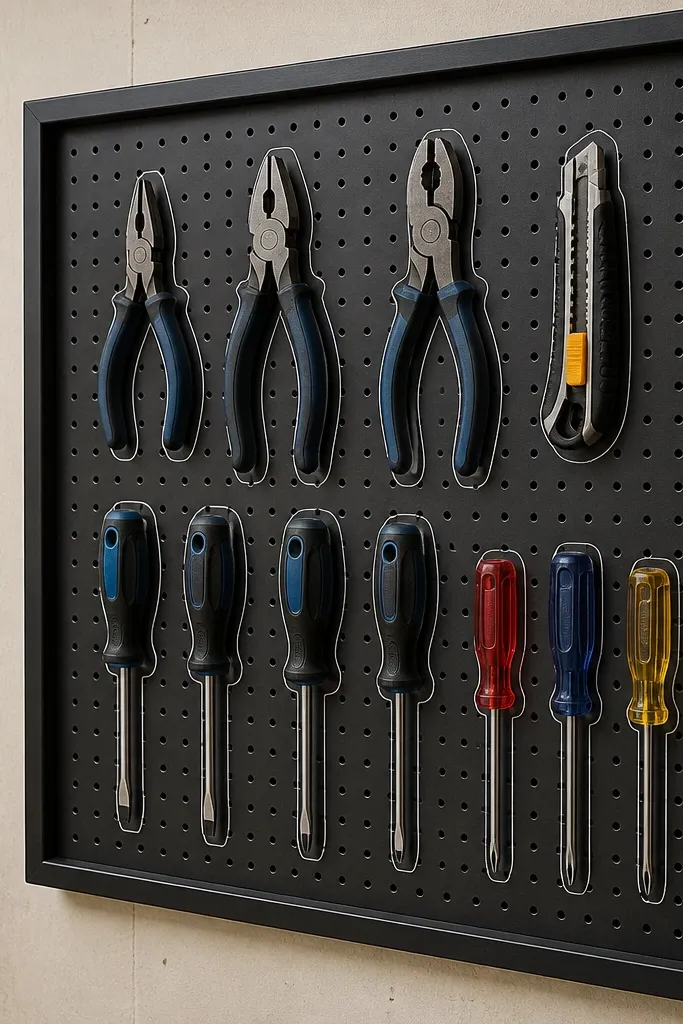
Cut a pegboard panel to fit a wall section, then mount it to studs. Use painter’s tape to mark tool positions, then trace tool outlines with a fine marker so each tool has a home. Install hooks or pegs at the traced marks. Add a small label strip at the bottom with the tool categories, then keep only hand tools in this panel — no cords or random parts.
A shadow-box style pegboard panel makes small hand tools look museum-like and easy to return. The outlines tell you where each tool belongs, which keeps the wall neat even when you’re rushing. It’s photogenic because the tools sit in a clean grid with consistent spacing. This is perfect for small-space Garage Organization Ideas where you want organization you can see from across the room.
Skip thisDon’t cram the panel. Leave 1-2 inches between tools so the layout stays readable.
Editor's noteUse different hook lengths for tools so handles sit at the same height across the panel.
15. Industrial Pipe Shelf With Clear Under-Bin Storage
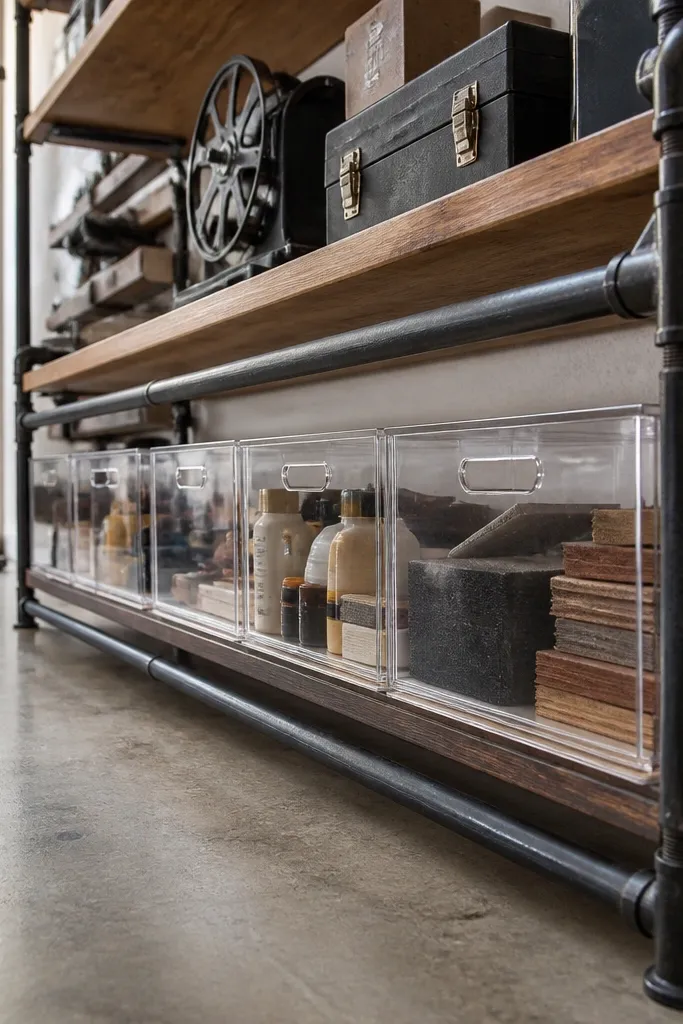
Build the shelf frame with black steel pipe and matching flanges, anchoring into studs with proper brackets. Set shelf height so the underside stays useful — about 10-14 inches between shelf and top of bins works well. Place clear bins on the underside supports and label the bin fronts. Seal the pipe shelves if needed and wipe the area clean before loading so dust doesn’t settle into labels.
Pipe shelves look good in garages because the hardware matches other metal storage you likely already have. Clear bins under the shelf keep the look tidy while still letting you see what’s inside. This is a strong option when you want open shelving but hate the visual mess of open bins. Use it for frequently used supplies like sandpaper, rags, and replacement parts.
Skip thisDon’t mount pipe shelves on drywall only. Stud anchoring is non-negotiable.
Editor's notePick one bin size and one label color. Repetition makes it look intentional.
16. Wire Basket Wall System for Lightweight Cleaning Supplies
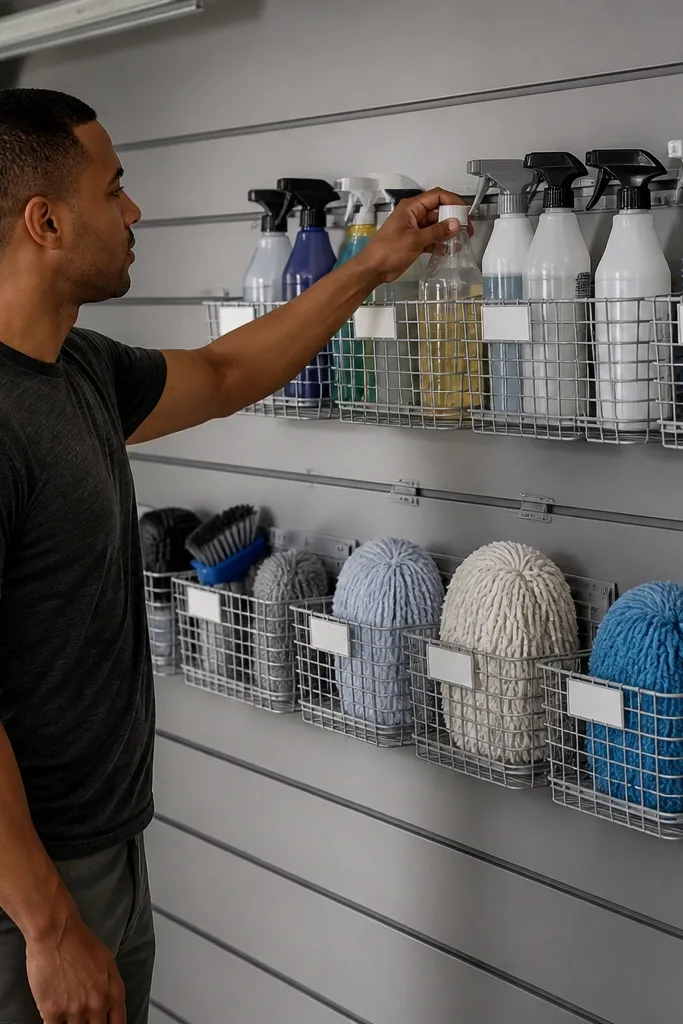
Mount a wire basket rail or slatwall system into studs. Install baskets in a vertical stack with consistent spacing so the wall stays aligned. Hang the heaviest items lower and keep bottles in the center baskets. Label each basket with a label maker and put a small drip mat under any bottle that can leak.
Wire baskets look airy and neat, which helps small garages feel less crowded. They also drain and don’t trap moisture like solid shelves do, so they work well for mops, scrub brushes, and cleaning bottles. The aesthetic is clean when you keep basket sizes uniform and use the same label style. This project is ideal for garages that look messy because cleaning tools are always in the wrong spot.
Skip thisAvoid storing heavy power-tool batteries in wire baskets without a secure base.
Editor's noteUse small binder clips to keep spray nozzles from snagging on the wire.
17. Stackable Drawer Cabinets for Nuts, Bolts, and Screws
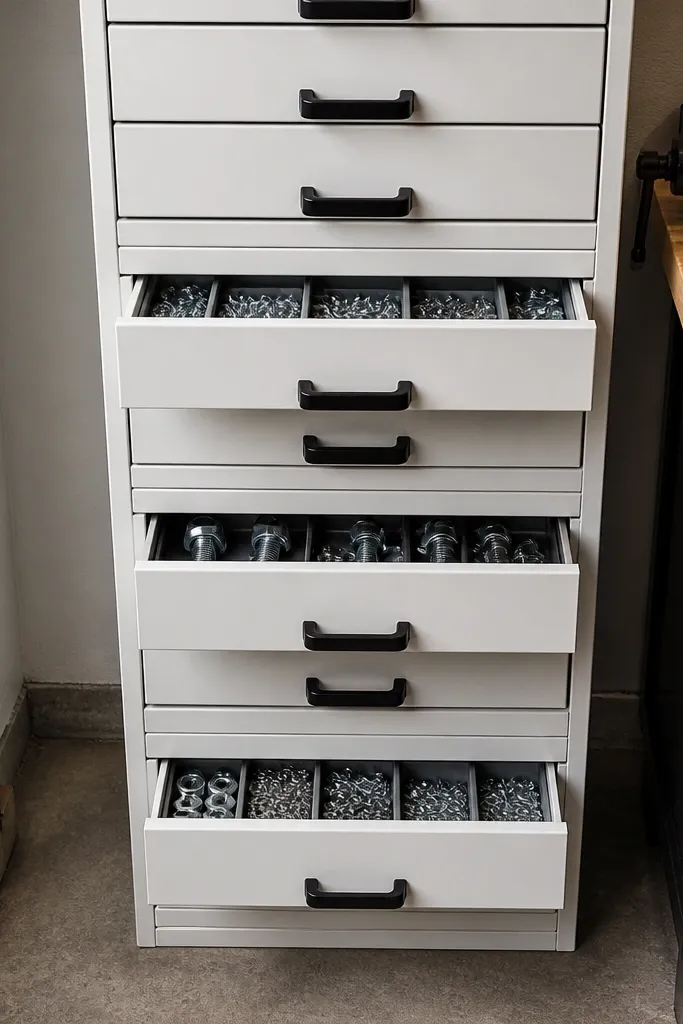
Buy stackable drawer units and set them on a wall or on a base shelf depending on your space. Keep the top row at about 60 inches so you can reach most drawers without a step stool. Label each drawer with exact contents like “3/8 wood screws” or “M6 washers” so you don’t guess. Sort by size and type, then add a small “spares” drawer at the bottom for odd leftovers.
Drawer cabinets make hardware look organized because the compartments hide mess but keep items separated. In small-space Garage Organization Ideas, they win because you get storage without the visual clutter of open bins. Choose stackable units so you can build up storage vertically. The look is clean when you keep all drawers labeled and avoid mixing unrelated categories in one drawer.
Skip thisDon’t combine multiple screw lengths in one drawer just because you’re in a hurry.
Editor's noteUse uniform label size and placement so the face of the cabinet looks like one design.
18. DIY Pegboard Cord Organizer With Cable Clips and Labels
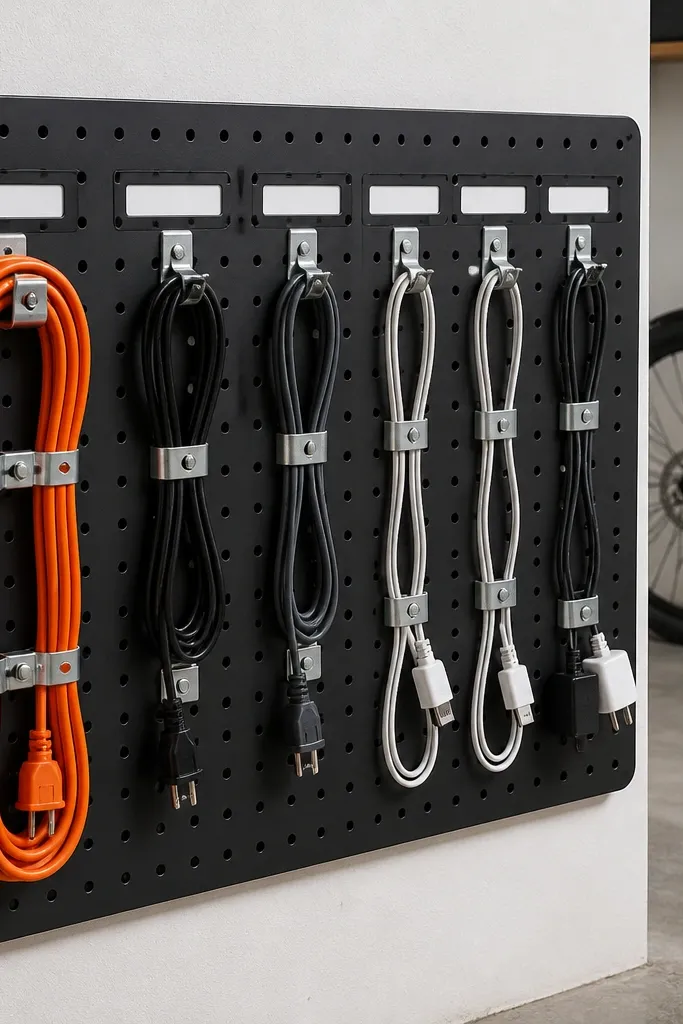
Cords are the fastest way to make a garage look chaotic. A cord organizer panel fixes it by keeping extension cords, charger cables, and air hoses in a tidy loop. It looks good because cords hang in straight lines and labels sit in a consistent row. This is a small-space win because cord storage frees up floor space around the garage door and workbench.
Mount a small pegboard panel or plywood backing to studs. Install cable clips or cord hooks at consistent intervals, leaving enough room for the cord diameter so it doesn’t kink. Coil each cord neatly and secure it with a fabric strap. Label each clip position with a label maker so you always return the cord to the same spot.
Use fabric Velcro straps, not plastic ties, to prevent cord damage and frayed ends.
Skip random “just hang it somewhere” spots — cords drift and the wall goes messy.
19. Vinyl-Backed Wall Paper Organizer for Manuals and Receipts
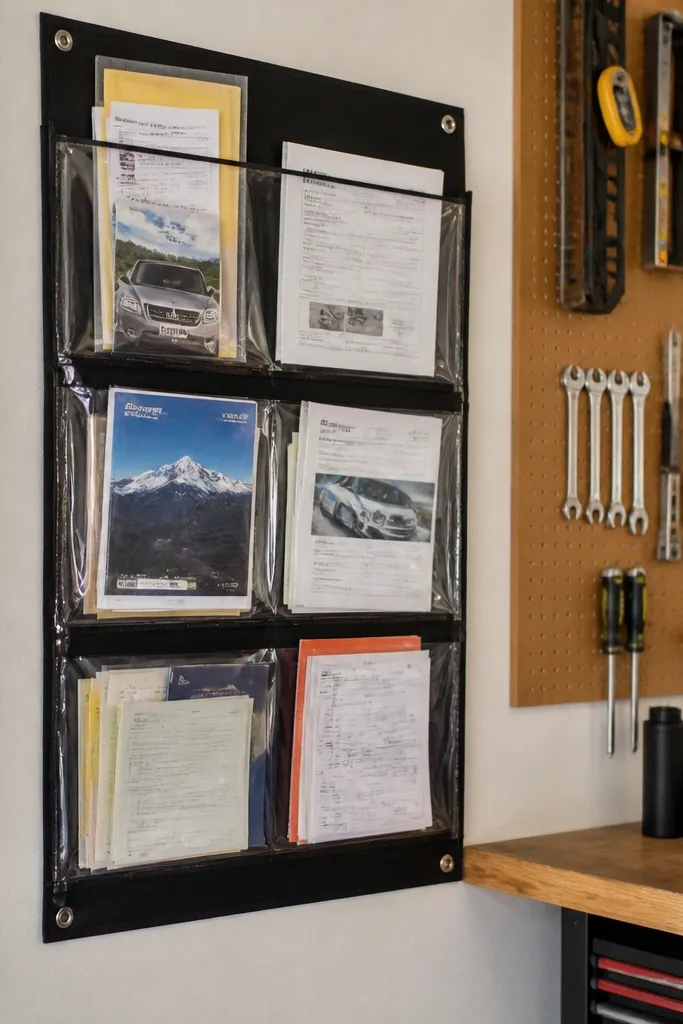
Mount a backing board to studs or a solid wall panel. Attach clear document pockets in a grid with uniform spacing, then label each pocket by category like “Tools,” “Appliances,” and “Home projects.” Add a pocket for “active jobs” so you can move papers out after the project. Use a vinyl or laminated backing so dust wipes off easily.
Paper clutter is sneaky in garages. Manuals, warranties, and receipts end up stuffed into drawers, then you lose them when you need them. A wall organizer with clear pockets looks orderly and prevents the messy stack. In small-space Garage Organization Ideas, it also keeps your bench surface clear, which makes everything else easier to find. Choose a grid layout so it looks like a designed system, not a pile taped to a wall.
Skip thisDon’t add too many pocket sizes. Stick to one pocket format for a clean look.
Editor's noteUse a single color label tape for every pocket so the grid looks cohesive.
20. Under-Shelf Bin Line for Cleaning Supplies
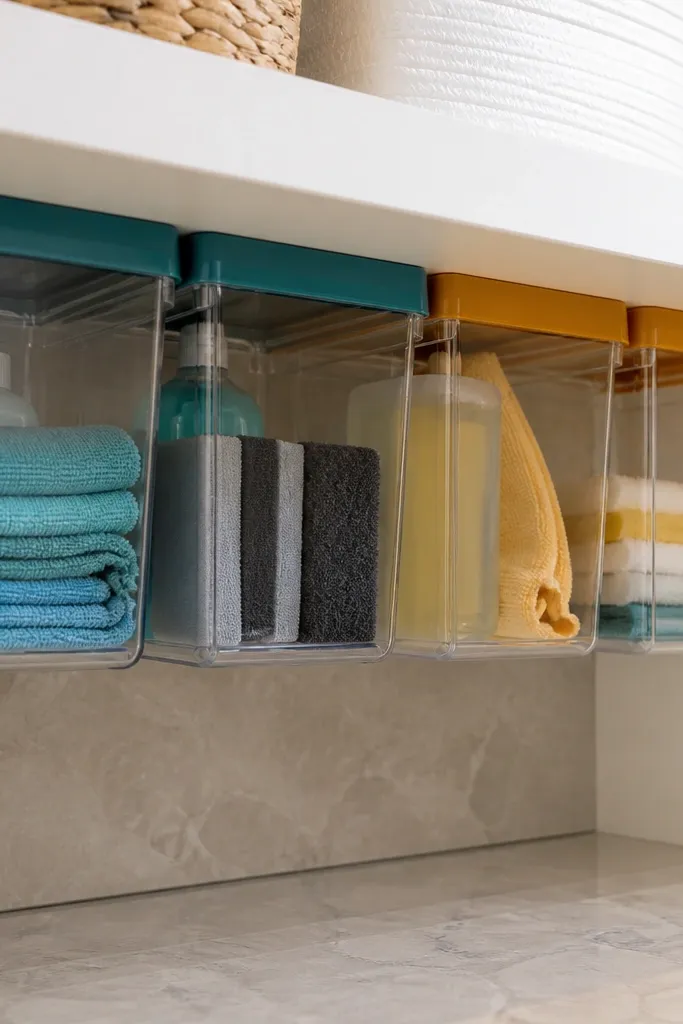
The space under a shelf is wasted in a lot of small garages. A line of bins under a shelf keeps cleaning tools together and makes the shelf area look finished. This works because it turns “dead space” into a consistent storage face. The look is better when bins are identical and aligned, so the underside reads like a tidy wall unit rather than clutter.
Install a shelf on studs at about 48-60 inches. Add bin supports or use shelf brackets that let you mount small bins underneath without blocking access. Choose bins with open fronts so you can grab items quickly. Line them up by use — rags in one, scrub brushes in another, sprays in a third — then label each bin front.
Add a small drip tray under spray bottles so the underside stays clean.
Avoid bins that are too deep. Deep bins become junk drawers under the shelf.
21. DIY Wood Slat Tool Divider for Long Wrenches
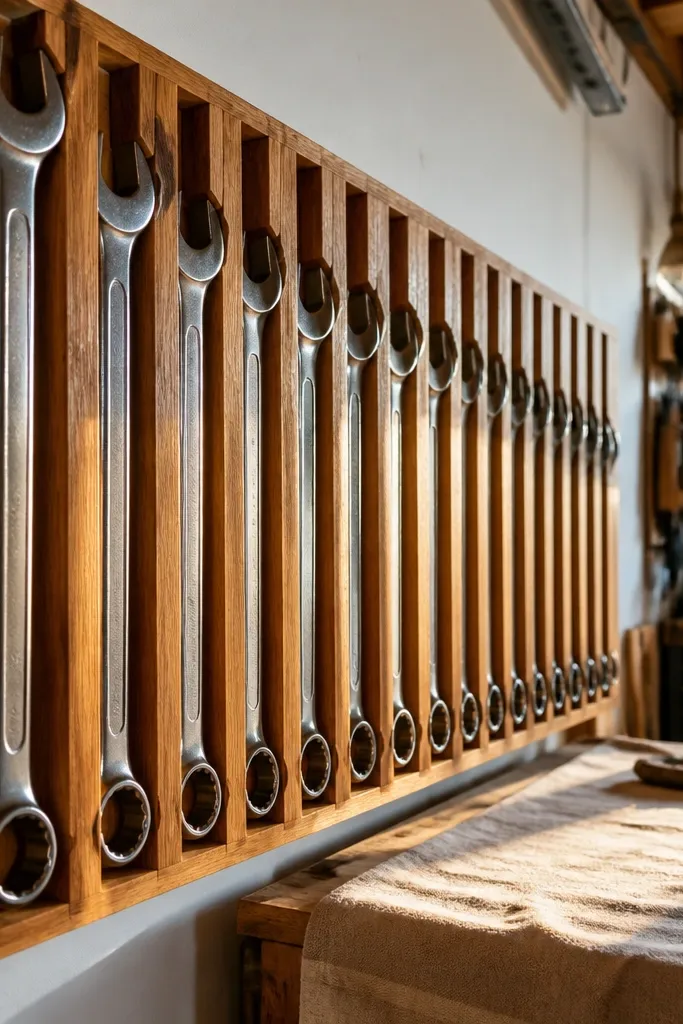
Wrenches and long tools look messy when they lean in a pile. A wood slat divider holds them in separate slots, and the wood grain looks warm instead of harsh. It’s photogenic because each tool has its own spacing, so the wall looks organized even from a distance. This setup is great for small-space Garage Organization Ideas where you want long tools visible and easy to grab without taking up floor space.
Cut a plywood or 1x board backing panel and mount it to studs. Add vertical wood slats spaced for your wrench sizes — leaving 1/2 inch clearance for easy removal. Sand edges smooth and apply a clear coat so metal doesn’t rust into raw wood. Place the slat panel at around 36-48 inches so you can reach without stretching.
Use a thin rubber strip behind each slat to reduce rattling and prevent scratches.
Don’t use slat spacing that’s too tight. Tools will jam and you’ll stop using the organizer.
22. Wall-Mounted Bike Stand and Pump Station
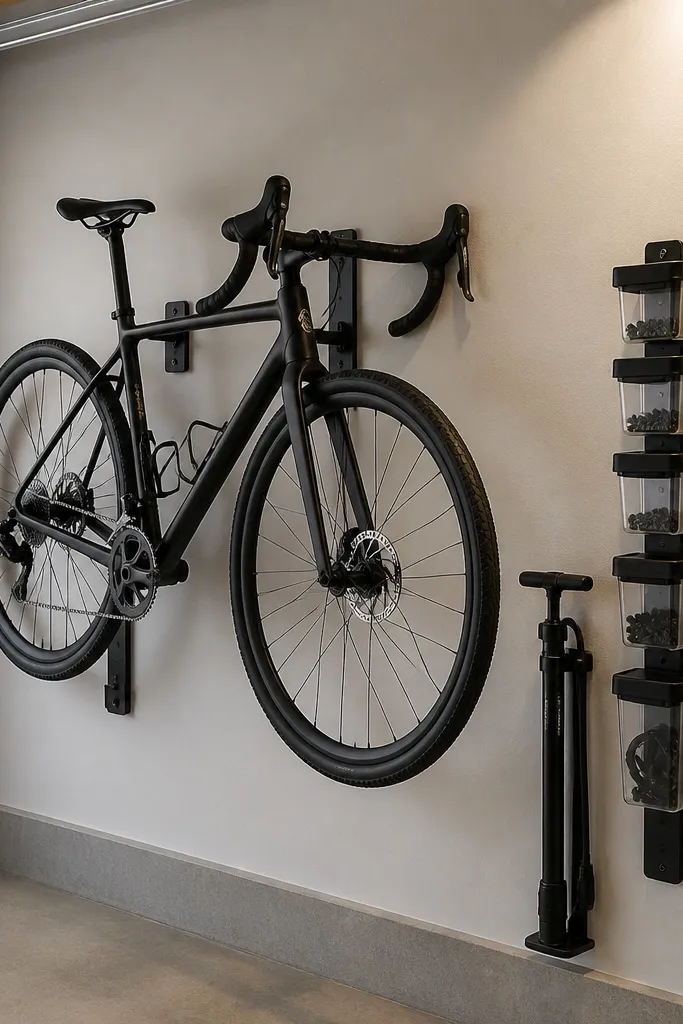
Mount a bike stand to studs at a height that lets the bike hang without dragging the floor. Add a small wall organizer next to it with hooks for the pump and a bin for repair tools. Keep pump storage at about 48 inches so you can reach quickly. Label the accessory bin and store only the repair kit items there — tire levers, patch kit, and spare tubes.
If bikes live in your garage, they steal floor space and make everything else harder to access. A wall-mounted bike stand with a small pump and accessory station keeps the bike from becoming a clutter magnet. The look is clean because the bike is vertical, and the accessories live in a tidy row of small bins. This is one of the most effective Small-space Garage Organization Ideas for multi-use garages.
Skip thisSkip mounting to only studs at one side if the bike stand uses two mounting points.
Editor's noteAdd a soft mat between stand and bike frame to prevent scuffs.
23. Pegboard Drawer Boxes for Drill Bits and Sandpaper
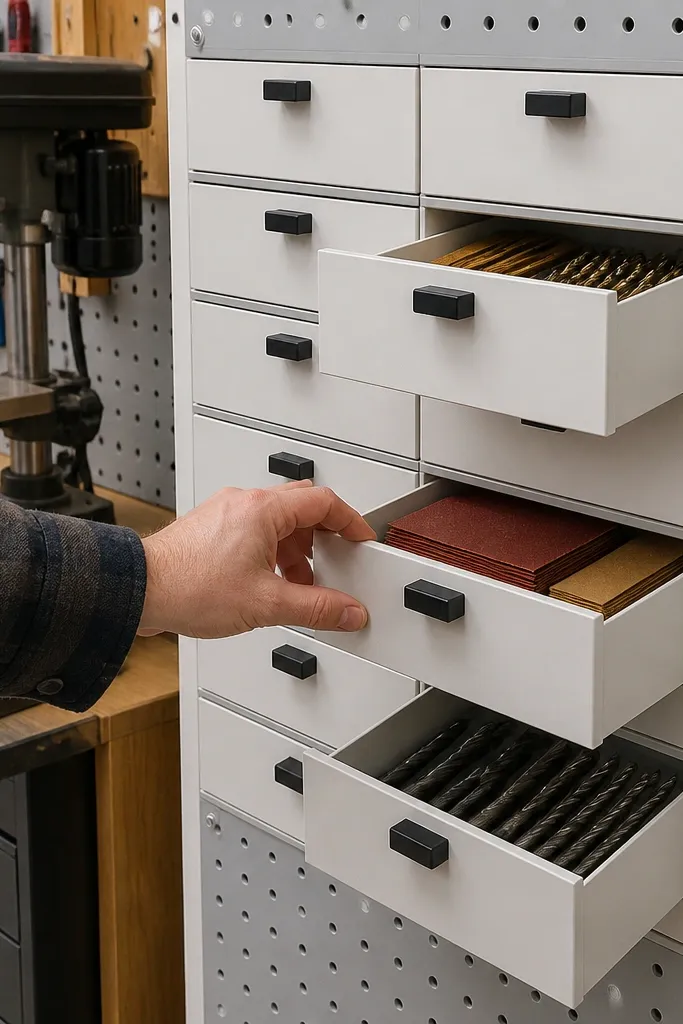
Mount pegboard to studs, then attach small wooden or plastic drawer boxes to the pegboard using bracket hardware. Keep drawers shallow for easy access — around 3-4 inches deep for bits and discs. Label each drawer front with exact sizes and grit numbers using a label maker. Fill drawers by type and keep one drawer for “misc” only if you truly need it.
Small drill bits and sandpaper sheets look chaotic until you give them small, repeatable storage. Pegboard drawer boxes look sharp because each drawer face matches and pulls out smoothly. It’s a great Small-space Garage Organization Ideas choice when you want everything visible but not exposed. This setup keeps your most-used consumables ready for the next project without turning into a mess.
Skip thisDon’t overload drawers. If a drawer won’t fully close, the system fails.
Editor's noteUse clear drawer fronts for sandpaper so you can see grit without opening.
24. Cabinet-Style Trash and Recycling Station With Door Panels
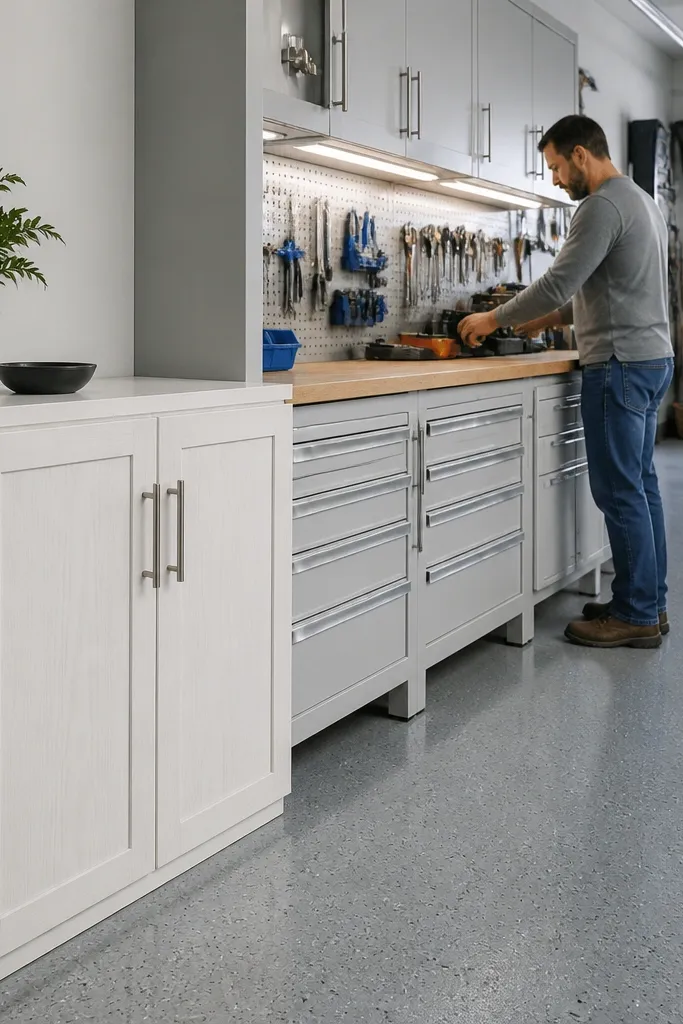
Trash and recycling clutter makes garages feel dirty even when everything else is organized. A cabinet-style station hides bins behind doors, so the space looks clean and photo-ready. This is one of the most underrated Small-space Garage Organization Ideas because it changes the visual baseline. Use it near the workbench so you don’t leave bags open on the floor.
Build a small cabinet frame with melamine or plywood, then install a door front with hinges and a magnetic latch. Inside, mount two pull-out bins or a simple sliding tray system sized to your trash containers. Keep the doors aligned so they close smoothly and don’t rub. Label each bin area on the inside with a label maker and place a matching label on the door so guests understand it too.
Add a small rubber gasket to the cabinet door edge to reduce noise and keep smells contained.
Avoid leaving bins exposed if your garage is visible from the driveway.
25. Wall-Mounted Ladder Storage With Rubber Cradles
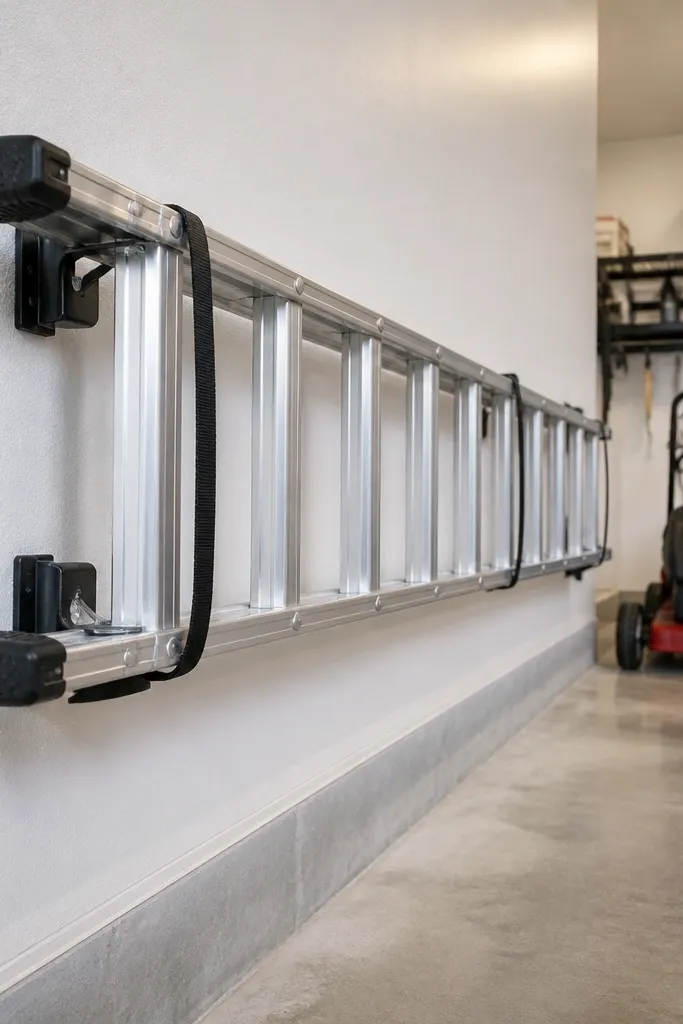
Ladders take up floor space and make a garage look cramped. Wall-mounted storage instantly improves the layout and makes the garage feel bigger. The look is clean when the ladder sits straight in rubber cradles and is secured with straps. This is a high-impact project for Small-space Garage Organization Ideas when your floor is crowded with seasonal tools.
Find studs behind the wall and install two sturdy mounting brackets with rubber cradles sized for your ladder rails. Mount the cradles so the ladder sits stable and doesn’t wobble. Add a strap or tie-down at the top to prevent shifting when you bump the ladder. Paint or cover metal parts to match your other hardware so it looks cohesive, then load only the ladder you store there.
Use rubber pads thick enough to prevent metal-to-metal contact and rattling.
Don’t mount ladder brackets into studs that aren’t aligned with the ladder rail positions.
26. Tool Bench Side Panel With Pegboard and Small Cabinet Door
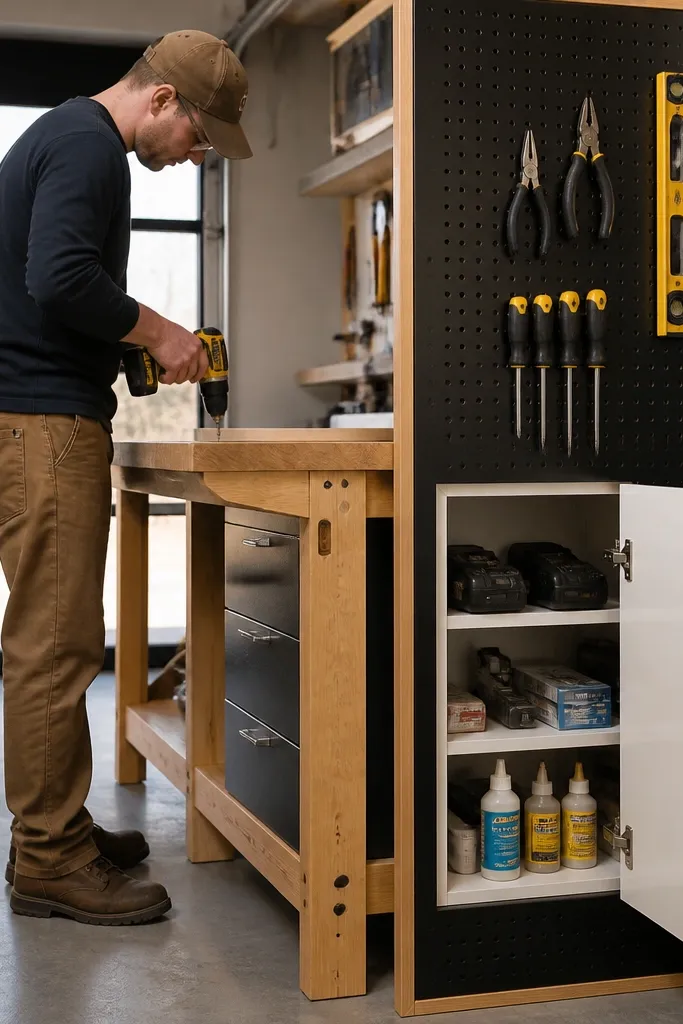
This hybrid setup looks good because it blends open tool display and closed storage in the same vertical panel. Pegboard handles tools you grab daily, while a small cabinet door hides the messy stuff like chargers, extra blades, and adhesive. For small garages, it keeps your workbench surface clear and your wall organized. The visual payoff is a neat “work station” look instead of scattered tools.
Mount a pegboard panel to studs next to the workbench, and keep the pegboard height around 48-60 inches. Build a small cabinet box beneath or beside the pegboard with a door sized to your storage needs. Add internal shelves or a single divider for chargers and consumables. Install magnetic catches or a simple latch, then label what goes in the cabinet so it stays tidy after projects.
Keep the cabinet door hardware finish matching the pegboard hooks for a unified look.
Avoid placing heavy items inside if the cabinet isn’t anchored into studs.
27. Clear-Lid Rolling Bin for Seasonal Car Supplies
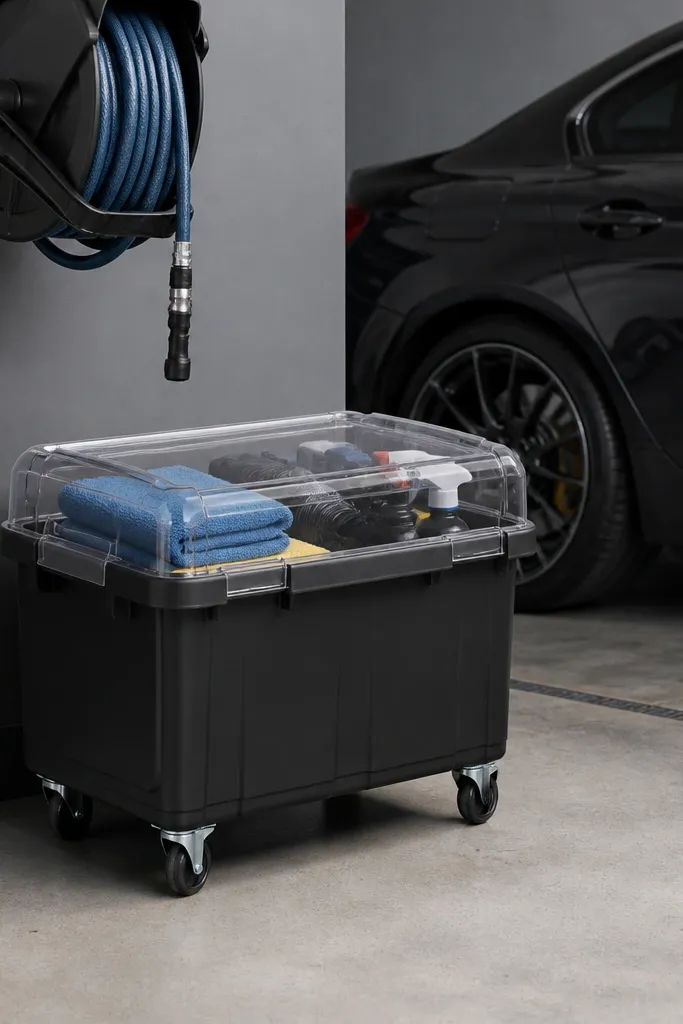
Choose a rolling bin with a lid and at least two internal compartments or add a removable divider insert. Place it on the floor near the car side so you can grab it quickly. Label the lid front with categories like “Winter washer,” “Summer towels,” and “Spare pads.” Keep only car supplies inside and wipe the bin exterior so labels stay readable.
A clear-lid rolling bin looks clean and keeps seasonal car supplies contained until you need them. It’s better than a pile because you can see what’s inside, and it doesn’t take up floor space when you roll it to the side. This is a practical Small-space Garage Organization Ideas option when your garage changes roles — one week it’s car cleaning, the next it’s DIY. The aesthetic is strong because the bin has a consistent front label and a clear lid.
Skip thisDon’t store loose chemicals without secondary containment inside the bin.
Editor's noteUse a marker-resistant label tape on the lid so it doesn’t peel from sun and grime.
28. Corner Shelf With Hidden Trash Can Pull-Out
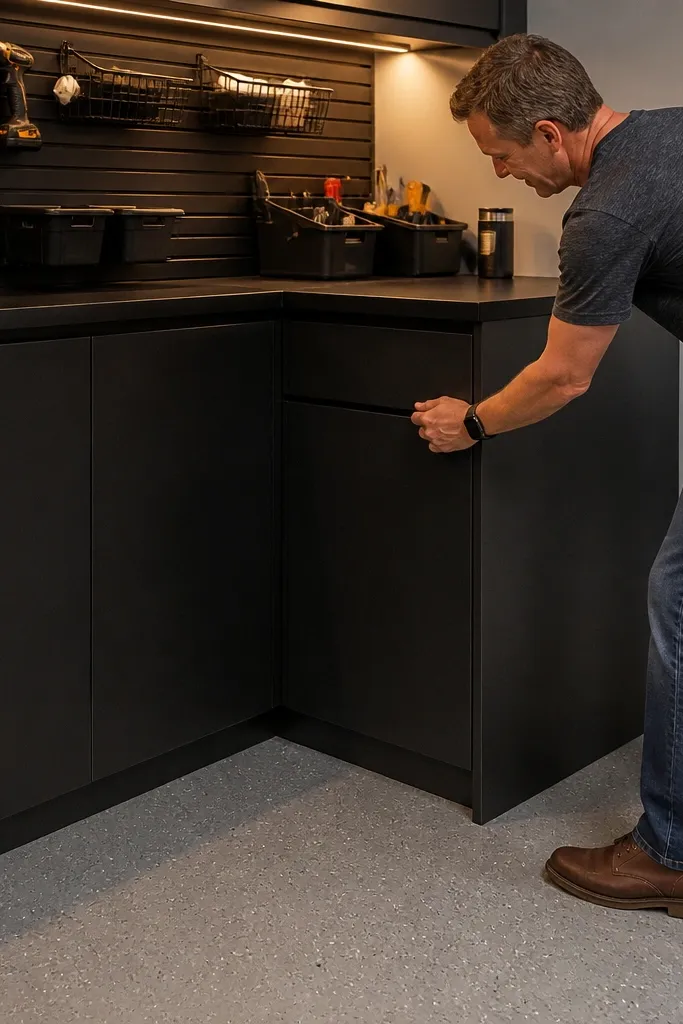
Build a corner shelf unit with a hinged or sliding front panel sized to your trash can. Install a pull-out tray system on the inside, anchored to studs or a sturdy frame. Leave enough clearance so the can pulls out fully without scraping the shelf. Add a small label on the inside panel and keep only one type of waste in that can so it stays consistent.
A corner pull-out makes the garage look cleaner because trash disappears immediately. It’s especially useful in small garages where you can’t spare a floor trash can that blocks movement. The look stays tidy because you see only the shelf face and a clean panel line. This project is ideal when your corner becomes clutter during projects and you want a fast reset.
Skip thisAvoid mounting pull-out hardware to thin plywood without bracing.
Editor's noteUse a soft-close hinge or drawer slide so the panel doesn’t slam and loosen over time.
29. Magnetic Label System for All Bin Faces
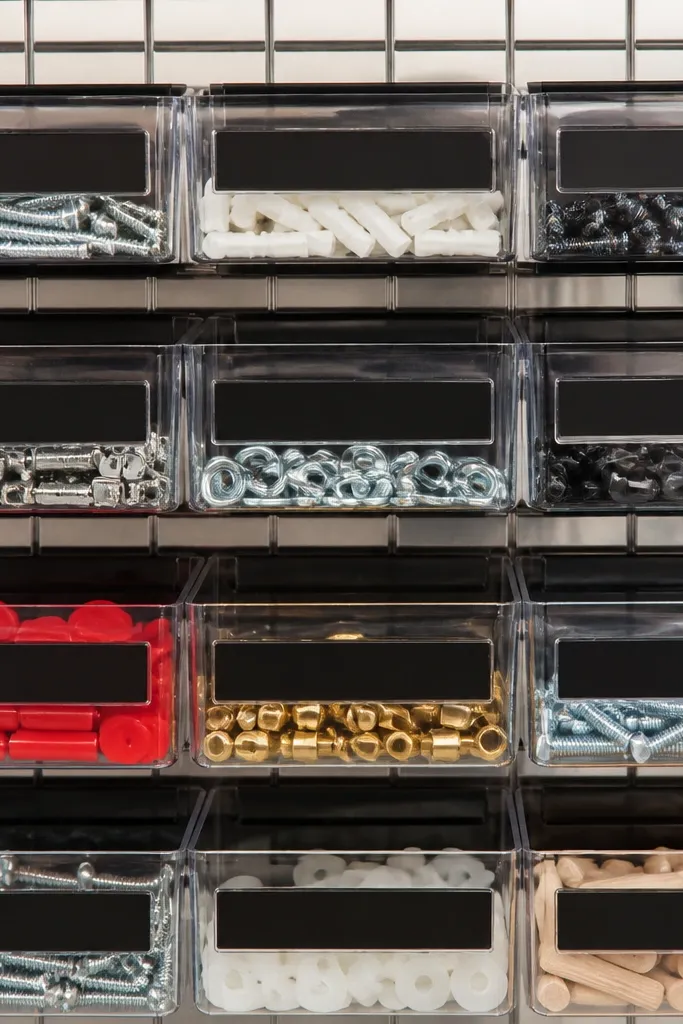
Labels are what make small-space organization stay organized. A magnetic label system looks clean because the label strips are uniform and easy to swap when you change what’s stored. This solves the common problem where taped labels peel, and you end up with blank bins that nobody wants to open. Pair it with clear bins, drawer fronts, or cabinet doors for a consistent look across the whole garage.
Attach a thin metal strip or magnetic-friendly label strip to the front of each bin or drawer face. Create label cards using a label maker or printed cards sealed with clear tape. Keep label text short — item and size only — like “1/4 drill bits” or “Grit 120.” Store extra label cards in a small envelope so you can update quickly after a project.
Use a single font size across all labels so the garage reads as one system.
Avoid long sentences on labels. If it doesn’t fit, you won’t read it.
30. Budget Overhead Peg Rail for Lightweight Storage Bags
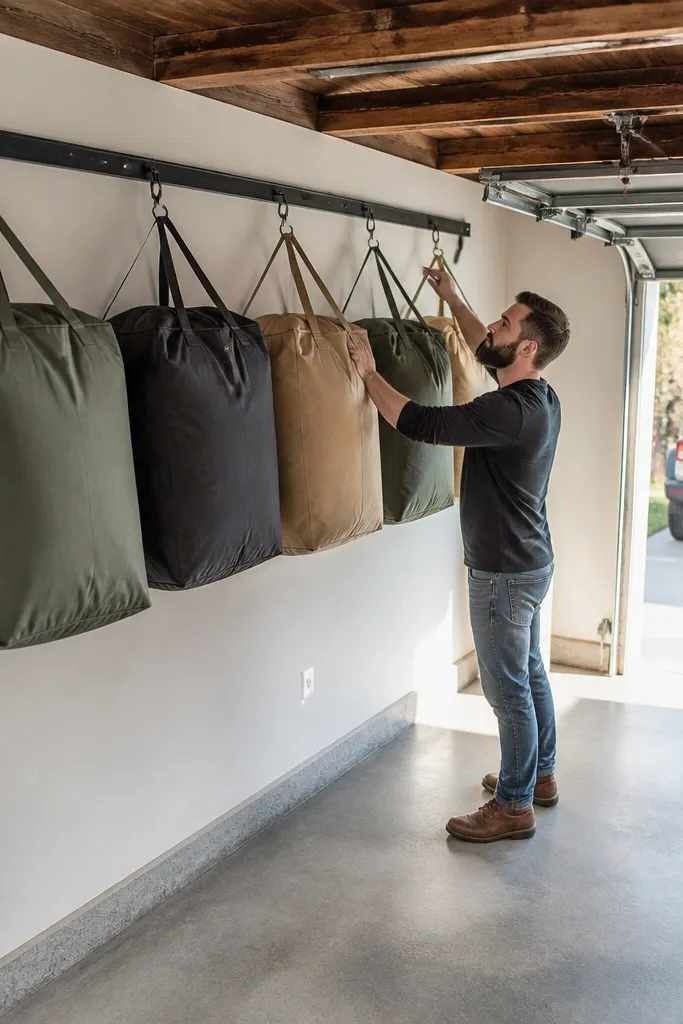
Overhead rails for lightweight bags are a cheap way to add storage without building cabinets. It looks good when bags hang evenly and straps are adjusted so the tops align. This is a smart fit for small-space Garage Organization Ideas because you free up floor space for parking and large tools. Use it for lightweight items like seasonal covers, extra tarps, and camping gear.
Install a horizontal rail to ceiling beams or rated supports, then attach hanging hooks at equal intervals. Use lightweight bins or fabric bags with loops that can clip to the hooks. Adjust strap lengths so the bags hang at the same height and don’t sway into each other. Label each bag with a simple tag and keep only lightweight items up top to avoid sagging.
Add a small zip pocket tag on each bag with inventory so you don’t open everything to check.
Avoid hanging heavy items above your car. Use overhead only for light storage.



