
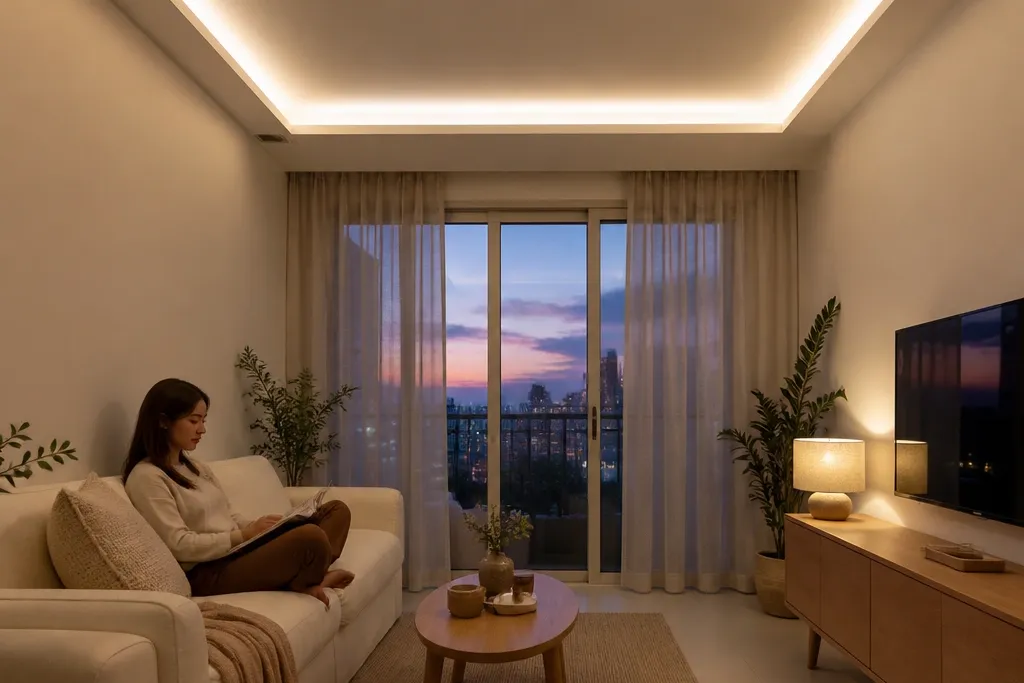
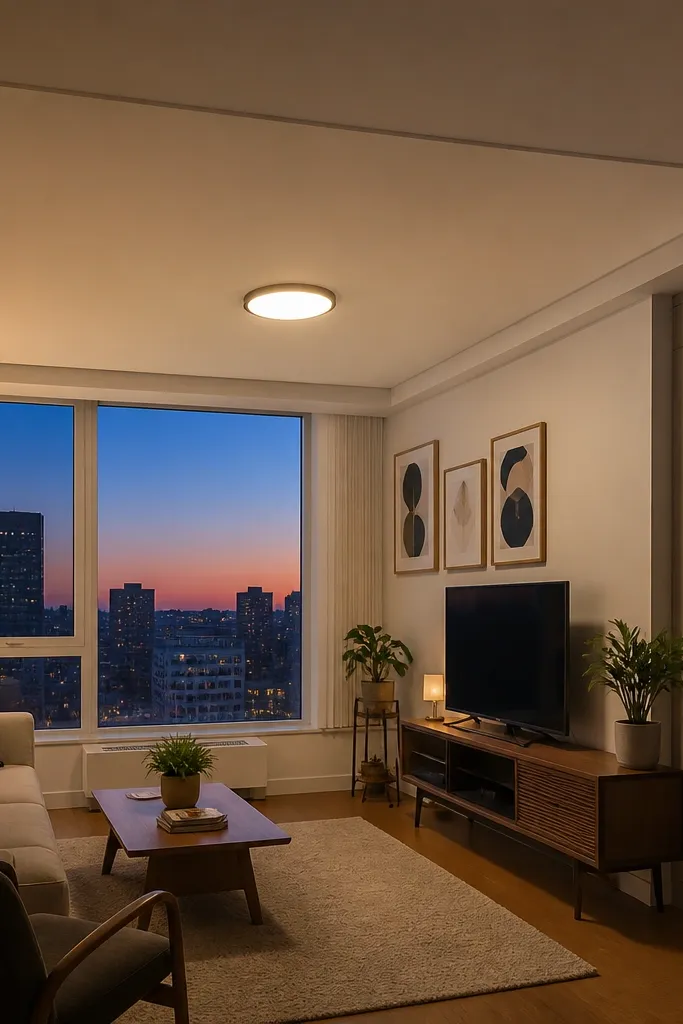
1. Flush perimeter border with hidden LED strip
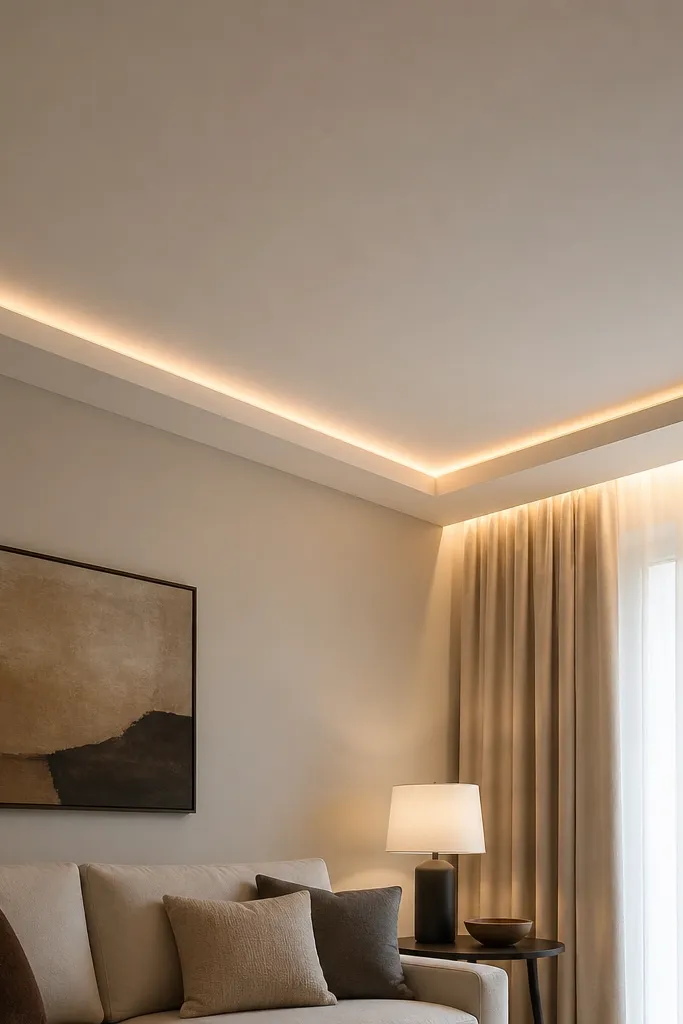
Measure and mark a level line around the walls where the border bottom will sit, then decide your drop (about 2.5-3.5 inches / 6-9 cm). Install ceiling channels first across the ceiling, then fix perimeter channels along your border line. Build a border frame with smaller channel runs, leaving a recess gap for the LED strip diffuser (about 2-3 cm). Finish by jointing, sanding, and painting the whole ceiling; mount the LED strip after paint so you don’t scuff the diffuser.
This is the safest “small-space” design because it adds definition without stealing height. A flush main ceiling stays flat, while a narrow perimeter border creates a frame that makes the room look more finished and wider. The hidden LED strip behind the border gives a soft line of light so the eye reads the ceiling as higher. It’s also budget-friendly: you’re basically building a thin box outline, not a complex stepped pattern.
Skip thisDon’t mount the LED too close to the board edge — you’ll get a harsh hotspot instead of a clean glow.
Editor's noteUse a frosted LED diffuser channel so you get a smooth glow line instead of visible LED dots.
2. Shallow tray ceiling with a centered square frame
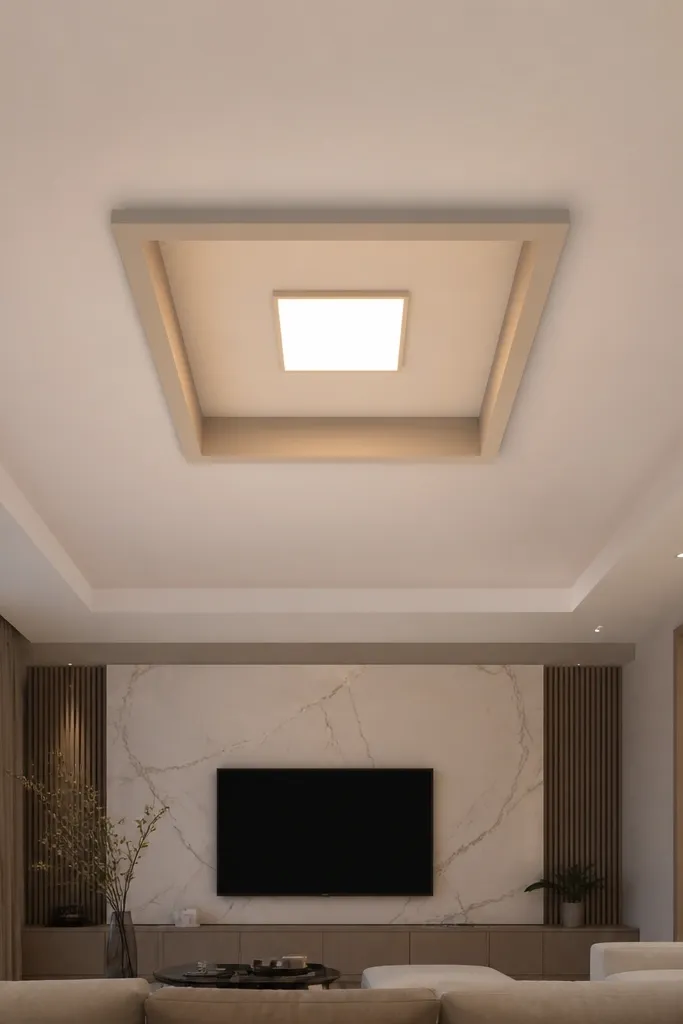
A shallow tray gives you that “designed” look while keeping the ceiling drop modest, which is exactly what a small-space False Ceiling Living Room needs. The centered square frame breaks up the ceiling plane and makes the room feel organized. Add a recessed light or a small LED panel inside the square so the center gets attention without a heavy medallion. This style photographs well because the geometry reads clearly from the seating area.
Pick a tray drop around 3-4 inches (8-10 cm) from the main ceiling plane, and keep the outer tray border narrow (about 6-8 cm). Mark the tray perimeter using a string line for accuracy, then install channels for the outer tray and cross supports for stiffness. Build the inner square frame by fixing smaller channel tracks inside the tray, leaving a recess depth for the light. After framing, board the tray surfaces, joint and sand all seams, then paint; finally install a recessed downlight or a small recessed LED panel in the inner square.
Use a laser level for the tray perimeter marks — even a 5 mm tilt shows up fast in square designs.
Avoid a deep inner frame; it makes the ceiling feel lower than the outer tray drop.
3. Two-step V-shaped border for a wider look
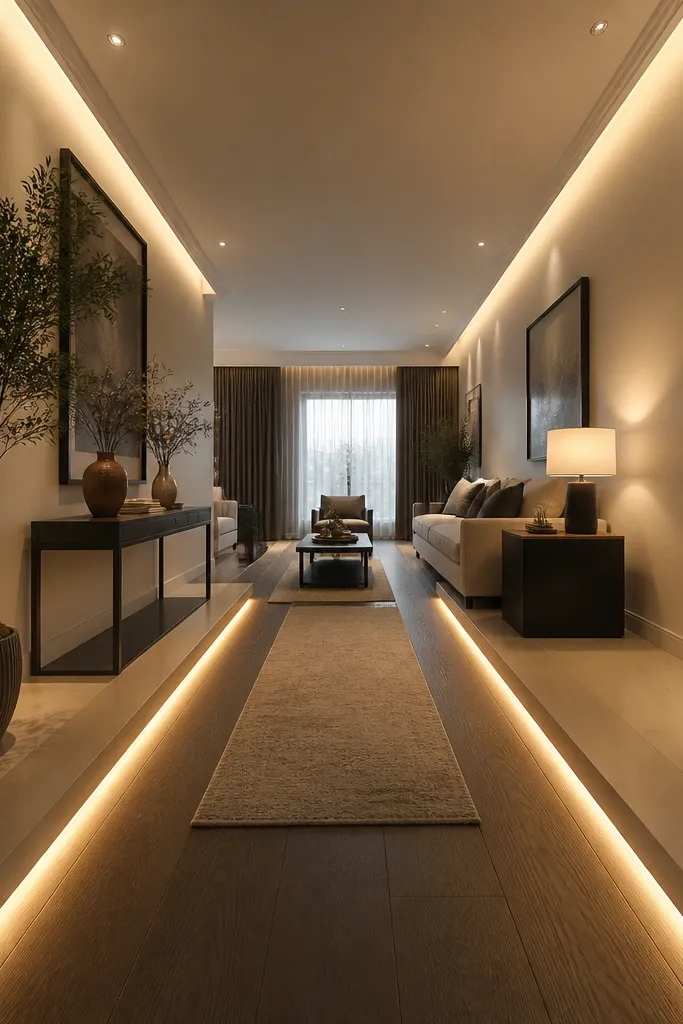
Decide your border width on the long walls first, around 7-10 cm, then draw a V guide that points toward the room center. Install perimeter channels along the walls at the outer drop height, then add extra channel runs to form the second step at a slightly higher or lower level (keep the difference around 1-1.5 cm). Board the two steps, leaving a shallow recess for LED strips along the V edges. Finish with joint compound and sanding, then paint; install LED strips last and test brightness before sealing the diffuser.
If your living room is narrow, the V-shape border helps the eye travel toward the center instead of bouncing off flat walls. The trick is keeping both steps shallow and using clean, straight lines so it looks intentional, not crowded. A light line placed along the V edges makes the geometry pop and creates a mild “depth” effect. This design is simple to build because you’re shaping borders, not carving a full ceiling grid.
Skip thisDon’t place the light line too far from the V board — if the glow doesn’t “catch” the edge, the shape looks flat.
Editor's noteKeep the V angle consistent on both sides; measure from the same reference corner each time.
4. Cove ceiling with a full perimeter glow
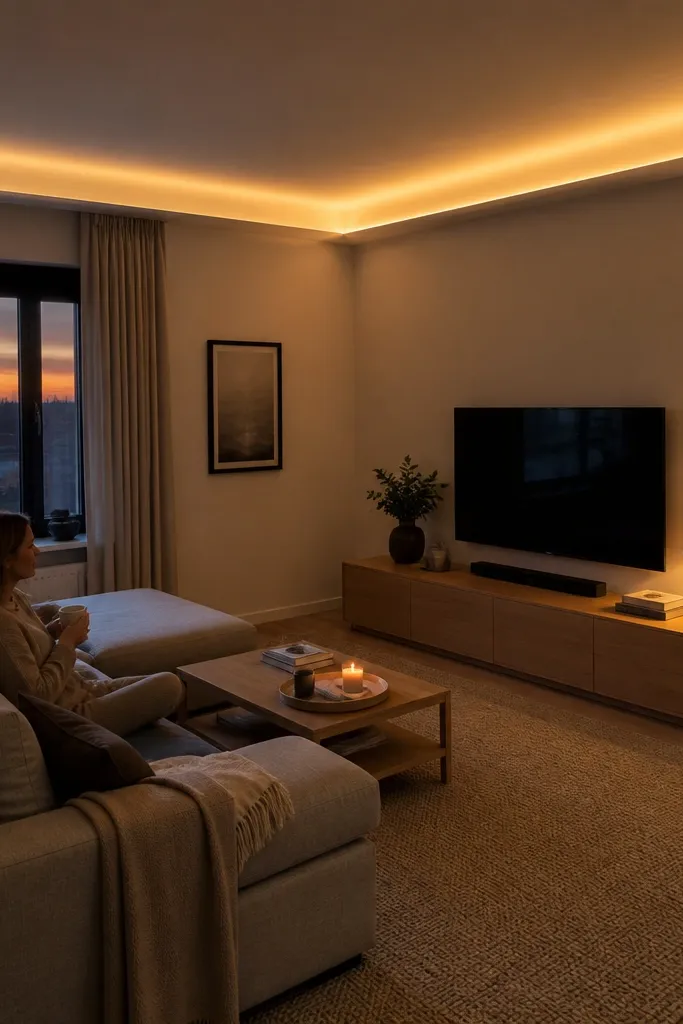
Cove ceilings are made for small spaces because the glow hides the light source and lifts the visual ceiling line. When the perimeter is lit, the room feels calmer and taller, even if your drop is the same. This design also hides minor wall unevenness because the glow reads as a continuous line. It’s a go-to for living rooms where you want cozy, not harsh, lighting.
Mark a perimeter line for the cove inner edge and keep the cove depth shallow, about 3-4 inches (8-10 cm) total drop. Install perimeter channels and hangers, then build the cove frame with angled or stepped supports so the LED sits inside the cove. Fix gypsum board on the cove faces and the main ceiling plane, then joint and sand. Paint the main ceiling and cove surfaces in matte/eggshell; install a frosted LED strip in the cove, and wire it to a dimmer if you want mood control.
Use neutral warm light around 2700K-3000K so the glow feels soft on walls.
Don’t use glossy paint on the cove — it reflects LED glare and looks cheap.
5. Center panel with four corner downlights
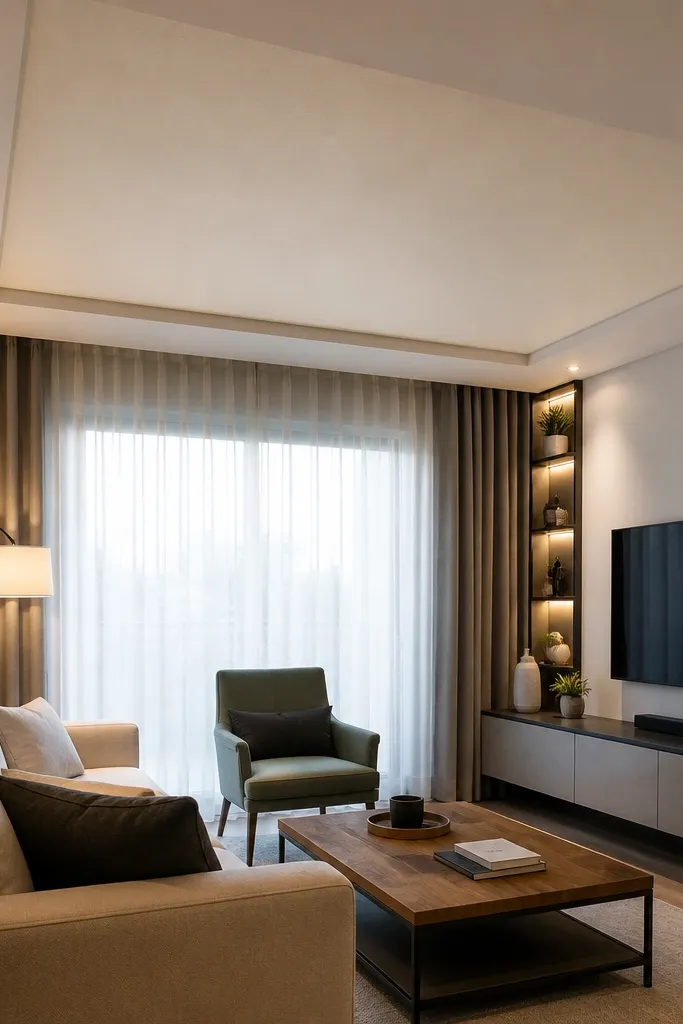
This is a clean layout when you want even lighting without building a big stepped ceiling. The central panel gives the design a focal point, while corner downlights spread light across the room so corners don’t look dark. It’s photogenic because the ceiling reads organized from the sofa — you see one calm center and four balanced light points. It’s also friendly for DIY because the structure is basically a simple frame plus a panel.
Choose a central panel size about 60-70% of the room’s width, leaving at least 60-80 cm margin around it for the border channel. Install ceiling channels across the span, then frame the central panel with channels and hangers for stiffness. Board the panel and the main ceiling; cut openings for four downlights at near-corner positions, keeping equal distances from each wall. Joint, sand, paint, then install downlights and test for alignment before final finishing.
Use a template cut for downlights so all four holes look identical.
Don’t place downlights too close to the border — you’ll see uneven shadowing on the panel edges.
6. Grid ceiling with thin channels and warm LED lines
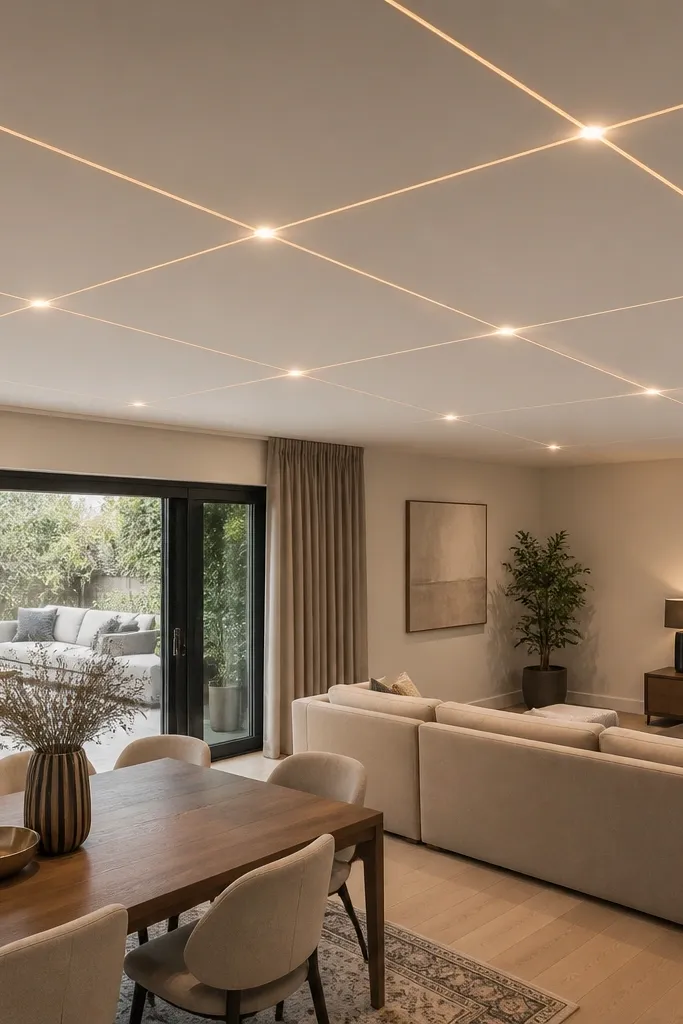
A thin grid can make a small-space ceiling feel more “designed” without huge drops, especially when the lines glow gently. The look is modern and structured, and the light at intersections creates a subtle sparkle effect. Keep the grid spacing consistent so it looks intentional and not like a dropped tile ceiling. This works best when your ceiling height is close to the average and you can keep the drop around 2.5-3.5 inches (6-9 cm).
Plan your grid spacing first — 30-45 cm spacing reads clean at living-room distances. Install a stable metal frame with main channels across the room, then add thinner channel runs for the grid lines at your marked spacing. Board the main ceiling surface at flush height, then fix narrow trims or board strips to form the grid ribs. Add LED strips into the grid channels, using a diffuser so the lines stay soft; joint and paint carefully around the grid ribs.
Dry-fit a few ribs before boarding to confirm the spacing reads straight from the sofa.
Avoid thick ribs — they look heavy and reduce the “light” feel of a grid.
7. Long rectangle runner with LED edge lighting
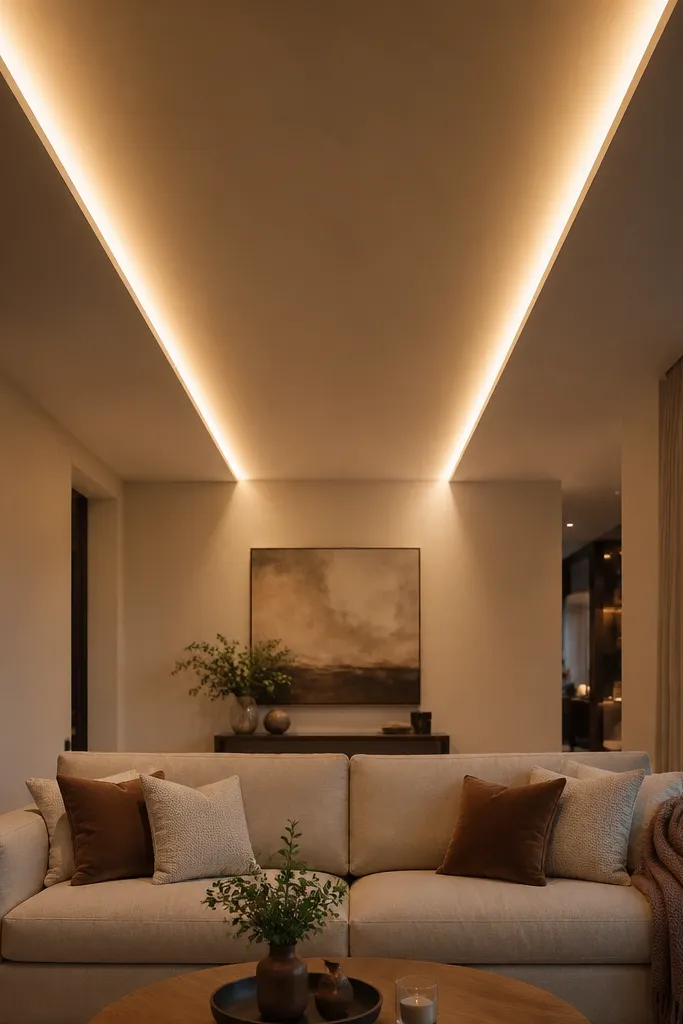
Pick runner dimensions that match seating layout: about 70-80% of the room’s length and 35-45% of its width. Mark the runner outline on the ceiling and keep the drop shallow, around 3 inches (8 cm). Install channels for the runner perimeter first, then add cross supports so the runner board doesn’t flex. Board the runner top and sides, leaving a thin recess for a diffuser on the LED edges; paint, then install LED strips and diffuser covers.
This is the best trick for living rooms where the sofa faces one short wall. A long rectangle runner pulls the eye along the room length and makes the ceiling feel stretched and taller. Edge lighting along the runner’s sides gives a crisp, architectural look without needing multiple steps. It also hides wiring neatly because you can run LED leads along the ceiling channels.
Skip thisDon’t center the runner blindly if your sofa is off-center; align it to the main seating focal wall.
Editor's noteChoose a matte diffuser — it keeps the runner edges clean and avoids LED glare in photos.
8. Asymmetrical half-tray for a modern small living room
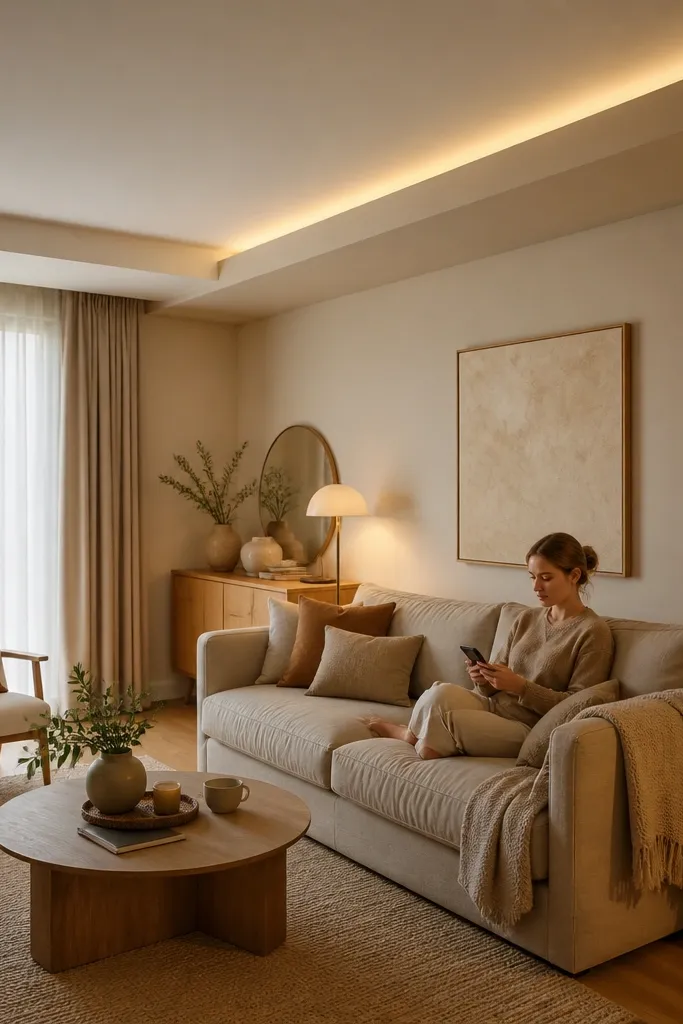
Asymmetry looks expensive and makes small spaces feel less boxy because the ceiling doesn’t mirror the room shape. One side can be slightly deeper, while the other stays flush, so the ceiling creates a diagonal visual rhythm. Place the deeper tray above the seating zone and keep the glow softer on the shallower side. This design works when you want modern lines and you’re okay with a layout that’s not perfectly symmetrical.
Mark a main ceiling reference level, then decide where the deeper tray sits (usually above the sofa). Keep the deeper drop around 4 inches (10 cm) and the shallower side around 2.5-3 inches (6-8 cm). Build framing for both levels using channels and hangers, then board the tray surfaces and the main plane. Add LED strips along the tray step line with a diffuser so the glow follows the diagonal edge; joint, sand, paint, and install lighting last.
Use a single straight edge line for the asymmetry — curves are harder to level and can look wobbly.
Avoid mixing too many shapes; one asymmetrical tray line looks cleaner than multiple competing details.
9. Round corner border with a small square insert
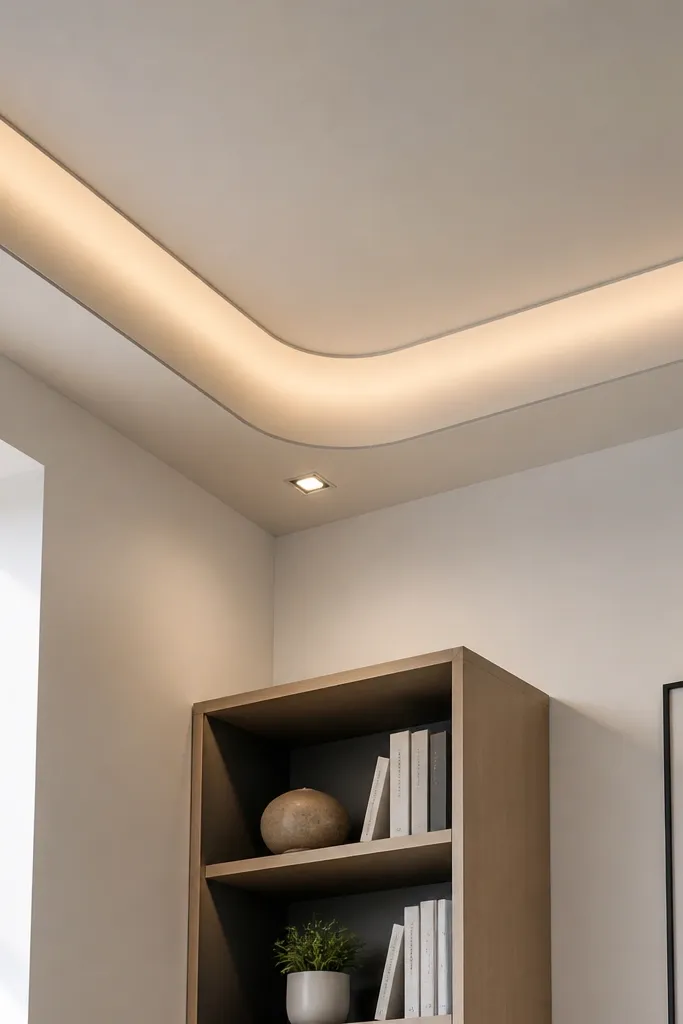
Start by drawing your border path on paper: rounded corners with a consistent radius (around 30-45 cm). Mark the border level drop around 3 inches (8 cm) from the ceiling, then install perimeter channels following the rounded layout. Build a small square insert inside the border, leaving even spacing on all sides (around 60-80 cm depending on room size). Board everything, joint and sand smooth, then cut and install the recessed light in the square insert.
This design softens sharp room corners using a rounded border, which makes a small living room feel less harsh. The rounded border still reads structured, and the small square insert keeps the look grounded. Add a single recessed light or a small LED panel in the insert for a neat focal point. It’s a good choice if your room has a lot of straight furniture lines and you want the ceiling to counterbalance them.
Skip thisDon’t make the insert too large; a big square medallion drops the ceiling visually.
Editor's noteUse bendable channel or pre-cut relief cuts to create consistent curves without kinks.
10. Bookmatched strip ceiling with alternating recessed strips
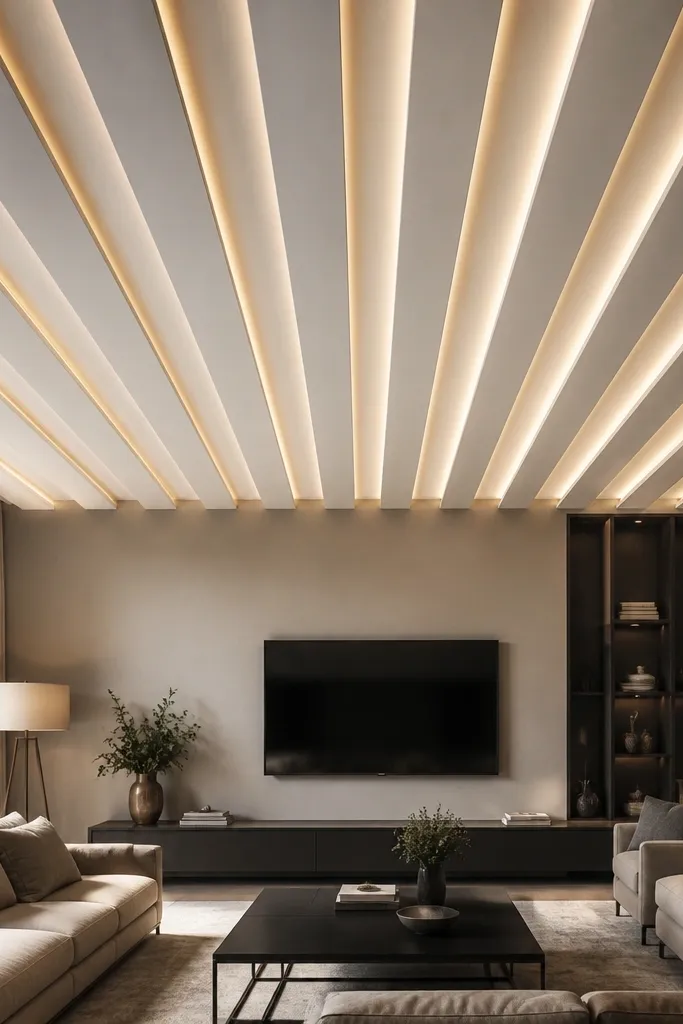
Alternating recessed strips create a high-end look because the shadows do the design work. Instead of a big step, you get rhythm across the ceiling plane, which makes the room feel layered. This is the kind of false ceiling that looks great in side lighting because the strips cast clean, even shadows. Keep it simple with straight strips — you get the texture effect without complicated curves.
Choose strip widths around 8-12 cm and spacing around 6-10 cm, then mark a grid of strip lines across the ceiling. Install main ceiling channels first, then add channel supports for the recessed strips so each strip recess stays the same depth (about 2-3 cm recess difference). Board the main plane flush, then board the recessed strips with tight joints. Add warm LED backlighting along the recess gaps so you get shadow + glow, then paint the whole surface in matte white.
Use the same paint batch for the entire ceiling to keep the white tone consistent in photos.
Avoid uneven strip depth — it turns the pattern from “designed” into “wavy ceiling.”
11. Geometric hexagon accents on a flat ceiling
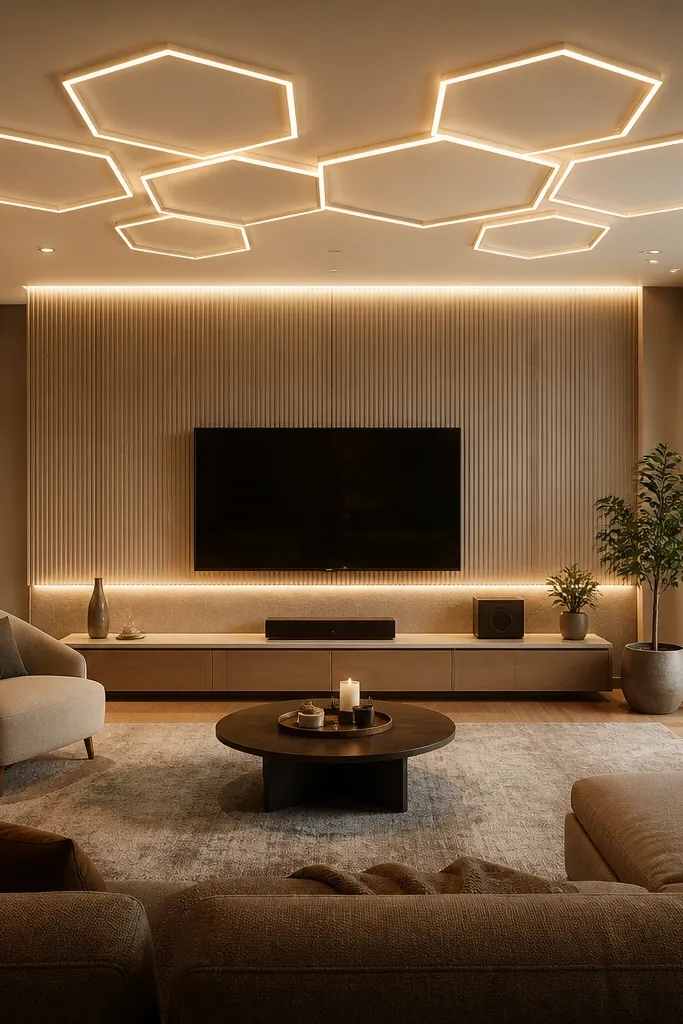
Plan your accent size first — use hexagon frames about 40-60 cm across, with 2-4 hexagons total depending on room size. Install a flush ceiling plane using channels and hangers, then board and finish the base. Build hexagon frames with smaller channel tracks, then board the frames and cut openings for small recessed LED spots or a small LED strip inside each hexagon. Paint the base and frames together, then install the LED modules and test brightness.
If you want a modern aesthetic without lowering the whole ceiling, keep the base flush and add geometric accents. Hexagon accents look stylish and are easier than full stepped layouts because you only build small frames on top of a flat plane. Place them in a cluster above the TV wall or seating area so the ceiling becomes the focal point. This is perfect for a small-space False Ceiling Living Room where every inch counts.
Skip thisDon’t cover the entire ceiling with hexagons; small rooms need negative space to feel airy.
Editor's noteUse frosted LED modules inside the hexagons so the light stays soft and doesn’t glare.
12. L-shaped border around TV wall with micro-cove
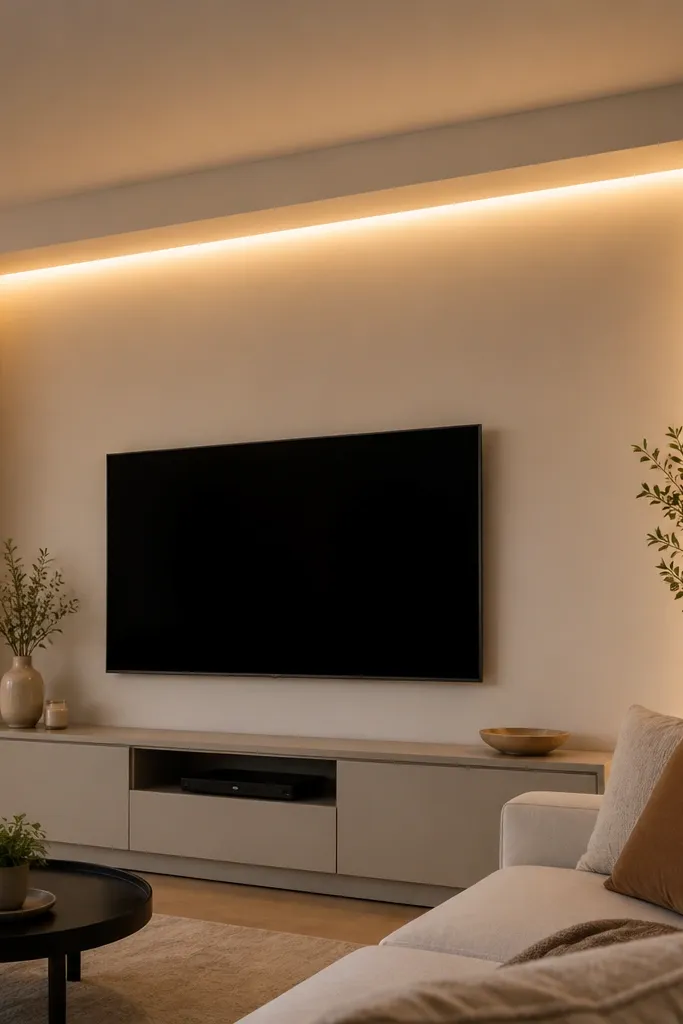
This is a smart design for living rooms where the TV wall is the main visual anchor. An L-shaped border frames the TV area and makes the ceiling look intentional without dropping across the whole room. The micro-cove glow line adds depth and makes the TV wall feel “built-in” rather than floating. It’s also easy to keep the drop minimal because you’re only detailing one side and the back wall line.
Measure the TV wall width and decide your border run along it, usually leaving 10-15 cm spacing from wall edges. Mark an L-shaped perimeter line and keep the border drop around 2.5-3 inches (6-8 cm). Install perimeter channels along the two runs, then add corner supports so the L joint is stiff. Board the border and include a small recess for a diffuser strip; finish with jointing and sanding, then paint. Install the LED strip after paint and aim it so it washes the wall slightly, not the room ceiling.
Use a dimmer — TV rooms look better when ceiling brightness drops in the evening.
Avoid pointing the LED straight into the room; you want wall wash, not direct glare.
13. Dual-tone ceiling with a thin shadow gap
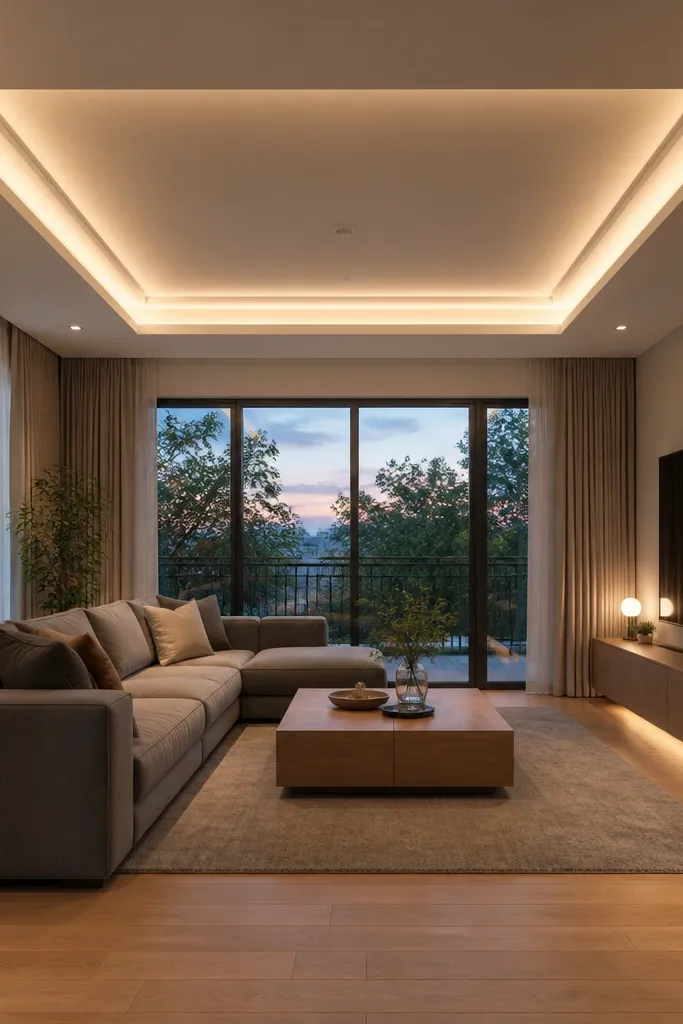
Pick two paint tones that are close, not contrasting. Example: pure white (base) and warm off-white (inner tray/border) so the room stays bright. Build the ceiling design with a shallow tray or border and leave a thin gap between the two planes (about 6-8 mm) using board thickness and spacer strips during framing. Joint and sand the base plane, then paint base first, mask the border tone edges, and paint the inner tone. After drying, remove masking and confirm the shadow gap line is clean; install recessed lights afterward so you don’t trap paint around fixtures.
Two-tone false ceilings look high-end because the separation line creates depth even when the drop is small. Use a white base and a slightly different tone for the border or tray insert, like warm off-white on the inner panel and pure white on the outer plane. The slim shadow gap between the tones makes the edges look crisp and intentional. This works well in small-space False Ceiling Living Room setups because it adds visual structure without heavy steps.
Skip thisDon’t choose a strong contrast color pair; small rooms feel smaller when the ceiling has loud blocks.
Editor's noteMask with sharp painter’s tape and press edges firmly — the shadow line shows every smear.
14. Cornice-style ceiling with vertical panel lines
Mark the perimeter border at about 3 inches (8 cm) drop, then build the cornice frame with channels and hangers. Board the main plane, then plan vertical ribs inside the border with spacing around 20-30 cm depending on room width. Install rib supports using smaller channel tracks, board the ribs, and keep their thickness consistent (about 2-4 cm). Cut downlight openings or add recessed spots along the border line so the light hits the ribs at a slight angle. Joint, sand, paint all surfaces, then install lights and check shadow direction.
This design uses vertical panel lines to pull the eye upward, which is the main job in a small-space False Ceiling Living Room. A simple cornice border around the perimeter frames the ceiling, then thin vertical ribs inside the border create height illusion. Keep the ribs narrow and evenly spaced; the goal is a clean rhythm, not a heavy pattern. It looks especially good when you use warm downlights that create gentle shadows along the ribs.
Skip thisAvoid thick ribs — they look heavy and make the ceiling drop feel bigger.
Editor's noteUse downlights with adjustable aim so you can fine-tune shadows without rebuilding anything.
15. Ceiling fan medallion ring with slim LED ring
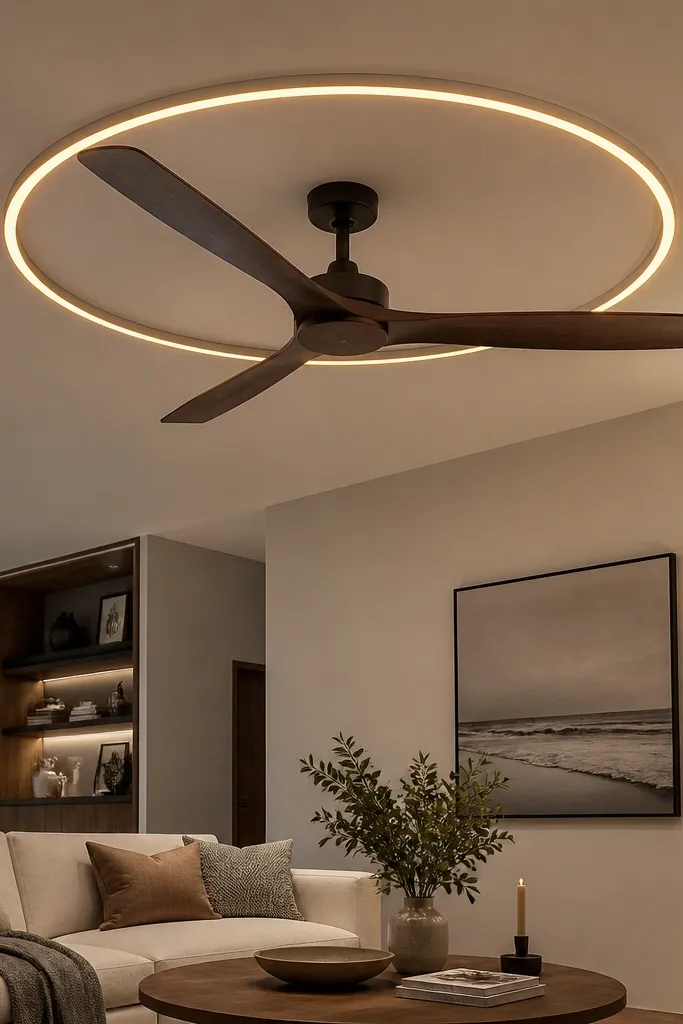
If your living room has a ceiling fan, you can turn the center hardware into a design feature instead of a distraction. A medallion ring around the fan opening creates a tidy focal point and gives you a controlled light source. Keep it slim and centered so it doesn’t feel like a heavy chandelier base. This design works for small-space False Ceiling Living Room setups because it focuses attention where people already look — the center — without adding extra steps everywhere.
Measure your fan canopy size and decide the outer ring diameter, usually adding about 10-15 cm clearance all around. Frame a circular ring using channel segments cut and bent to match the circle, then board the ring and the main ceiling plane flush. Cut the fan opening and install the fan support correctly before finishing, so you don’t regret wiring placement later. Add a shallow recess for a slim LED ring or a small LED strip behind a diffuser ring. Joint and sand around the ring, paint, then install the LED and test fan + light together.
Use a diffuser ring that hides the LED edge — the fan area looks cleaner in photos.
Don’t block fan airflow with a tall ring; keep the ring height minimal so cooling stays normal.



