
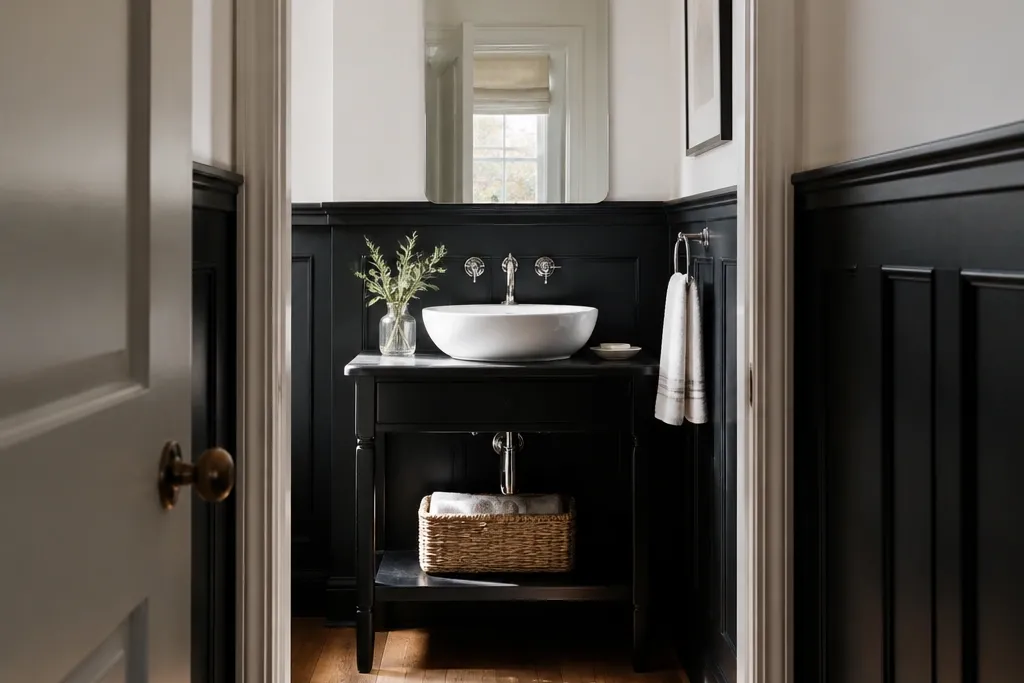
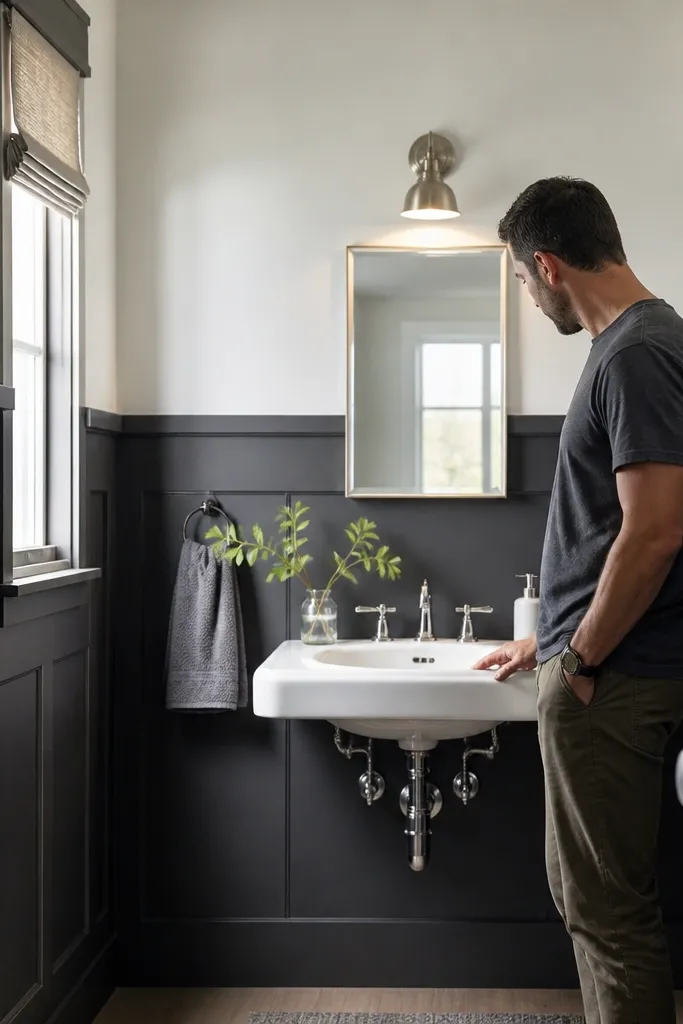
1. Charcoal board-and-batten wainscoting with a single chair rail
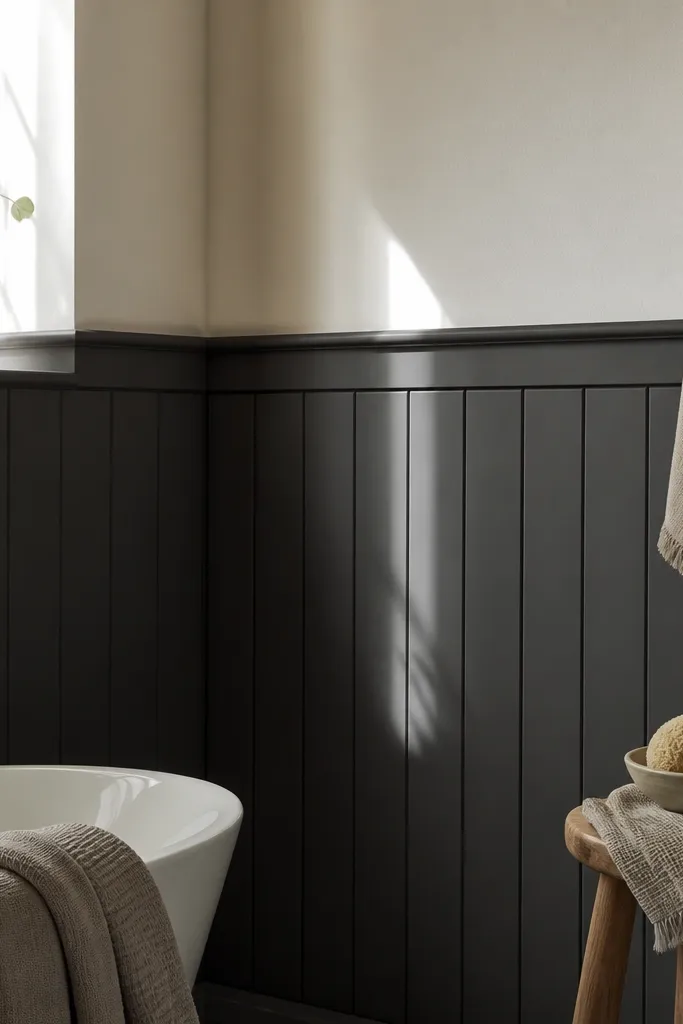
This is the easiest “depth” look because vertical lines pull the eye up while the dark lower half anchors the room. The chair rail keeps the transition clean, so the dark paint feels intentional instead of like a stain line. Use narrow boards (about 1.5 inches wide) spaced with consistent gaps so the pattern reads crisp, even in small bathrooms. Finish it in charcoal matte and paint the upper wall a warm off-white to keep the contrast flattering under vanity lighting. The result photographs like built-in trim because the pattern is regular and the stop line is sharp.
Editor's notePre-prime MDF and sand once before the first coat — it prevents fuzzy edges from showing through dark paint.
Start by marking the chair rail height at 40 inches from the floor and snapping a level line around the room. Install the rail first using a moisture-resistant primer on the wood/MDF and screws into studs where you can, then shim for level. Cut vertical boards to run from the rail down to about 18-20 inches above the floor, leaving a small gap for baseboard overlap. Glue and nail the boards, then install a simple lower rail cap if you want a finished edge. Caulk the seams with a paintable acrylic latex caulk, sand lightly after it cures, then paint the wainscoting charcoal and the upper wall in your chosen off-white.
Skip thisDon’t eyeball the gaps; measure the gap width and repeat it with spacers.
2. Black paneled wainscoting with 4x4 square grid
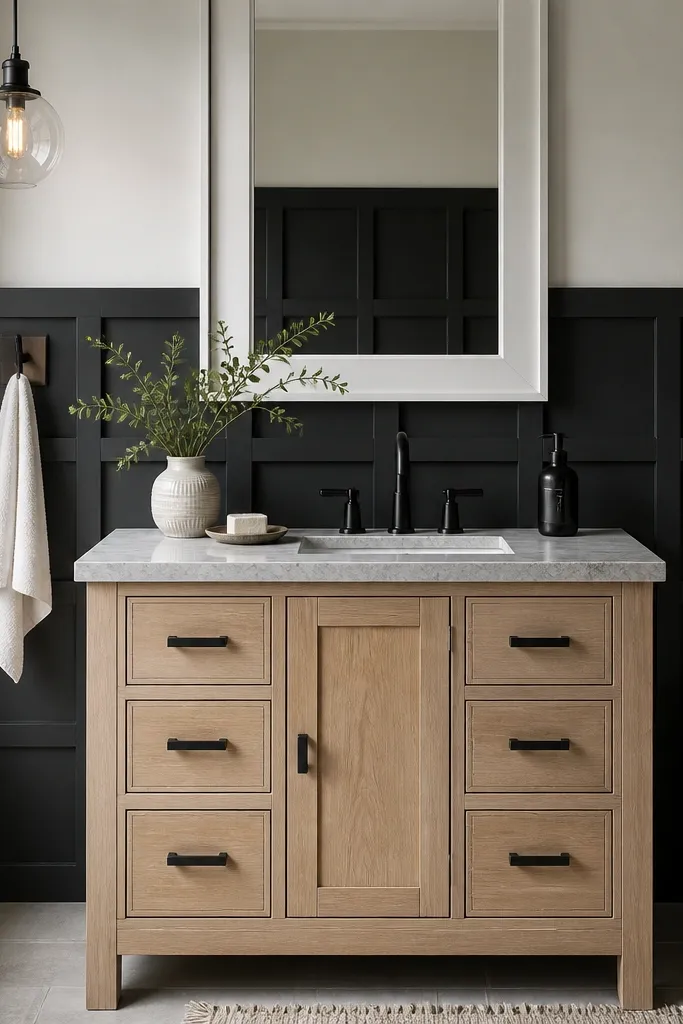
A square grid is the most “architectural” way to add depth in a tiny bathroom because it creates repeated geometry. Black matte on the lower wall makes the individual squares look like shadow boxes, especially when the upper wall is a creamy white. Keep the square size around 10-12 inches so the panels feel proportional to a small height like 36-42 inches. Add a thin top rail and a matching bottom rail to frame the grid cleanly. This look is bold but controlled — it reads polished even when the room is only a few feet wide.
Editor's noteUse a scrap spacer template for your panel gaps so every square stays identical around corners.
Choose a total wainscot height of 42 inches and install a top rail along that line with a level. Build the square grid using stiles (verticals) and rails (horizontals) so each opening is the same size; for example, a 42-inch height minus top/bottom trim thickness gives you the panel opening height to divide evenly. Dry-fit a full section on the floor or workbench to confirm your square dimensions before cutting into the room. Install the grid pieces, then cut panel inserts (MDF panels or thin plywood) to sit flush inside the openings. Fill nail holes, caulk every seam, sand, then paint the panels and trim in a single black matte system.
Skip thisDon’t mix panel sizes to “make it fit” — the asymmetry reads messy in small rooms.
3. Deep espresso wainscoting with vertical plank panels
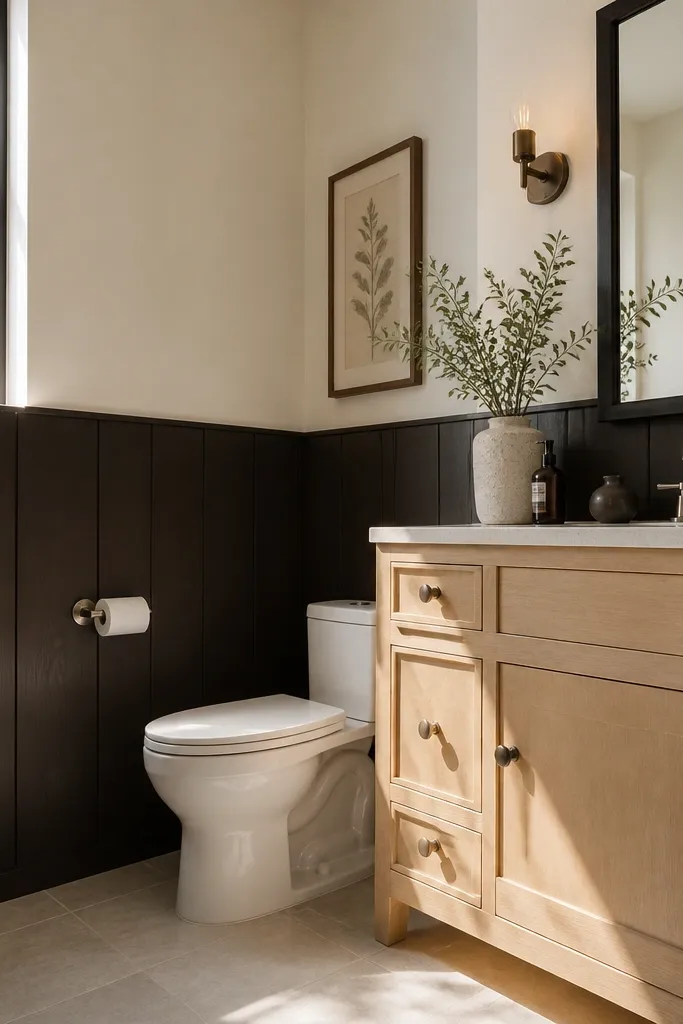
If you want dark depth without the “busy” look of lots of small panels, vertical planks are the move. Espresso-brown reads warmer than black, which helps bathrooms feel less harsh and more inviting. The vertical pattern adds height, and the dark lower portion keeps the room grounded. This is also easier to build neatly because you’re repeating long straight runs rather than tight grids. Pair it with a light upper wall and a simple chair rail so the planks look like a purposeful built-in wall treatment.
Mark your chair rail at 38-40 inches and install it level around the room. Lay out vertical planks with a consistent width (about 2 to 3 inches) and consistent gaps, starting from the least-visible corner so cuts land where they look best. Cut planks to the same height and install them using construction adhesive plus nails into studs or blocking. Add a bottom cap rail if your bottom edge would otherwise show raw ends. Prime all surfaces, then paint the planks and rails in deep espresso matte while painting the upper wall separately for a crisp stop line.
Plan your layout so a full plank lands near the center of the main wall — it makes the whole look feel intentional.
Skip glossy paint on the dark — it highlights wall texture and patch work.
4. Inky navy wainscoting with white crown molding at the top
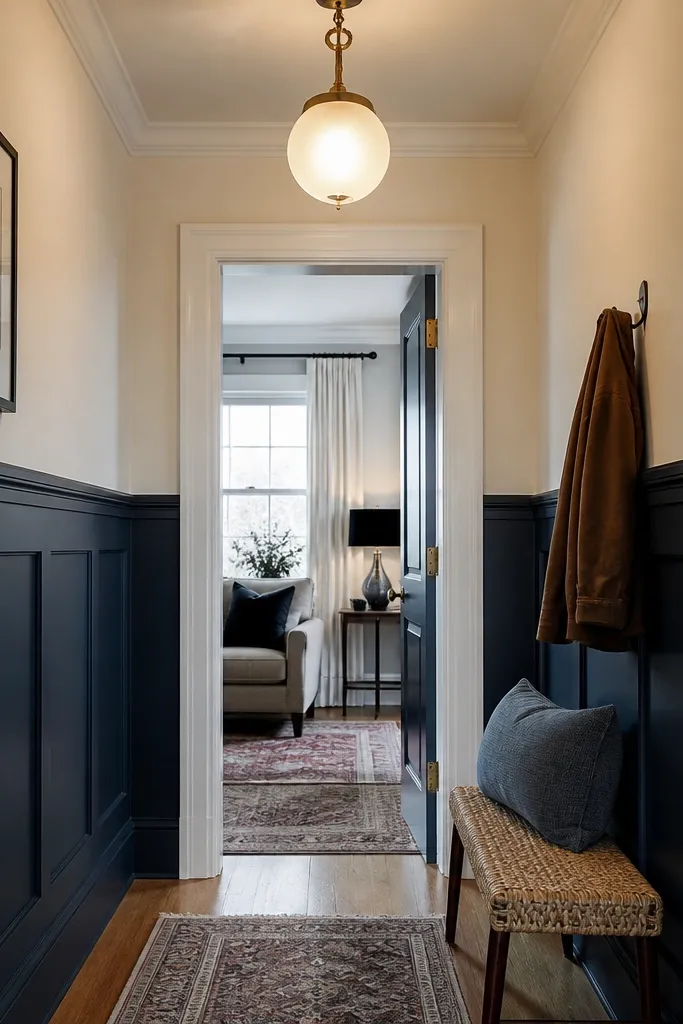
Navy gives you depth without the starkness of black, and it still reads dark in bathroom lighting. The trick is the top crown molding — it creates a clean architectural “cap” that makes the lower section look finished and built-in. Use navy matte for the wainscot and keep the crown molding crisp white so the transition line pops. This combo looks especially good in small bathrooms with a window or bright vanity light because the white top trim catches highlights. It’s a high-contrast look, but the crown keeps it classy rather than heavy.
Pick a wainscot height of about 36-40 inches so the crown sits high enough to feel airy but stays in the depth zone. Install a chair rail or top rail first, then add the crown molding on top of it — keep the molding profile consistent across the room. Cut and install the wainscot panels (you can use simple rectangles or flat board sections) below the top molding. Prime and paint the navy first, then paint the crown molding white after masking to protect sharp edges. Caulk all seams, then lightly sand any caulk ridges before final paint to keep lines crisp.
Mask with painter’s tape set back 1/8 inch from the trim edge so you get a cleaner paint line without bleed.
Don’t attach crown molding directly to uneven drywall — shim and level first or the top line will wobble.
5. Black wainscoting with beadboard panels and a thick lower rail
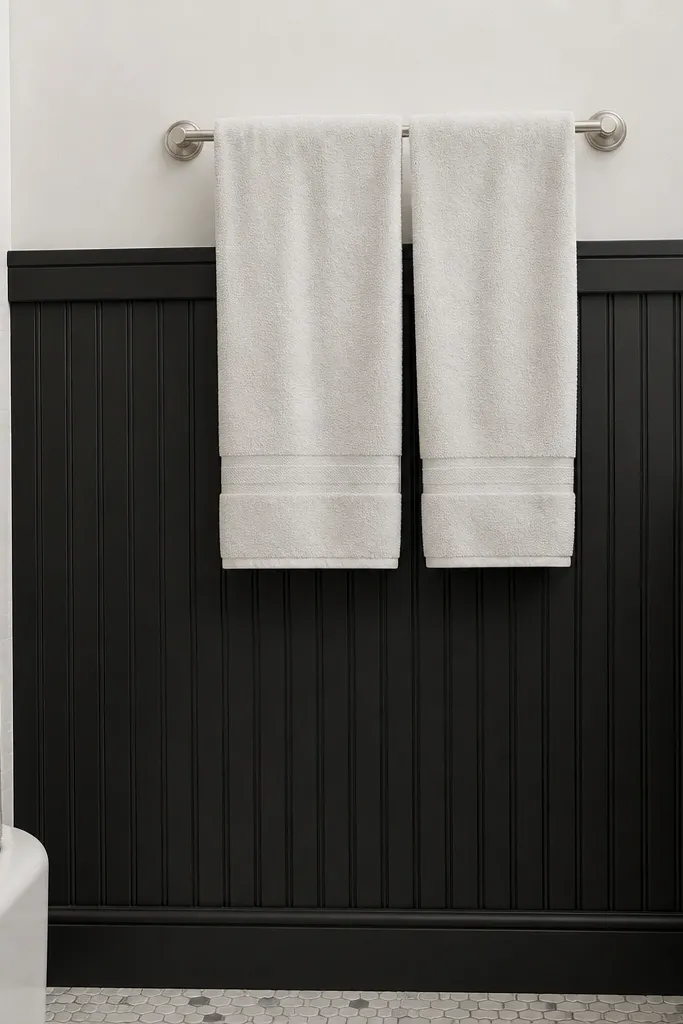
Beadboard adds a subtle texture that looks great in small bathrooms because it catches light in tiny shadows. When you paint beadboard black matte, the grooves create depth without needing a complicated grid. A thick lower rail makes the transition feel substantial and gives the wall a stronger “base” visually. Keep the beadboard panel height around 18-24 inches below the chair rail so it reads balanced, not overpowering. This is a great choice when you want dark depth but also want softness and texture rather than flat panels.
Install a chair rail at 40 inches and a thick lower rail or base cap around 10-12 inches above the floor, leaving room for your baseboard. Cut beadboard panels to fit between rails; for a clean look, run beadboard vertically or horizontally consistently across the room. Nail or staple the beadboard to studs or solid backing, then fill nail holes and caulk the edges. Prime everything with a bathroom-rated bonding primer, then paint beadboard and rails in black matte. Let the first coat dry fully and do a second coat for even coverage — dark paint can show streaks on beadboard if you rush.
Use caulk on the seams, not spackle — caulk stays cleaner and resists cracking with seasonal humidity changes.
Don’t leave raw bead edges — seal them with primer so the black looks even.
6. Dark walnut wainscoting stained panels with painted rails
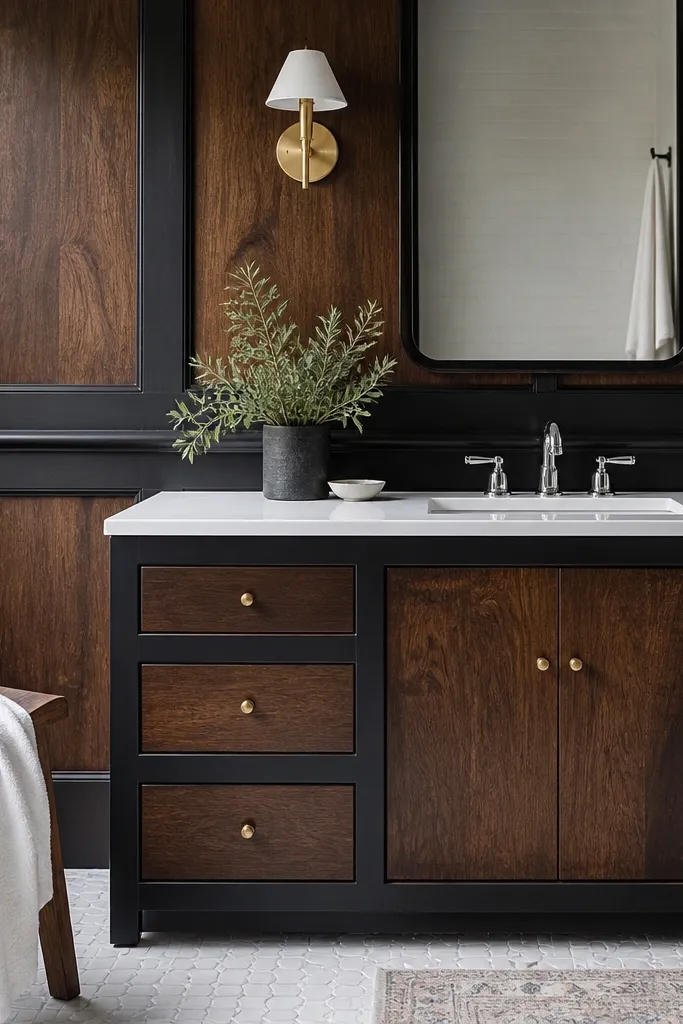
Stain gives you depth by showing wood tone, and dark walnut is a strong choice for small bathrooms because it reads rich without looking black-flat. The key is mixing stained panels with painted rails: paint the rails and chair rail in near-black so the geometry is crisp, then stain the panel faces for warmth. This looks especially good when the bathroom has warm lighting or a wood vanity. It also photographs well because the grain catches light while the trim stays solid and shadowed. If you want “depth” that isn’t purely paint, this is a strong option.
Editor's noteDo a test stain on a scrap panel — walnut can go almost black depending on the base material.
Choose moisture-resistant plywood or MDF for panels, then seal before staining to prevent blotching. Install rails and stiles in your near-black paint system first, then cut panel inserts to fit inside the openings. Stain the panel faces with a dark walnut stain, wipe to your preferred depth, and let them dry fully before topcoating. Use a clear water-resistant topcoat (matte or satin) on the stained panels, then paint the rails and chair rail in near-black. Caulk all seams after the stain/topcoat cures, then touch up paint so the stop line stays sharp.
Skip thisDon’t skip sealing — unsealed panels blot and look patchy once you install them.
7. Matte black wainscoting with floating shelves as panel tops
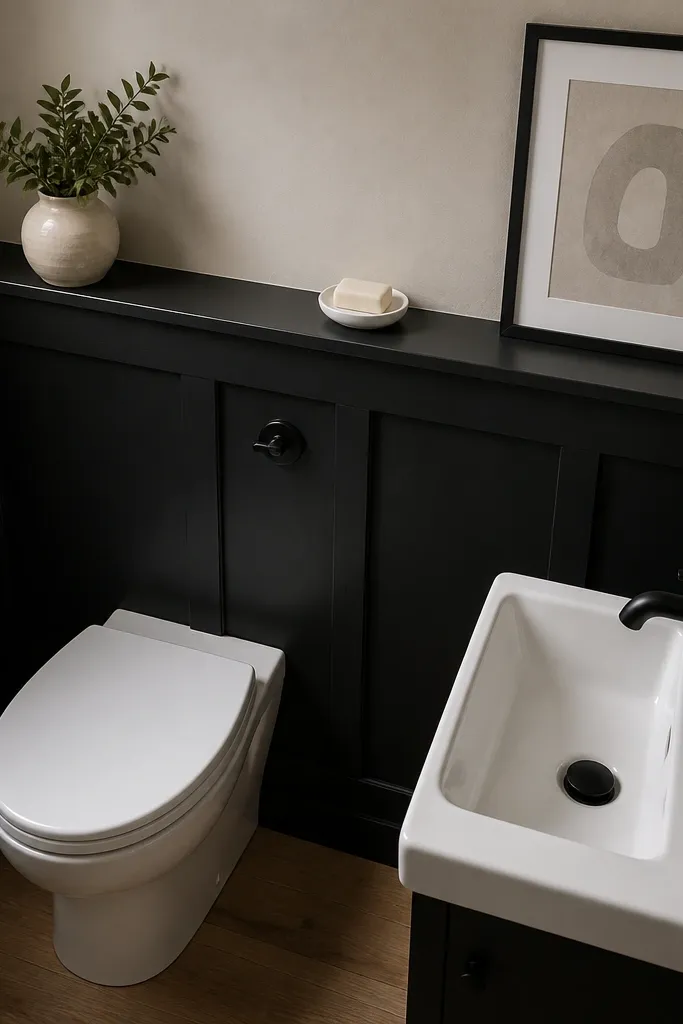
This one adds depth and function. A thin “shelf line” above the wainscot creates a horizontal reference that makes the dark lower wall feel like part of the room’s structure. Keep the shelf and trim matte black for a monochrome look, then paint the upper wall a lighter neutral. The shelf line also creates a place for small decor — a candle or soap dish — without adding more visual clutter. In small bathrooms, that extra ledge detail makes the wall look intentional rather than flat.
Decide on a wainscot height around 34-38 inches, then plan a shelf/rail element at the top that’s about 3/4 to 1 inch deep. Install the shelf/rail level first, anchored into studs or blocking, and check with a long level. Build panel sections below using stiles and rails so you get consistent openings; flat panel inserts are easiest. Prime and paint the monochrome black system in two coats, letting it dry between coats. Caulk around the shelf edges and where trim meets drywall, then install your decor only after paint cures fully.
Use a long straightedge to set the top shelf height — tiny errors show up instantly in a monochrome wall.
Don’t put a glossy finish on the shelf; it shows dust and water spots more.
8. Dark gray wainscoting with arched-top panels
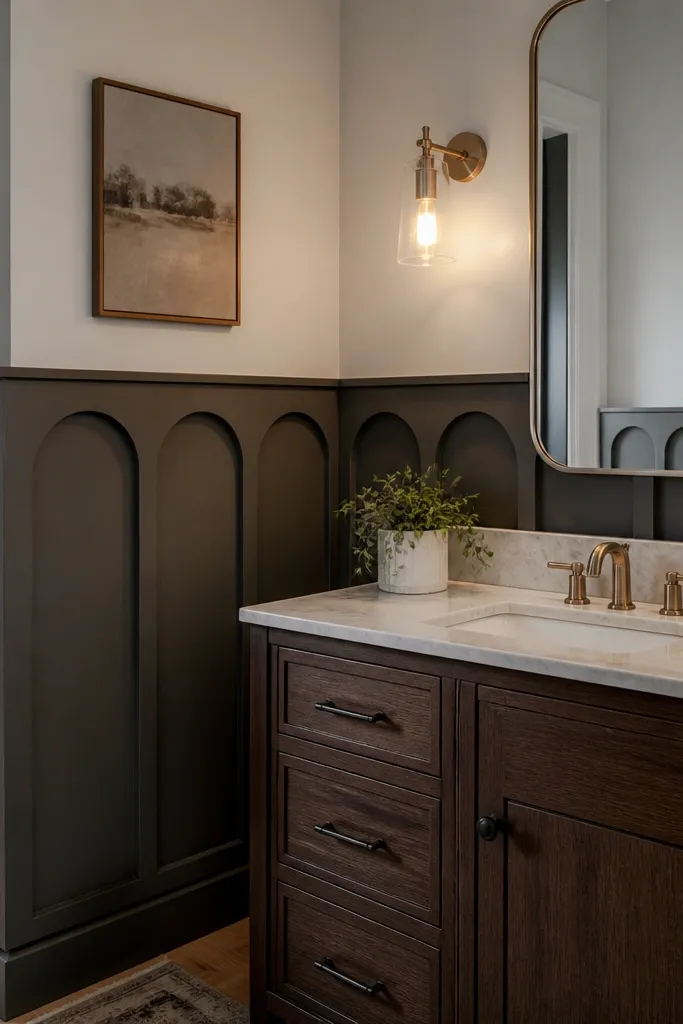
Arched-top panels are a small-space trick: they add “movement” upward without using extra height. Dark gray matte keeps it grounded, while the arches add softness around vanity corners and doorways. Keep the arch spans consistent and sized to your wainscot height so the curves feel intentional, not decorative cutouts. This style looks best in bathrooms with traditional fixtures — brushed nickel, oil-rubbed bronze, or matte black hardware — because the shapes echo the hardware lines. It’s photogenic because the arches cast a clear shadow under bathroom lighting.
Editor's noteMake one arch template from scrap plywood and trace it for every opening to keep the curves identical.
Lay out a wainscot height around 38-42 inches and install your base rails first so the panel openings have a stable frame. Cut panel frames with arched tops using a template: one consistent radius per panel is what makes it look custom. Install stiles between arches, then attach panel inserts behind the frames or use thin MDF panel pieces trimmed to fit. Prime everything, then paint the frames and panel faces in the same dark gray matte so there’s no edge glare. Caulk the panel edges lightly and sand any uneven caulk ridges once cured before the final coat.
Skip thisDon’t crowd arches too close to the corners — leave a clean margin so the pattern doesn’t look cramped.
9. Near-black wainscoting with vertical faux shaker frames
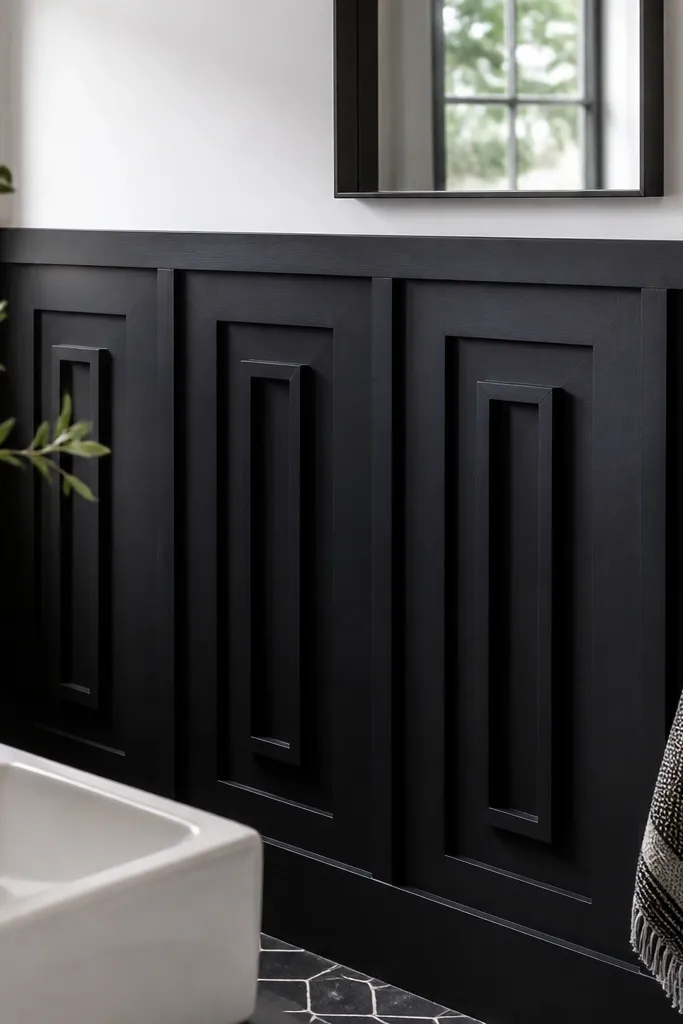
Faux shaker frames look expensive because they create thick shadow lines with simple pieces. In small bathrooms, vertical framed rectangles keep the wall from feeling flat and give you a subtle “depth ladder” effect. Use near-black matte for the frames and panel backing, then paint the upper wall in a crisp warm white. The thicker frame pieces also hide minor wall imperfections better than thin profiles. This is a good choice when you want something classic but still clearly “dark wainscoting,” not farmhouse beige.
Mark your wainscot height between 36 and 44 inches and install a top rail and bottom rail first. Create your faux shaker frames by installing vertical stiles and then adding a horizontal rail inside each section to form rectangles. Use MDF strips cut to a consistent width, and dry-fit a section to confirm the rectangle proportions look right. Attach the backing panel (MDF or plywood) and then glue/nail frame strips over it for clean shadow lines. Prime, caulk seams, sand, then paint the full wainscot in near-black matte in two coats.
Use the same strip width for every frame member — variation reads as DIY fast.
Don’t rely on caulk alone for gaps; if the strips don’t meet cleanly, the paint will show it.
10. Dark green wainscoting with narrow picture-rail molding

Dark green feels luxe and still reads as “dark” enough to add depth. A narrow picture-rail molding above the panels makes the transition look like a designed feature, and it visually separates the bathroom into two zones. Choose a deep green matte (think forest but not teal) and keep the upper wall warm white. The narrow rail also works well if your bathroom has a low ceiling because it doesn’t add bulk like a big crown. It’s a smart way to get that depth look while keeping the line light and clean.
Set your top rail height around 38-40 inches and install the narrow picture rail molding level. Frame simple rectangular panels between rails using thin MDF strips, keeping the openings consistent across the wall. If you have a vanity, align the panel pattern so the center opening lands roughly above the vanity centerline. Prime all surfaces, then paint the wainscot in deep green matte and the upper wall in warm white. Caulk the molding seams and fill nail holes, then do a final touch-up pass with a small foam roller for even sheen.
Foam roll the dark paint; it reduces roller marks that show up under bathroom lighting.
Don’t paint over unfilled nail holes — dark green shows them fast.
11. Black two-tone wainscoting with a darker panel insert
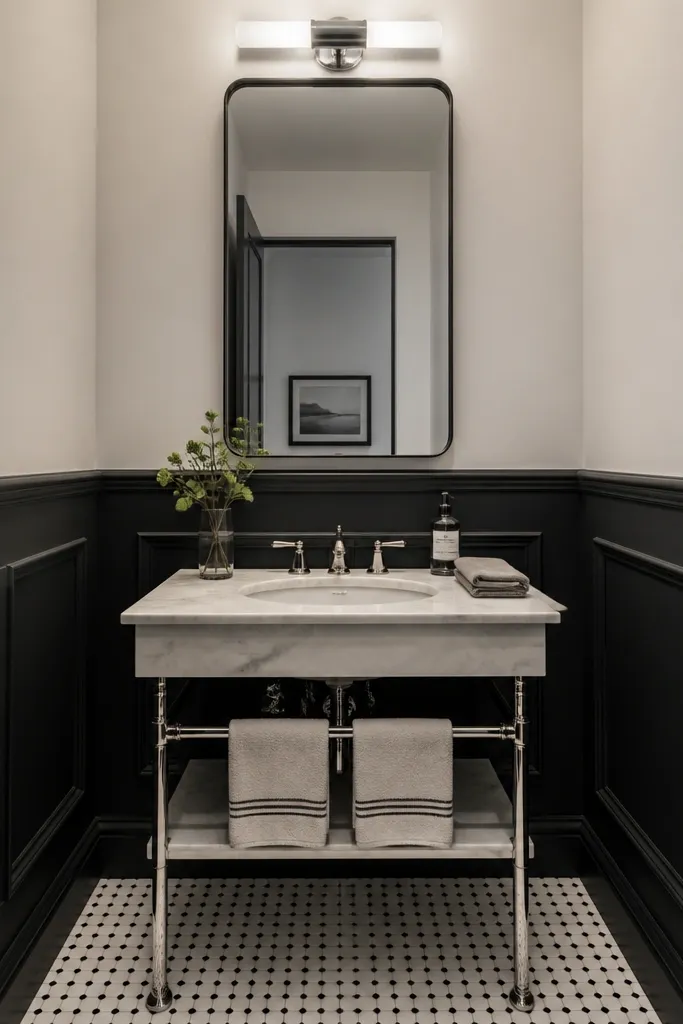
This is a depth trick using value, not just darkness. Make the outer rails and chair rail a soft near-black, then put an even darker black insert on the panel faces. The difference is subtle but photographs like dimension because the insert creates a recessed look. Keep the upper wall light so the two-tone stays readable. This works great in small bathrooms where you want a dark feature wall but don’t want it to feel heavy — the panel value shift keeps it airy. It also hides minor unevenness because the “recess” effect is visual, not physical.
Editor's noteTest your two blacks on the wall in two coats; the “darker insert” should look meaningfully deeper, not just different in name.
Install your standard wainscot frame using near-black paint on rails and stiles first. Cut panel inserts slightly smaller than the openings so they sit back and look recessed; even 1/8 inch inset helps. Prime and paint the inserts in a darker black matte than the rails. Assemble and install the inserts so the edges are consistent around each panel. Caulk only where you need to seal gaps, then touch up the near-black rails so the color separation stays crisp along every opening.
Skip thisDon’t use glossy for one tone and matte for the other — you’ll get glare mismatch.
12. Dark slate wainscoting with horizontal panel lines
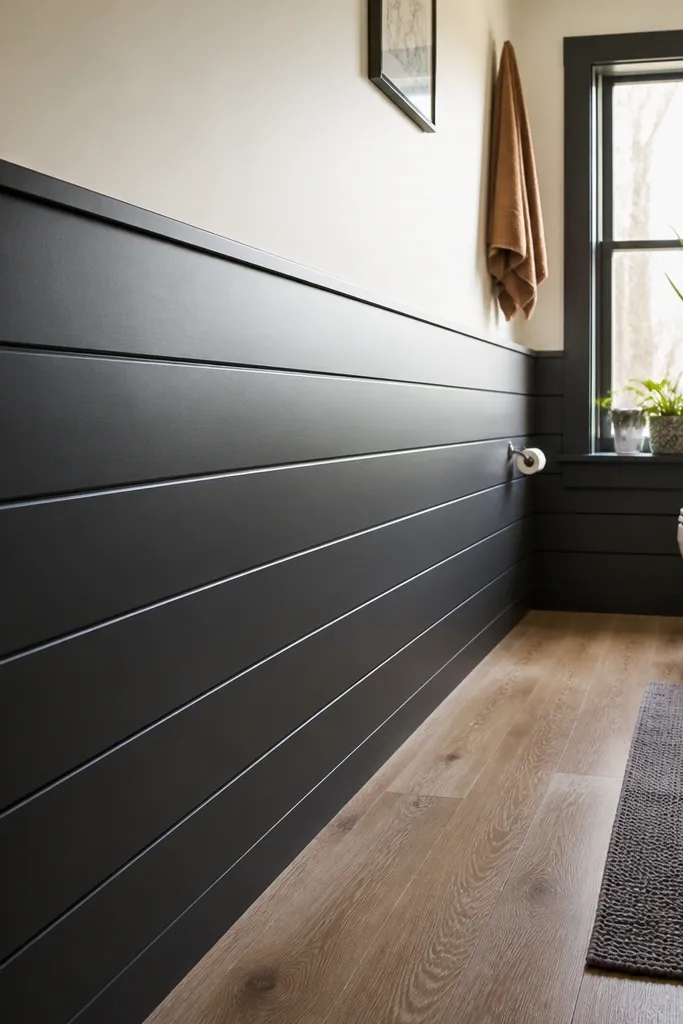
Horizontal lines add depth by stretching the wall visually, but in a small bathroom you need to keep them controlled so they don’t make the room feel wider than it is. Dark slate matte works well because it has a slightly cool tone that reads grounded. Use stacked horizontal panel bands of equal height, separated by thin rails, so the pattern looks like built-in wall cladding. This is especially good on walls beside a shower or tub where you need a continuous pattern that won’t break around fixtures. It’s clean, modern, and very photogenic in side lighting.
Editor's noteUse a laser level if you have one; horizontal lines show every drift instantly.
Pick a wainscot height around 40 inches and install your top and bottom rails first. Mark horizontal panel bands using a tape measure and small pencil marks so the rail spacing stays even. Install thin MDF strips as the separators, then attach panel backing pieces behind each band. Prime the whole assembly, then paint dark slate matte in two coats. Caulk the seams where separators meet backing and sand any raised caulk spots once cured.
Skip thisDon’t make the top band too thin — it looks like a mistake in small spaces.
13. Black wainscoting with raised corner blocks and trim caps
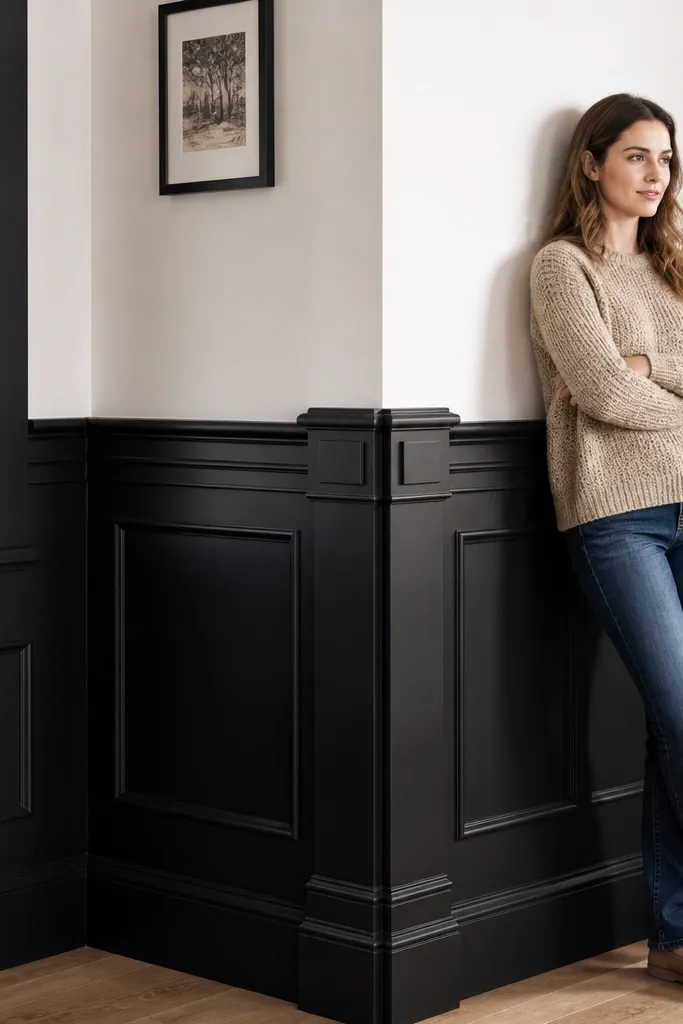
Corner blocks make wainscoting look custom because they frame the geometry at the most noticeable locations. In small bathrooms, corners are where your eye lands first, so adding raised blocks gives a “designed” feel even if the main panel layout is simple. Use black matte and keep the blocks and caps the same color so the shadowing comes from the shape, not color changes. This style also helps you hide small wall gaps at corners because the block creates a deliberate transition. It’s a strong choice if your walls are slightly uneven and you want the trim to look intentional.
Plan a simple panel grid or vertical boards, then decide where you’ll place corner blocks — typically at each corner where the wainscot meets the upper wall and where it meets the base rail. Install the main rails first and keep them level. Mount corner blocks using construction adhesive plus small finishing nails so they sit square; use a level or square to keep faces flush. Add trim caps to cover raw edges where panels meet rails. Prime and paint the entire wainscot system black matte, then caulk around the blocks for a seamless edge.
Cut blocks from the same MDF profile thickness you use for rails so the shadow gap stays consistent.
Don’t over-caulk the corners; thick caulk creates a lumpy line that shows in dark paint.
14. Dark wainscoting with a thin white picture frame inside each panel
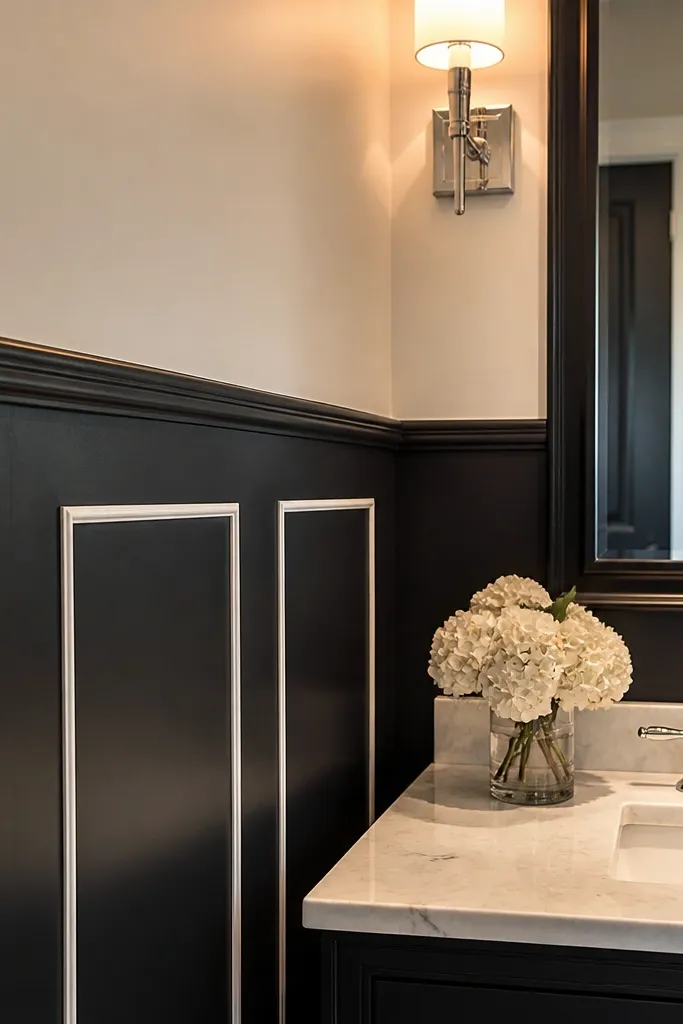
A thin inner frame is a high-impact way to make small-space dark wainscoting ideas look crisp and layered. The dark background gives depth, and the white inner border reads like a gallery mat, which keeps the wall from feeling too heavy. Keep the inner frame width around 1/2 inch so it stays delicate. This works beautifully with a matte dark paint and a bright, smooth white trim so the lines look sharp in photos. It also helps the panel layout look intentional even if the room has odd wall angles.
Editor's noteUse a small foam roller for the dark base and a brush for the inner white strips to keep edges clean.
Install your outer wainscot frame in dark paint first — rails and stiles define the big rectangles. Cut thin trim strips for the inner picture frames and attach them centered within each panel opening, keeping the same border width on every side. Prime and paint the inner frames in bright white after the dark base is fully dry and masked off. Assemble the panels so the white inner border stays consistent and doesn’t get messy at corners. Caulk the outer seams only, then do a final paint touch-up with a fine brush at the inner frame edges.
Skip thisDon’t let the inner frames touch the outer trim; leave a tiny consistent gap so it reads as a frame.
15. Near-black wainscoting with recessed panel look using thin slats
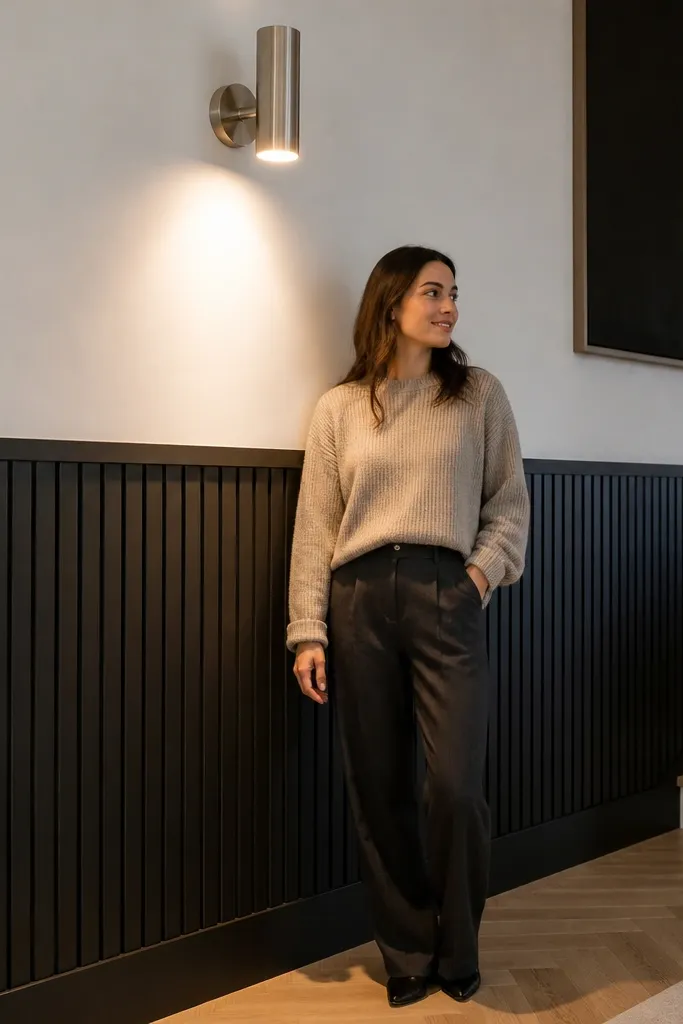
You can fake a recessed panel look without building deep boxes by using thin slats that create shadow lines. The slats sit on top of the panel backing, so you get a “carved” effect even though the wall isn’t physically carved. Near-black matte makes the shadows read clean and adds depth through light, not thickness. This is a good option for renters because you can keep the wainscot height moderate (around 36-40 inches) and the layout simple. It looks modern, sharp, and very photo-friendly in bathrooms with bright top lighting.
Editor's noteKeep slat spacing consistent by using a single spacer strip — it’s faster and looks more professional.
Prime and paint a smooth backing panel (MDF or plywood) the same near-black as your final color. Install the slats on top using a consistent width strip (for example 1/2 inch) and space them evenly to form rectangles. Build one full test section on a scrap backing to confirm the shadow depth looks right, then replicate across the wall. Mount the assembled wainscot sections to the wall or install slats directly onto the wall with backing support behind them. Caulk seams lightly, sand raised caulk, then paint over everything in two coats.
Skip thisDon’t choose a glossy base coat; it fights shadow clarity and can look flat.
16. Dark espresso wainscoting with a curved toe-kick rail at the bottom
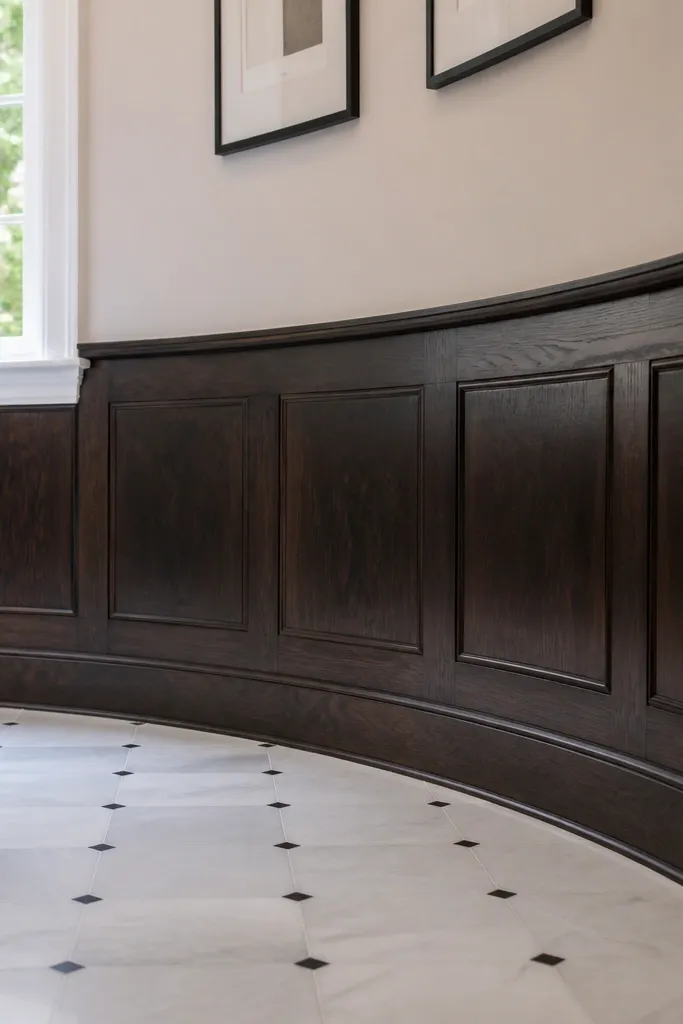
A curved toe-kick rail at the bottom adds a surprising amount of softness in a small bathroom. The dark espresso color anchors the wall, while the curved bottom detail makes the whole treatment feel custom and less boxy. This works especially well if your baseboard and floor line are slightly irregular — the curve visually smooths the transition. Keep the wainscot height around 34-40 inches and use simple panels or flat board sections above the curve. It’s one of those details that shows up in photos as “designer” even when the build is straightforward.
Editor's noteIf you use curved trim, clamp it in place while adhesive cures to prevent tiny gaps that show in dark paint.
Install your chair rail level first at 38-40 inches and decide on a bottom rail that sits just above the floor/baseboard line. Use a pre-made curved toe-kick molding or bendable MDF trim if you want the arc; test fit before fastening. Frame simple rectangular panels between the chair rail and the curved bottom rail so the geometry stays consistent. Prime and paint the entire wainscot in dark espresso matte, then caulk the edges where the curved molding meets the wall. Sand and touch up any thin spots so the dark finish stays even.
Skip thisDon’t force the curve around a corner with no plan — measure the corner radius and cut accordingly.
17. Black wainscoting with vertical panels aligned to the vanity mirror
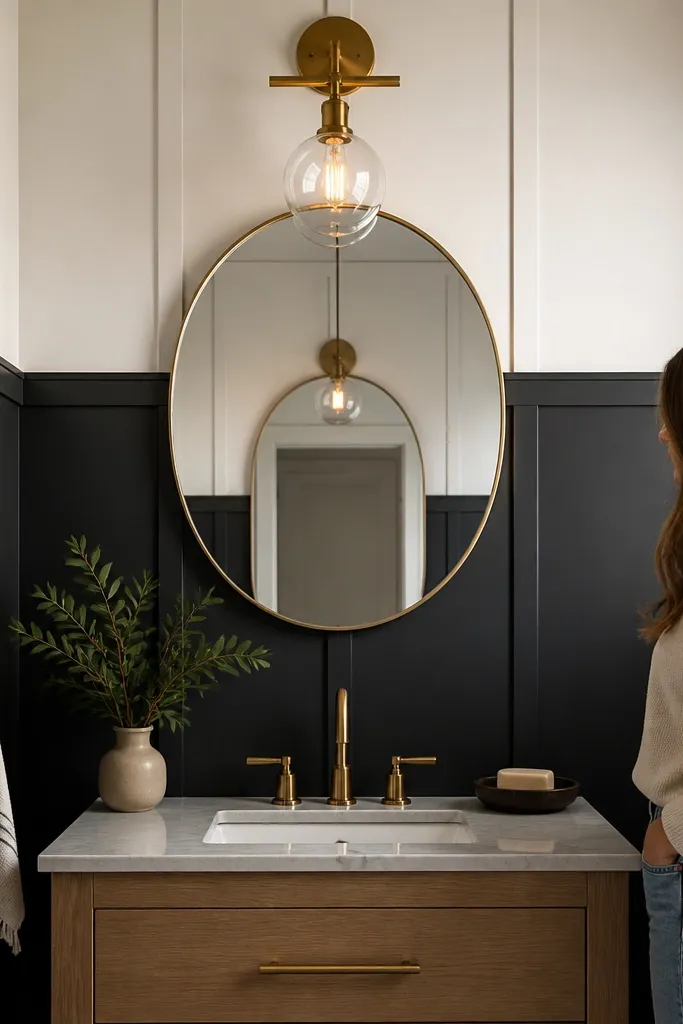
This idea is about placement, not just style. When the vertical panel spacing aligns with the vanity mirror or light fixture centerline, the bathroom instantly looks designed. Black matte adds depth, but the alignment makes it look intentional instead of randomly installed. Use a simple vertical panel layout with fewer, wider panels so the alignment stays visually clean in a small space. It’s also easier to build because you’re repeating a small number of sections rather than a complex grid. The final look feels calm and balanced, which is what you want in a tight bathroom.
Measure the vanity mirror width and mark its centerline on the wall. Layout vertical panel lines so a full panel lands centered under the mirror, then build outward with equal spacing. Install the chair rail at 40 inches and add vertical stiles from the rail down to your chosen panel height. Use MDF panels or flat backing behind the stiles so the surface stays smooth and paint-ready. Prime, caulk seams, sand, then paint the wainscot black matte, masking a crisp line where it meets the upper wall.
Mark panel lines with a pencil and painter’s tape so you can re-check alignment before any trim goes up.
Don’t start layout from a corner if the mirror is off-center — you’ll end up fighting symmetry.
18. Dark charcoal wainscoting with slim crown + base cap for a floating look
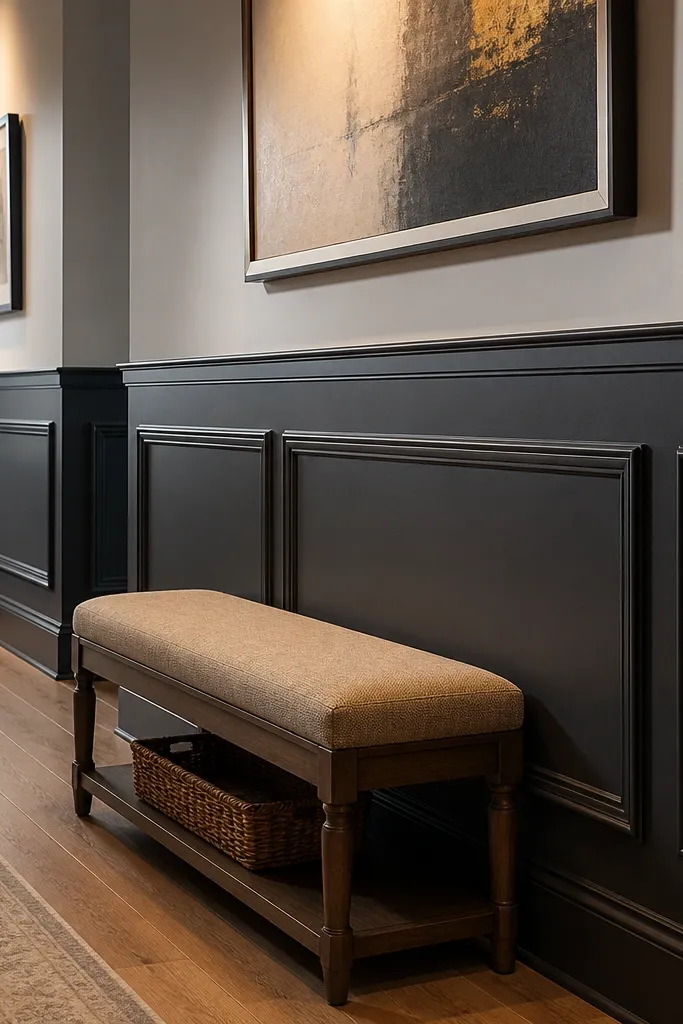
A slim crown at the top and a matching base cap at the bottom creates a “floating panel” frame effect, even when the bathroom is small. Dark charcoal matte reads deep but not as intense as black, which keeps it flattering in tight rooms with limited natural light. The thin trim profiles make the wall feel taller because they don’t add bulky thickness. You get a clean, modern look that still feels traditional because the wall treatment frames itself. This design is also forgiving if your wall has minor texture — the shadow gaps hide it.
Choose a wainscot height around 36-42 inches and install a top rail first, then attach a slim crown molding on top. Add a matching base cap rail at the bottom of the wainscot so the frame reads complete. Fill the center with simple flat panel inserts or flat board sections cut to fit. Prime all surfaces, then paint the charcoal matte on the trim and panel faces in one continuous system. Caulk the joints lightly and sand any raised caulk after it cures, then do a second coat for even coverage.
Use a single trim profile for both top and bottom caps so the proportions look intentional.
Don’t skip the base cap — without it, dark wainscoting can look like it stops mid-wall.
19. Black wainscoting with diagonal corner panel accents
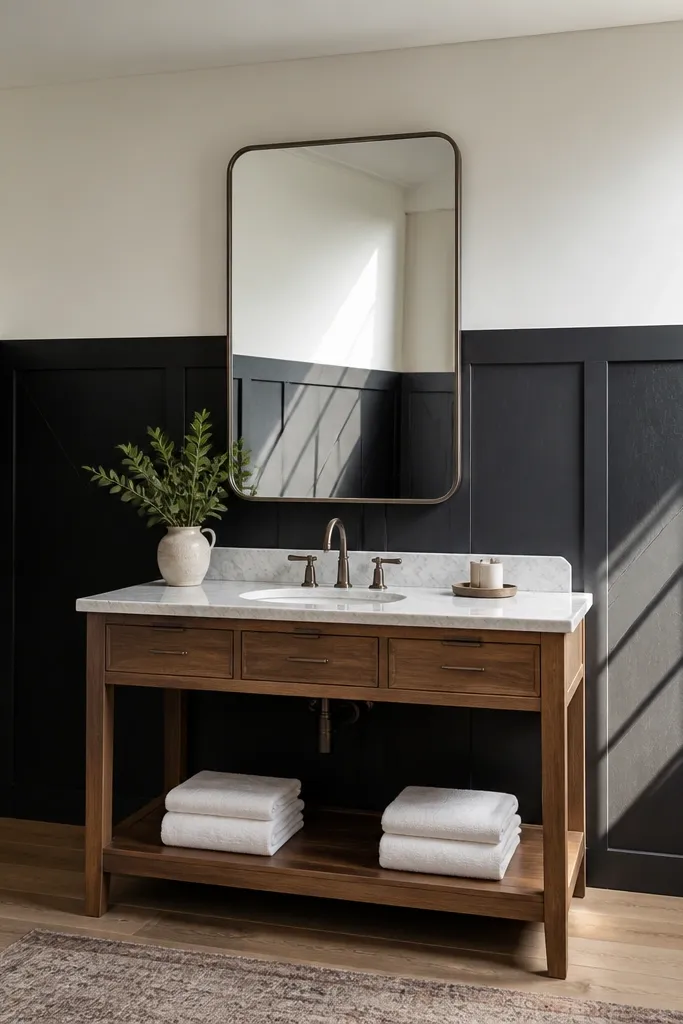
Diagonal corner accents add depth by creating a subtle sense of motion — the eye travels along the diagonal and then returns to the dark base. In small bathrooms, that movement helps prevent the wall from feeling flat. Keep the main wainscot simple (vertical or rectangular), then add one diagonal accent at each corner panel opening. Paint the main wainscot black matte and keep the diagonal accent in the same color but slightly different sheen (matte to satin) if you want it to catch light. This style is very photogenic because the diagonal shadow line shows up even in low bathroom lighting.
Build your base wainscot frame with rails and stiles first, keeping the openings consistent. Choose a corner opening and cut a diagonal panel insert at 45 degrees, sized so it fits snugly inside the frame. Install the diagonal insert and caulk around the edges for a tight seam. Repeat for the other corner if the room layout allows symmetry; if not, keep the same diagonal direction for visual continuity. Prime and paint everything black matte, then decide whether to add a satin topcoat only on the diagonal inserts after the matte base cures.
Cut diagonal inserts using a miter saw with a stop block so both sides match the same angle.
Don’t make the diagonal too wide; it should read as an accent line, not a whole new panel.
20. Dark wainscoting with vertical slats and a lighter center panel column

This design adds depth through contrast inside the wainscot zone itself. Dark vertical slats on the sides create a shadowy frame, while a lighter center column panel pulls attention to the middle and keeps the bathroom from feeling heavy. It’s a great option for bathrooms with a focal point like a mirror or towel bar, because the lighter center reads like a “stage.” Choose a warm light tone for the center column so it doesn’t look stark next to dark trim. The overall effect is layered, clean, and very easy to photograph because the eye has clear landing spots.
Editor's noteUse the same slat width on both sides so the center column looks perfectly centered.
Mark your wainscot height around 38-42 inches and install the top and bottom rails level. Frame a center column opening sized to match your mirror or a key fixture — for example 12-18 inches wide depending on the wall. Install vertical slats on both sides of the center column using consistent widths and gaps, then leave the center column as a flat panel backing. Prime everything and paint slats and rails in dark charcoal or near-black matte, then paint the center column a warm light color in the same sheen family (matte works best). Caulk seams and touch up edges with a small brush so the center column boundary stays crisp.
Skip thisDon’t pick two different sheen levels for the dark and light; mismatched sheen makes DIY lines look obvious.



