
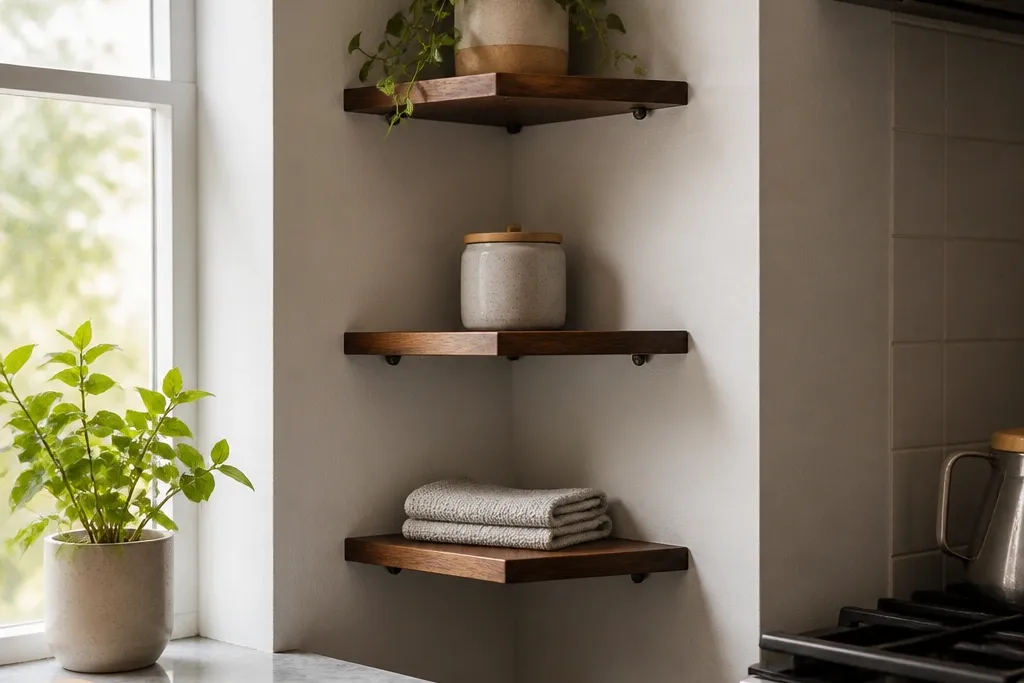
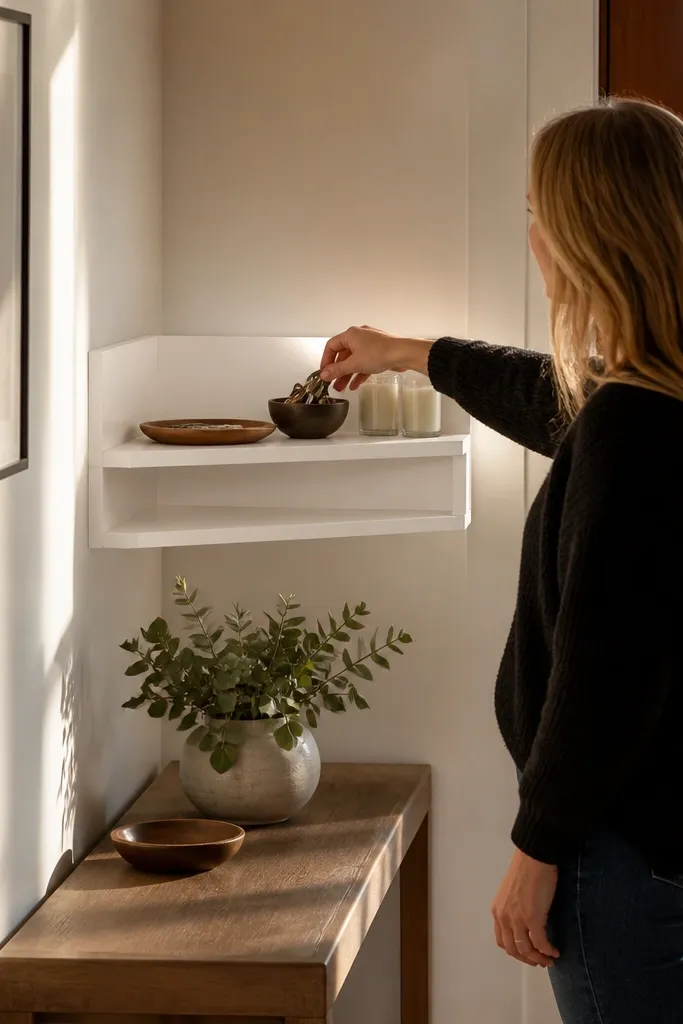
1. Mitered corner picture ledge in matte white
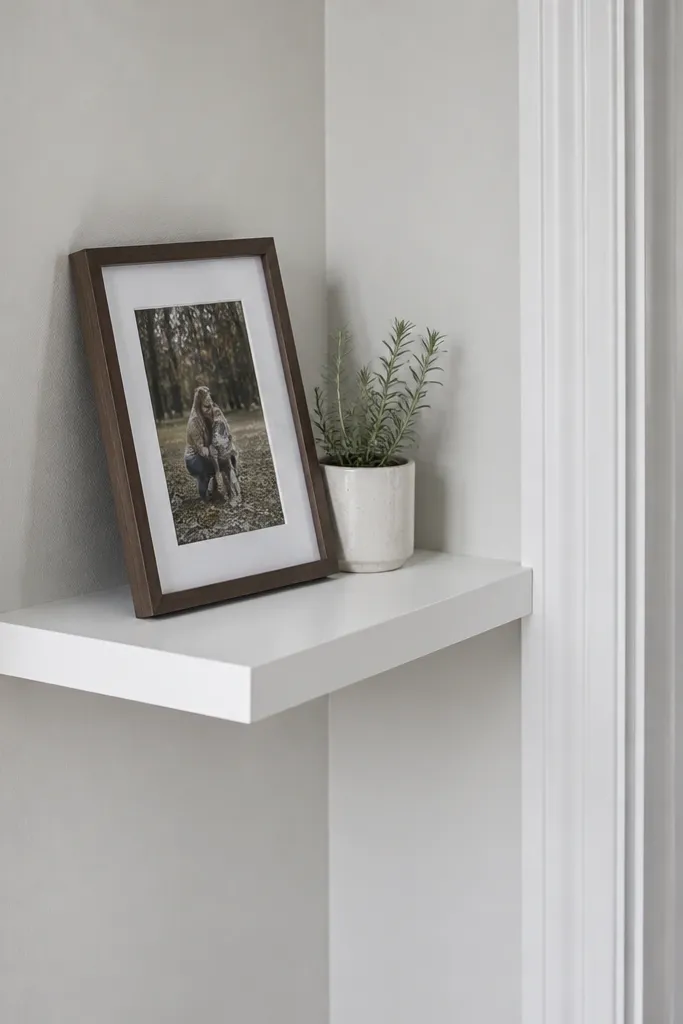
Cut a single shelf board that’s long enough to reach both walls, then miter the two front corners at 45 degrees so they meet at the corner. Build a face frame from 3/4-inch plywood or MDF strips, then glue and nail it around the top and front edges for a clean “box” look. Mount a hidden back rail to studs, then set the shelf on the rail and secure with screws through the back. Finish by filling nail holes, sanding to 180 grit, and painting with a cabinet-grade enamel for a smooth finish.
This is the “built-in” look without the built-in cost. The mitered corner means the front edges meet cleanly at the 45-degree angle, so the shelf reads as one object instead of two separate boards. Matte white also hides minor wood imperfections and makes small decor look sharper. Use it for tight entries and hall corners where you want framed photos, small plants, or a pair of slim candles without visual clutter. It’s the kind of corner shelf that photographs straight and looks tidy from across the room.
Skip thisDon’t rely on butt joints at the corner without a miter or you’ll see gaps every time the light hits.
Editor's notePaint the shelf before mounting so you can roll a perfectly even coat on the underside edges too.
2. Walnut veneer corner floating shelf with black steel pins
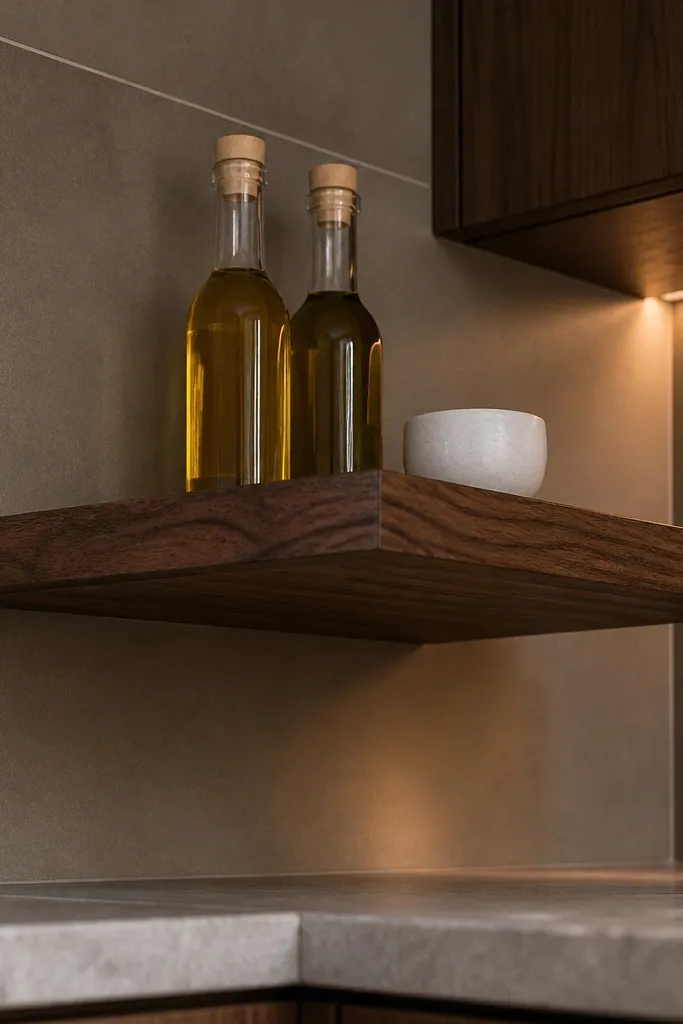
Use a plywood core with walnut veneer to keep the board stable; veneer alone can warp. Cut the shelf to your chosen depth (start with 8-10 inches), then mark mounting points along the back edge. Install two or three black steel support pins into studs or a backer board, keeping pin spacing consistent across both walls. Place the shelf over the pins, then secure from underneath with the pin hardware so the top stays clean. Seal the veneer with a wipe-on polyurethane or a hardwax oil, then buff for a satin sheen.
If you want the corner to look designer, this is the move. Walnut veneer brings warmth even in a small space, and the black steel pins make the support look intentional instead of hidden. The shelf reads light because the hardware is thin, not bulky, so it doesn’t swallow the corner. This design works great in kitchens and living rooms where you want a few objects to stand out — a ceramic bowl, a small framed print, or a pair of stacked books. It also holds up visually with fewer items because the wood grain does the work.
Skip thisDon’t skimp on pin count for heavier decor; add one extra pin near the center for a tighter, flatter look.
Editor's notePre-drill veneer carefully — use painter’s tape over the mark so the bit doesn’t chip the edge.
3. Two-tier corner shelf with a floating "L" brace
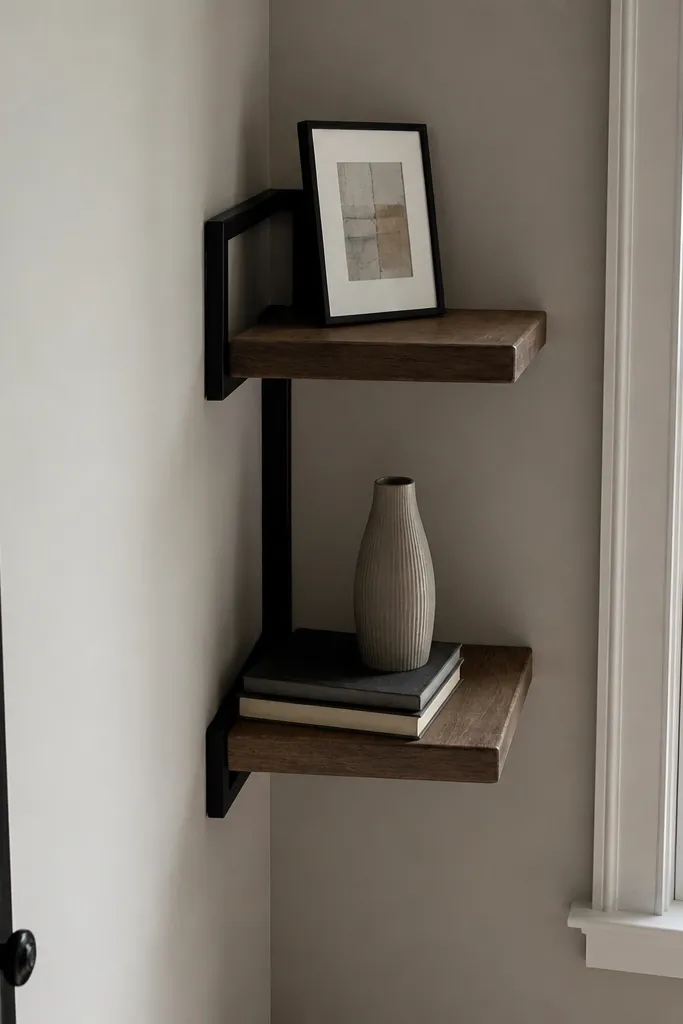
Two tiers make corners feel usable fast, and the L-brace keeps it from looking like separate random planks. The lower shelf is for daily items or books, and the upper shelf is for a smaller object that adds height. This style is especially good for narrow hall corners because it gives you vertical structure without taking up floor space. The brace line can be painted to match the shelf, so it disappears visually while still adding strength. It’s a clean, modern look that stays tidy even when you change what’s displayed.
Cut two shelves from 3/4-inch plywood and edge them with hardwood strips or edge banding. Build an L-shaped backer brace from 3/4-inch plywood and screw it to studs, using a level to keep the top tier perfectly level. Mount the lower shelf first, then line up the upper shelf using a spacer block so the gap between shelves stays consistent. Secure through the backer into studs, then fill screw holes and paint the whole assembly. Finish with a topcoat that resists scuffs since this spot gets touched.
Use a scrap spacer the exact width of your desired shelf gap so both tiers match even if your ceiling isn’t perfectly straight.
Don’t mount the top tier by eyeballing; corners magnify small level errors in photos.
4. Reeded front corner shelf for a textured, high-end look
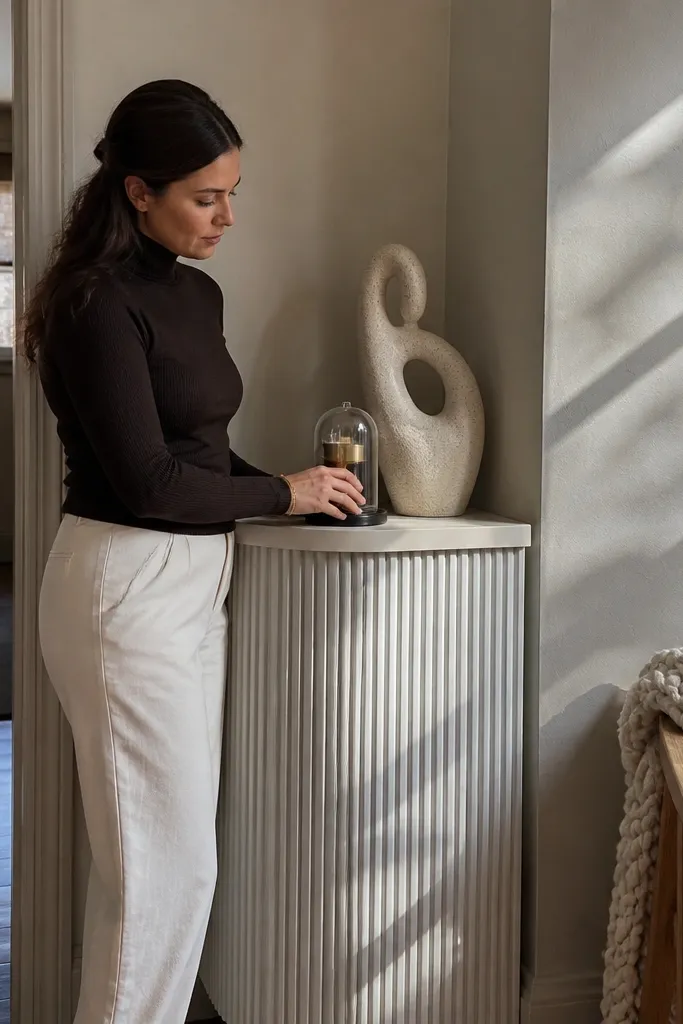
This one looks expensive because the front face has texture, not because it’s complicated. Reeded panels catch light and hide minor wall unevenness, which is a lifesaver in older homes. Keep the top smooth and simple so the reeding becomes the focal point. This design is best for display-only corners where you want the shelf to look styled even when it’s not full. It also pairs well with ceramic, glass, and woven baskets because the texture gives those objects a “stage.”
Start with a box-style shelf: cut a backing panel, side panels, and a top from 3/4-inch plywood. Add a reeded front by using store-bought reeded MDF strips or by routing shallow grooves in a face panel. Prime everything, then attach the reeded face to the front frame so it aligns evenly across both walls. Mount the back panel to studs with two or three screws per stud location. Paint with a satin finish so the reeding stays crisp, then install the top board as the final step.
Sand the reeded face lightly after priming, not before, so the primer fills tiny gaps for a cleaner light-catching effect.
Don’t make the reeding too deep; deep grooves look busy in small corners.
5. Slim 5-inch corner ledge for tiny decor and keys
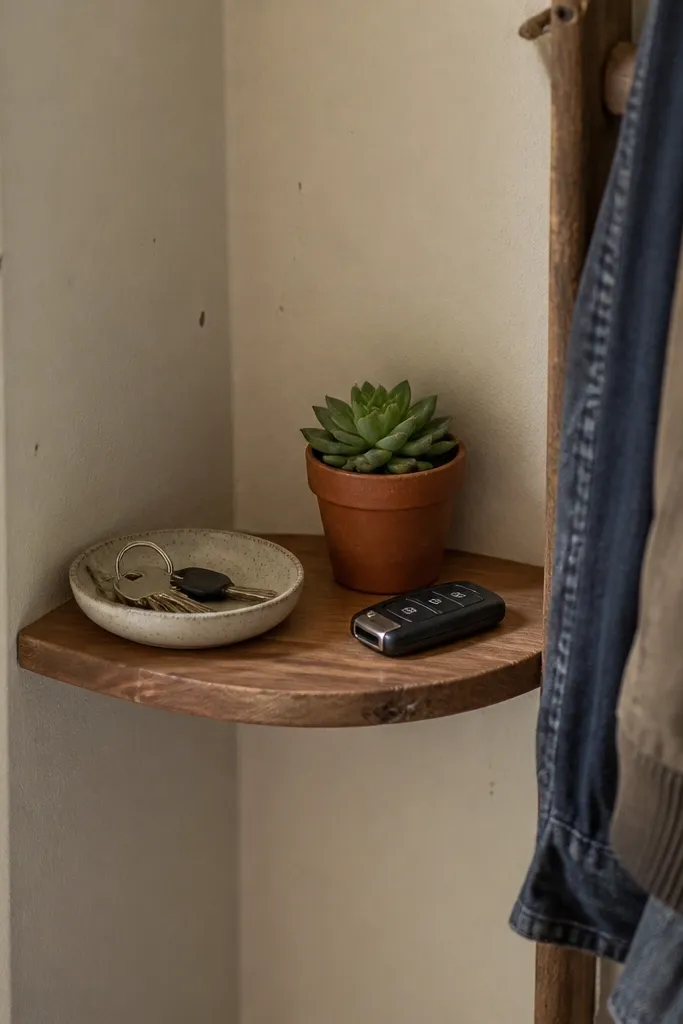
Sometimes the best corner shelf is the one that barely takes up space. A 5-inch ledge is perfect for a catch-all moment: a small dish, a single plant pot, or a stack of thin books. It looks intentional because it stays narrow, and it avoids the “clutter shelf” vibe that happens in tight hallways. This is also a smart choice if you rent and want something less intrusive visually. The key is building it strong enough that it doesn’t flex when you set things down.
Use 3/4-inch plywood for the top and add a thin back lip made from 1/2-inch strip wood so items don’t slide off. Mount a continuous back rail to studs, then set the shelf on it and screw from underneath. Keep depth at 5 inches, and cut the shelf so it wraps the corner cleanly with a mitered front edge if possible. Finish with paint or a clear coat if you want wood grain. Add soft bumpers to the underside corners if the wall has texture.
Use a small front lip (about 3/4-inch tall) instead of a tall guard; it keeps the look open.
Don’t go too thin on the shelf board; a floppy ledge ruins the clean look fast.
6. Corner shelf with a glass-front cabinet bottom and open top
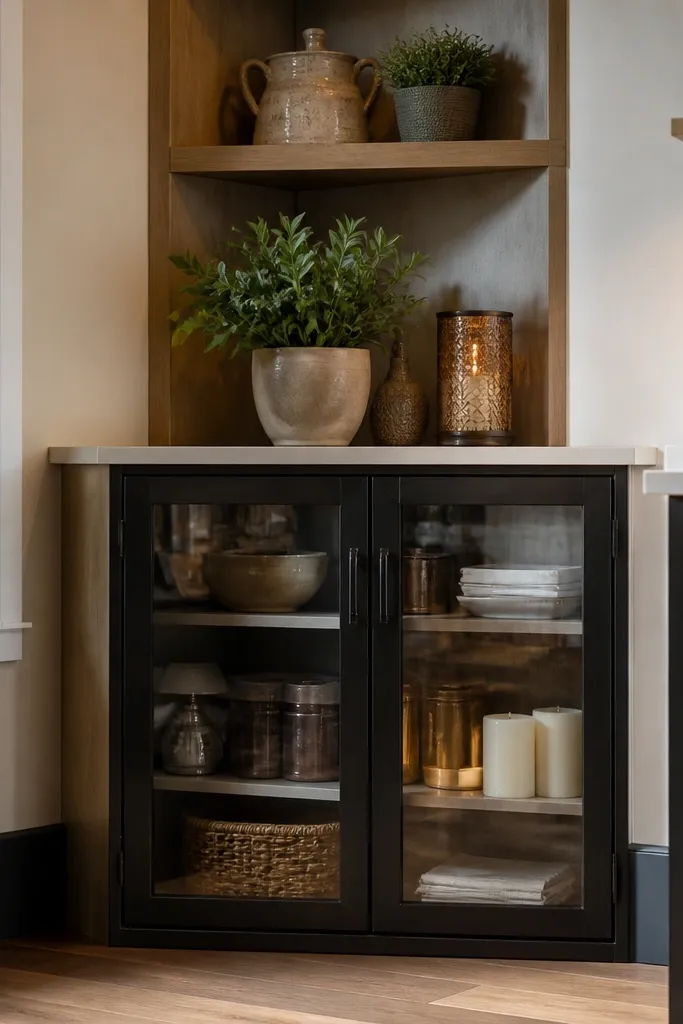
This idea solves the mess problem while still looking good. The open upper shelf is for decor, while the glass-front cabinet below hides clutter like chargers, remotes, or extra candles. In a small-space corner, that mix of open and closed storage makes the whole wall feel calmer. Use clear glass with black trim or frosted glass if you want a softer look. It’s a great fit for living rooms and entryways where you need storage but hate visible clutter.
Build a corner unit from plywood: one top shelf panel and a small cabinet box beneath. Add a face frame around the cabinet front, then attach a glass door using small hinges and magnets. Mount the entire unit to studs with a back ledger and screws through the cabinet back. Install the open top shelf directly onto the unit frame so it looks continuous. Finish by painting the frame and cabinet interior, then add glass door trim and seal edges to prevent squeaks.
Use magnetic catches for the door so it closes quietly and stays aligned in a corner.
Don’t leave the cabinet interior unfinished if you’re using light paint — raw plywood shows through glass.
7. Black-stained oak corner shelf with a floating "bridge" bracket
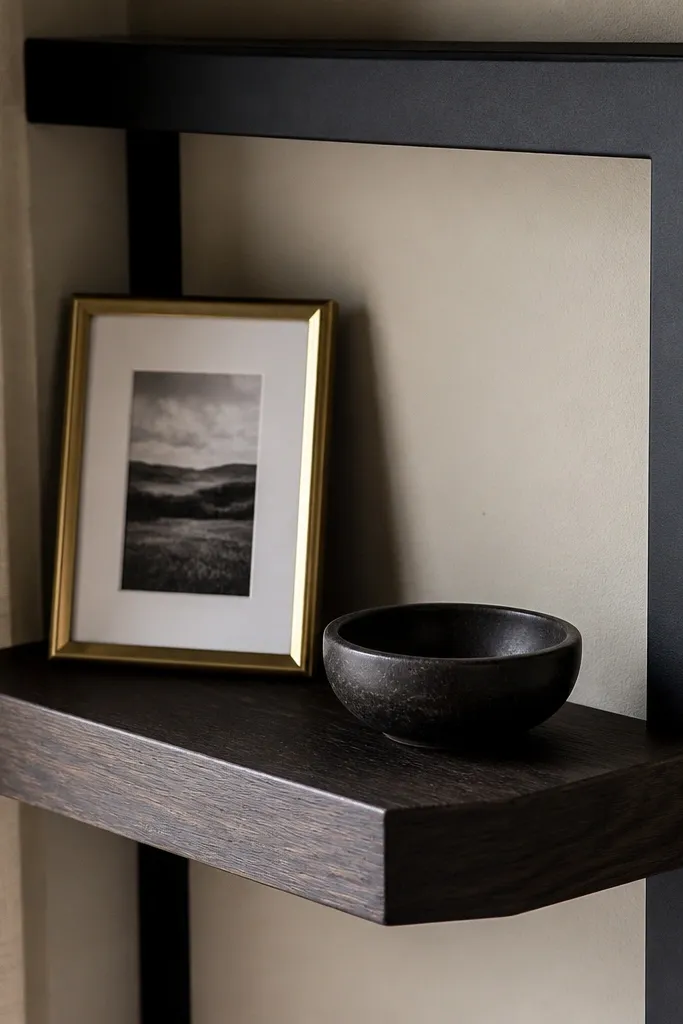
This is for the corners that need a stronger visual line. The bridge bracket creates a graphic “frame” behind the shelf, so even with minimal decor, the corner looks designed. Black-stained oak gives depth without the heavy look of solid black paint. It pairs beautifully with brass accents, black frames, and dark ceramics. Keep the shelf depth around 10-11 inches so the bracket line doesn’t overwhelm the space.
Cut the shelf from 3/4-inch oak or oak plywood and stain with a black-brown dye stain, then seal. Build the bridge bracket from 1x2 lumber or 1/2-inch plywood strips, and mount it into studs along the back edge. Install the shelf on top of the bracket and secure with hidden screws from underneath. Finish the bracket and shelf in matching stain so the line looks intentional. Add a thin spacer behind the shelf if your wall is textured.
Make the bracket line slightly thicker at the corner so the sightline looks stable in photos.
Avoid staining over rough sandpaper; it makes the oak look blotchy next to the dark bracket.
8. Painted plywood corner shelf with a built-in cable channel
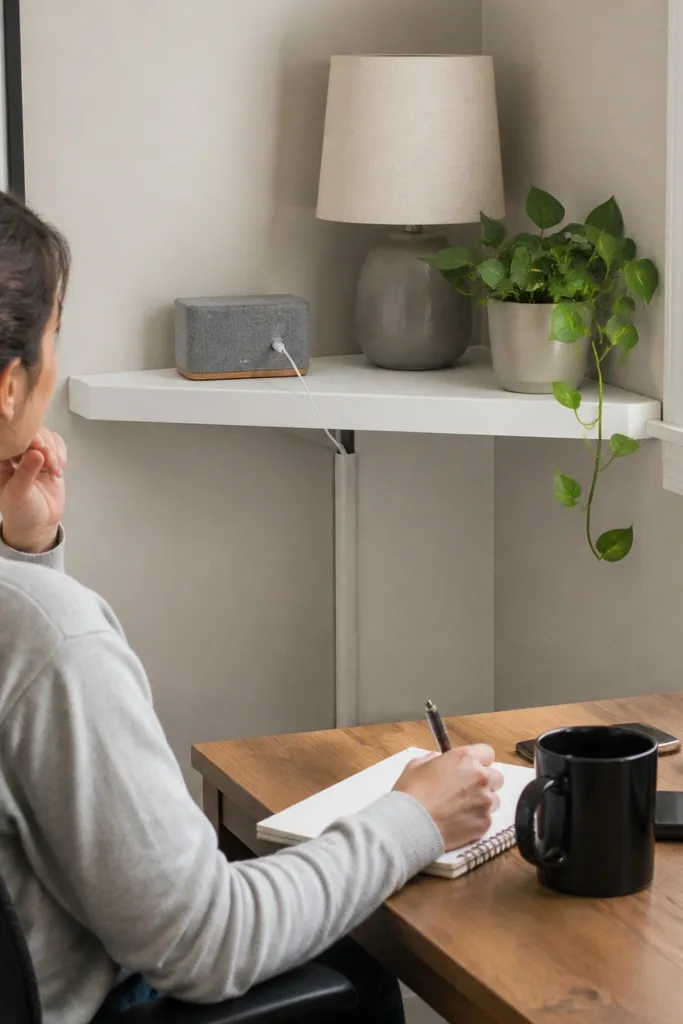
If your corner has a router, lamp cord, or charging station, this shelf makes it look clean instead of messy. A built-in cable channel runs behind the shelf so cords drop straight down and disappear. The shelf face stays uncluttered, and you can still display something small on top. This works in living rooms, offices, and bedrooms where corners get tech. The look is modern because the cable path is hidden and the shelf edges stay crisp.
Use a 3/4-inch plywood shelf top with a backing panel that includes a U-shaped cable channel (about 1 inch wide). Mount the backing panel to studs, then mount the shelf top so the channel sits between the shelf and wall. Cut a hole in the backing panel near where you want the cords to drop, then add a grommet. Seal and paint everything before final mounting. Place your devices on the shelf, route cables through the channel, and test slack before you fully secure.
Leave 3-4 inches of extra cable length inside the channel so you can move the device without yanking.
Don’t route cables in a tight bend at the corner; it looks messy and can stress the cord.
9. Corner shelf with a floating tray frame for plants
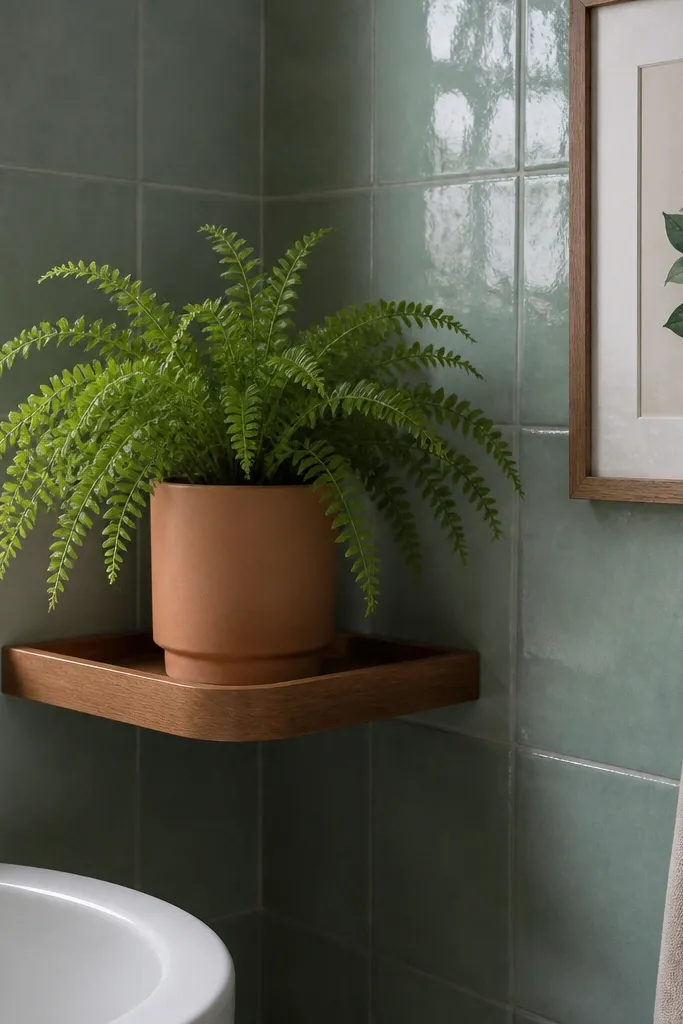
A tray-style top is the easiest way to make a corner shelf look styled even when it’s just one plant. The tray frame catches drips and gives the pot a defined boundary, so everything looks intentional. This is especially good for small-space corners where you want one hero plant without making the shelf feel cluttered. It also makes the shelf more forgiving if your plant setup changes seasonally. Build it with a slight lip and a clean finish so it photographs neat.
Start with a shelf top board cut to your depth (8-10 inches) and add a frame around it made from 1x2 strips. Make the tray lip about 3/4-inch tall so water doesn’t run off the edge. Mount a back rail or cleats to studs, then attach the shelf top to the rail. Seal the tray with a waterproof finish like polyurethane or a hardwax oil, and add felt pads if the plant pot sits directly on wood. Finally, install and level the shelf with a laser or long level so the tray looks straight.
If you use ceramic pots, add a thin cork or silicone pad under them to stop scuffs and sliding.
Don’t skip the lip; one spill turns a corner shelf into a stained mess.
10. Corner shelf with a recessed back for a shadow gap
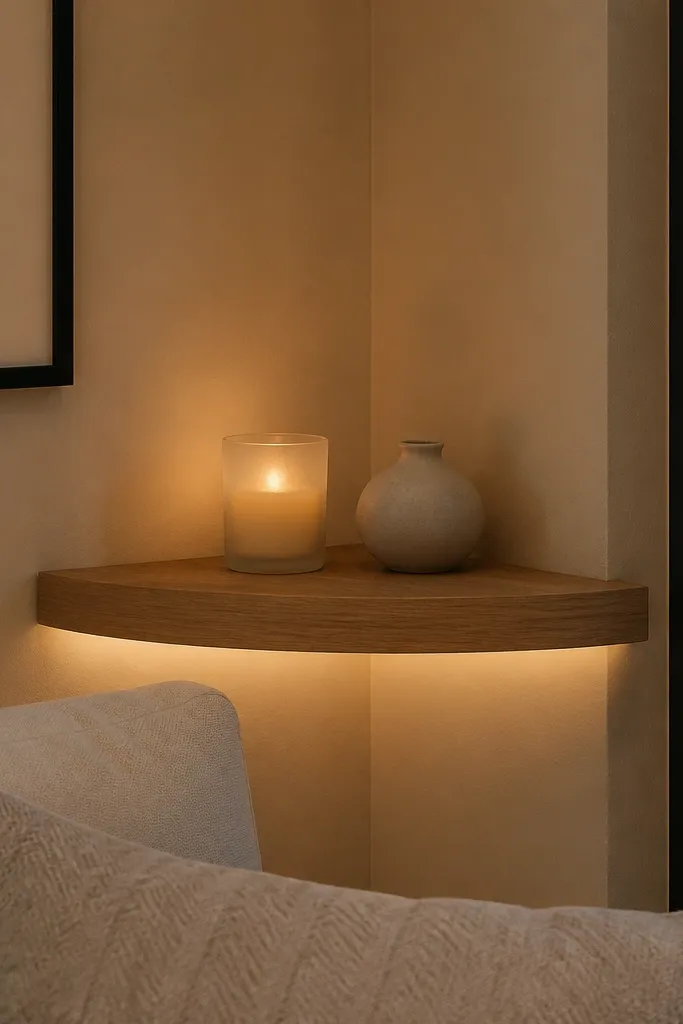
This design looks clean because it creates a shadow gap that separates the shelf from the wall. The recessed back edge makes the shelf look like it’s floating, even if it’s not. That tiny line of depth is what makes corners feel more expensive in photos. It’s perfect for minimalist decor — one frame, one candle, one small vase. It also helps if your wall has texture, since the shadow gap hides uneven paint or minor bumps.
Build a shelf with a recessed back: cut a rabbet (about 1/2-inch deep) on the underside back edge so the shelf sits off the wall slightly. Use spacers behind the shelf to maintain a consistent gap, then mount mounting cleats into studs. Attach the shelf to the cleats with screws from underneath so the front stays clean. Sand and finish the underside too, because the gap reveals the back edge. Paint with a satin finish so the shadow line stays crisp.
Make the gap uniform at 1/4-inch; smaller gaps disappear, bigger ones look sloppy.
Don’t mount directly against the wall if you want the floating effect; you need that consistent spacer gap.
11. Corner shelf with a built-in book stop rail

A book stop rail keeps spines aligned, which makes a corner shelf look tidy even when you’re not styling it. This is ideal for corners in bedrooms and offices where you want books nearby but don’t want a full bookcase. The rail also gives you a natural place to stack thin objects without them sliding. Use it with 8-10 inch depth shelves so books don’t stick out into the room. The look is graphic and straight, which photographs well.
Cut the shelf top from 3/4-inch plywood. Add a front rail made from 1x2 that’s about 3/4-inch tall, centered and glued to the front edge. Mount two back cleats to studs, then screw the shelf down so the top stays level. Pre-finish the shelf and rail, then assemble and finish edges last to avoid paint buildup at joints. Place your books against the rail; if you want them perfectly aligned, add a small stop block on the corner side.
Paint the rail the same color as the shelf top to keep the look clean and uniform.
Don’t make the rail too tall; tall rails block sightlines and make corners feel cramped.
12. Half-moon corner shelf with a soft arc front
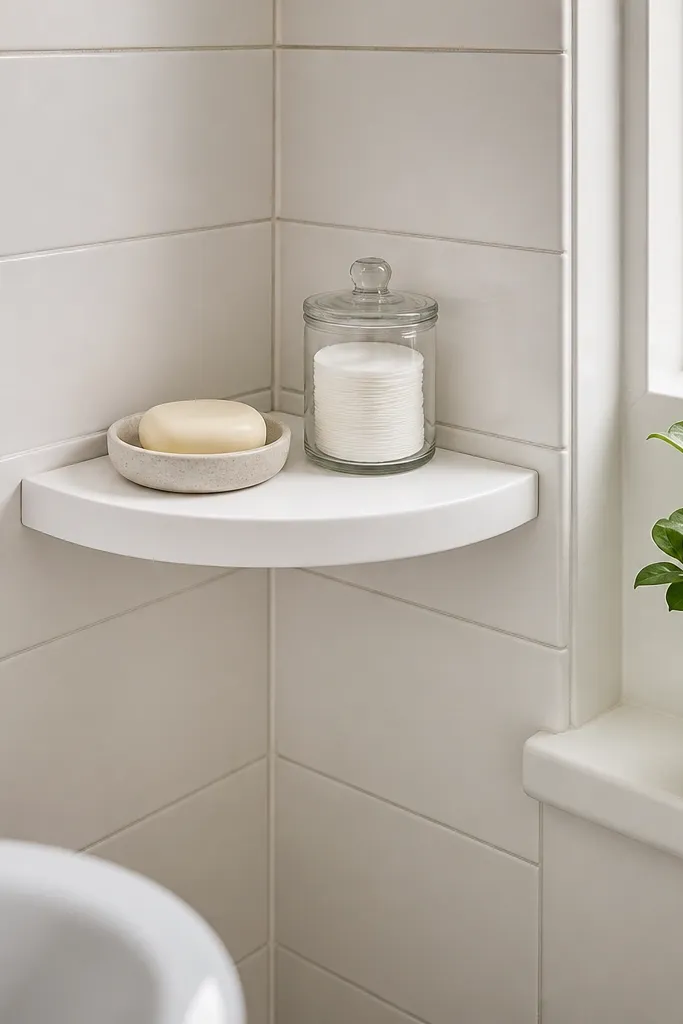
Curves fix corner awkwardness. A half-moon front edge softens the hard 90-degree lines, which makes the shelf look friendly and more modern than a straight plank. It also helps decor sit naturally — a small vase or framed print looks balanced on the arc. This is a standout option for bathrooms and kitchens because it feels less blocky around sinks and fixtures. It’s also forgiving if your wall corner isn’t perfectly square.
Cut a half-moon shelf top from 3/4-inch plywood using a template made from a string-and-pencil radius or a printed pattern. Add a back bracket plate or hidden cleats mounted to studs so the shelf stays stable. Use a backing board to cover the mounting area and make the unit look clean from both sides. Seal and finish the plywood, then add a thin edge band on the arc for a crisp look. Mount by aligning the arc so it sits centered in the corner footprint.
Sand the arc to 220 grit before finishing; curves show sanding scratches more than straight boards.
Don’t skip the backer — half-moon shelves want extra support because the shape creates leverage.
13. Corner shelf with a floating tray for spices and jars
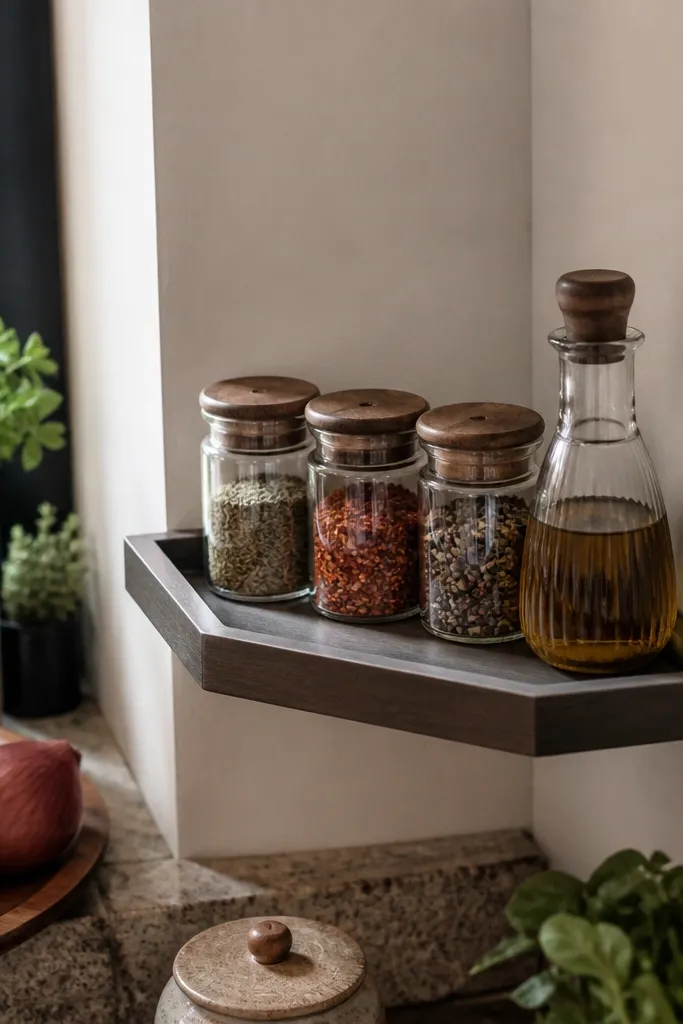
If your kitchen corner is wasted space, this shelf turns it into a functional display. A shallow tray surface keeps small jars from rolling and makes the whole corner look curated, not chaotic. Use it for 2-3 spice jars, a small olive oil bottle, or a trio of matching containers. The shelf depth stays compact, so it doesn’t bump into walkways. It’s a practical aesthetic that stays photogenic even when the kitchen is busy.
Build a tray top: cut a shelf base from plywood, then glue a thinner tray insert (about 1/2-inch thick) inside a shallow recess. Add a small front lip so jars can’t slide forward. Mount a back cleat to studs and screw the tray assembly down through the back. Finish with a kitchen-safe topcoat like water-resistant polyurethane or a hardwax oil. Measure jar sizes before cutting so you don’t end up with wasted space or jars too tight.
Use matching jar heights and a single label style; the shelf looks intentional instantly.
Don’t place the tray too deep; deep trays make kitchen corners feel heavy.
14. Corner shelf with warm brass rail and glass accents
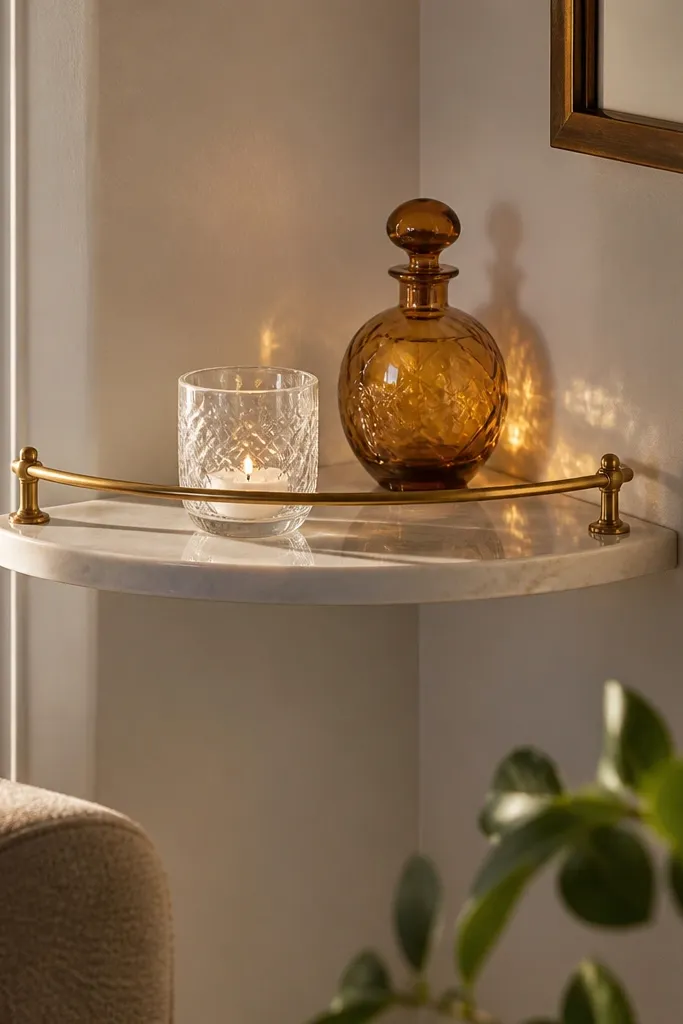
Use a straightforward floating shelf top from 3/4-inch plywood or wood, finished in light oak or painted white. Mount a back cleat to studs, then install the shelf and keep the front edge clean. Attach a thin brass rail along the front edge using countersunk screws or a concealed mounting channel. Add glass decor and a small tray if needed to keep pieces aligned. Seal wood with a clear coat if you want the brass to look crisp against natural grain.
Brass rail details make a floating shelf look like it belongs in a store window. The rail gives you a clean line across the front, and it also helps keep small items from sliding. Pair it with glass decor so the brass catches light and adds sparkle without adding visual clutter. This setup works in living rooms, bedrooms, and entryways where you want a luxury feel. It’s also a good option if you want to keep the wood simple and let hardware do the styling.
Skip thisDon’t use a thick, chunky brass rail; thin metal reads more modern in small corners.
Editor's notePolish brass hardware before installation so it looks bright under indoor lighting.
15. Stained pine corner shelf with rope bracket detail
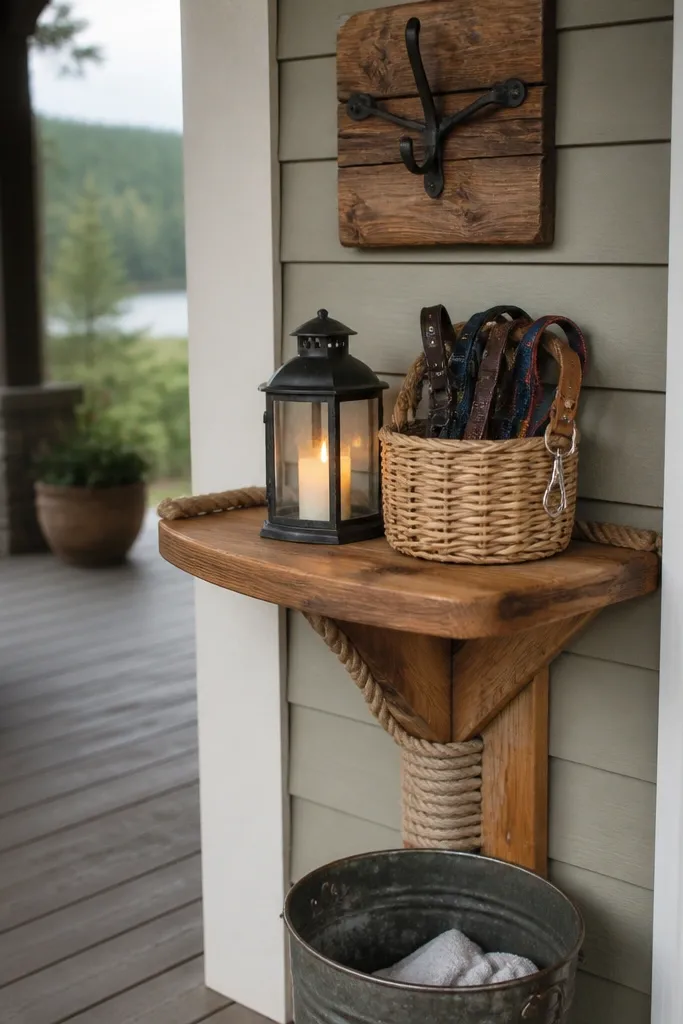
Build a basic floating shelf top from 3/4-inch stained pine. Mount hidden cleats to studs, then attach decorative rope-wrapped straps around the cleats so the hardware looks intentional. Wrap rope tightly with a staple gun or glue, then finish rope ends with a small amount of clear sealant. Install the shelf so the rope detail sits behind the shelf line and doesn’t interfere with items. Seal the pine with a matte clear coat so it doesn’t glare in photos.
This gives you an outdoorsy texture without turning the whole room rustic. The rope-wrapped bracket detail adds softness and visual interest, while the pine keeps it warm and casual. It’s a strong choice for covered patios, laundry rooms, and entry corners where you want something that feels handmade. Keep the shelf simple on top and use a woven basket or a small wooden tray for styling. It looks good in natural light because the rope texture shows depth.
Skip thisDon’t let rope touch the wall directly if you’re using glue; it can loosen when humidity changes.
Editor's noteUse jute or cotton rope in a consistent thickness; mixed thickness looks messy fast.
16. Corner shelf set with angled sides for a gallery wall vibe
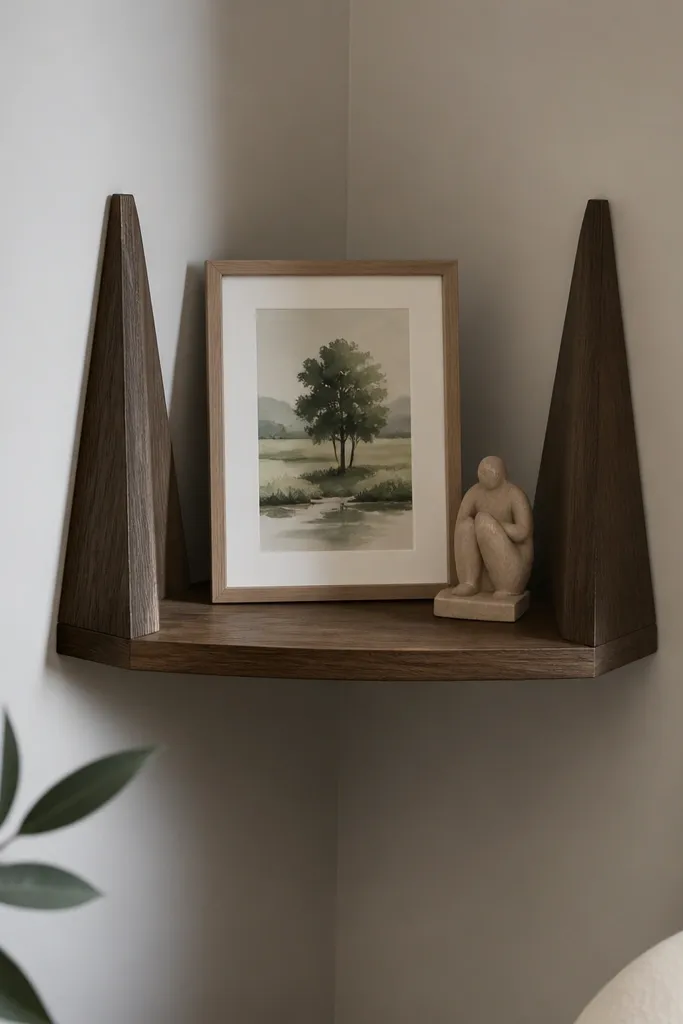
Cut the shelf top from plywood, then cut two side panels with a slight inward angle (start with 15 degrees). Build a back panel that mounts to studs, then attach the angled sides to the back panel so the shelf face looks framed. Mount the unit, then secure the top board to the side panels using screws from underneath. Paint or stain the frame, then finish the shelf surface. Install picture ledge stops so frames sit at the same height each time.
Angled side panels make corner shelves look like a mini display system, not a single plank. This design frames your art and gives the decor a “gallery” angle, which is why it looks good even when you rotate what’s on it. It’s especially effective for corners where you want to show prints or small paintings rather than bulky objects. Choose one strong color for the frame and keep the shelf surface simple. The angled sides also help hide small wall imperfections behind the shelf edges.
Skip thisDon’t eyeball the side angle; small angle differences show up immediately in corner sightlines.
Editor's noteUse a consistent frame stop height so every frame sits level; it’s the difference between “cute” and “intentional.”
17. Color-block corner shelf with a contrasting inner corner panel
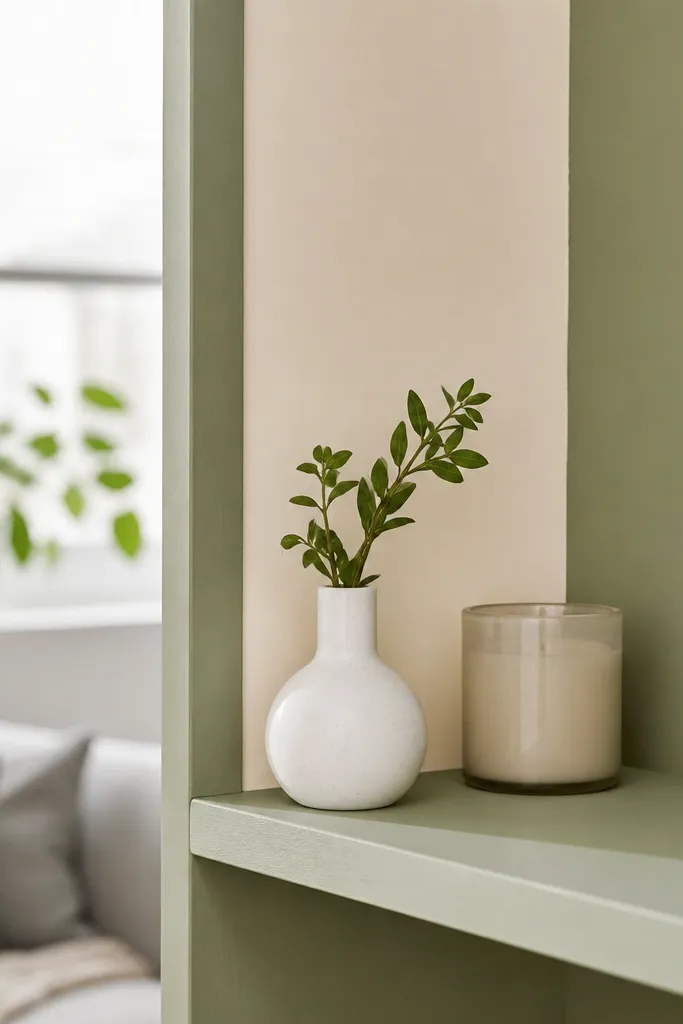
Color-blocking is the fastest way to make corner shelves look like a design choice. Paint the shelf face one color and the inside corner panel another so the corner reads as a “frame.” This is great for renters because paint is reversible, and it’s also easy to update later when your decor changes. The shelf looks bold in photos because the inner panel creates a strong shadow and color contrast. Use it in bedrooms, kids' rooms, and entryways where you want personality without clutter.
Build a simple box-style corner shelf with a top board and a front face frame. Leave the inner corner panel recessed by about 1/4-inch so paint lines stay crisp and you get a shadow edge. Prime everything, then paint the top in your base color and the inner panel in the accent color. Mask edges carefully with painter’s tape and remove tape while paint is still slightly tacky to avoid peeling. Mount the shelf to studs using a back cleat and make sure the inner panel stays aligned with the corner seam.
Use semi-gloss for the accent panel so it reflects light and looks intentional in different rooms.
Don’t use two similar shades; the whole point is contrast that reads clearly in tight corners.
18. Corner shelf with a hidden drawer under the top board
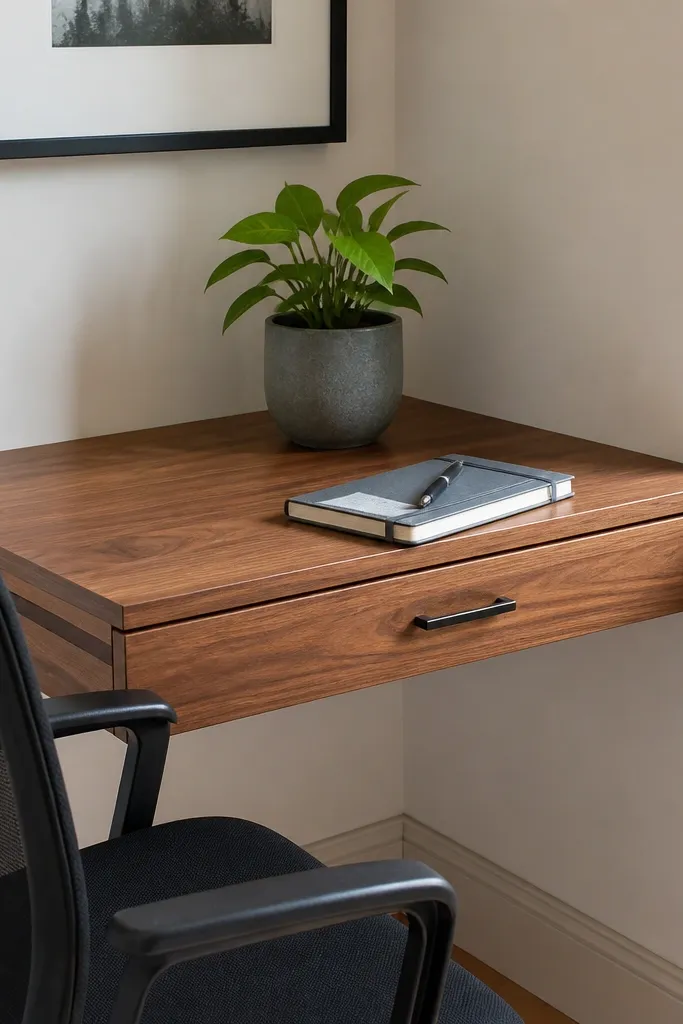
Build a corner shelf box: top board on top, drawer cavity behind a front face frame. Mount the back box to studs with a ledger board, then install drawer slides on the drawer sides inside the cavity. Cut a drawer front panel to match the shelf face, and use a concealed pull or a small recessed finger pull. Screw the top board to the box so the drawer operates smoothly without wobble. Finish with paint-grade sanding and a durable topcoat so the drawer face doesn’t scuff.
This is how you get storage without adding visual bulk. The shelf top displays decor, and the drawer under it hides small items like charging cables, gift wrap, or pens. In a corner, drawer fronts can look awkward, so the trick is keeping the drawer flush with the shelf face and using a slim pull. The result is a clean, modern corner that looks tidy even when you need function. It’s a good fit for entry corners and office corners where you want things within reach but out of sight.
Skip thisDon’t skip slide alignment; misaligned slides make the drawer bind and it ruins the clean look.
Editor's noteAdd a thin felt strip to the drawer cavity so the drawer closes quietly and doesn’t rattle in corners.
19. Corner shelf made from reclaimed window trim with a glass jar line
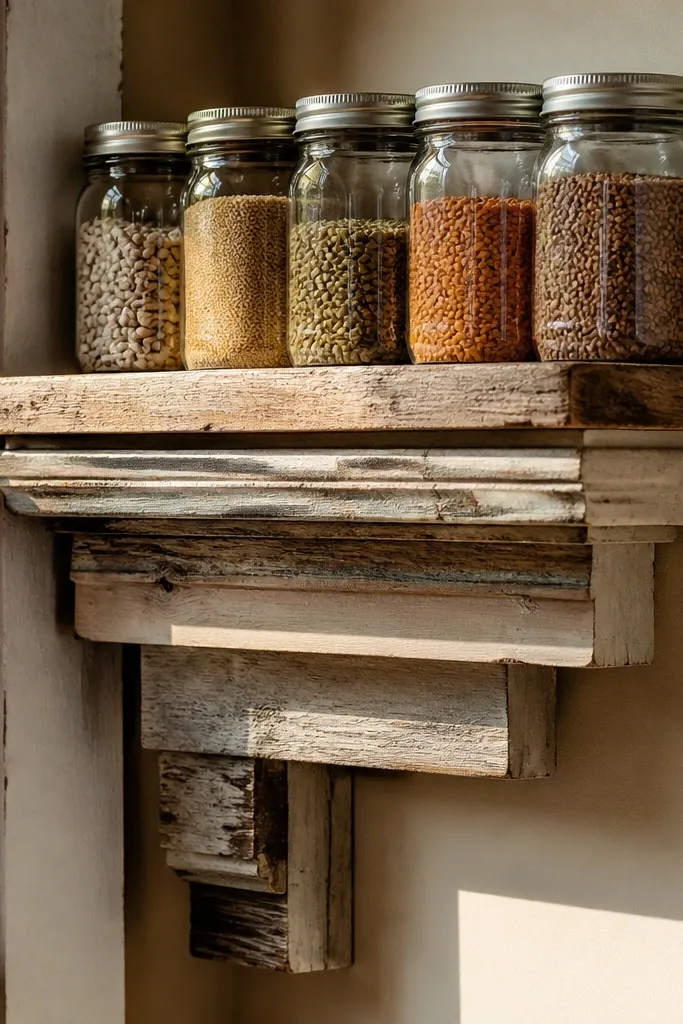
Reclaimed trim turns a corner shelf into a focal point because the profile has history and shape. Use it with a simple shelf top and line up a few matching glass jars so the decor looks curated instead of random. The layered trim profile adds depth and shadow even if the shelf is only 7-8 inches deep. This style looks best in kitchens, laundry rooms, and entry corners that already have some wood tones. It’s also great if you want a corner shelf that looks good even without lots of items.
Rip reclaimed trim to a consistent profile and sand it flat enough to sit cleanly. Use a plywood or solid wood top board for the shelf surface, then glue and nail the trim around the front and sides as a frame. Mount a back cleat to studs, then secure the shelf to the cleat through the back. Seal the reclaimed wood with a clear matte finish to protect it while keeping the texture visible. Arrange 3-4 jars first, then adjust the shelf position if you need more or less spacing.
Use matching jar lids in one finish so the shelf looks intentional even with reclaimed wood variation.
Don’t mount reclaimed trim to drywall only; the profile makes the shelf feel heavier and it needs solid backing.
20. Corner shelf with floating hexagon accents on the side
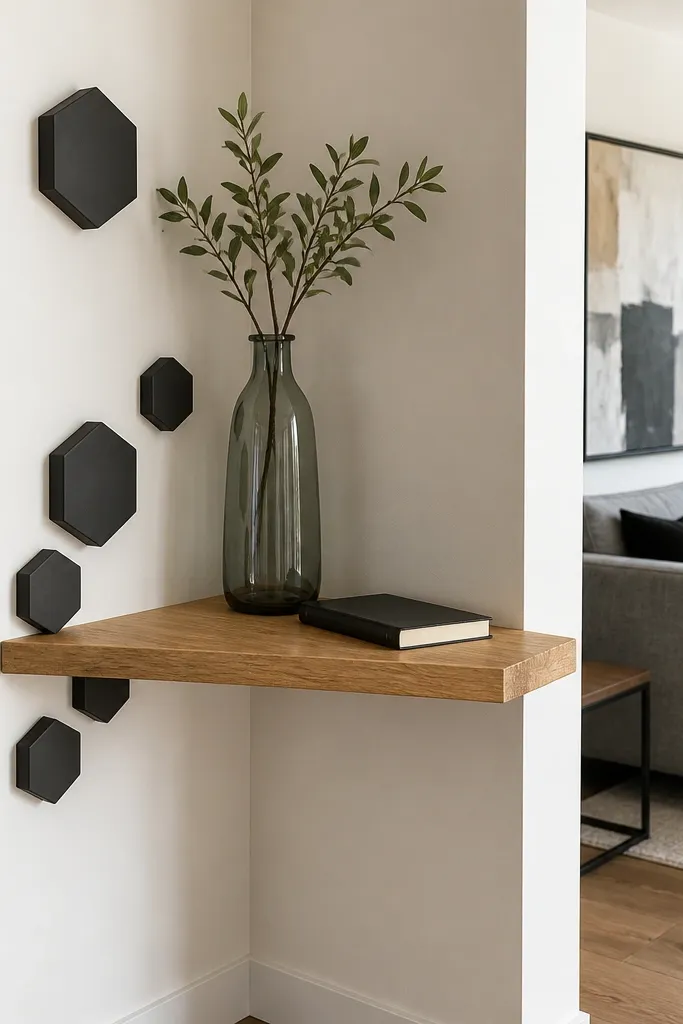
Build the main shelf from 3/4-inch plywood and finish it in your base color. Cut two small hexagon accent panels from 1/2-inch plywood, prime, and paint to match or contrast. Mount the hexagon panels to studs or a backer board along the side walls at eye level, then mount the shelf above them using a back cleat. Keep the shelf alignment consistent so the hexagons sit symmetrically in the corner. Finish the shelf top surface separately so you don’t get paint drips on the display area.
Hexagon accents make the corner feel designed without building a whole piece of furniture. The shelf stays simple, but the side accents add a pattern that draws the eye and makes the corner look like part of a set. This works well with modern interiors that use black, white, and one warm wood tone. Style it with one framed photo and a small sculptural object. The shelf looks balanced because the hexagons echo the geometry of the corner without making it busy.
Skip thisDon’t add too many accents; two hexagons look intentional, five looks like decoration overload.
Editor's noteUse painter’s tape to outline the hexagon locations first; corners exaggerate asymmetry.



