
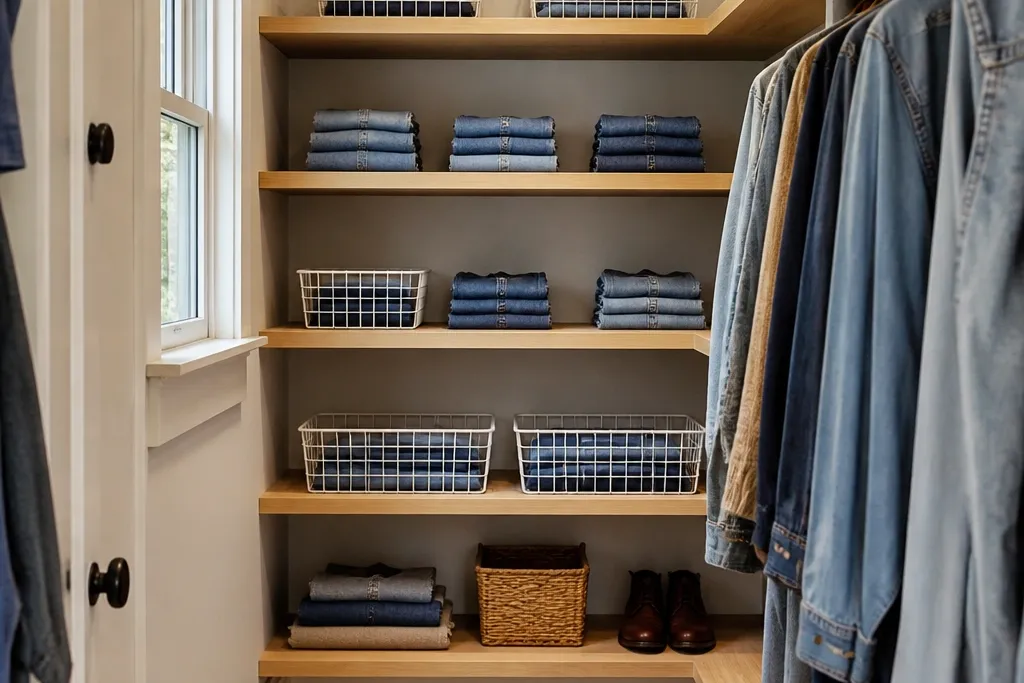
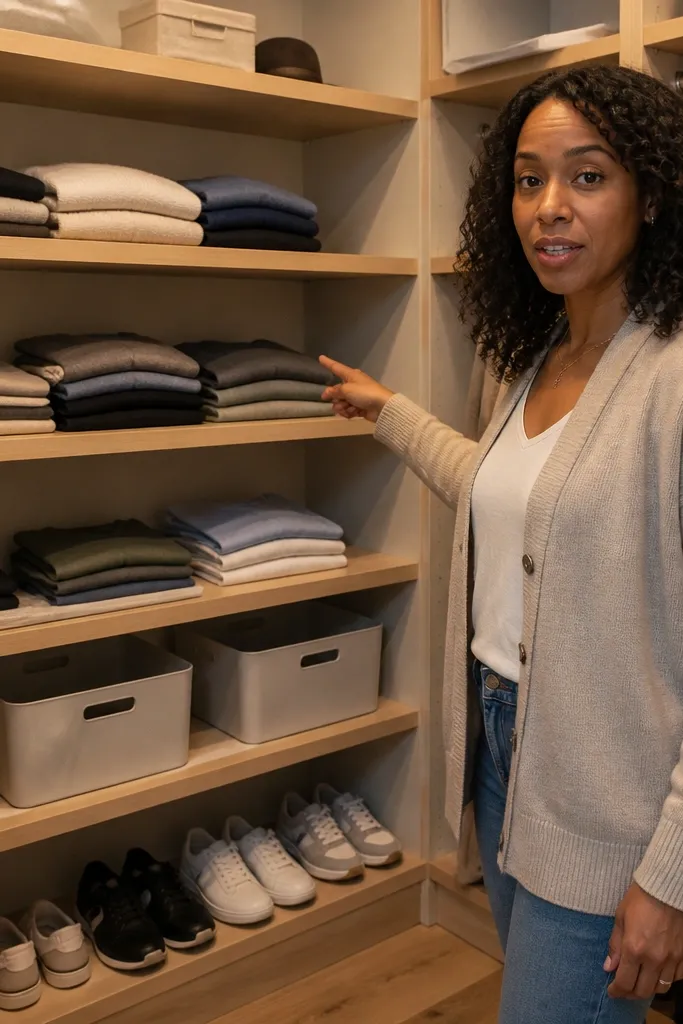
1. Mitered L-Run With 1x3 Face Frame
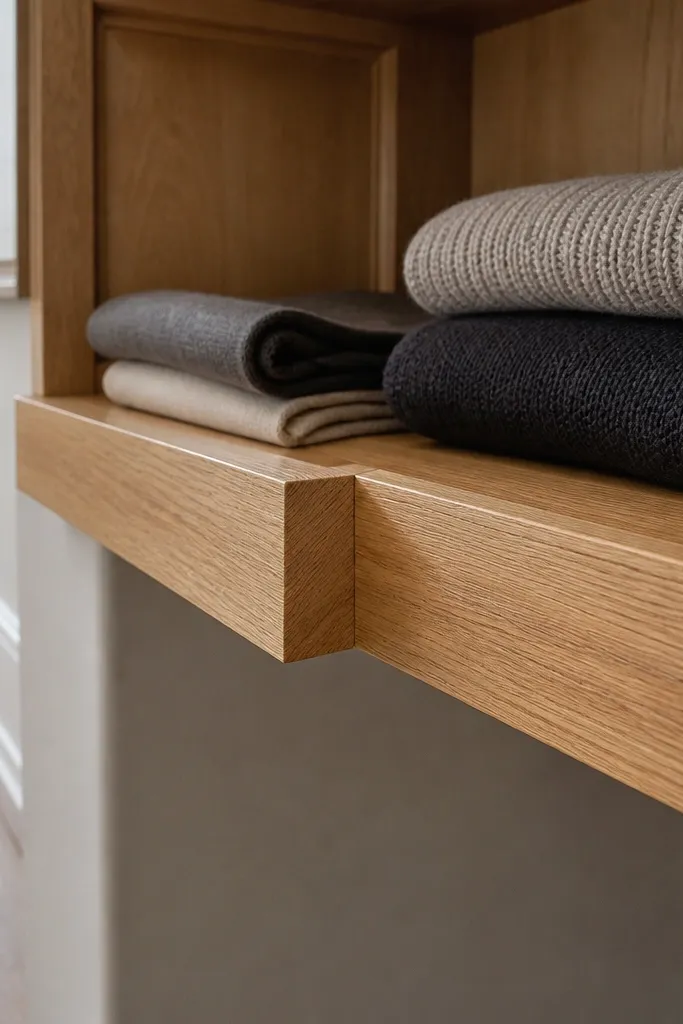
Step 1: Cut a pair of shelf boards to run along each wall, with the corner meeting using a 45-degree miter on the top face. Build a simple 1x3 face frame that wraps the outside of the L so the shelf edges are “boxed in.” Step 2: Install ledger cleats first using a level, then attach the shelves to the cleats with wood screws. Finish by adding the face frame pieces, then stain and topcoat after dry-fitting everything.
This is the cleanest way to make small-space corner closet shelves look built-in. The face frame gives you a continuous “edge” that makes the corner feel finished, even if the inside angle is awkward. Use a light oak or maple stain so the shelves brighten the closet and keep folded clothes from looking messy. The look is crisp because the shelf faces match the frame pieces, and the brackets don’t steal attention. It works best in closets where you can see the corner from the doorway and where you want bins or neatly stacked stacks to look intentional.
Skip thisDon’t attach shelves directly to drywall without anchors — sag shows up fast in corner spans.
Editor's noteUse a 2-inch reveal on the face frame so the shelves don’t look swallowed by the corner.
2. Floating Corner Shelf With Hidden French Cleat
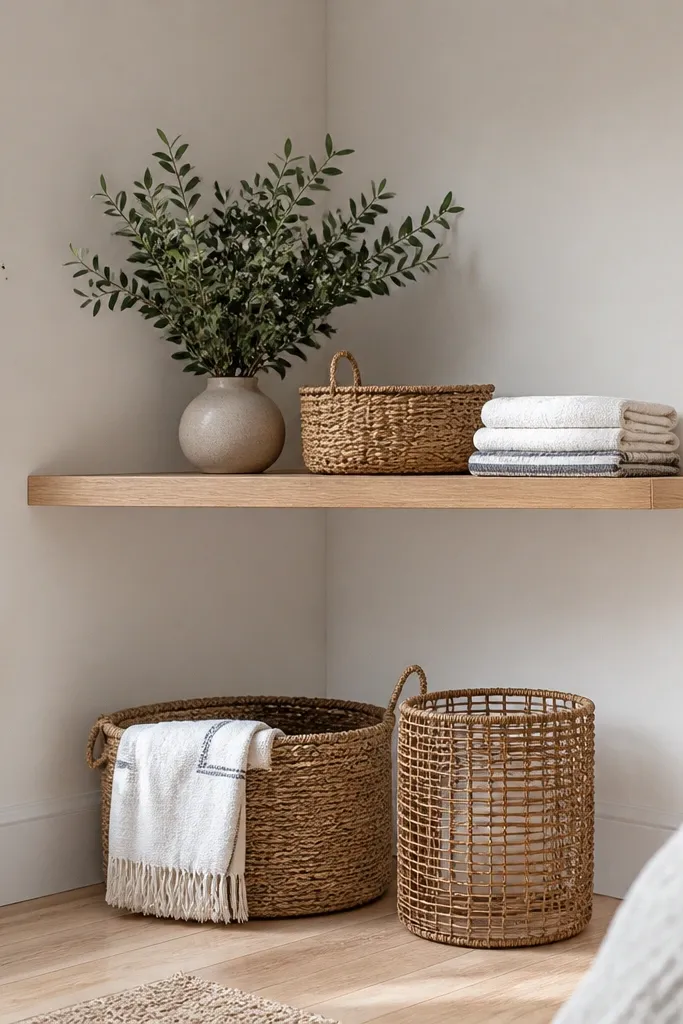
Step 1: Screw a French cleat rail to the studs along both walls where the shelf will land, keeping the top edge level and the corner alignment tight. Cut the mating cleat on the back of a 3/4-inch thick shelf board so it locks securely. Step 2: Pre-drill and screw the shelf cleat to the shelf, then hang the shelf by aligning the cleat seam and pressing it into place.
If you want the corner to look airy, a floating shelf with a French cleat is the move. It doubles storage without adding visual clutter because you don’t see hardware under the shelf. The shelf reads like a clean ledge, which is perfect for small-space corner closet shelves that need to hold decorative baskets, folded scarves, or a few shoes. This also makes future changes easier since you can remove the shelf by lifting it off the cleat. It’s a great fit for renters or anyone who wants a high-end look without complex trim work.
Skip thisDon’t use thin 1/2-inch shelf stock — it flexes and makes the floating look sloppy.
Editor's noteMark stud locations and use a long level across the corner so the shelf doesn’t “twist” visually.
3. Angled Corner Cap Shelves (The "Inside Angle" Fix)
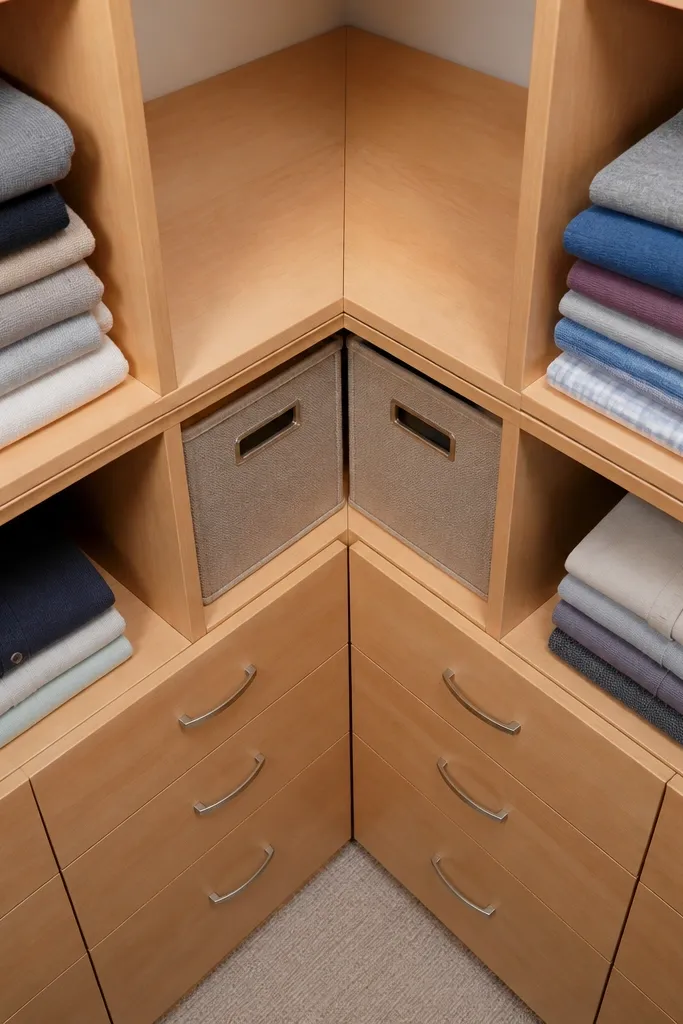
Step 1: Dry-fit your main shelf boards along each wall, then measure the inside angle gap at the corner. Cut a corner cap from 3/4-inch plywood or solid wood using a bevel cut that matches the inside angle, then sand it to fit snugly. Step 2: Attach the main shelves to cleats or brackets first, then screw the corner cap in place from behind and along the shelf edges. Finish by rounding the outer edges with 1/4-inch radius or a light chamfer.
Corners look messy when shelves stop short and leave a weird gap inside the angle. A corner cap solves that by filling the inside with an angled piece that makes the whole run look intentional. You get the storage benefit of L-shaped shelves plus a more furniture-like silhouette that looks good in photos. This design is especially nice for small closets because it keeps the corner from turning into a dust trap. Build it with thick boards and a smooth edge so the cap reads like a single architectural element.
Skip thisDon’t leave the cap with a visible seam wider than 1/16-inch — it looks like a patch.
Editor's noteDo a pencil-test fit: rub chalk on the cap edge, then slide it in to find tight spots before final sanding.
4. Shelf + Toe-Kick Boot Ledge
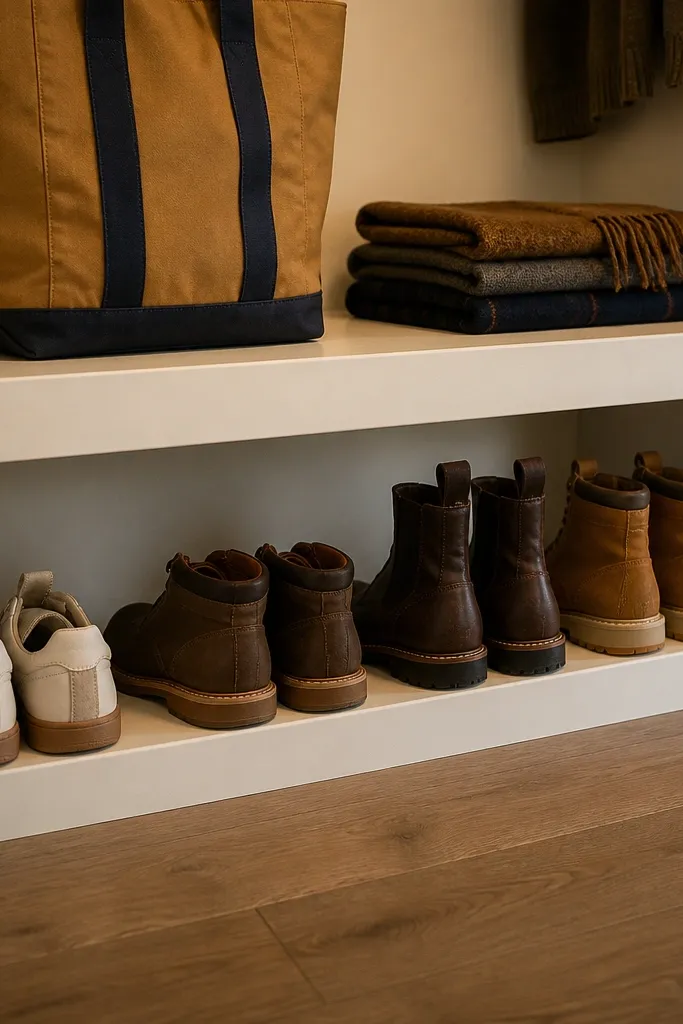
Step 1: Build a two-level unit: a main shelf board at the height you want (often 18-24 inches from the floor) and a toe-kick ledge 4-6 inches above the floor. Use 2x2 or 1x2 side supports fixed to studs, then add a back rail so the ledge doesn’t bow. Step 2: Install a front face strip (1x3 works well) to create a crisp line, then finish with stain or paint and a durable topcoat.
Shoes are the fastest way to make a closet corner look cluttered. This layout solves it by combining small-space corner closet shelves with a low toe-kick style ledge so shoes don’t tip or disappear behind hangers. The shelf surface holds bags or folded items, while the bottom ledge holds pairs upright or stacked. It also looks grounded because the front edge gives a “built” feel. Use it in entry-style closets, hall closets, and anyone who stores boots near the door.
Skip thisSkip the flimsy 1x2-only support — it vibrates and causes shelf sag under shoe weight.
Editor's noteAdd a small 1/8-inch lip on the toe-kick edge so shoes can’t slide off.
5. Vertical Stacked Cubes With Corner Frame
For tiny closets, storage needs to be tall and repeatable. Vertical stacked cubes put the storage where the corner already pulls your eye, and the frame makes it look like furniture rather than random shelves. You can mix open cubes for baskets and closed cubes for tucked-away items. This is the easiest way to “double storage” visually because each cube reads as a box you can fill. It looks best with a painted finish and clean, square edges.
Step 1: Build a corner frame using 1x3 or 2x2 boards fixed to studs on both walls, keeping the inside corner square with spacers. Step 2: Cut cube dividers from 3/4-inch plywood and screw them into the frame at measured intervals, like 10-inch cube spacing for small folded items and 12-inch cubes for totes. Step 3: Add a back panel only if you want extra rigidity; otherwise use corner braces behind the frame.
Use 1/4-inch backer board behind open cubes if you see drywall texture through the gaps.
Don’t make cubes deeper than 12 inches — small-space corner closet shelves start to feel bulky.
6. Rounded Edge Shelves With Black Brackets
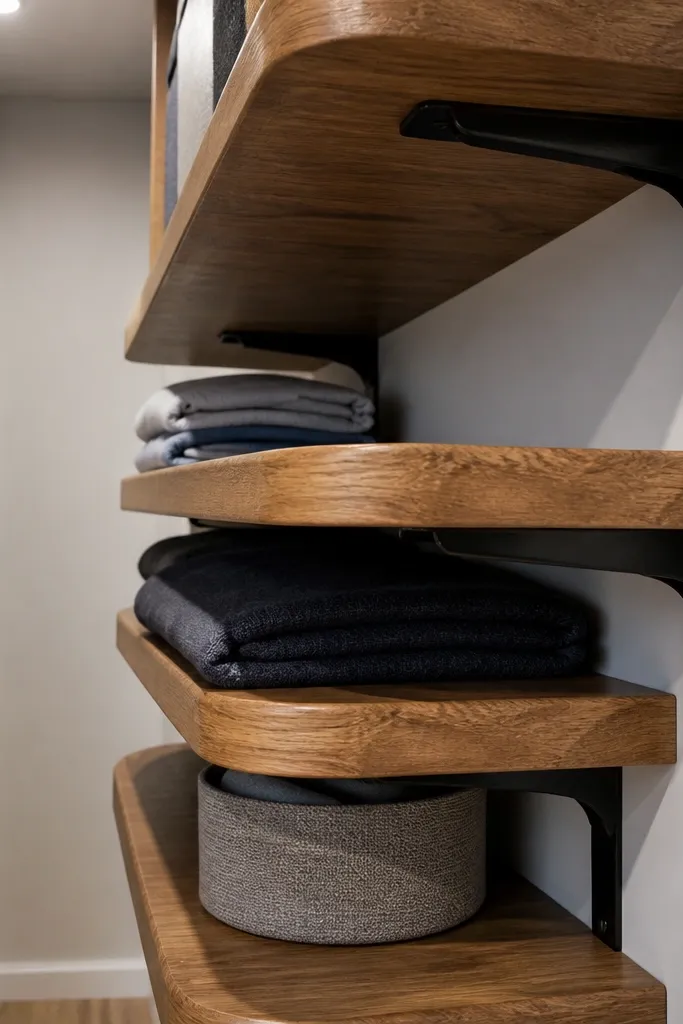
Step 1: Choose 3/4-inch thick shelves and rout a 1/4-inch roundover on the front edge, then sand to 180 grit. Step 2: Install two bracket rails along each wall at the same height, using a level and studs as your anchor points. Step 3: Mount shelves to brackets, then add a back stop strip to keep bins from sliding toward the corner.
This look is modern and intentional: rounded shelf fronts soften the corner and matte black brackets keep everything crisp. The rounded edge also makes the shelves feel safer for tight hallways and prevents corners from catching on sleeves and bags. It’s great for small-space corner closet shelves because the contrast makes the corner feel designed, not cramped. Use a medium wood tone like walnut or natural oak with a satin topcoat so the wood grain stays calm. This setup works for mixed storage: small bins on top and folded clothes on the lower shelf run.
Skip thisDon’t mount brackets only into drywall mud — corner shelves need real stud bite.
Editor's notePre-drill bracket holes and use washers — it keeps the screw heads from pulling through the shelf edge.
7. Painted Corner Shelves With Mirrored Back Panel
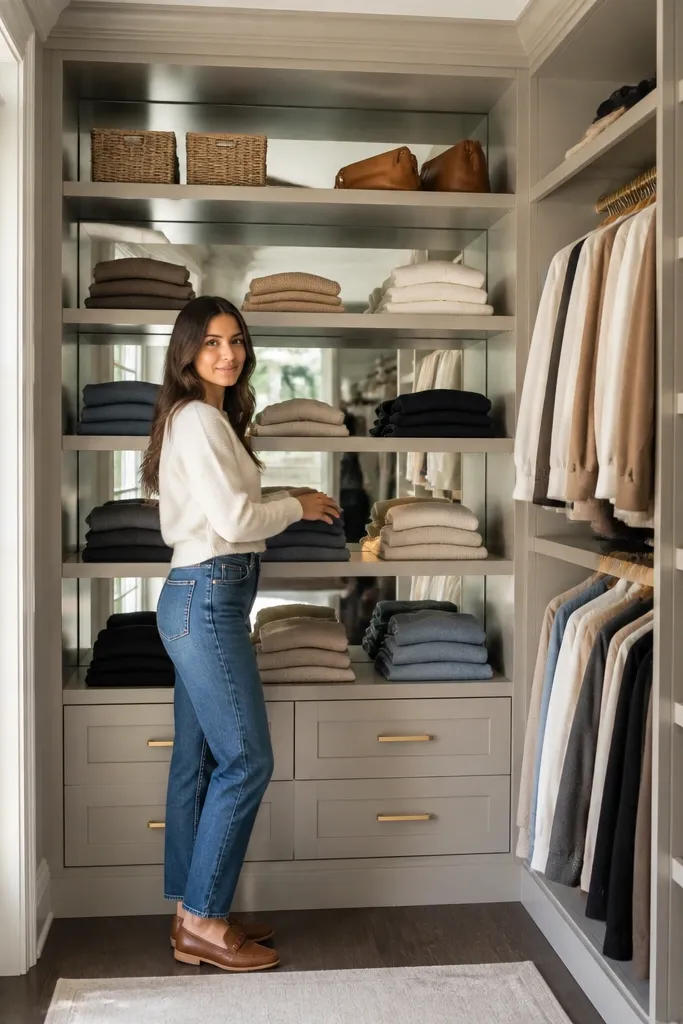
Mirrors in a closet corner aren’t just decorative; they make the space feel bigger and reflect light onto folded items. This idea pairs painted shelves with a mirrored back panel behind the corner run, so the corner looks deeper and brighter. It’s a strong choice if your closet has weak lighting or if the corner is hard to see from the door. Keep the shelves clean and simple so the mirror doesn’t make clutter more obvious. This is best for small-space corner closet shelves holding neatly stacked clothing or slim bins.
Step 1: Paint the shelves and face frame first, then let them cure fully. Step 2: Cut a mirrored panel to fit behind the shelves and secure it to the studs using mirror-safe adhesive or small mechanical clips. Step 3: Install shelves on cleats so you can place the mirrored panel behind them without trapping edges.
Use frosted or lightly tinted mirror if you store lots of small items — it reduces glare.
Don’t use standard glass adhesive without checking compatibility — mirror panels can pop if the wrong product is used.
8. Staggered Shelf Heights for Bins and Clothes
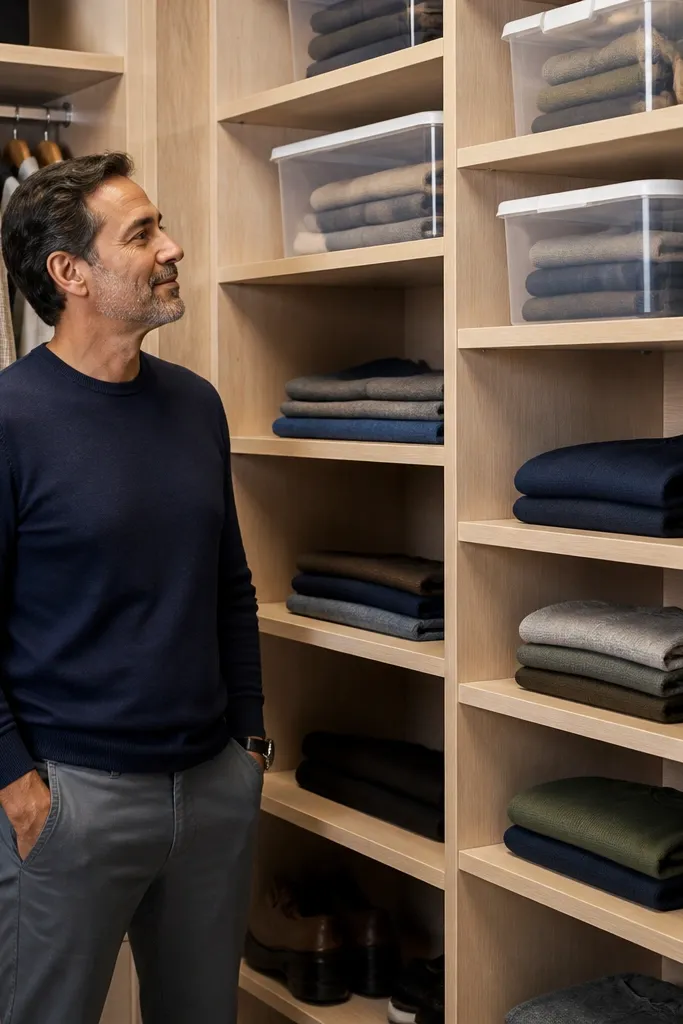
Step 1: Draw a quick cut list with three or four shelf levels, then assign each level a target height like 8 inches (bins), 12 inches (folded tops), 16 inches (sweaters). Step 2: Install two continuous side cleats on studs, then mount shelf boards at the measured offsets so the stagger stays consistent across both walls. Step 3: Add a back stop strip on each shelf so bins don’t slide into the corner.
Instead of making every shelf the same height, stagger them so each level matches what you actually store. In a corner closet, staggered heights stop the “dead space” where bins don’t fit and folded clothes slump. The look is also more interesting because the line of shelves steps across the corner. Use this when you have mixed items: socks and folded tees on top, sweaters in the middle, and small totes lower. It’s one of the best small-space corner closet shelves ideas for people who want their closet to look styled, not stuffed.
Skip thisDon’t guess bin height; measure the bin lid height with a tape measure and build to that.
Editor's noteMark shelf positions on cleats with painter’s tape so you don’t end up with one level drifting out of alignment.
9. Corner Shelf Ladder With Two Rails
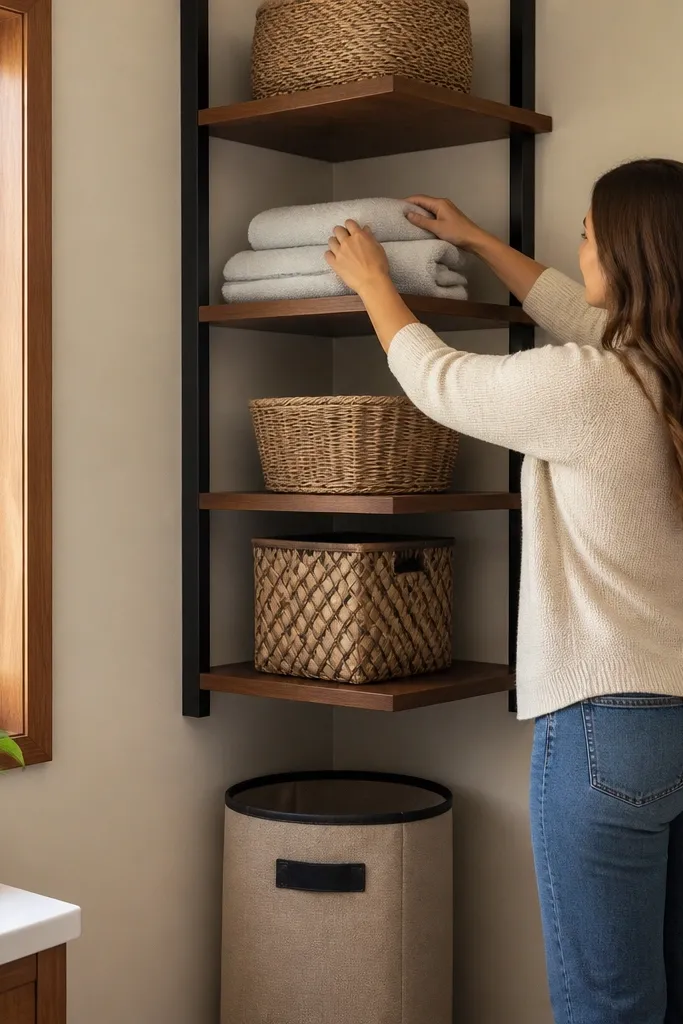
A ladder-style corner shelf makes the corner feel taller and gives you storage that looks intentional even when it’s not full. The two vertical rails frame the corner and keep shelves visually aligned, which matters in tight spaces. It’s great for small-space corner closet shelves when you want open storage for baskets, folded scarves, and small decor. The open design also lets you see what’s inside, which reduces the “mystery pile” effect. Choose a warm wood tone and a satin finish so it looks soft, not heavy.
Step 1: Cut two side rails from 2x2 lumber or 2x3 boards and mark shelf notch locations at even intervals like every 10-12 inches. Step 2: Cut shelves to fit between the rails, then secure with wood glue and screws through the rails. Step 3: Anchor the rails to studs and add diagonal braces at the back if the closet is deeper than 24 inches.
Use a scrap block as a spacer so each shelf lands at the same angle and height across both rails.
Avoid shelves that are too narrow; 7-9 inches wide looks awkward when you slide bins in.
10. Open Shelving With Closed Drawer Bottom
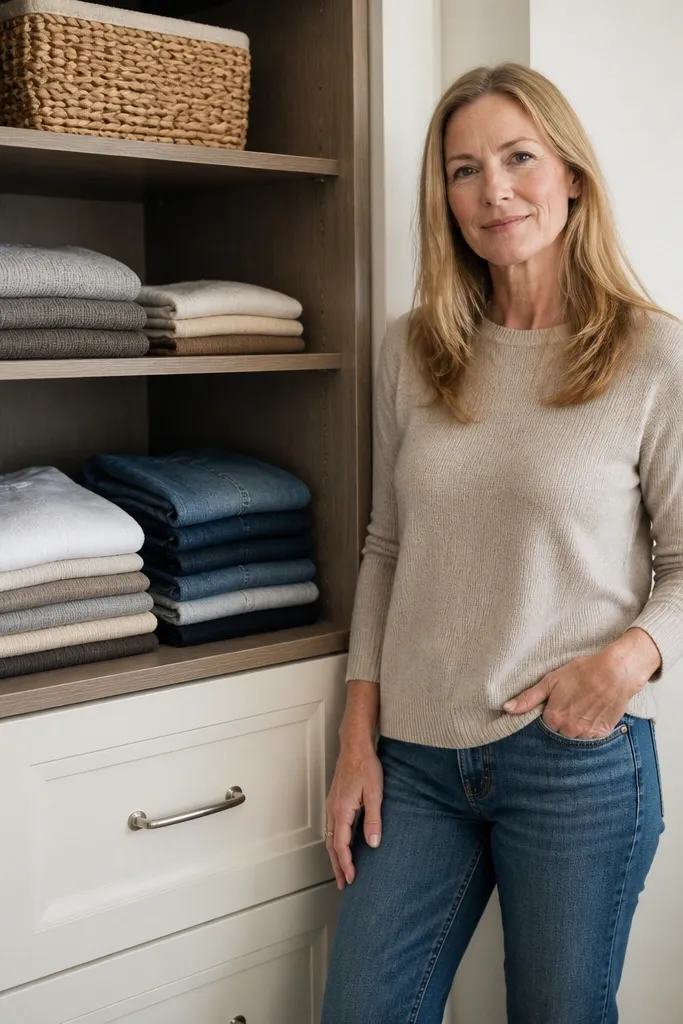
This idea doubles storage by separating “display” from “hide it.” The top shelves are open for folded clothes and baskets, while the bottom drawer handles socks, belts, and anything you don’t want visible. In a corner closet, a drawer adds real functionality because it uses the space that would otherwise be awkward to reach. The look is clean because the drawer face creates a strong base line. Pair it with matching shelf trim so the corner reads like one unit.
Step 1: Build a simple drawer box for the bottom section using 1/2-inch plywood, then mount it on side-mount slides rated for your weight. Step 2: Frame the corner above the drawer using cleats and side supports, then attach shelf boards at your chosen spacing. Step 3: Add a face trim around both the drawer and shelves so the edges line up and hide gaps.
Set the drawer height so the top of the drawer sits about 16-18 inches from the floor for comfortable reach.
Don’t install the drawer slides after shelves — install slides first so you can square everything.
11. Narrow Shelf Run With Slim Vertical Dividers
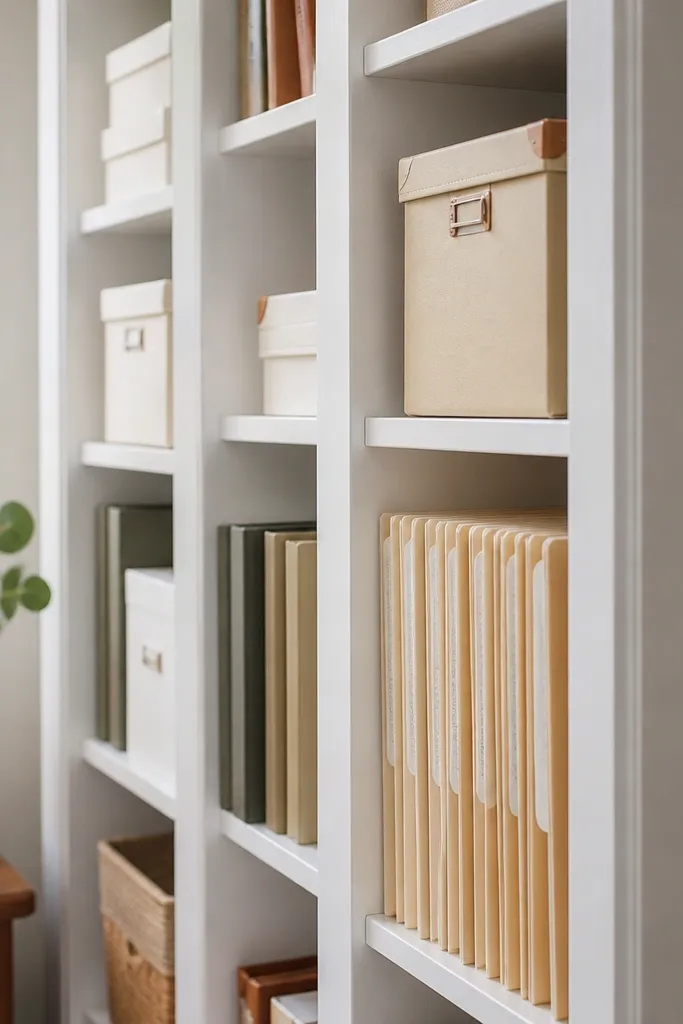
Step 1: Cut shelf boards to a narrow but usable depth like 8-10 inches, then cut dividers from 1/4-inch or 1/2-inch thick plywood. Step 2: Install the shelf boards on a cleat system, then screw dividers into the shelf top using pre-drilled pilot holes. Step 3: Add a back rail so dividers don’t wiggle and keep bins from sliding.
When you have a corner closet with lots of small items, narrow shelves with vertical dividers make the storage look tidy and keep everything from spilling into the corner. This setup works especially well for file folders, folded sets, and small boxes. The dividers create a grid effect that looks stylish and helps you see what’s where. Keep dividers thin and consistent so the corner doesn’t look cluttered. This design looks best with paint or a smooth stain and a crisp finish.
Skip thisDon’t stack dividers without measuring folder size; build spacing to your biggest item.
Editor's noteUse a 1/2-inch divider thickness for a sturdy grid that still looks light in a small corner.
12. Corner Closet Spice Rack Shelves (Small Bins, Big Order)
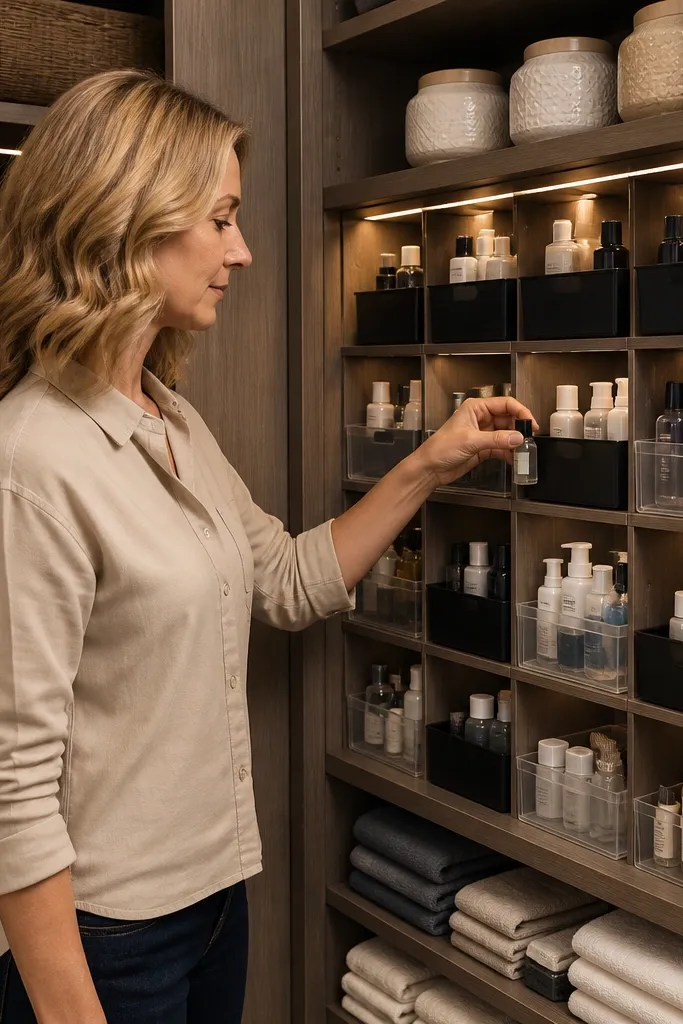
Step 1: Plan compartments around 4-6 inches wide and 6-8 inches tall depending on what you store, then cut dividers from 3/8-inch plywood for a light build. Step 2: Frame the corner with a backer strip and side rails fixed to studs, then screw the grid dividers into the frame. Step 3: Add a thin face trim around the outside edges to hide the plywood layers and give a clean look.
This is the “small-space corner closet shelves” idea that looks cute and stays organized: mini compartments sized like a spice rack. Instead of one big shelf, you get many small sections that stop items from migrating toward the corner. Use it for toiletries, hair tools, cleaning supplies, or small accessories inside a closet that doubles as a utility space. The look is photogenic because the compartments form a neat grid. Keep the finish bright and uniform so it reads intentional.
Skip thisDon’t make compartments too small for the items you’ll actually use; measure the largest container first.
Editor's noteLabeling is optional, but use removable tape labels on the inside back — it keeps the front clean.
13. Two-Tone Corner Shelves With Teak-Style Shelves
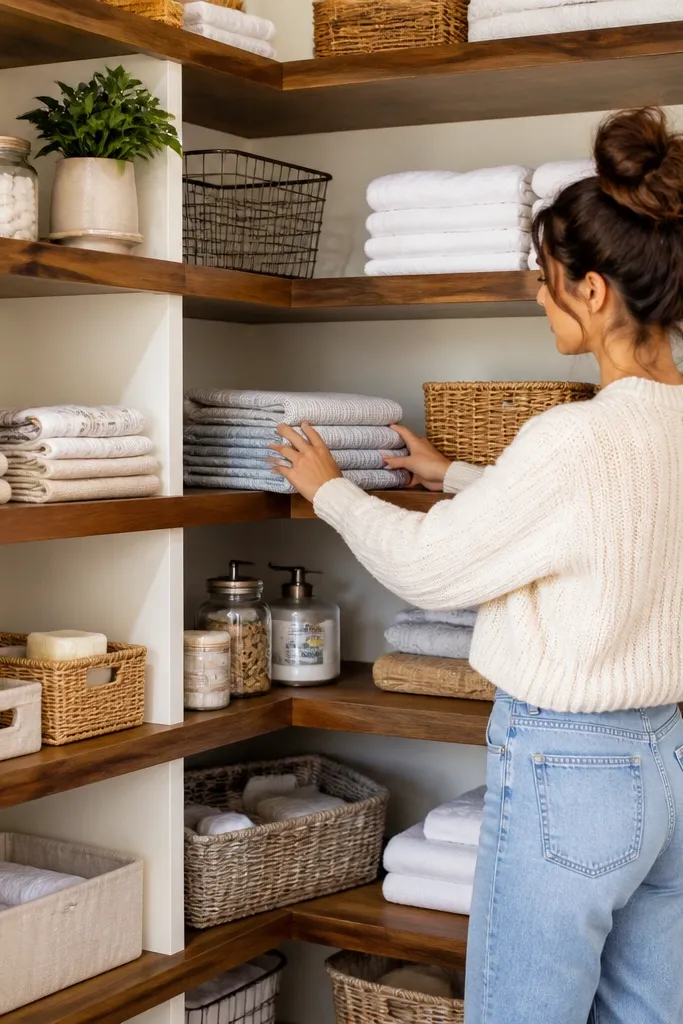
Step 1: Build a corner frame with painted 1x3 boards, then sand and prime them before paint. Step 2: Stain the shelf boards separately with a warm brown tone, then seal with a satin polyurethane. Step 3: Assemble by installing the painted frame first on cleats/studs, then attach stained shelves to the frame with countersunk screws.
Two-tone shelves look expensive because the corner has contrast. Put a darker “teak-style” stain on the shelf boards and a lighter paint on the frame and supports. This makes the storage look layered and gives the corner depth, even in tight closets. It also hides minor wall imperfections because the darker shelves pull focus forward. This idea is perfect when you want small-space corner closet shelves that look like furniture and still handle bins, folded clothes, and small baskets.
Skip thisDon’t paint over stained edges without masking — you’ll get messy bleed lines at every shelf.
Editor's noteUse the same stain batch for all shelves so the tone doesn’t shift between boards.
14. Corner Shelf With Built-In Rod for Slim Hangers
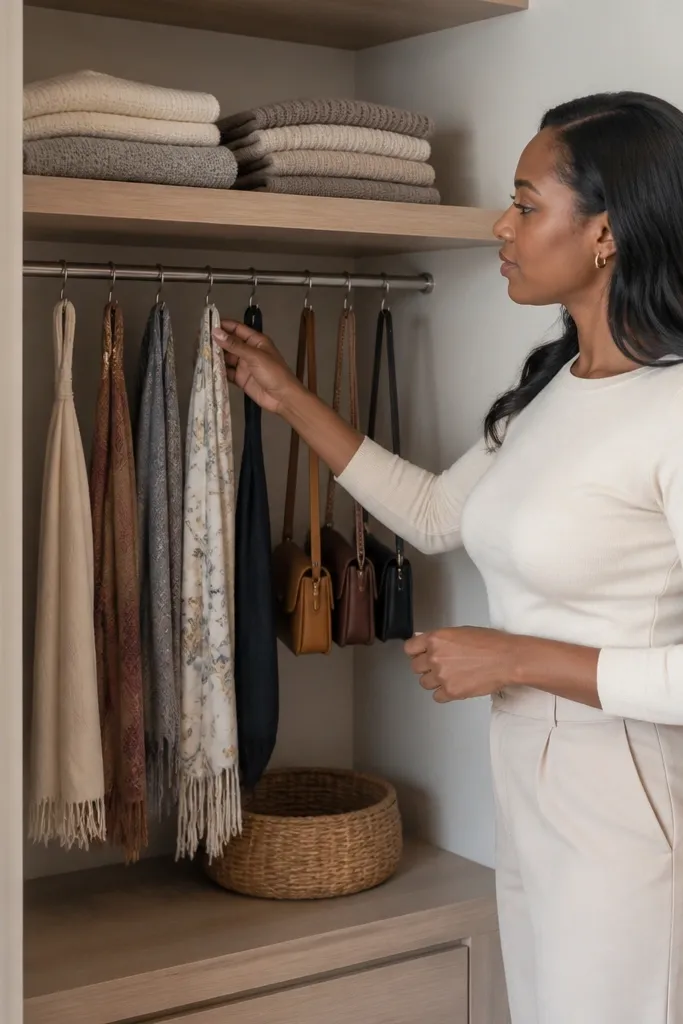
Step 1: Install two strong side supports into studs at the desired height, then mount a shelf board on top using brackets or a cleat. Step 2: Add a short rod (often 18-24 inches for corner access) with rod flanges attached to the side supports, keeping the rod centered under the shelf. Step 3: Finish the wood shelves with satin topcoat and paint metal hardware if needed.
If your corner closet holds scarves, bags, or lightweight garments, combine a shelf with a small rod. The top shelf stores folded items, while the rod below gives you vertical hanging that keeps small things from piling up. This layout makes the corner feel more useful because it adds a second storage mode without taking extra floor space. For looks, keep the rod black or brushed steel and match bracket hardware so the corner looks intentional. It works great in small closets where every inch matters.
Skip thisDon’t mount the rod to only shelf brackets; anchor to side supports that hit studs.
Editor's noteUse a rod height where hangers clear the shelf lip by at least 2 inches.
15. Pre-Finished Wall Shelf Panels for a Fast Corner Build
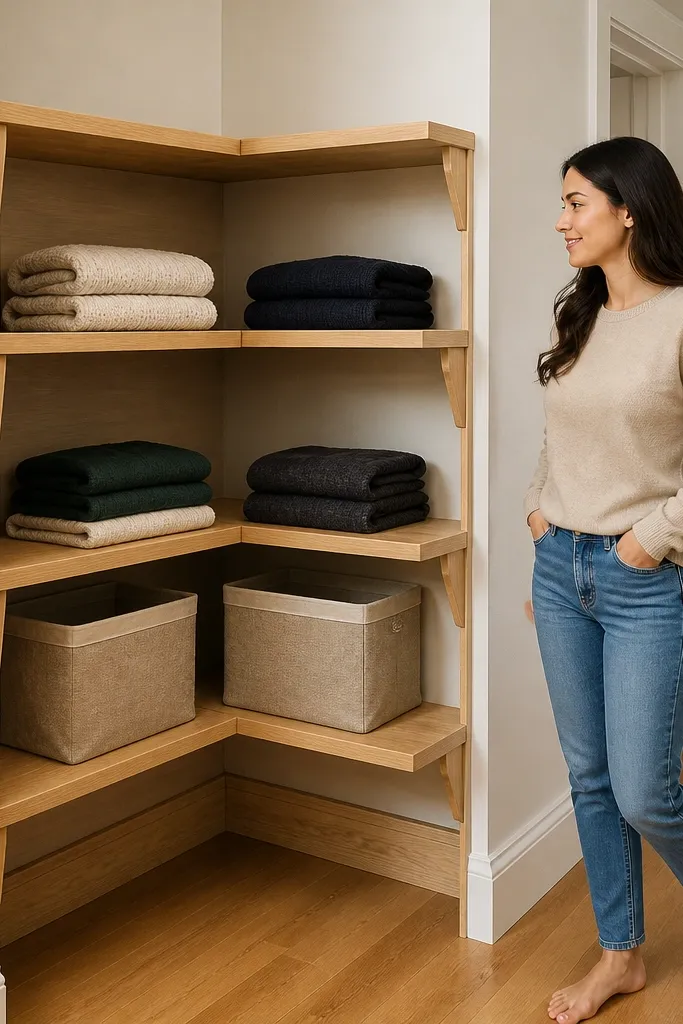
When time matters, pre-finished shelf panels let the corner look polished without stain matching and long cure times. You still get the storage increase of small-space corner closet shelves, but the finish is uniform and the edges are already sanded. This idea looks best when you use matching panels and brackets with the same color throughout. It’s a great option for beginners who want a good-looking corner without routing and heavy woodworking. Plan this for closets where you can mount into studs and keep the layout simple.
Step 1: Choose pre-finished boards in a fixed thickness like 3/4-inch and cut them only if needed to match the corner length. Step 2: Install a stud ledger or cleats along both walls, then mount shelf brackets at the same spacing on each side so the top line stays straight. Step 3: Add side trim pieces to cover bracket edges and seal any exposed edges if the panels are composite.
Dry-fit one panel and one bracket before you commit — a single bracket shift shows immediately in corners.
Skip mismatched panel thickness; uneven thickness makes the corner look crooked.
16. Corner Shelves With Decorative Wainscot-Style Backing
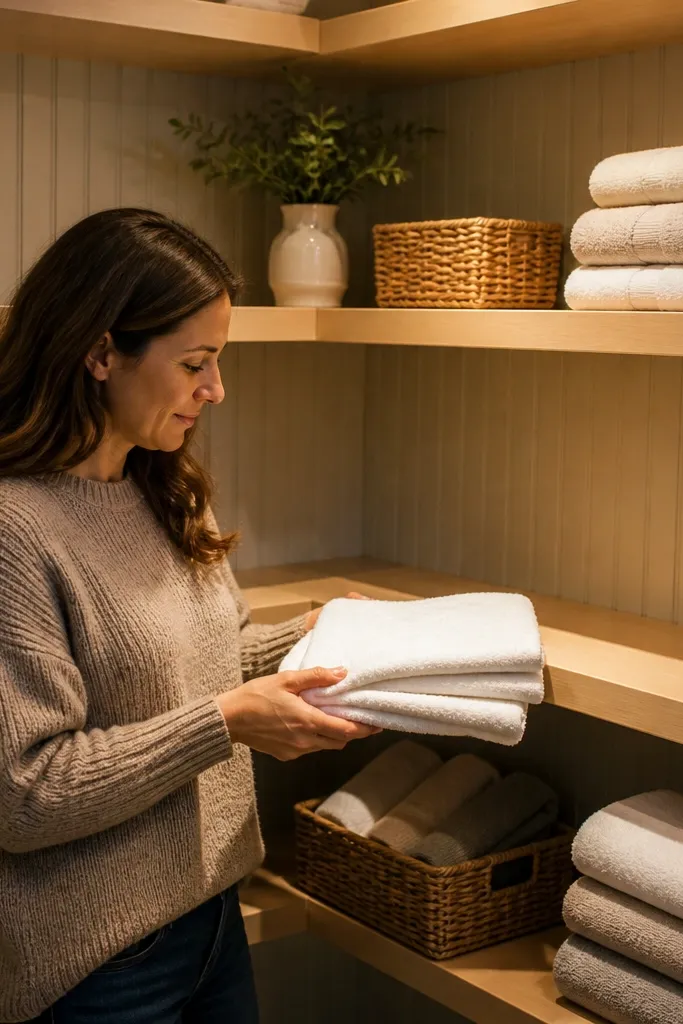
Step 1: Install a backing panel system on the wall corner before shelves, using beadboard or 1/4-inch raised panel sheets cut to fit. Step 2: Attach cleats or a ledger through the backing into studs, then mount shelf boards on top. Step 3: Add a trim cap along the top edge so the backing doesn’t show raw cuts.
If your closet corner feels plain, add a decorative backing behind the shelves. Wainscot-style paneling (simple beadboard or narrow raised panels) gives the corner depth and makes the shelves look like a built-in cabinet. The shelves can stay simple, but the background makes them photogenic. This is a strong choice for small-space corner closet shelves in bedrooms where the closet door is always in view. Keep the shelf front clean and let the backing do the visual work.
Skip thisDon’t screw shelf cleats into the beadboard alone — anchor into studs or you’ll get movement.
Editor's notePaint the backing one shade lighter than the shelves to create a subtle halo effect.
17. Shoe-Box Nook With Sliding Bin Doors
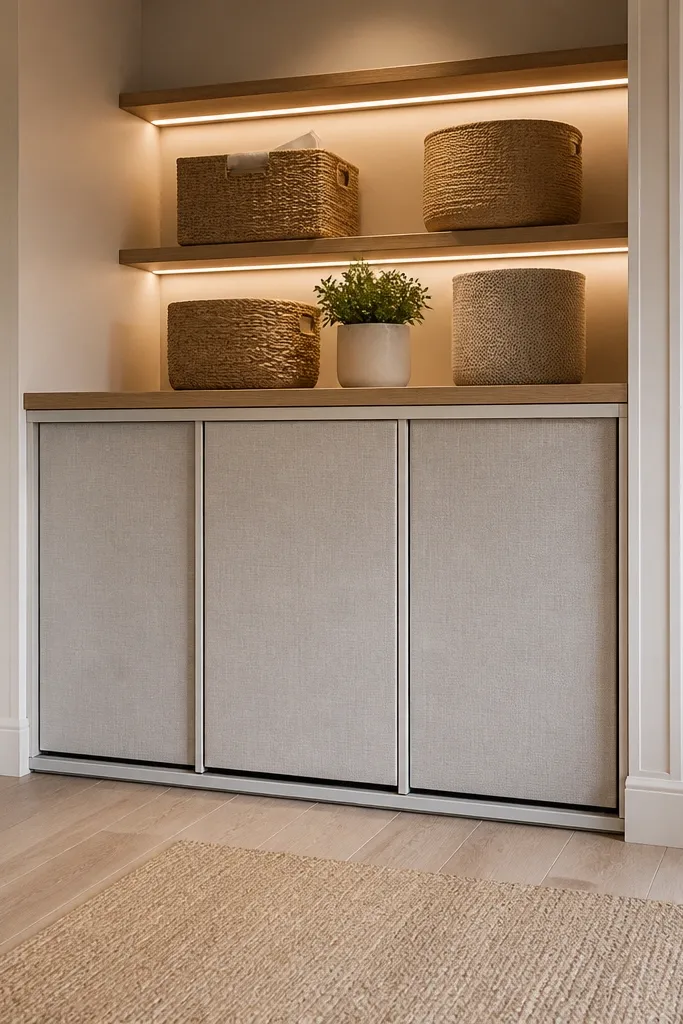
Step 1: Frame the nook with side supports and a back panel, then install fixed shelves for top storage and a bin floor for the bottom. Step 2: Mount a track for sliding doors on the top edge of the nook and hang doors cut to fit the opening width. Step 3: Add stops at the ends of the track so doors don’t slide out when you open it.
This idea looks neat because you hide the mess. Build small-space corner closet shelves as a bin-ready nook, then add sliding doors or fabric panels that cover the bins. The shelves can hold baskets on top, while the bottom section stores shoes or seasonal items behind a clean front. It’s especially good if your closet corner is visible and you hate seeing random pairs or stacked boxes. Use a matte finish and simple door hardware so the look stays modern.
Skip thisDon’t make the door opening too tight; leave 1/4-inch clearance for smooth sliding.
Editor's noteUse lightweight doors with a soft-close bumper so the corner doesn’t slam.
18. Corner Floating Shelves in Matching Walnut Tone
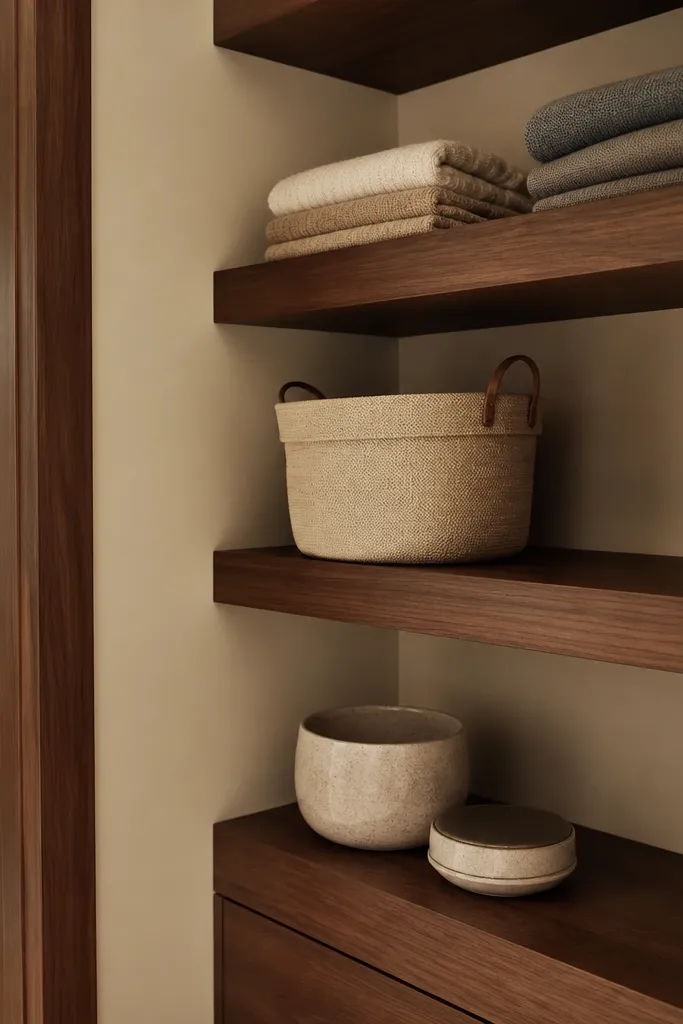
Step 1: Cut shelves from 3/4-inch walnut plywood or veneer board, then sand and apply stain to match all boards. Step 2: Install hidden cleats along studs, then mount shelves so the top line stays level across both walls. Step 3: Add a thin back stop strip under each shelf so items don’t fall into the corner gap.
Walnut tone makes closet storage look warm and intentional, even when the closet is small. Floating shelves also keep the corner looking uncluttered, which matters because corners already feel tight. This design works for small-space corner closet shelves that hold a few hero items: folded sweaters, a small hamper, or a basket for hats. The key is matching hardware color to the shelf tone so it doesn’t look like random DIY brackets. Use satin finish so the wood reflects light without glare.
Skip thisDon’t skip a back stop; corner gravity pulls items straight into the inside angle.
Editor's noteStain all shelves at once on a drop cloth and label the boards so the tone stays consistent.
19. Corner Shelf Run With Built-In Lighting Strip
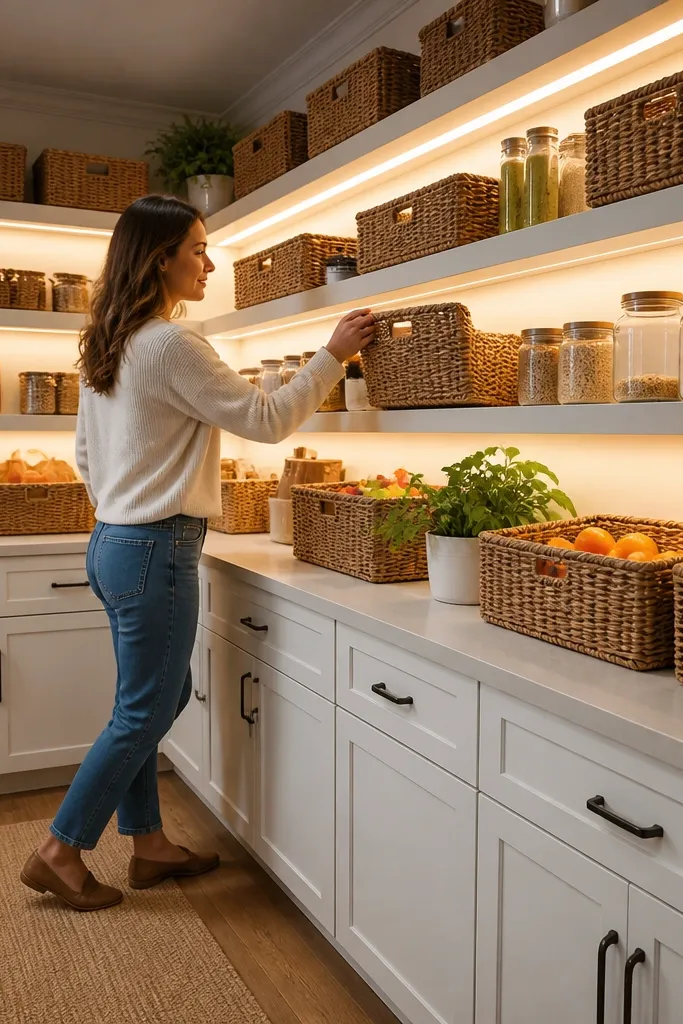
Step 1: Install a shallow LED channel under the top shelf edge, wired to a low-voltage driver placed in an accessible spot. Step 2: Cut a small notch in the back or side support for the wire path, then mount the shelf boards so the channel sits flush. Step 3: Test the light before closing everything, then add a diffuser strip if your LED points show.
Lighting turns small-space corner closet shelves into something you can actually use and see. A warm LED strip under the top shelf makes the entire corner look cleaner because it reveals the shelf face and reduces shadows behind bins. This is one of the best aesthetic upgrades because it makes the corner look custom, not just functional. Keep the shelves simple and the lighting hidden so the glow looks like it comes from the shelf itself. It’s ideal for closets with dark corners, especially in hallways and bedrooms.
Skip thisDon’t run wires through drywall without a protected route — clamp and shield the cable.
Editor's noteUse 2700K warm LEDs so clothes and wood tones look natural instead of blue.
20. Corner Shelves With Glass Jar Fronts on Top Level
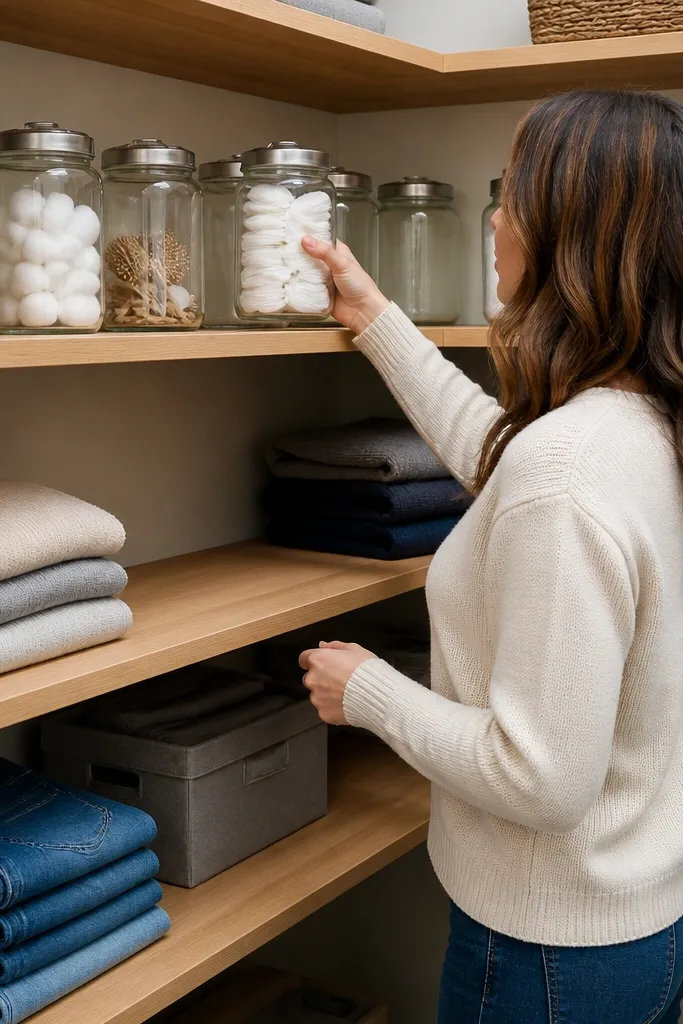
If your closet corner has small daily-use items, glass jar storage makes it look organized and styled. Put glass-front jars on the top shelf and reserve the lower shelves for folded clothes or bins. The jars create a neat visual rhythm that looks good even when the closet is half-full. This design also protects items from dust in a corner, which is a real issue. Keep the shelf finish matte and use matching jar lids so it reads cohesive.
Step 1: Build the corner shelf run with a solid top surface and a back stop strip to keep jars from shifting. Step 2: Add a lip or 1-inch raised edge on the top shelf so jars stay in place when you open the door. Step 3: Arrange jar sizes first, then adjust shelf spacing so labels line up visually and don’t crowd the corner.
Use uniform jar heights; it makes the corner look designed instead of random.
Don’t place jars on a shelf without a lip — one bump and they slide into the corner.



