
1. Wall-Mounted Rail + Slim Shelf Coffee Landing
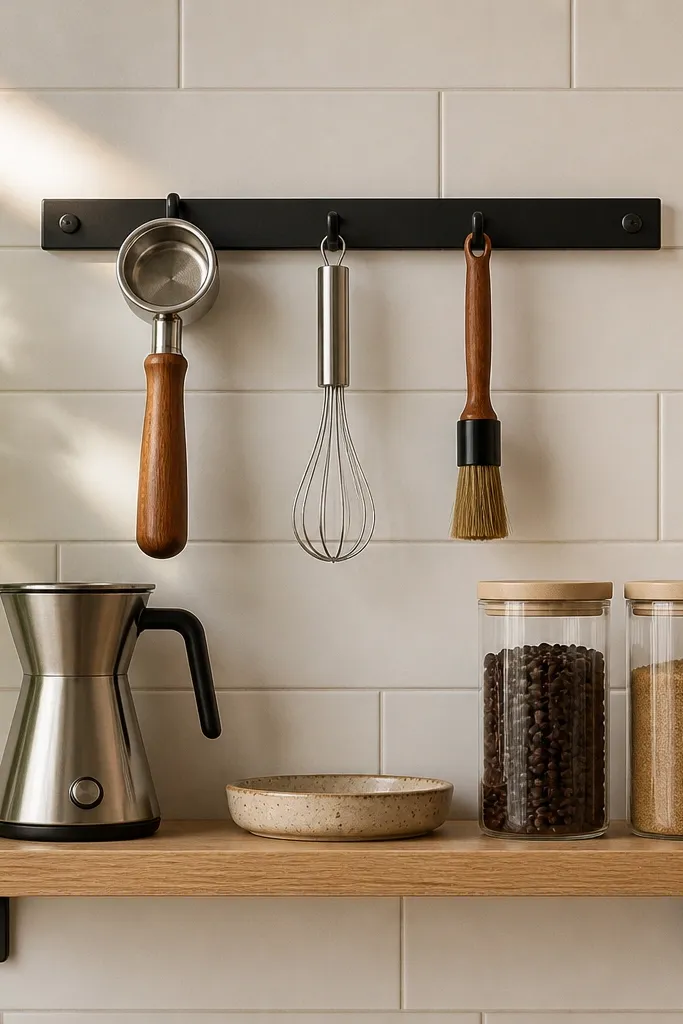
This setup looks intentional because it frames the station with clean lines instead of spreading items across the counter. A slim shelf gives you a place for the brewer and a tray, while the rail holds the tools that would otherwise clutter the counter. Use matching canisters so the rail looks styled, not random. It works great in narrow kitchens where you still have a blank wall above a small counter or breakfast bar. Skill level is beginner-friendly: you’re drilling a few anchors and keeping the shelf load within the hardware rating.
Start by measuring the counter width and picking a shelf length that matches it, usually 18-24 in for tiny spaces. Install a wall rail at about 72 in from the floor so mugs and utensils hang without knocking into each other; then mount a floating shelf 10-12 in below the rail. Place a heatproof mat on the shelf, set the brewer on it, and use a tray (about 10x16 in) for filters, spoons, and daily coffee. Finally, fill matching jars with beans and instant options, and hang only the tools you use daily so the rail stays neat.
Editor's noteUse a level and mark stud locations even if you’re using anchors. A slightly off rail ruins the whole look.
Skip thisDon’t hang heavy items like a full grinder on a rail meant for light utensils.
2. Pegboard Coffee Corner With Color-Coded Tools
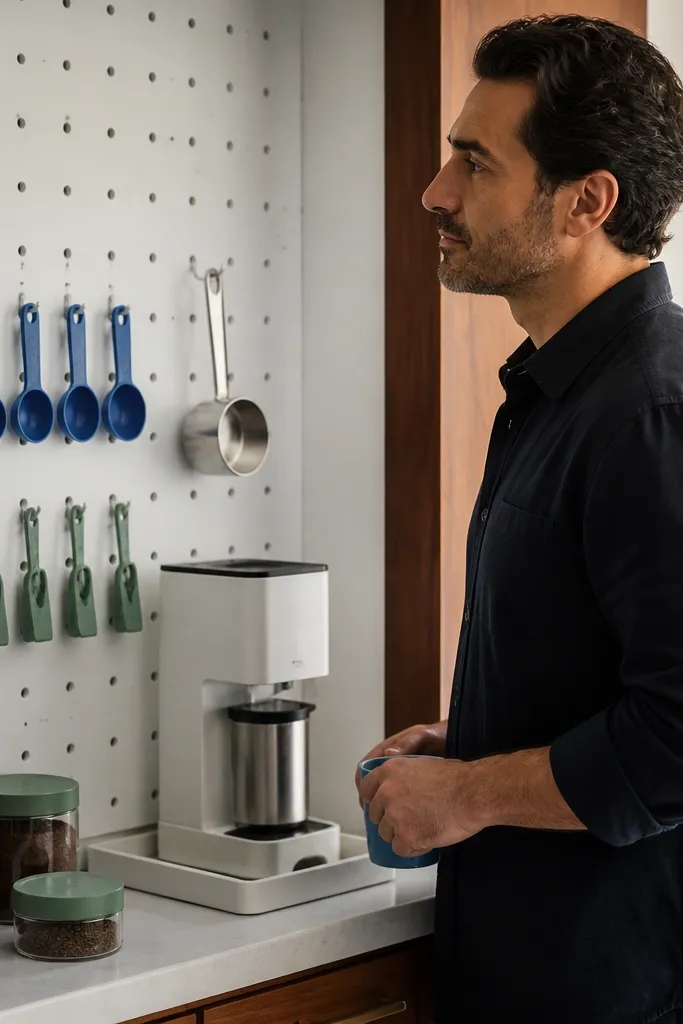
Pegboard instantly makes a tiny station look designed because everything has a place and the grid creates visual order. For small-space coffee station ideas, it’s especially good when you want open storage but hate clutter. Stick to one pegboard background finish (painted matte white or black) and use a consistent set of hooks and baskets. It photographs well because the items line up and the wall does the heavy lifting. This is a mid-beginner project: you’ll cut or mount pegboard, then attach hardware and arrange the tools.
Mount pegboard to a wall near your sink or the main prep area, keeping the station within arm’s reach of water and power. Use a heat-safe pad on the counter and place a compact tray for the brewer and filter area. Arrange jars on the pegboard using small shelf brackets or clear bins so lids stay visible; then hang your daily tools (measuring spoon, tongs, tamper if you use one) on hooks. Seal raw wood edges if you cut pegboard, and paint the board before installing hooks for a clean finish.
Editor's notePaint the pegboard first, then attach hooks after it cures for best adhesion and a smoother look.
Skip thisAvoid mixing metal finishes everywhere; pick black or brushed steel hooks and commit.
3. Rolling Bar Cart With a Flip-Top Coffee Tray
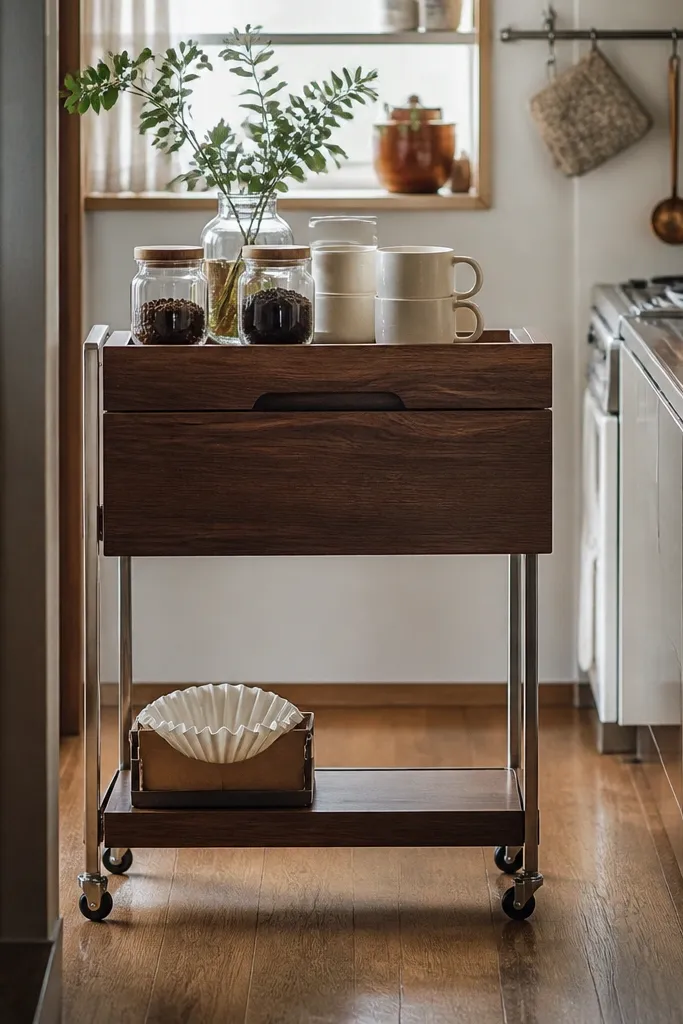
A rolling cart is one of the cleanest solutions for tiny kitchens because it gives you storage on wheels and a defined station surface. The flip-top tray is the trick that makes it look tidy: you can close it when guests come over, then open it for brewing. Use two tiers: upper for mugs and jars, lower for filters, spare cups, and backup stir sticks. It looks great in photos because the cart forms a vertical “frame” and keeps items off the counter. Build time is about a half day if you’re assembling a ready cart and adding a tray system.
Buy a narrow cart with at least two shelves and a tray or platform around 18-24 in wide. Add a hinged tray top using a pre-made tabletop cut to size, or attach a thin wood panel with a piano hinge and latch. Use a heatproof pad on the open tray area and keep the brewer small enough to fit without blocking the latch. On the bottom shelf, add a lidded bin for pods or grounds and a slim organizer for paper filters so nothing spills onto the floor.
Locking wheels matter. Choose casters with a brake so the cart doesn’t creep during pouring.
Don’t stack mugs on open shelves higher than the brewer controls; it makes the station feel cramped.
4. Under-Cabinet Coffee Shelf for the Tiny Counter Run
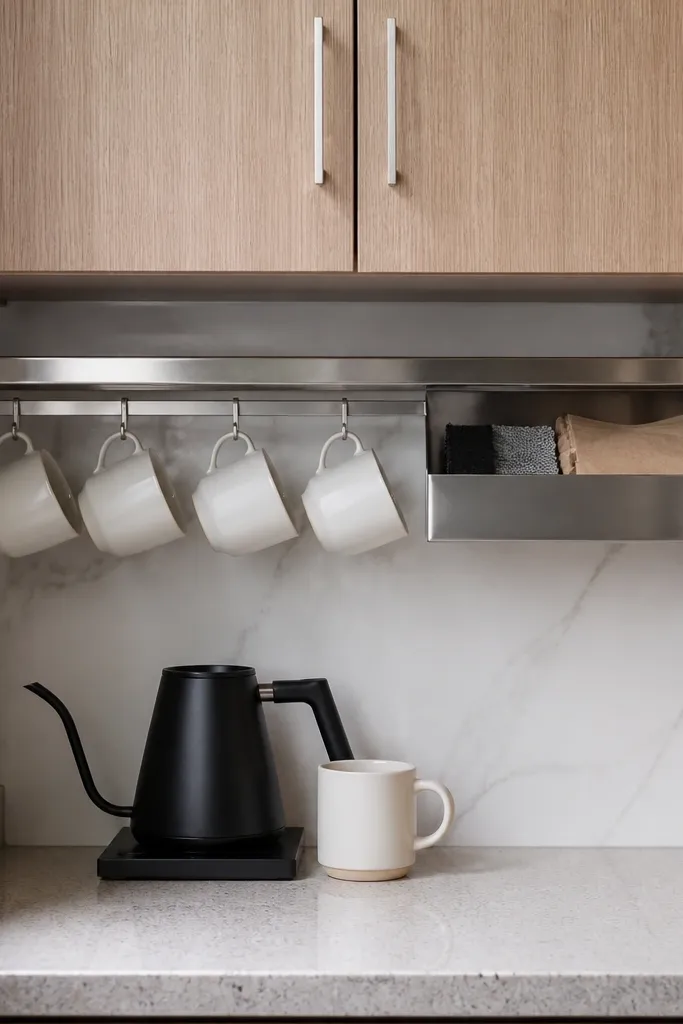
If your counter is basically a prep zone, under-cabinet storage is the stealth upgrade that makes small-space coffee station ideas actually work. The shelf adds a vertical landing for cups, filters, and a small caddy so your main counter stays clear for cooking. Keep everything within the cabinet footprint so you don’t hit cabinet doors or handles. This looks crisp because the shelf is hidden until you reach for it. It’s beginner-friendly: mounting is straightforward, and you can use the existing cabinet structure for anchoring.
Find a spot under your upper cabinet where you can still open doors fully and keep clearance from the ceiling line. Mount a narrow shelf 14-18 in above your counter so mugs don’t bump your hands while brewing. Place a shallow bin for filters and a slim organizer for spoons and stir sticks. Set your brewer on the counter with a heatproof mat, and use a small tray for daily items so drips stay contained.
Use a light color shelf and dark bins together. It reads clean in photos and hides small messes.
Avoid installing too low; you’ll hit the shelf with your kettle or arms every morning.
5. Corner Floating Shelf With Two-Tier Mug Wall Display
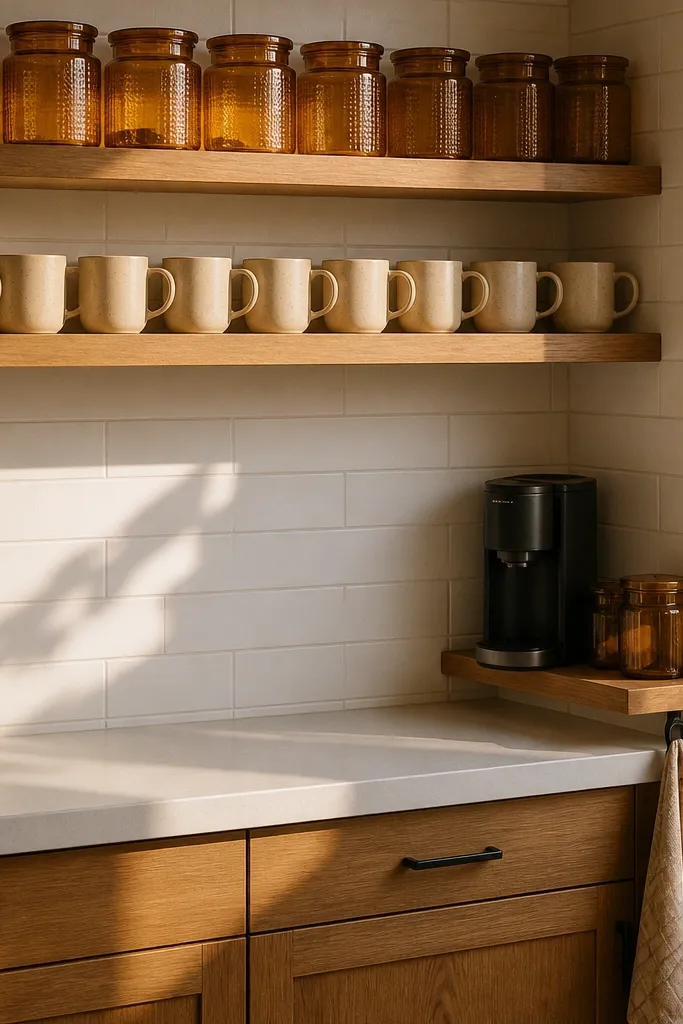
Corner stations look great because they use space you can’t reach for cooking anyway. Two-tier shelves let you keep mugs vertical and coffee supplies organized without eating counter space. The design looks cohesive when you repeat the same jar style on both shelves and keep your mug handles facing forward. It’s ideal for tiny kitchens where a straight wall is busy, but a corner is open. Skill level is beginner: the main work is getting shelf brackets perfectly level.
Measure the corner and choose shelves that fit the depth you can see, usually 8-10 in deep for mugs. Install the top shelf first, then mount the second tier about 10-12 in below so mugs fit without crowding. Use small risers or shelf dividers so mugs don’t slide and jars don’t roll. Add a heatproof mat on the counter directly below and keep only the brewer and a tray on the surface.
Hang mugs by color or style, not randomly. A grouped look reads intentional instantly.
Don’t place a deep shelf in a corner; it blocks sightlines and makes the station feel cramped.
6. Cabinet Door Coffee Station With Pull-Out Tray
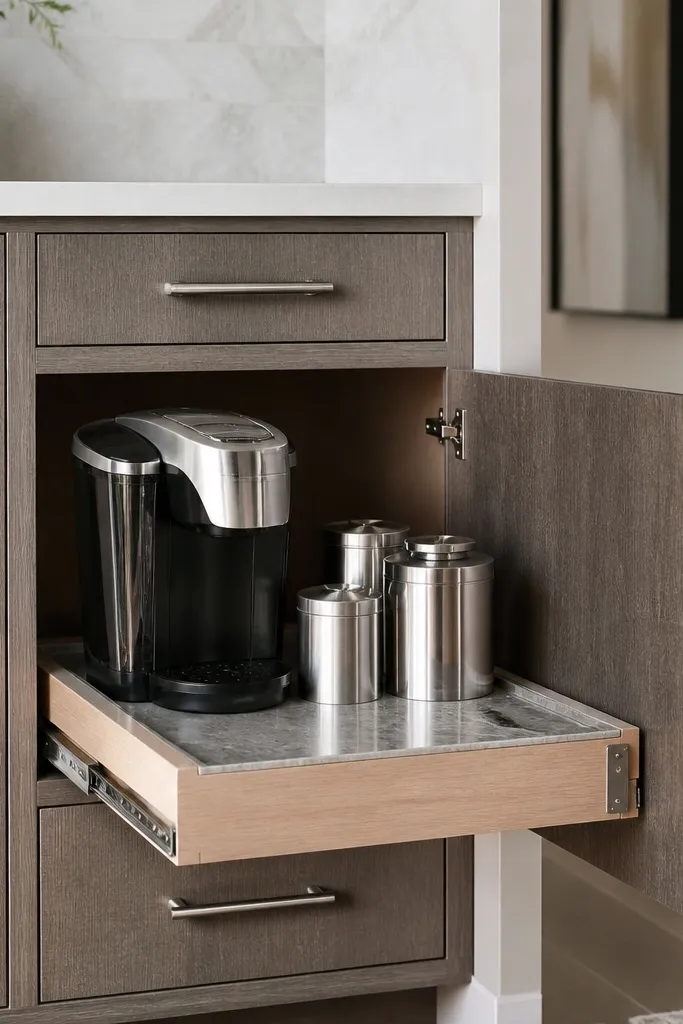
This is the cleanest option for kitchens that need to look tidy all day. A pull-out tray behind a cabinet door keeps the station out of sight, but you still get a dedicated brewing zone when you open it. It looks sleek because the cabinet hardware and tray create a single block of design instead of scattered items. It’s also practical: you can store extra filters, backup cups, and cleaning tools inside the cabinet. This is a more hands-on DIY because you’re building a tray system and mounting slides.
Pick a cabinet that’s within 3-4 ft of power and water access, ideally near your prep area. Install a pull-out drawer slide rated for the tray weight, then mount a tray board sized to fit inside the cabinet opening with 1/2 in clearance. Attach a small lip or stop block so cups and jars don’t slide out when you pull it. Inside the cabinet, mount a small vertical organizer for mugs and add a lidded bin for filters so the inside looks neat too.
Use soft-close slides if you want the station to feel premium and quiet.
Don’t overload the tray with tall items; keep jar height under the cabinet door line.
7. Reclaimed Wood Picture-Ledge Coffee Shelf With Matching Jars
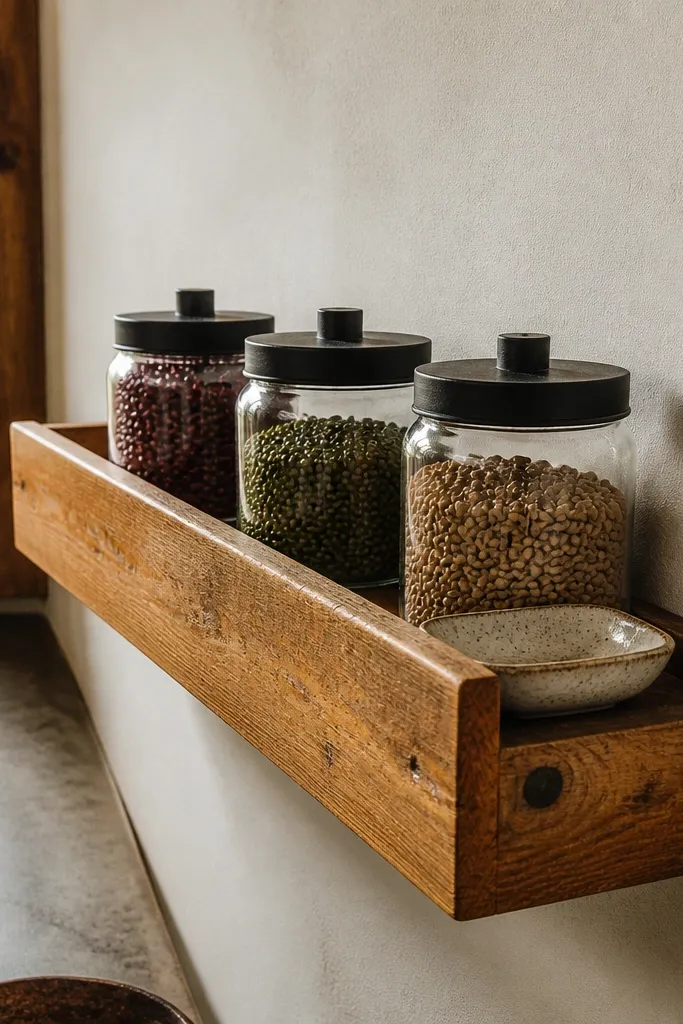
A picture-ledge shelf has a built-in lip that keeps everything from sliding, and the wood grain adds warmth that looks good even in small spaces. Pair it with matching jars and a single tray, and you get that styled coffee nook look without needing a full counter. This works best when your station is on a narrow wall above a small counter or in a laundry room kitchen corner. It’s great for photogenic setups because the wood grain frames the items. Build time is quick if you buy the shelf and focus on arrangement.
Mount the picture-ledge shelf so the bottom lip sits about 52-56 in from the floor, depending on your mug size. Add a heatproof mat or silicone pad on the counter below, then place your brewer on a tray that fits within the shelf’s visual width. Use three jar sizes max: one for beans, one for instant or sweetener, one for filters or pods. Label with consistent tape or a single label style so the shelf reads clean.
Match jar lids to the shelf finish: black lids on dark wood, brass on light wood.
Avoid mixing jar heights wildly; it makes the shelf look messy even if the layout is functional.
8. Slim Stainless Coffee Station on a Floating Desk Shelf
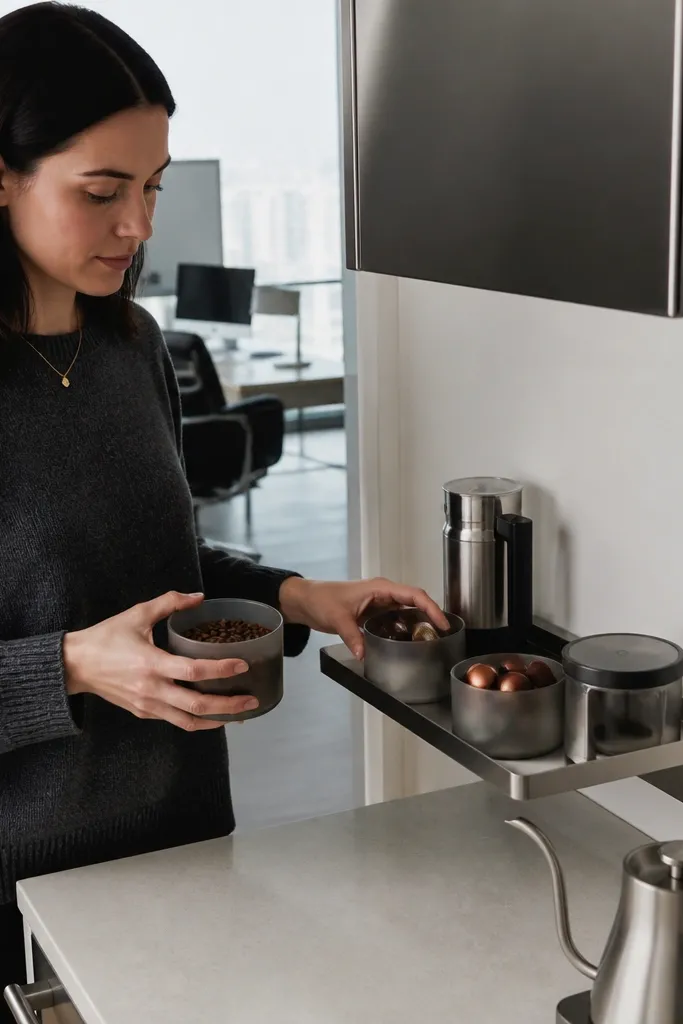
If your kitchen has stainless appliances, a slim metallic station looks like it belongs there. The trick is keeping the footprint small while still giving you a clean work surface. A floating shelf with a narrow stainless tray gives you a “counter” without the bulk. Store coffee tools in slim, stackable containers so the visual rhythm stays tight. This suits tiny kitchens with modern hardware and a short counter. It’s beginner to intermediate, mainly about mounting securely.
Choose a floating shelf depth around 10-12 in and mount it level with your backsplash line. Place a stainless drip tray or silicone mat on the shelf surface, then set the brewer so the cord can drop behind the shelf. Add a slim organizer for filters and a small jar set that matches your appliance finish. Finish by placing a single stack of mugs on the counter below, not on the shelf, to keep the shelf from looking crowded.
Editor's noteUse a cable hook under the shelf so cords disappear behind the station.
Skip thisDon’t put everything on the shelf; keep mugs on the counter or lower shelf so the top stays clean.
9. Magnetic Knife Strip for Coffee Tools and Measuring Spoons
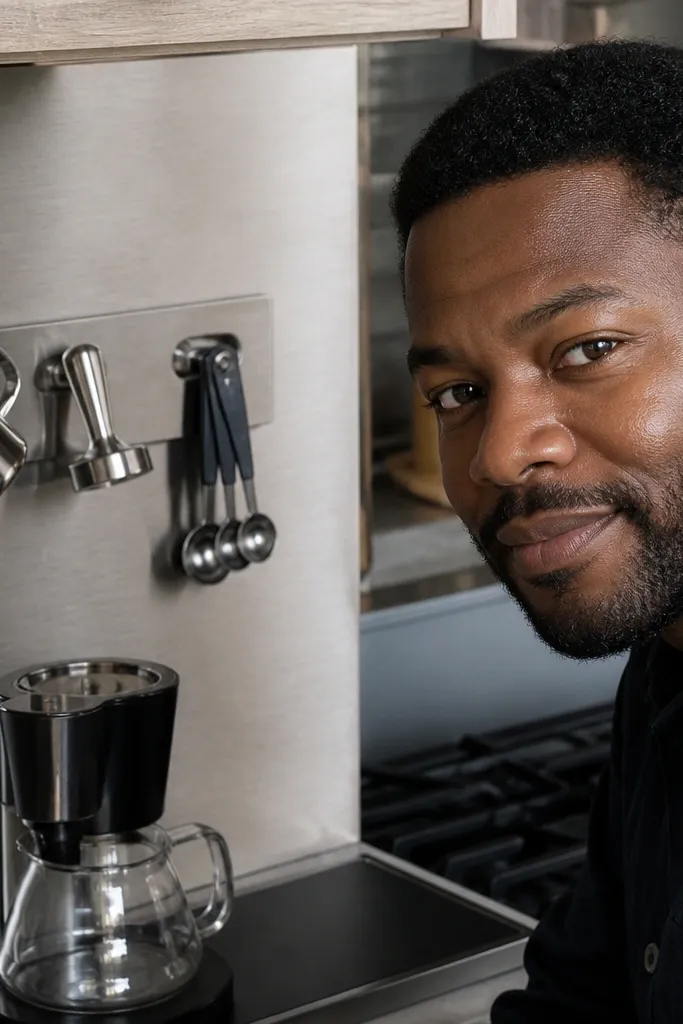
This is one of those small-space coffee station ideas that looks clever because the tools look exactly where your brain expects them. A magnetic strip keeps metal tools visible and organized without taking up shelf space. It also cleans up the look because you’re not seeing loose spoons and random accessories. Use it for measuring spoons, portafilter tools, small scissors for bags, and a metal funnel. It suits kitchens where you already have metal surfaces or where you want a sleek, minimal look. The build is quick and the hardware is cheap.
Mount a magnetic strip on the wall beside your brewer, keeping it within arm’s reach but away from where you’ll splash water. Add a small caddy (magnetic or wall-mounted) for items that don’t stick, like a wooden stir stick or small brush. Use one small container for paper filters on the counter and keep the magnetic strip for metal tools only. Finish by placing the coffee beans and sweeteners in matching jars to keep the area cohesive.
Editor's noteStick to tools with a metal base for the magnet. Mixed materials fall off and ruin the neat look.
Skip thisDon’t mount the strip too high; you’ll end up leaving tools on the counter because reaching is annoying.
10. Stacked Drawer Coffee Station With Pull Bins
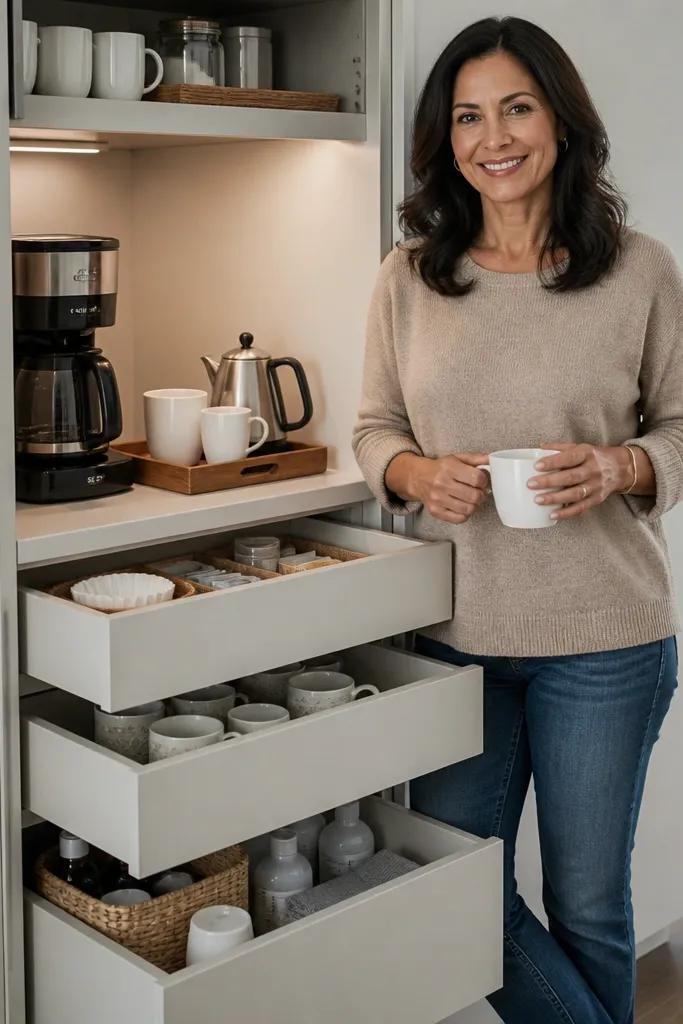
If you have a blank wall or a small cabinet that’s underused, a stacked drawer station gives you a clean, drawer-first look. The top surface holds mugs and a tray, while the drawers hide the messy stuff like filters, extra cups, and cleaning supplies. This is photogenic because the front stays smooth and the station looks like furniture, not a pile of items. It’s excellent for tiny kitchens where open shelves would feel busy. It’s intermediate DIY if you build it from scratch, but you can also retrofit with ready drawer units.
Plan a two-drawer layout: top drawer for daily items (filters, stir sticks, sweetener sachets) and bottom drawer for backups. Fit a shallow tray on the top surface for the brewer landing area, sized to contain drips. Install pull-out bins inside each drawer so you can grab without digging. Keep mug storage on the top surface or a small wall hook line so the drawers stay for supplies only, then add a heatproof mat where the brewer sits.
Use bins with front labels facing forward. It makes the station look organized even when you’re rushing.
Avoid stacking paper products loose in drawers; they collapse and look messy fast.
11. Over-the-Sink Shelf With Sway-Proof Mug Hooks
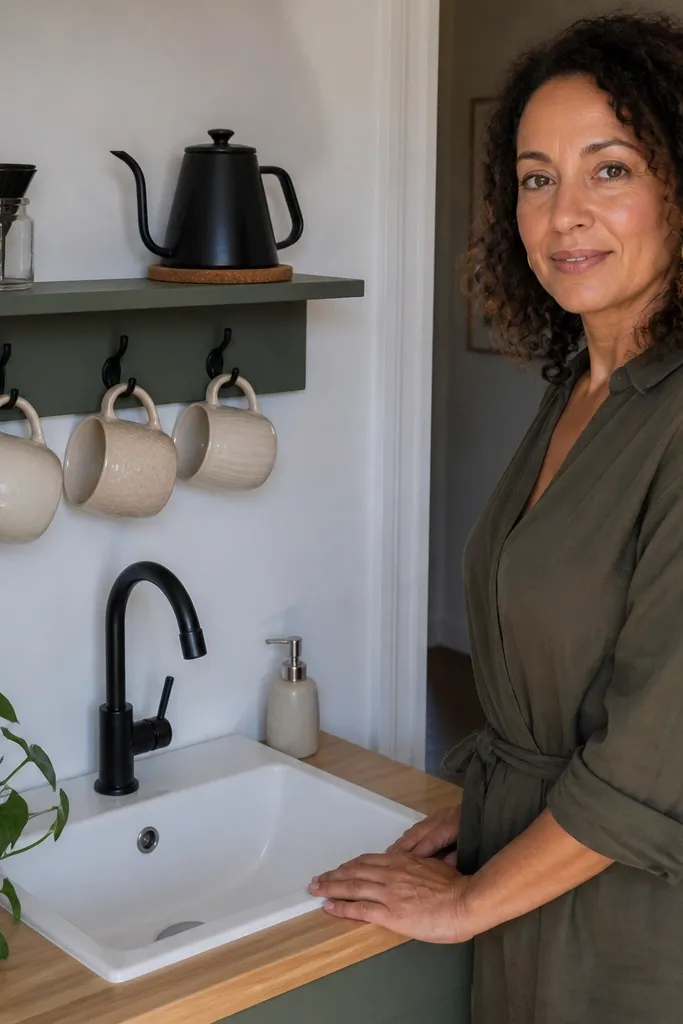
A shelf above the sink can work in small kitchens because it uses a vertical zone you already have. The station looks great when you keep it to a narrow set of items: mugs, a filter container, and a compact brewer or kettle station. Mug hooks make the area feel styled, not storage chaos. The big win is that you’re close to water, so rinsing tools is easy. Skill level is beginner if you use a ready-to-install shelf system with proper brackets.
Choose a shelf that clears the sink faucet and doesn’t block cabinet doors, then install it level over the sink area. Add a heatproof mat on the counter below or a small tray on the shelf landing if your brewer is kettle-based. Hang mugs on hooks attached to the shelf underside or side panel, spaced so handles don’t touch. Store filters in a lidded container and keep only one jar of coffee visible.
Editor's noteUse a matte finish shelf and keep the jars in one color family to look clean around splashes.
Skip thisDon’t place a paper filter box where steam hits it directly; it warps and looks bad.
12. Mini Sideboard Coffee Station With Open Shelf + Door Hideaway
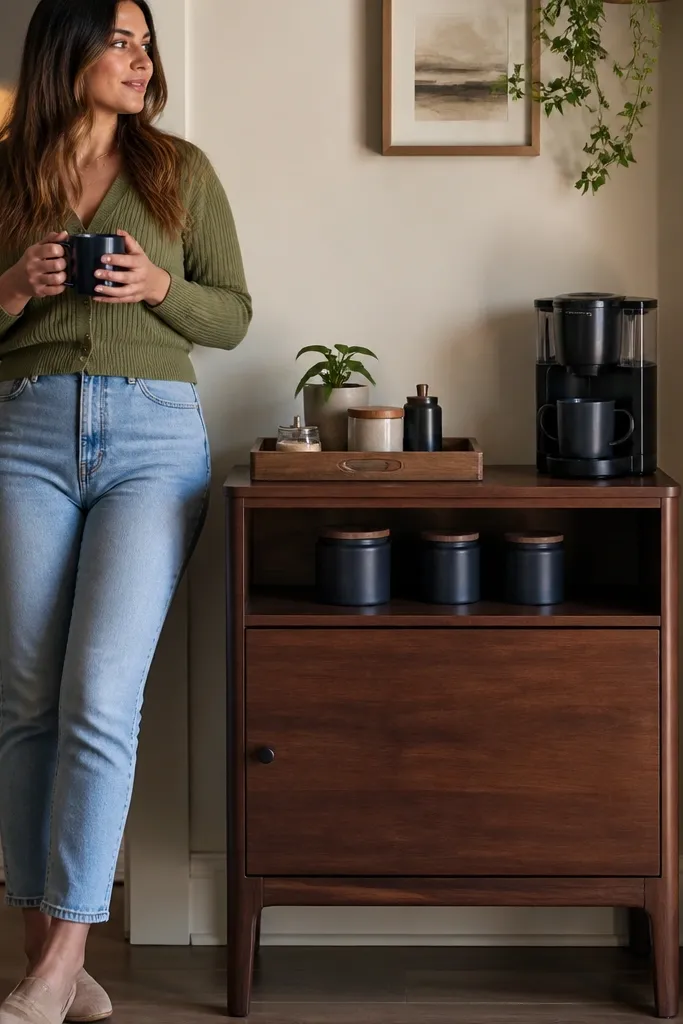
A mini sideboard is a tiny-kitchen cheat code because it gives you a real furniture look. Keep the top narrow and styled with a tray, while the open shelf holds only the daily jars. The door below hides the extra cups and bulky supplies so the station always looks neat. This setup looks great in photos because you get a clear silhouette and a consistent backdrop. It suits kitchens with space for a 24-32 in wide piece, like a breakfast nook or hallway kitchen. It’s intermediate if you’re assembling furniture, but it’s mostly about planning the insert organizers.
Pick a sideboard width that fits your walkway, usually leaving at least 30 in clear path. Add a tray on top sized to your brewer and kettle footprint, then place a heatproof mat under any hot appliance. On the open shelf, arrange three matching jars and one small utensil crock with tools you use daily. Inside the door area, use a small stackable bin set for backups and a narrow organizer for cleaning supplies.
Editor's noteUse cabinet interior bins in a matching color so the inside looks intentional when you open the door.
Skip thisAvoid filling every open space. In tiny kitchens, open storage should be limited to what you grab daily.
13. Glass-Front Coffee Cabinet With Uniform Canisters
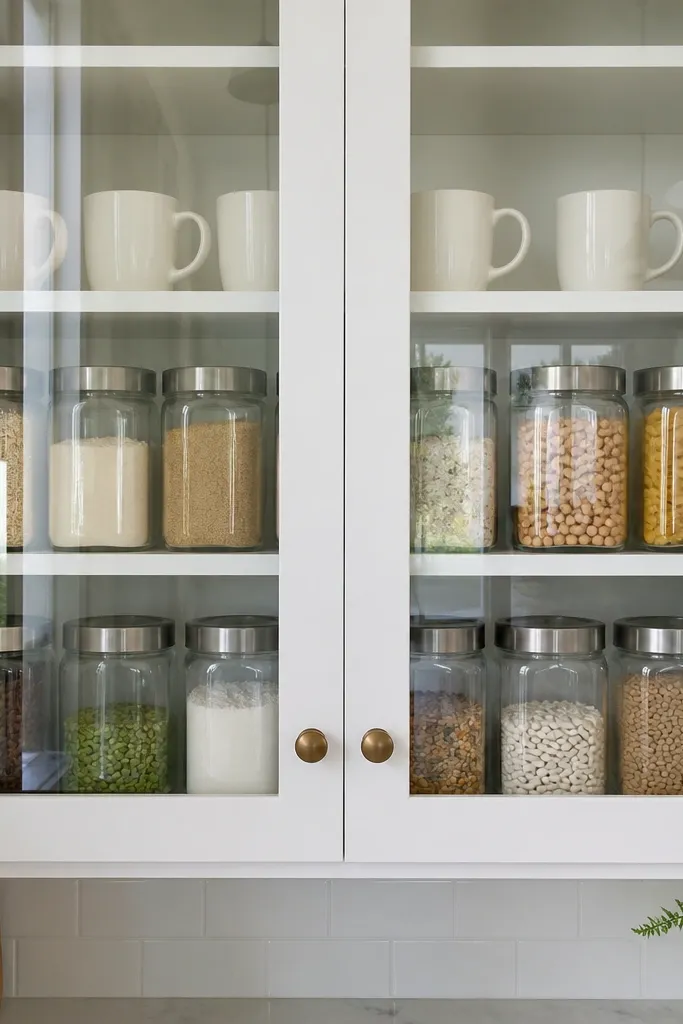
A glass-front cabinet is the best small-space solution when you want the station to look like décor but still stay organized. The glass gives you that styled, display feel without open clutter everywhere. The uniform canisters are what make it look expensive even if the cabinet is small. Put coffee and supplies in matching shapes, and use a tray on the bottom shelf for the brewer landing area. This works when you have an existing cabinet you can convert or when you can add a narrow display cabinet. It’s beginner-friendly if you’re just organizing an existing cabinet.
Choose canisters that match in height and lid style, ideally 3-4 containers max for beans, instant, sweeteners, and filters/pods. Place a small tray on the bottom shelf to catch drips and keep the area clean. Arrange mugs in one direction so handles face the same way through the glass. Add a small backstop (a thin wood strip or shelf liner lip) so jars don’t slide when you open the door.
Use clear labels with the same font and size. Consistency is what makes glass cabinets look clean.
Don’t mix jar shapes with mismatched lids; the cabinet will look chaotic through the glass.
14. Countertop Coffee Station in a Single Tray System
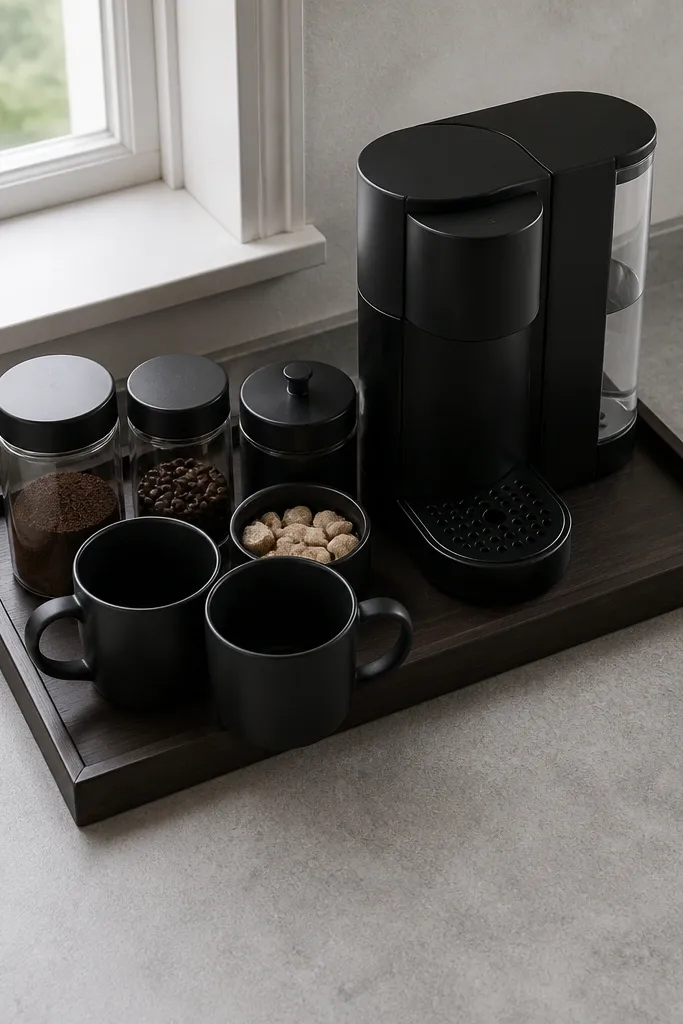
This is the simplest approach that still looks good: everything sits on one tray so the station has a boundary. In tiny kitchens, a boundary prevents coffee gear from creeping onto every inch of counter. The look is crisp because your items share the same base color and sit at consistent height. It’s excellent for renters who can’t drill and for kitchens where the station needs to move. Skill level is beginner: you’re assembling a tray setup and organizing containers.
Pick a tray that’s large enough to contain your brewer and daily tools, usually 12x18 in or 14x20 in. Add a heatproof mat on the tray where the brewer sits, then place jars at the back edge so they don’t crowd your hands. Use a small organizer cup for measuring spoons and a shallow basket for filters. Keep mugs off the tray if you have limited space; set them on a wall hook or a small rack so the tray stays functional.
Choose one tray color and repeat it in small accents, like a cloth in the same tone nearby.
Avoid using multiple trays. One boundary looks cleaner than several small zones.
15. Corner Shelf Ladder With Hanging Basket Coffee Storage
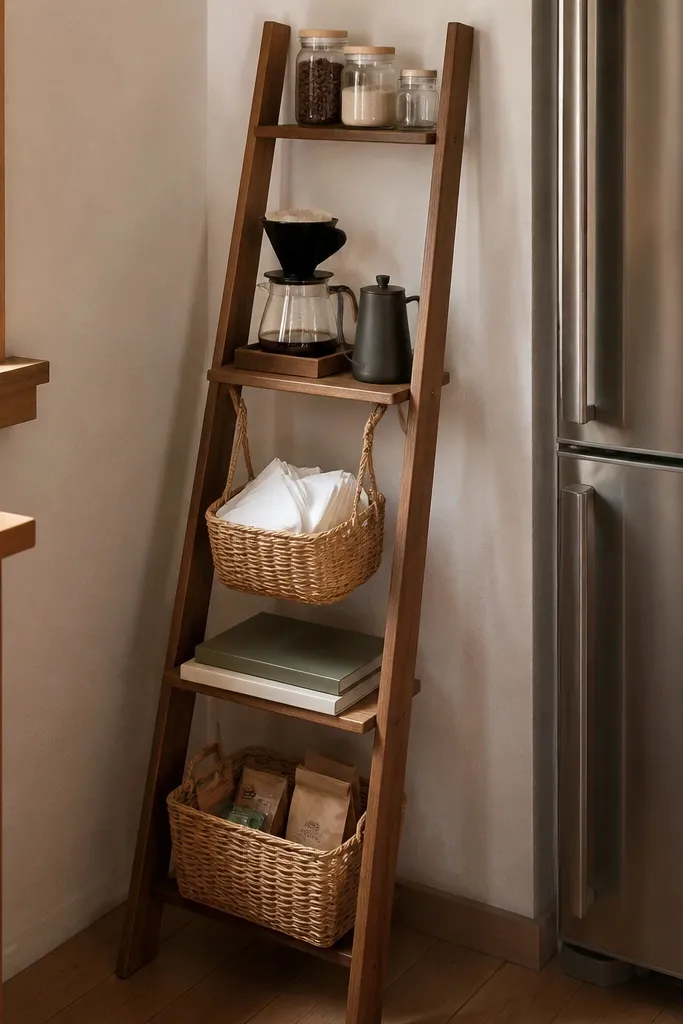
A small ladder shelf adds height without adding visual bulk, and hanging baskets keep coffee supplies accessible. This is a good match for small-space coffee station ideas because it uses vertical space you already have in corners. The ladder lines create structure, and baskets hide the messy parts like extra filters and backups. For a photogenic look, use baskets in one material (black wire or woven) and keep your jars consistent. It suits kitchens with a corner that can handle a tall object, but you still want the station to feel light. It’s intermediate because you’re anchoring for safety.
Place the ladder in the corner where it won’t block doors or walkways, leaving at least a few inches clearance. Anchor the ladder to the wall studs using the manufacturer hardware or additional brackets. Install hanging baskets on the rungs for filters and extra cups, then place matching jars on the shelves. Add a heatproof pad and tray on the counter or shelf base where your brewer sits, and keep the daily mug stack at one consistent height.
Use basket liners or bins so coffee bags and filter boxes don’t show random branding.
Don’t hang heavy full bags at the top. Keep heavy items on lower shelves for stability.
16. Magnetic Wall Panel With Clear Acrylic Coffee Supply Blocks
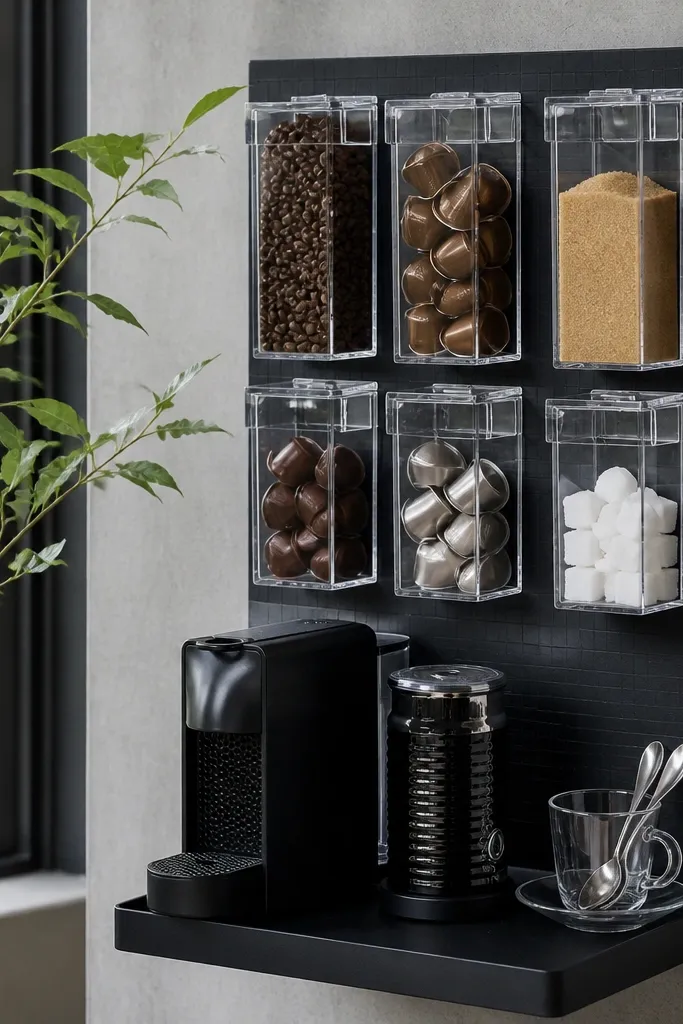
A magnetic panel with clear acrylic blocks looks sleek because it turns loose supplies into a display grid. For tiny kitchens, this makes “small-space coffee station ideas” feel curated without taking counter space. The clear blocks show the contents while keeping everything upright, so you don’t get the crushed-bag look. It also helps you see what you’re low on, which prevents the station from turning into a messy storage dump. Skill level is intermediate because you’re mounting a panel and aligning blocks neatly.
Mount a thin magnetic panel to a wall next to your brewer so you can reach it while brewing. Attach clear acrylic blocks or small magnetic holders to create a grid for filters, stir sticks, and measuring tools. Place beans and larger items in matching jars on a nearby shelf or tray, because the blocks work best for small consumables. Finish with a heatproof mat and tray for the brewer so the wall stays clean and safe from steam.
Editor's noteUse blocks with straight edges and identical spacing so the grid reads clean in photos.
Skip thisDon’t put wet or heat-exposed items on the wall setup; steam residue makes clear acrylic look cloudy.
17. Folding Table Coffee Station With Hidden Shelf for Small Appliances
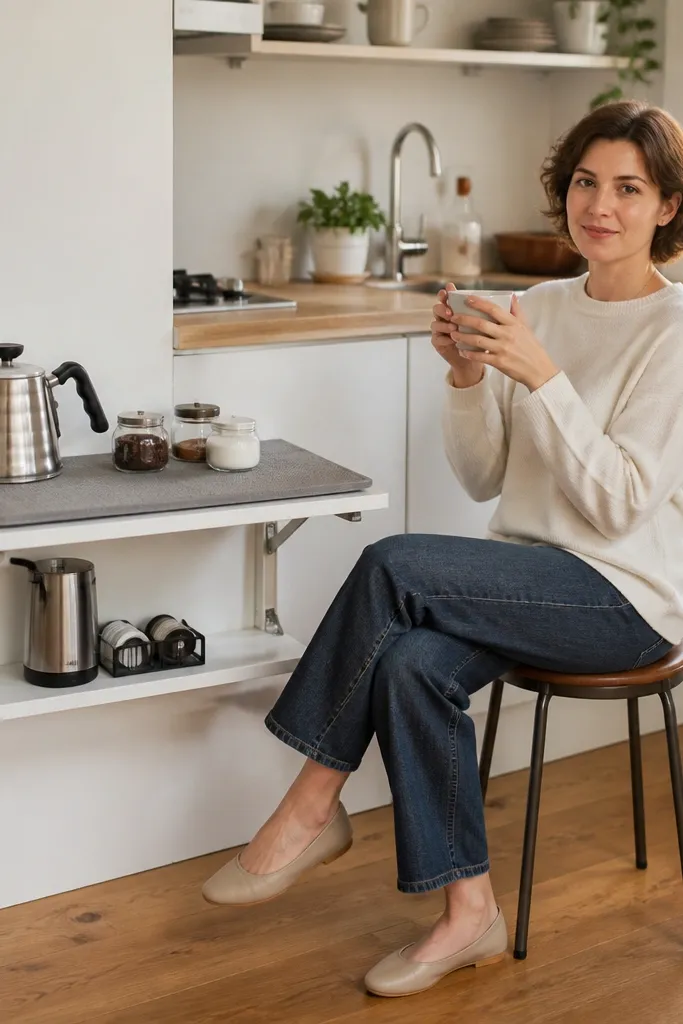
A folding table gives you a station surface only when you need it, which is perfect for kitchens where counter space is constantly changing. The look is photo-friendly because you can style it like furniture: a tray, matching jars, and one small tool caddy. When you fold it away, the kitchen feels open again. This is one of the best small-space coffee station ideas for people who host or use their kitchen as a multi-purpose space. It’s intermediate DIY because you’re mounting a shelf and managing stability.
Choose a folding table size that fits your space when open, usually around 24-30 in wide and 24-30 in deep. Add a fixed heatproof landing surface on top with a tray system so the brewer and kettle sit safely. Install a small hidden shelf or hook panel under the tabletop edge for tools so they don’t fall when you fold. Style the top with matching jars and a single mug stack, then store backups in a lidded bin under the folded unit or in the nearest cabinet.
Use a non-slip pad between tray and table top so the whole setup doesn’t shift when you pour.
Avoid a folding station without a stable base — wobbles make it look messy and feel unsafe.
18. Slim Bookcase Coffee Station With Vertical Canister Tower
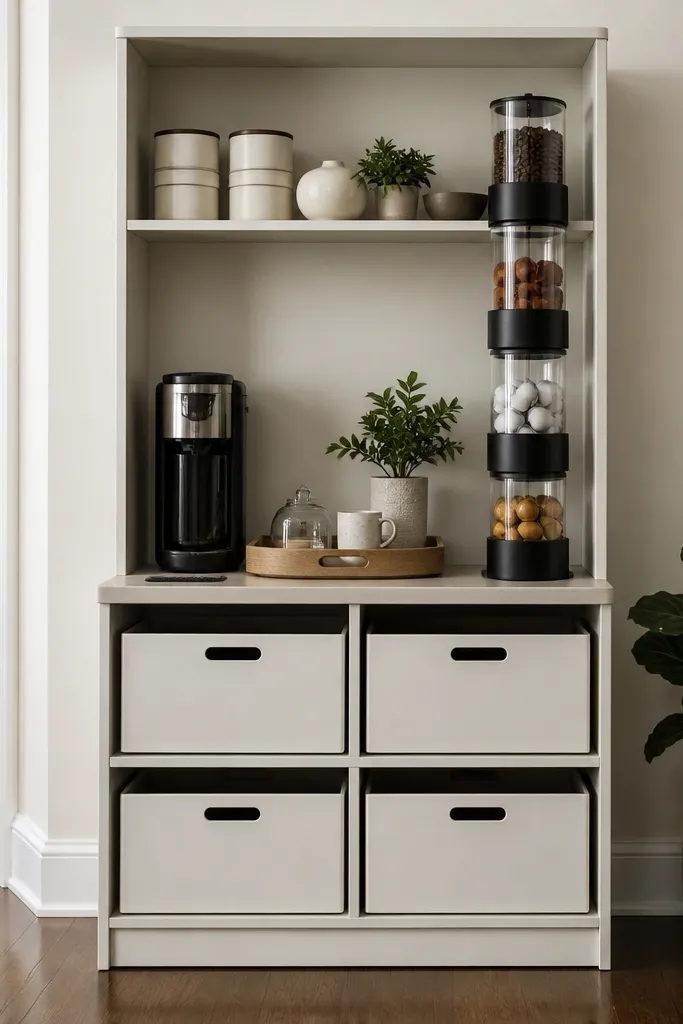
A slim bookcase makes a coffee station look like built-in shelving even when it’s freestanding. The vertical canister tower is the visual trick: it makes coffee supplies look tall and tidy instead of scattered. Keep the top shelf as the landing area with a tray and heatproof mat, then store backups in closed bins on the lower shelves. This works in tight kitchens where you can spare a narrow 12-16 in width. It’s intermediate because you need to secure the unit to the wall and plan shelf spacing for your jar sizes.
Pick a narrow bookcase with adjustable shelves so you can match it to your jar heights, usually 12-16 in wide. Anchor the unit to the wall studs to prevent tipping. Create a canister tower using tall jars (or stacked canisters inside a tall bin) on one shelf so everything aligns visually. Put your daily brewer on a tray on the top shelf with a heatproof mat underneath, then add a small organizer for filters and a mug hook rack on the side.
Editor's noteMeasure your tallest jar and add 1 in of clearance above it so lids stay easy to remove.
Skip thisDon’t cram too many jars on one shelf. Two to three aligned jars look better than six random ones.
19. Coffee Station Under Stairs Style Cabinet With Corkboard Backing
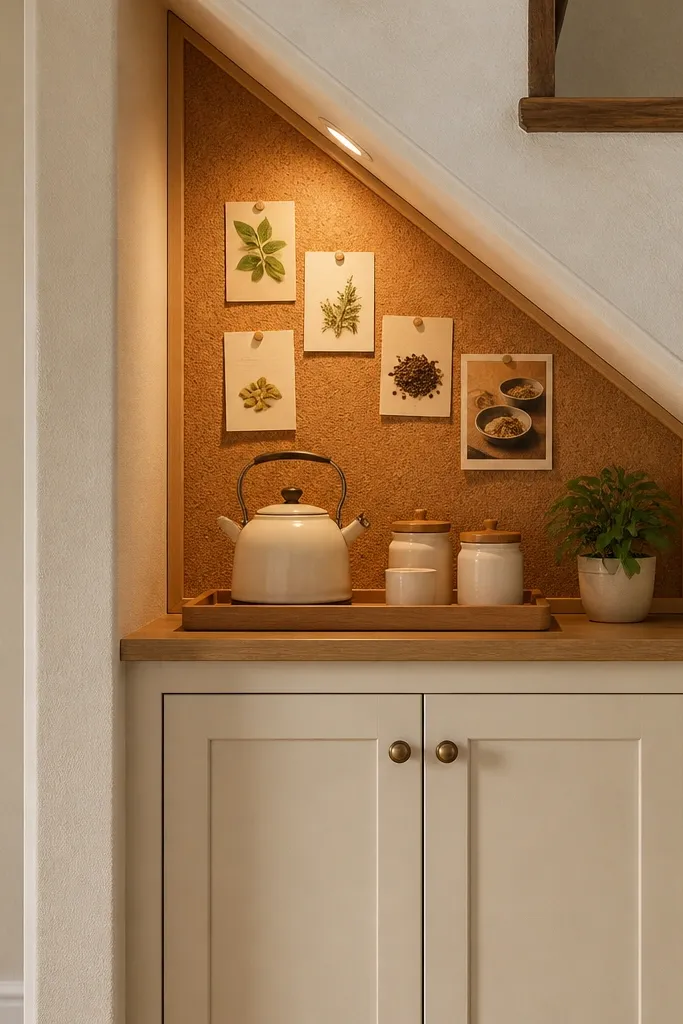
If you have an awkward nook, a small cabinet with corkboard backing creates a cozy, photogenic backdrop without clutter. Cork gives you a warm texture that makes plain jars look styled, and you can pin a simple brew chart or ingredient notes. For small-space coffee station ideas, this is great because the station lives behind a door but still feels personal when you open it. It’s also practical for keeping tools in place with small hooks. This is beginner-friendly if you’re organizing an existing cabinet, or intermediate if you’re installing cork and hooks.
Line the back panel of your cabinet with corkboard using construction adhesive, then add small hooks or a cork-mounted utensil holder. Mount a small shelf or basket inside for filters and a ledge for jars so they don’t fall forward. Add a tray on the cabinet floor area where the brewer sits, and use a heatproof mat under any hot appliance. Pin a simple layout on the corkboard using straight thumbtacks so it looks clean and readable.
Use corkboard only on the inside back wall. It keeps the look warm without making the kitchen look busy.
Avoid too many pinned notes. One clean brew chart beats a wall full of scraps.
20. Built-In Pantry Side Shelf With Slide-Out Bins
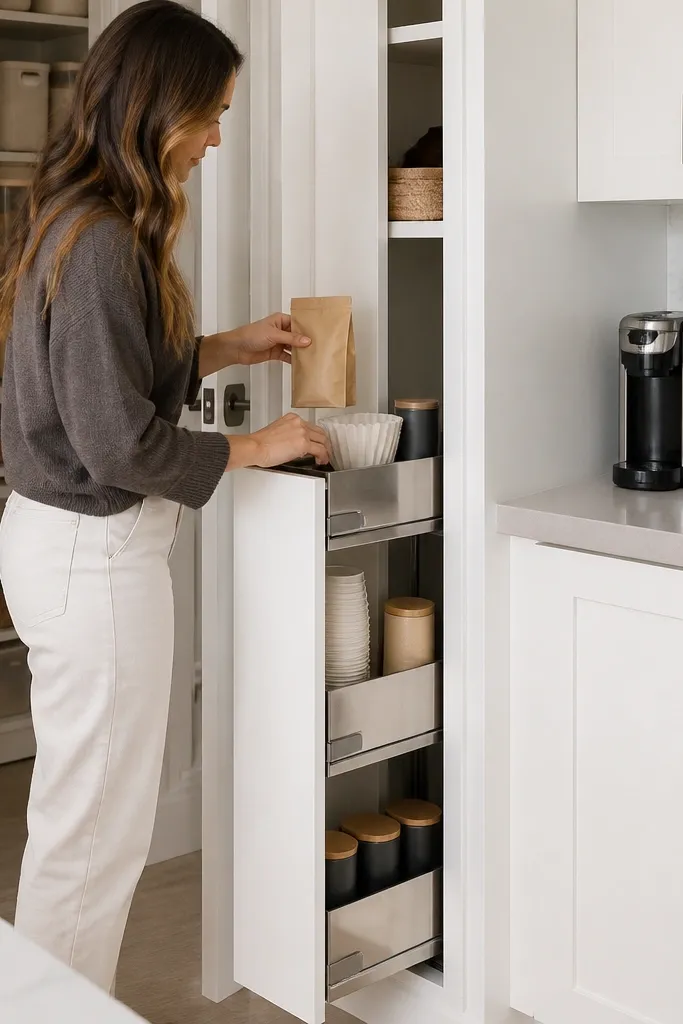
A pantry side shelf is a sneaky way to create a coffee station that doesn’t steal kitchen counter. You get a dedicated storage zone for coffee, filters, and cups, while the kitchen surface stays clear for cooking. The look stays clean because the station materials are contained inside pantry space. It also makes restocking easier because everything lives in one place. This works best when your pantry is close enough to power for your brewer or when you use a kettle-based setup. Skill level is intermediate due to cutting shelf inserts and installing slides.
Install a narrow shelf on the pantry side wall with a width that matches your daily items, usually 10-14 in deep. Add slide-out bins for coffee supplies and keep them aligned so the face looks neat when pulled. Create a small landing tray on the shelf edge for the brewer or pour-over tools, and use a heatproof pad where hot items sit. Finish by adding a small mug hook or a mug holder inside the pantry so cups stay out of the main kitchen.
Editor's noteUse same-height bins and label them on the front edge so the station looks orderly even when the door is open.
Skip thisDon’t hide your daily coffee in deep bins. If it takes digging, the counter will get messy.



