
1. Side-Symmetry TV Wall With Tall Pantry-Style Columns
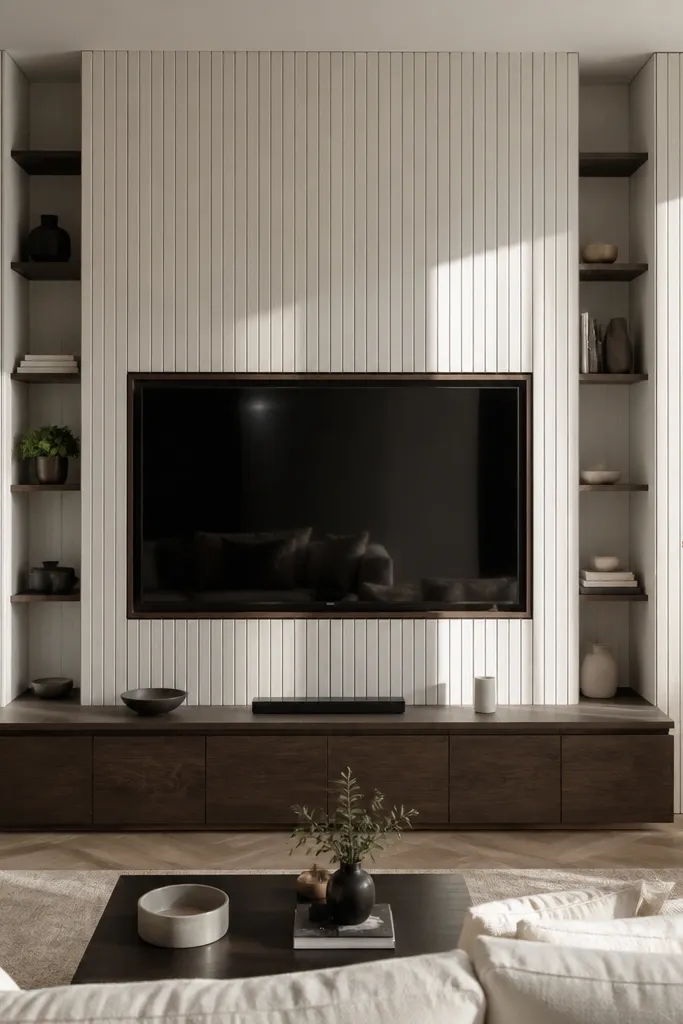
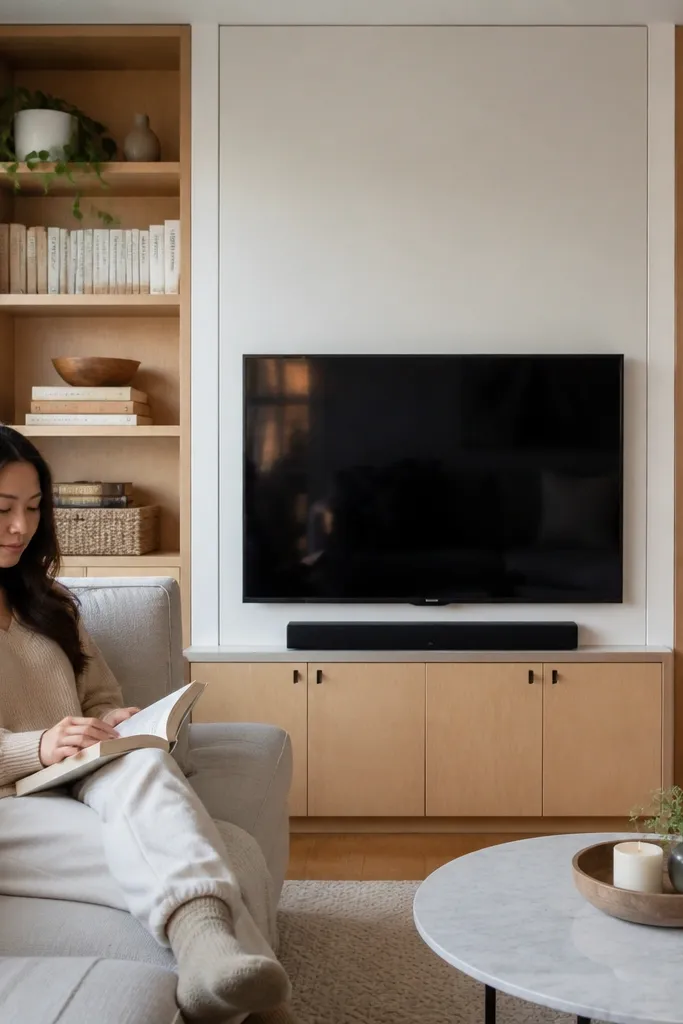
1) Measure your wall and mark a centerline; set the TV center at 42-48 inches from the floor, then sketch a rectangle around the TV with 2 inches of clearance on each side. 2) Build two vertical column boxes to the full wall height you want, using 3/4-inch plywood with a face frame so the edges look crisp. 3) Install a flat ledger board for the shelf run above the TV, then add three shelves with the same depth and finish as the TV surround. 4) Finish by adding simple crown trim or a wide flat top rail to tie the columns and shelves together.
This layout looks expensive because it gives the TV a frame with weight on both sides. The tall “columns” act like architectural anchors, so your eyes land on the TV and then move up the shelf line without the wall feeling chopped. Build the columns with full-height vertical panels and keep the TV surround a simple rectangle. Above the TV, use three evenly spaced open shelves for books and decor; below, keep storage closed if you have remotes, chargers, and clutter. It’s a strong choice for small rooms where you need storage but still want the wall to look styled.
Skip thisDon’t vary shelf heights randomly above the TV — it kills the symmetry fast.
Editor's notePre-drill and countersink for face-frame screws so the trim stays flush and clean.
2. Floating Shelves Over a Low Media Base
1) Build a low cabinet under the TV that’s 60-72 inches wide (or the full width of your planned media wall) and about 16-20 inches tall, leaving space for cable access. 2) Mount two side cleats and a center ledger on the wall at the exact shelf locations, then attach floating shelves (use 3/4-inch plywood with internal cleats). 3) Add a slim TV surround frame that overlaps the cabinet top by about 1 inch for a clean layer effect. 4) Route your cable path inside the cabinet and cover it with a removable back panel.
If your space is narrow, floating shelves over a low media base keeps the wall from feeling bulky. The lower cabinet hides cords and gaming gear, and the open shelves above add the “built-in” look without eating visual space. Keep the TV surround slim and matte, then use shelves with a consistent lip or shelf edge detail so everything looks intentional. This design is also forgiving if you’re not perfectly level — the cabinet anchors the eye while the shelves read as a neat grid.
Skip thisAvoid open shelves under the TV if you have console mess — it makes the whole wall look busy.
Editor's noteUse a ledger level and laser line for shelf placement; floating shelves show every off-by-line problem.
3. Bookcase-Look TV Wall With Adjustable Shelf Zones
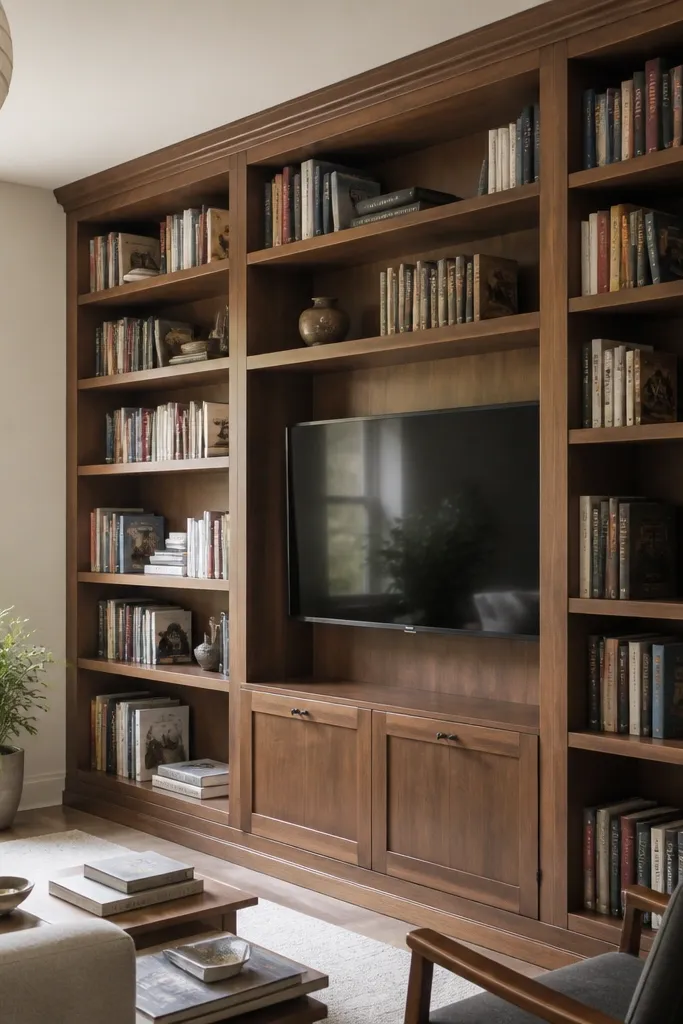
This is the “I want it to look like a library wall” option. The trick is making the shelf zones adjustable so your decor and books don’t outgrow the spacing. The TV sits in a dedicated opening, and the surrounding shelves share the same depth and finish so the wall feels built as one unit. It’s great for small-space living rooms where you want flexible storage without redoing the whole wall later.
1) Frame the TV opening with a fixed inner box, leaving 2 inches of side clearance and 2.5-3 inches behind for cables. 2) Build left and right bookcase bays with internal rails or shelf standards so shelves can move; plan for 3-5 adjustable positions above and around the TV. 3) Install the adjustable shelves with consistent spacing, then add a trim surround that matches the inner frame. 4) Finish with a backer panel behind the shelves so the wall looks clean even when you remove items.
Use shelf standards on the inside faces so the front edges stay clean and photo-ready.
Don’t use mismatched shelf depths on the TV side vs the display side — it reads uneven.
4. Shaker-Style Panel Surround With Hidden Cable Spine
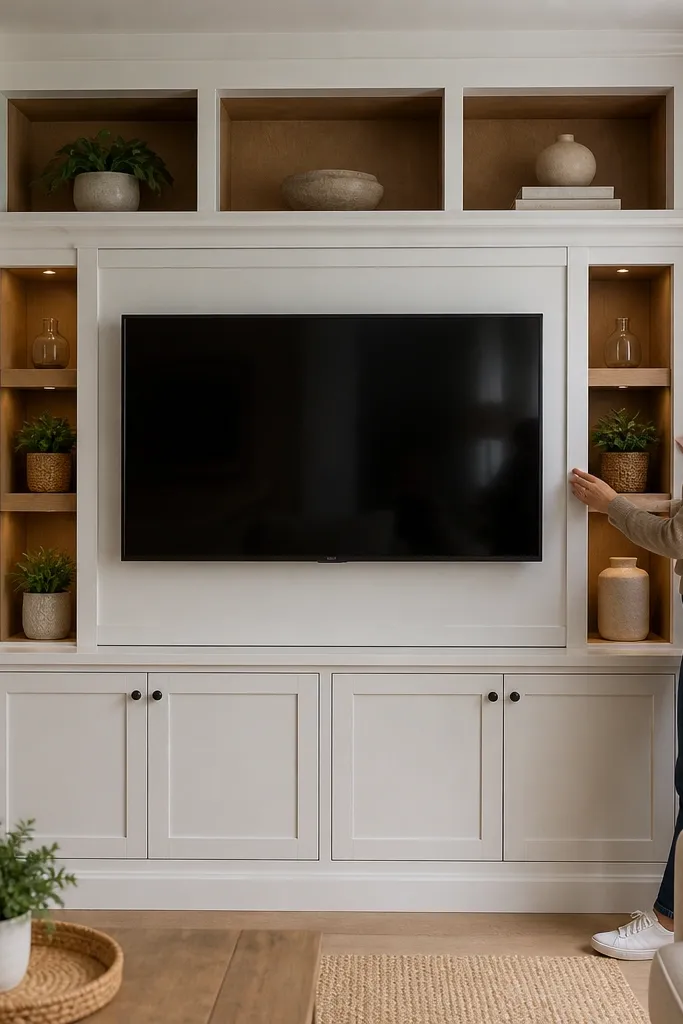
1) Build a TV surround frame using 1x2 or 1x3 rails and stiles (face frame look), and keep the opening sized for your TV with at least 2 inches clearance. 2) Add a vertical cable chase behind the surround with a hinged access panel on the side facing the room. 3) Install two or three shelves above the TV using the same frame trim profile, then add matching side shelves or small cubbies. 4) Paint or stain the frame as one piece so the panel lines stay crisp.
This one looks sharp because the TV is treated like a framed art piece. A Shaker-style surround adds structure, and the best part is a hidden cable spine that keeps wires from becoming a visual line. You get built-in shelves on top and sides, but the wall stays calm because cables live behind a removable panel. It’s perfect for small-space built in shelves living room tv setups where the TV is close to seating and any mess is visible.
Skip thisDon’t run power cords through open shelf bays — they show and they pull the look apart.
Editor's noteUse a cable management raceway and label both ends before you close the panel.
5. Recessed TV Nook With Flush Shelf Faces
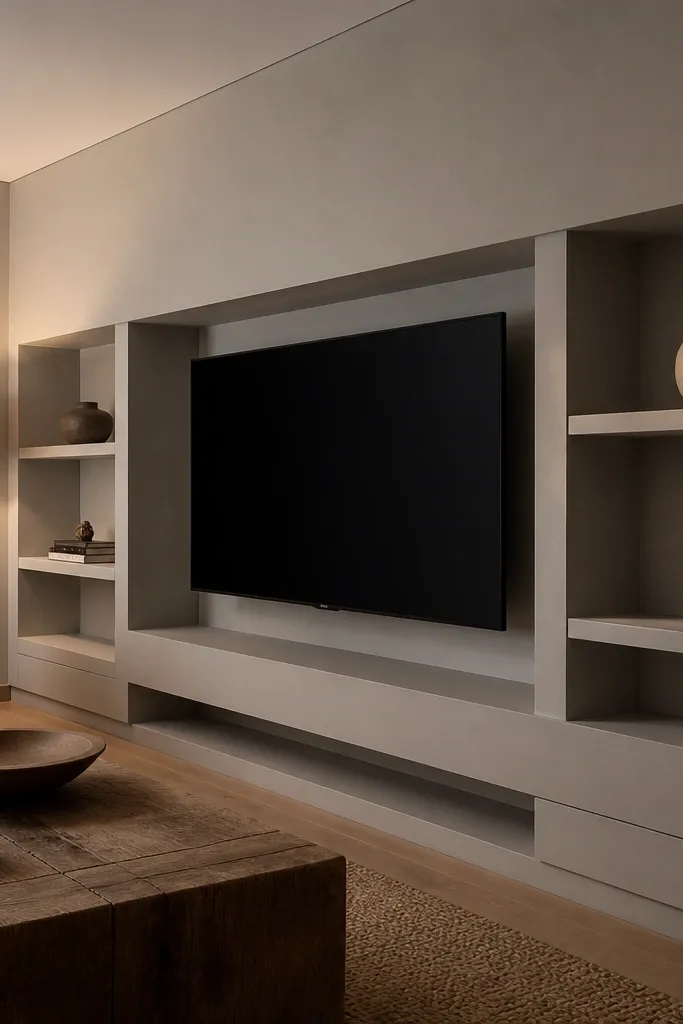
A recessed TV nook makes even a small wall feel intentional. When the TV sits back, the shelves can stay flush with the wall plane, so the whole thing reads like built-in architecture instead of stacked furniture. This setup is especially photogenic because shadows define the shelf edges and the TV area. Use open shelves sparingly — two or three shelves look better than five when you’re keeping the TV nook tight.
1) Cut or frame a recessed cavity so the TV sits at least 1.5-2 inches behind the shelf face line, with extra depth behind the screen for airflow. 2) Build shelf boxes that align flush with the front plane; attach a face frame so shelf edges are perfectly straight. 3) Install the TV mount to the framed cavity, then pull cables through a top or side access channel. 4) Add simple trim around the niche and paint everything the same color for a seamless look.
Dry-fit the TV mount and check the TV’s back clearance before you close the cavity.
Avoid shallow recesses that force the TV too close to the wall — heat buildup looks and feels wrong.
6. Corner-to-Center L-Shaped Media Wall
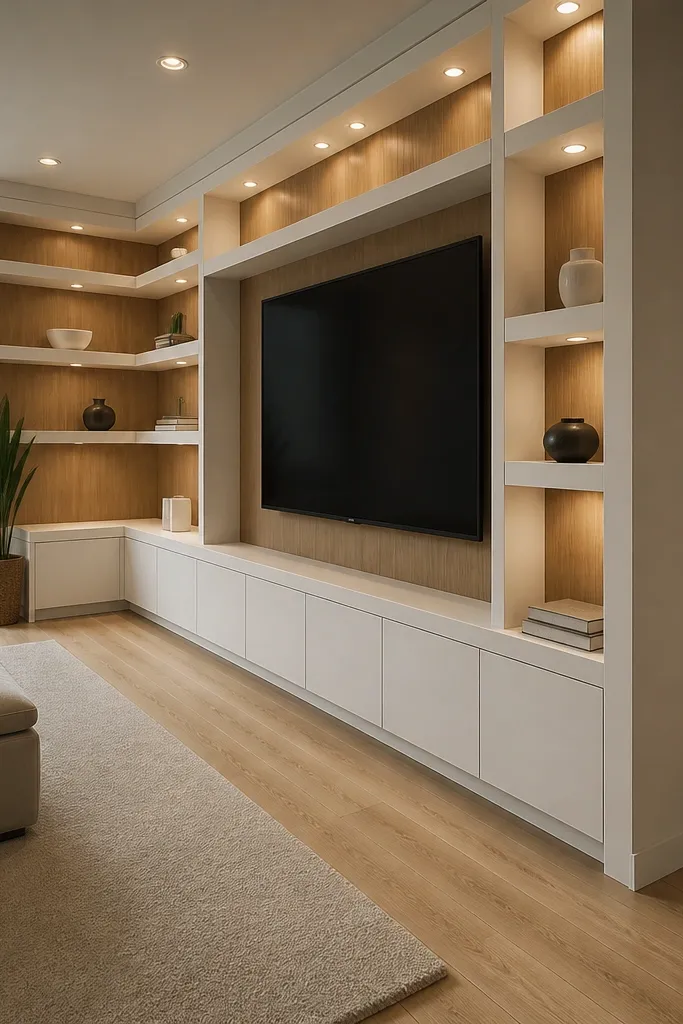
This is the small-room cheat code: use the corner to create extra shelf run without crowding the main walkway. The TV anchors the long wall, and the shorter corner run adds display space that doesn’t steal width from where people walk. Keep shelf spacing consistent around the bend so the wall looks designed, not improvised. Use closed storage on the corner base if you need hiding space, then keep open shelves on the long run for visual calm.
1) Mark two lines for the walls and measure the longest run first; decide where the TV centerline lands on the long wall. 2) Build a long media base with a TV opening, then frame a corner return shelf box that matches the shelf depth and face frame thickness. 3) Use a mitered or coped corner trim piece so the shelf faces meet cleanly. 4) Finish by adding shelves on both runs with the same shelf edge profile and stain/paint matching the face frames.
Use spacer blocks during install so shelf depths match at the corner seam.
Don’t change shelf depth at the corner — it makes the bend look accidental.
7. Media Wall With Glass-Front Top Cabinets
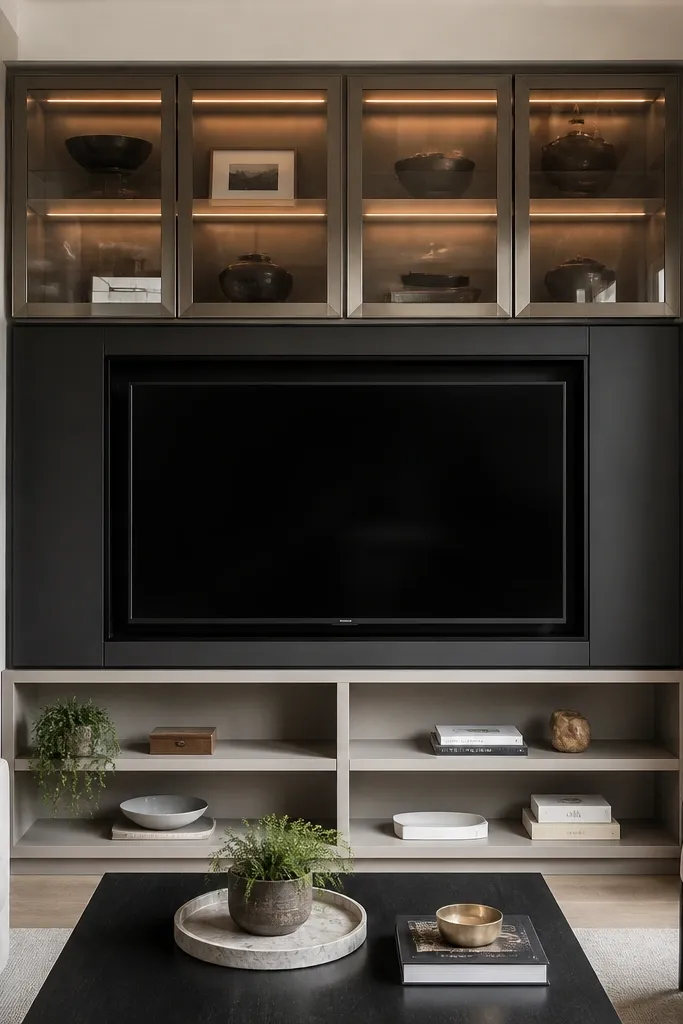
1) Build a base media unit under the TV and add open shelves on the sides or below if you want quick access storage. 2) Frame two upper cabinet boxes above the TV opening and install glass doors with slim frames; keep the cabinet depth consistent with the shelf depth. 3) Add a shelf inside each cabinet at one or two fixed heights for decor and glassware. 4) Install the TV surround trim so the opening reads like a single framed element with the cabinets.
Glass-front cabinets add that “designed living room” look because they show only what you choose. Put them above the TV so the top half has controlled display, then keep the shelf area below more open or more closed depending on your clutter. This design works in small spaces because it creates height without adding visual chaos. Use slim muntins on the glass doors so it looks crisp, not like a pantry.
Skip thisAvoid heavy, thick door frames — they make the top feel too heavy for a small room.
Editor's noteUse LED puck lights inside the cabinets for an even glow that photographs well.
8. Two-Tier Shelves Flanking a Center TV
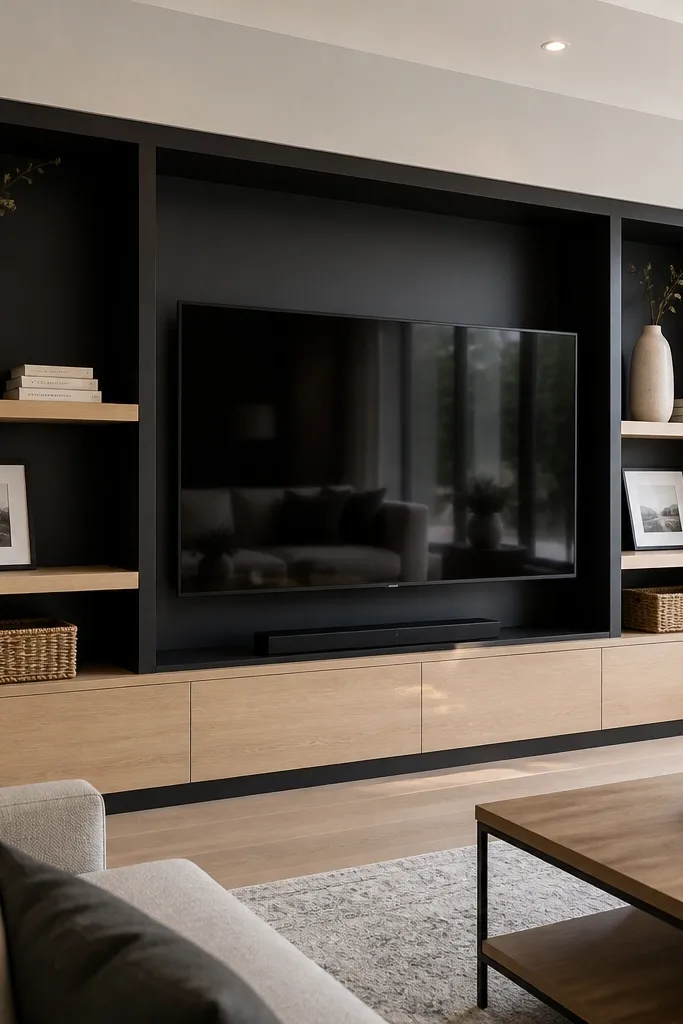
1) Plan shelf tiers at consistent heights, then mount a TV surround frame centered between them; keep the TV opening sized with clearance. 2) Build two side shelf boxes per side (top and bottom), or use a single side frame with two shelf platforms supported by hidden brackets. 3) Add a face frame or trim around the TV opening so the shelves and TV feel connected. 4) Finish with matching paint/stain and add cable access through the lower portion of the surround.
Two-tier shelving makes the wall look structured and gives you more display area without adding more shelves. The key is to keep both tiers aligned left and right, with the same shelf depth and the same vertical spacing. This layout also helps if you have tall decor like vases or framed art — you can place them on the top tier and keep the lower tier for books. It’s a solid option for small-space built in shelves living room tv setups because it uses symmetry to avoid the “too many shelves” problem.
Skip thisDon’t let the lower tier land too close to the TV — keep at least 10-12 inches for visual breathing room.
Editor's noteUse a simple shelf edge detail like a 3/4-inch bullnose or a thin rounded router profile so the light catches nicely.
9. Open Cubby Grid With TV Center and Floating Trim
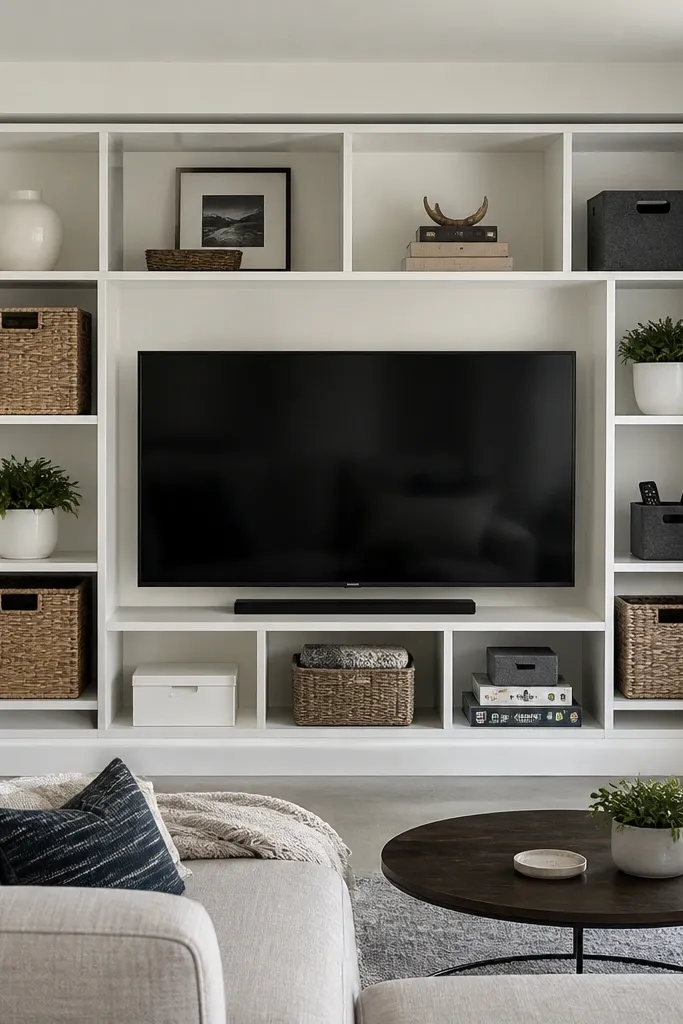
1) Decide your cubby size (common starting point is 10-12 inches wide) and build a center TV opening sized to your TV plus clearance. 2) Frame the grid using 1x2 or 2x2 lumber for a sturdy skeleton, then install cubby dividers to exact spacing. 3) Add a flat trim border around the whole grid and install the TV mount to the framed back panel. 4) Sand, fill, and paint/stain as one system so the grid lines stay sharp.
A cubby grid looks modern and tidy because the compartments create a visual rhythm. Put the TV in the center opening, then build a checker-like pattern of small cubbies around it — keep them consistent so the wall reads clean. This design is great for small spaces when you want storage for remotes, small games, and decor without bulky cabinets. The secret to the aesthetic is the border trim: a crisp frame makes the whole grid look like one custom piece.
Skip thisDon’t make cubbies too small for real items — tiny boxes look cute but stay empty.
Editor's noteUse a backer panel behind the cubbies to prevent wall texture from showing through.
10. Tall Floating Shelf Run With Low TV Base
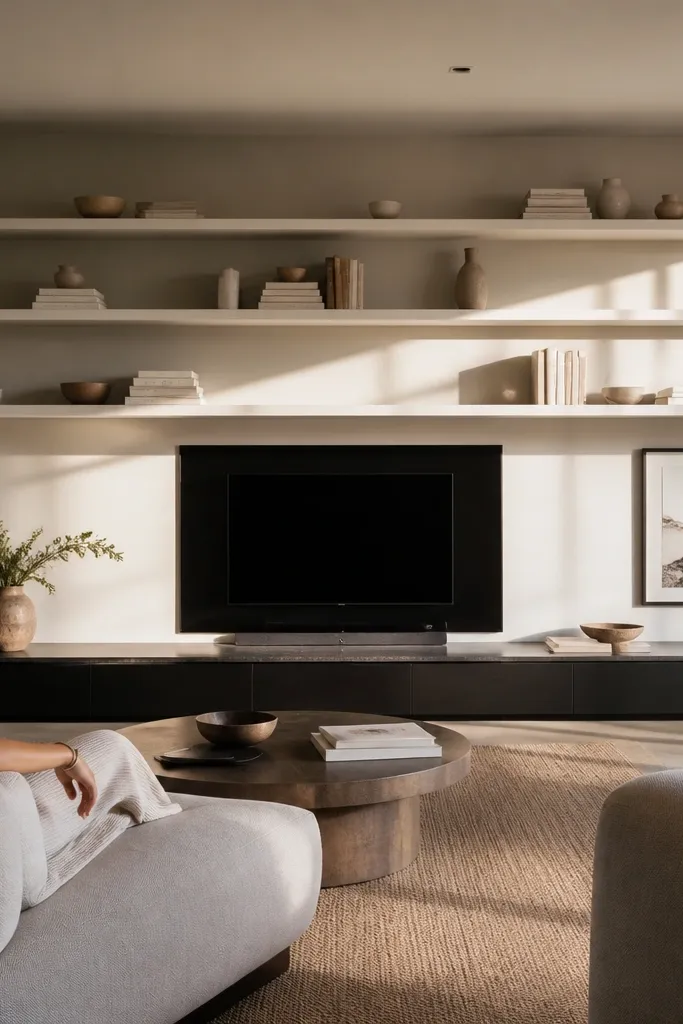
If you want the wall to feel airy, keep the TV low and run a long floating shelf strip across the wall. This is visually strong because your eye travels horizontally, and the shelf line creates a modern “floating” effect. Add one or two larger shelves (not many thin ones) so the wall looks intentional. Use the low base for closed storage and keep the shelves for a small number of strong items so the design stays photogenic.
1) Build a low media console with doors or drawers and mount it level; choose a height that positions the TV comfortably (often TV bottom around 30-34 inches). 2) Mount a continuous ledger at the shelf height, then install 1-1/4 inch thick shelves on concealed brackets for a floating look. 3) Frame a slim TV surround so the TV sits inside a clean rectangle above the console. 4) Route cables through the console and include a removable panel for access.
Conceal brackets inside the shelf thickness so they don’t show from the couch.
Don’t overload the shelves — one tall piece per shelf beats five small items.
11. Built-In Entertainment Niche With Corner Fireplace Look
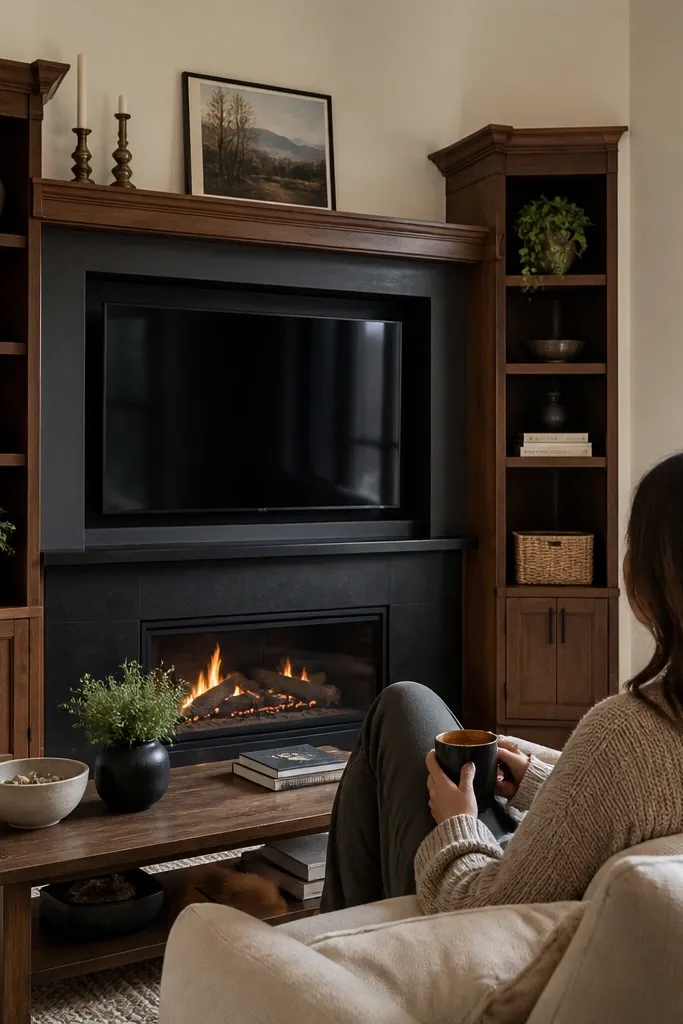
This design borrows the visual comfort of a fireplace mantel but gives you shelves. The TV sits inside a deeper niche, framed by decorative trim and flanked by shelves that look like built-in mantels. It’s surprisingly good in small spaces because the niche creates a focal point and reduces the urge to add more decor elsewhere. Use a deeper mantel shelf top (about 8-10 inches) so you can style it without items falling off.
1) Frame the niche box with a deeper interior depth than a flat TV wall, usually 6-8 inches, and mount the TV to the back studs. 2) Build side shelves that are integrated into the niche frame; keep shelf depth consistent with the mantel top. 3) Add a wide top mantel trim piece and a simple base trim to anchor the look. 4) Finish with paint or stain and seal edges so the trim lines stay crisp in daylight.
Add a thin back panel inside the niche so the area behind the TV doesn’t show bare wall texture.
Avoid overly thin trim — it looks fragile and cheap next to a TV.
12. Rounded-Edge Shelf Inserts Around a Flat TV Frame
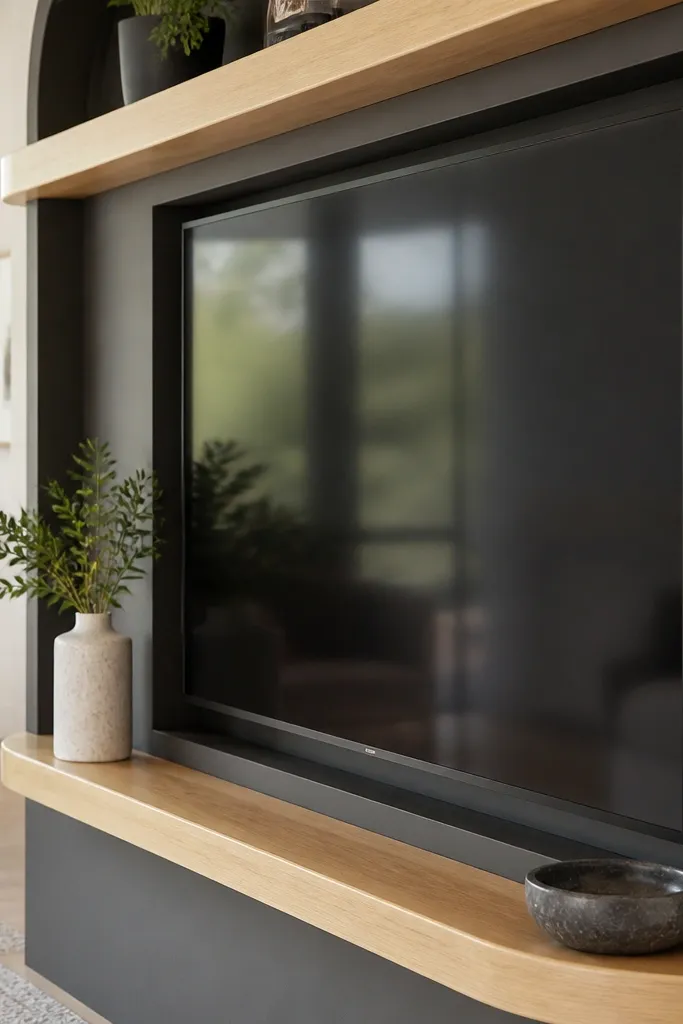
1) Build a flat TV surround frame first using 3/4-inch plywood and a face frame, then mount the TV opening with clearance behind the screen. 2) Fabricate shelf boards with a router-rounded front edge profile and finish them before installation. 3) Install shelves using hidden brackets or shelf cleats aligned to the frame so the rounded edge stays perfectly even. 4) Use the same rounded edge detail on the mantel or top trim for consistency.
Rounded edges soften the whole TV wall and make it feel less boxy in a small room. The TV frame stays sharp and flat, then the shelves get a subtle rounded front edge so light hits them smoothly. This is a great option if your room has a lot of sharp angles or dark furniture; the rounded shelf faces balance it. Keep the shelf spacing simple: two shelves above and one or two on the sides.
Skip thisDon’t mix rounded edges with aggressive corners in the same section — it looks random.
Editor's noteSand the rounded edge to 180-220 grit before finish; rough edges look obvious under TV glare.
13. Cabinet-Under-TV With Open Side Shelves and Center Media Door
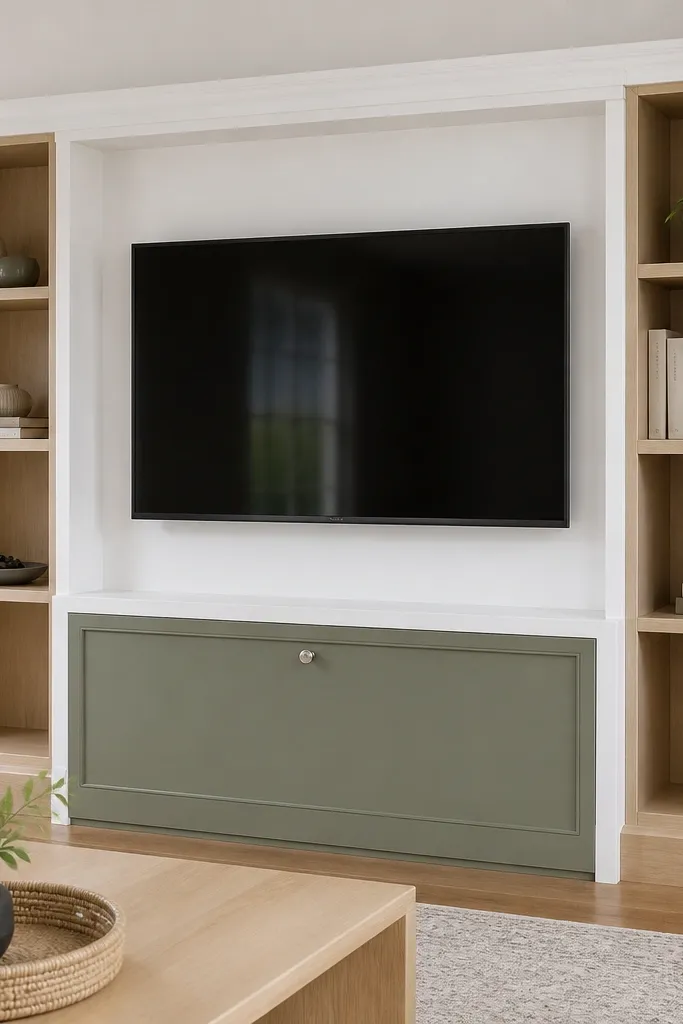
1) Build a cabinet base under the TV with a center door or drawer front, leaving side areas open for shelves. 2) Frame the TV surround and mount the TV to the back panel, routing cables into the closed base. 3) Install two side shelves at consistent heights, using the same shelf depth as the cabinet top. 4) Add matching trim to connect the cabinet and side shelves into one continuous unit.
This layout hides the mess where it matters. The center under-TV cabinet is closed so remotes, game controllers, and routers disappear, while open side shelves give you a place for books and decor that still looks intentional. The visual trick is keeping the open shelves narrower than the TV width so the wall doesn’t feel heavy. It’s a good middle-ground design when you want a clean aesthetic but still need real storage.
Skip thisAvoid open shelving immediately next to the TV if you store clutter there — it shows from the couch.
Editor's noteUse soft-close hinges or slides on the under-TV door so the hardware stays quiet and smooth.
14. Wallpaper-Backed TV Niche With Plain Shelves
1) Frame a TV niche and leave the back open enough to install a removable backing panel; size the panel to cover the niche area. 2) Install a wallpaper panel or a decorative backing material on that panel, then seal it so it survives cleaning. 3) Build shelves that attach to the surround frame with a consistent shelf edge and finish. 4) Mount the TV and route cables through a side access gap covered by a trim piece.
A patterned backing behind the TV makes the whole wall look designed even when the shelves are simple. The shelves stay plain and clean, while the niche brings the personality without adding clutter. This works especially well in small spaces because the pattern lives only in one area — the TV zone — so the wall doesn’t feel busy. Pair it with warm wood shelves and a clean white or charcoal surround for a high-contrast look.
Skip thisDon’t put wallpaper behind shelves — it turns every item into visual noise.
Editor's noteUse a removable backing panel held with screws so you can change the pattern later without rebuilding.
15. Monochrome Built-In With Same Color Shelves and Back Panel
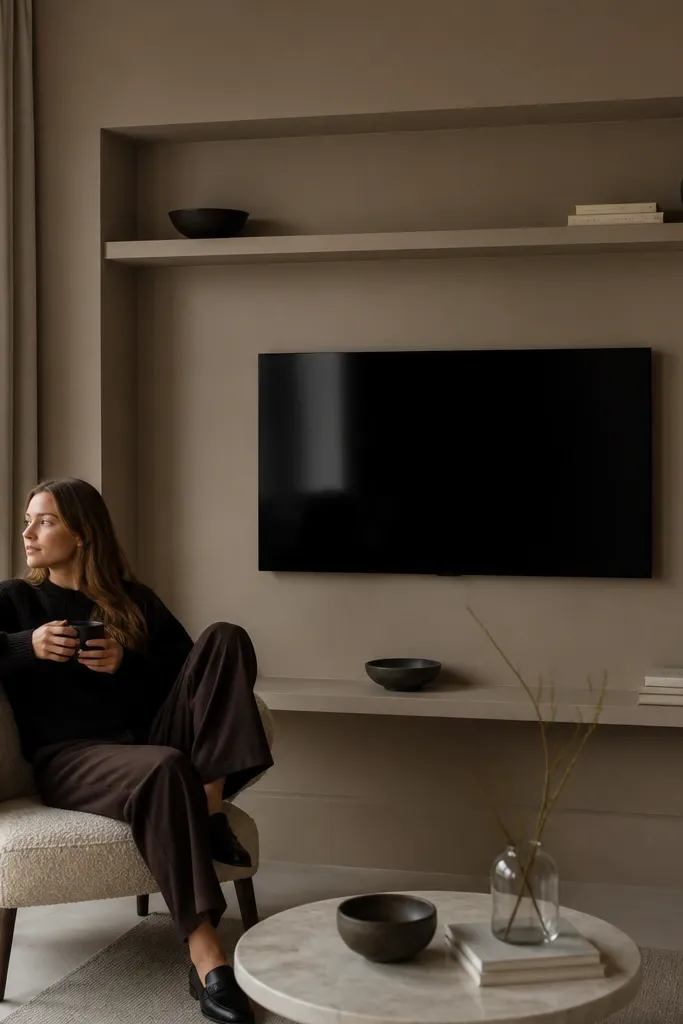
1) Build the TV opening and shelf framework using plywood, then sand and fill all seams for a smooth finish. 2) Add a back panel behind the TV and shelves so the wall texture doesn’t peek through. 3) Paint everything in one coordinated system, then install shelves and trim after the base coat cures. 4) Finish with a thin caulk line at the shelf edges for a crisp look and wipe clean before the final coat.
Monochrome built-ins look sleek because you remove visual breaks. When the TV surround, shelves, and niche back panel share the same color, the wall reads as one plane, which is perfect for small spaces. This design also helps if you have patterned wallpaper or furniture already; the built-in stays calm. Use a matte paint on the shelf faces and a slightly different sheen on trim so the edges still show in daylight.
Skip thisAvoid mixing too many wood tones — monochrome only works when color stays consistent.
Editor's noteUse painter’s tape to mask shelf edges before the final coat so you get sharp lines.
16. Walnut Veneer Shelf Faces Over White Frame
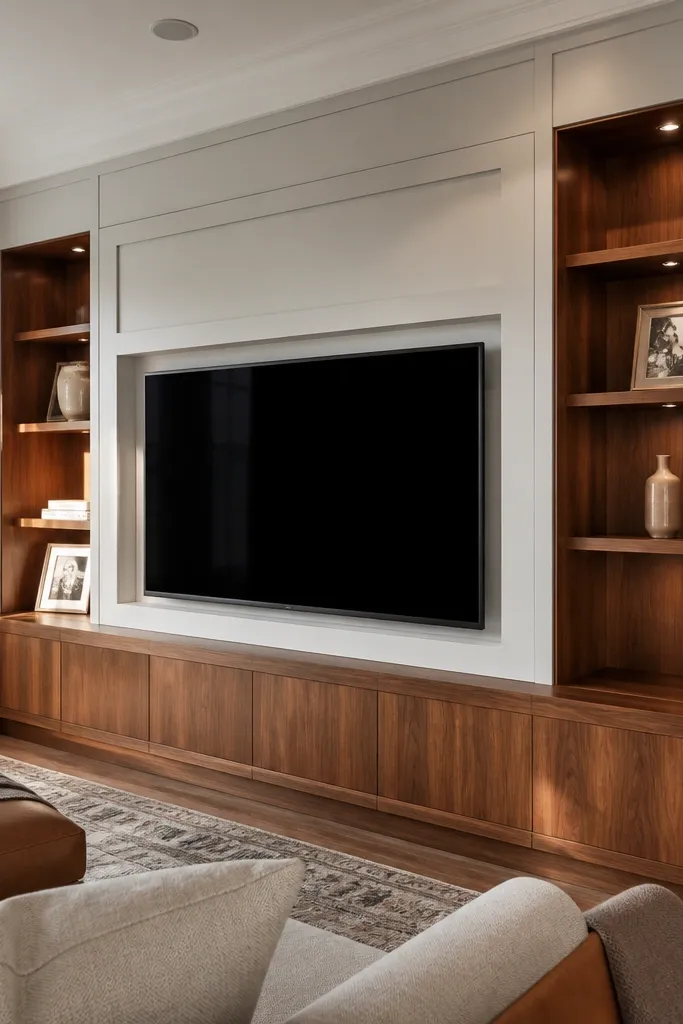
1) Build the shelf boxes and TV surround frame from plywood and MDF, then sand flat for veneer adhesion. 2) Apply walnut veneer to the exposed shelf faces and trim edges; use contact cement or veneer glue and press with a roller. 3) Seal veneer with a clear finish like water-based poly so it resists dust and fingerprints. 4) Paint the frame components first, then install veneer shelves after the paint cures to avoid scuffs.
This is the “warm wood meets clean frame” look that photographs well. Keep the frame white or light gray so the TV zone feels bright, then wrap shelf faces in walnut veneer for depth and contrast. The TV surround stays crisp, while the shelves look like custom furniture. It works in small-space living rooms because the color contrast gives structure without needing more elements.
Skip thisDon’t veneer the whole interior — keep veneer only where it’s visible to prevent uneven color.
Editor's noteStain or glaze the veneer edges lightly so the seam lines don’t look stark.
17. Two-Color Split Level Shelves With Dark TV Surround
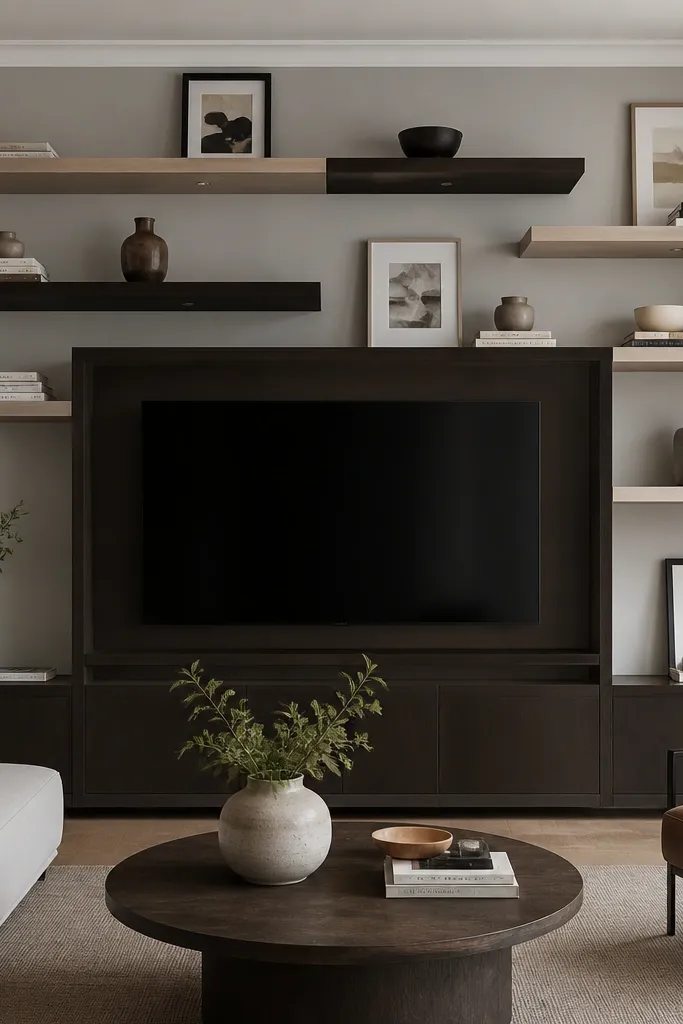
1) Frame the TV opening and surround in plywood and attach a dark face trim, keeping the inner opening sized for TV clearance. 2) Install shelf boxes in two sections: top shelves in light finish and bottom shelves in the same light finish, with a dark trim band separating the zones. 3) Paint or stain in two batches so edges stay sharp; mask the color boundary with tape after the first coat dries. 4) Mount the TV and route cables through the shelf box interior, covering access with a small removable panel.
A dark surround makes the TV feel grounded, while light shelves keep the rest of the wall from feeling heavy. Split-level shelves — where shelf faces change color at different heights — add a designer look without complex carpentry. Keep the TV opening framed in dark paint or stain, then build shelves in a lighter tone with matching trim. This works well when your room has light walls but dark furniture, because it ties the room together without making it gloomy.
Skip thisAvoid too many color changes — two tones plus one trim band is enough.
Editor's noteUse a 1-inch wide trim band for the color break; narrow bands look accidental.
18. Low-Profile Shelf Beams With Minimal Trim
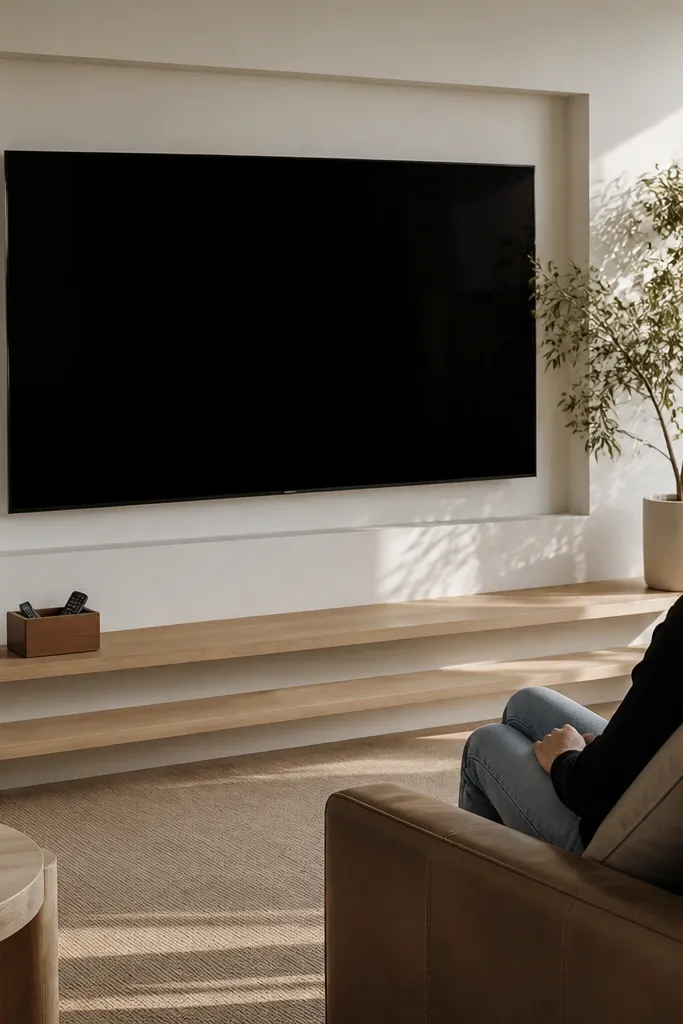
1) Build a minimal TV surround frame with a thin face trim and mount the TV to a secured back panel. 2) Install shelf beams using hidden cleats and 3/4-inch thick shelves, keeping spacing consistent above the TV. 3) Use minimal side returns or brackets so the shelves read as clean beams. 4) Finish everything with a matte paint and caulk the perimeter seams for a tight look.
If you hate bulky trim, this design keeps the built-in look through clean lines instead of heavy framing. Use low-profile shelf beams — think thin shelf edges with hidden supports — and keep the TV surround simple. The result is modern and airy, which matters in small spaces where big trim can swallow the wall. Pair it with a matte paint and a consistent shelf depth so it still looks intentional from the couch.
Skip thisDon’t use thin shelves with heavy decor — it makes sagging visible fast.
Editor's noteUse a single shelf depth across the whole wall so the eye reads a continuous architectural element.
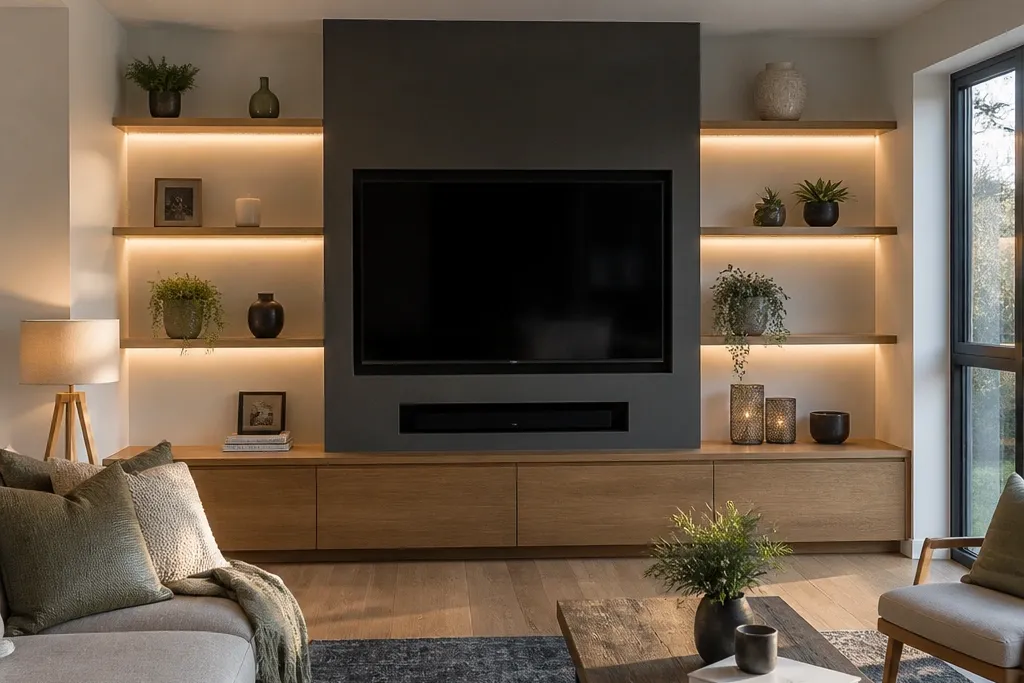
19. Symmetric Uplight Shelf Nooks for a Gallery Glow
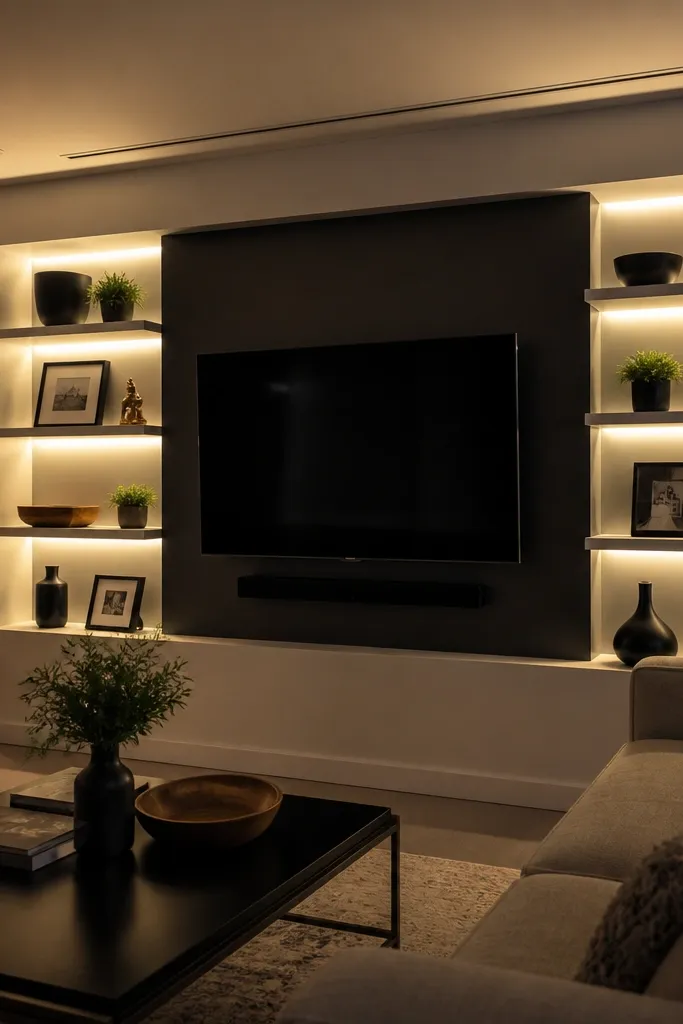
1) Plan shelf lips that create a shadow gap; leave about 3/4-inch of lip depth for the LED to hide. 2) Install LED channels under each shelf lip, then run wiring back to a hidden power supply inside the base cabinet. 3) Frame the TV surround and mount the TV so it sits centered between the lit shelf zones. 4) Finish with a diffuser or frosted cover for smooth light and install a dimmer so you can match movie nights.
Uplighting turns ordinary shelves into a gallery wall. This design places small LED uplights under shelf lips on both sides of the TV so the shelves glow and the wall looks more dimensional. In a small living room, lighting is what makes the built-in feel high-end, especially at night. Keep the shelf styling controlled — one or two objects per shelf — so the glow highlights shapes instead of clutter.
Skip thisAvoid bare LED chips — you’ll see dots and it looks cheap under daylight.
Editor's noteTest the LED placement with painter’s tape before you cut channels so you get the glow angle right.
20. Open Shelves on Top, Base Cabinets Under, and a Floating Center Door
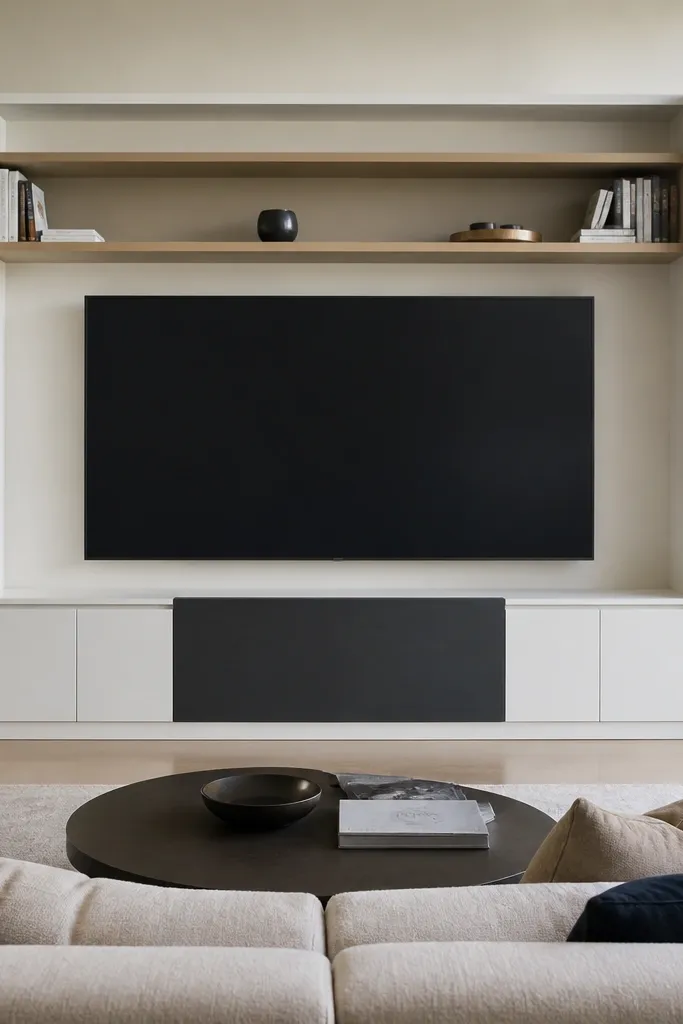
1) Build base cabinets under the TV with a center opening for a floating door panel; keep the cabinet height around 18-20 inches for a balanced look. 2) Frame the TV opening above and mount the TV to the back panel, routing cables into the cabinet. 3) Install open shelves overhead with a consistent shelf depth and edge trim, keeping the shelf heights aligned with the door centerline. 4) Add a floating center door using concealed hinges so it sits flush and doesn’t fight the trim lines.
This layout adds a clean “center door” detail that breaks up the wall and gives you a place for media gear. Open shelves above keep the styling visible, while cabinets under the TV hide everything that makes living rooms look messy. The floating center door — aligned with the TV centerline — gives the whole piece a focal point that looks intentional even if you don’t decorate perfectly. It’s a good option for small-space built in shelves living room tv setups where you want both storage and a crisp, furniture-like silhouette.
Skip thisAvoid mismatched hardware finishes — knob and hinge mismatch makes the build look unfinished.
Editor's noteUse a magnetic catch or soft-close hinges so the center door closes cleanly and quietly.



