
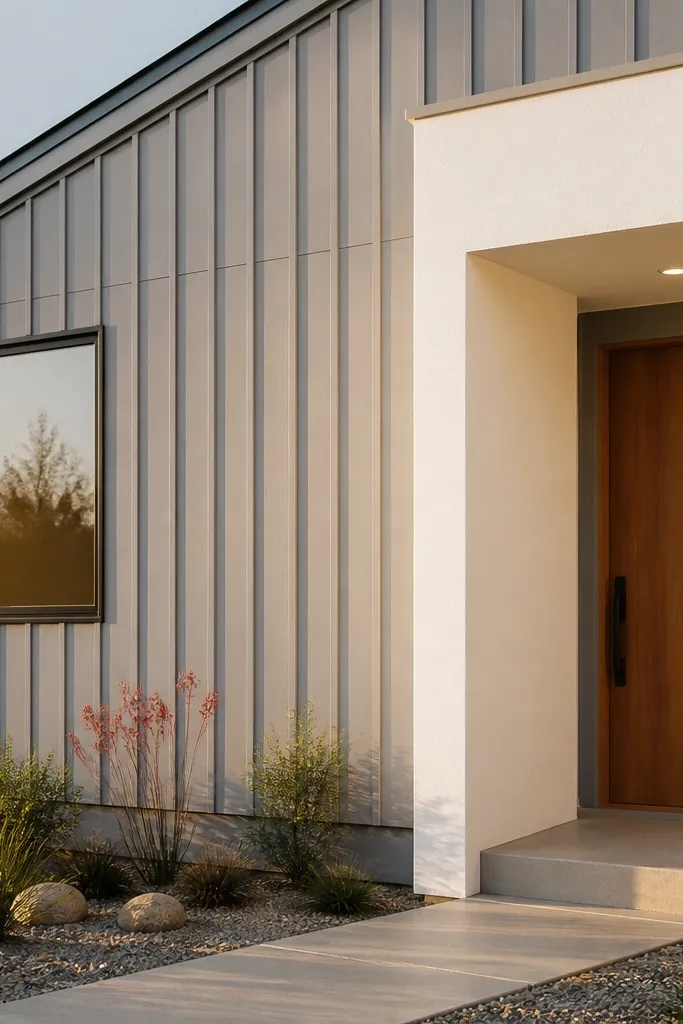
1. Charcoal fiber-cement with crisp white window reveals
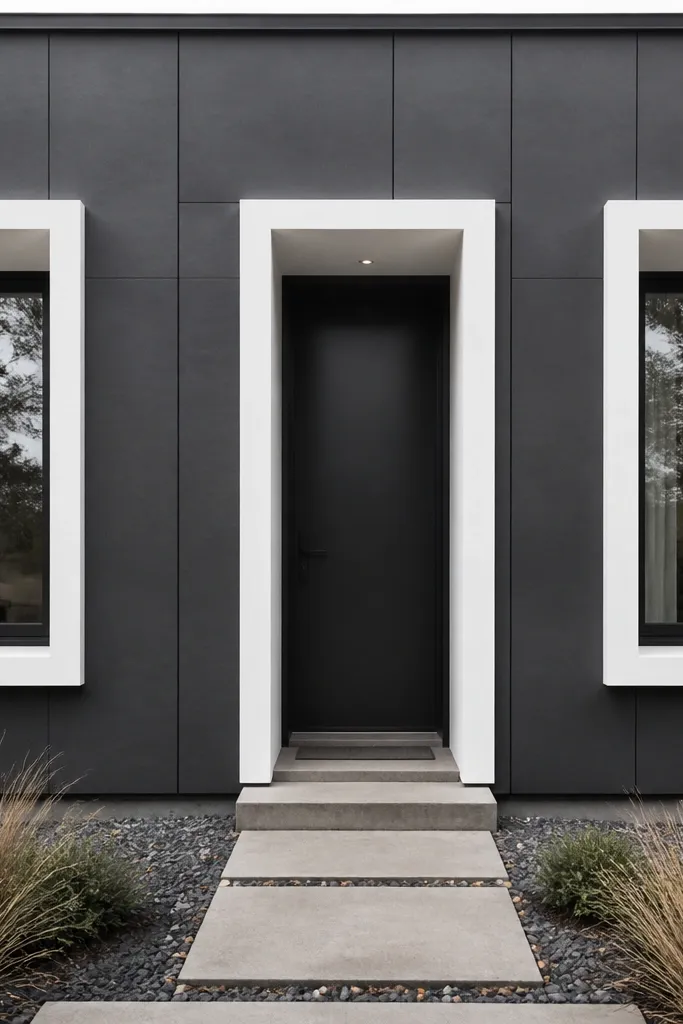
This is the modern facade look that survives small-plot physics. Dark charcoal fiber-cement reads sleek from the street, and the white reveals around every opening create strong frames that make the facade feel taller and more deliberate. The key is keeping reveals consistent — same thickness, same shadow line, same return around corners. It also hides minor wall imperfections better than smooth stucco because panels create a clean grid. Beginners like it because you can build it in sections and stop when one elevation is complete.
First, confirm your wall is flat and solid, then install a weatherproof membrane over the existing surface. Add battens to create a ventilated cavity, using 30-40 mm spacing depending on your cladding thickness. Next, install fiber-cement sheets or boards, starting from a corner, and leave a small expansion gap at edges. Finally, add PVC or primed trim boards for the white reveals, then seal every joint with exterior-grade caulk and fit flashing around windows.
Editor's noteUse a 10 mm shadow gap between cladding and trim so the reveal reads as a line, not a smear.
Skip thisDon’t paint trim before caulking and sealing — you’ll trap gaps that show later.
2. Vertical timber slat screen with a dark entry frame

A vertical slat screen makes a small facade feel taller because the lines run upward. It also gives you privacy and sun control without blocking light like solid cladding. Pair it with a dark entry frame around the door and you get a modern “portal” effect — the entry becomes the focal point even when the plot is narrow. Go for natural timber tones with a matte finish so it looks architectural, not like a fence. This one works great on flats, townhouse fronts, and narrow drive entries.
Start by installing treated timber or aluminum battens horizontally across the wall so slats can sit straight. Use spacers (or a jig) to keep consistent slat gaps, then screw each slat with stainless or exterior screws to prevent rust staining. Next, build a simple rectangular frame around the entry using 50x100 mm boards or metal trim, then mount it level before cladding. Finish by staining or painting slats with a matte exterior product and seal the underside of every cut edge.
Make a slat-spacing jig from scrap plywood — it saves time and keeps the gaps equal.
Avoid tight slat gaps that trap moisture; leave breathing space at least 12-18 mm depending on your timber.
3. Two-tone horizontal banding with a bright entry bay
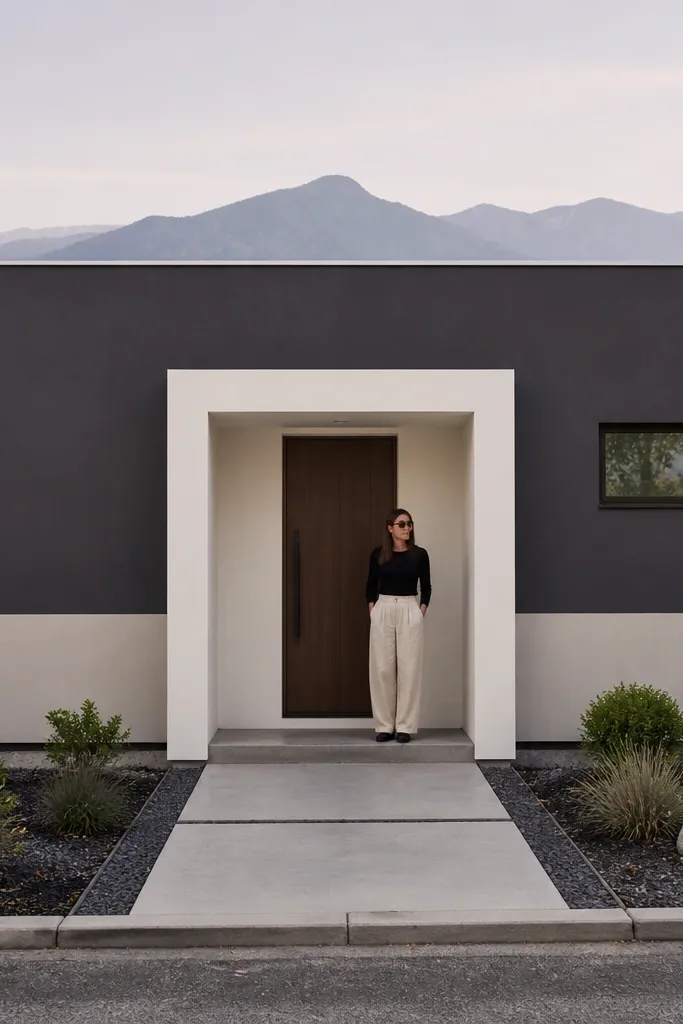
Horizontal banding makes the facade feel organized, and a bright entry bay stops the front from looking heavy. Use one darker tone for the main field and a lighter tone for the lower band or around the door, depending on whether your entry sits low or centered. The modern trick is to keep the band thickness consistent and align it with window bottoms or sill lines. This is a strong choice when your frontage is narrow but your wall height is decent because the bands visually “settle” the facade.
First, measure your facade and mark the band line using a laser level so it stays perfectly level across corners. Then install a base cladding layer (fiber cement or smooth boards) in the main field color if you’re changing materials, or paint if you’re staying with existing smooth surfaces. Next, tape off the band edges and apply primer rated for exterior use, then paint the second tone. Finally, add a thin trim strip at the band boundary and around the entry bay so the color change reads as a crisp line.
Use 2 coats of exterior primer on any patched areas before you lay down the darker paint.
Don’t freehand the band line; even a 5 mm drift looks sloppy on modern facades.
4. White stucco look using board-and-batten paneling

If you want that smooth stucco vibe but need a DIY approach, board-and-batten does the job. You get the clean, vertical rhythm that modern facades use, and the flat white surface stays bright on small plots. The trick is to keep the battens narrow and evenly spaced so it reads like panel texture, not random trim. This facade is also forgiving for beginners because you can build it over a substrate with proper weatherproofing and then paint everything in one go.
Start by attaching a weather-resistant barrier over the existing wall, then fix vertical battens at regular spacing. Lay flat backing boards or rigid panels first, then attach battens over them to create the recessed lines. Use consistent batten width, like 25-30 mm, and keep reveals around openings identical on both sides. Prime thoroughly and paint with an exterior masonry or siding paint system designed for the panel type.
Editor's noteUse painter’s tape to mark batten positions before screwing so you don’t end up with uneven spacing.
Skip thisAvoid skipping caulk in the corners and at panel joints; micro-gaps show as dark lines after rain.
5. Black slatted privacy wall beside the entry with clear glass door
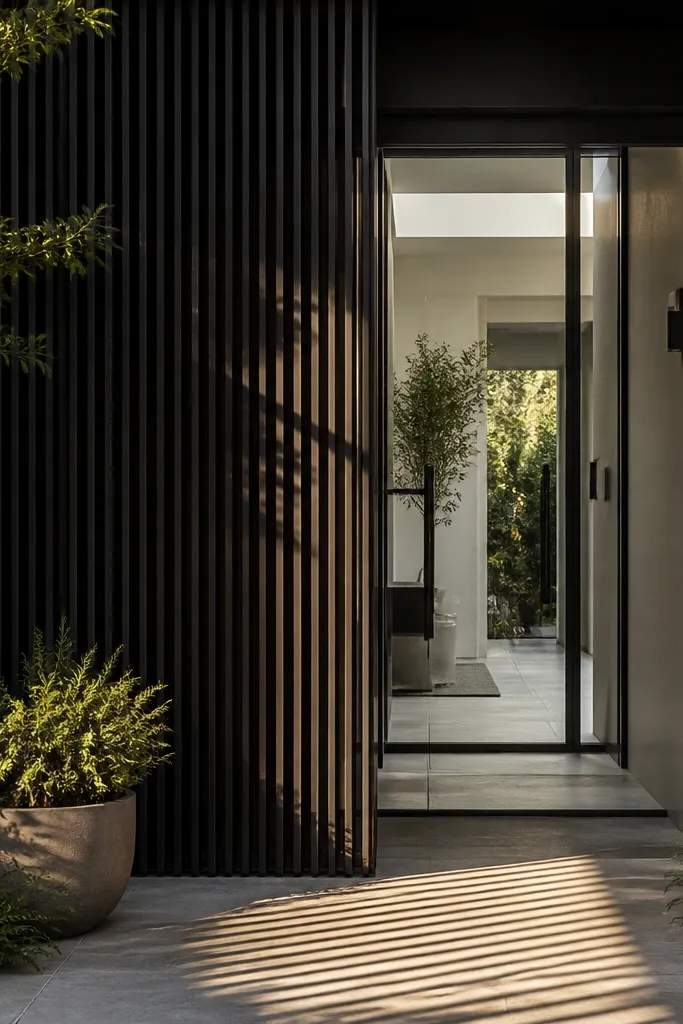
Modern small facades often feel tight at the entry, so this design uses a slatted side screen to create a styled “frame” without blocking the entry view. Black slats look crisp against lighter walls and make the door area feel intentional. Add a glass door or sidelights to keep the front bright and avoid that cave effect. It’s especially good where your door is close to a boundary wall or where you want privacy from the street.
First, build a simple rectangular frame on the side elevation using treated timber or metal posts, anchored to the wall structure. Then add slats vertically and keep the spacing consistent with a spacer block. Install a matching trim cap at the top edge to prevent water pooling. Finish by painting the slats matte black and sealing cut ends, then install the glass door and door flashing.
Paint slats before installation and touch up screw holes after — it gives cleaner edges.
Don’t let slats run unsealed to the bottom; water will sit and streak the black over time.
6. Staggered brick veneer pattern with a modern flat trim band
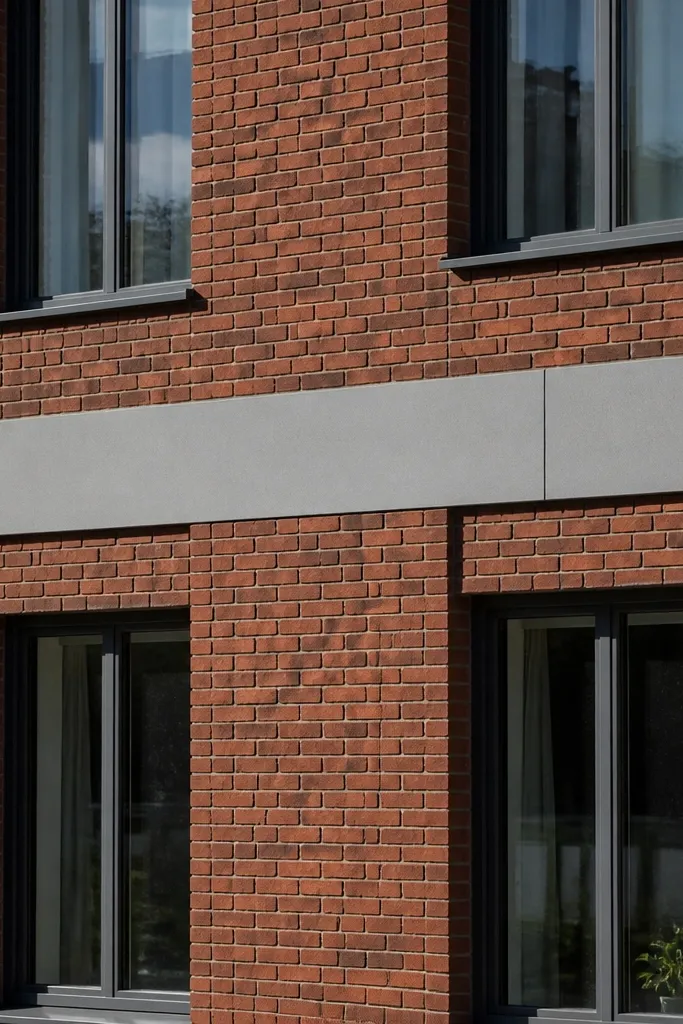
Brick can look modern when you control the pattern and use flat trim lines. A staggered brick veneer with a single flat trim band across the facade creates structure and keeps the design from turning into a traditional cottage look. This works well for small plots because brick adds texture without clutter, and the trim band visually aligns windows and door so the facade reads “designed.” Choose a lighter gray or warm buff brick to avoid making the front feel too heavy.
First, install a suitable backing system for brick veneer, including a weather barrier and drainage plane if required by your wall type. Apply a leveling base and dry lay a small section to confirm the stagger alignment and corner pattern. Then mortar and install the veneer in courses, keeping joints consistent with spacers. Finally, add flat trim boards or metal coping at the band line and around openings, then seal joints where trim meets brick.
Editor's noteUse a laser level for the trim band line; masonry looks off even with small misalignment.
Skip thisDon’t skip a proper drainage plane — veneer can stain and fail when water can’t move.
7. Cedar panel field with aluminum vertical fins at corners
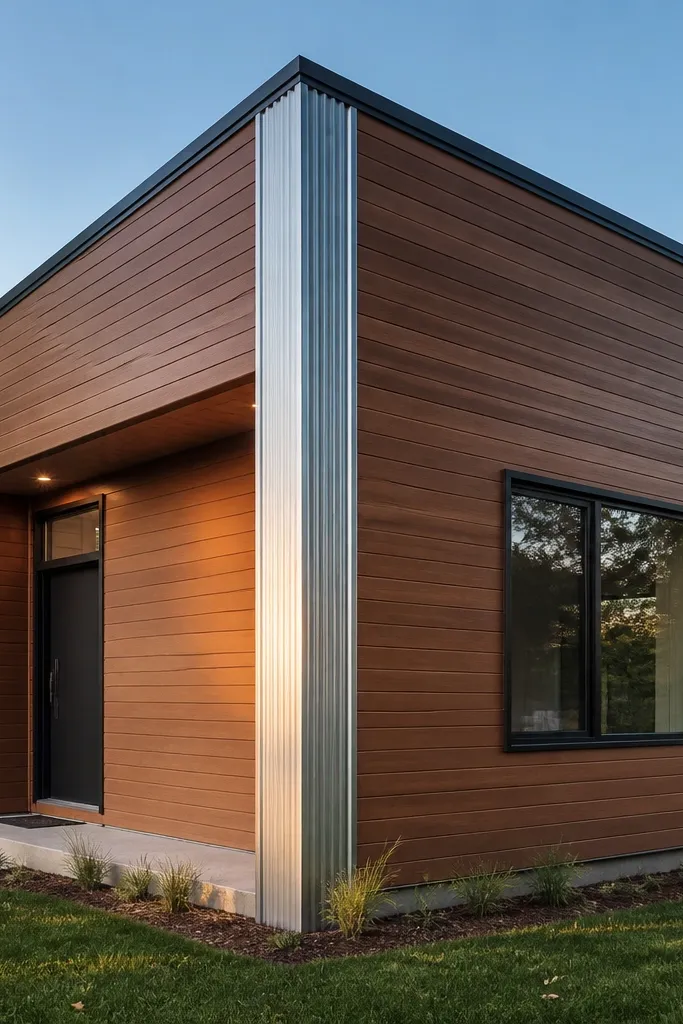
This is a clean modern facade recipe: warm cedar for the main field and slim aluminum fins at corners to sharpen the silhouette. Corner fins make a small house look more “cut” and designed, especially if your plot has neighboring buildings close by. The cedar adds warmth, while metal fins keep it contemporary. This design also photographs well because the fins catch light and create a shadow line that changes through the day.
Start by installing a ventilated backing system with battens and a weather membrane. Mount cedar panels or boards in a consistent direction, usually vertical for a sleek look, and keep fasteners hidden where possible. Next, install aluminum corner fins by anchoring to the framing at regular intervals, then seal edges with exterior sealant. Finish by staining cedar with a matte exterior oil or paint system and ensure all cut edges are sealed.
Editor's notePick a cedar finish that dries matte, not glossy — modern facades look cleaner with low shine.
Skip thisAvoid mixing cedar stain sheen levels across panels; it shows as patchy light differences.
8. Monochrome gray facade with a single warm wood stripe
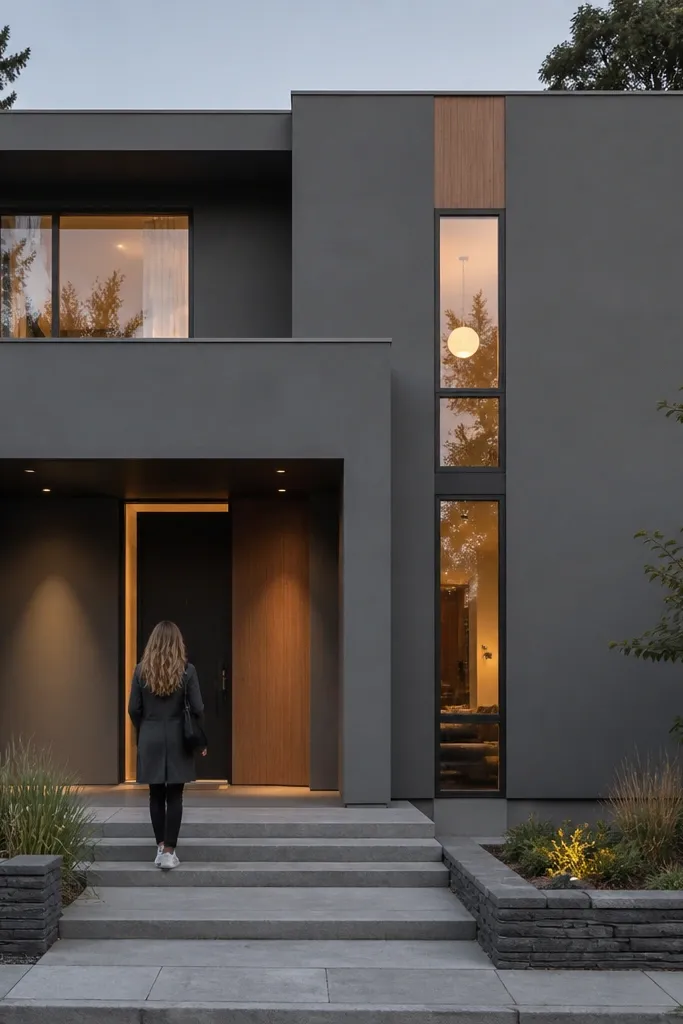
If you want modern without going all-dark, monochrome gray with one warm wood stripe is the easiest way to make it look styled. The gray keeps the facade calm and modern, and the wood stripe adds warmth right where your eye lands — usually alongside windows or the entry. Keep the stripe narrow and aligned with openings, not floating. This is great for small plots because it avoids visual noise while still adding contrast.
First, choose your gray paint or cladding color and do a full primer coat for consistent tone. Mark the stripe height with a level line and mask clean edges with tape. Install a narrow wood battens strip, like 40-60 mm wide, or use a continuous wood panel strip if you want less seams. Then seal and paint or stain the rest of the facade, and finish by adding a thin trim return to make the wood stripe feel mounted, not pasted.
Use a tape-release trick: press tape firmly along edges and remove within the manufacturer’s recommended window for sharp lines.
Don’t add a second wood accent elsewhere; one stripe is the point.
9. Flat metal panels with concealed trim joints
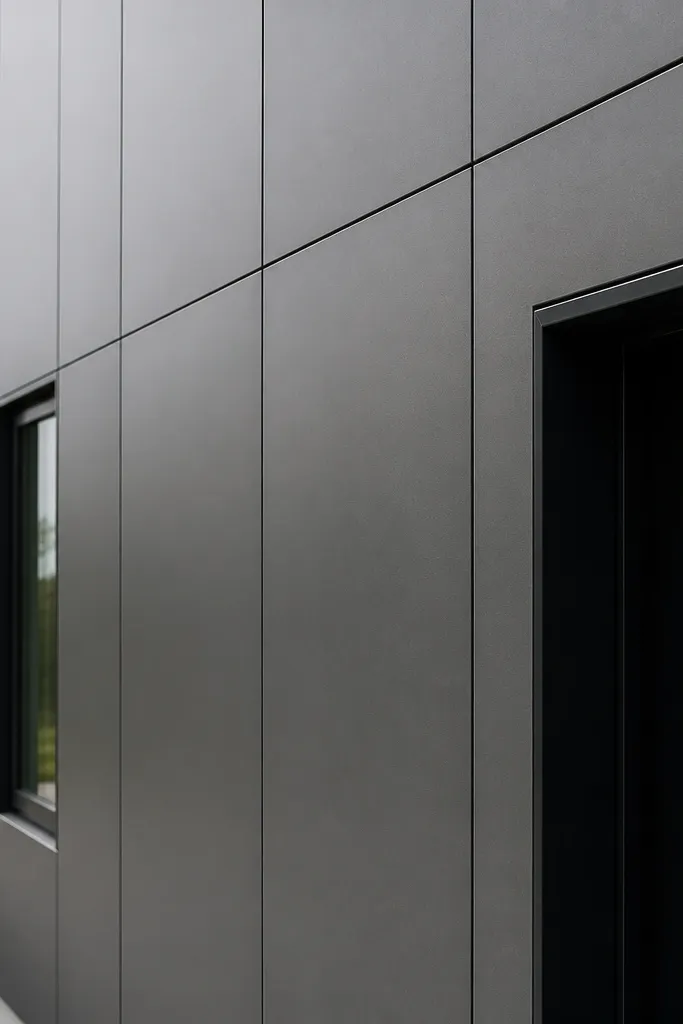
Metal panels look modern instantly, but the real win is how you hide the joints. Flat metal cladding in a dark gray or warm charcoal reads clean from the street when seams are straight and trim lines are consistent. For small plots, metal reflects light in a controlled way, so the facade looks crisp instead of bulky. This project is more beginner-friendly than people think if you use panel systems with starter tracks and preformed flashing for openings.
Start by installing a compatible subframe and starter track at the base line, using a level to keep the first row perfect. Then mount metal panels with the correct clips or concealed fasteners so you don’t see screw heads. Next, install trim pieces around windows using preformed corner and J-channel style parts to manage expansion and water. Finish by checking all edges for sealant continuity and fitting flashing at the top and sides of openings.
Lay out panel widths on paper first; it’s the easiest way to avoid a tiny sliver at a corner.
Don’t caulk over moving joints; use the correct expansion gaps the panel system calls for.
10. Light limewash facade with dark vertical fins
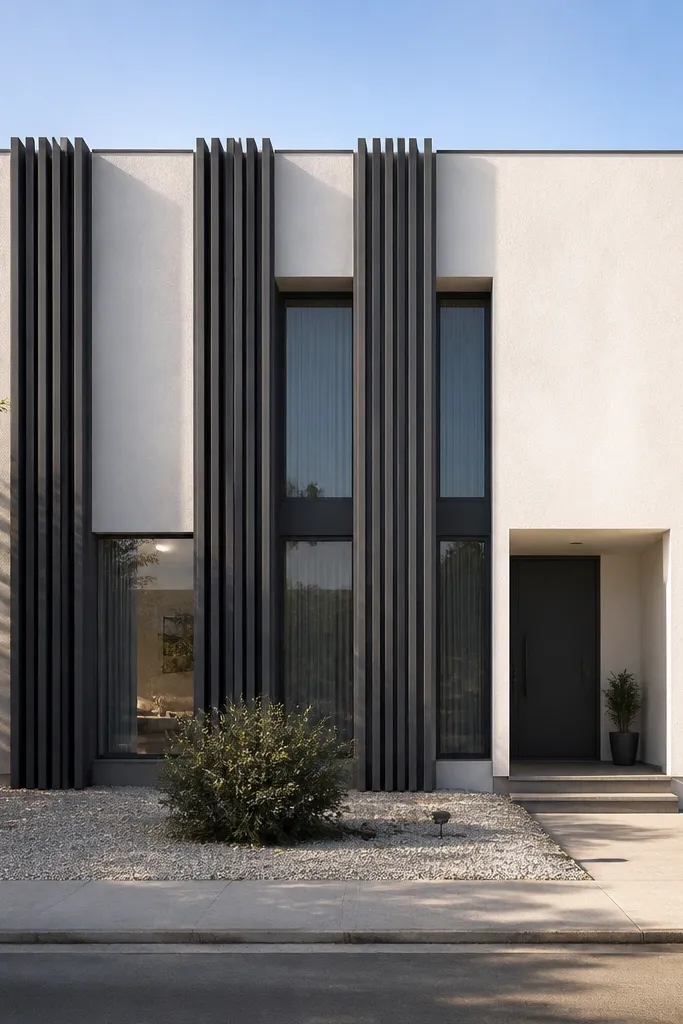
A light limewash look keeps small facades airy, and dark vertical fins add modern structure without adding much bulk. The facade stays bright, but the fins bring the eye upward and give you that architectural “frame” effect around windows. This is a good choice if your plot has limited sunlight or if your existing wall is dull and needs visual lift. The finish matters: choose a breathable exterior limewash or limewash-style paint so the facade doesn’t look plasticky.
First, prep the wall thoroughly: patch cracks, sand, and apply a primer system compatible with limewash-style finishes. Then install thin battens or fin strips where you want the vertical lines, anchored to the wall structure. Paint the main facade in a light lime tone, then paint the fins a deep matte black or charcoal. Finally, seal around window trim with exterior caulk and fit drip edges at any horizontal surfaces.
Test the lime color on a patch under real shade — lime tones shift with light more than standard paint.
Avoid painting over chalky or unsealed repairs; lime-type systems highlight weak prep.
11. Front porch screen wall with horizontal slats and slim soffit
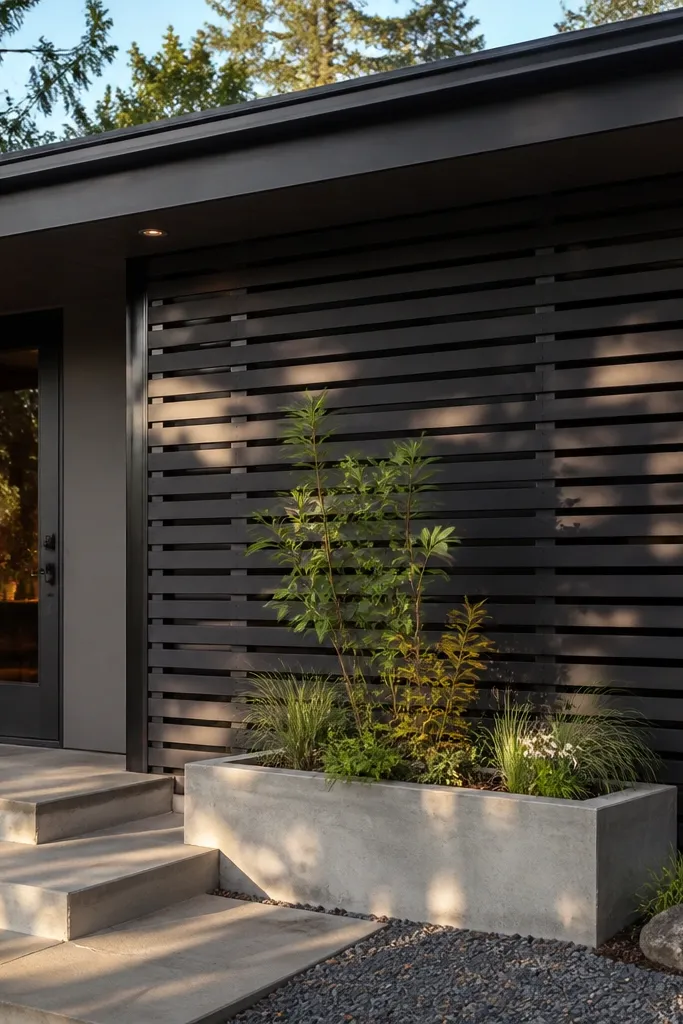
If your facade includes a porch or entry overhang, horizontal slats on the screen wall look modern and also hide clutter like meters or bins. Add a slim soffit line under the porch roof so the facade has a clean top boundary. Horizontal slats make a narrow plot feel wider because the lines run left to right. This design is beginner-friendly because it’s a partial facade upgrade instead of covering the entire front.
Start by measuring the screen wall opening and building a simple frame using treated timber or aluminum. Add horizontal slats with equal spacing, fastening them to the frame with exterior screws. Then install a slim soffit board under the porch roof line so the screen wall ends at a crisp edge. Finish by painting or staining slats and sealing all top edges so rain doesn’t sit on horizontal pieces.
Use a level and a spacer block for every slat — horizontal lines show every mistake.
Don’t use untreated end grain on slats; it soaks water and stains the screen fast.
12. Concrete-look facade panels with a timber screen column
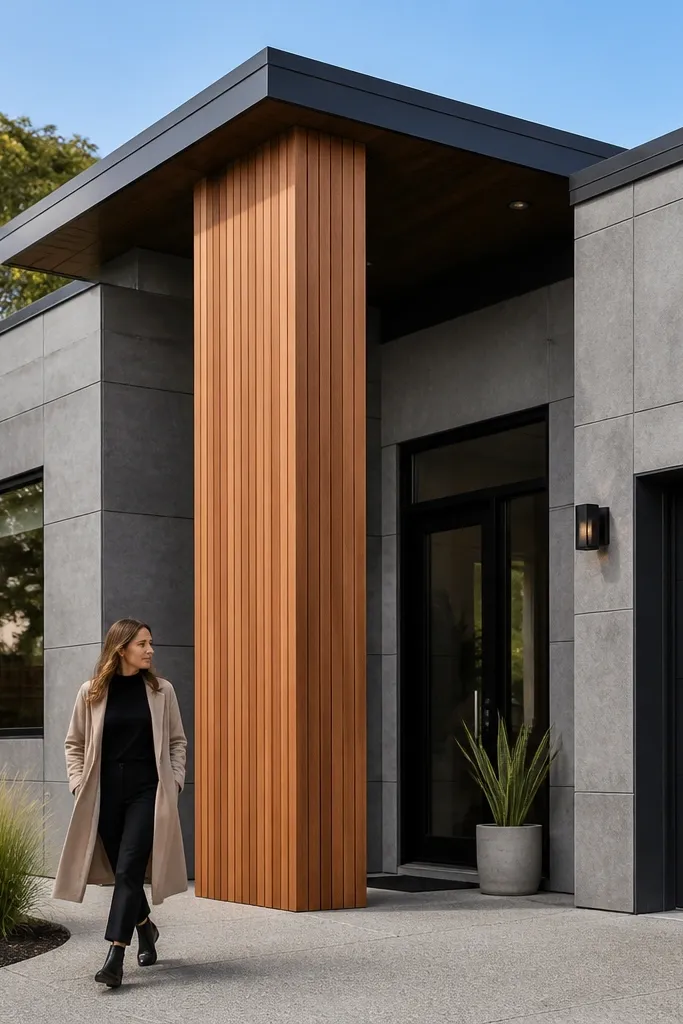
Concrete-look panels give you that modern industrial feel without the weight and mess of actual concrete. Pair them with a timber screen column at the entry and you get contrast: cool gray field plus warm vertical accent. This helps small plots because the concrete look adds presence, while the timber column gives an intentional focal point near the door. It also makes your entry look taller and more “framed,” even if your doorway is narrow.
First, install a ventilated backing system and weather membrane on the main wall. Mount concrete-look fiber-cement panels in a grid with consistent joints and expansion gaps. Then build the timber screen column as a vertical frame anchored to the wall structure and wrap it with slats or boards. Finish by coating the concrete-look panels with the recommended exterior paint and sealing the timber screen with exterior stain or paint.
Editor's noteKeep panel joints aligned with window edges; this is what makes it read modern rather than random.
Skip thisAvoid leaving raw cut panel edges exposed — they stain and can wick moisture.
13. Black-and-white framed openings with a thin horizontal header
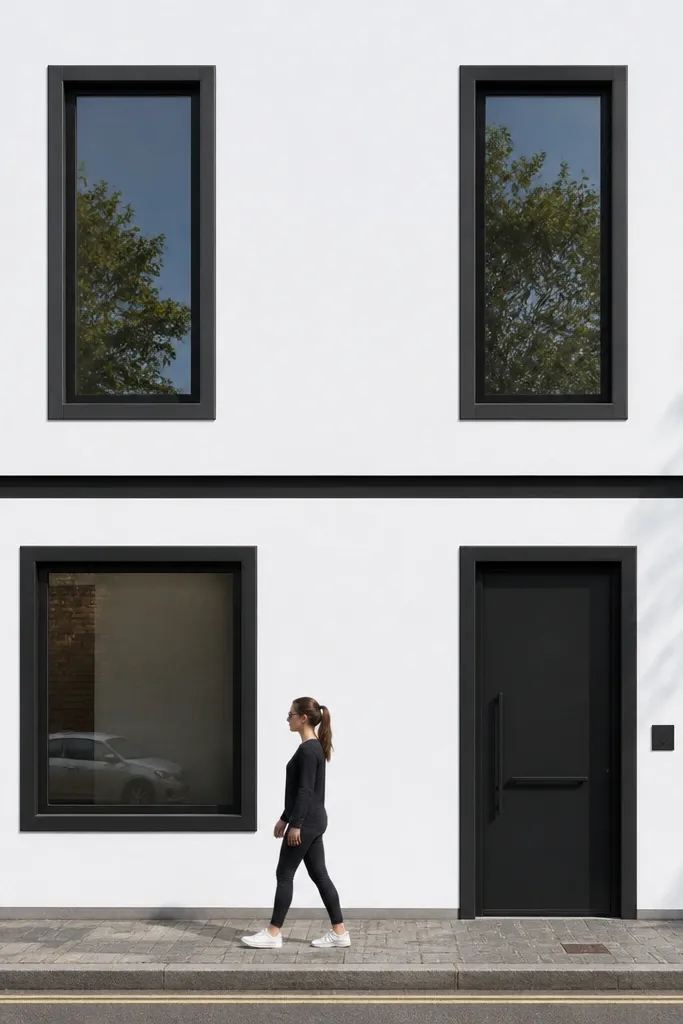
This is a graphic modern facade style: black frames around windows and door make the openings look like designed cutouts. Add one thin horizontal header strip across the facade and you get a clean, modern rhythm without needing lots of materials. For small plots, the high-contrast framing makes the house read bigger because the eye sees sharper boundaries. Keep everything matte so it looks architectural, not glossy or cheap.
Start by painting or cladding the main facade in a light neutral like off-white or warm white. Then install trim boards around each window and the door using the same profile and thickness. Add a thin header strip at a consistent height, aligned with window tops, using straight lengths and corner miters or butt joints with backing. Finally, caulk all trim joints and paint the trim black with an exterior matte finish.
Use a single trim profile for every opening; matching profiles is what makes it look intentional.
Avoid mixing trim widths between windows; it kills the graphic symmetry.
14. Terracotta board-and-batten with a white corner return
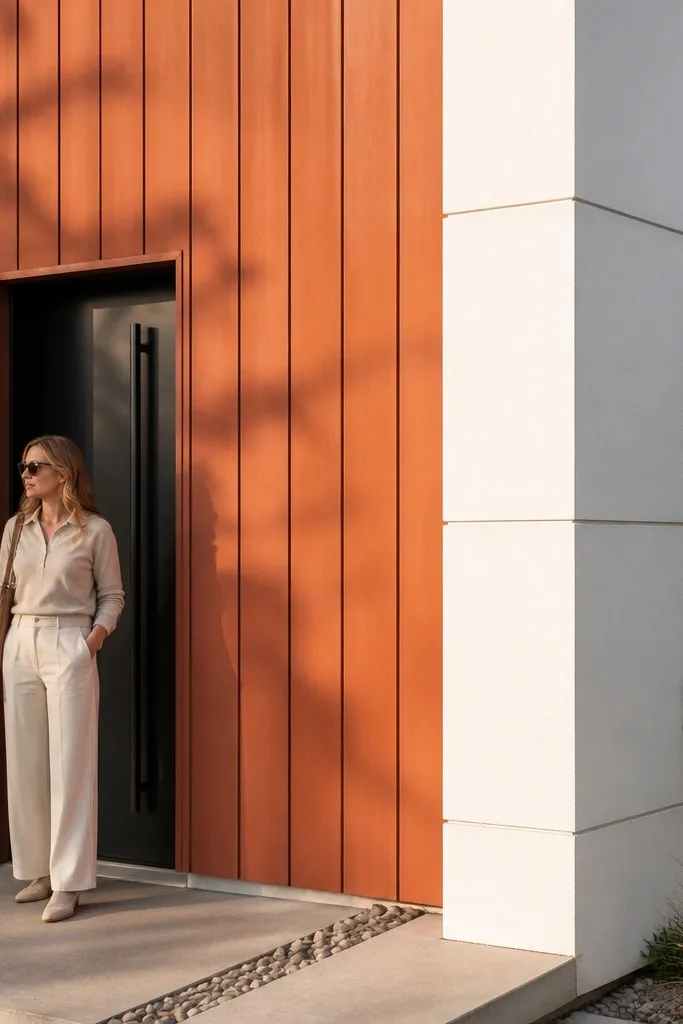
Terracotta can look modern when you keep it flat and structural. Board-and-batten in a terracotta tone adds texture and vertical rhythm, while a white corner return gives you that crisp architectural edge that small facades need. This combo looks warm on camera and doesn’t feel cold like all-gray. It also hides minor patching because the batten lines create visual structure. Choose a muted terracotta, not bright orange, for a more modern read.
First, prep and prime the wall, then install vertical battens and backing boards to create the board-and-batten pattern. Keep batten spacing consistent and use corner boards so returns look sharp. Paint the main field in terracotta and the corner returns in a clean white using exterior trim paint. Finish by sealing all joints and adding drip edges at the bottom of any vertical assemblies.
Use a matte finish on the terracotta; it reads more modern and hides touch-ups.
Don’t pick a glossy terracotta — it reflects too much and looks less architectural.
15. Raised panel facade with shadow gaps and matte charcoal paint
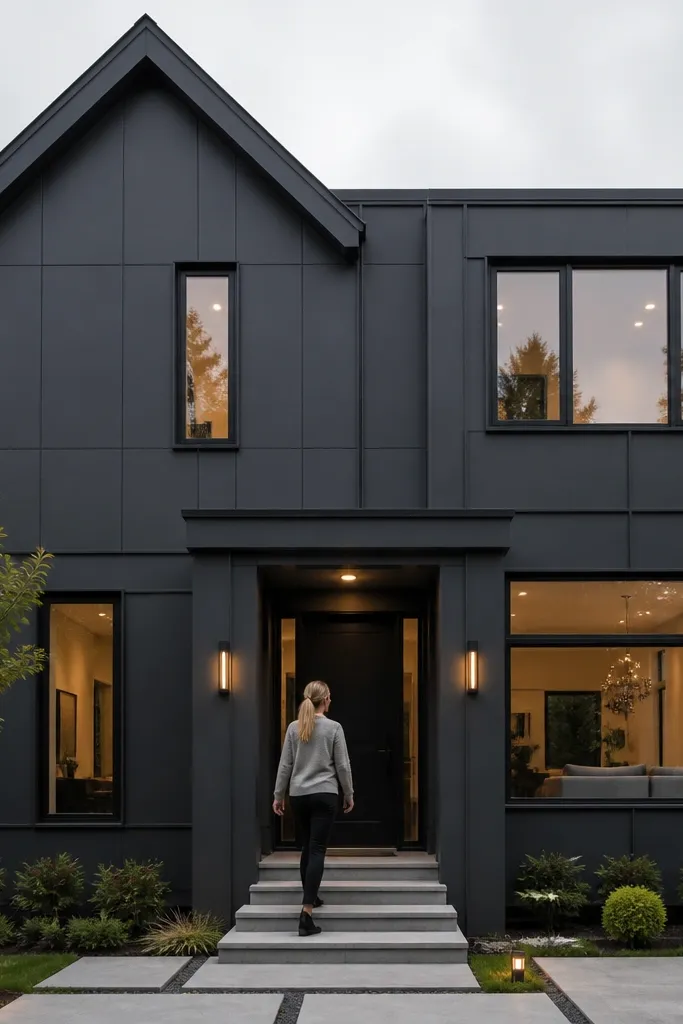
Raised panel facades look premium because they create depth without busy patterns. The modern way to do it is with shadow gaps — thin recess lines between panel fields. On small plots, this adds dimension and makes the facade look layered instead of flat. Matte charcoal keeps it sleek, and the raised geometry gives you a “designer door” feel even if your entry is basic.
Start by marking a grid on the wall where panels will sit, using a level so lines stay straight. Install flat backing boards, then add raised battens or panel strips to create recessed shadow gaps between rectangles. Keep the gap width consistent, like 8-12 mm, and seal edges so water doesn’t sit in recesses. Prime and paint the entire facade with a matte exterior system designed for siding or boards.
Editor's noteUse a consistent recess depth by building a small spacing block for your battens.
Skip thisDon’t skip sealing inside the recesses — water will collect and stain the shadow lines.
16. Crisp white board cladding with a single dark vertical accent column
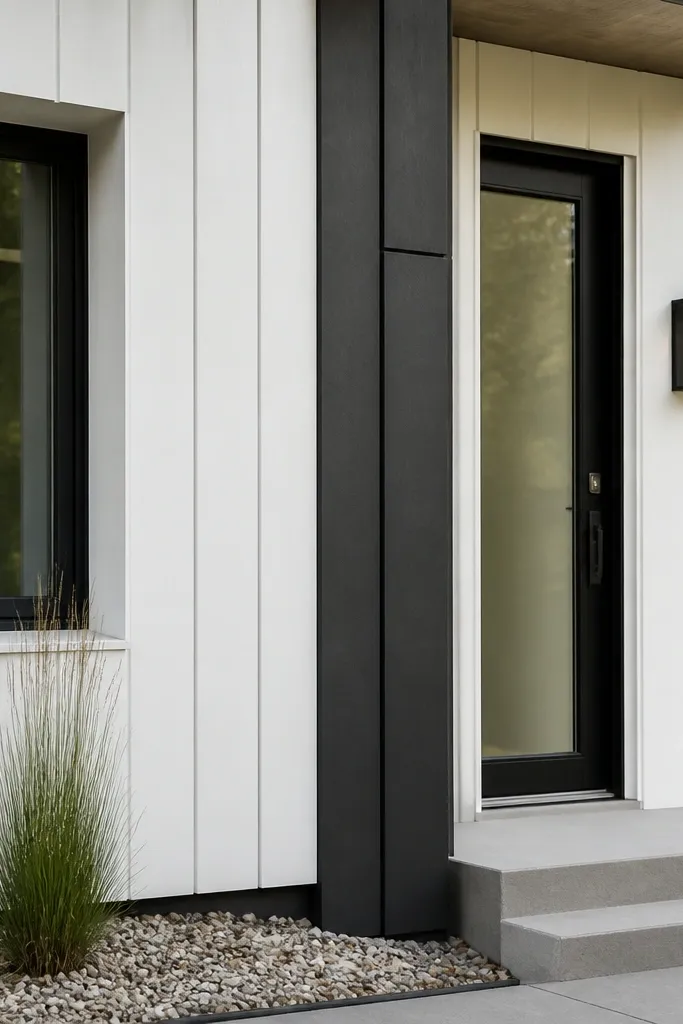
When your plot is small, you want one strong accent instead of many competing details. White board cladding keeps the facade bright, and one dark vertical accent column beside the door creates a modern focal point. This design also works when you can’t change much about the windows because the accent column frames the entry area. It’s clean, easy to photograph, and beginner-friendly because it’s mostly painting and straight board installation.
First, install or replace facade boards in a consistent direction and spacing, keeping corners square. Paint the main cladding white using exterior siding paint and let it cure fully before adding accents. Then build the dark accent column using a narrow board frame or metal trim, anchored to the wall structure. Finish by lining the column edges with trim so you get crisp vertical lines.
Pick a white with slight warmth; pure blue-white often looks harsh on small elevations.
Avoid a dark accent that’s not plumb — a crooked column makes the whole facade look off.
17. Glass-and-metal entry canopy with thin side fins
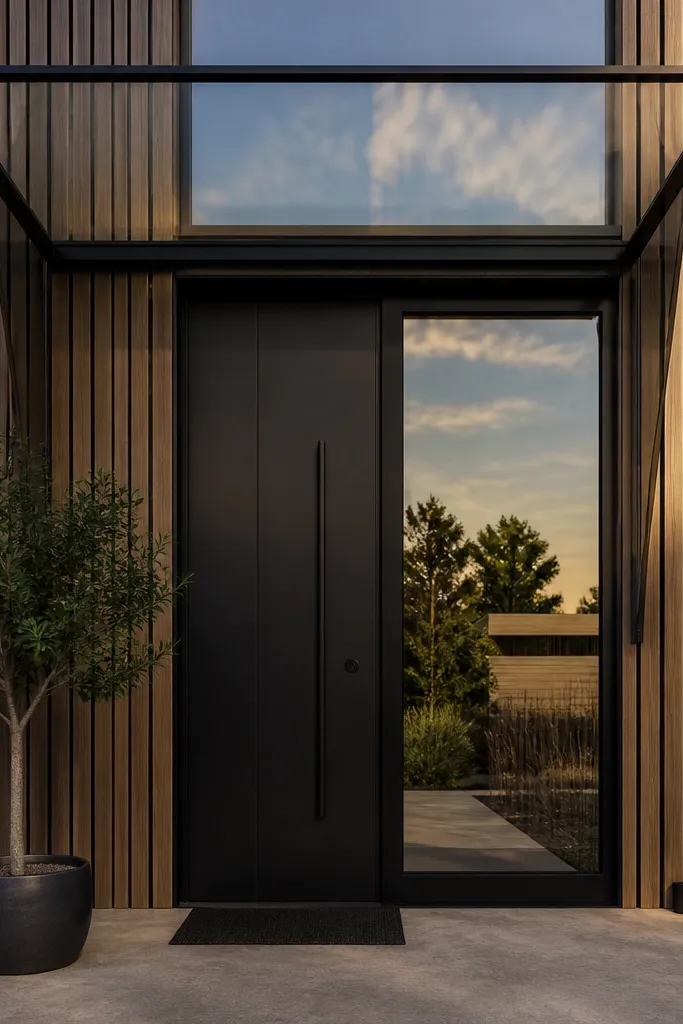
A modern entry canopy changes the facade read immediately because it adds a top “cap” above the door. Use a slim metal frame and a glass or clear panel so the entrance stays bright and doesn’t block light. Add thin side fins to keep the canopy visually aligned with the facade. This is a great small-plot upgrade because you’re focusing on a small area that the street view emphasizes. It also helps protect the entry from rain, which keeps your doorway area looking clean.
Start by planning the canopy size based on door width plus at least 300-450 mm overhang on each side. Install mounting brackets into structural framing and add flashing where the canopy connects to the wall. Then assemble the metal frame, fit the glass or clear panel, and seal edges with exterior glazing sealant. Finally, add two slim side fins aligned with the facade cladding lines and paint the metal frame with a powder-coated or exterior rated finish.
Editor's noteUse stainless hardware and proper sealant around every penetration — water leaks show fast on modern canopies.
Skip thisDon’t mount to drywall or thin trim — the brackets need real structure behind them.
18. Polished stone veneer base with smooth cladding above
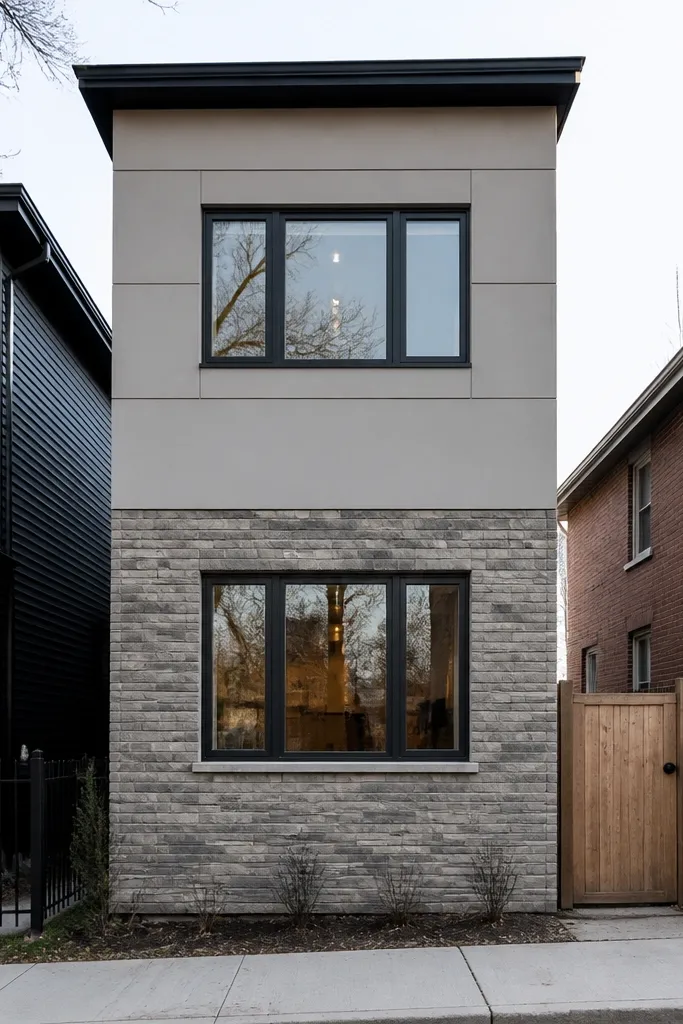
A stone veneer base makes small facades feel grounded and expensive, but the modern part is keeping everything above it smooth and minimal. Use a stone band at about 600-900 mm height, then switch to a clean cladding material above like fiber-cement boards or smooth panels. This split reduces visual clutter on narrow plots and makes the house look proportioned. Keep stone color consistent — gray or warm buff works best with modern trims.
First, install a weatherproof base system and a suitable backing on the lower wall where stone will sit. Dry lay a section to pick the best stone orientation and joint look, then mortar or mechanically fix the veneer according to your product instructions. Next, finish the top edge with a straight metal or PVC coping strip so water sheds cleanly. Finally, clad or paint above the stone in a smooth finish, and add trim around openings to connect both materials visually.
Editor's notePick a coping strip color that matches your window trim — it ties the materials together.
Skip thisAvoid using uneven stone heights without a leveling plan; it makes the modern line look crooked.
19. Matte white facade with a hidden downspout line and slim gutter
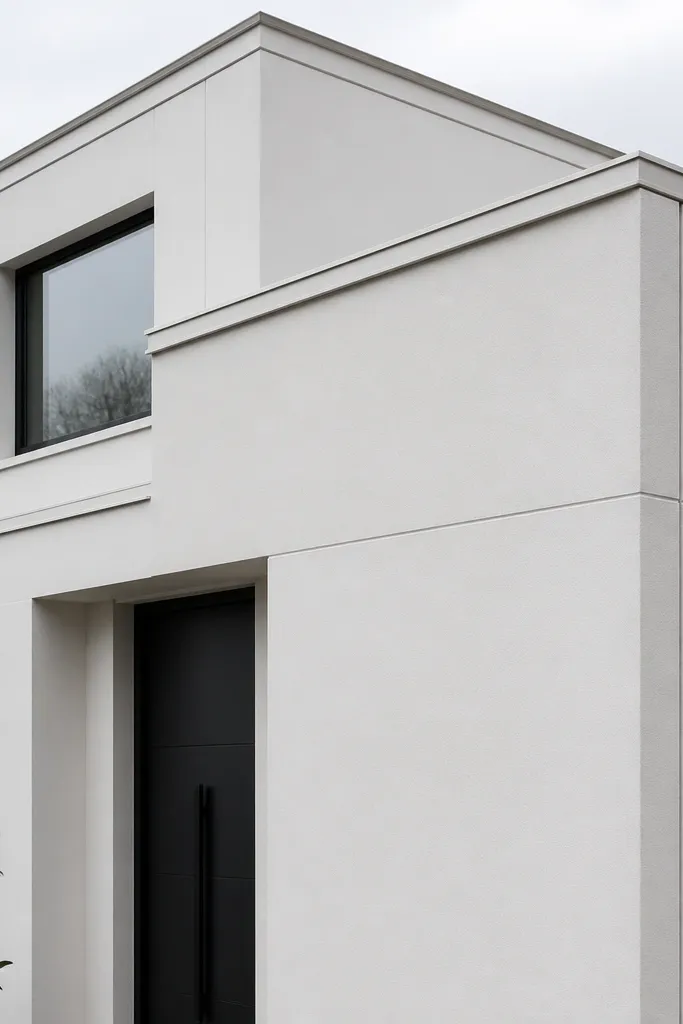
This one is about the details people ignore. On small facades, visible downspouts and messy gutters make the facade read unfinished even when paint looks great. A matte white facade with a slim gutter system and a concealed downspout line makes the front look designed and modern. It also improves water management at the base, which helps the wall stay cleaner. If you have a narrow frontage, keeping the water lines straight boosts the “quiet” modern look.
First, remove any old gutter and downspout sections and check fascia boards are solid. Install a slim gutter profile and run a downspout line inside a concealed chase or behind a trim cover panel. Then install flashing where the downspout enters the concealed area, and seal every joint with gutter sealant rated for your material. Finish by painting the trim cover to match the facade and add a clean splash guard at the bottom discharge.
Use a level chalk line for the downspout cover so it stays straight from the street.
Don’t leave gaps around concealed covers — they collect leaves and water stains the paint.
20. Corner-to-corner vertical cladding with a continuous baseboard
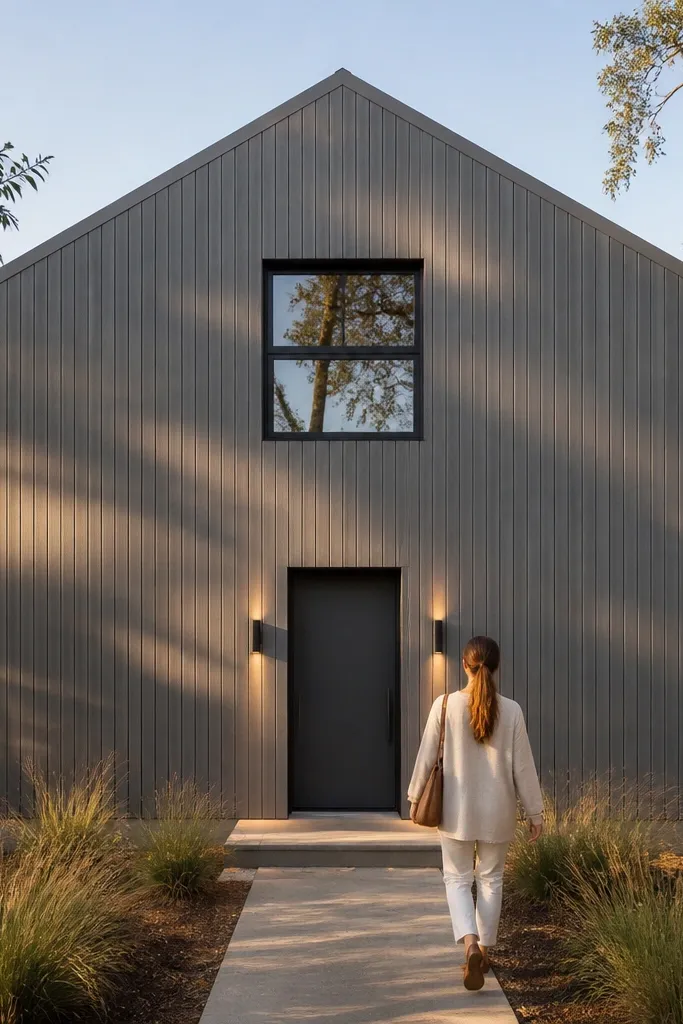
A continuous vertical cladding layout makes small plots look taller and cleaner because the facade has one continuous “skin.” Add a continuous baseboard line that wraps across corners and you get a modern foundation band. This is a great option when your house has multiple small windows because the vertical cladding ties them together. Keep the cladding in one color and use minimal trim so you don’t create visual breaks. The result is crisp and photogenic from a street angle.
First, install corner framing and battens so cladding lines align across the front elevation and wrap corners. Then attach vertical cladding boards with consistent spacing, starting from a level reference line at the base. Install a continuous baseboard using a straight board profile anchored to the framing, then seal the top edge where it meets cladding. Finish by fitting corner trim and painting or staining the entire cladding system in one schedule.
Use pre-cut corner boards to keep the corner returns tight and shadow lines even.
Don’t start boards from the ground without checking the existing slope — your vertical lines will look off in photos.
21. Dark entry wall panel with a built-in house number plinth
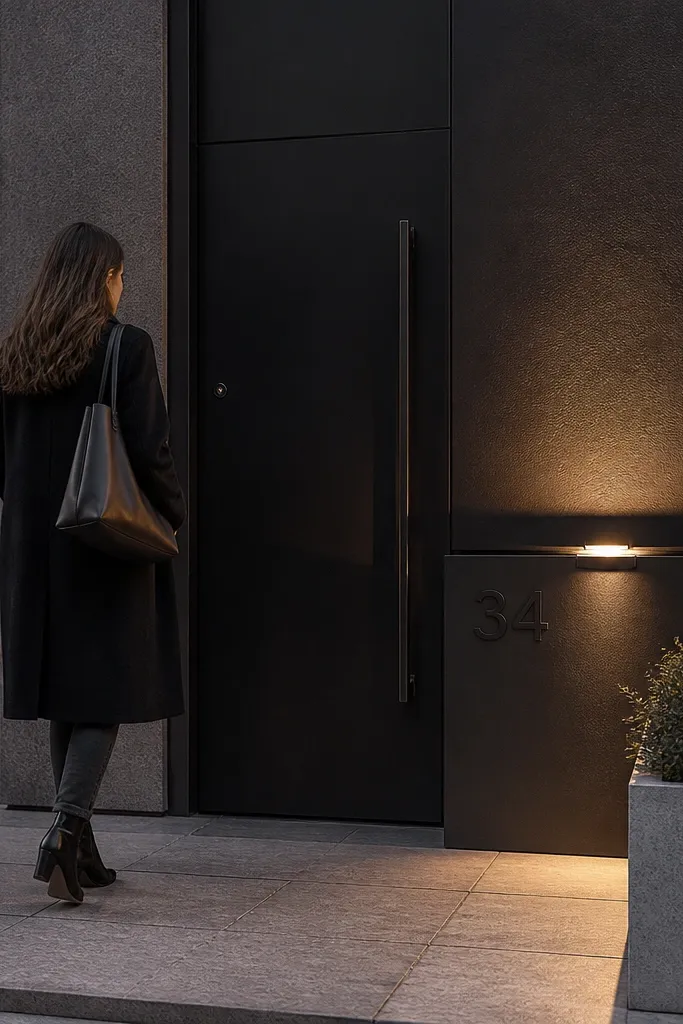
This is how you make a small facade look designed in one area. A dark entry wall panel adds contrast, and a built-in plinth for house numbers looks like architecture instead of a sticker. Keep the panel flat and matte, then add a single accent light washing the numbers and panel. It’s a simple DIY that still looks high-end because the number placement is aligned and framed. This works especially well on houses where the door is set back or the entry is narrow.
First, choose a panel material like fiber-cement or exterior plywood sealed system, then cut it to fit the entry wall section. Install a weatherproof backing and ventilated cavity before mounting the panel. Then build the house number plinth by adding a small frame box and a front face panel, sized so numbers sit at eye level. Finally, paint the panel and plinth in matte black (or charcoal), mount the house numbers, and install a small exterior wall light with a shield to prevent glare.
Editor's noteMount numbers to a recessed plate so they cast a stronger shadow in daylight.
Skip thisAvoid installing numbers directly on textured cladding; the shadows look messy and the letters collect grime.
22. Stone-look porcelain tile facade panels with slim aluminum frames
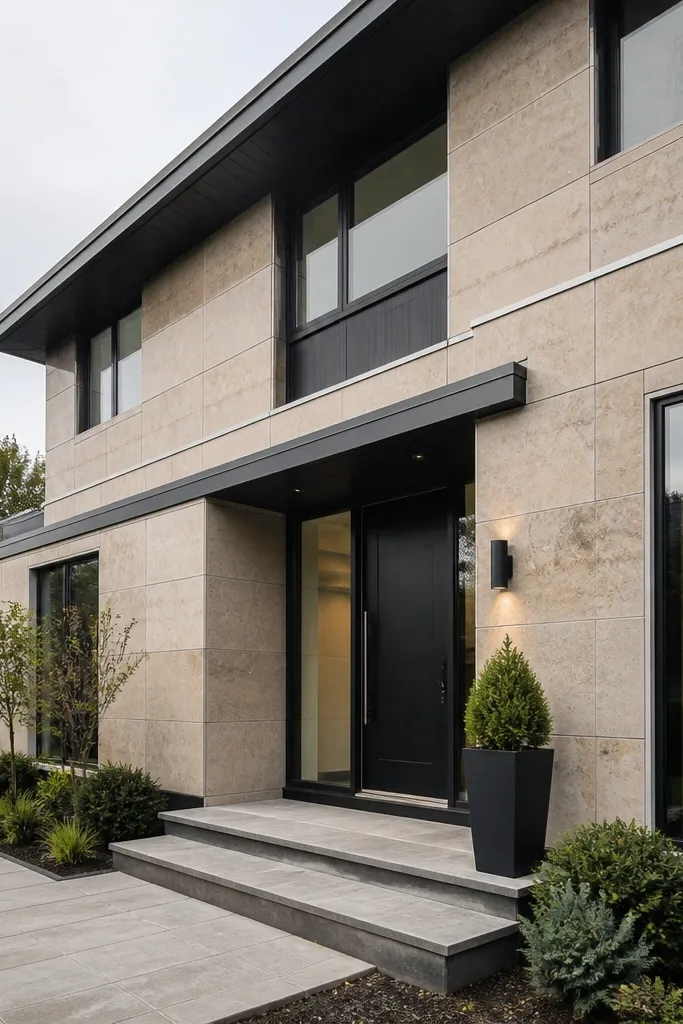
Porcelain tile panels on a facade look modern because they’re flat, uniform, and crisp when the framing lines are thin. Stone-look porcelain in gray or warm beige gives you texture without the maintenance of real stone. Slim aluminum frames around panel edges create a grid that reads modern, especially on small plots where clean geometry matters. This is visually striking on camera, and the flat surface helps hide minor substrate variations if you use the right leveling method.
First, install a suitable exterior tile backer system approved for facade use, then waterproof it according to the backer manufacturer. Next, create a layout grid and dry-fit several tiles to confirm alignment and frame widths. Install slim aluminum edge trims using mechanical fasteners, then set tiles with exterior-grade thinset and spacers for consistent grout joints. Finish by grouting with an exterior-rated grout, sealing as required, and fitting flashing at the base and around openings.
Editor's notePlan your tile layout so you avoid narrow cuts at corners — that’s where facades look DIY.
Skip thisAvoid using interior tile adhesives; exterior facade systems need the right waterproofing and movement allowance.
23. White cladding with a zig-zag accent rail under the windows
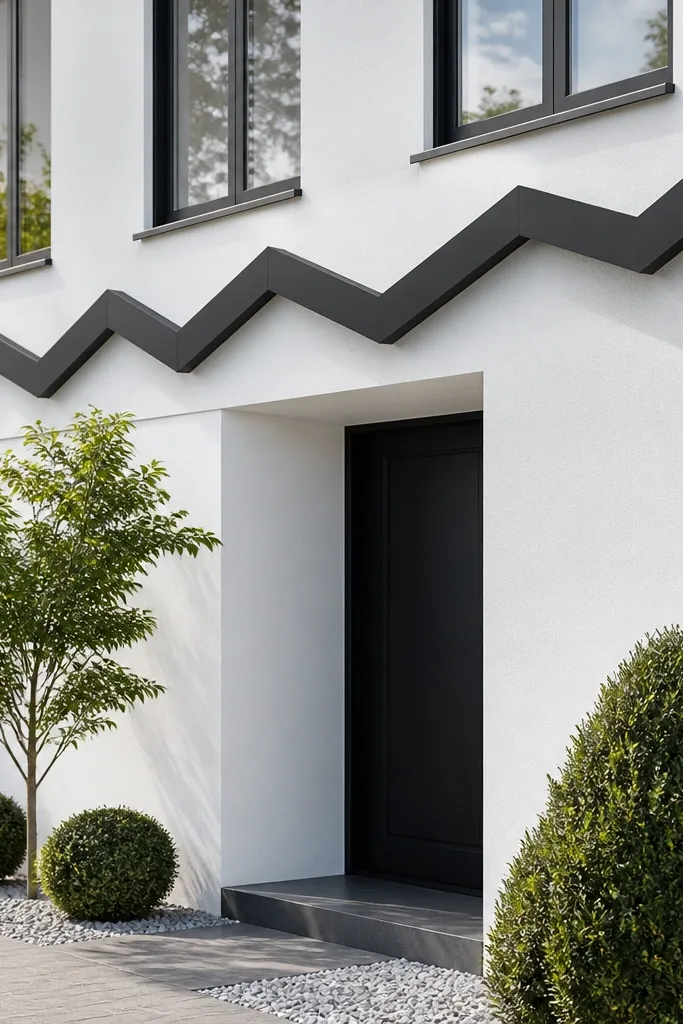
This is a modern facade trick for small plots that need a little personality. Keep the main facade simple — clean white cladding — then add one zig-zag accent rail under the windows. The zig-zag adds motion and makes the facade feel less boxy, which is common on narrow frontage. Use a single material for the rail like powder-coated metal or stained timber so it looks intentional. It’s photogenic because it creates a strong diagonal rhythm that stands out in street photos.
First, install or paint the main cladding in white and let it cure. Then measure the window run and design a zig-zag rail length so the pattern starts and ends aligned with window edges. Cut the rail pieces from thin aluminum or timber, and mount them to a level backing strip fixed to the wall framing. Finally, finish with exterior sealant at joints and paint or coat the rail so it’s consistent in color and sheen.
Editor's noteMake a cardboard pattern for the zig-zag and check it against your window spacing before you cut metal.
Skip thisDon’t make the zig-zag too tall; if it’s chunky, it reads decorative instead of architectural.
24. Monolithic front wall with a recessed vertical slot for the door
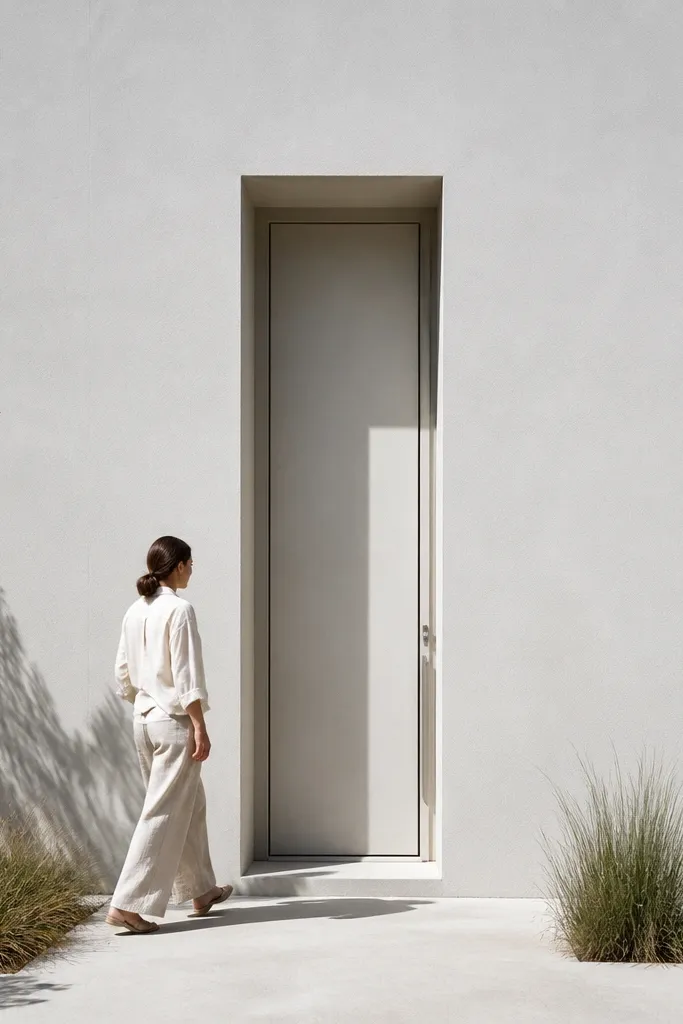
A monolithic front wall is modern because it reduces visual breaks, and a recessed vertical slot makes the door feel like part of the architecture. This is great for small plots because it makes the facade look like one piece rather than separate parts stuck on. Use one color for the wall field, then create the recess with the same material but deeper — the shadow line does the work. Add a slim step or threshold detail so the door area looks crisp rather than hollow.
First, plan the recess size by measuring your door plus trim clearance and deciding the recess depth, typically 60-120 mm for a readable shadow line. Build a simple framed recess around the door opening using exterior-rated lumber or metal studs anchored to the wall structure. Then clad the recess walls and the main wall in the same panel system so transitions look seamless. Finish by installing a modern door with matching trim, seal all edges, and add a small exterior light to emphasize the shadow line.
Use one continuous trim profile around the recess; it’s the line that makes it look intentional.
Avoid shallow recesses; if the depth is too small, you lose the shadow definition.
25. Warm wood soffit line plus matte charcoal cladding
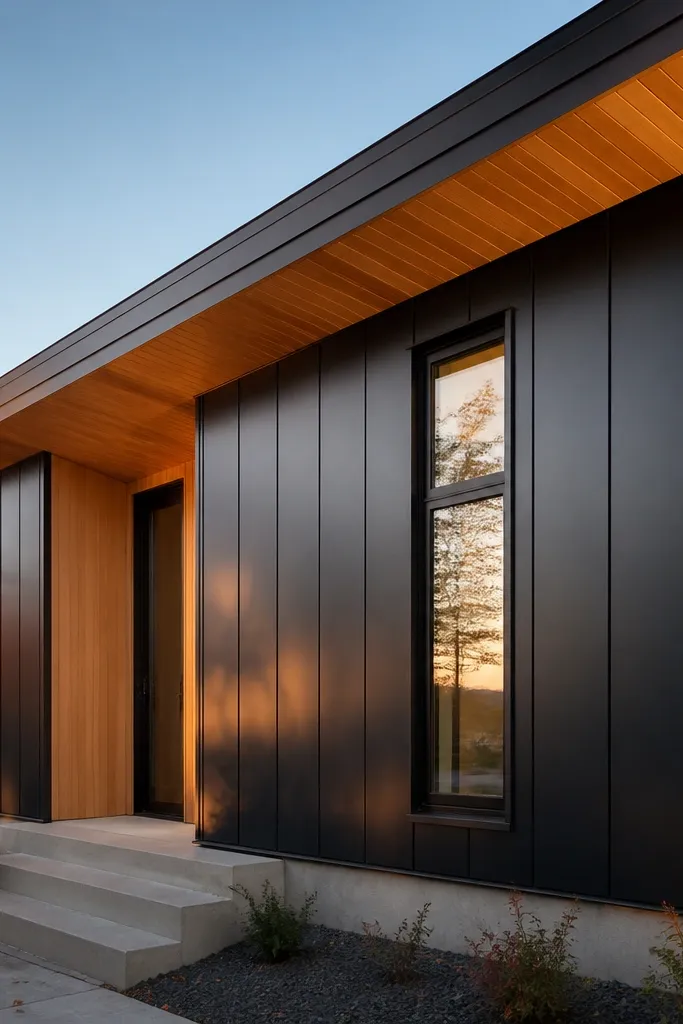
This facade looks modern because it adds a warm horizontal band at the top, then keeps the rest dark and clean. Matte charcoal cladding feels sleek, and a warm wood soffit line under the roof creates a “finished” edge that small facades often lack. It also draws the eye upward, which helps when your frontage is tight. This is a strong choice if you already have a porch or overhang and want to upgrade the visible underside and fascia area.
First, confirm the roof edge is straight and measure the soffit length across the front elevation. Install soffit boards in a ventilated manner using proper soffit vents if needed, then frame the fascia edge for a crisp line. Next, clad the main wall in matte charcoal fiber-cement or boards and keep joints consistent. Finish by sealing all cut soffit edges, painting fascia and trim in matching charcoal, and using exterior-rated hardware for all attachments.
Editor's noteKeep the soffit color slightly lighter than the cladding so it reads as a band, not a blob.
Skip thisDon’t trap moisture under soffits; ventilation and drip edges matter.



