
1. Corner-to-corner sheer curtains with a single rod span
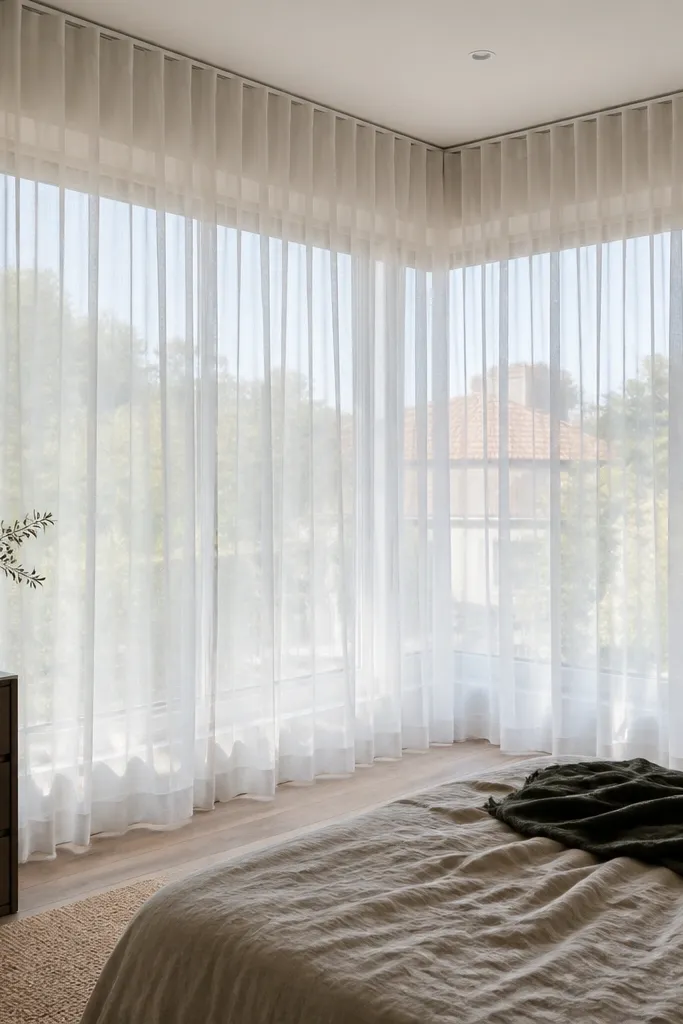
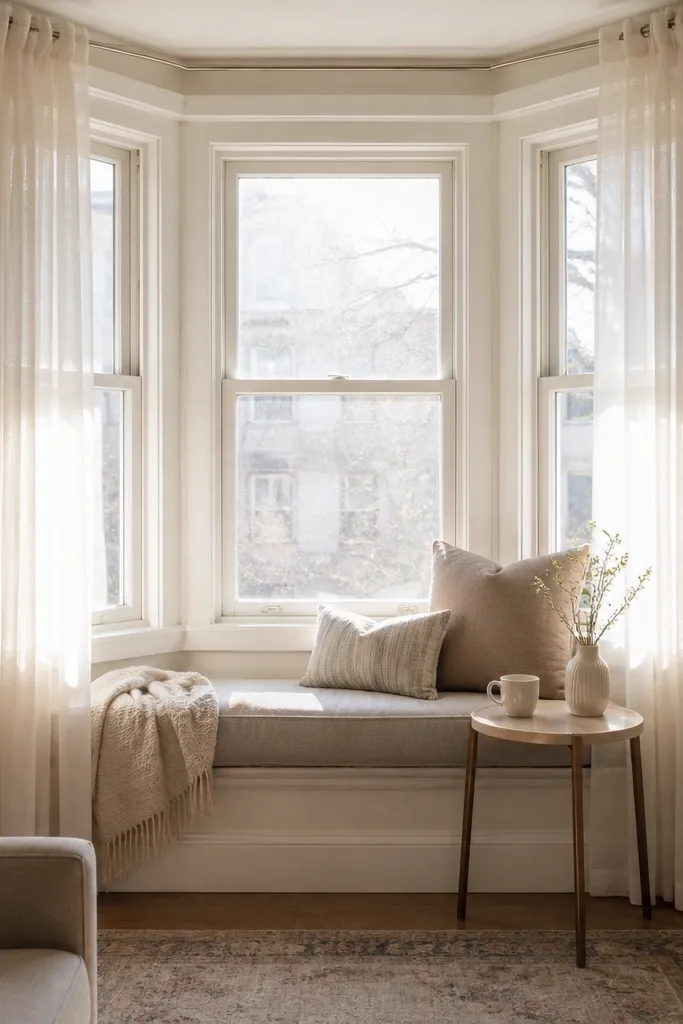
A bay window looks bigger when the curtains don’t break into separate visual blocks for each angled section. Use one continuous rod mounted close to the ceiling, then let the sheers fall straight to the floor so the light keeps moving. The look is airy, but it’s also structured because the header line stays level across the whole bay. This is one of the cleanest options for small-space Bay Window ideas because it doesn’t eat depth — there’s no bulky valance and no hard fabric overlaps at the angles. If you have a small room, the soft movement also makes the bay feel like it has more air.
Measure the bay width end-to-end along the ceiling line where you want the rod. Install a single rod with brackets spaced so the rod doesn’t sag, then hang sheer panels that cover each angled section plus 3-5 inches of overlap at the corners. Steam or lightly iron the sheers, then pull them fully closed at night so the folds align in each section. Finally, hem to the floor or stop 1 inch above the floor if you have heat registers that push air upward.
Choose sheers with a slightly heavier weave; they hang flatter and don’t cling to the glass.
Don’t mount the rod inside the window frame — you’ll lose the height effect and the bay will look smaller.
2. Printed roman shade on the bay, solid sheers on the sides
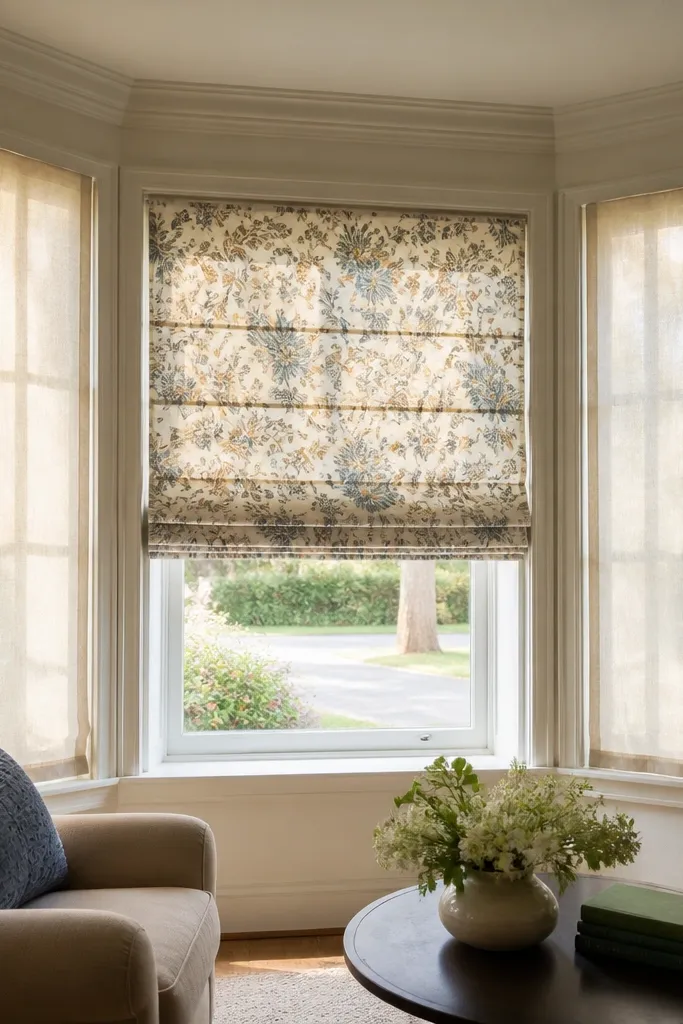
If you want the bay to look styled but still bright, combine a roman shade on the main center section with simpler solid sheers on the angled sides. The printed shade gives you a focal point that reads in photos, while the solids keep the angles from turning into a cluttered patchwork. Use a pattern that has a clear repeat and a limited palette; too many colors makes a small bay feel busy. This approach is great for compact apartments because you control privacy without adding extra fabric volume across the depth of the bay. You also get a “tailored” look because roman shades sit close to the glass when raised.
Pick a roman shade width that matches the center section and mount it at the top of the window casing for a tight fit. Add solid sheer side panels on each angled section, hung from the same ceiling rod height as the center so the header line stays consistent. Test the roman shade drop length by raising it fully and checking that it clears the sill and any hardware. Sew or use pre-made tiebacks in a matching fabric so the shade doesn’t drift into the view when you open it.
Use a matte fabric for the roman shade; glossy prints reflect light and look washed out in daylight.
Don’t choose a pattern with tiny busy detail — it turns into visual noise at bay-window scale.
3. Low-profile window bench with a slipcovered cushion

Measure the sill-to-floor clearance and the deepest point you can use without hitting the window trim or radiators. Build or buy a bench box sized to the bay’s longest section, with a depth of about 12-14 inches so it doesn’t crowd the room. Cover the top with batting and a foam layer, then wrap a removable slipcover over a fitted cushion insert. Add two anti-slip pads under the cushion and anchor the bench lightly to the wall if you’re in a rental to prevent sliding.
A bench turns a bay into a usable micro-zone. In small spaces, the win is that you can style the bench like seating without adding chairs that block walkways. Go low-profile so you keep sightlines open and light reaches the floor. A slipcovered cushion is the secret for keeping the look photogenic — the fabric stays smooth, and you can swap covers when seasons change. This is also practical: the bay becomes a spot for keys, a book, or a throw, without turning into a decorative shelf pile.
Skip thisSkip tall legs or chunky storage bins — they visually weigh down the bay.
Editor's noteUse piping on the cushion edges; it makes the bench look crisp instead of squishy.
4. Rug that follows the bay angle with a border pattern
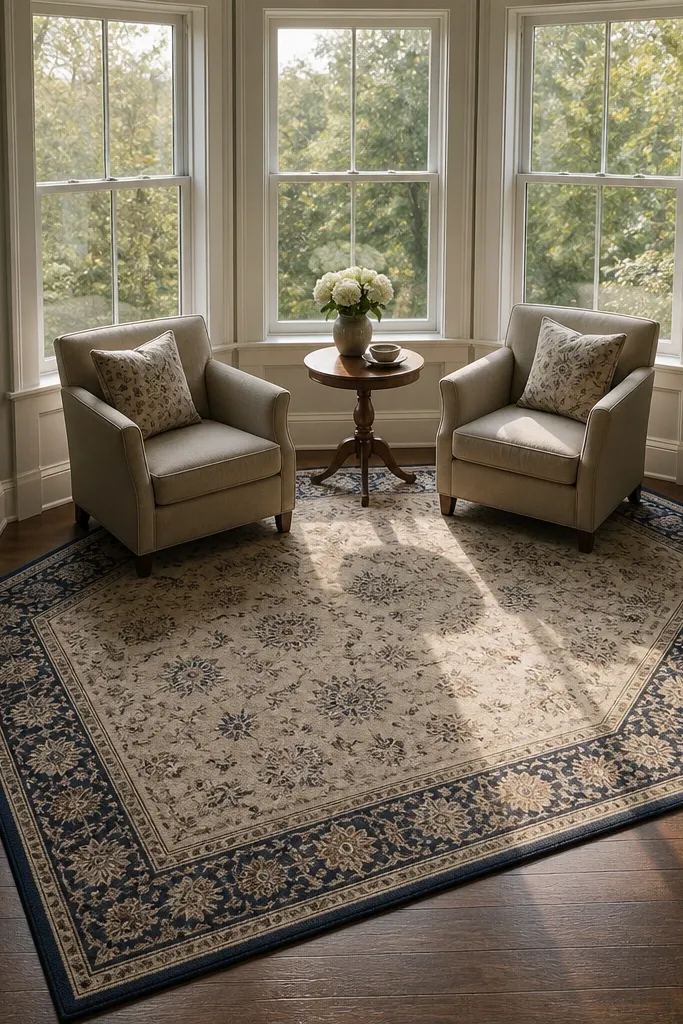
A rug is the fastest way to make a bay look like it belongs to the room. For small-space Bay Window ideas, the smart move is alignment: let the rug’s long edge follow the bay’s main line, not the room’s walls. A border pattern helps because it gives the eye a frame, and frames make small layouts feel intentional. Choose a low pile so it doesn’t catch on furniture legs or make the bay feel visually “thick.” This styling also photographs well because the bay angles and rug edges create a clean geometric rhythm.
Measure the bay footprint you want to define, usually the space from the front face of the bay to the nearest furniture edge. Choose a rug size that leaves 6-10 inches of bare floor at the outer corners so the angles stay crisp. Place the rug so one edge visually tracks the longest bay section, then check from two viewing angles: doorway and couch line-of-sight. Secure with a thin rug pad and tape down the corners if you have slick floors.
Pick a rug with a border that’s one shade darker than the base color; it reads as “framed” without looking heavy.
Don’t pick a rug with a busy all-over pattern — the bay geometry already creates motion.
5. Painted radiator cover in the bay color family
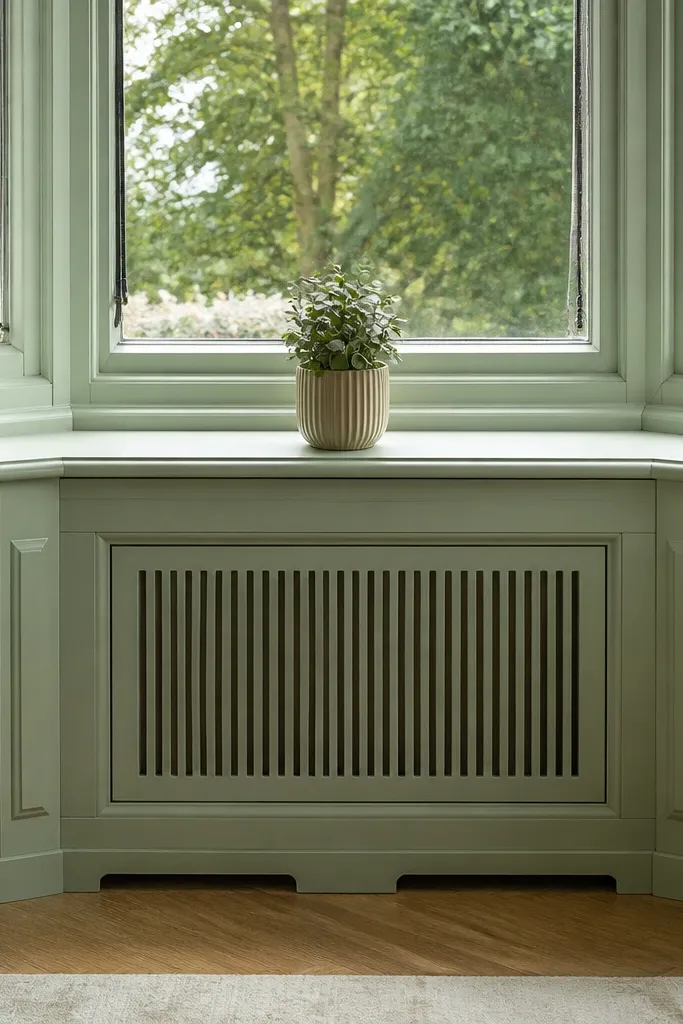
If your bay has a radiator, the cover can either ruin the look or make it feel designed. Paint the radiator cover and surrounding trim in the same color family as your curtains or wall, then keep the top surface clear. The bay reads cleaner because the heat unit stops acting like a separate object. This is one of the most underrated small-space Bay Window ideas because it solves a real visual interruption that no amount of decor can fix. You’ll also gain a tidy “landing spot” that looks good even when you’re not actively styling it.
Remove any loose grilles or hardware if possible, then sand the radiator cover lightly to scuff the finish. Wipe with a degreaser and use a high-heat primer if the unit runs hot, then spray or brush paint in thin coats. Let it cure fully before reinstalling grilles, and do a final touch-up where the paint meets metal edges. Finish by adding a slim tray on top only if it stays at least 2 inches away from vents and doesn’t block airflow.
Use a foam roller for the edges; it prevents brush marks that show under window light.
Don’t cover vents with fabric or decor — you’ll block heat and the bay will look worse as it stains.
6. Slim console table on the longest bay side
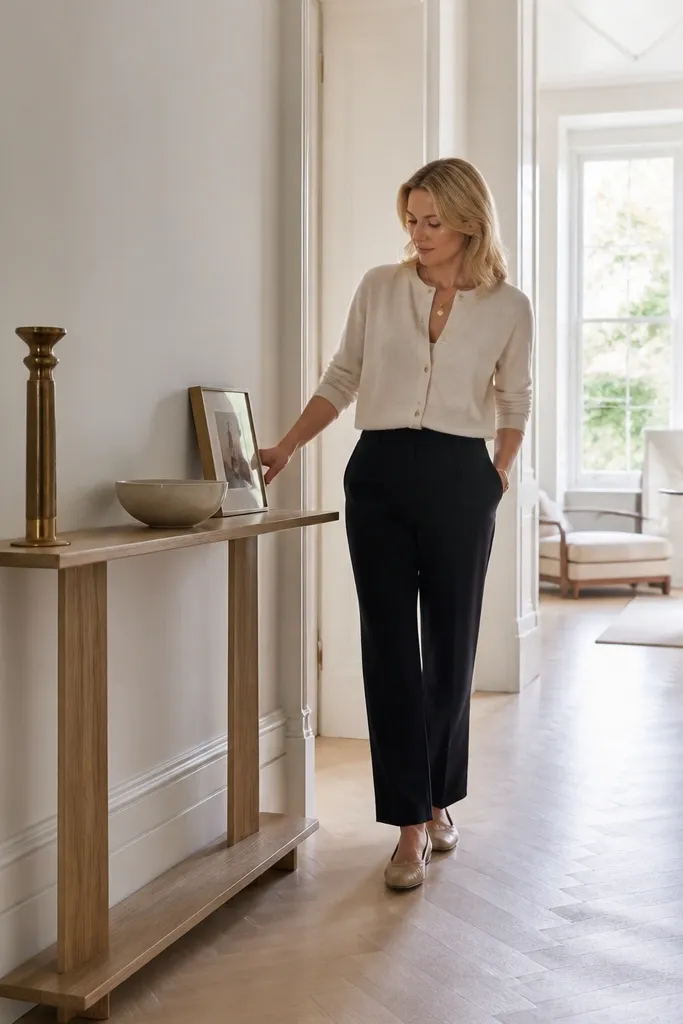
A slim console on the longest bay side gives you vertical structure without stealing floor space. Choose a console depth of 8-12 inches so you can still walk past, and style it like a photo set: one tall element, one medium element, one small object. This works because bays already have visual angles; the table anchors them with a straight line. In compact apartments, it also creates storage for keys and mail that otherwise ends up on the floor. The look stays clean because the console is narrow and the decor is intentional.
Find the longest bay section and measure for clearance from the wall to the front of the glass. Buy or build a console that is 8-12 inches deep and long enough to span from near the angled corner to the opposite wall area. Level the table, then attach anti-tip brackets to the studs if the console is tall. Style with a tray, a lamp or sculptural vase, and one framed print or small mirror mounted to the wall behind for height.
Match the console finish to your curtain hardware or floor trim; it ties the bay together fast.
Don’t place a wide table across the bay — you’ll crush the airy look.
7. Floating shelf ladder for bay plants
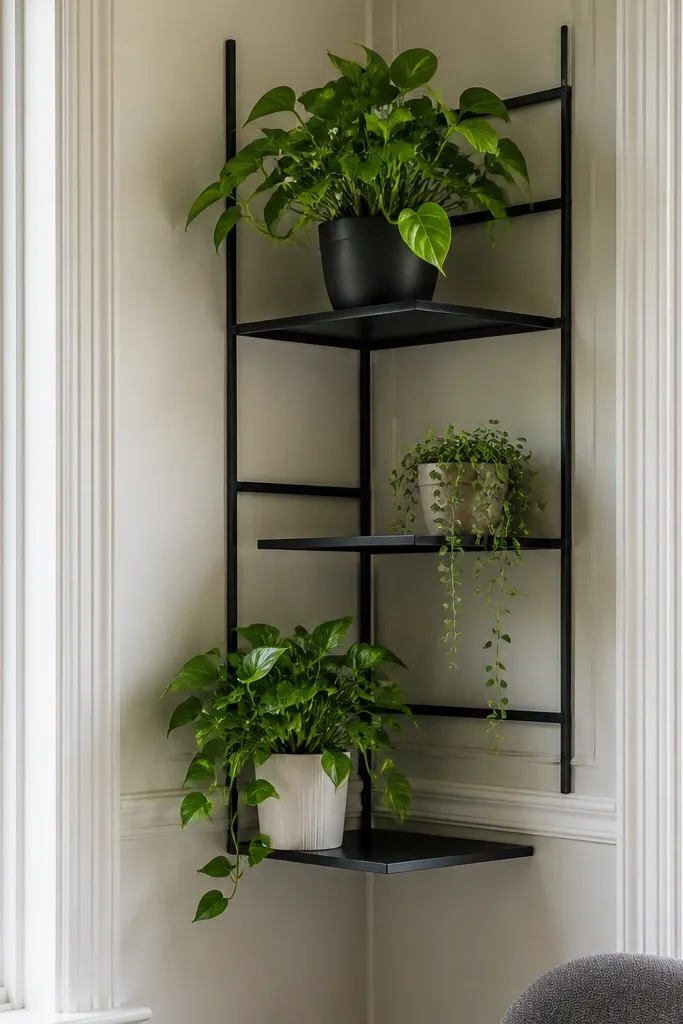
Choose shelves that are 4-6 inches deep so they don’t jut into the room. Mark stud locations and mount the shelf ladder on the wall next to the bay, not on the window frame itself. Start with the highest shelf near the outer corner and step down by 6-8 inches each shelf level so watering access stays easy. Use lightweight planters and add saucers; then group plants by light needs, not by size.
Plants make bays feel alive, but shelves that sit too deep can block light and make the bay feel cramped. A floating shelf ladder solves that by using thin lines and staggered heights. The stagger matters: put taller plants on the outer corners and shorter ones toward the center so the angles stay balanced. This is photogenic because the shelves create a vertical rhythm that matches the bay’s geometry. It’s also practical in small-space Bay Window ideas because you can keep the sill clear while still getting greenery.
Skip thisSkip thick wood shelves with heavy brackets — they block light and look bulky.
Editor's noteUse a single plant pot color (white, black, or terracotta) so the shelves look curated instead of random.
8. Mirror panel on the angled wall to double the light
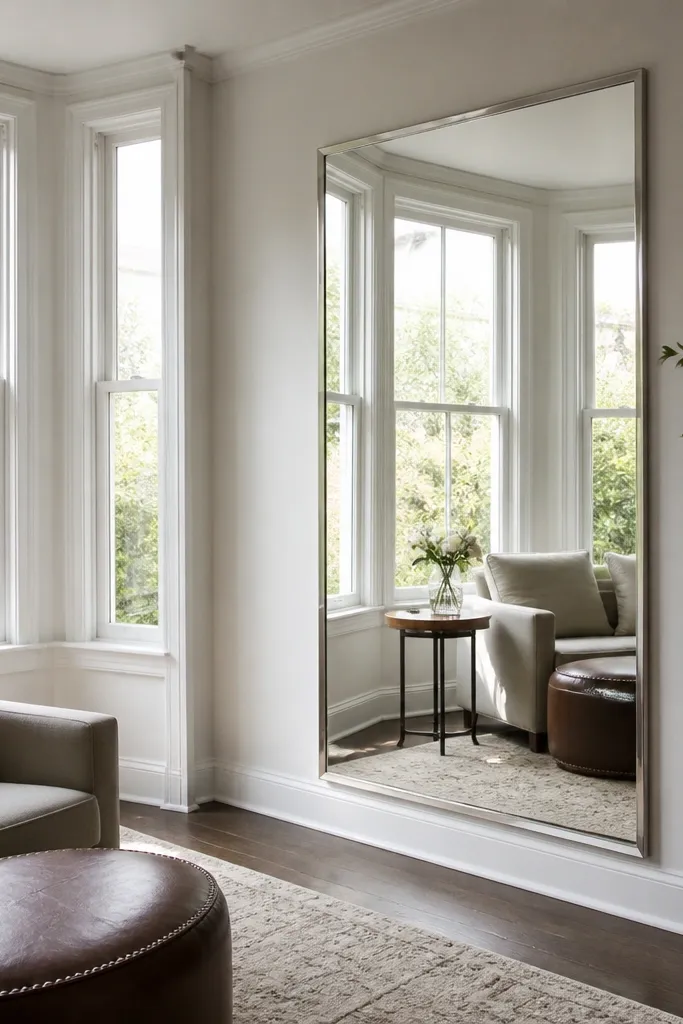
A mirror is the quickest way to make a bay feel larger because it multiplies brightness. Place it on an angled bay wall so it reflects the window and visually extends the space. Keep the mirror frame simple and slim; chunky frames fight the geometry and make the bay look busier. This works especially well in apartments with limited natural light because the mirror gives you a second “light source” without adding clutter. In photos, the bay reads deeper and cleaner.
Measure the angled wall panel and choose a mirror height that lands around 60-70 inches from the floor for a flattering proportion. Select a slim frame and mount it with a level so the reflection lines up with the window trim. Use wall anchors rated for the wall type and weight, and test the mirror position by standing at the doorway and checking whether it reflects the brightest part of the window. Wipe the mirror with a streak-free cleaner and keep it free of decor directly in front of it.
Use a matte backing and avoid decorative bevels; they can create glare in window light.
Don’t hang the mirror too low — you’ll get a chopping effect and the bay won’t look taller.
9. Gallery rail above the bay with matching frames
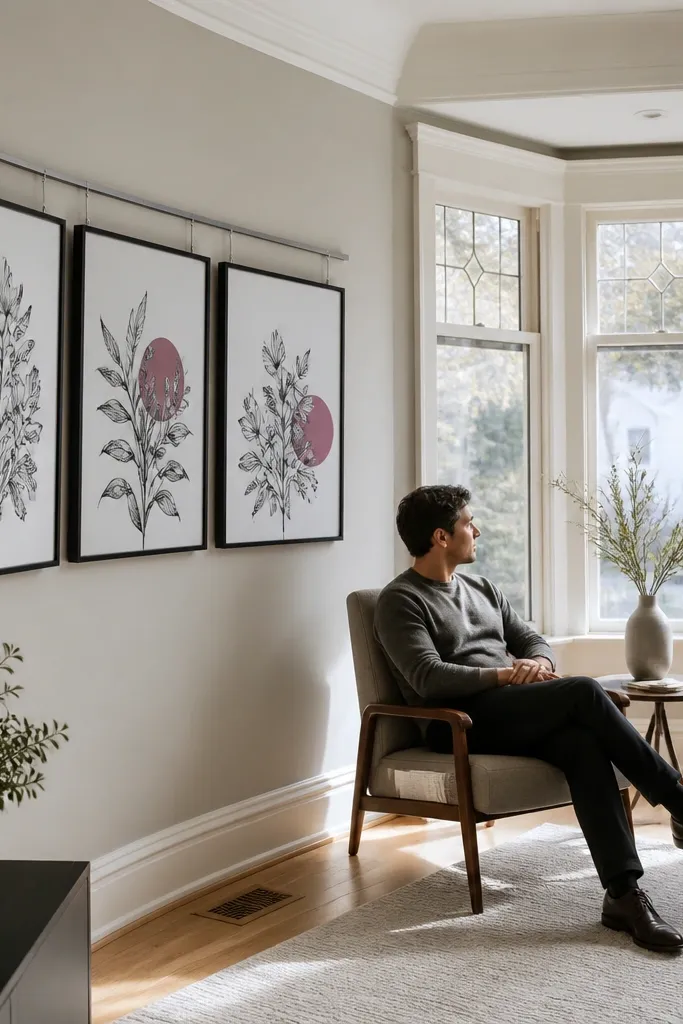
If you want a high-impact look that doesn’t take floor space, a gallery rail above the bay is the move. The key is matching frame sizes so the angles don’t distort your composition. Keep the art theme cohesive — black-and-white line drawings, botanical prints with one palette, or simple geometric prints. This makes the bay feel like a designed wall, not a window-only feature. It’s also easy to swap prints seasonally without changing the whole setup.
Install a picture rail or wall-mounted track along the wall above the bay at a height that keeps the art centered above the window line. Choose frames with identical dimensions and mat colors so the spacing looks intentional. Hang the first frame at the center point of the bay, then measure equal gaps between frames using painter’s tape outlines. Finally, lock down any rail hooks and confirm the frames are level from both sides of the room.
Use glass with anti-glare coating if your bay gets direct sun; it prevents harsh reflections in photos.
Don’t mix frame widths — the bay angles exaggerate visual mismatch.
10. Tone-on-tone textured throw pillows on the window seat
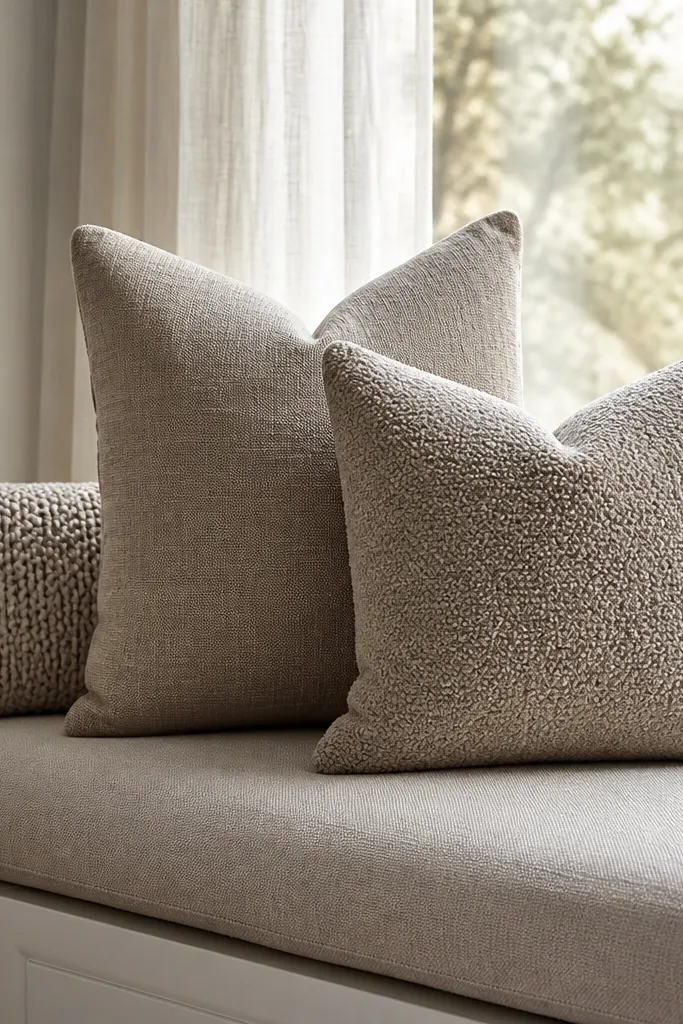
Pillows are small-space Bay Window ideas that look luxurious without eating space. The trick is tone-on-tone texture, not random patterns: think linen + boucle + knit in one color family. Use two pillow sizes and keep the arrangement simple — one larger pillow, one medium, and one smaller accent that matches the curtain header color. This gives the bay depth and softness while staying light visually. In tight apartments, the bay seat becomes a focal point that feels cozy without turning into a storage area.
Pick a color family tied to your curtains or wall trim, then choose fabrics with different textures. Use pillow covers sized to your inserts so they look plump, not saggy; common starting sizes are 20x20 and 16x24. Place the largest pillow against the back edge of the seat, then layer the medium in front and finish with the smallest accent centered or slightly off-center. Fluff and align seams so the shapes are crisp when daylight hits them.
Match your pillow piping or seam color to the curtain color for a clean, “set” look.
Don’t stack too many small pillows — three is the sweet spot for a bay seat.
11. Sculptural floor lamp placed at the bay corner
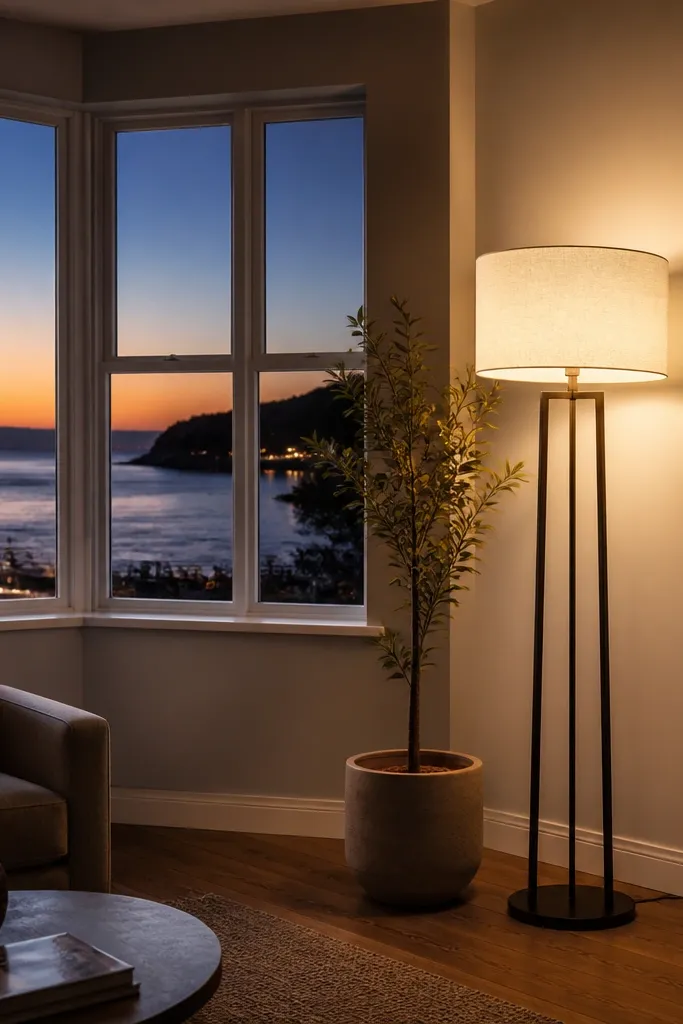
Choose a lamp height that places the shade near the same level as the window sill line when viewed from the room. Place it at the outer corner of the bay so it frames the window without blocking the center sightline. Route the cord along the baseboard and use cord clips or a flat cord cover so it doesn’t snag curtains. Test the light direction: aim for the wall or nearby art, not straight into the bay glass.
A floor lamp at the bay corner adds warmth and makes the bay a real focal point after dark. Choose a slim profile so it doesn’t visually fight the window angles, and pick a shade that glows softly rather than shining directly. The best look is one lamp, one side, placed so the light washes the wall next to the bay. This makes the bay feel layered without piling on decor. It’s also practical in compact apartments because you get both style and usable lighting in the same move.
Skip thisSkip bulky tripod bases — they take over the bay and shrink the room visually.
Editor's noteUse a warm LED bulb around 2700K to keep curtains from looking gray in evening light.
12. Rope-wrapped curtain tiebacks in brass hardware
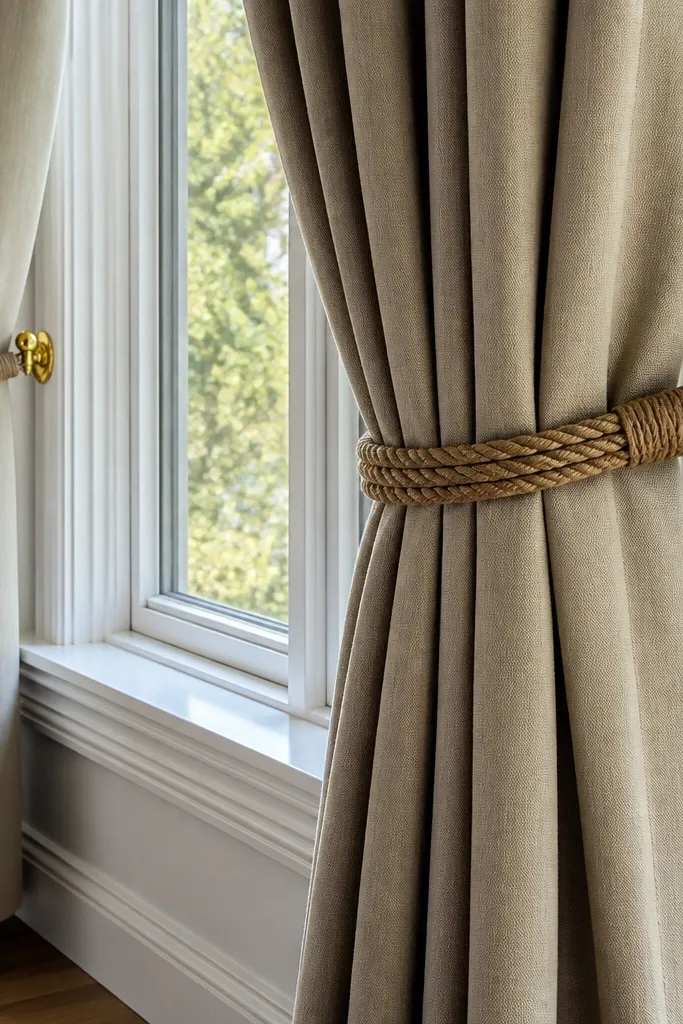
Buy or wrap rope around a small cord form to create a consistent thickness for each tieback. Install brass hooks or wall anchors at the right height so the tiebacks pull the curtains back without lifting them too high. Gather each curtain panel at the same height and attach the tieback loop to the hook. Adjust the curtain length and fold so the fabric gathers in the same way on both sides of the bay.
Tiebacks are the difference between “decorated” and “styled.” Rope-wrapped tiebacks with brass hooks add a tactile, intentional detail and keep the curtain fabric gathered neatly at the angles. In small-space Bay Window ideas, neat gathering matters because loose curtain fabric can spill into the room and make the bay feel smaller. The brass hardware gives you a warm metallic accent that works with wood floors, light walls, and neutral textiles. This look is subtle but very photogenic because it shows texture and shape.
Skip thisDon’t use tiebacks that pull too tight — you’ll create ugly strain lines in the curtain fabric.
Editor's noteWrap with a tight tension and use fabric glue on the final wrap so the rope doesn’t unravel over time.
13. Painted wood window sill styling strip
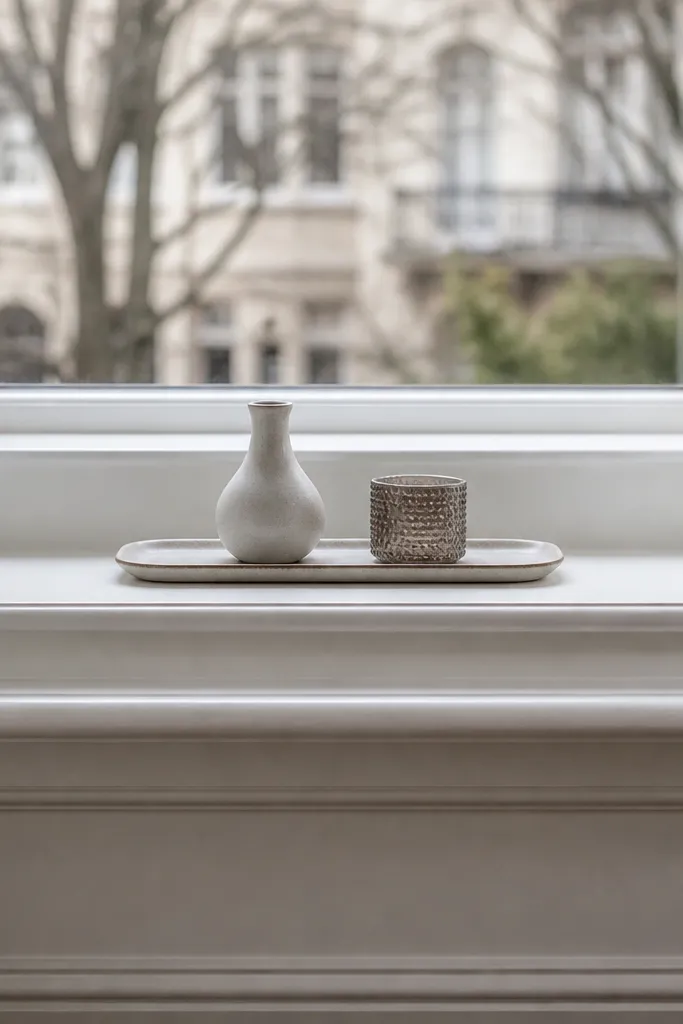
A long, painted styling strip on the sill turns a bare window edge into a designed surface. If your bay sill is narrow, you still get impact by limiting the number of objects and making them match in height. Paint the sill trim in a crisp white or soft warm tone, then style with one long tray and two small items. This makes the bay look intentional even with minimal decor. In compact apartments, the sill becomes a “landing” instead of a clutter magnet, and the color finish keeps everything looking clean in daylight.
Sand the sill lightly and wipe away dust, then prime and paint with a trim-grade finish that resists scuffs. After curing, add a slim tray that fits the sill width with 1-2 inches of breathing room on each side. Place one candle or small ceramic on one end and one framed photo or book on the other, then keep the center area open for visual calm. Clean the sill weekly so dust doesn’t build up around the painted edge.
Use a tray with a lip; it keeps small items from sliding toward the window.
Don’t line up five tiny decor pieces — the sill will look messy fast.
14. Bay window wallpaper panel behind a narrow console
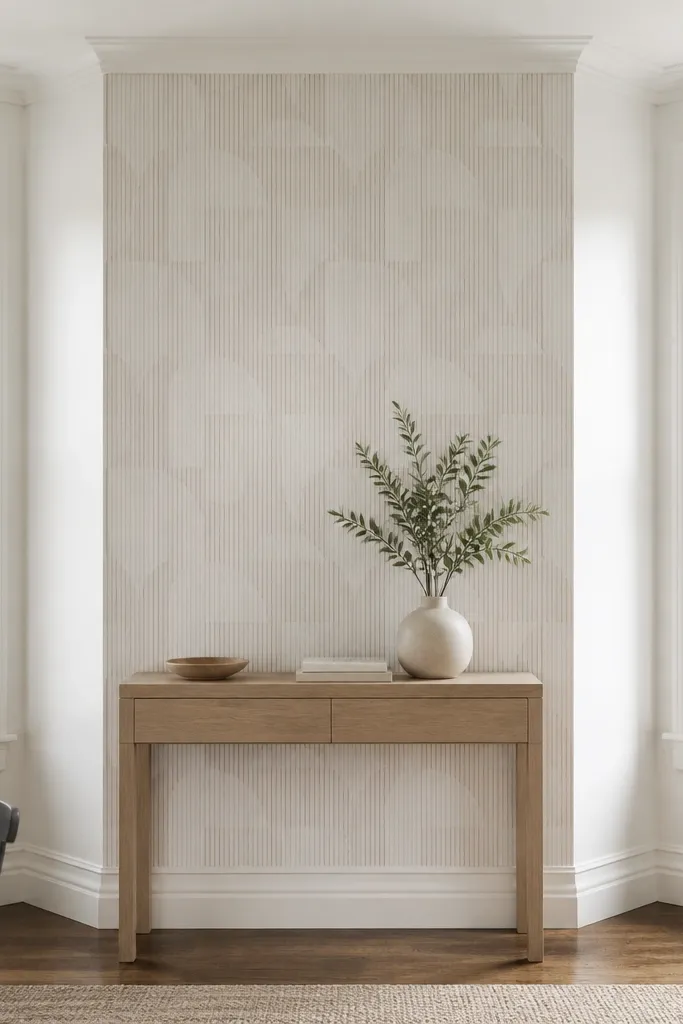
Wallpaper behind a console makes the bay look like it has its own “room within a room.” For small-space Bay Window ideas, keep the wallpaper confined to the wall area behind your anchor so it doesn’t overwhelm the window itself. Use a removable peel-and-stick option if you’re renting, and choose a pattern that has strong vertical lines or a subtle repeat that doesn’t fight the bay angles. This adds depth and makes the console decor look more expensive because the background has texture. It also photographs well because the pattern sits in the same plane as the furniture.
Measure the wall section behind where your console will sit, leaving 1-2 inches of margin near trim lines. Clean and dry the wall, then apply peel-and-stick wallpaper starting at the center so the pattern lines up. Use a plastic smoothing tool to push out bubbles and trim edges with a sharp utility knife. Install the console after the paper is fully smoothed and check that the console doesn’t scratch the wallpaper finish.
Pick wallpaper with a matte finish; it reduces glare from the window and keeps colors true.
Don’t cover the window trim or overlap onto the glass — it looks amateur and collects dust.
15. Shiplap window-seat backer with open cubbies and a slip-on cushion cover
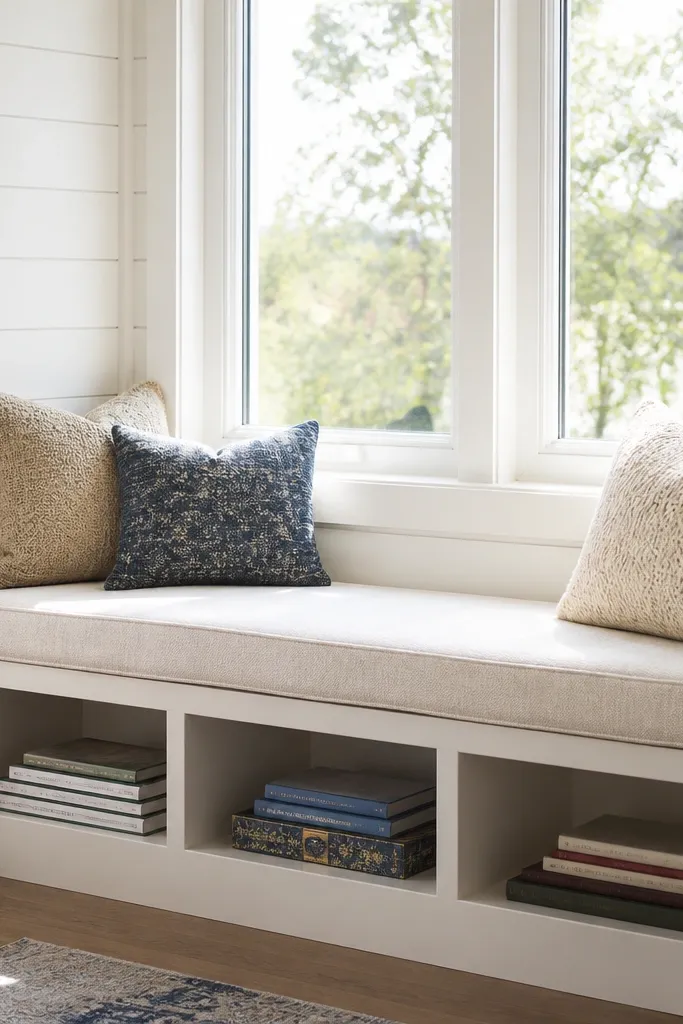
This is one of the best small-space Bay Window ideas because it gives you real storage where the bay usually just eats floor space. The shiplap backer makes the whole bay feel built-in, and the open cubbies keep blankets, books, or board games close without making the area look heavy. The slip-on cushion cover is what makes it practical — you can remove it and wash it, so the seat stays inviting instead of messy. Build it if you want a cozy reading nook that still works in tight rooms like apartments, bedrooms, and home offices. The look is clean and photogenic because the angled walls stay crisp and the lines follow the bay geometry.
Measure the bay’s inner width at the front opening, then measure each angled side wall from floor to where you want the backer to end. Cut a backer panel for the center and two side panels in shiplap (1/2-inch thickness) so the seams land in the corners of the bay. Frame the open cubbies with 3/4-inch plywood strips so each cube matches the bay angle — keep cubbies shallow at 8-10 inches deep so the seat still feels open. Screw the shiplap panels to the frame, fill nail holes, then prime and paint in a satin finish that matches your room trim. Finish the seat with a cushion base that sits on the existing bench (or a new plywood top), then sew a slipcover from heavy canvas or outdoor fabric with a zipper so it comes off in seconds.
Use a 1-inch reveal between the cushion edge and the cubbies so crumbs and lint don’t fall into the storage — it also makes the cushion look more “designed” in photos.
Don’t build the cubbies full depth; anything over 12 inches makes small bays feel cramped and blocks light from the angles.



