
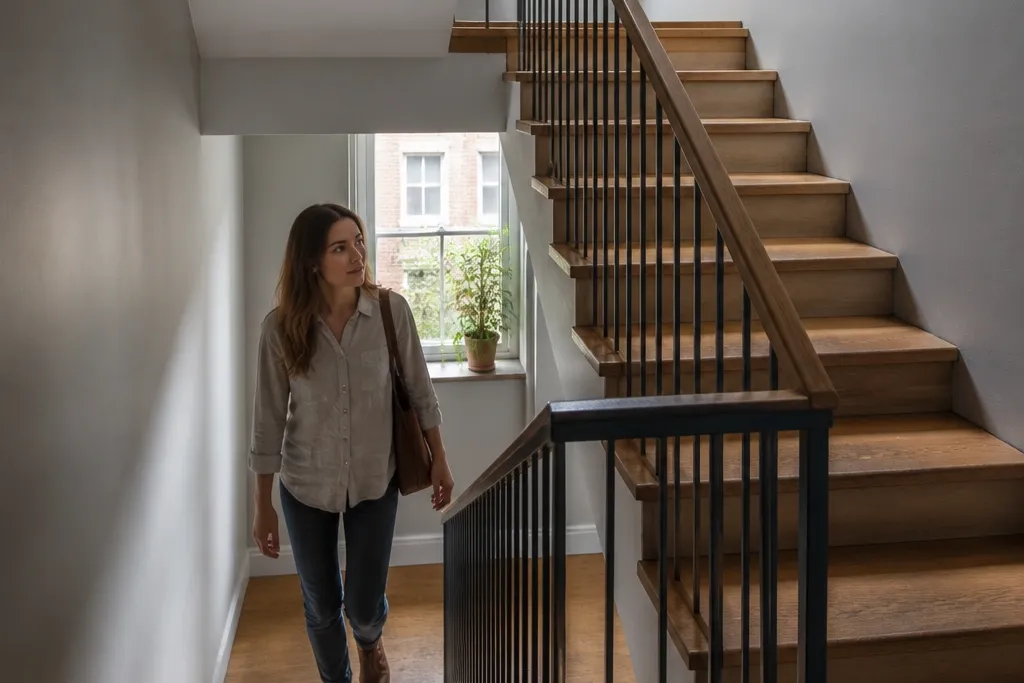
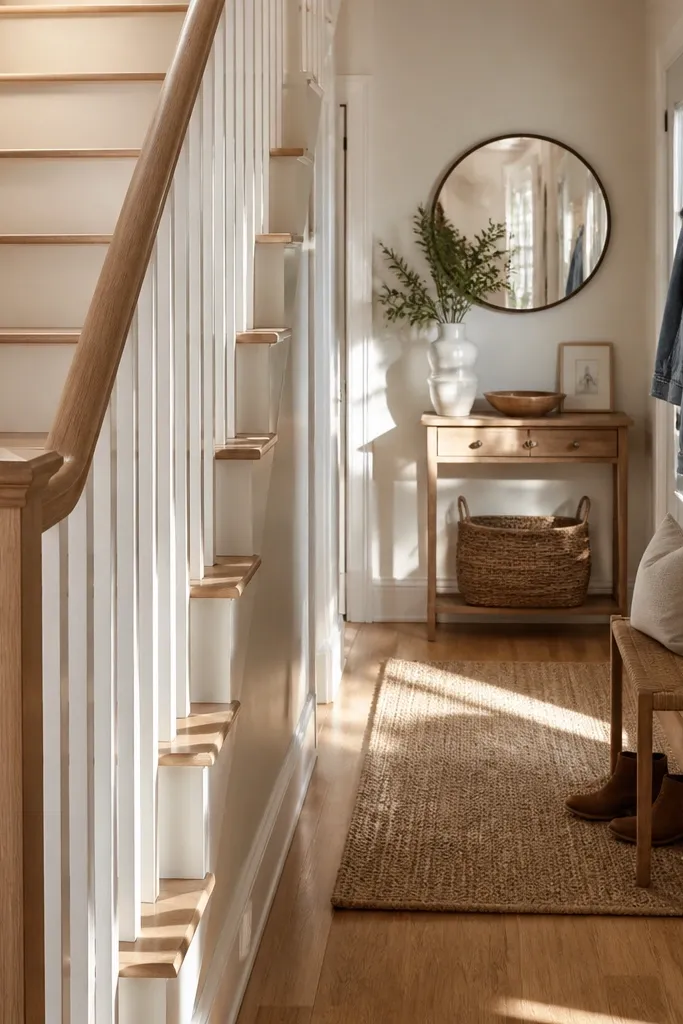
1. Matte black steel rail with thin vertical bars
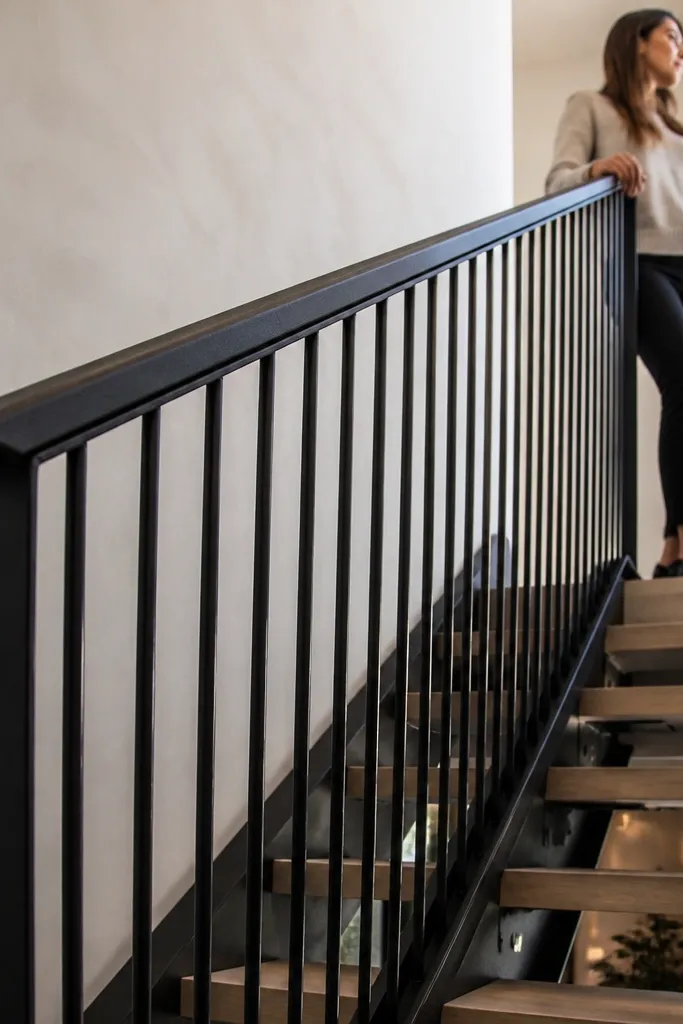
This is the cleanest look for a small-space apartment stair railing when you want structure without visual bulk. A matte black steel handrail reads sharp against light walls, and thin vertical bars let light pass so the landing doesn’t feel crowded. The trick is keeping the bar thickness small (think around 1/2 inch) and spacing them evenly so the pattern looks intentional. Use a flat or slightly rounded handrail profile so it catches light without looking glossy. It suits narrow staircases, hallways with low ceilings, and homes where you want a modern, photo-friendly edge.
Measure your stair run and mark the rail line using a laser level or a long straight board and a pencil. Install new mounting blocks or brackets into studs at the correct handrail height, then attach the handrail straight along the run. Add the vertical bars by clamping each bar position with a spacing jig (or scrap spacers) before tightening. Finish by checking plumb on every post/baluster line from the side, then tighten all hardware and wipe the surface clean before the final coat cures. If you’re using powder-coated steel, avoid sanding through the coating.
Editor's noteUse a simple spacer strip cut to your target gap so every bar lands the same distance apart.
Skip thisDon’t use thick square tubing for the posts — it makes the staircase feel smaller than it is.
2. Single wood handrail with wall-mounted cable anchors
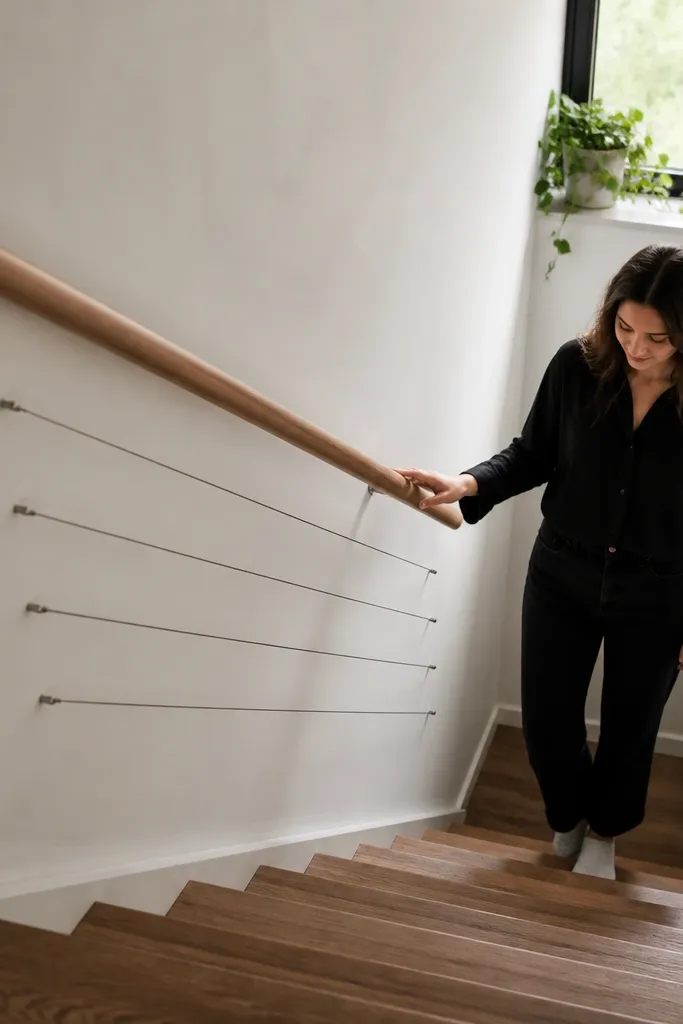
This idea keeps the railing visually light because the “framework” sits on the wall, not in the open space above the stairs. A single continuous wood handrail gives you grip comfort, while cables create a modern line that doesn’t block light. It’s especially good when the staircase has a wall on one side and you don’t want posts marching down the stairs. The look stays airy even in photos because there’s less metal mass at eye level. Go for a warm stain and matte finish so it blends with floors and trim instead of looking like a metal ladder.
Find the studs along the wall side and mark your anchor spacing with painter’s tape. Install cable brackets into studs at regular intervals, then run stainless steel cable through tension hardware. Mount the wood handrail brackets to the wall at the same handrail height, and set the wood rail on top so it reads like one smooth line. Tension the cables evenly using the tensioner until they’re straight and don’t sag when you push lightly with your hand. Seal the wood with a matte clear coat and let it cure fully before you load the rail.
Editor's notePre-tension one cable at a time and sight down the run; it’s easier to correct alignment early.
Skip thisDon’t anchor into drywall — studs only, or you’ll get wobble fast.
3. Clear glass panels with slim metal posts
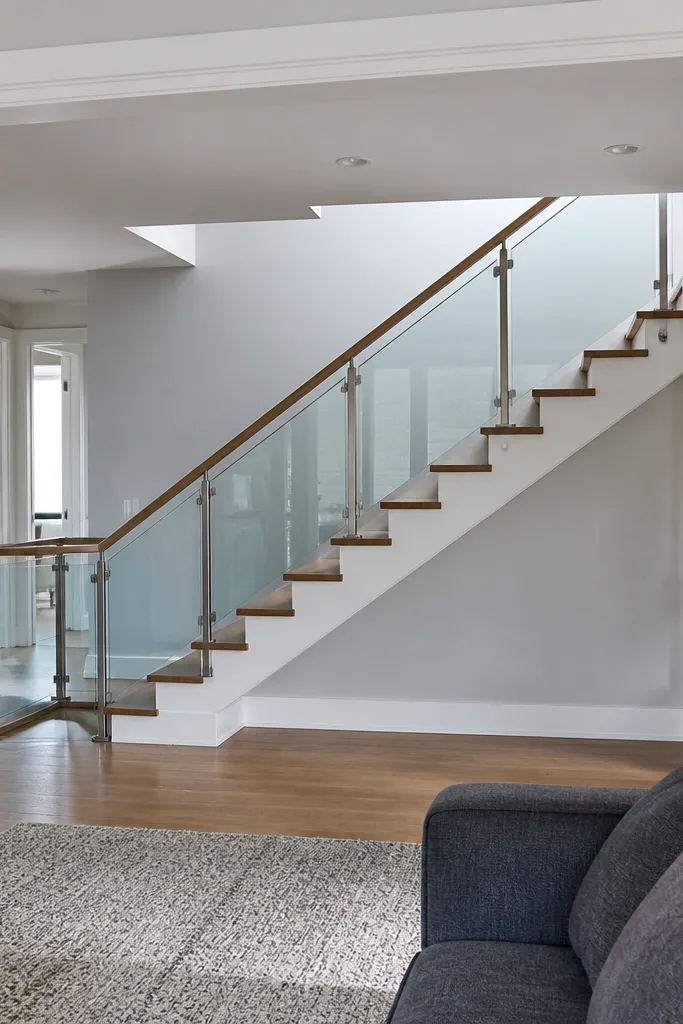
Clear glass turns a small-space apartment stair railing into a window. Slim metal posts keep the structure strong while the glass keeps the staircase visually open, so the space feels bigger and brighter. This is a great choice when your stairs face a living room and you want the railing to disappear rather than dominate. Choose tempered glass panels and a handrail that matches other metals in the home, like brushed nickel or matte black. The result looks high-end without adding clutter.
Decide the panel layout first: measure the opening width and calculate how many glass panels you can fit with even spacing for posts. Install slim posts anchored into studs or solid framing, keeping each post perfectly plumb. Fit the glass panels with proper gaskets so they don’t rattle and so edges are protected. Install the handrail on top of the posts and align it so the top line is straight along the stairs. Finish by checking for movement at the base and tightening all post caps after the glass is seated.
Editor's noteUse black or clear gaskets deliberately; black gaskets make the glass look cleaner against dark walls.
Skip thisDon’t skip gaskets — glass will squeak and loosen over time.
4. Cedar handrail with white-painted pickets
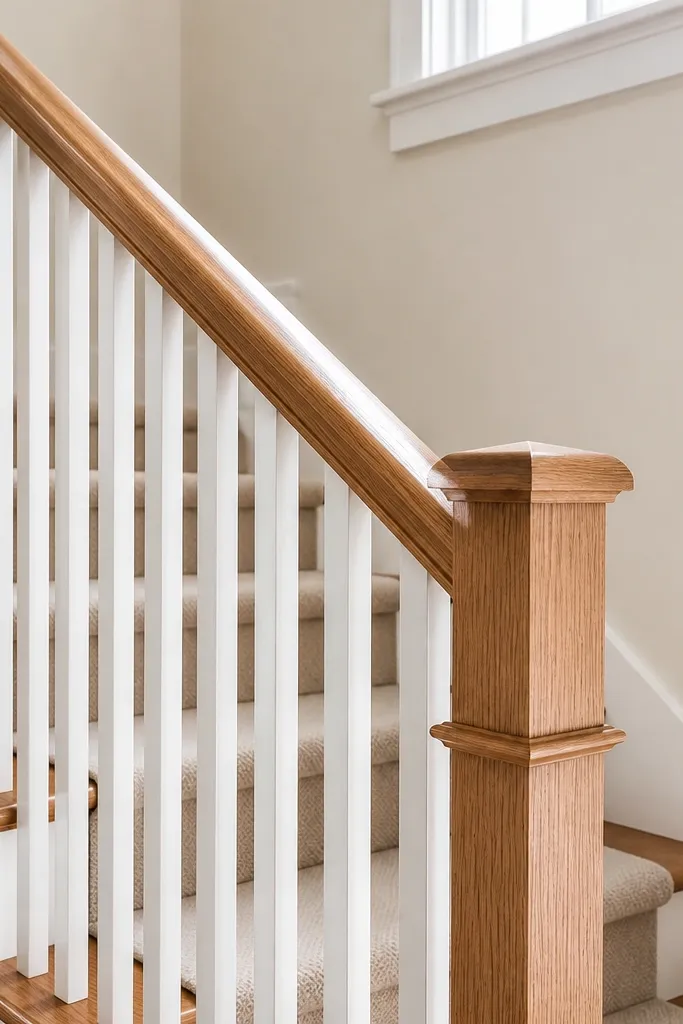
This is a bright, cottage-leaning option that still photographs cleanly in small interiors. A cedar handrail adds warmth and grip, while white-painted pickets keep the railing light and airy. The key is to keep pickets slim and evenly spaced so the rail reads as one crisp line instead of a fence. It also works well with stairs that already have white trim or light walls. If you want “cozy but not bulky,” this is one of the best small-space apartment stair railing combos.
Cut pickets to a consistent height and sand edges smooth so paint lays evenly. Prime them with a bonding primer, then paint with a durable trim enamel in satin or semi-gloss for easy wipe-down. Build the handrail from cedar with a rounded top edge for comfort. Attach pickets to the top and bottom rail line using hidden fasteners or a consistent bracket system so spacing stays uniform. Finish with a matte clear coat on the cedar so it doesn’t turn shiny.
Editor's notePaint pickets on a flat surface and let them fully cure before assembly to avoid scuffs.
Skip thisDon’t use thick, rounded pickets — they look chunky on narrow stairs.
5. Wood-and-metal mix: stained handrail on black angle brackets
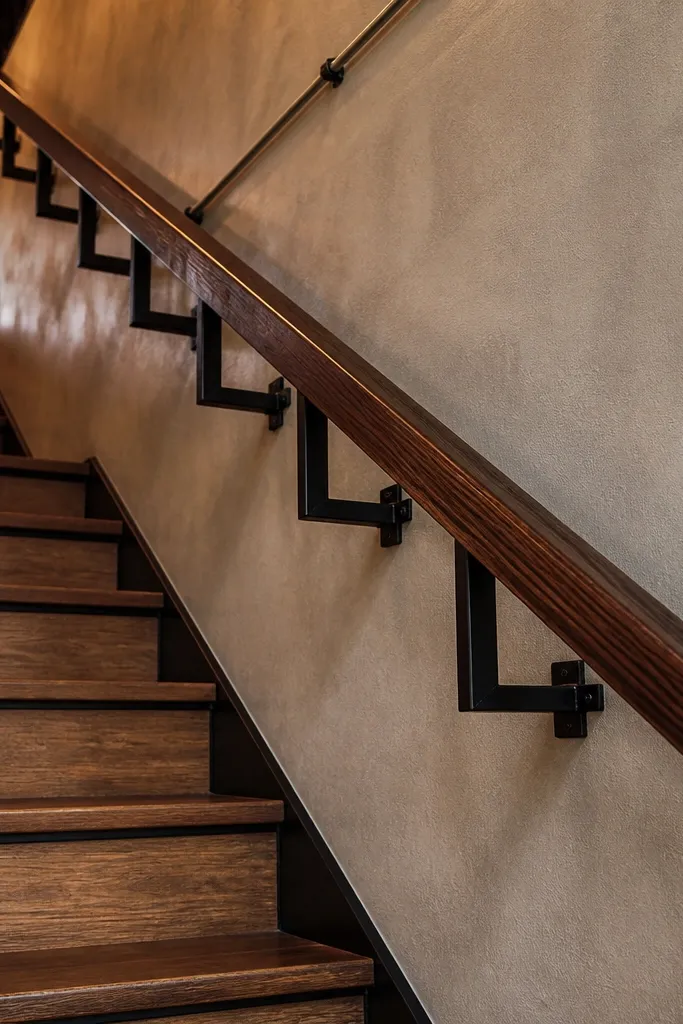
This is a strong “industrial cozy” look that works in apartments because it’s mostly a handrail and bracket system, not a whole cage of balusters. Stained wood gives warmth and grip, while black angle brackets add a graphic, repeatable pattern. The rail looks intentional because the brackets create a rhythm along the stair run. It’s also forgiving if you need to adjust spacing because bracket spacing can be planned around stud locations. Choose a medium stain like walnut or dark oak so it doesn’t compete with flooring.
Plan bracket placement by finding studs and marking your handrail line with a level. Install angle brackets into studs so the rail height stays consistent on every bracket. Cut your wood handrail to length and pre-drill holes so the rail seats without splitting. Attach the handrail to the brackets with screws that bite into wood and sit flush. Sand the rail smooth, stain evenly, and finish with a satin protective topcoat.
Editor's noteUse predrilled countersink holes so screw heads don’t create bumps under your hand.
Skip thisDon’t pick a super light wood stain — it shows every scuff on stairs.
6. Horizontal slat railing with natural oak top rail
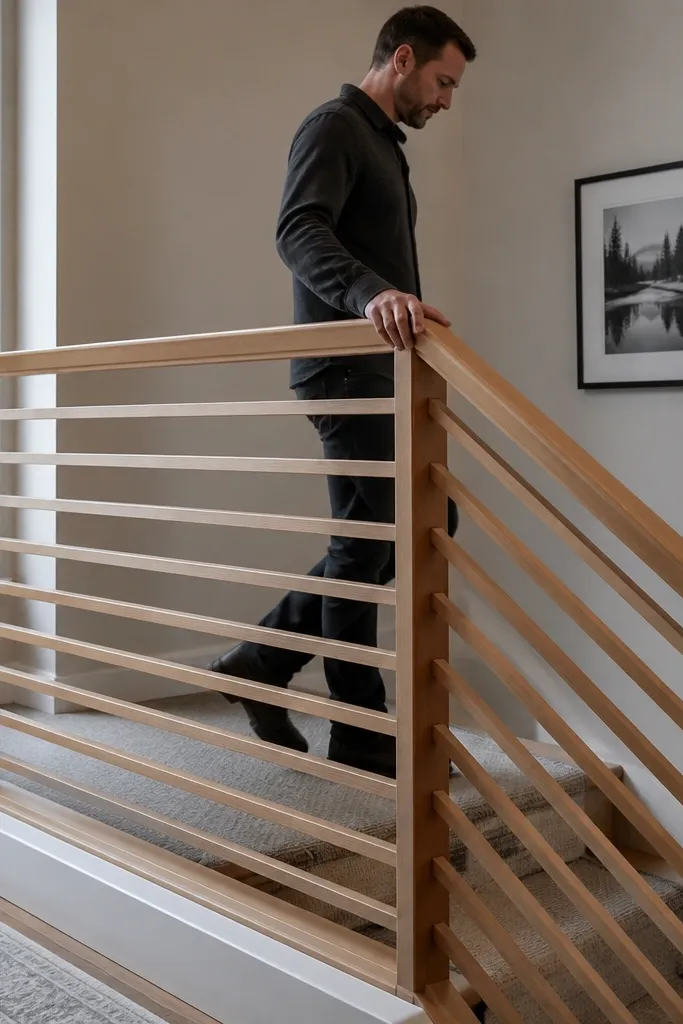
Horizontal slats make small staircases feel wider because the lines travel across the frame instead of stacking vertically. Pair a natural oak top rail with slim horizontal slats for a clean, modern-meets-sleek look. This works especially well if your walls are neutral and you want the railing to add texture without heavy blocking. Keep slats thin and evenly spaced so the pattern reads as one band. The top rail should have a smooth, rounded edge because you’ll grip it often.
Cut slats to the exact spacing you want using a spacer block, then sand them all to the same thickness. Attach slats to a concealed frame or directly to a bottom track depending on your wall structure. Install the oak top rail on brackets into studs so it stays rigid; don’t rely on slats to hold the rail. Stain or oil the oak, then seal with a matte finish. Finally, do a straight-edge check along the slat line so it doesn’t drift and look sloppy in photos.
Make one slat and use it as your template to keep spacing consistent.
Don’t overcrowd the slats — too many lines make the rail feel busy.
7. Rope-wrapped handrail with minimal posts
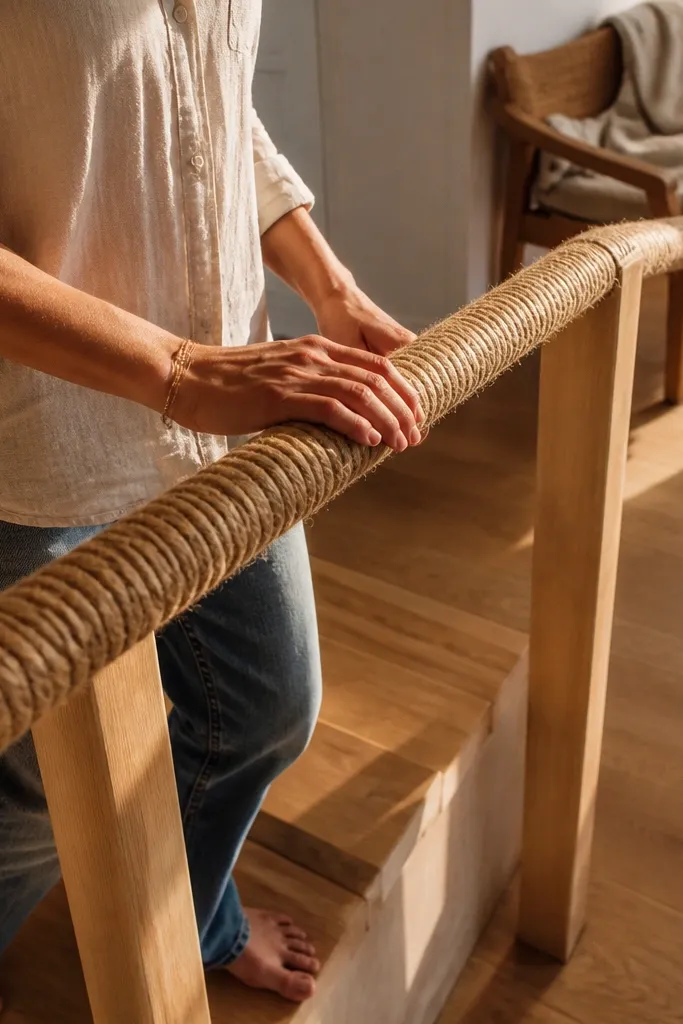
If you want a warm, textural small-space apartment stair railing, rope wrapping does it without adding visual height. Minimal posts keep the structure light, and the rope wrap adds grip and a casual, coastal or farmhouse vibe. This looks great in bright interiors and pairs well with light wood floors, rattan, and linen textures. Keep rope color consistent and tidy so it doesn’t look like a DIY afterthought. The result is tactile and photogenic, especially when sunlight hits the rope fibers.
Choose a thick, clean rope (jute is rough and sheds; use a tighter synthetic or treated natural rope that holds shape). Wrap the handrail starting at the underside so the seam stays hidden. Secure each pass with small, evenly spaced tacks or a concealed adhesive strip, then trim ends and seal with a clear rope finish. Install minimal posts anchored into studs or a solid stringer structure. Finish by sanding any sharp edges on the handrail and checking that the rope doesn’t shift under pressure.
Wrap under tension — loose rope looks messy fast in small spaces.
Don’t use fraying rope — it looks worn even when it’s new.
8. White-painted metal balusters with dark handrail
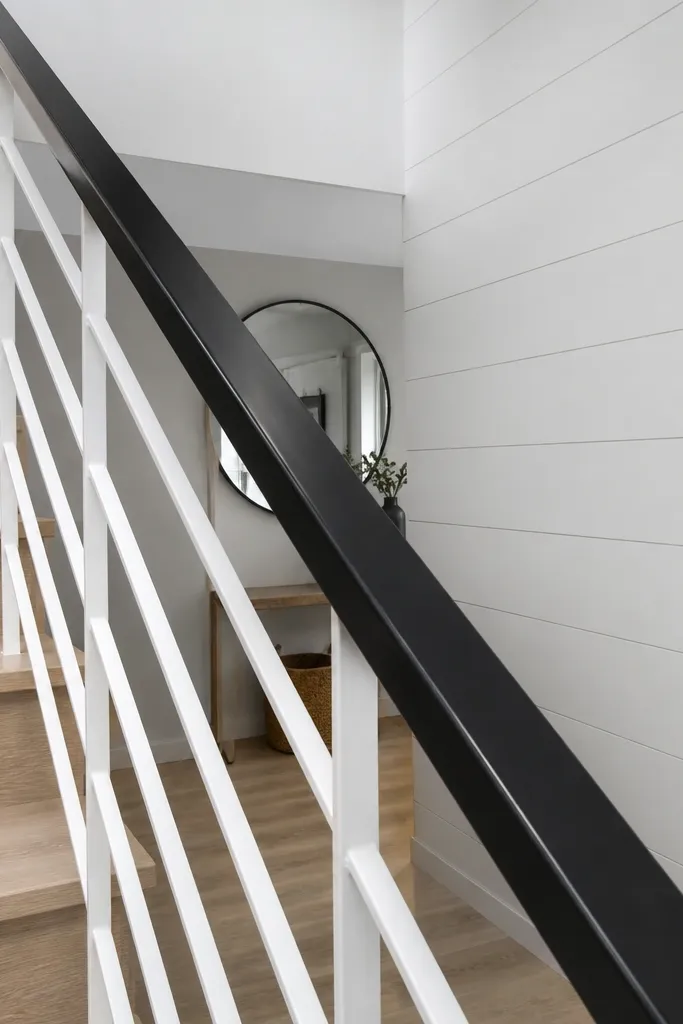
This color-blocked railing is made for apartments that need contrast without getting too heavy. Dark handrail + white balusters creates a crisp grid that reads clean and modern, especially against light walls. It also helps hide dust: fingerprints show less on matte dark metal than on glossy black. Use slim balusters so the grid doesn’t look like a gate. This works well if your trim is white but your floors or furniture are darker. It’s a great “looks styled” option without custom woodworking.
Pick a handrail material you can finish cleanly, like powder-coated steel or a pre-finished wood rail. Install the end posts and intermediate mounting points into studs along the stair run. Add white-painted balusters using a measured spacing jig so each vertical line stays parallel. Mount the top rail and check it for level, then tighten all joints. Cure the paint fully before using the railing heavily so you don’t scuff it.
Editor's noteUse painter’s tape to outline the baluster grid before you drill — it prevents crooked lines.
Skip thisDon’t mix glossy and matte finishes in the same railing.
9. Walnut handrail with black mesh infill
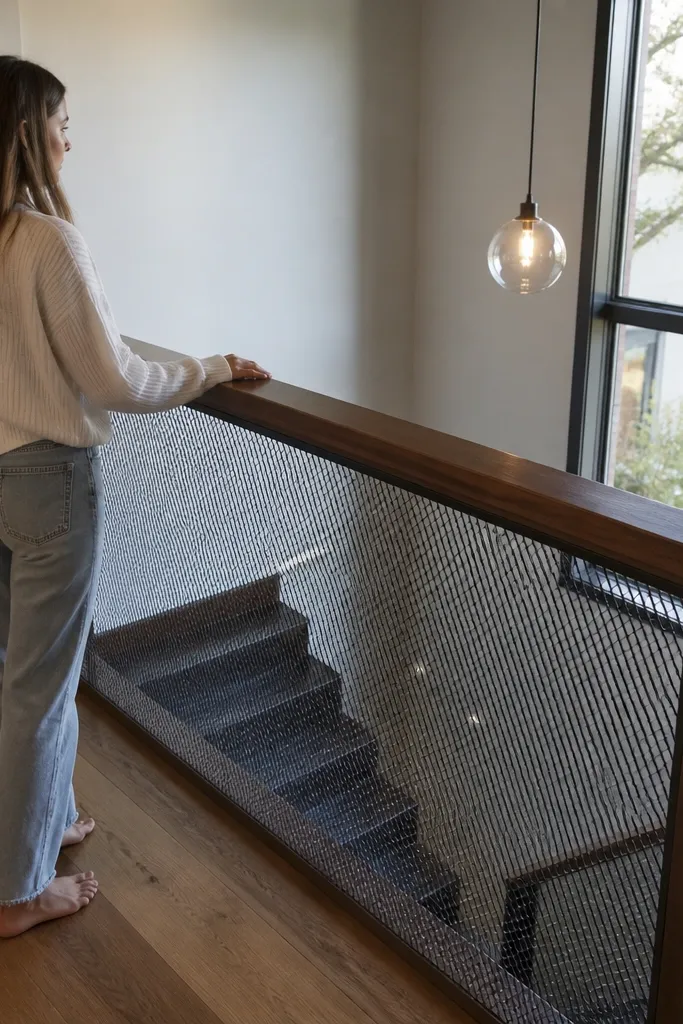
Mesh infill gives you the look of a protective barrier without the visual weight of solid panels. A walnut handrail adds warmth and makes the black mesh feel intentional instead of harsh. This is a smart pick for small-space apartment stair railing when you want safety and privacy but still want light to pass through. The mesh pattern also photographs well because it adds texture without turning into a busy fence. Keep the mesh stretched tight so it looks crisp, not saggy.
Build a frame for the mesh using thin steel or aluminum rails that you can anchor to posts. Cut mesh panels slightly oversized, then stretch them tight and fasten with clips or a pinch strip system. Install posts into studs and attach the frame, then mount the walnut handrail on top with concealed screws. Sand and oil the walnut so it feels smooth under your hand. Finish by checking tension: push at the mesh in the center; it should flex minimally.
Use stainless mesh if you can; it keeps its shape and doesn’t rust into ugly stains.
Don’t let the mesh touch the wall or floor — friction scuffs it quickly.
10. Micro-post railing with clear acrylic panels
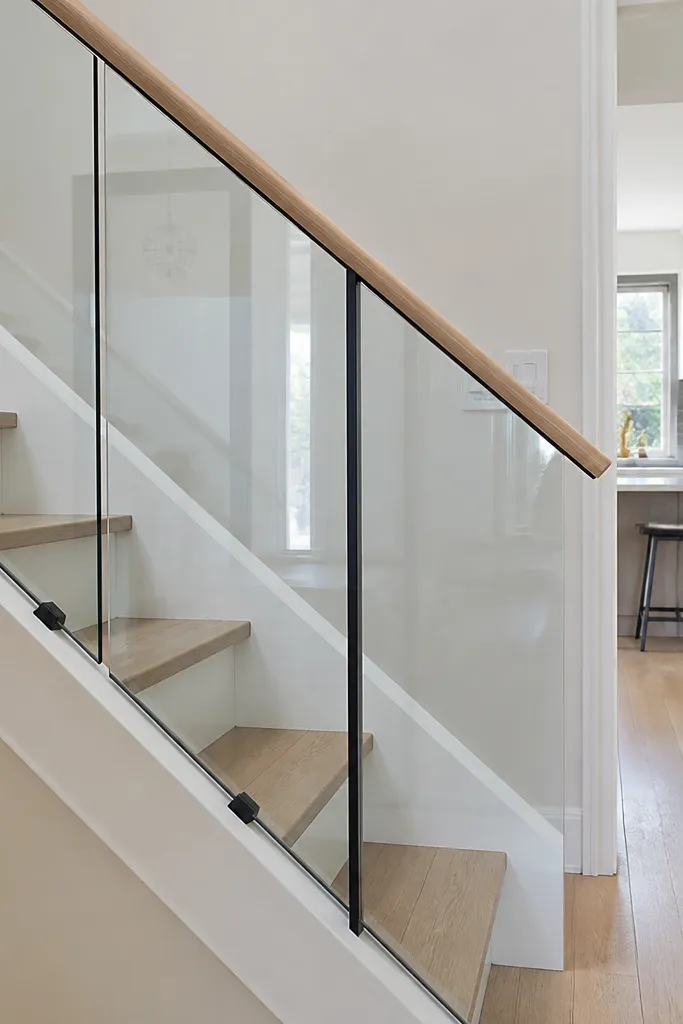
If you want the “glass look” without glass weight and cost, clear acrylic panels work for indoor stair railings in many homes. Micro-posts create a minimal frame so the staircase stays open and light moves through. Pair it with a simple wood handrail to keep things warm and forgiving for hands. Acrylic is also lightweight, which helps if your stair structure is tricky. This is a strong option for small-space apartment stair railing when you want sleek visuals and don’t want a heavy, bulky build.
Choose acrylic panels with a thickness that resists bowing, then cut with a fine-tooth blade and sand edges smooth. Build micro-posts with sturdy mounts anchored into studs and keep post spacing consistent with panel sizes. Install the acrylic using gaskets or spacer strips so it doesn’t rub and crack. Mount the handrail on top using brackets that keep it straight along the stair run. Finish by checking for any panel wobble and tighten all fasteners after the acrylic is seated.
Editor's noteUse gaskets and leave a small expansion gap so acrylic can move without stress cracking.
Skip thisDon’t overtighten screws into acrylic — it cracks from stress.
11. Two-tone railing: light oak handrail with matte black verticals
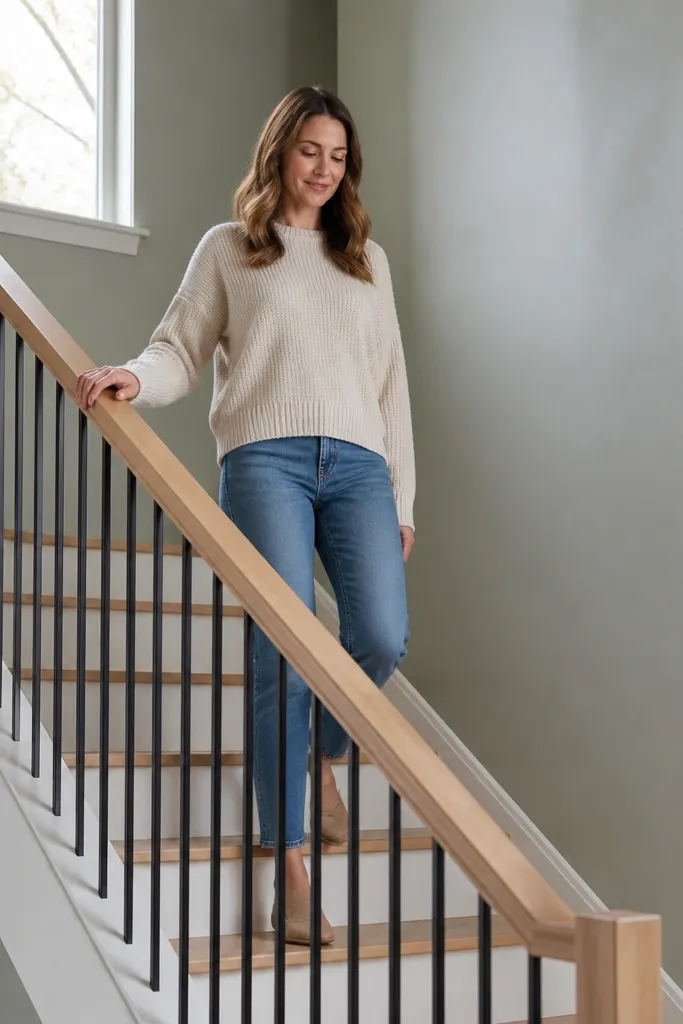
Two-tone railings look designer in small spaces because they create a clean contrast line without adding bulk. Light oak keeps the feel open and warm, while matte black verticals give definition and help the railing read as intentional. The verticals should be slim and evenly spaced so the pattern looks like a controlled grid, not random hardware. This works especially well when your walls are warm white and your floors are light oak or laminate. It’s photo-friendly from both the top and bottom of the stairs.
Install matte black vertical baluster mounts into studs along the stair run, then attach the balusters so they’re all plumb. Cut and sand your light oak handrail and finish it with a clear satin topcoat to keep the grain visible. Mount the handrail to the tops of the balusters using brackets or concealed screws. Check the rail line from the side and adjust any off-plumb balusters before everything is fully tightened. Finish with a wipe-down and a final inspection for any sharp edges.
If your oak is uneven in color, stain the whole rail evenly before assembly so the tone matches.
Don’t use chunky balusters — the two-tone effect gets swallowed by thickness.
12. Stair railing with built-in base trim panel for privacy
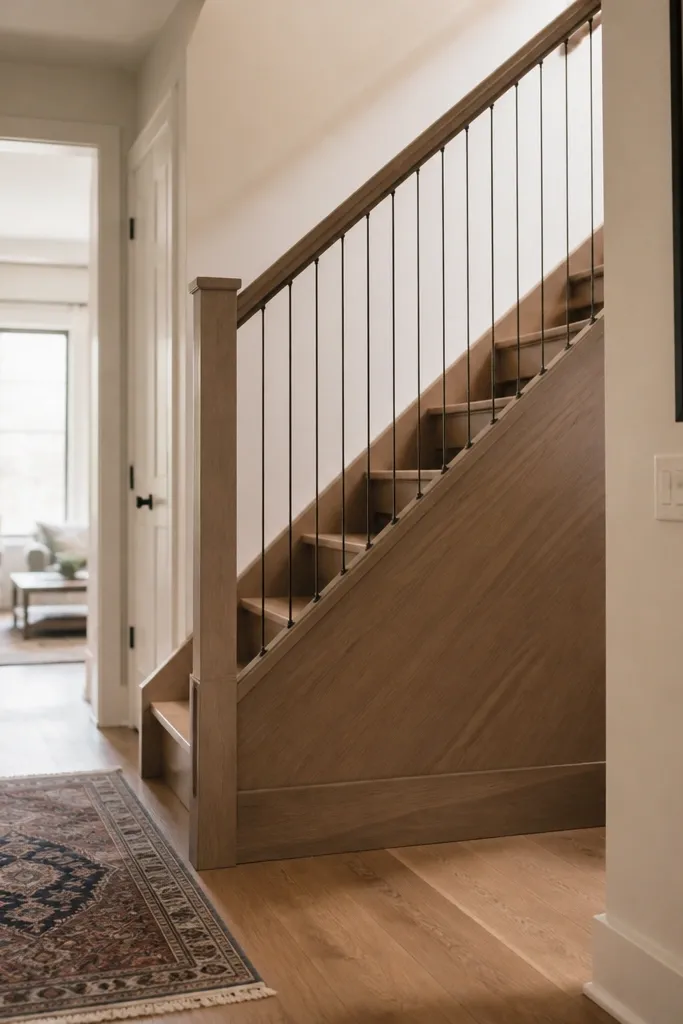
For apartments where you need privacy from a landing or hallway, a low base panel gives you coverage without blocking the entire view. The trick is to keep the top section open with slim verticals or cable so light still passes. A wood base panel also hides gaps and looks finished, which matters when the stair stringer isn’t perfectly uniform. Use a matte paint or stain that matches your trim, then keep the upper part slim. This is a good choice when you want the railing to look polished from street-level sightlines and from inside rooms.
Measure the height of the privacy panel you want, then cut a wood panel to fit between posts. Install posts into studs, then mount the privacy panel using a concealed bracket or screws from the inside face. Build the upper section with slim verticals or cable so the staircase remains airy. Attach and align the handrail last so it covers any uneven transitions between panel and upper elements. Sand edges smooth and add a protective finish that can handle scuffs from shoes and bags.
Editor's noteUse a panel that’s 1/4 inch taller than the gap so you can sand it flush for a tight fit.
Skip thisDon’t cover the whole opening — a full panel makes small stairs feel boxed in.
13. Brass-toned handrail with white powder-coated verticals
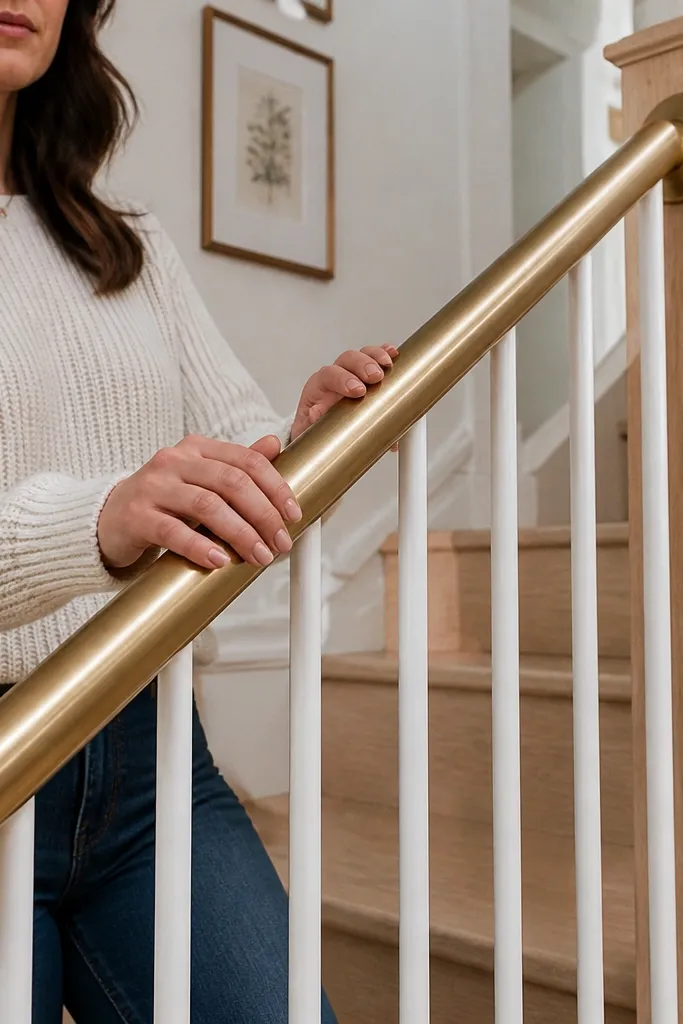
Brass tones read warm and intentional, especially in small-space apartment stair railing setups where you want the staircase to look “styled,” not industrial. Pair a brass-toned handrail with white powder-coated verticals to keep the overall frame bright. The combination looks great under warm indoor lighting and in natural light because brass reflects softly instead of glaring. Choose thin verticals to keep the rail from feeling like a barrier. This is a strong pick if your kitchen hardware, light fixtures, or decor already lean brass.
Select a brass-toned handrail finish that’s matte or satin so it doesn’t show scratches as clearly as polished. Install vertical mounts into studs and keep spacing consistent with a template strip. Attach the verticals, then mount the handrail so it sits centered and straight across the run. Secure all joints and check for wobble by pushing gently at the middle of the handrail. Finish by cleaning with a non-abrasive cleaner and buffing only if the manufacturer recommends it.
Match the sheen level: satin brass with matte verticals looks cleaner than mixing high-gloss surfaces.
Don’t go heavy on the brass — thick brass posts swallow the small staircase.
14. Bent plywood handrail with vertical slits
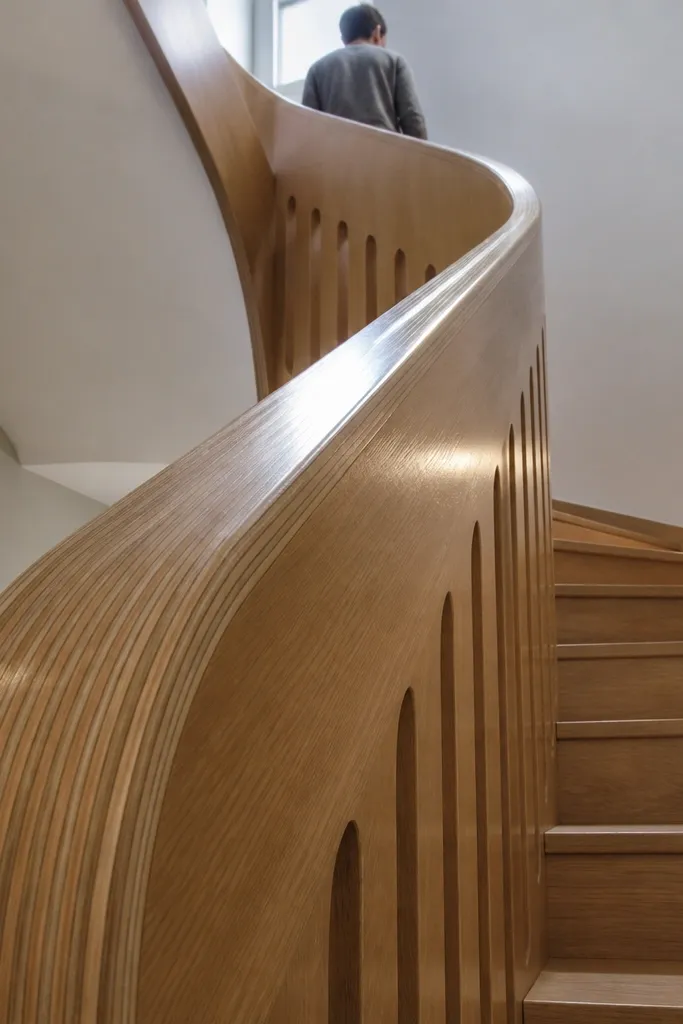
This is a sculptural option that looks custom without needing metal fabrication. Bent plywood forms a smooth, continuous grip that follows the stair’s angle, and vertical slits keep the railing airy. The look is modern and warm, and it photographs well because the grain catches light in a narrow band. It’s also great if you want something less “cable and glass” and more furniture-like. Keep the slits consistent and the plywood finish matte so the rail doesn’t look shiny and cheap.
Cut plywood strips wide enough for a comfortable handrail and bend them using clamps over a form that matches the stair curve. Sand the bent shape smooth before finish; any ridges will show in photos. Install mounting brackets into studs and attach the bent plywood handrail to the brackets. Create the vertical slit infill using a rigid backing frame so slits stay straight and don’t warp. Finish with a matte oil or clear coat and check that all edges are smooth to the touch.
Editor's noteBend one test strip first; it saves you from wasting a full handrail piece.
Skip thisDon’t leave sharp plywood edges — they catch clothing and look rough fast.
15. Recessed rail with flush wood trim frame
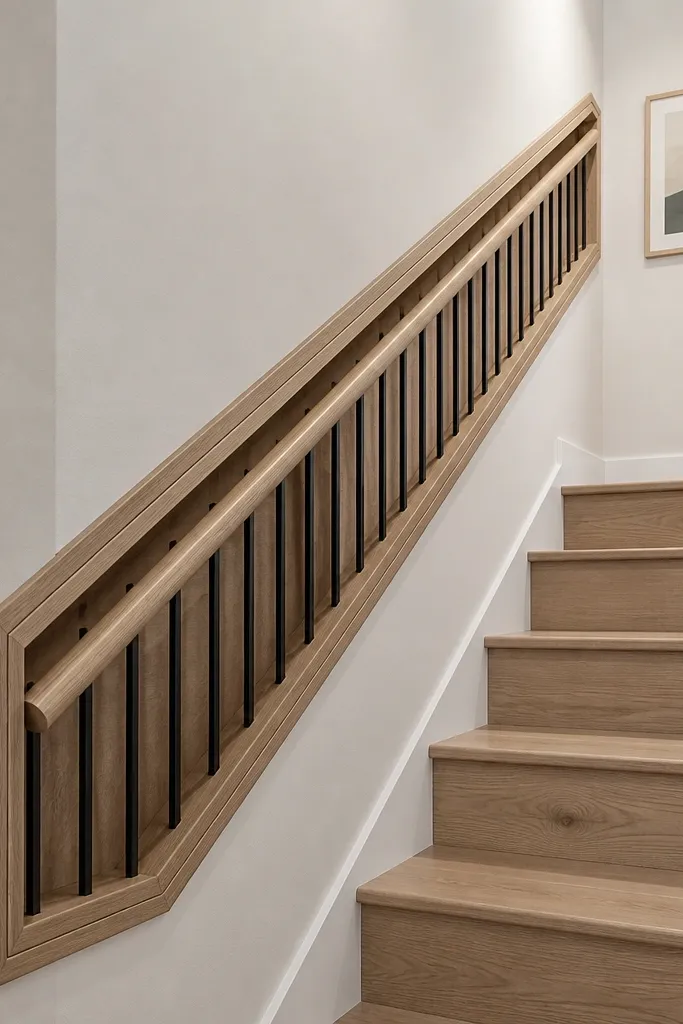
A recessed rail makes a small-space apartment stair railing feel built-in instead of attached. You’re essentially creating a shallow “frame” around the railing, then placing the handrail and balusters slightly back so the front face is clean. This reduces the visual clutter of brackets and fasteners. It’s especially useful in older apartments where the wall has uneven surfaces or where you want to hide the install details. Choose a flush trim style and keep the face color matching the wall for a seamless look.
Build a shallow trim frame from thin plywood or solid wood that matches your wall finish thickness. Anchor the frame into studs along the stair run, keeping the top line level and the depth consistent. Install your handrail and balusters inside the recessed area, using hardware that stays hidden behind the trim. Sand and fill seams between trim sections so the face looks continuous. Finish the trim with the same paint or stain as the wall area so the railing reads as part of the architecture.
Editor's noteUse a 1/2 inch reveal from the wall for a crisp shadow line that looks intentional in photos.
Skip thisDon’t recess so far that the rail becomes hard to grip — keep the handrail edge reachable.



