
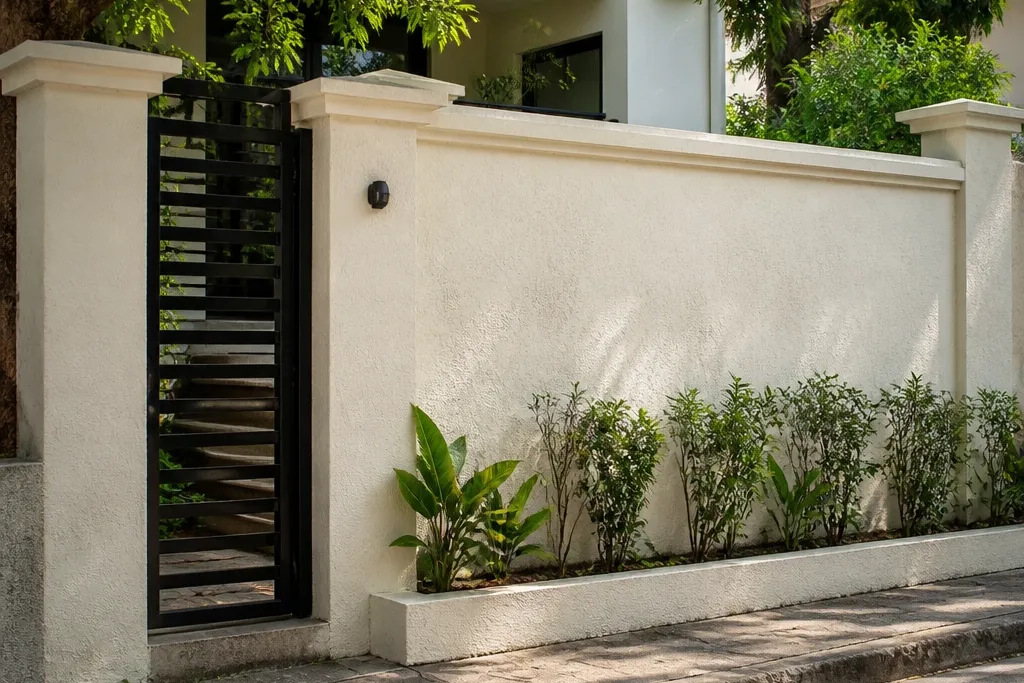
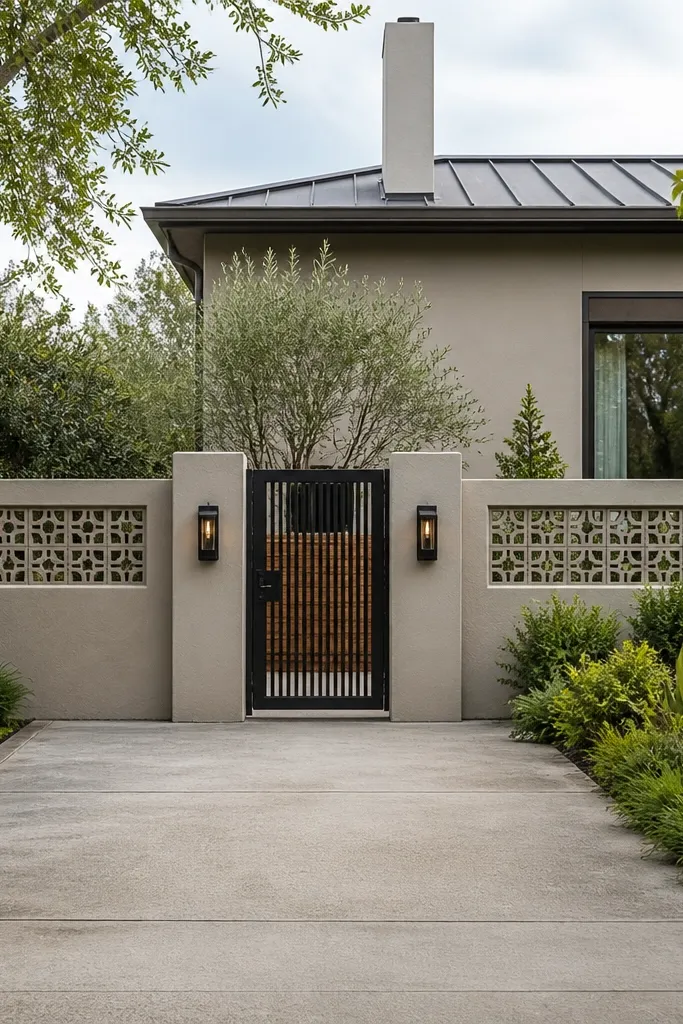
1. Two-tone vertical bay wall with shadow gaps
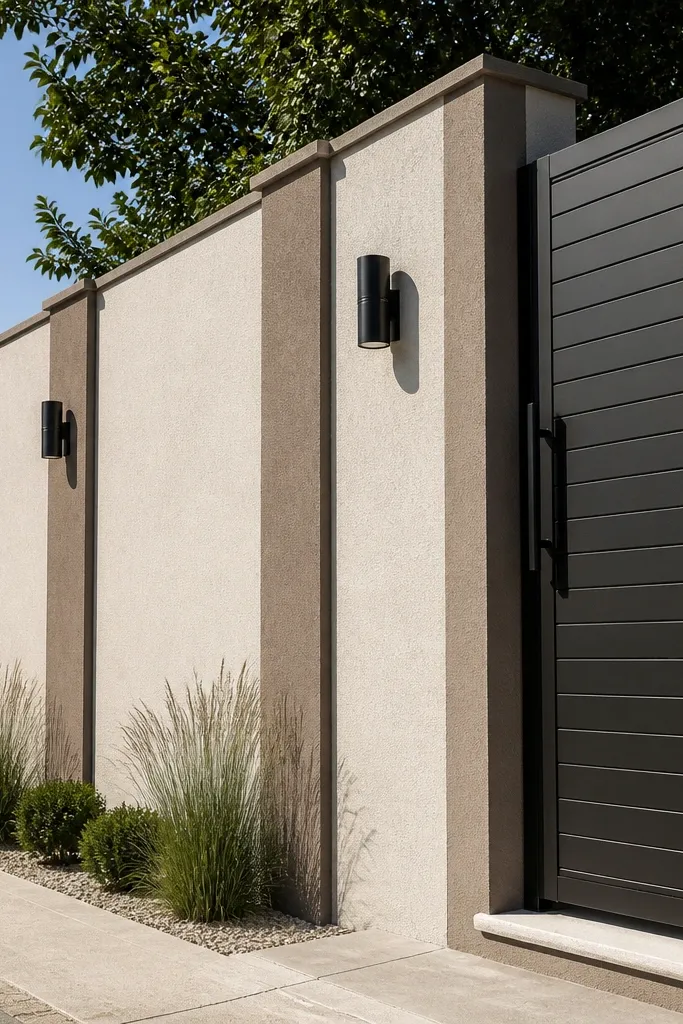
This design fixes the “small plot wall feels bulky” problem by slicing the facade into tall vertical bays. Use a light base plaster (off-white or sand) and a darker secondary tone for the bay borders, then add a thin shadow gap so each panel reads separately. It stays clean because the eye gets clear lines instead of one long flat surface. It’s also DIY-friendly since you’re repeating the same measurement over and over — perfect for long frontages where consistency matters.
Start by marking bay widths on the wall at 4 ft intervals, then draw vertical guide lines using a chalk line and level. Apply base plaster first, let it firm, then use a straight trowel to carve 10-15 mm grooves for the shadow gaps. Finish the borders with a second color plaster or thin cement-sand coating, keeping grout-like edges sharp. Seal everything with a matte exterior coating so the grooves don’t turn glossy and highlight unevenness.
Editor's noteMake your grooves with a straight metal straightedge and tape it down — straight lines hide a lot of DIY mistakes.
Skip thisDon’t paint over uneven grooves; fill and level first or the shadow lines will look messy.
2. Stone-look tile cladding only on pilasters
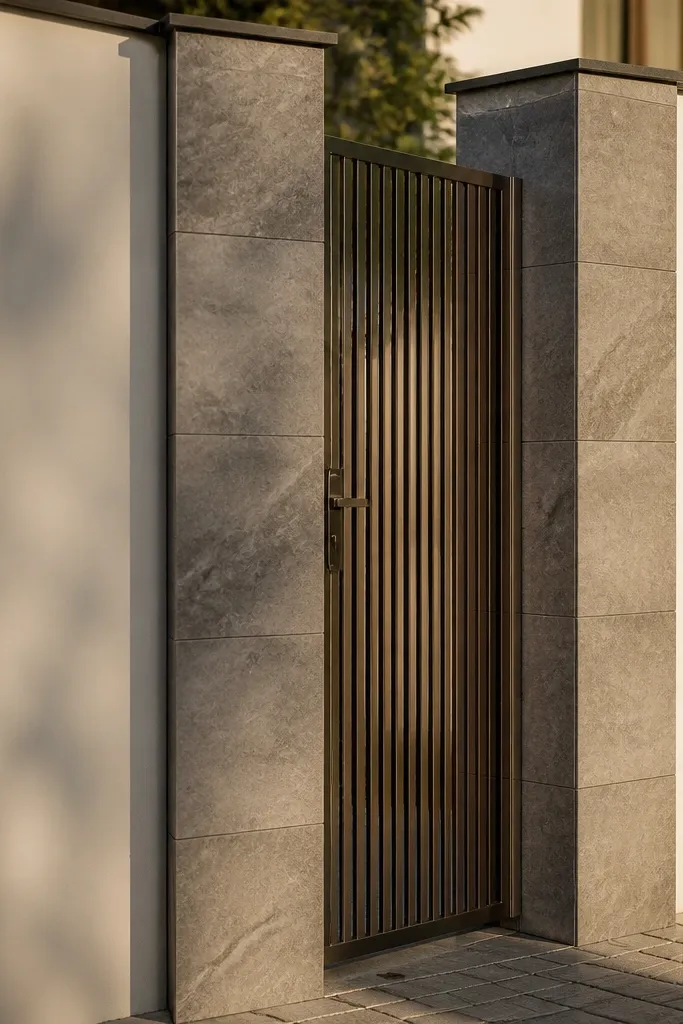
If you want a high-end look without tiling the whole wall, clad only the pilasters. The contrast makes the wall feel structured and adds depth that photographs well. Choose stone-look porcelain tiles in one consistent shade range (grey with subtle movement) so the pattern doesn’t fight your plaster. This works great for small plots with a gate centered on the frontage because the pilasters can frame the gate and make it look intentional.
Plan pilaster locations first: place one on each corner and one on each side of the gate, then add two more in between if the frontage is long. Install cement board or rough plaster base, then apply thinset mortar and set the tiles vertically, aligning edges to keep grout lines straight. Use 3-4 mm spacers so the joints stay consistent across all pilasters. Finish with exterior grout and a tile sealer if your tiles are not already water-resistant.
Dry-lay a single pilaster section to decide the tile orientation so the “stone veins” run cleanly up the height.
Avoid mixing tile batches with different grey tones; it creates patchy pilasters that look DIY.
3. Charcoal horizontal slat wall with light infill panels
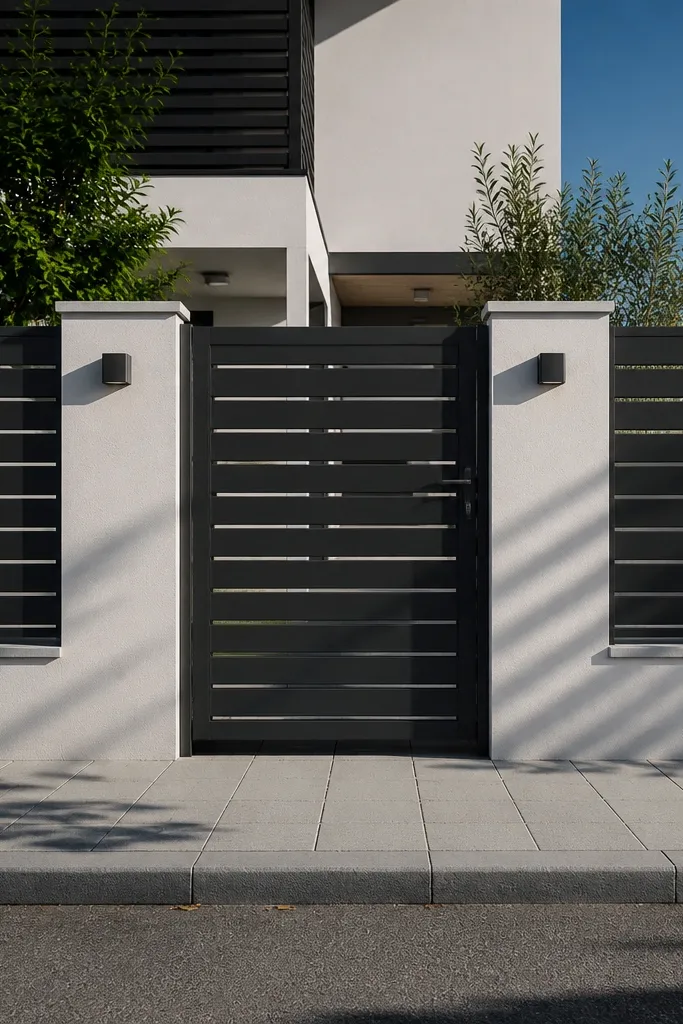
Horizontal slats make a small plot feel wider and more modern because they guide the eye sideways. For privacy, use slats that are not flush — add a small offset so light can hit edges and create a clean striped pattern. Pair charcoal slats with light infill panels (white, cream, or very light greige) so the wall doesn’t look heavy. It’s a strong choice if your gate is metal and you want the whole frontage to match.
Mark three to five slat bands across the wall height, depending on your wall height (for 6 ft, three bands looks balanced). Build slat frames using treated wood or aluminum angle supports fixed to the wall with masonry anchors. Space slats with 25-35 mm gaps and keep the offset consistent so the shadow line stays even. Paint slats with exterior metal paint or use pre-finished powder-coated slats, then finish infill with exterior plaster or panels before a protective top coat.
Use a laser level or a long spirit level to keep slat bands perfectly level — crooked horizontal lines show immediately in photos.
Don’t use random slat spacing; uneven gaps make the whole wall look unfinished.
4. Recessed brick-pattern privacy blocks (offset course)

This is one of the best small-plot compound wall ideas for people who want privacy but still want airflow and a “designed” surface. Recessed blocks create depth, and depth is what makes the pattern look premium instead of flat. Use a brick-pattern layout with offset courses so the rectangles don’t line up like a boring grid. The look stays photogenic because shadows move across the recesses through the day.
Choose block size and spacing first: for a 6 ft wall, plan recessed rectangles about 200 x 100 mm with a 40-60 mm recess depth. Build a simple frame with cement blocks or formwork strips, then cast the recess using cement mortar and a template to keep dimensions consistent. Install an exterior waterproofing layer on the back side of the recesses before finishing the face. Finish the face with textured plaster so the block edges don’t look like raw concrete.
Make one plywood template for the recess rectangle — repeat it and your pattern stays crisp.
Don’t skip waterproofing behind recesses; water gets trapped and stains show later.
5. Microcement wall with thin steel-grey grooves
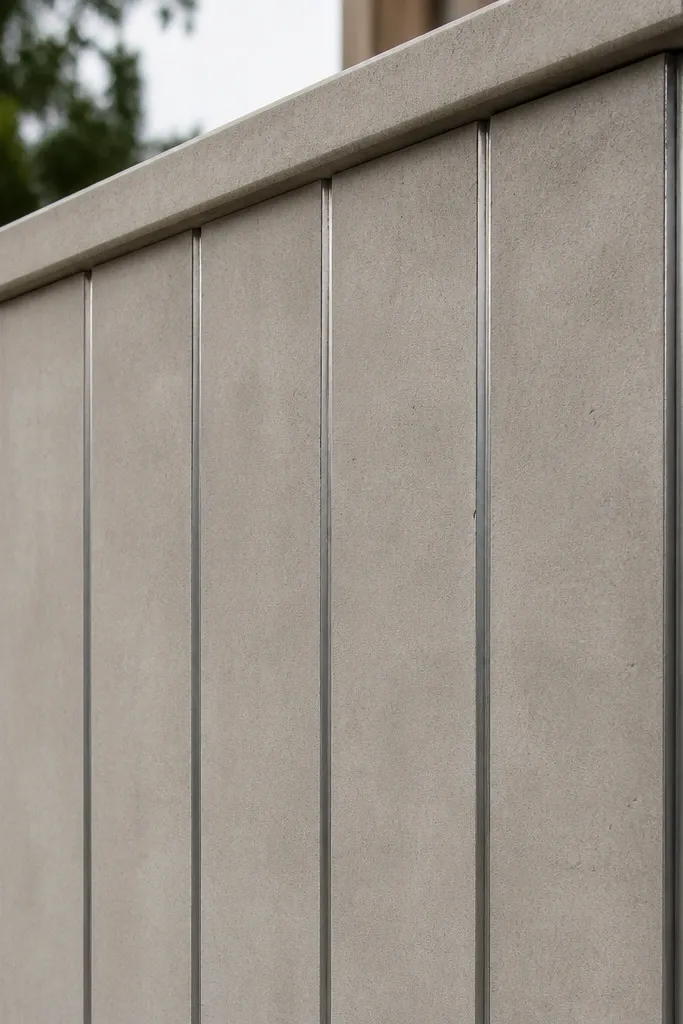
Microcement gives you that smooth, modern look that usually costs more than DIY plaster. The trick is pairing the smooth base with thin grooves in a steel-grey tone so the wall has definition without heavy ornament. This design reads upscale in close-ups and wide shots because the surface is uniform and light reflects softly. It’s ideal for small plots where you want a clean, architectural facade rather than a busy pattern.
Prep the wall by removing loose plaster and leveling high spots. Apply microcement base coat in one direction, then sand and wipe dust thoroughly. For grooves, use a marking guide and cut shallow lines using a grinder with a dust shroud, then fill grooves with a tinted microcement or cement-sand mix tinted to steel grey. Seal with an exterior microcement sealer in two coats, letting the first cure before the second.
Use a vacuum while cutting grooves; dust ruins bonding and makes grooves look fuzzy.
Don’t go too deep on grooves; deep cuts create dark channels that collect dirt.
6. Terracotta checker panel at the gate frame
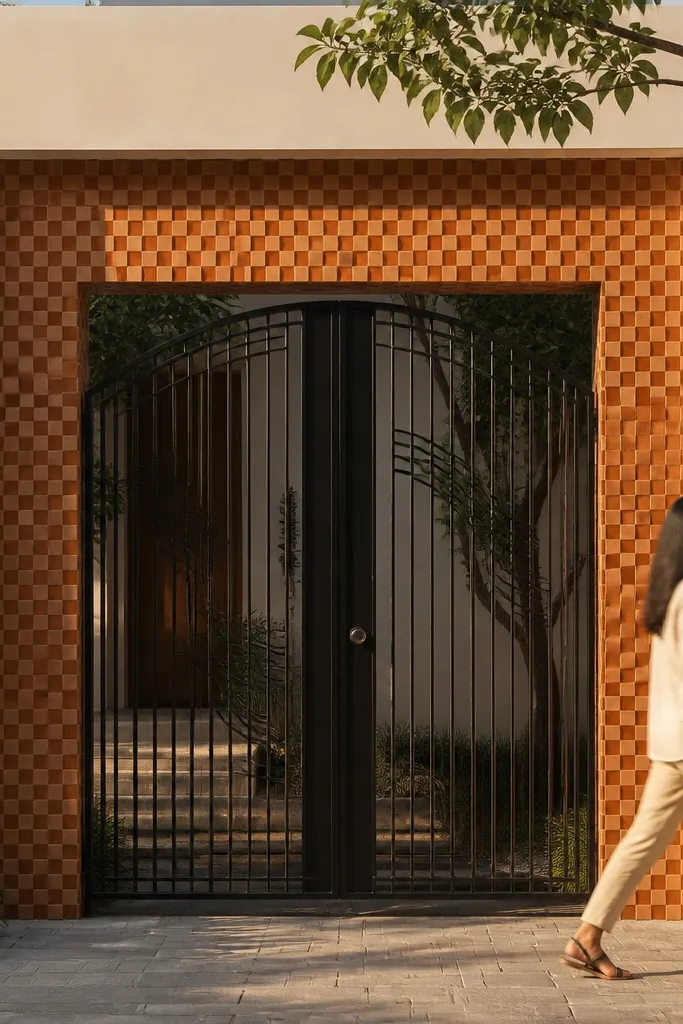
If your gate area looks plain, this idea makes it the focal point without covering the entire wall. A terracotta checker panel adds warmth and texture, and the pattern frames the gate so the frontage looks complete. Keep the rest of the wall simple — off-white plaster or smooth cement finish — so the checkerboard does the talking. This works especially well on small plots where the gate is centered and is what people notice first.
Build a gate frame border first using cement plaster edges or thin brick strips, leaving a clear inner panel area. Choose square tiles about 100 x 100 mm in terracotta and a contrasting light tile for the checker. Apply thinset, set tiles with 2-3 mm spacers, and keep the pattern aligned to the gate frame edges. Grout with an exterior grout and seal the panel edges with exterior waterproof sealant to prevent staining.
Editor's noteStart laying from the center of the gate frame so the checker stays symmetrical even if your wall isn’t perfectly square.
Skip thisAvoid glossy tiles; they reflect street glare and can look harsh on camera.
7. Vertical slate-look tiles with lime grout accents

Vertical slate-look tiles make the wall feel taller and more refined, which is exactly what you want on small plots. The lime-toned grout lines add a subtle accent that looks intentional rather than random. This design looks best when you keep the top coping simple and in one tone. It also helps hide minor wall unevenness because slate textures forgive small variations better than smooth tiles.
Plan tile size around your wall height so you don’t end up with tiny cuts at the top. Apply a waterproofing primer, then set tiles vertically using spacers and a level. Use lime-tinted exterior grout and wipe clean immediately to keep lines sharp. Finish with a thin border trim along the top and corners, then seal grout if your grout isn’t pre-sealed.
Editor's noteUse a tile leveling system for large vertical tiles; it prevents lippage that ruins the slate look.
Skip thisDon’t skip grout sealing; porous grout stains quickly in dusty, sunny fronts.
8. White limewash effect with dark coping stones
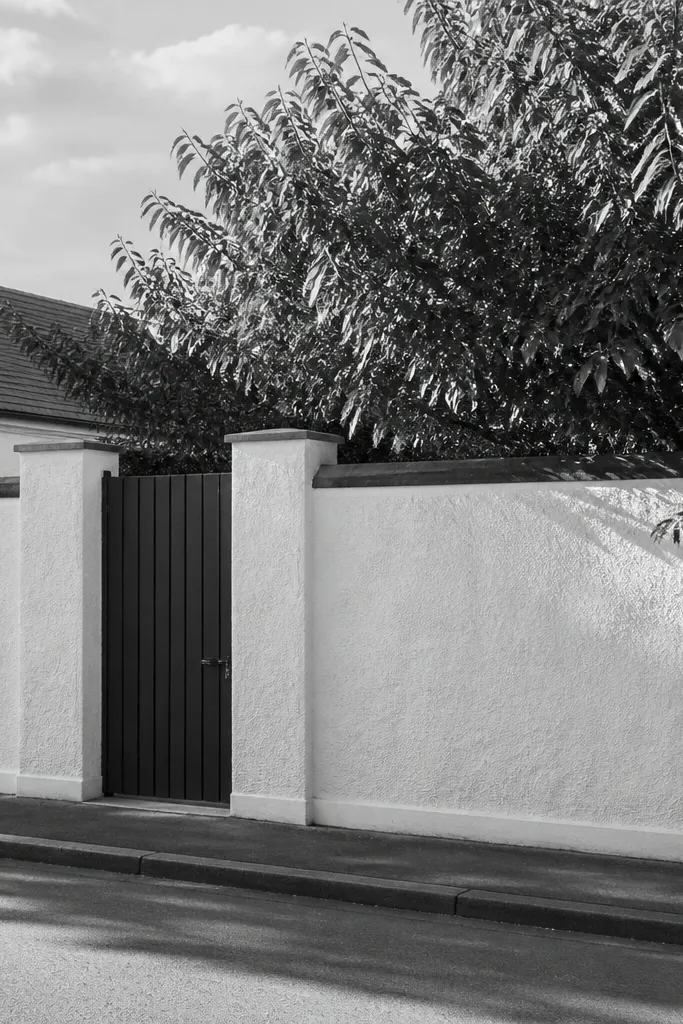
This is a classic, photogenic look that works on small plots because it stays light and airy. The rough limewash effect hides hairline imperfections, and the dark coping stones add a strong finish line at the top. Keep the wall mostly monochrome so the texture becomes the design. This choice is great if your soil is dusty or your area gets harsh sun — matte surfaces hide glare and keep the facade looking soft.
Apply a base plaster coat, then add a limewash or limewash-effect exterior coating in thin layers. Work in small sections and brush in one direction so the texture stays consistent. Install dark coping stones on mortar after the wall coating cures, ensuring a slight slope for water run-off. Finally, seal the coping joints with exterior sealant and avoid sealing the full limewash layer if you want the matte look to stay true.
Editor's noteDo a test patch on a hidden section to confirm the exact white tone after it dries.
Skip thisDon’t use glossy paint over limewash; it looks plastic and kills the texture.
9. Patterned jali panels framed in cement borders
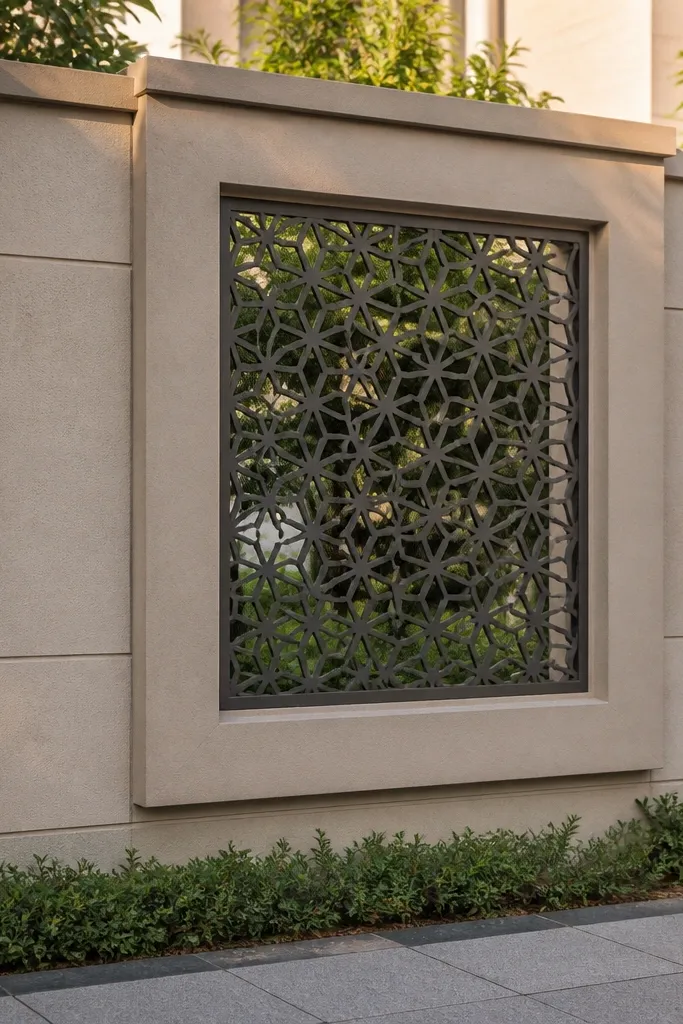
A framed jali panel breaks up the solid wall without giving up privacy. The key is the frame: cement borders make the metal look like part of the architecture instead of a pasted insert. Choose geometric jali patterns with repeating shapes so the facade looks orderly on narrow frontages. This is the best option when you want ventilation, want to reduce noise, and still want a clean, modern look.
Mark jali panel positions at eye level — typically around 3 to 4 ft from the ground for a 6 ft wall. Build cement frames around each panel with 25-35 mm thickness so the jali sits recessed. Install the metal jali using embedded anchors or bolts into the frame, then plaster and finish the frame edges. Paint the metal with exterior anti-rust coating and match the cement finish with exterior primer and top coat.
Editor's noteGet your jali panel sizes cut precisely — a 10 mm mismatch shows up fast on a small frontage.
Skip thisDon’t leave the jali frame edges rough; sharp, clean edges make it look custom.
10. Offset block columns with smooth plaster infill
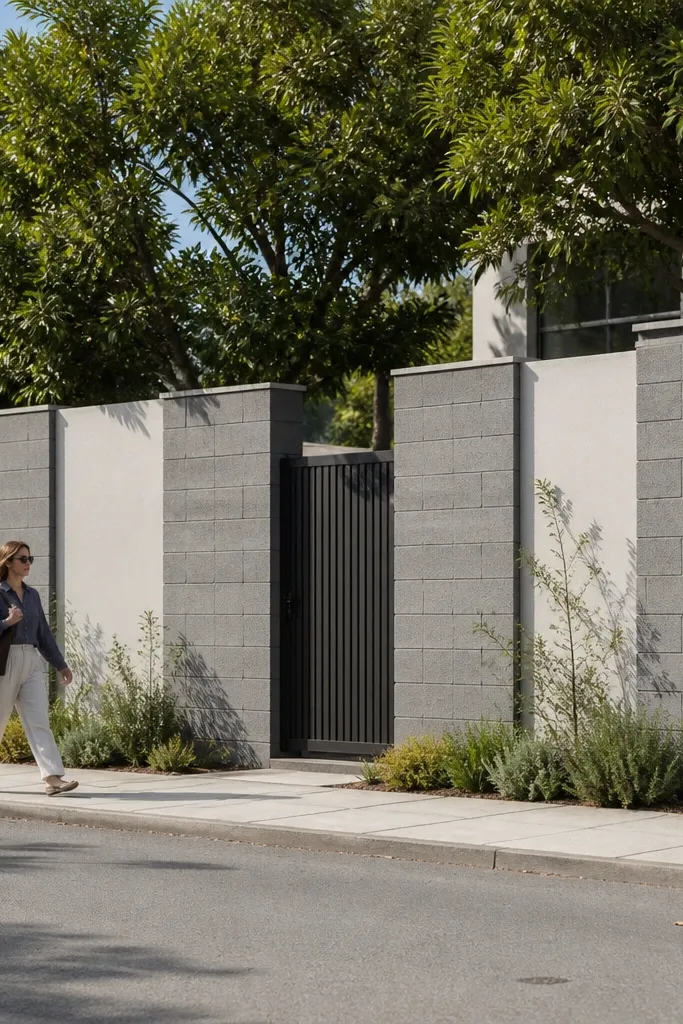
This design uses a simple rule: keep infill smooth, and make the columns do the visual work. Offset block columns look structured and modern, and the spacing prevents the wall from feeling like one big slab. Use a slightly darker tone for the columns so they pop in daylight but still feel calm. It’s ideal for small plots where you want a clean facade that doesn’t rely on heavy tile work.
Choose column width and spacing: for a 20 ft frontage, 4-6 columns looks balanced, with each column about 300-400 mm wide. Mark column centers and cast or build columns with concrete blocks, leaving them slightly protruded (10-20 mm) from the infill plane. Apply smooth cement plaster to infill sections, then sand and finish for a clean look. Paint columns and infill in two tones and seal both with exterior matte paint.
Editor's noteProtrude columns by 15 mm for a noticeable shadow line without making the wall look bulky.
Skip thisDon’t make columns flush with the infill; zero shadow makes the design look flat.
11. Terracotta brick texture wall with white vertical lines
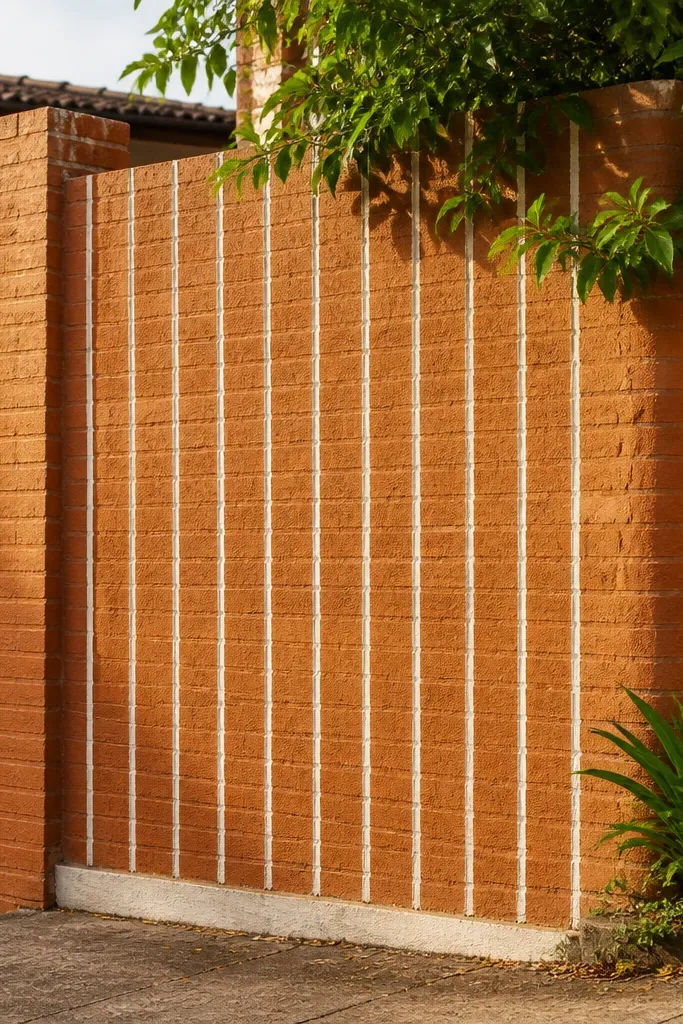
Brick texture plus thin white lines gives you a warm, craft look that still feels neat. The trick is keeping the stripes thin and evenly spaced so you get rhythm, not clutter. This works well on small plots because terracotta makes the facade welcoming, while white lines visually break up the width. It’s also a forgiving finish: texture hides minor plaster waves better than smooth coatings.
Apply a base plaster and then use a brick-texture roller or stamp finish to create a consistent brick pattern. Once cured, draw vertical lines with a level, then tape them and apply a white exterior paint or cement-based coating. Keep stripe width around 20-30 mm and spacing consistent across the entire wall. Seal the brick texture lightly so dust doesn’t collect in the pores.
Editor's noteUse painter’s tape with a firm press; paint bleed ruins the crisp stripe look.
Skip thisDon’t go too thick on stripes; wide stripes make a small frontage feel busy.
12. Geometric panel wall using cement-sand grooves only
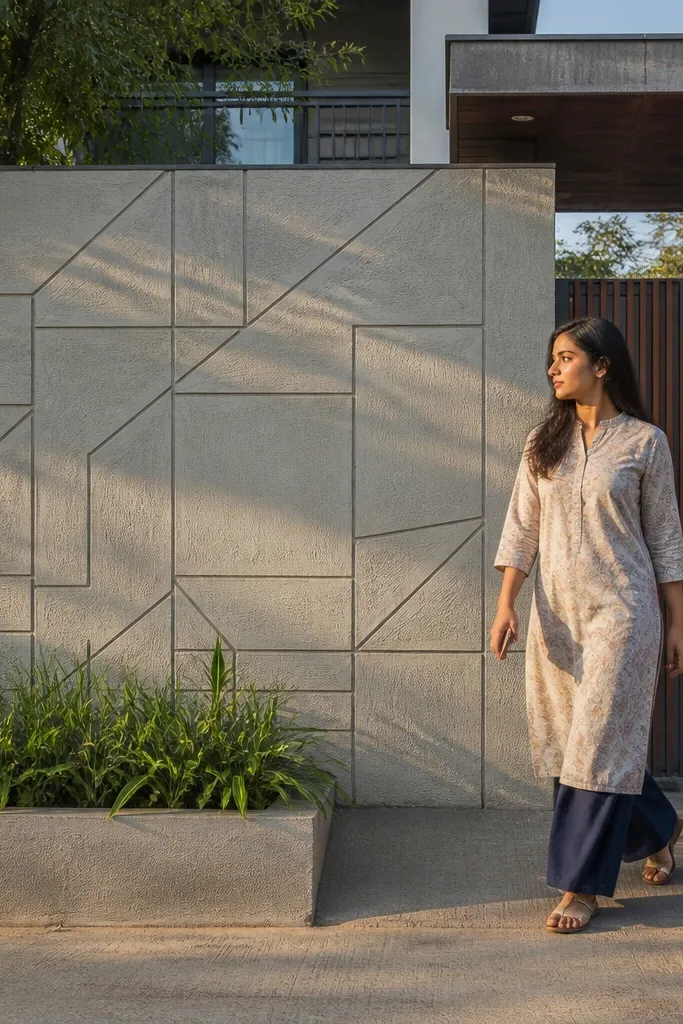
This is a DIY-friendly way to make a plain wall look designed using only grooves and paint. Geometric shapes look sharp in photos when the lines are straight and the depths are consistent. You get a modern facade without tiles, jali, or fancy materials. It suits small plots because you can scale the geometry to your frontage width and keep it balanced around the gate.
Start with a layout: plan rectangles or zig-zag shapes that fit your wall bays. Mark lines with chalk and measure groove widths — aim for 8-12 mm grooves with 5-8 mm depth. Cut grooves with a grinder (carefully) or carve after partial set of plaster. Fill grooves with a darker cement-sand mix or paint, then apply base paint to the rest. Seal after curing so the groove edges don’t chip.
Editor's noteMake one corner template and replicate it; the whole design depends on consistent geometry.
Skip thisAvoid hand-free carving; wobbly lines destroy the clean look.
13. Raked plaster waves with a single dark stripe
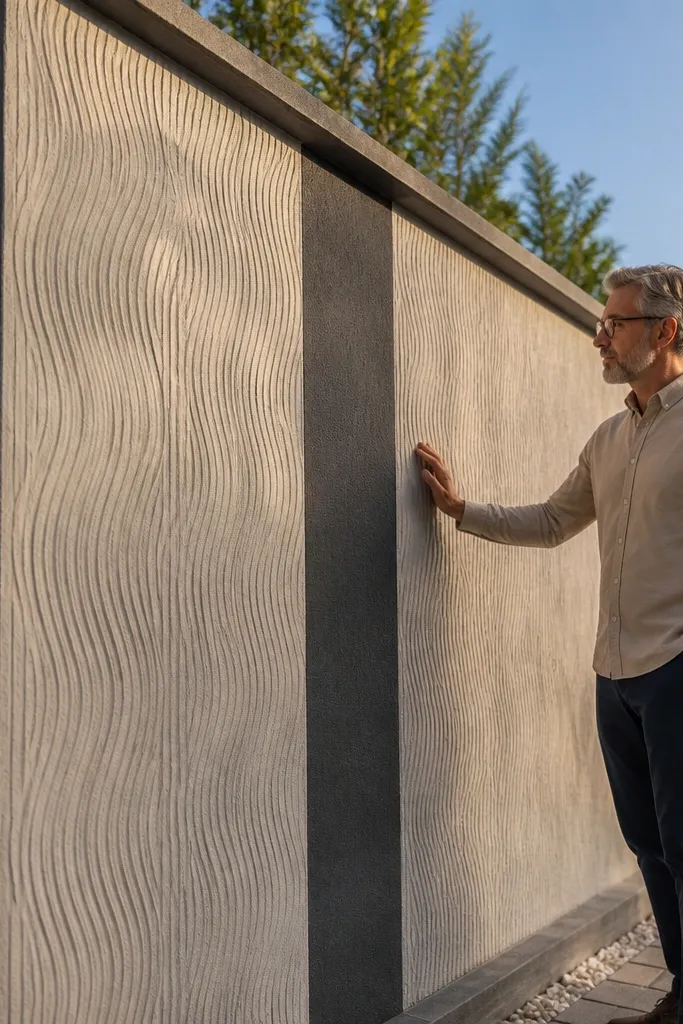
Raked plaster waves add movement without making the wall look busy. Add one vertical dark stripe (about 150-250 mm wide) and the wall becomes a clean, modern composition. The waves catch light and look good in both morning and late-afternoon sun, which matters on narrow plots where the facade gets uneven lighting. This is a solid choice if you want texture but hate the maintenance of tiles.
Apply base plaster and while it’s still workable, rake horizontal or slightly diagonal lines using a comb tool. Keep spacing even — around 10-15 mm between ridges — for a consistent wave feel. After curing, paint the base in a light tone and apply the single dark stripe with tape for a straight edge. Finish with exterior primer and matte top coat to keep the texture from turning shiny.
Editor's noteRake in one direction for the whole wall section, then blend at bay breaks so it doesn’t look patchy.
Skip thisDon’t rake too deep; deep ridges trap dust and look dirty fast.
14. Half-height solid with full-height mesh panels
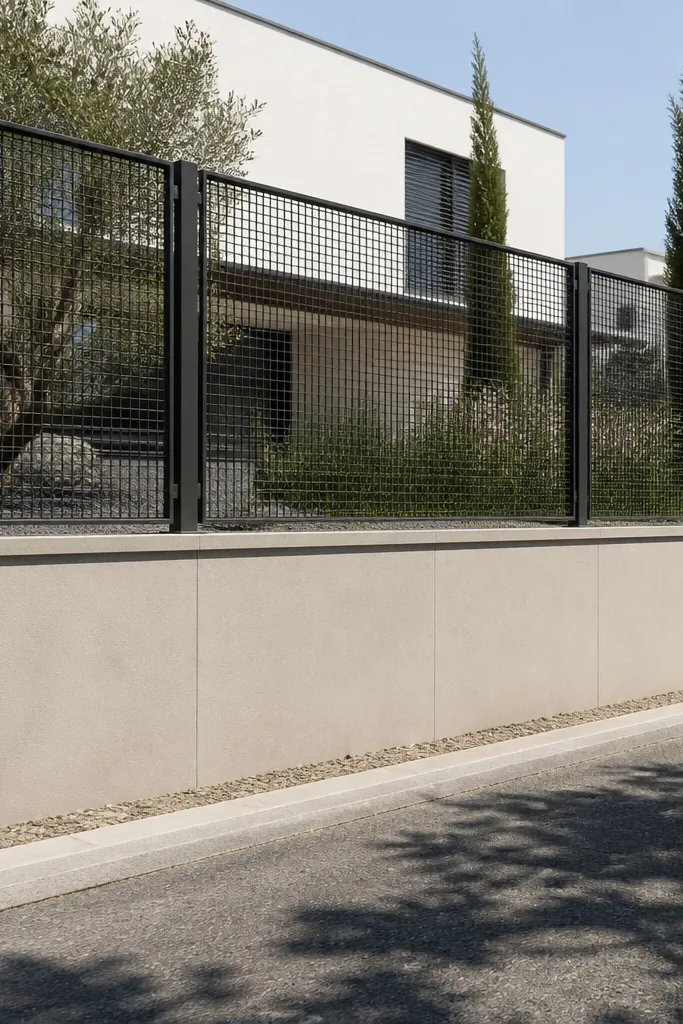
If your priority is airflow and a modern look, split the wall into two zones: solid lower section for privacy and mesh upper section for visibility control. This makes a small plot feel less boxed in because the upper area is lighter visually. Use a powder-coated grey or black metal mesh and frame it with straight metal angles or cement borders. It looks especially good when the gate and boundary share the same metal tone.
Mark a half-height solid zone, usually 3 ft for a 6 ft overall wall, then build the lower section with blocks and plaster. Install the metal mesh upper section on embedded anchors, keeping the frame level across the frontage. Use mesh sheets with consistent pattern size so it looks uniform, then paint the metal frame and touch up mortar points. Finish the top coping to cover the metal frame and seal edges with exterior sealant.
Match the mesh frame color to your gate hardware; it makes the whole frontage look like one system.
Don’t use thin, flimsy mesh; sagging becomes obvious on small frontages.
15. Top-heavy coping with stepped parapet rhythm
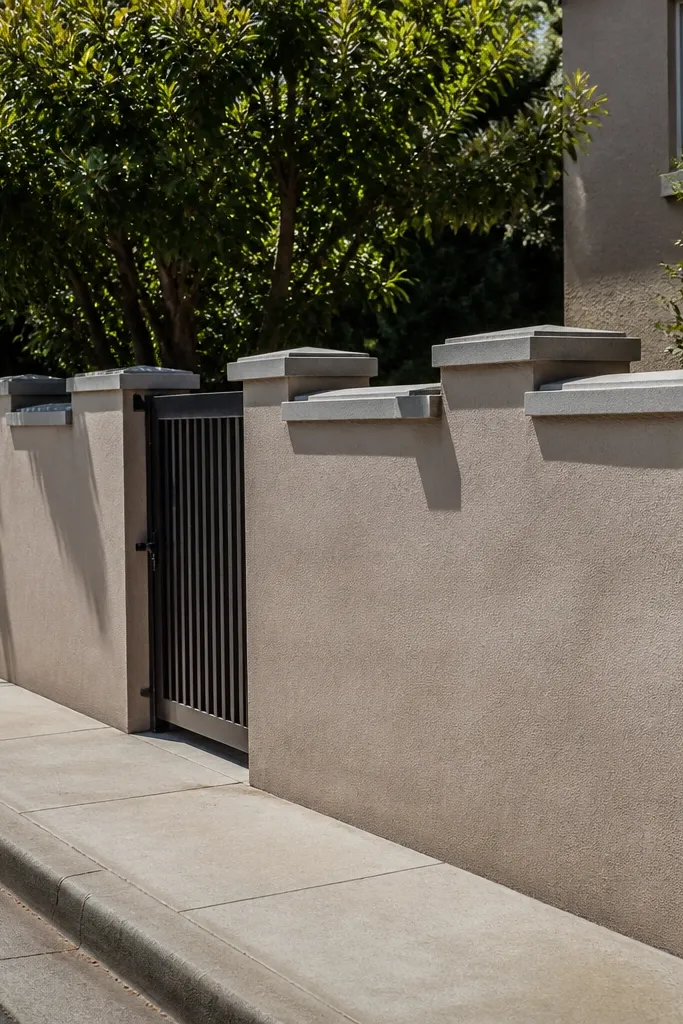
Stepped parapet rhythm is a styling trick that makes a small plot wall look taller and more intentional. By adding small step-offs at regular intervals, you create a pattern that reads even from across the street. Keep the body simple and use a strong coping finish — concrete or stone — to make the steps look crisp. This design works best when your wall is plain plaster now and you want a noticeable upgrade without covering the whole surface.
Plan step intervals: for 20 ft frontage, steps every 2 to 2.5 ft looks balanced. Build the wall body first with smooth plaster, then install precast coping blocks or cast step parapet sections with a template. Use mortar to set each step and keep top surfaces sloped slightly for water run-off. After curing, seal the coping joints and paint the wall body to a matte exterior finish.
Editor's noteUse a spacer jig for the step thickness so each step height stays consistent.
Skip thisDon’t eyeball step spacing; uneven steps look worse than a plain coping.
16. Vertical planter niches built into the wall
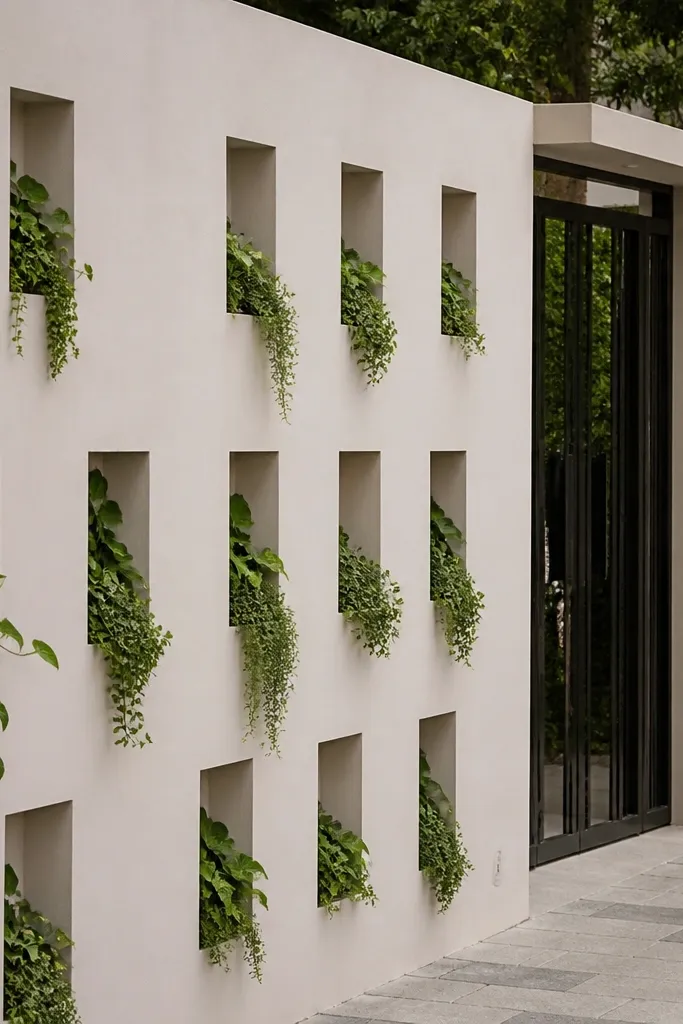
Planter niches turn a boundary wall into a living facade without needing extra landscaping space. For small-plot compound wall ideas, niches work because they add height interest and break up long stretches. Choose uniform niche sizes and place them in a grid or staggered columns for a clean look. Use outdoor-grade waterproofing so the wall survives monsoon rains and doesn’t stain.
Decide niche dimensions first — a good starting point is 300 mm wide, 250 mm high, and 150-200 mm deep. Build niches into the wall during blockwork or cut recesses after plastering, then line them with waterproof membrane. Install a drainage plan: small weep holes at the bottom and a tray under each niche if you want less mess. Finish the wall around niches with exterior plaster and paint, then add soil and plants that suit the light level.
Paint the inside niche with cement-compatible waterproof coating before adding soil — it stops ugly water marks.
Don’t skip drainage; trapped water will crack plaster and stain the wall face.
17. Accent tile band at eye level with matching corner caps
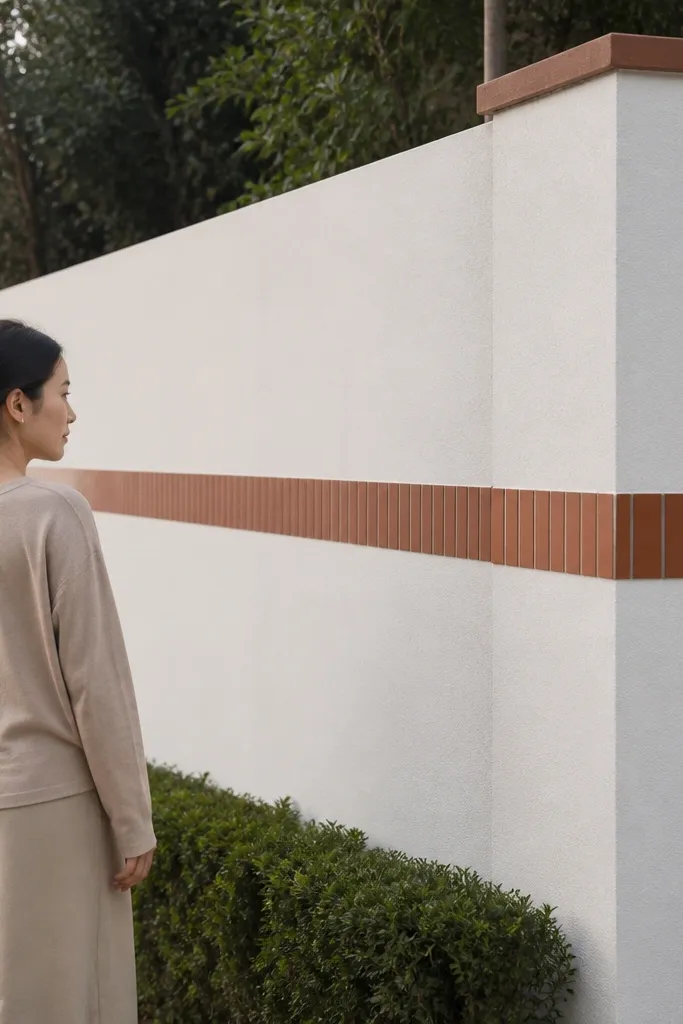
A single accent tile band makes a plain wall look styled, and it’s one of the quickest ways to upgrade curb appeal on small frontages. Place it around eye level so it frames people passing by and looks good in street photos. Match the band with corner cap tiles so the edges look finished. This works well if you don’t want to tile large areas but still want a crisp, premium detail.
Mark a straight line for the band height — about 4 ft from the ground is a good starting point for a 6 ft wall. Install waterproofing primer on the band area, then apply thinset and set tiles in one consistent pattern. Use corner cap tiles or cut tiles with clean 45-degree edges so corners don’t look patched. Grout with exterior grout and seal the grout, then paint the rest of the wall in a matte finish.
Use a laser or long level for the band line; a slightly off band ruins the whole symmetry.
Avoid mixing tile sizes within the band; it creates a wavy look that’s hard to fix later.
18. White wall with olive vertical slats and metal caps
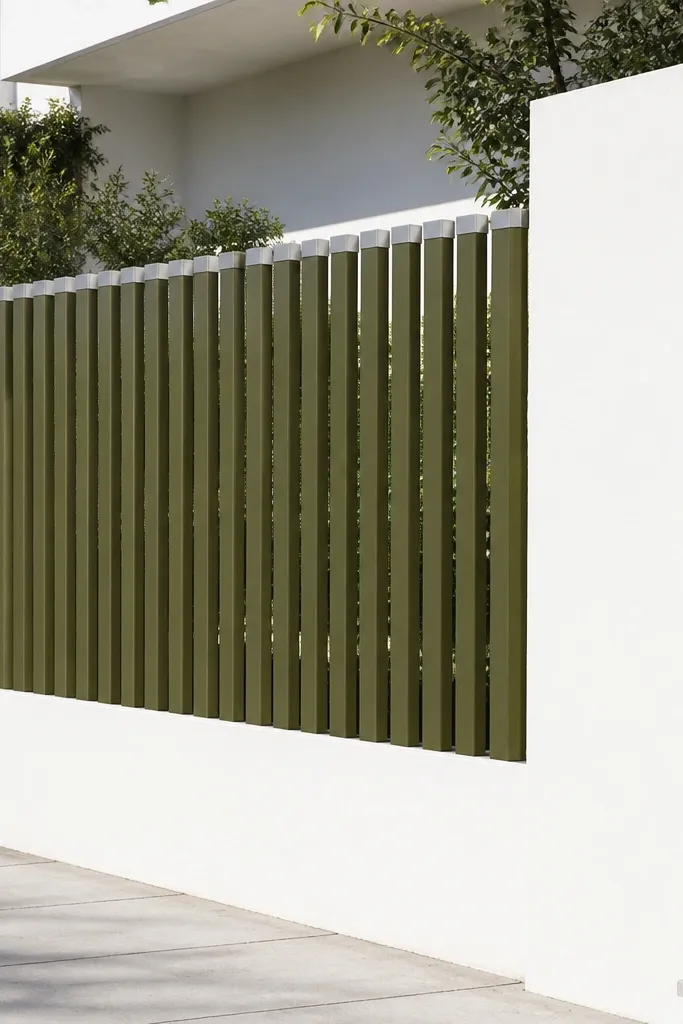
Vertical slats in olive against a white wall look clean and earthy, which is exactly the vibe that flatters small plots. The slats create privacy without fully blocking light, and the metal caps add a sharp, finished top detail. This design is photogenic because the vertical lines pull the eye upward and break up the wall width. It also hides small wall imperfections since slats sit on frames that can be adjusted.
Build a simple frame system using treated timber or aluminum rails fixed with masonry anchors. Install vertical slats at a consistent spacing of 40-60 mm, then paint or powder-coat olive. Add small metal caps at slat ends or at regular intervals to sharpen the top edge. Finish the wall behind slats with exterior plaster and paint so you don’t see patchy edges around the frame.
Editor's notePre-mark slat spacing with a template strip so every slat gap is identical from corner to corner.
Skip thisDon’t mount slats directly on uneven plaster; use rails so the slats stay straight.
19. Cement board paneling with black grout lines
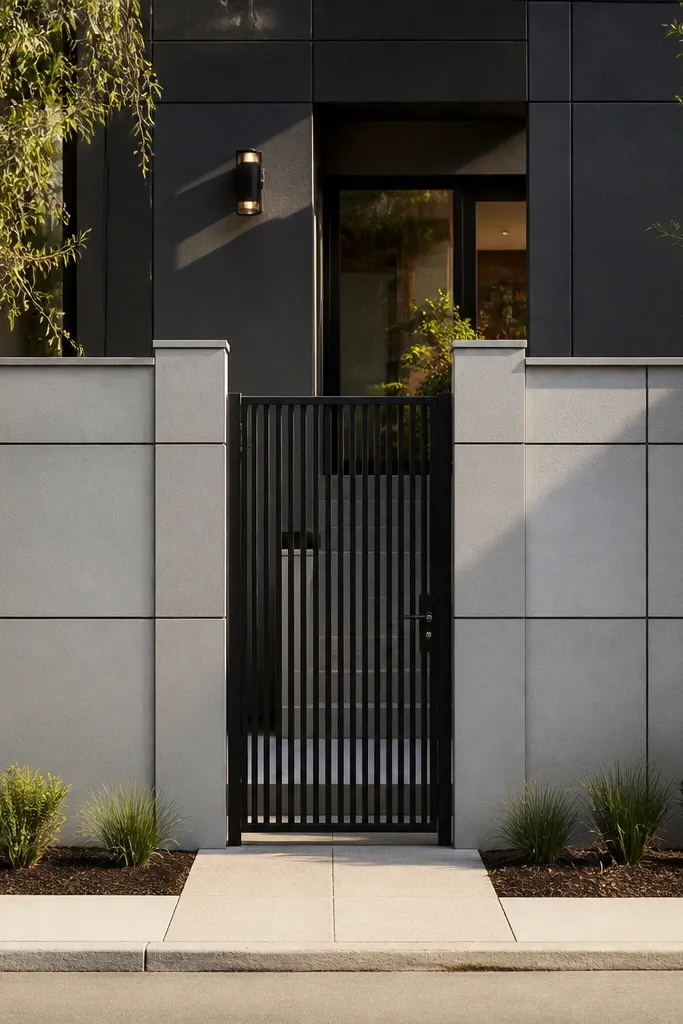
Paneling turns a boring wall into a structured facade. Using cement board sections and crisp black grout lines creates a modern grid without expensive stone cladding. The look is especially good when the panels are centered around the gate and corners, because the grid reads like architecture. This is a good fit for DIY builders who can cut boards accurately and want a repeatable process.
Fix cement board to the wall with proper masonry fasteners, then apply thinset skim coat where needed to remove gaps. Cut panels into rectangles sized to your frontage — for example 600 x 400 mm modules. Apply a thin layer of exterior adhesive and set a thin decorative tile strip or cementitious finish to create the “grout” lines, then fill with black exterior grout or paintable grout. Seal the whole surface with an exterior coating so the panel joints resist water.
Do a dry layout on the floor and measure panel count before you start fixing boards; it prevents awkward slivers on the edges.
Don’t skip sealing panel joints; water will find the seams and stain around the black lines.
20. Color-blocked half moon vents with recessed frames

Half-moon vents look playful but still clean when you keep the frames consistent. A recessed vent frame gives privacy and depth, so you get airflow without a “see-through” feeling. Use one contrasting color for the vent frames, like deep charcoal or muted blue, and keep the wall body in a light neutral. This design works well for small plots where you want ventilation but you also want the wall to photograph as stylish, not purely functional.
Plan vent spacing first — put vents in a vertical rhythm, with one row near mid-height for a 6 ft wall. Cut vent openings into the wall body using a template so the half-moon shape is consistent. Build recessed frames using cement-sand mortar or pre-made vent frames, then install them so the opening sits 30-50 mm inside the wall face. Finish around the frames with exterior plaster and paint in two tones, sealing the vent edges to prevent water ingress.
Editor's noteMake a cardboard template for the half moon and trace it twice before cutting; it saves boards and mortar.
Skip thisDon’t make vent frames flush; flush edges look like rough holes.



