
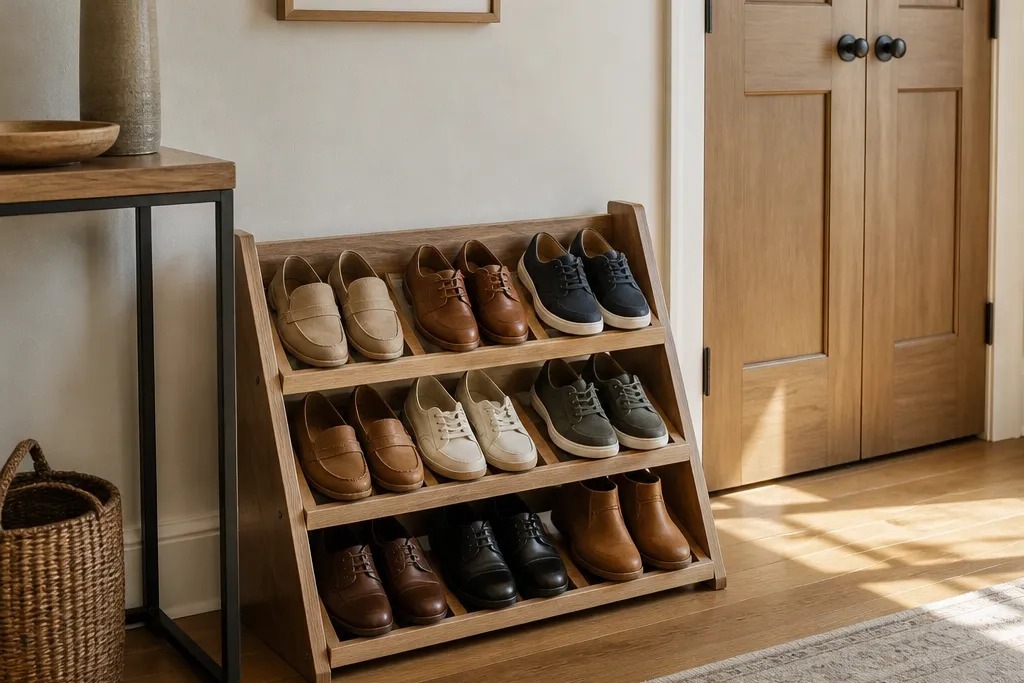
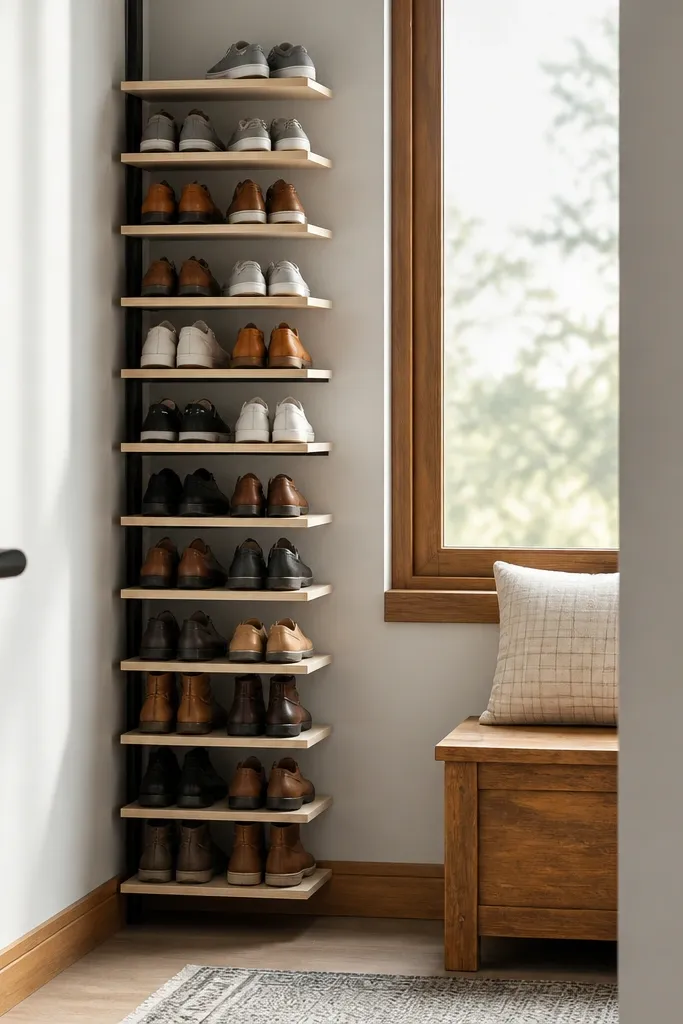
1. Angled Slat Entry Shelf With a 2-Inch Shoe Lip
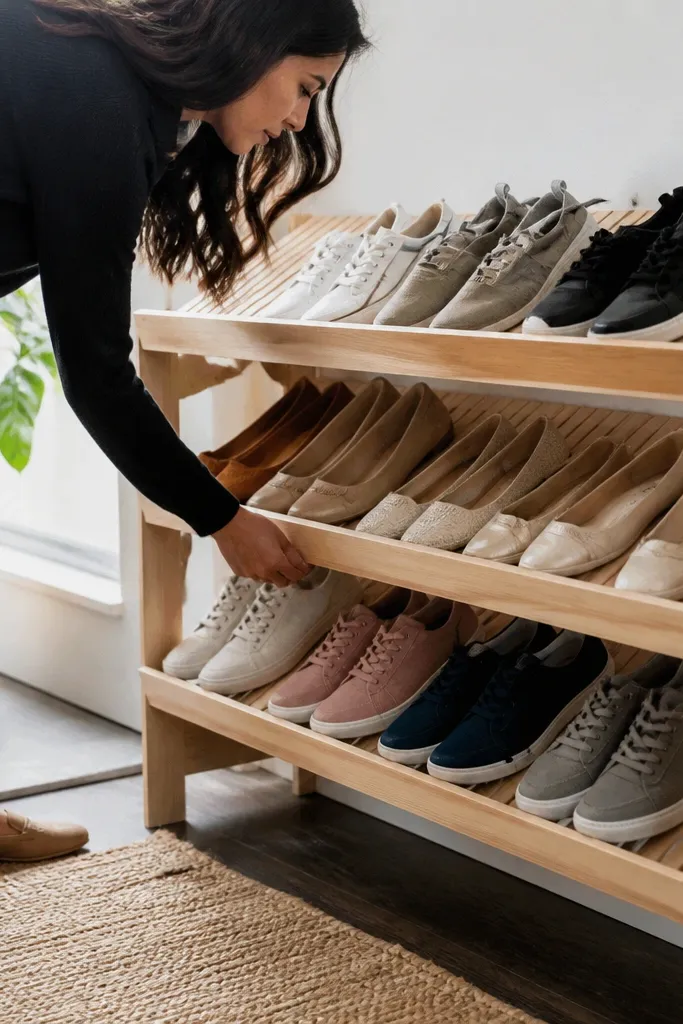
Step 1: Build a simple rectangular frame sized to your space, then attach angled supports that create a 25-35 degree slope for each tier. Step 2: Cut slats from 1x2 or 1x3 boards and screw them across the angle, leaving 1/4-inch gaps for airflow, then add a 2-inch front lip board across the front edge. Step 3: Sand to 150 grit, stain or paint, then seal with a matte poly so scuffs don’t show immediately in a high-touch entryway.
This is the most “reads clean from the doorway” rack style for small entryways because the shoes sit on a consistent angle and the soles line up. The 2-inch lip keeps pairs from creeping forward, so you don’t get that messy toe drift that makes entryways look chaotic. Use slats instead of solid shelves to keep air moving, which helps sneakers dry without smelling. The look is basically a mini shoe library — warm wood, light color contrast, and straight lines that match typical door trim. It’s a solid DIY choice if you can cut repeated slats and you want it to look custom without fancy joinery.
Skip thisDon’t use solid shelves if you store damp shoes; the rack will trap moisture and smell.
Editor's noteClamp a straight scrap board as a “lip guide” so the lip stays level across every tier.
2. Slim Wall-Mounted Cubbies in a 6-Inch Grid
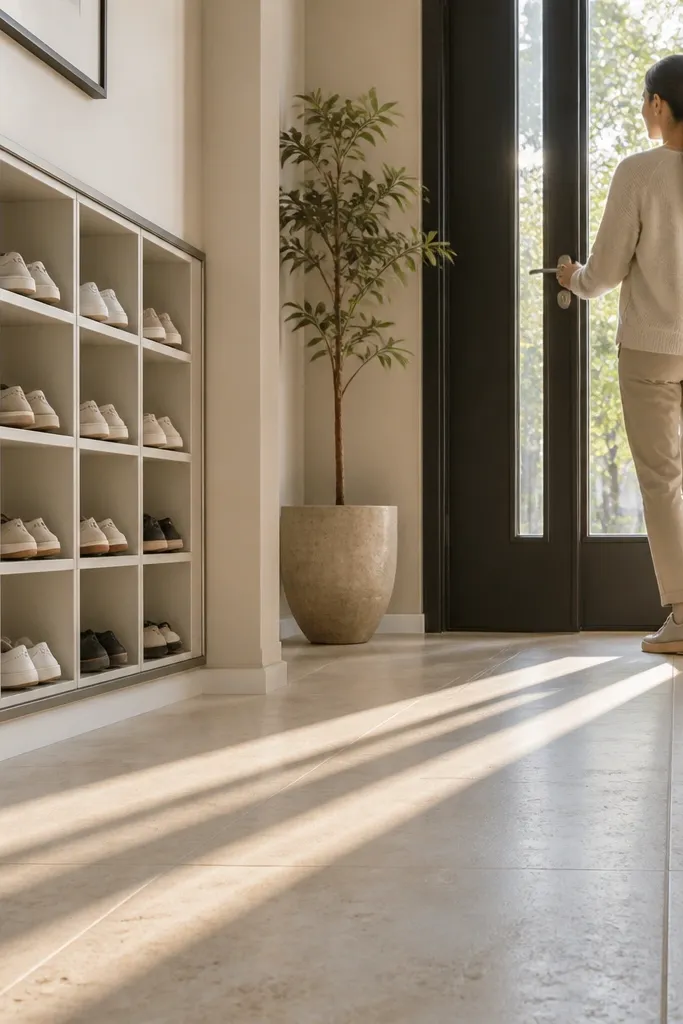
Step 1: Mark and level a ledger rail on the wall, then build a back frame from 1x2 lumber sized to your measured width. Step 2: Add vertical dividers to create 6-inch wide compartments, secure them with screws through the back frame, and keep the compartment depth shallow at 9-10 inches. Step 3: Add a top trim board, then paint everything satin white or match your trim color for a built-in look.
A wall-mounted cubby grid is the cleanest way to get storage without eating floor space. In small entryways, the floor is where clutter becomes visible, so keeping everything off the ground instantly makes the space look larger. Use a 6-inch grid because it fits low-top sneakers and most flats while still looking organized. The open-front look is modern, but you need consistent spacing and a matching finish so it doesn’t look like random boxes. This project is also great if you want to store shoes in pairs facing the same direction for fast grabs.
Skip thisAvoid making compartments wider than 7 inches unless you’re storing sandals; wide cubbies look empty and messy.
Editor's noteUse a laser level or a long level for the ledger rail; one crooked line ruins the whole grid.
3. Hanging Rope and Wood Slat Shoe Rack
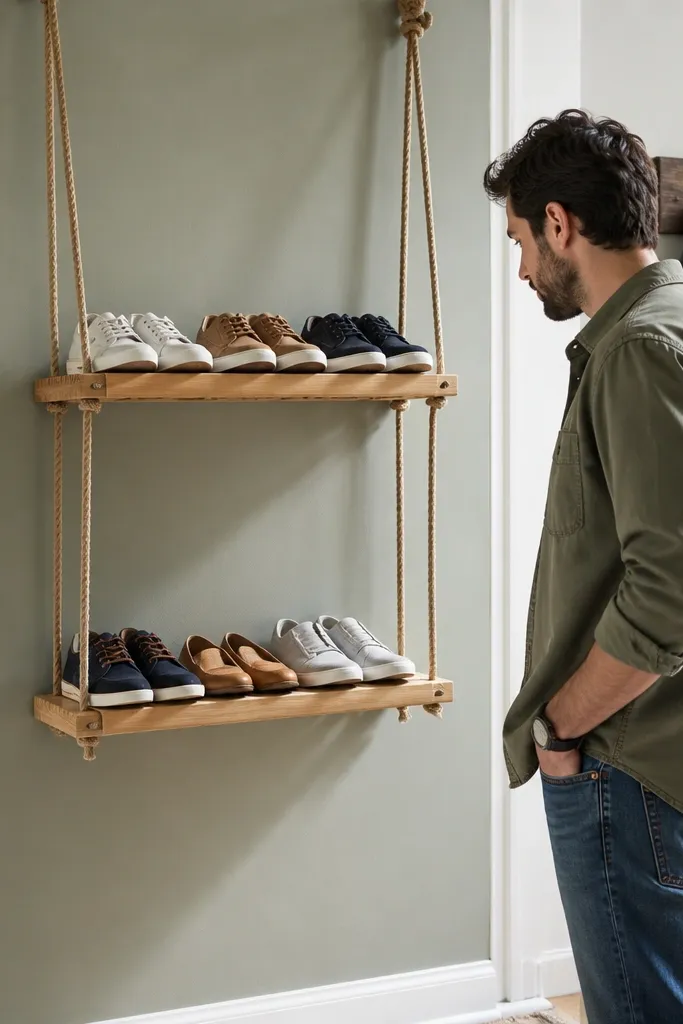
Step 1: Mount two heavy-duty ceiling or wall anchors with a level line between them, then cut rope pieces to match your desired platform heights. Step 2: Make each platform from a frame of 1x3 boards with slats spaced 1/4 inch apart, then tie rope to the four corners so each platform stays level. Step 3: Hang 4-6 platforms, starting with the lowest at about 6 inches above the floor to avoid toe bumps, then finish the wood with matte clear coat.
If your entryway is narrow but tall, hanging platforms solve storage without requiring floor depth. The rope-and-wood look feels light, so it doesn’t visually weigh down the wall. Place shoes on slats with gaps for airflow, and keep the platforms consistent so pairs look aligned. This is a great option for small-space simple shoe rack ideas because it uses vertical space and keeps the entryway airy. Build it with sturdy rope and solid slats so it holds weight without sagging.
Skip thisDon’t use thin decorative rope; it stretches and the slats start to sag.
Editor's notePre-tension the rope before tying knots so the platforms don’t settle crooked after a few weeks.
4. Two-Tier Bench Rack With a Front Toe Stop
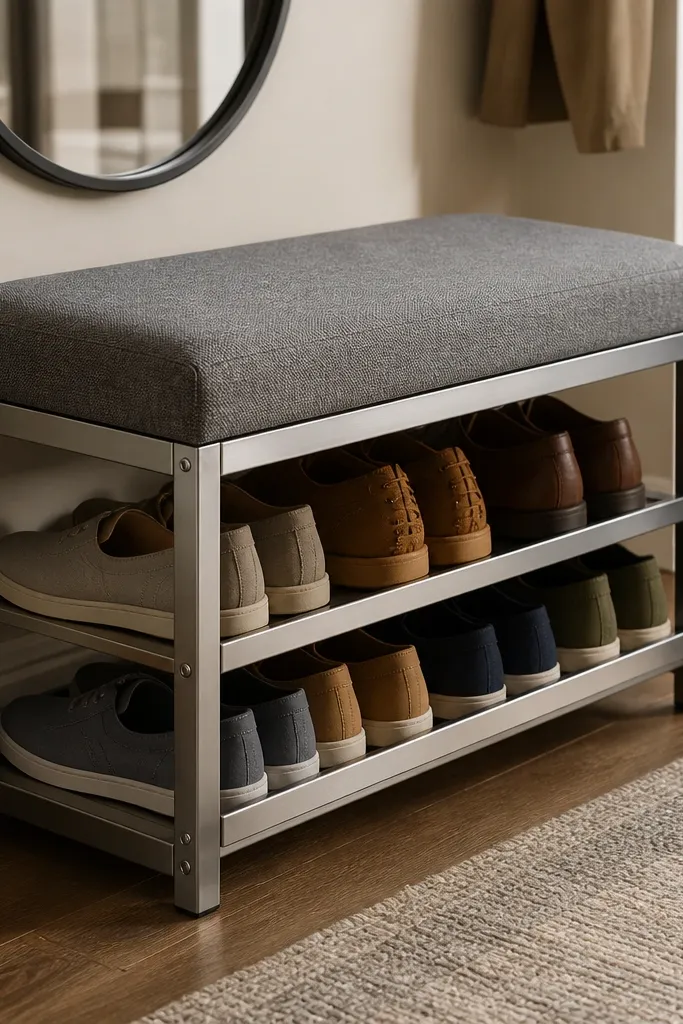
Step 1: Build a bench frame sized to your width, then add two internal shelf levels with a 10-12 inch depth each. Step 2: Install a continuous front toe stop lip board on the upper tier and a shorter one on the lower tier, then add a back brace so pairs don’t fall backward. Step 3: Sand and finish the bench top first, then add a simple top cushion or leave it flat with a sealed surface that wipes clean.
A bench-style shoe rack is the fastest way to make a small entryway feel complete, because it gives you a place to sit while also hiding shoes. The toe stop lip keeps shoes from sliding forward, which is the difference between “cute bench” and “pile of shoes.” Two tiers is the sweet spot for tight spaces: enough capacity without turning the front into an overwhelming block. Use a wood frame with a contrasting toe stop, and add an open lower tier for airflow. This looks intentional even if you don’t keep every pair perfectly aligned.
Skip thisDon’t make the shelves fully enclosed; trapped air makes the bench smell like wet shoes.
Editor's noteMake the toe stop removable with screws if you want to adjust spacing later.
5. Recessed Look Rack Using a Narrow Frame and Wire Baskets
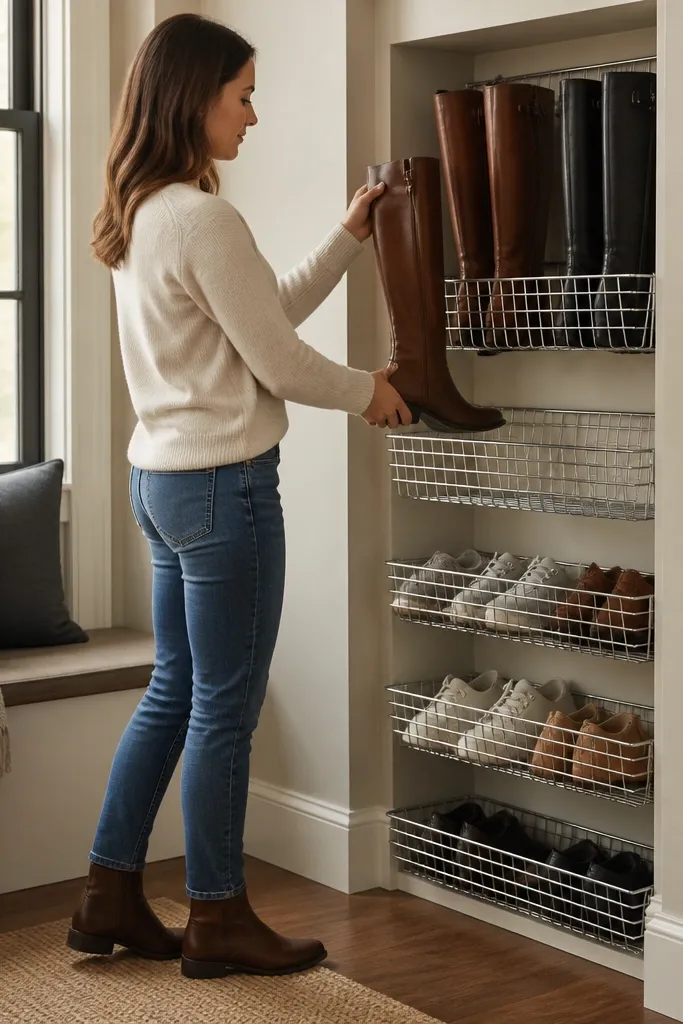
Step 1: Build a narrow outer frame (depth 12-14 inches) and mount it to studs, then add horizontal rails spaced to match wire basket heights. Step 2: Slip in wire baskets sized so there’s 1 inch of clearance on each side for smooth insertion. Step 3: Finish the frame with matte black paint and seal any wood edges so the unit wipes clean.
Wire baskets inside a slim frame give you the “contained but breathable” look. The wire keeps shoes from trapping moisture, and the frame makes it look built-in rather than like random bins. For small entryways, this design is especially good because it keeps tall boots and sneakers separated visually. The recessed look also reduces the visual clutter effect you get when shoes sit on open shelves. It’s a great aesthetic choice if you like dark accents and want the rack to look crisp.
Skip thisAvoid flimsy baskets; thin wire bends and makes the whole unit look sloppy.
Editor's noteHang baskets so their front edge sits 1-2 inches behind the frame face; it hides the mess when you’re busy.
6. Stacked Pegboard Shoe Display With Numbered Hooks
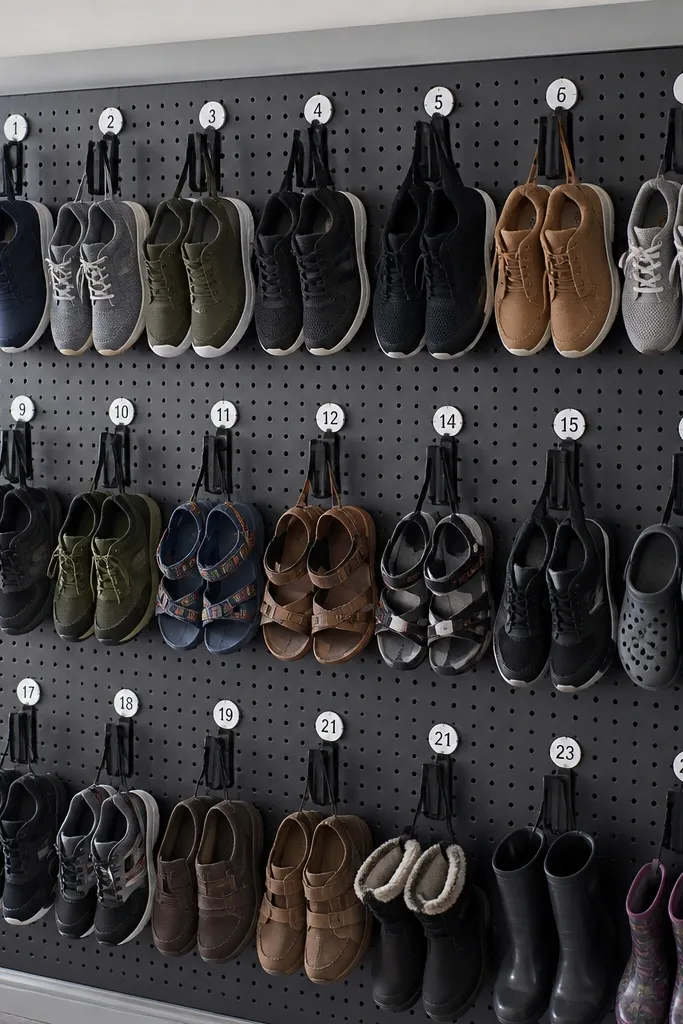
Pegboard is one of the best small-space simple shoe rack ideas because it’s modular and the wall becomes the storage. Numbered hooks make it look organized even when you rotate shoes — every pair has a home and a consistent direction. This works best for shoes with loops, laces, or straps you can hang without deforming. The look is clean and practical, and it suits entryways that already lean workshop-industrial or Scandinavian. It’s also fast to build, and you can expand later by adding pegs and hooks.
Step 1: Cut pegboard panels to fit your wall width, then mount to studs with spacers so it sits straight. Step 2: Install hooks for each shoe pair and add a simple numbering strip with small vinyl labels so the layout stays consistent. Step 3: Hang shoes by laces or straps using the hook positions, then add a clear matte top coat for easy wipe-down.
Use hooks with rounded ends so laces don’t snag and the shoe shape stays cleaner.
Don’t hang heavy boots on thin hooks; it warps the pegboard and pulls the layout crooked.
7. Corner Ladder Rack With Short Shelf Steps
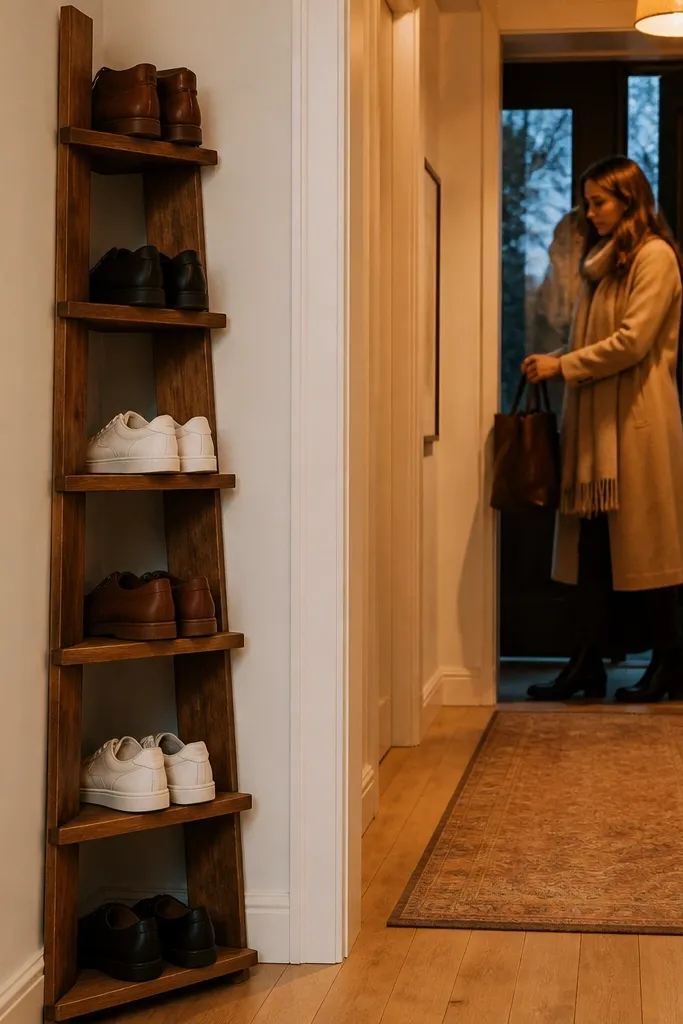
Step 1: Build two ladder side rails and add short step shelves between them, keeping shelf depth around 10-11 inches. Step 2: Space steps 7-8 inches apart so sneakers and flats stack without rubbing. Step 3: Sand, paint with enamel for smoothness, and anchor the unit to the wall studs with anti-tip hardware.
A corner ladder rack turns dead space into storage and keeps your entryway looking intentional because the geometry is built-in. The angled “step” shelves show off the shoes neatly, and the corner placement hides the rack from the main walking line. This design is photogenic because it creates a vertical rhythm and gives each pair a distinct spot. It’s best for small entryways where wall space is limited but corner space is available. Build it with a clean white paint or a wood finish that matches your door frame.
Skip thisAvoid leaving it un-anchored; ladder racks tip easily when you grab shoes fast.
Editor's notePre-drill and countersink screw holes into the side rails so you don’t get ugly hardware heads.
8. Bamboo Slat Shoe Drawer Rack (No-Tools Look)
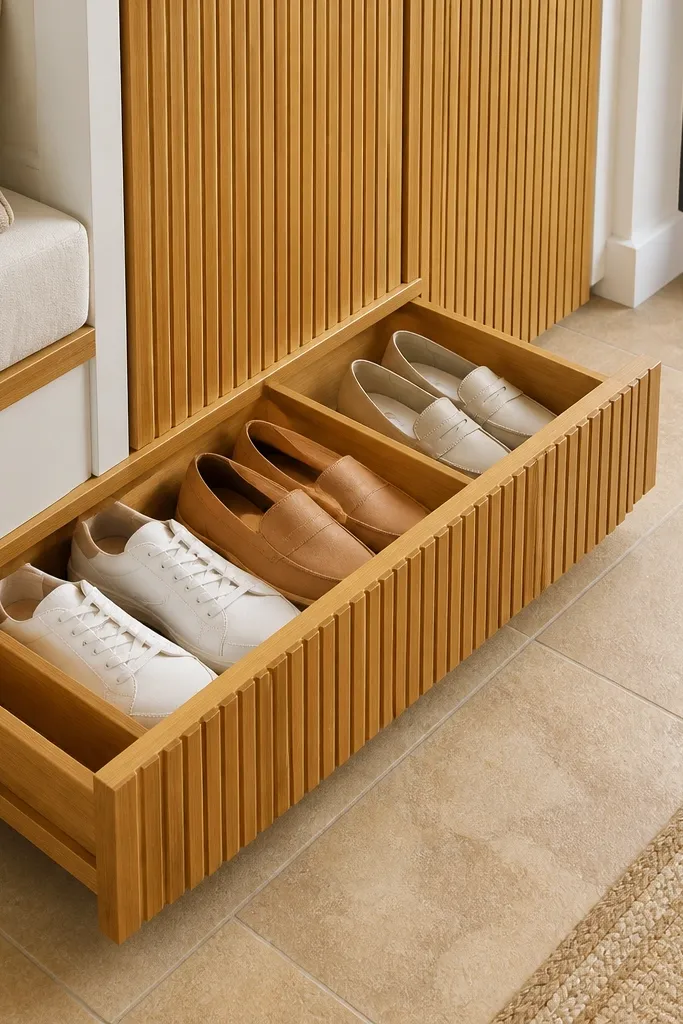
Step 1: Build a shallow outer cabinet frame with 2-3 compartment openings sized to your shoes, keeping depth around 14 inches. Step 2: Create each pull-out unit from a slatted base frame, then attach drawer slides rated for the weight of shoes plus a little extra. Step 3: Install handles, then sand and seal bamboo with a matte clear coat.
If you want small-space simple shoe rack ideas that look calm and organized, a drawer-like slat rack is a great move. Bamboo slats create a warm, natural texture, and the pull-out compartments hide the messy part of shoe storage. This is ideal for families where multiple people use the same entry, because you can slide compartments closed when guests arrive. The slats also keep airflow, so you’re not trapping dampness. Build this if you’re comfortable with basic rails and simple frames.
Skip thisDon’t skip drawer slide alignment; misaligned slides make compartments look crooked fast.
Editor's noteUse soft-close drawer slides if you want the rack to feel more “furniture” and less DIY.
9. Reclaimed Wood Crate Side Rack With Matching Liners
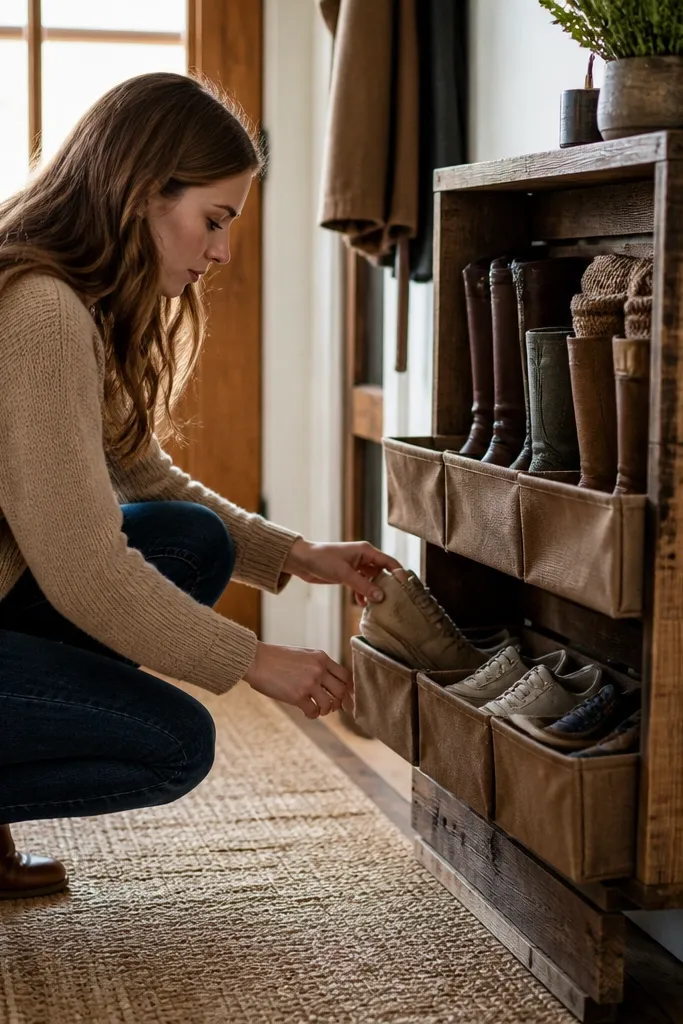
Step 1: Choose crate frames with similar dimensions, then cut and reinforce corners so they stack or mount securely as a single rack unit. Step 2: Add liners made from canvas or indoor-outdoor fabric, sized to fit each compartment, and attach using staples or Velcro strips. Step 3: Seal reclaimed wood with a clear matte finish to reduce grime and scuffs, then mount to the wall or place on a stable base.
Crates look great in a small entryway when you control the visual mess. The wood gives you texture, but the liner keeps shoes from looking chaotic, especially when you have tall boots and low sneakers in the same area. This idea works best when your entryway already has warm tones — like oak, tan tile, or wood doors. It also gives you a slightly rustic aesthetic without going full farmhouse clutter. If you like “collected but neat,” this is a smart build.
Skip thisDon’t leave crates raw; they stain quickly from shoe dirt.
Editor's noteUse the same liner color across every crate; it keeps the whole rack from looking patchy.
10. Clear-Back Organizer Rack With Fabric Doors
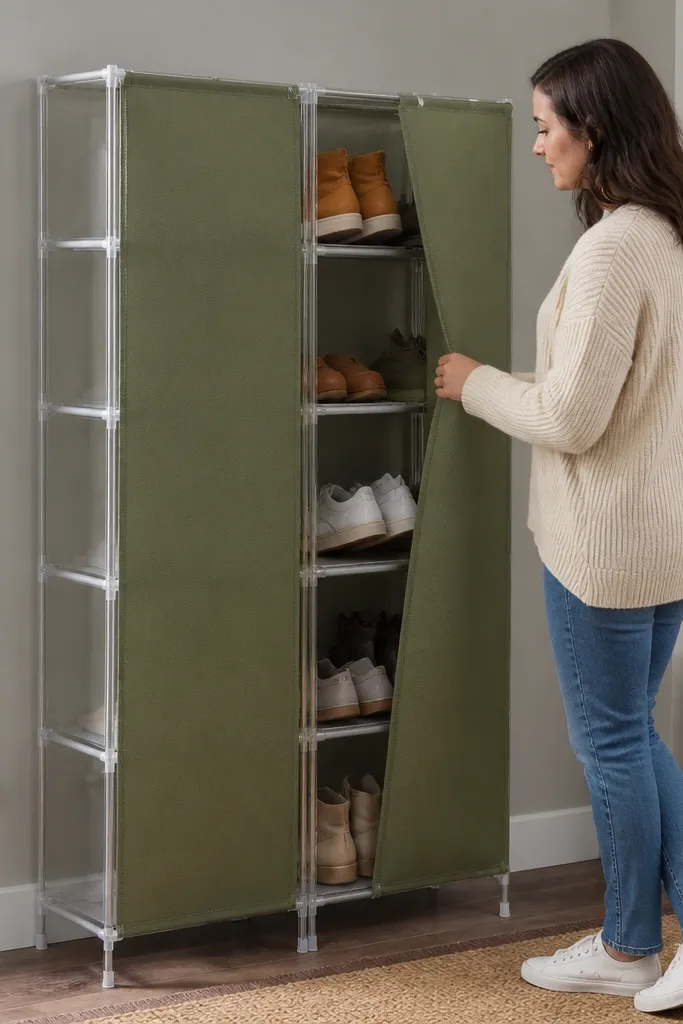
Step 1: Build a slim cubby frame with open fronts, then add a clear back panel using acrylic or polycarbonate sheets. Step 2: Cut fabric panels to cover cubbies and attach them to the frame with Velcro at the top and sides. Step 3: Add a bottom lip board so shoes don’t slide forward, then seal wood edges and test door fit before final mounting.
A clear-back organizer with fabric doors gives you the best of both worlds: contained look and easy airflow. The clear back keeps the structure visually light, while the fabric doors hide the mess when you’re not keeping shoes perfectly aligned. This is great for entryways where you want storage but you don’t want the rack to look like open shelving. It also makes the rack easier to clean because the doors wipe down and the shoes stay in place. Build it if you want a cleaner, softer look than wire or wood-only designs.
Skip thisAvoid fully enclosed doors without venting; choose fabric that lets air move around shoes.
Editor's noteUse magnetic snaps on the fabric doors so they close flat and don’t sag.
11. Metal Pipe and Wood Shelf Rack With 10-Inch Tiers
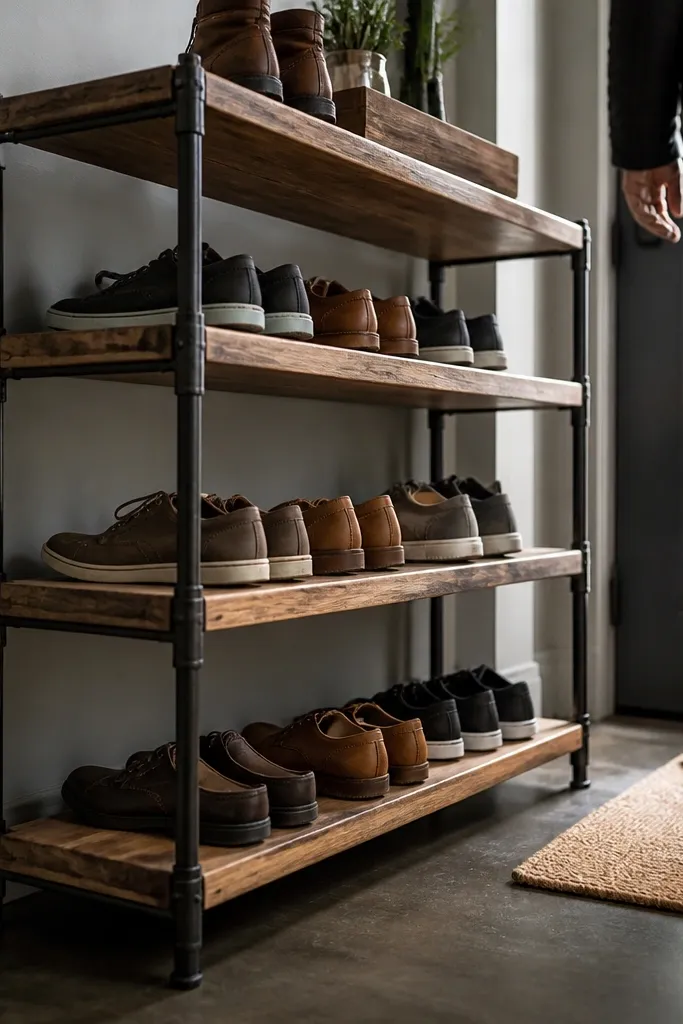
Industrial metal pipe with wood shelves looks sharp and structured, which is exactly what small entryways need. The open metal frame keeps the rack visually light, and 10-inch tiers prevent shoes from slumping forward. This style is also easy to customize because you can set shelf heights to match your shoe sizes. It’s a great choice if your entryway has black hardware or a dark front door. The look is crisp, and it hides dust better than light-colored solid shelves.
Step 1: Assemble a pipe frame with two vertical uprights and two or three horizontal shelf supports, then cut wood shelves to 10-11 inches deep. Step 2: Drill pilot holes and screw shelves to flanges, keeping spacing around 7-8 inches between tiers. Step 3: Sand and seal the wood with a satin finish, then secure the frame to the wall studs with anti-tip brackets.
Use shelf boards with a slight edge bevel so the corners don’t look harsh in photos.
Don’t skip anti-tip; pipe frames still tip when you yank shoes out.
12. Fold-Down Shoe Shelf Hidden in a Wall Panel
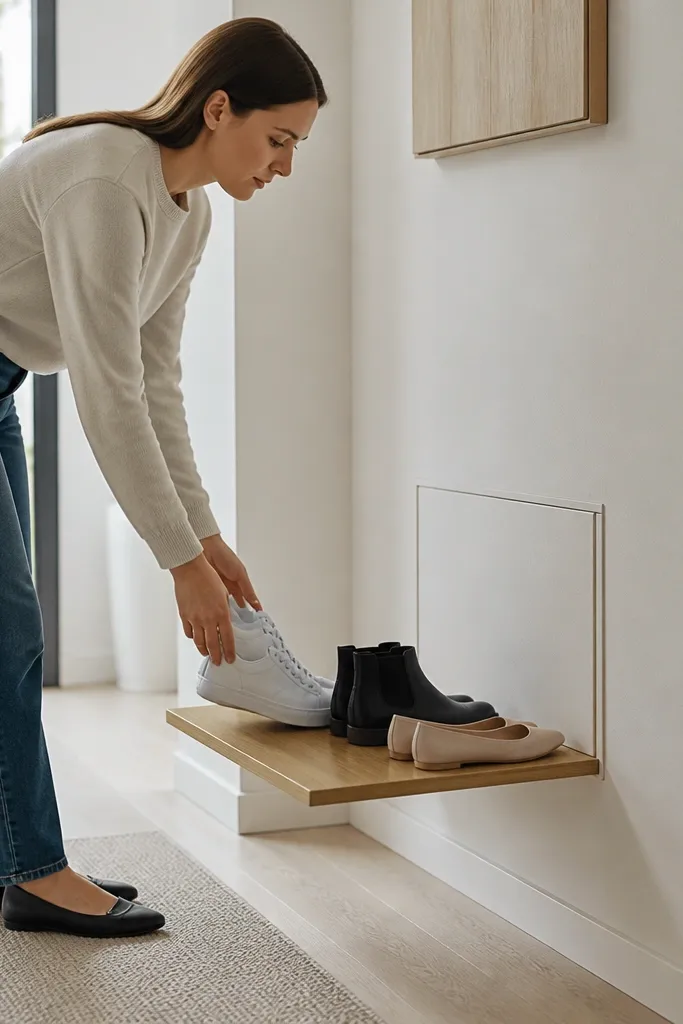
A fold-down shelf is the ultimate small-space simple shoe rack idea because the rack disappears when you don’t need it. In tiny entryways, visual clutter is the real problem, and flush storage beats open racks every time. When the shelf is down, it holds shoes neatly on a shallow deck, and you can add a front stop so pairs don’t slide. This looks like built-in cabinetry even though it’s a straightforward carpentry project. It’s best for entryways with very limited floor and wall space where you want the wall to stay clean.
Step 1: Build a wall panel frame and mount it level to studs, then cut a hinged shelf deck sized to your shoe width. Step 2: Install heavy-duty hinges and a front stop board that drops into place or locks when the shelf is open. Step 3: Finish the panel to match trim, then add a soft-close hinge or damper so it doesn’t slam.
Use a rubber bumper on the hinge side so the panel closes quietly and doesn’t chip paint.
Don’t make the shelf deck too deep; if it projects past 12 inches, it blocks walking traffic.
13. Stackable Acrylic Shoe Blocks for a Gallery-Look Entry
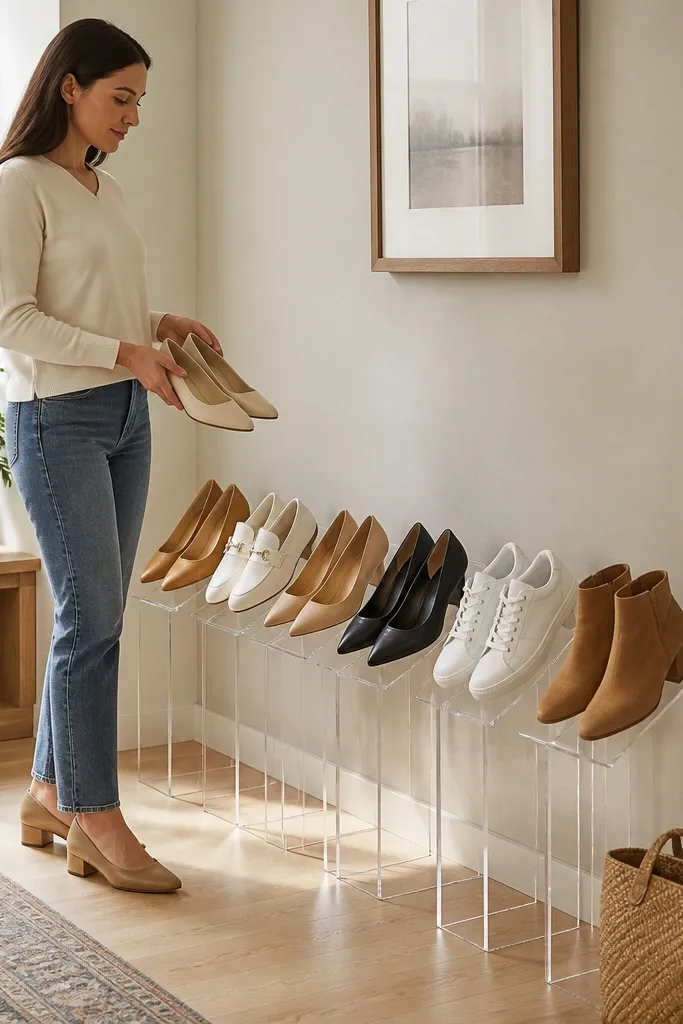
Clear acrylic blocks create a gallery-like look, and that transparency keeps the entryway from feeling packed. Shoes sit upright at consistent angles, and because the blocks are uniform, the whole setup reads tidy even when you rotate pairs. This is a great option for small entries where you want “display” energy without the messy look of open shelves. It’s also excellent for organizing shoes by color or style. Choose blocks with curved edges so shoes sit without scuffing.
Step 1: Pick acrylic blocks sized for your most common shoe type, then arrange them on the floor with 1-2 inches between stacks for stability. Step 2: Add one backstop row using a slim acrylic strip against the wall so pairs don’t tip forward. Step 3: Clean and polish the acrylic, then anchor the backstop strip or use non-slip pads under blocks.
Use felt pads on the underside of blocks to protect tile and prevent sliding.
Avoid flat-bottom blocks on glossy tile without pads; they skate when you grab shoes.
14. Curtain-Hidden Shoe Rack With Bottom Vent Slats
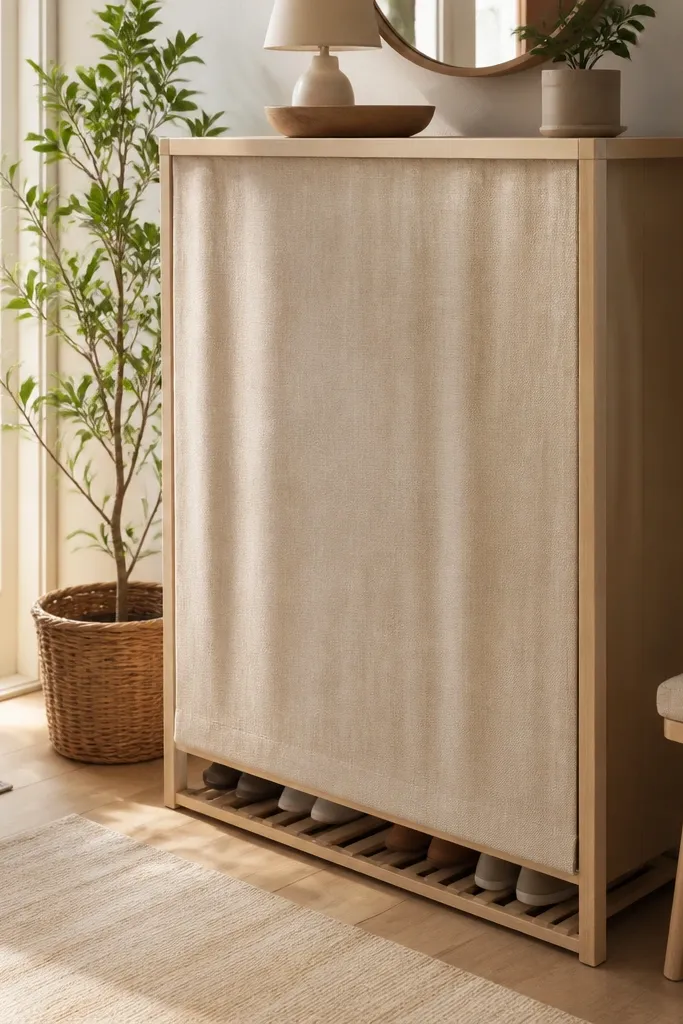
A cabinet body with a curtain front is the cleanest way to hide shoes in a small entryway without building doors. The curtain softens the look, and vented bottom slats keep airflow moving so shoes don’t turn musty. This style works well if your entry already has a coat closet or bench and you want the shoe storage to match. It also helps if multiple people use the space — curtains forgive imperfect alignment. Build a compact cabinet with a slim footprint so it fits tight hallways.
Step 1: Build a compact cabinet frame, then add an internal shelf system that keeps shoes in pairs with 2-3 inches of clearance between tiers. Step 2: Install bottom vent slats using 1x2 strips spaced 1/4 inch apart, then hang a curtain rail at the top of the cabinet opening. Step 3: Add a magnetic or Velcro closure at the sides so the curtain stays centered and doesn’t billow.
Choose a curtain fabric that can handle shoe dust; indoor-outdoor canvas wipes cleaner than thin cotton.
Don’t block the bottom with a solid panel; airflow has to happen somewhere.
15. Peg Rail + Basket Combo for Kids Shoes
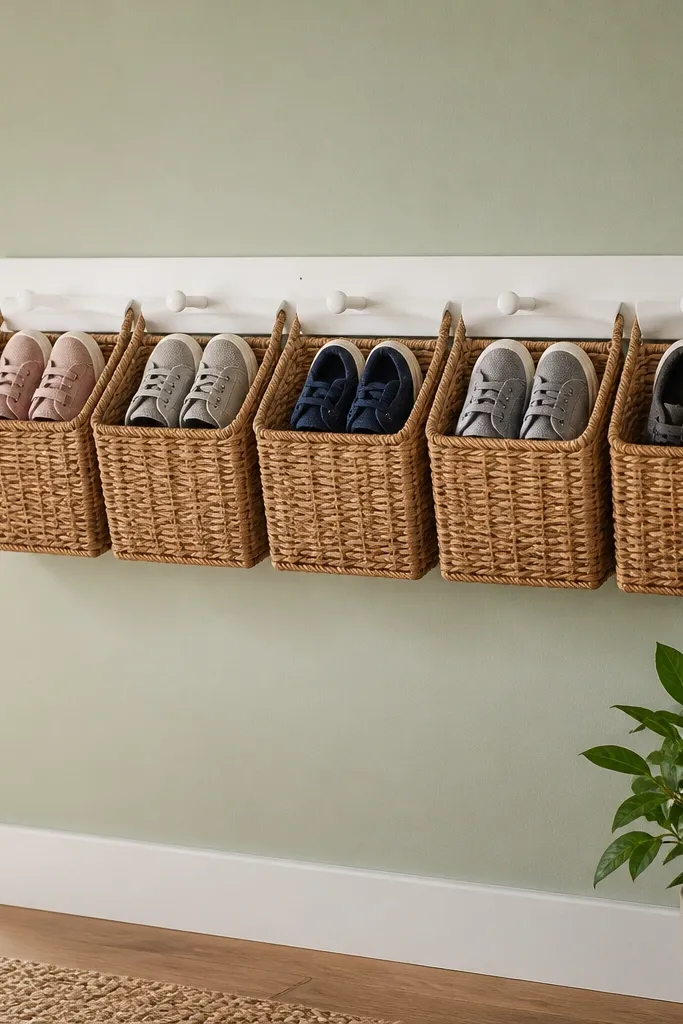
Step 1: Mount a peg rail to studs at a reachable height, then install basket hooks or small brackets spaced evenly across the rail. Step 2: Add wire or plastic baskets sized for sneakers and flats, with 8-10 inches of basket width per pair. Step 3: Label baskets with color-coded tape, then add a floor mat or small rug so shoes don’t track dirt outside the rack zone.
Kids' shoes multiply fast, and open racks look messy because sizes vary. A peg rail with small baskets keeps each size group contained, while the peg rail makes the storage line up neatly at eye level. This is a small-space simple shoe rack idea that stays photogenic because the baskets create uniform blocks of color and shape. It also makes grab-and-go easier since baskets are lighter than shelves. If your entryway has a family schedule vibe, this setup is more functional than it looks.
Skip thisAvoid oversized baskets; they make shoes slouch and the whole rack looks untidy.
Editor's noteUse baskets with front handles; it keeps kids from yanking and knocking them over.
16. Stair-Step Shoe Rack Inspired by a Bookcase Scale
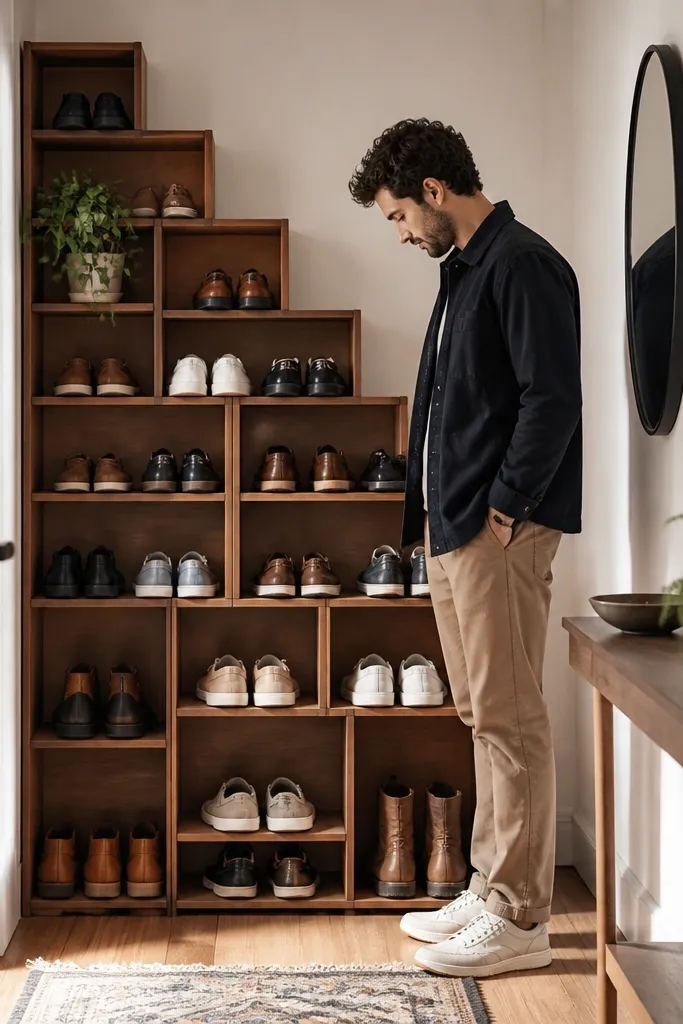
Step 1: Draw a staircase layout where each step changes height by about 3-4 inches, with shelf depth around 10-12 inches. Step 2: Cut side panels and shelf supports, then screw shelves into supports with consistent angles so the pattern stays straight. Step 3: Sand, paint or stain, then add a back cleat board to keep shoes from sliding backward.
Stair-step shelving looks good because it creates a pattern, not a grid. Alternating shelf heights hides empty space and gives shoes a consistent visual rhythm, which matters in small entryways where you see the rack from multiple angles. This design is especially flattering for sneakers, because the shoes sit at slightly different heights but still read organized. It’s also a great way to use odd wall widths since you can scale the steps. Build it in wood or paint it to match your trim for a furniture look.
Skip thisDon’t make shelves the same height; the pattern effect disappears.
Editor's noteUse a single spacer block to set every shelf height so the pattern stays crisp.
17. Slim Shoe Rack With Removable Drying Tray Bottom
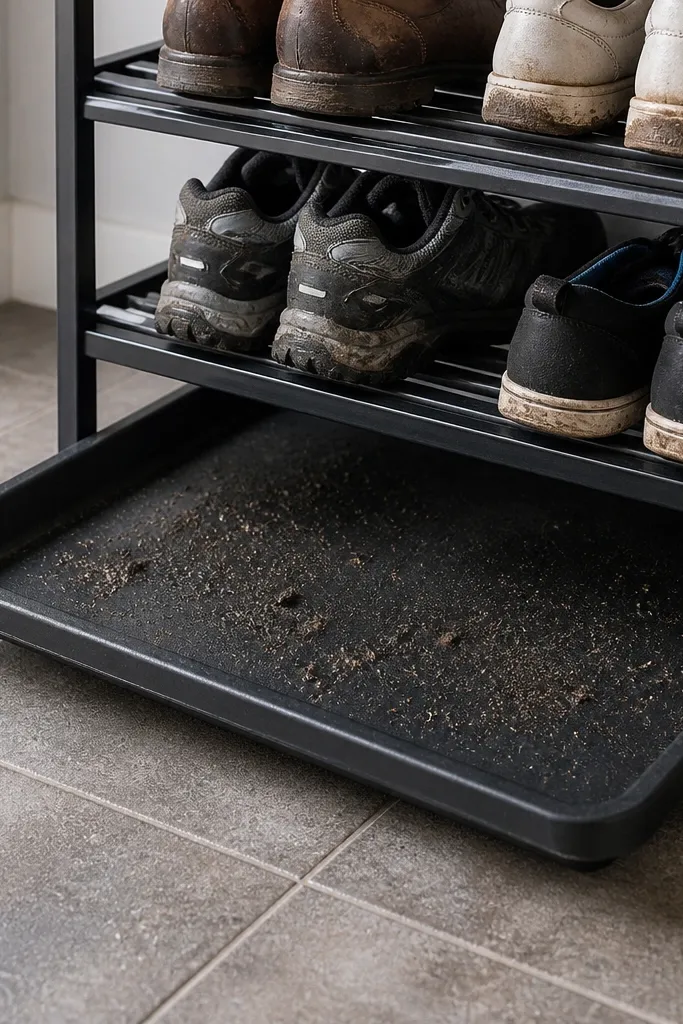
This one is built for real life: shoes get damp, and you don’t want that moisture trapped in a closed shelf. A removable drying tray bottom keeps water and grit contained while the upper open shelves keep air moving. The look stays clean because the tray pulls out and the rack reads as a tidy unit, not a science experiment. It’s ideal for small entryways where you want a rack that can handle wet weather without wrecking your floor. It looks best with matte finishes and clean lines.
Step 1: Build a slim frame with open upper tiers using slats or wire for airflow, keeping depth around 12-14 inches. Step 2: Install a sliding or hinged removable tray at the bottom sized to catch drips, using plastic or coated metal so it wipes easily. Step 3: Add a front lip on the upper tiers and seal the wood with a water-resistant finish.
Use a tray with raised sides so water doesn’t splash when you pull it out.
Avoid untreated wood at the bottom; it will darken from moisture.
18. Stacked Floating Ledge Rack With Hidden Fasteners
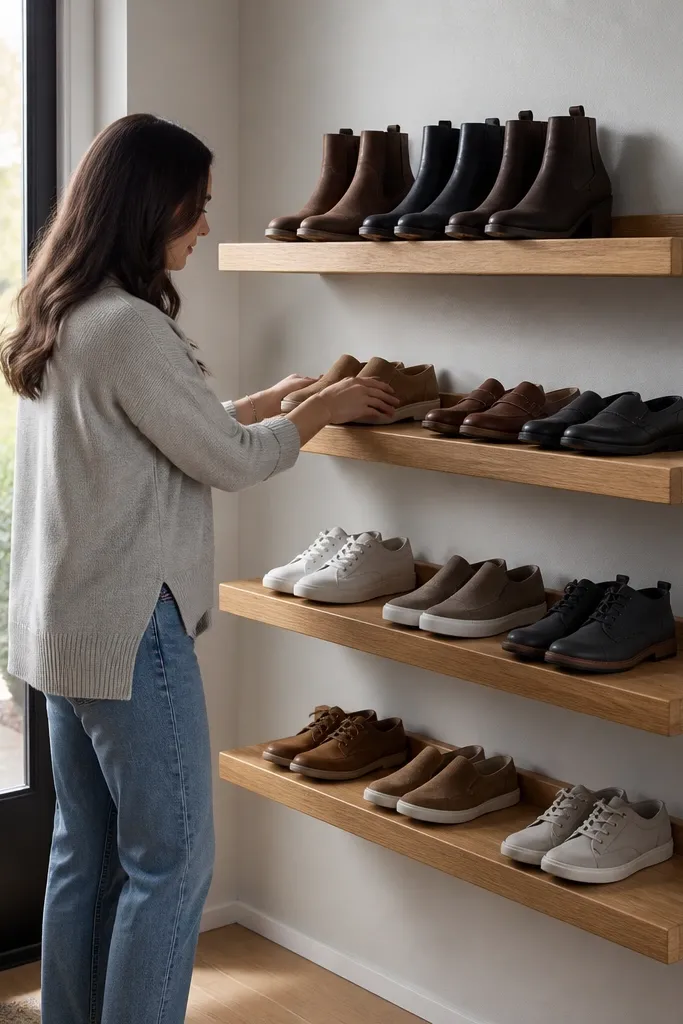
Floating ledges look built-in because the supports disappear and the shelves look like they’re floating on the wall. In a small entryway, that visual lightness matters, and it makes the rack look more like furniture than storage. Use ledges with a slight back lip so shoes don’t slide, and keep shelf depth around 10 inches for a clean footprint. This style is also great for organizing boots and sneakers side-by-side if you space tiers correctly. It’s a good DIY choice if you can measure precisely and drill straight.
Step 1: Decide your shelf spacing based on your tallest pair, then mark positions and drill mounting points into studs. Step 2: Build ledges with a 3/4-inch back lip and a 1/4-inch gap between shelves for airflow and dust control. Step 3: Mount using hidden brackets, then fill and sand any screw marks before painting.
Dry-fit the shelves and set a level across the front edge before tightening every bracket.
Don’t mount only to drywall; floating shelves need stud anchors for safety.
19. Woven Basket Shelf Rack With Matching Stain Frame
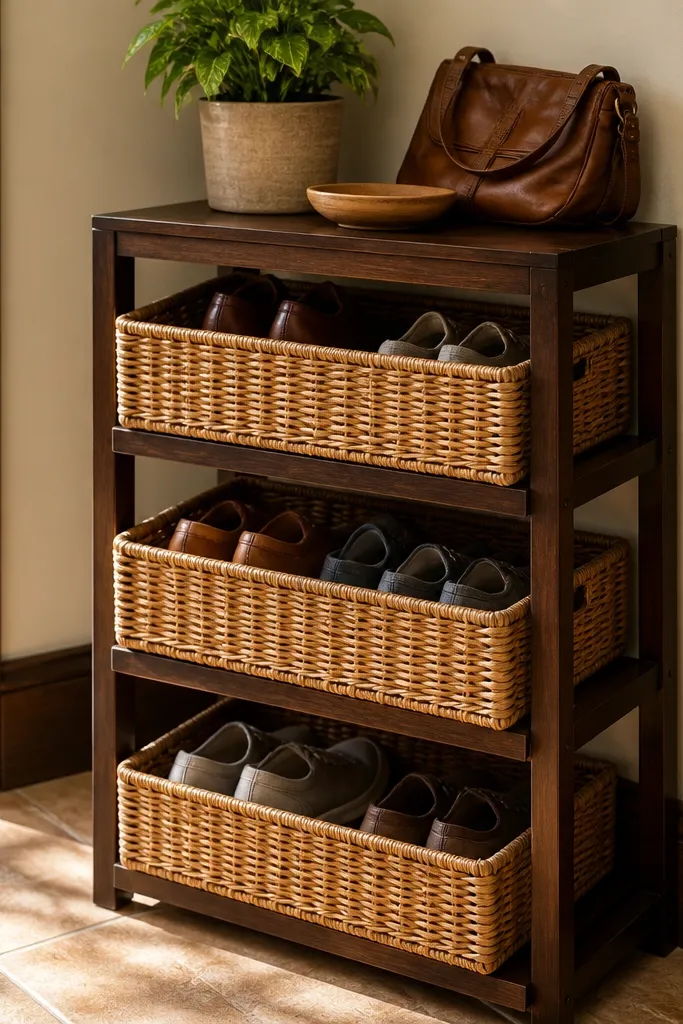
Woven baskets make small entryways look calmer because they create a consistent texture and hide the messy details of laces and soles. A wood frame stained to match your door trim makes it look intentional, not like a temporary storage hack. This is perfect when your shoe collection varies wildly by height, because baskets can hold uneven pairs without looking “wrong.” The baskets also keep shoes contained while still letting air move through the weave. Build this if you want an aesthetic that looks warm and tidy on day one.
Step 1: Build a shallow wood frame with two or three shelves and space them for basket heights, keeping depth around 14 inches. Step 2: Place woven baskets on each shelf, then add a thin front rail board so baskets don’t slide out. Step 3: Stain or paint the frame, seal with matte finish, and wipe baskets clean before final placement.
Choose baskets with the same weave direction so the texture lines up across shelves.
Avoid baskets that are too large; oversized baskets make shoes slump and the unit looks bulky.
20. Doorway Boot Rack Using a Slim Over-the-Door Organizer
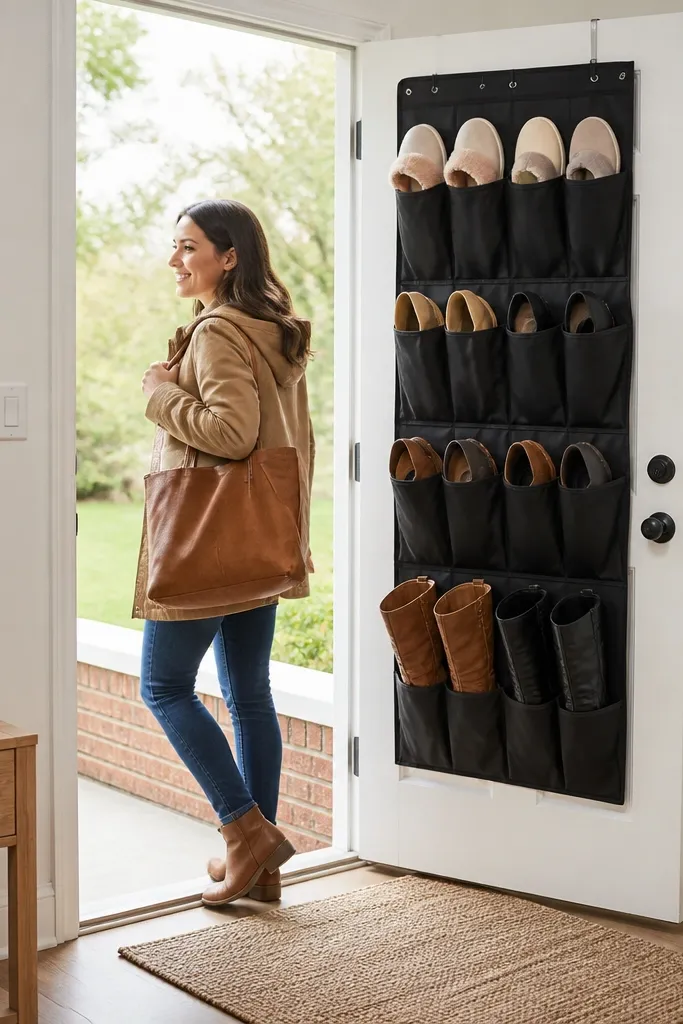
This is the fastest small-space simple shoe rack idea that still looks organized when you do one thing right: keep pockets consistent and face shoes the same way. Over-the-door organizers take almost no floor space, and the pockets create a tidy visual line across the door. It works best for flats, slippers, and some sneakers, and it keeps pairs from turning into a pile near the door. The aesthetic is clean if you choose a neutral color and pair it with a simple door hanger hook for keys. It’s also a practical choice for entryways where you don’t have wall space.
Step 1: Choose a slim over-the-door organizer with rigid pockets and a neutral fabric or coated finish, then hang it level on a sturdy door. Step 2: Insert shoes by sliding them into pockets with toes aligned in the same direction across the organizer. Step 3: Add a small labeled strip at the top for each person or shoe type, then check clearance so shoes don’t rub the door handle.
Use mini non-slip pads behind the pockets if your door moves or if the organizer shifts.
Don’t cram tall boots into shallow pockets; they distort and the whole rack looks messy.



