
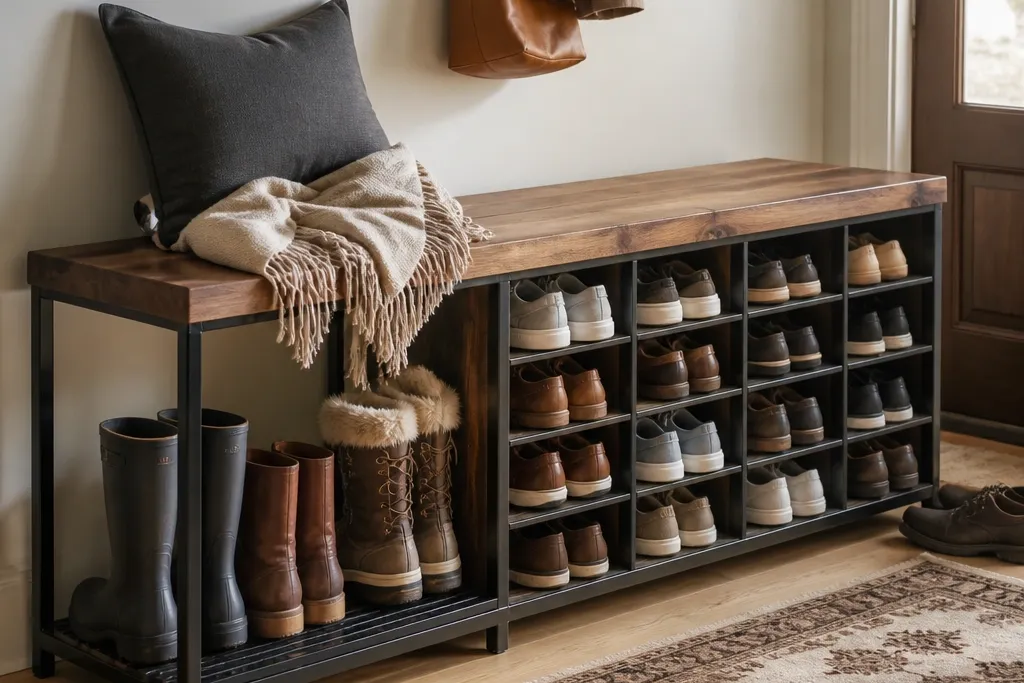
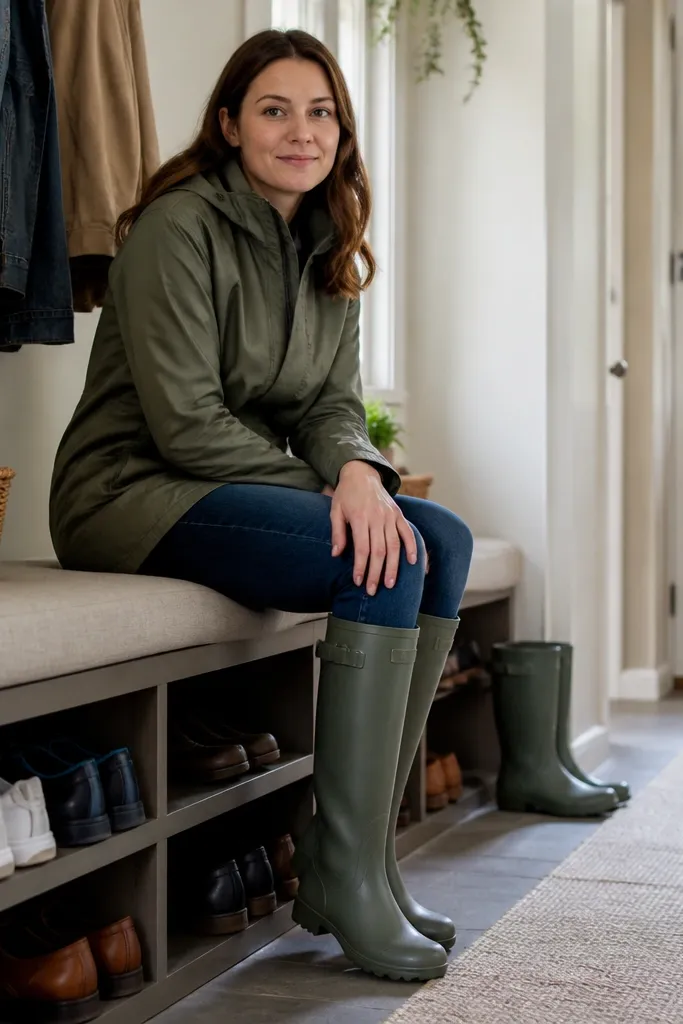
1. Black-metal frame + walnut slat bench with 20-pair open cubbies
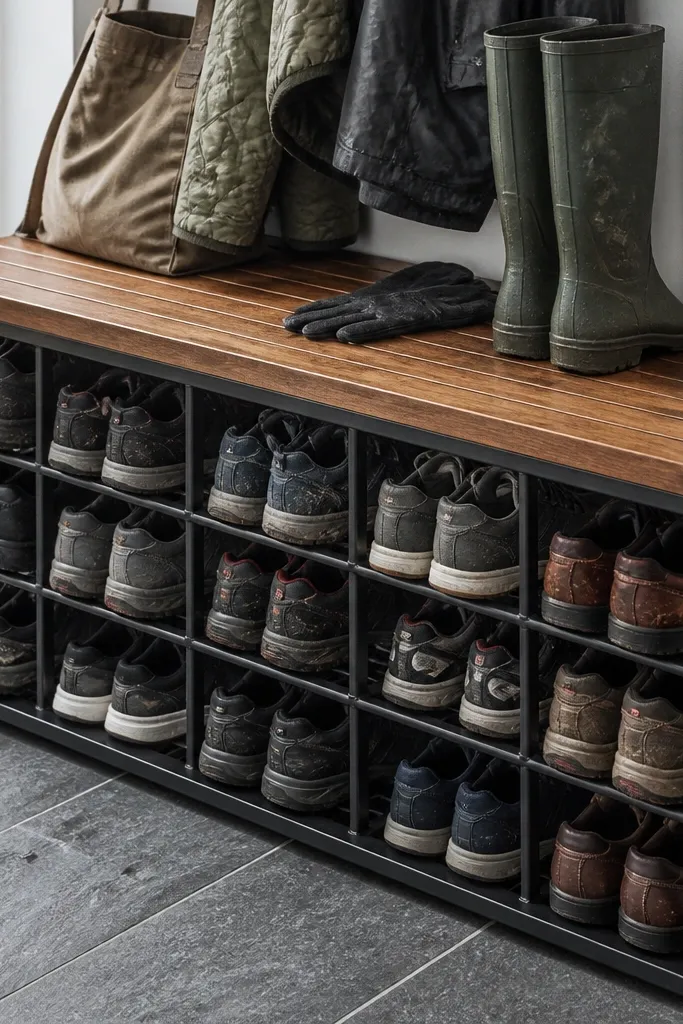
This is the “doorway tidy” build that looks intentional instead of cluttered. The open cubbies let shoes breathe, so wet sneakers don’t trap moisture under doors. Walnut slats on top look warm and expensive, while black metal keeps the lines crisp and modern. You get a year-round shoe rack with seating because the seat is fixed and sturdy, and the shoes are easy to grab without opening anything. Plan for 20 pairs by using 10 in-wide cubbies in two columns and keeping the top bench surface uncluttered.
Editor's noteAdd a 1/4 in back gap behind the dividers so airflow can move through the cubbies.
Build a rectangle frame first using 1.5 in square black steel tubing. Cut two bench side panels and weld or bolt cross supports so the top slats sit evenly at an 18.5 in seat height. Then build a cubby grid with 3/4 in plywood dividers, spacing each cubby about 9.5 in wide and 12 in deep. Finish by staining the slats walnut and sealing with a satin clear coat; install slats with countersunk screws so the surface stays smooth.
Skip thisDon’t make cubbies deeper than 14 in for everyday shoes or you’ll lose the “grab fast” look and function.
2. Shiplap cabinet bench with louvered shoe doors
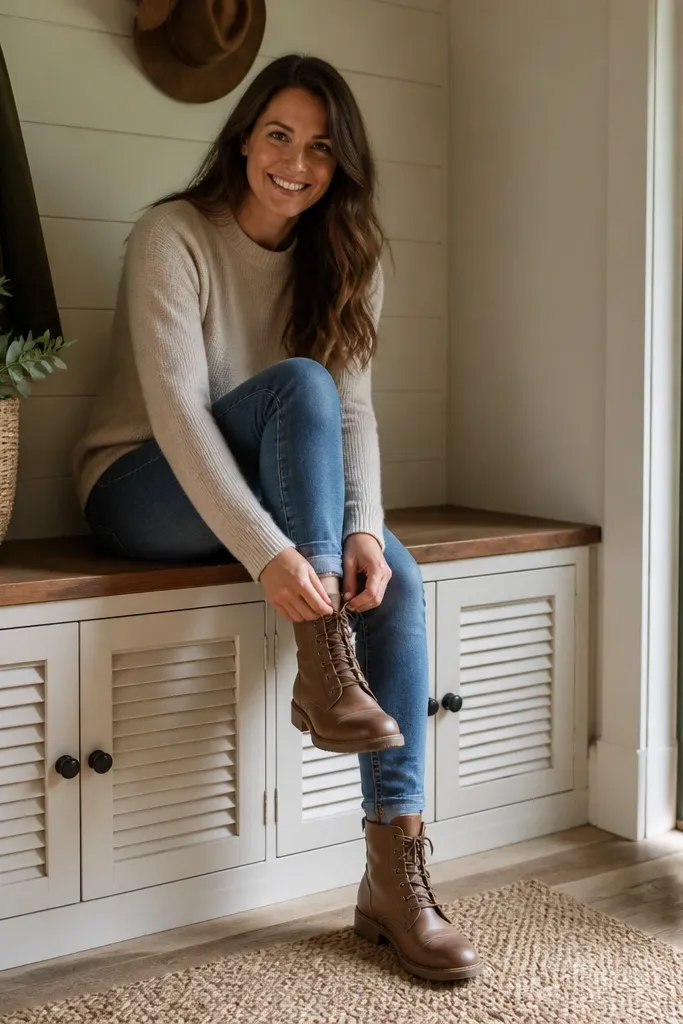
If you want a rack that always looks clean, this one hides shoes behind doors but still lets them dry. Shiplap panels give the whole unit that cottage-clean look without needing fancy decor. Louvered doors control airflow so shoes don’t smell like yesterday’s rain. The bench top makes it easy to sit and tie, and the closed face keeps the visual clutter down when guests walk in. This design fits hallways well because it reads like furniture, not storage.
Editor's noteUse a removable base tray under the shoe area to catch grit from boots.
Frame a bench base from 3/4 in plywood, then add a shiplap skin using 1/4 in boards. Install louvered inserts for the shoe section doors so air can circulate even when closed. Set the seat lid height to 18-19 in and hinge it with soft-close hinges if you’re storing anything inside. Finally, sand smooth, paint with a satin trim paint, and add magnetic catches or a small latch so doors stay shut.
Skip thisSkip solid doors without airflow; closed boxes trap moisture and ruin the “year-round” part.
3. Two-tone painted bench with woven front baskets
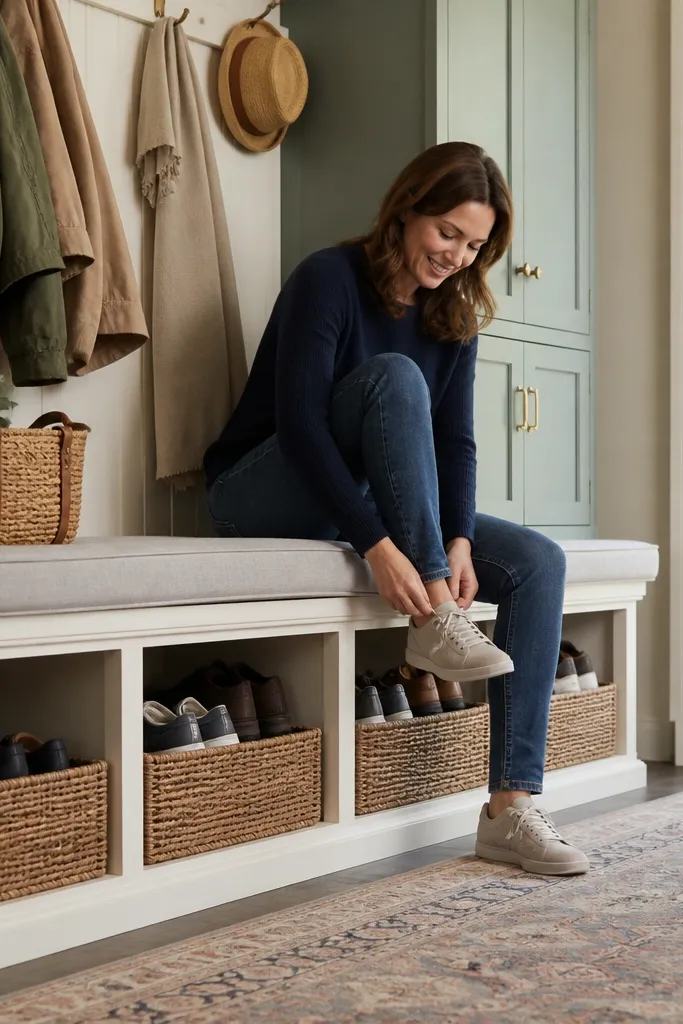
This build is photo-friendly because the texture is doing the work. Woven baskets make the rack look styled, even when shoes are in rotation. The two-tone paint keeps it modern: one color for the cabinet face and another for the bench base. Basket fronts also let you swap zones by season — sandals up front in summer, boots toward the sides in winter. It’s a great option if you want a year-round shoe rack with seating that feels light, not bulky.
Build the base cabinet from 3/4 in plywood and divide it into 6-8 cubbies. Cut openings sized to fit basket fronts with a 1/2 in reveal around each one. Paint the cabinet face in your main color, then paint the bench legs or skirt in the second color. Add a rigid plywood bench top on top of the cabinet and cover it with a removable cushion wrapped in washable fabric.
Choose baskets with a flat back so they sit flush and don’t swing when you pull shoes.
Don’t pick baskets that are too tall or they’ll hit the seat height and make the bench look off.
4. Reclaimed barn wood bench with hidden moisture-drain tray
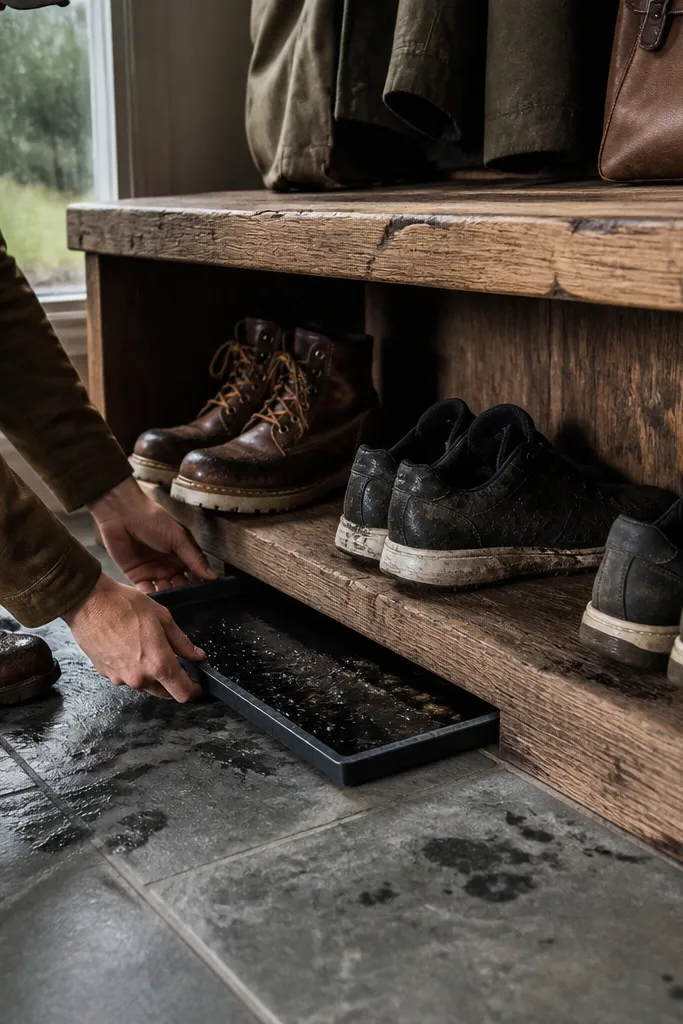
This one looks like character furniture. Reclaimed barn wood on the seat and side panels gives real texture, and the open shoe slots keep airflow high for wet weather. The hidden moisture-drain tray is what makes it practical year-round — you don’t end up with puddles on the floor when boots drip. Pair it with a simple metal drip edge under the tray opening so water has a path to escape. It’s best for mudrooms or entryways where shoes get handled daily.
Editor's noteAdd a removable tray liner so cleanup takes minutes, not hours.
Mill or buy reclaimed boards and cut a bench top that overhangs the base by about 1 in. Build the shoe frame from 2x2s or 1.5 in metal, then attach vertical dividers to create slots 10-12 in deep. Create a shallow tray from galvanized sheet or waterproof plastic, then slide it into a routed channel under the shoe deck. Seal the wood with a penetrating sealer and finish with a clear exterior topcoat so it handles winter grime.
Skip thisDon’t rely on raw wood for wet seasons; untreated reclaimed wood will stain and warp.
5. Corner L-shaped shoe rack bench with wraparound seat
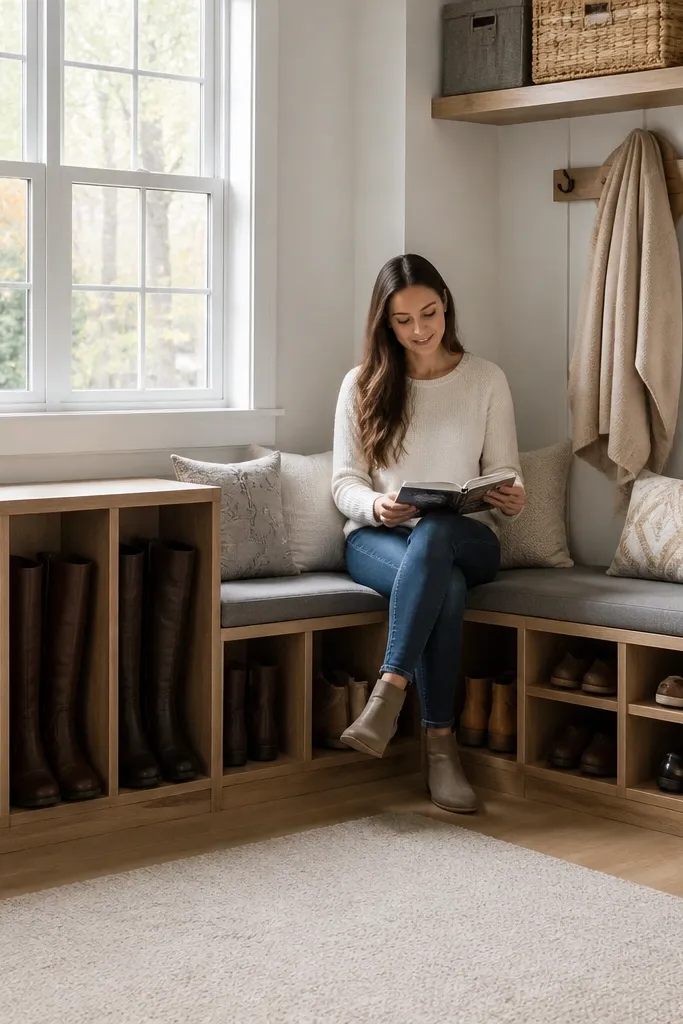
Corners waste space, so this design uses the awkward area and makes it useful. An L-shaped rack gives you more storage per square foot, and the wraparound seat makes the corner feel like a real nook. Because the cubbies sit in an L, you can dedicate one section to tall boots without crowding. The look is clean because the front line stays continuous across both runs. It’s ideal for narrow entryways where a straight bench would block traffic.
Editor's noteUse a single cushion with a corner seam so the seat looks built-in, not patched.
Sketch the corner footprint and decide a seat height of 18.5 in. Build two base runs that each hold cubbies, then connect them with a shared corner carcass. Use 3/4 in plywood for dividers and keep cubby depth consistent at 12 in for most shoes. Finish the top with one continuous plywood panel or two panels with a tight seam, then add a cushion that wraps around the corner.
Skip thisDon’t make the corner cubbies too shallow or boots won’t fit and the whole look turns messy.
6. Sliding-door bench with pull-out shoe trays
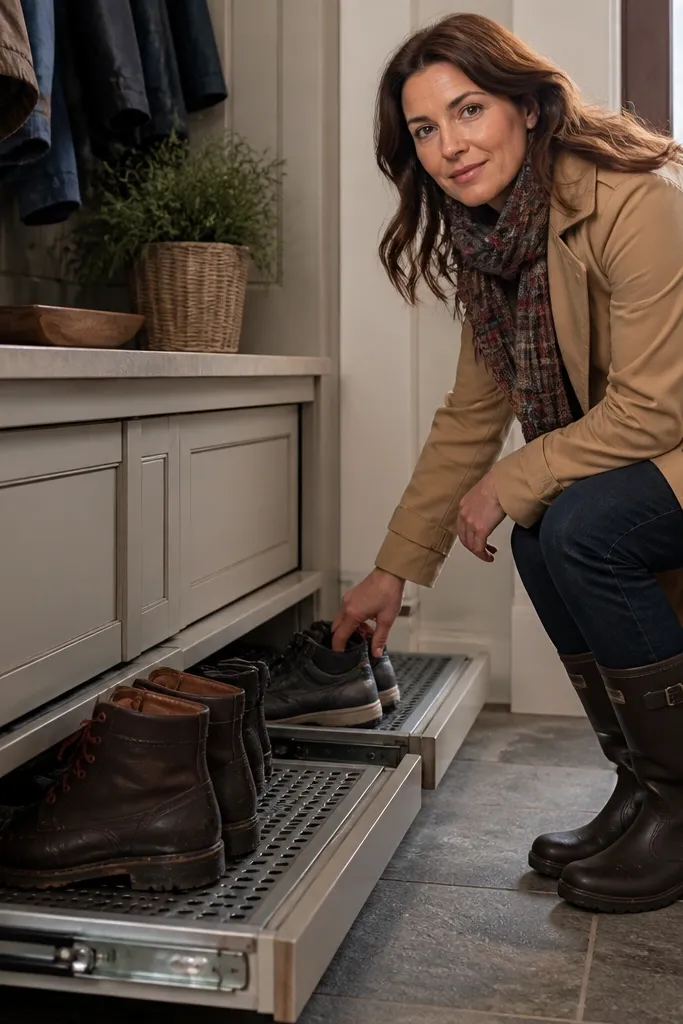
Sliding doors keep the front looking calm, and pull-out trays make shoes easy to access without digging. This is a strong pick for a year-round shoe rack with seating because you can close it after use and still manage moisture with trays that let air reach shoes between wears. Choose metal drawer slides rated for 75 lb so the trays don’t sag. The look is sleek because the sliding doors create one smooth face across the unit. It’s especially good in apartments where you want a clean line in a small hallway.
Editor's noteAdd small vent holes on the tray backs so airflow moves even when the cabinet is closed.
Build a cabinet carcass with 3/4 in plywood and cut a track opening for sliding doors. Construct pull-out trays from 1/2 in plywood with ventilation gaps and a lip so shoes don’t slide forward. Install heavy-duty drawer slides, mount trays, then build the door frame and attach a sliding hardware kit. Seal and paint the cabinet, then top it with a fixed bench surface and a removable cushion.
Skip thisSkip flimsy slides; cheap slides make trays stick and ruin the clean look.
7. Vertical boot tower bench with side seat overhang
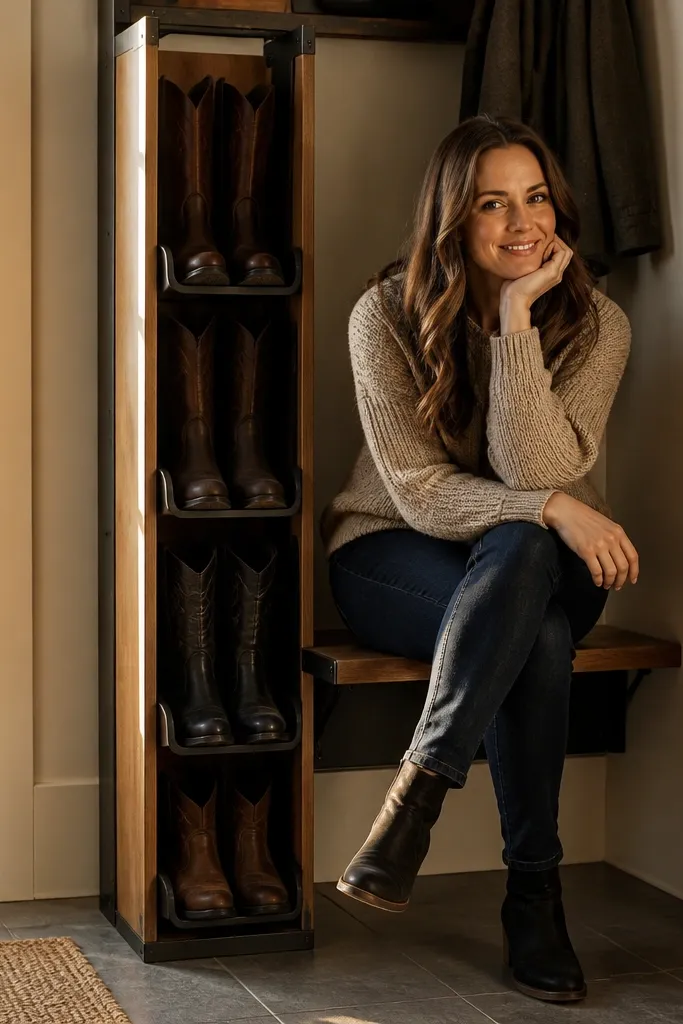
This design is for people who own real boots and hate shoe piles. Vertical boot slots keep shafts upright and prevent the flop that makes entryways look chaotic. The seat overhang gives you seating comfort without forcing the boot tower deeper into the room. It’s also great for year-round use because you can allocate tall storage to winter boots and still keep sneakers in lower cubbies. Visually, vertical lines look sharp and organized.
Build a tall side carcass from 3/4 in plywood with internal dividers spaced for boot widths. Keep vertical clearance about 14-16 in for most ankle boots, then add a lower section with shallower cubbies for sneakers at 10-12 in depth. Create an overhanging seat panel supported by two side brackets so the seat sits at 18-19 in. Sand, stain or paint the carcass, then add a cushion that covers the overhang cleanly.
Use rubber edge trim on slot openings so leather doesn’t scuff.
Don’t cram multiple boot sizes into one slot; separate widths look better and protect your shoes.
8. Rounded plywood bench with peg rail shoe hooks and hidden cubbies
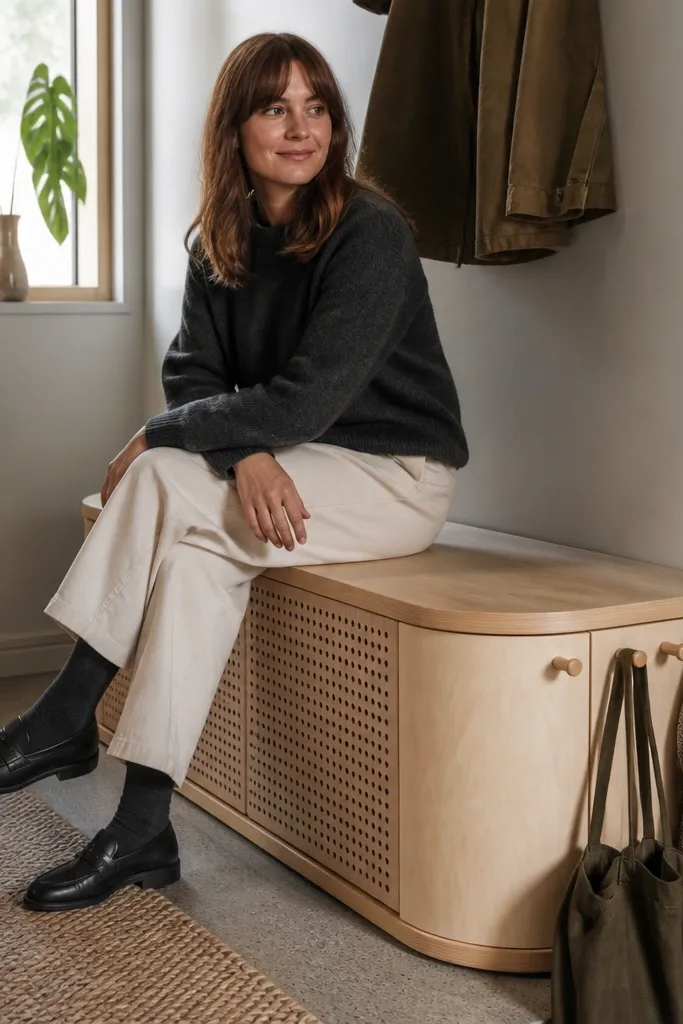
This one looks designer because the curves soften the whole entryway. A peg rail on the side or back lets you hang bags or scarves, and the hidden cubbies keep shoes from looking like storage. The bench top stays clean, so the unit reads as seating furniture. For year-round shoe management, the cubbies are ventilated with a back gap and small drilled holes under each shelf edge. It’s a good pick for small homes where you want one piece that does more than one job.
Build a curved bench frame using laminated plywood strips or buy pre-made curved panels. Mount a peg rail along the upper side panel with sturdy brackets. Build a lower cubby section from 3/4 in plywood dividers, then drill a 1/2 in ventilation line along the underside of each shelf. Finish with a durable water-based clear coat and add a removable cushion with tie-down straps.
Pre-finish the plywood edges before assembly; edges soak finish faster and look cleaner.
Skip open cubbies with no back gap; closed fronts plus no airflow becomes a smell problem.
9. Matte black metal slat bench with hinged shoe compartment doors
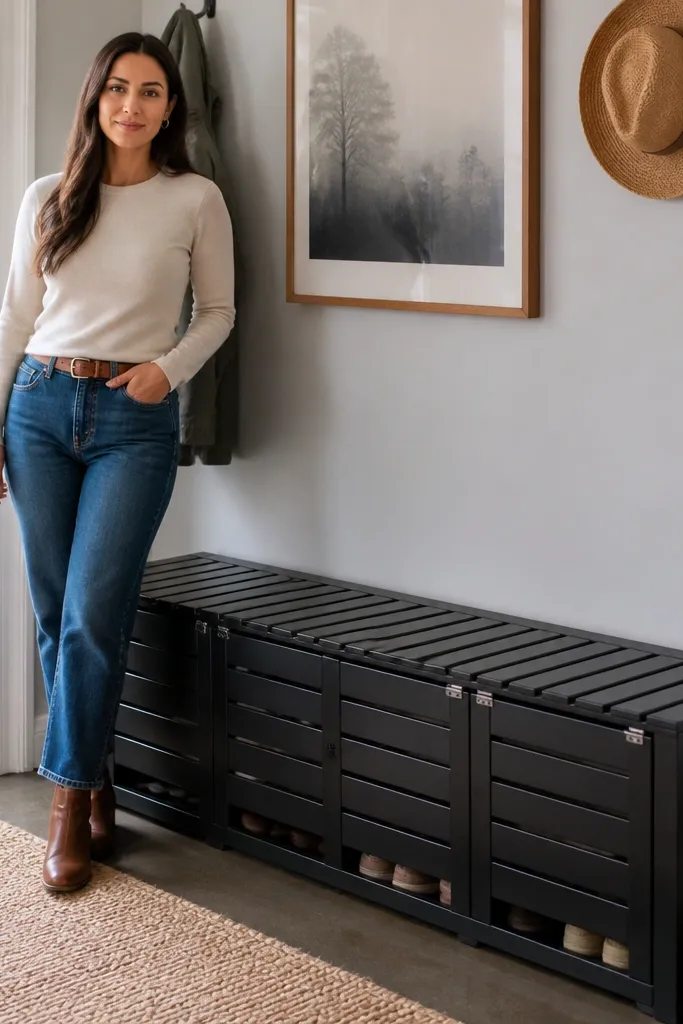
Metal slats on the bench top look industrial and stay easy to clean. Hinged compartment doors hide shoes, while the slat surface lets moisture escape instead of pooling on fabric. This build has a sharp, modern silhouette, and it photographs well because the hardware catches light. It works for year-round use if you build the shoe compartments with louvered sides or a rear ventilation channel. It’s best for entryways with tile, concrete, or easy-wipe flooring.
Build a steel frame and add metal slats for the bench top, spacing them about 1/2 in apart for airflow. Use 1/2 in plywood or thin sheet for the door panels and reinforce hinges with backing blocks. Add rear ventilation by leaving a 1 in gap at the back of each compartment. Paint metal surfaces with a high-adhesion matte black coating and seal any wood parts with clear poly.
Install a drip tray under the compartments if you often bring in wet boots.
Don’t use glossy paint on high-touch areas; fingerprints and scuffs show instantly.
10. White oak bench with glass-front shoe doors and brass pulls
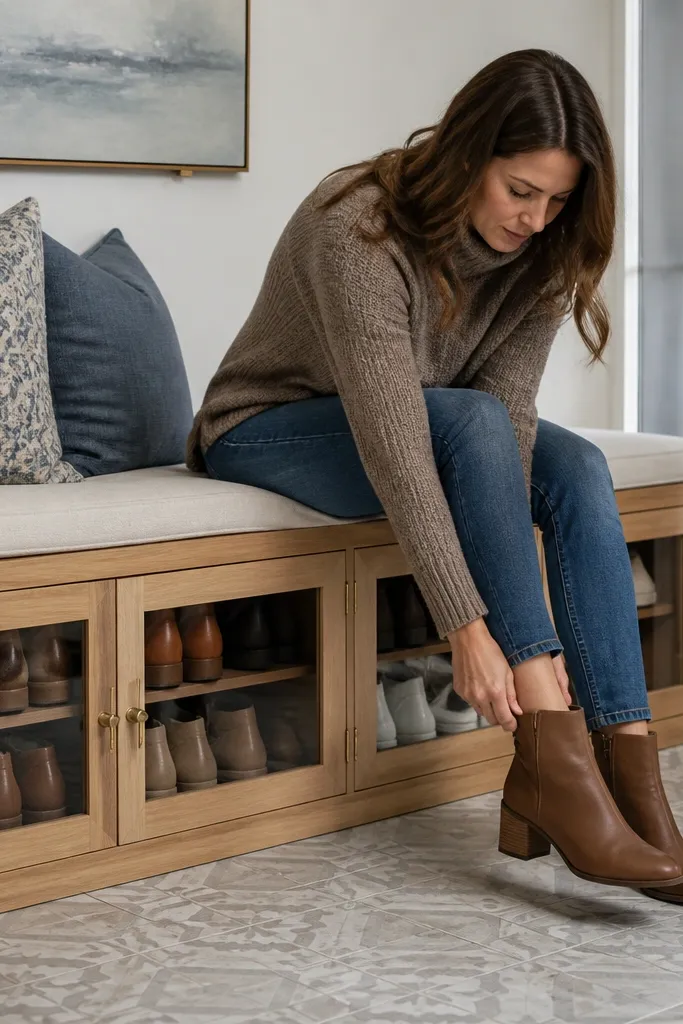
Glass-front doors make the rack feel like a boutique display, and brass pulls add warmth. You can see shoes clearly, which helps you rotate by season and keeps the whole thing looking styled instead of hidden. Oak veneer or solid white oak on the seat looks premium, and the glass gives that curated feel without adding clutter. For year-round use, install vent slots in the door frames so humid air can move out. This is a strong option for a living room entry wall where you want the rack to look like decor.
Editor's noteUse frosted glass on the bottom half so you hide scuffed toes while still keeping the top clear.
Build a bench base from 3/4 in plywood and attach white oak veneer or solid boards to the front and sides. Cut door frames and install tempered glass panels with rubber glazing strips. Add vent slots behind the shoe deck by routing shallow channels on the back panel. Finish the oak with a satin water-based clear coat and mount brass pulls centered at about 32 in from the floor for comfortable grabbing.
Skip thisSkip fully airtight glass doors; shoes need airflow to avoid odor buildup.
11. DIY pallet-style bench with slatted shoe deck and removable cushion
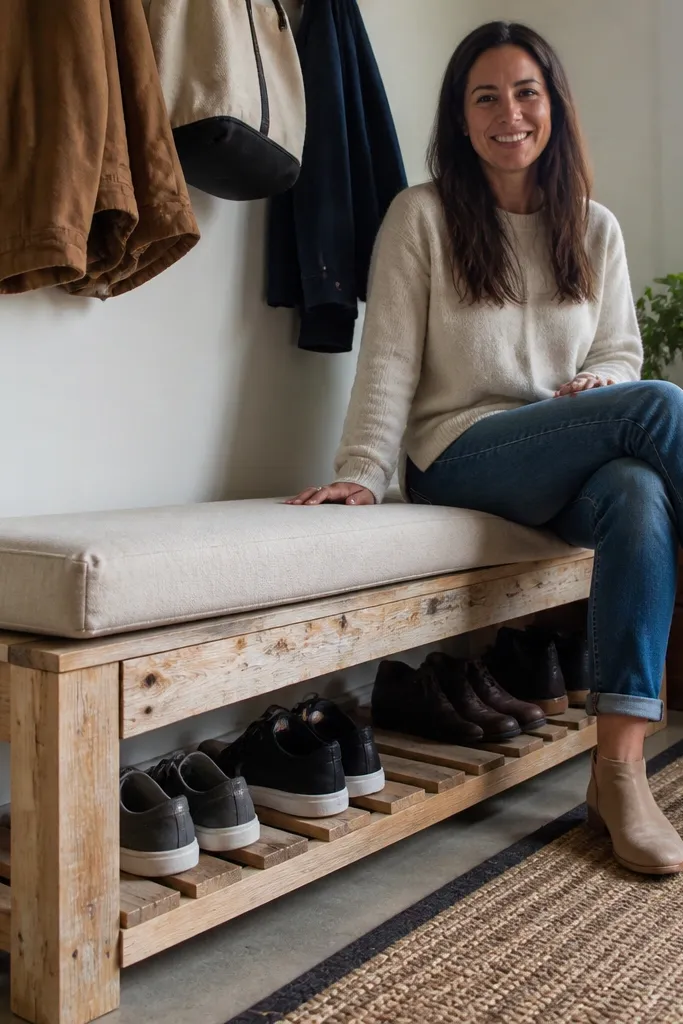
The pallet look is popular, but it can go messy fast. This version is cleaner by using slatted surfaces and a fixed shoe deck with consistent spacing. The seat cushion makes it comfortable, and the removable cover keeps it looking good year-round. Because the shoe deck is open and slatted, shoes dry quickly and don’t trap smell. It’s a solid choice for casual spaces like laundry room entries or back doors where style still matters but perfection isn’t the goal.
Editor's noteSeal knotty wood with stain conditioner first so the finish doesn’t blotch.
Disassemble a pallet or build a frame from 2x lumber, then square it to a consistent width like 48 in. Create a slatted shoe deck with 1/2 in gaps using 1x2 or 1x3 strips, and mount dividers for a neat grid. Sand aggressively, then stain or paint with a semi-gloss finish that resists scuffs. Add a cushion on top with corner ties so it doesn’t slide.
Skip thisDon’t leave pallet nails exposed; they catch socks and look rough.
12. Built-in look bench with flip-top seat and labeled shoe cubbies
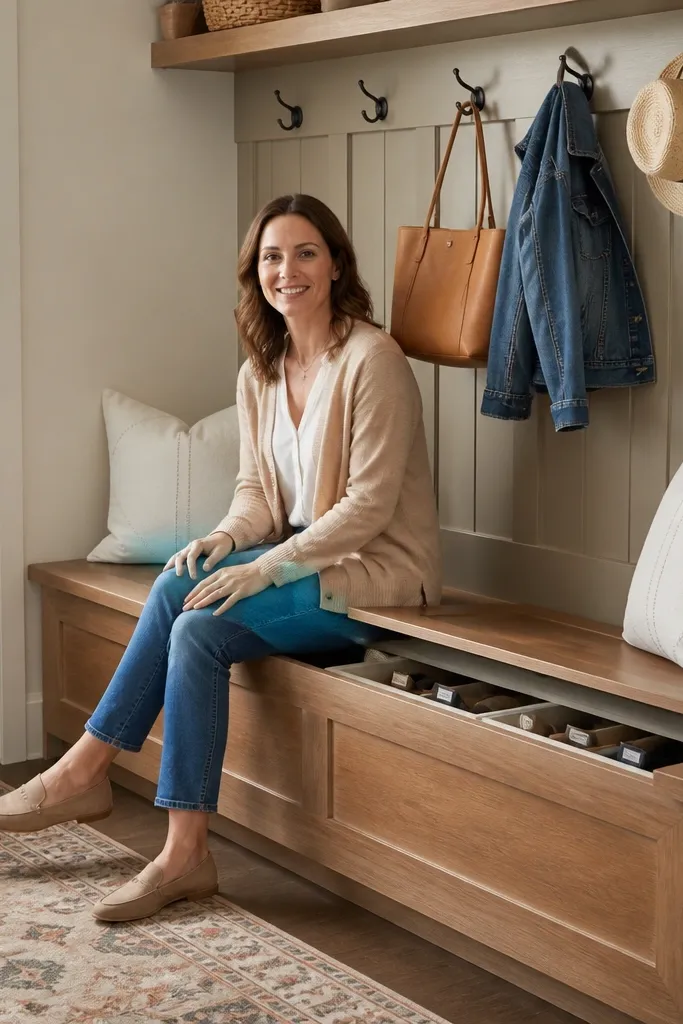
A flip-top seat gives you that built-in furniture look, and labeled cubbies keep the rack running year-round without turning into a dumping ground. Labels also help kids and guests put shoes back in the right place, which keeps the seating area clear. The design looks tidy because the seat lid covers the top clutter, and the dividers keep shoes aligned. Choose a neutral paint and matching hardware so it reads like home, not a craft project. It’s best for families who need organization more than display.
Build a bench carcass with 3/4 in plywood and divide the interior into cubbies sized for your most common shoe types. Install a flip-top lid on piano hinges and add a prop rod or gas strut for smooth opening. Add ventilation by spacing the shoe deck off the bottom panel by 1/4 to 1/2 in. Paint everything, then apply labels on the inside face of each cubby and finish with a removable cushion.
Use laser-cut or printed label cards behind clear plastic so they don’t peel.
Skip permanent labels on the seat top; scuffs and spills ruin them fast.
13. Terracotta tile-topped bench with open side shoe racks
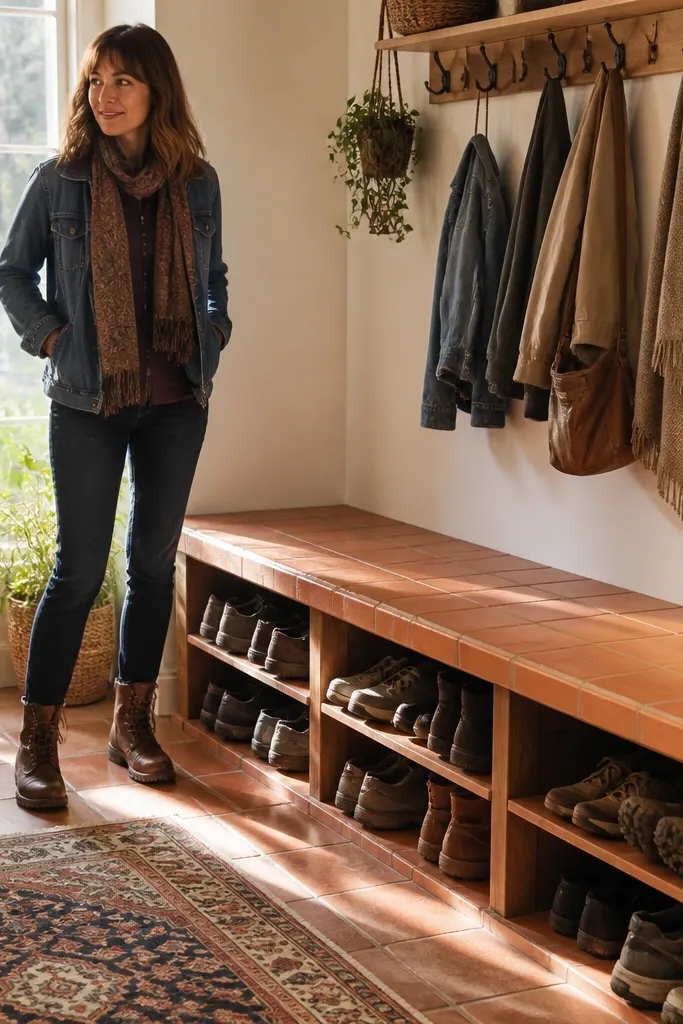
A tile top instantly makes the bench look intentional and easy to live with. Terracotta tiles add warm color that works with both natural wood and black metal frames. The open side shoe racks keep shoes visible and dry, while the tile surface stays easy to wipe after muddy boots. This is a great year-round shoe rack with seating because you don’t have to worry about spills or damp shoes. It’s also photogenic: tile texture shows up beautifully in daylight.
Editor's noteSeal grout after it cures fully so water from wet shoes doesn’t soak in.
Build a sturdy frame from 2x2s or metal and attach a plywood top layer designed to support tile. Set tiles with thinset mortar, then grout and seal. Build side shoe racks from 3/4 in plywood with dividers spaced 9-10 in, keeping depth around 12 in. Finish the frame with a paint or stain that matches the tile tone, then add a small back lip so shoes don’t slide into the seat.
Skip thisDon’t use thin, wobbly plywood under tile; it cracks when people sit.
14. Oak slat seat with fabric-front drawer shoe storage

Fabric-front drawers soften the look and make the rack feel cozy instead of industrial. The oak slat seat reads clean and modern, while the fabric hides the mess when shoes are mid-season. Drawers also let you store bulky items like heels, socks, or boot liners along with shoes. For year-round use, keep the drawer fronts breathable by using a mesh panel on the inside and leaving a small gap at the back. It’s ideal for bedrooms or closet-adjacent hallways where you want storage that looks like furniture.
Build a bench base with 3/4 in plywood drawers sized for your shoe types, and mount drawer slides rated for at least 50 lb. Add a breathable interior by using wire mesh or perforated plywood on the drawer back. Attach a removable fabric front over a rigid frame so you can swap it later. Finish the seat with oak slats and seal with satin clear coat; add a cushion for comfort.
Use removable fabric fronts with Velcro so you can wash them after rainy-season grime.
Don’t fully seal the drawer interiors; shoes need airflow even when stored.
15. Narrow 24-inch bench with deep cubbies and seat cushion
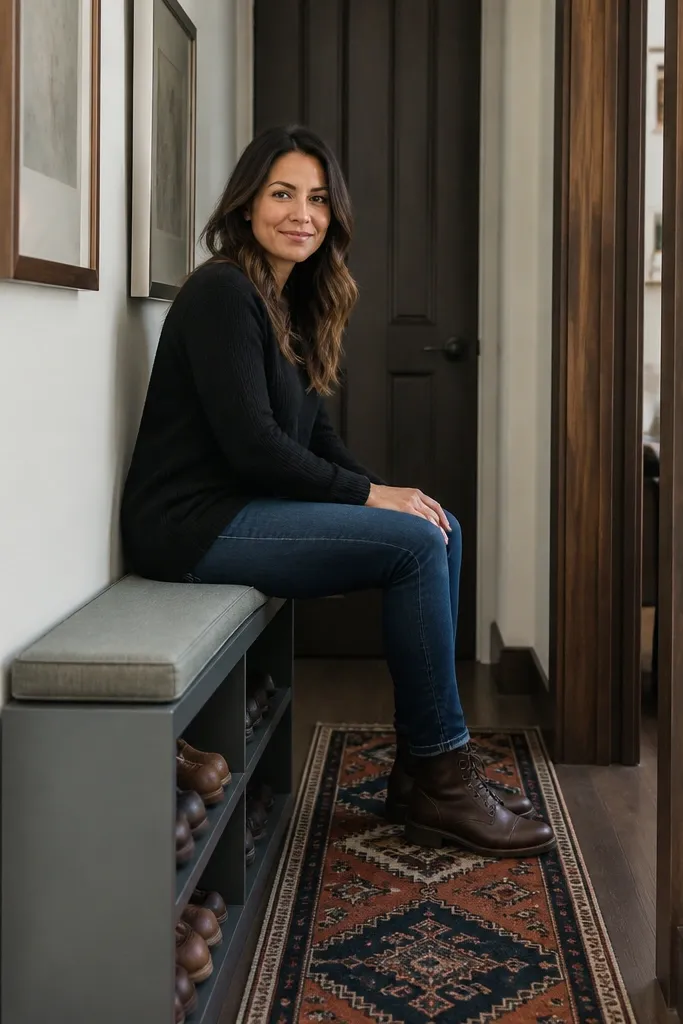
When space is tight, you don’t need a wide unit — you need depth and a seat that doesn’t steal room. This narrow bench uses deep cubbies to hold multiple pairs per bay while still looking clean in a hallway. The seat cushion adds comfort without requiring a bulky flip-top lid. For year-round use, add a ventilation slot along the back and a removable crumb tray under the lowest shelf. The look is streamlined because the cabinet face stays flat and the cushion hides the top seam line.
Editor's noteUse a cushion with a non-slip bottom so it doesn’t shift when you sit down.
Build a base width of 24 in and a depth of 16-18 in, then divide into 4-6 cubbies. Keep cubby openings around 8-9 in wide so shoes slide in cleanly. Build a fixed seat at 18-19 in using a plywood top, then cover with a foam cushion sized to overhang 1 in on each side. Drill ventilation holes behind the cubbies and add a small removable tray from thin metal or plastic.
Skip thisDon’t make cubbies too tall without dividers; tall empty spaces look sloppy.
16. Linen-wrapped bench with open shoe cubbies and hidden side panel
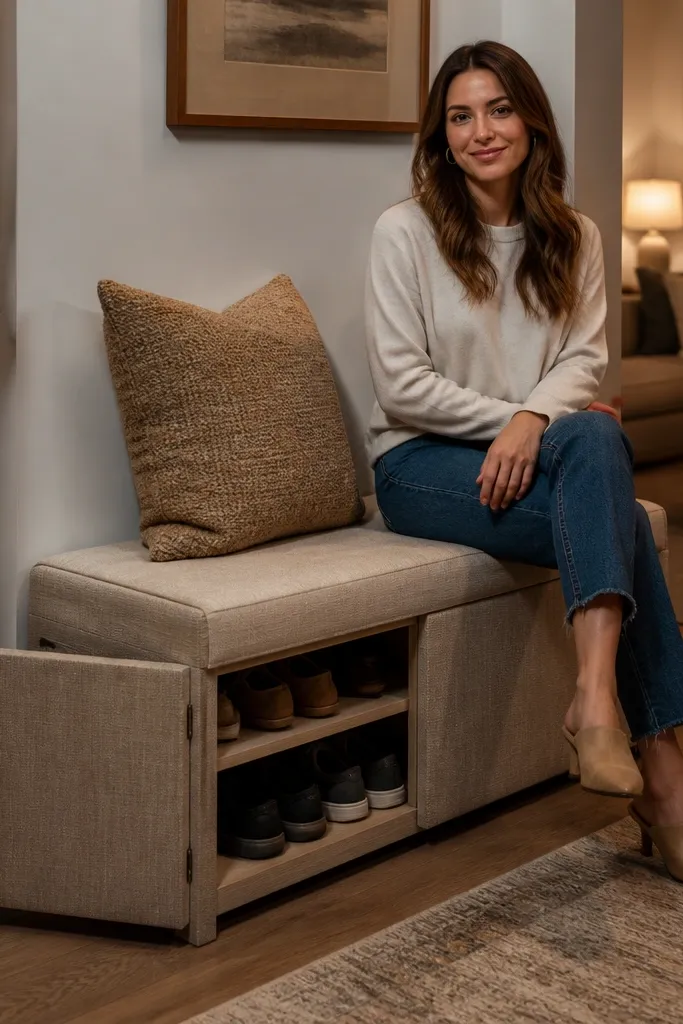
Linen wrap makes a shoe rack with seating feel soft and homey, like a bench you’d buy, not build. Open cubbies keep airflow high, while a hidden side panel lets you cover the mess when you need a quick clean look. This is great for entryways that also double as a living area. The linen texture makes the unit photogenic and masks minor scuffs on the frame. For year-round shoe storage, keep cubbies consistent and ventilated so wet footwear doesn’t sit in a closed box.
Build the frame and cubby dividers from plywood, then wrap the outer faces with linen stretched over foam-backed boards. Add an interior back gap and a few drilled vent holes under the shoe deck. Make a removable side panel from thin plywood covered in linen that slides into tracks when you want a cleaner front. Mount a fixed bench top and add a washable cushion cover.
Use upholstery spray adhesive and pull linen tight on corners so it doesn’t sag after a few months.
Don’t wrap the inside of cubbies; fabric traps moisture and smells.
17. Rustic white bench with pegboard back and shoe bin shelves

A pegboard back makes the rack look organized even before you add hooks. It also helps with airflow because it’s not a solid wall behind shoes. Put small bins on the shelves for things like socks, boot polish, and spare laces, so the seating area stays clean. The white finish keeps the look bright and year-round friendly, even in darker hallways. This is a smart choice when you want a shoe rack with seating that also handles accessories.
Editor's noteUse a small shelf lip under bins so they don’t slide when you pull shoes out.
Build a bench frame with plywood and add cubby shelves using 1x2 rails. Attach a pegboard panel to the back using standoffs so it doesn’t touch the shoe area. Install shoe bins on shelves sized for your most common shoes, keeping bin openings about 10 in wide. Finish with a durable white paint and seal the bench top; add a cushion that matches the trim.
Skip thisSkip a pegboard flush-mounted to the shoe deck; it blocks airflow.
18. Concrete-look sealed bench with metal mesh shoe doors

Concrete-look finishes make furniture feel modern and grounded, and metal mesh doors keep the shoe area breathable. This combo looks industrial without being heavy because the mesh is visually light. Seats are usually the place people test stability, so this design uses a solid bench top and a ventilated storage front. It’s a strong year-round shoe rack with seating for entries that get wet and messy. The mesh doors also hide shoes from full view while still showing you what pair is inside.
Build a bench carcass from plywood with strong internal braces, then apply a concrete-look coating system or cement board skin with a sealed finish. Frame metal mesh door panels on the front of the shoe compartment and hinge them with self-closing hinges if you want a tidy look. Keep the shoe deck vented with a back gap and small drainage holes in a catch tray. Seal everything with a water-resistant topcoat and attach corner guards for scuffs.
Use a removable catch tray under the shoe deck so wet grime wipes out fast.
Don’t use mesh that droops; sagging doors look cheap and catch shoes.
19. Walnut + leather strap seat with open shoe cubbies and boot shelf
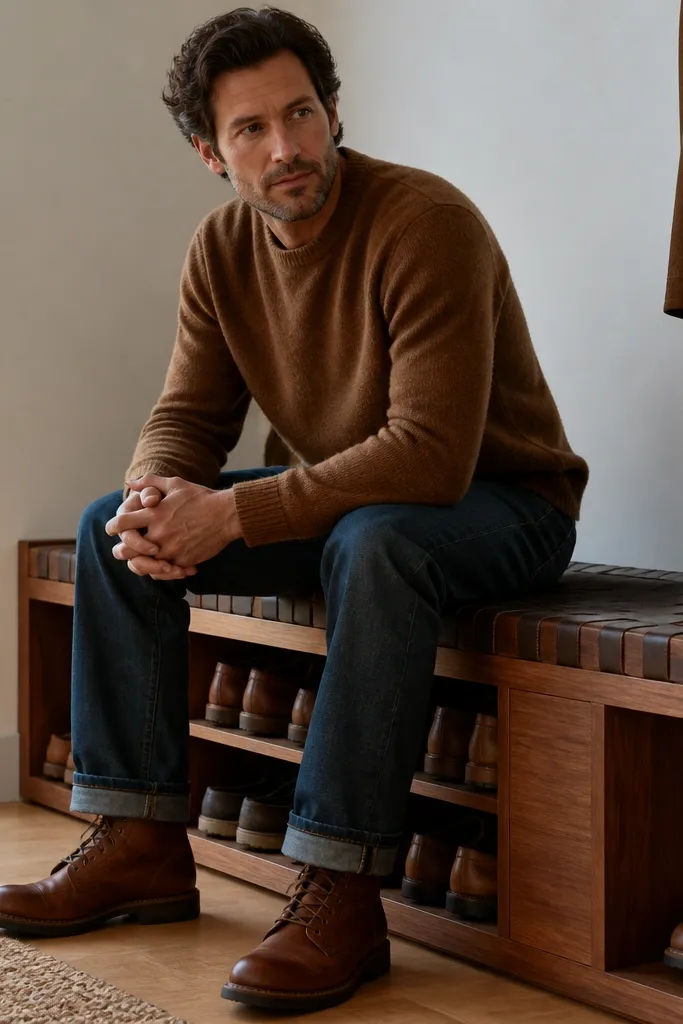
Leather strap details make the bench look custom and expensive, even when the build is straightforward. Open cubbies keep airflow moving, and the added boot shelf at one end handles tall items without breaking the layout. Walnut staining with a satin finish makes the wood look warm and consistent across seasons. This is a year-round shoe rack with seating that looks good even when it’s used daily, because open storage is kept visually calm by aligned dividers. It suits entryways where you want the bench to be the focal point.
Build the base cabinet with evenly spaced dividers so cubbies line up, and keep depth around 12 in. Add a separate boot shelf section with higher vertical clearance of about 14 in at the end. Install walnut seat slats, then mount leather straps under the slats to hold the seat top and add visual texture. Finish with satin clear coat and attach a thick foam cushion wrapped in neutral fabric for comfort.
Pre-drill leather strap holes and seal cut edges with a leather finish to prevent fraying.
Avoid mismatched stain tones; inconsistent walnut shading makes the whole unit look DIY.
20. Mid-century style teak look bench with angled shoe slots
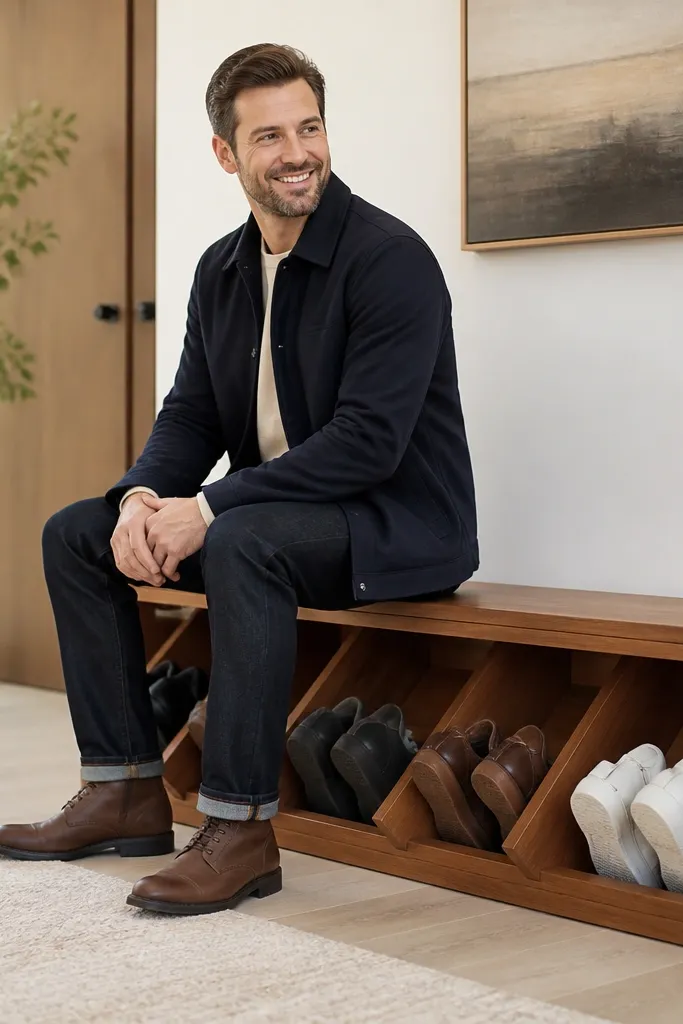
Angled shoe slots are one of the cleanest ways to keep shoes from looking like a pile. When shoes lean into a slot, they look aligned and intentional, which is exactly what you want for a year-round shoe rack with seating. The mid-century shape looks good in modern homes, and the seat stays simple and uncluttered. Use a teak-look finish on the wood for that warm, orange-brown tone that pops in daylight. This design works best when you want open storage without the messy look.
Build a bench base and set dividers at an angle so shoes rest with toes down and heels up. A practical angle is around 15-20 degrees from vertical, with slot depth around 11-12 in. Use 3/4 in plywood for dividers and add a back stop so shoes don’t slide out when you sit. Finish with a teak-look stain and satin topcoat, then add a flat seat cushion at 18-19 in height.
Add a thin rubber strip at the back stop so leather and soles don’t squeak.
Don’t angle slots too steep; tall boots will refuse the slot and you’ll end up with extra piles.



