
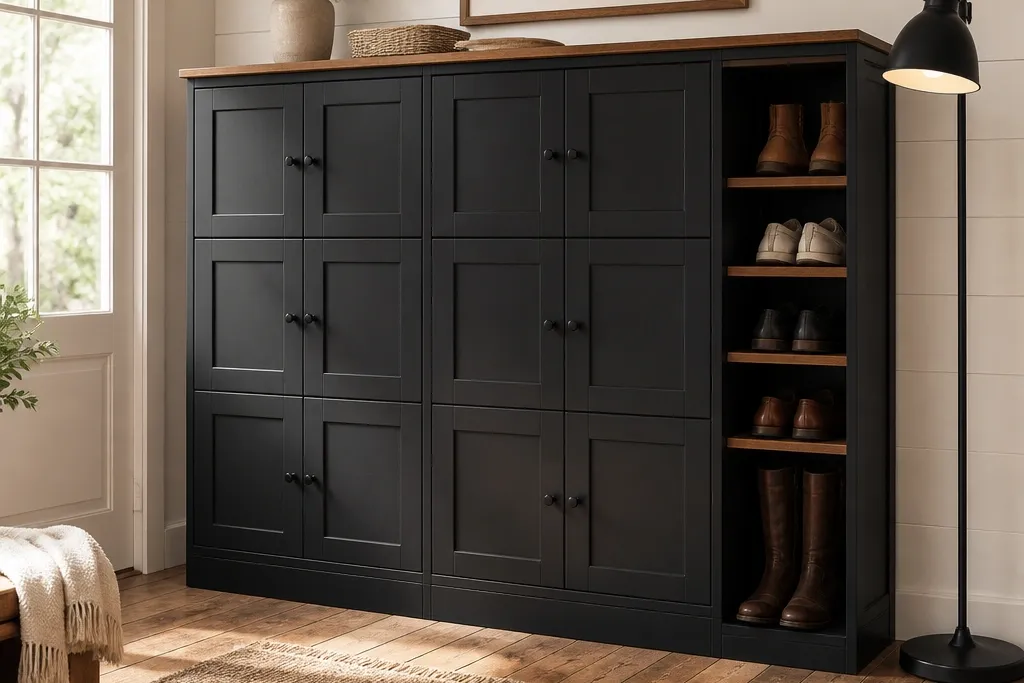
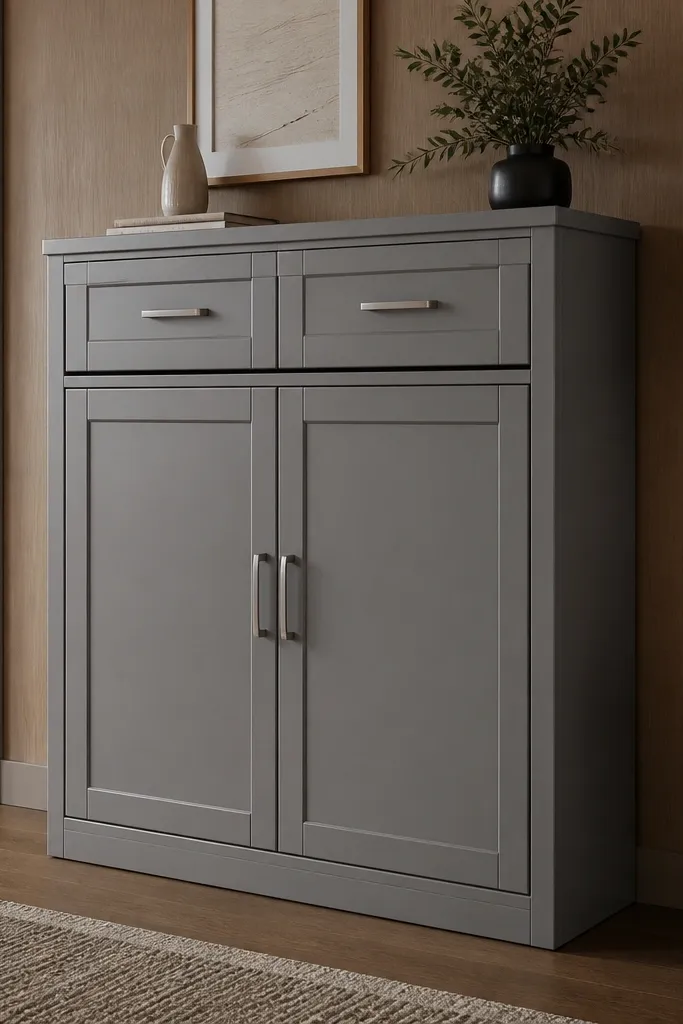
1. Shaker-Framed Shoe Rack Cabinet with Double Swing Doors
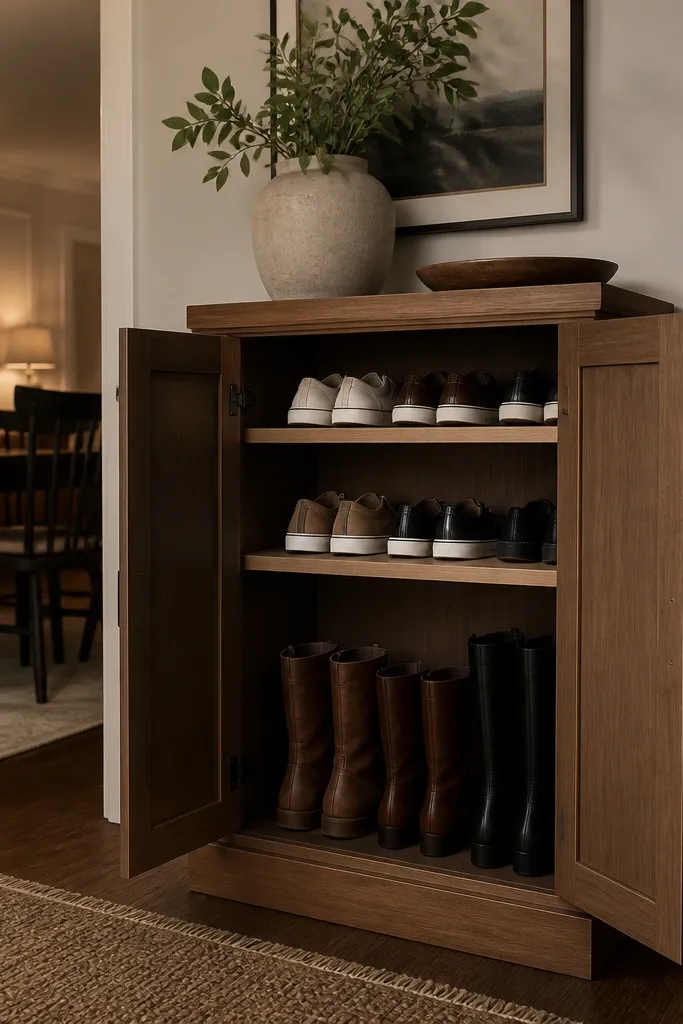
This design hides shoes behind classic shaker doors, so the front looks like a kitchen cabinet, not a closet. The inset panels create shadow lines that make the cabinet look crisp even when the room lighting is dim. Inside, you build fixed shelves for sneakers and a deeper bay for boots, so the cabinet stays organized instead of turning into a pile. It’s a great fit for entryways where you want a clean, symmetrical look and you have enough space to open two doors.
Start by building a face frame with 1x2 or 1x3 rails and stiles, then attach 3/4 in plywood backer panels behind the openings. Cut two door slabs to the same outer dimensions as the openings and use inset rabbets so the doors sit flush with a consistent reveal. Install three to four shelves with a mix of heights: 10-12 in for sneakers and one deeper section at 16 in for boots. Finish by adding soft-close hinges rated for the door weight, then paint with a cabinet-grade primer and two coats of satin enamel.
Use a consistent reveal measurement on all four sides of each door — it’s what makes shaker doors look “store-bought.”
Skip flimsy hinges mounted straight into thin plywood — use blocking so the hinge screws bite.
2. Walnut Veneer Look Shoe Rack Cabinet with Vertical Slats Behind Glass
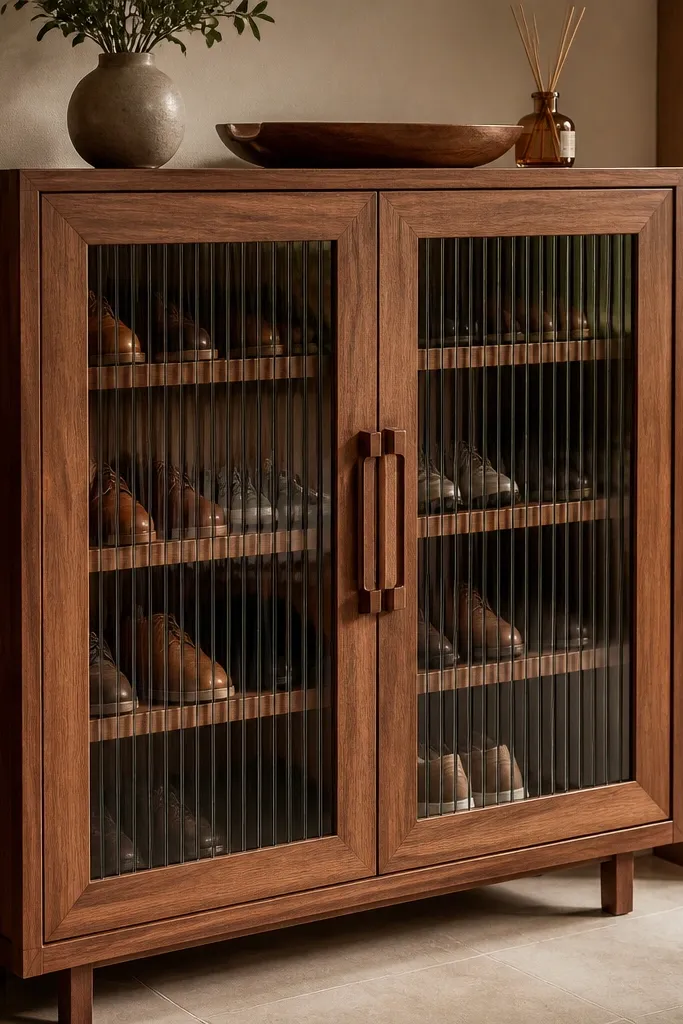
If you want “good-looking” without hiding everything completely, this cabinet uses glass doors plus vertical slats to keep the interior from looking like random stacks. The slats act like a visual filter, so you can see the shoe silhouettes but not the mess. Use a walnut-toned finish so it looks warm and furniture-like, especially against light walls. This design is best for living-area entry nooks where you don’t want a fully opaque block.
Build the cabinet box from 3/4 in plywood and install a back panel of slats using 1/4 in strips spaced about 1/2 in apart. Frame the openings with 1x2 trim and set glass panels using a glazing bead so the glass doesn’t rattle. Inside, add two or three shelf levels plus one tall compartment for boots at 15-16 in. Finish by staining with a walnut color and adding a hard clear topcoat like water-based conversion varnish for durability.
Tint the glass slightly or choose smoked glass so muddy shoe colors don’t show through.
Don’t use clear glass with no slat filter — you’ll see every scuff and stack.
3. Corner Shoe Rack Cabinet with Angled Bays and One Mirrored Panel
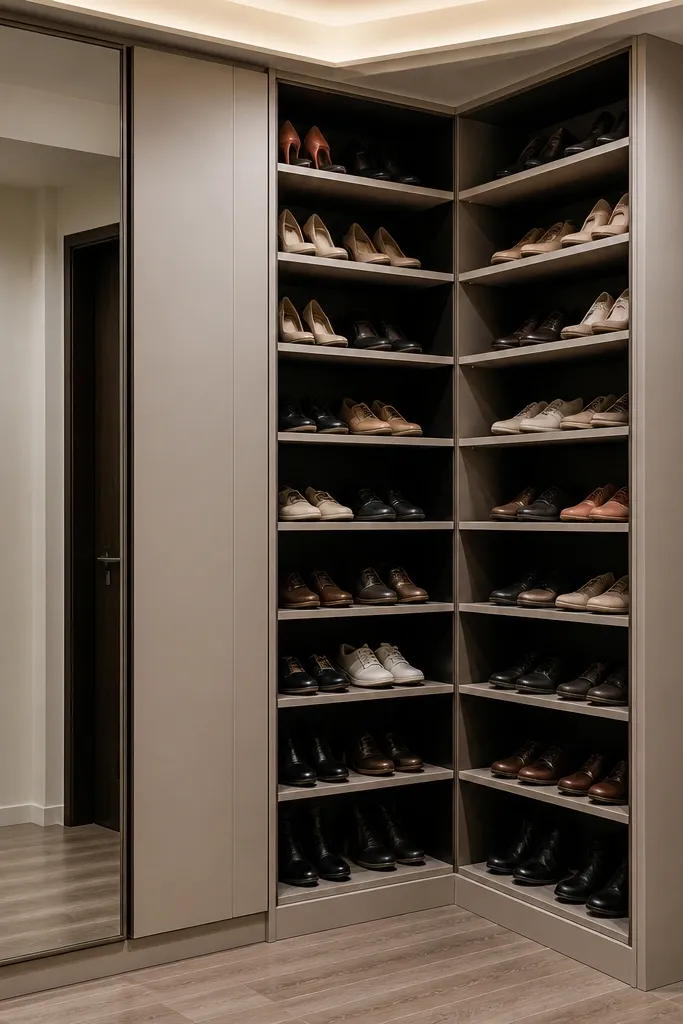
Corner spaces are where shoe mess multiplies, because you can’t fit a normal cabinet wall-to-wall. This design makes the corner look intentional by using angled bays that follow the geometry of the room, and the mirrored panel makes the corner feel larger. The angled compartments reduce shoe pile-up because each pair has a home. It looks great in small hallways and makes narrow entries feel brighter.
Editor's noteUse a mirror panel thickness of at least 1/4 in so it doesn’t flex when doors are opened.
Start with a base cabinet footprint sized to your corner, then cut angled partitions using a simple triangle template so each bay points toward the cabinet opening. Build the cabinet from 3/4 in plywood and add a back panel that supports the angled shelves. Install one mirrored panel on the side using a mirror-friendly adhesive and mechanical stops so it stays aligned. Add two or three angled bays for sneakers and flats, then one taller straight bay for boots at 15 in.
Skip thisSkip tight corner tolerances — if your partitions don’t align, the doors won’t sit flat.
4. Tall Entry Shoe Rack Cabinet with Lift-Up Lid and Soft Pull
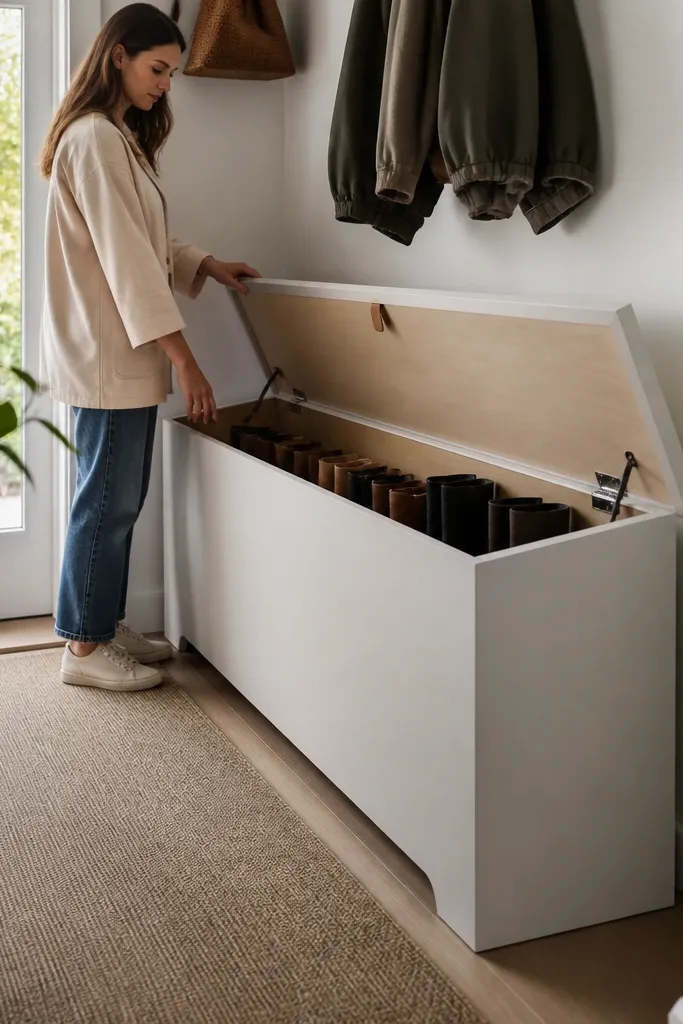
A lift-up lid keeps the front looking clean because there are no swinging doors to misalign or take up space. When closed, it reads like a slim bench or storage cabinet, not shoe storage. Inside, the lid lets you store boots upright without bending over constantly. This works well for apartments or tight entryways where door swing clearance is a problem.
Editor's noteMount the gas strut so the lid opens to about a 60-70 degree angle — it’s the sweet spot for not hitting your head.
Build the cabinet base as a rectangular box from 3/4 in plywood, leaving an opening sized to your shoe height. Install a hinged lid with a gas strut or lift hinge so it stays up without slamming. Add internal dividers: one deep boot bay at 16 in height and two shorter bays at 10-12 in. Add a pull or soft handle to the lid edge, then cap the top with a solid wood face strip for a clean seam.
Skip thisDon’t use cheap friction hinges — they drift and the lid stops closing square.
5. Two-Tone Shoe Rack Cabinet with Black Frame and Oak Doors
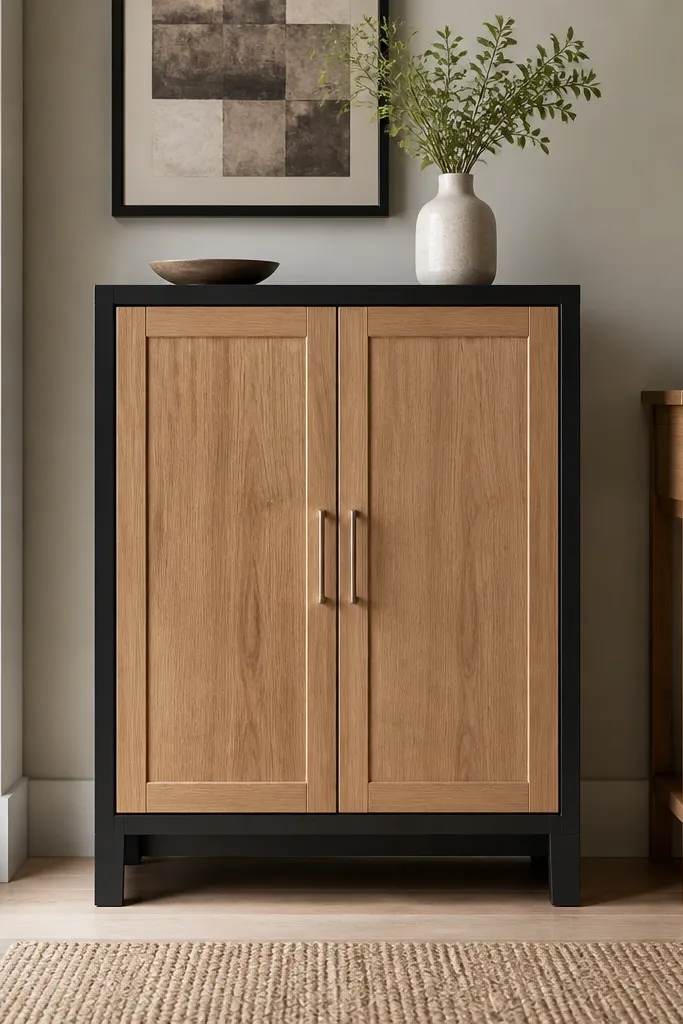
Two-tone cabinets look intentional fast, because your eye reads the frame first. The black frame makes the oak doors feel like a designed piece, and the hidden shelves keep the interior from cluttering your entry. This is a strong choice if your room has black accents like frames, lights, or handles. Build it with clean lines and you’ll get a high-contrast look without needing complicated joinery.
Editor's noteSand the black frame to 180 grit before primer so the finish doesn’t look rough near the door edges.
Make a face frame from 1x2 lumber and paint it matte black with a bonding primer first. Use oak veneer or oak-faced boards for the door panels, then add simple shaker-style rails and stiles. Install the doors with concealed hinges and keep a consistent 1/8 in reveal around each edge. Inside, use adjustable shelves so you can switch between sneakers and boots by moving pegs or shelf pins.
Skip thisDon’t mix glossy black with satin oak — choose one sheen level for the whole cabinet.
6. Slim 6-Inch Shoe Rack Cabinet with Flip-Down Doors
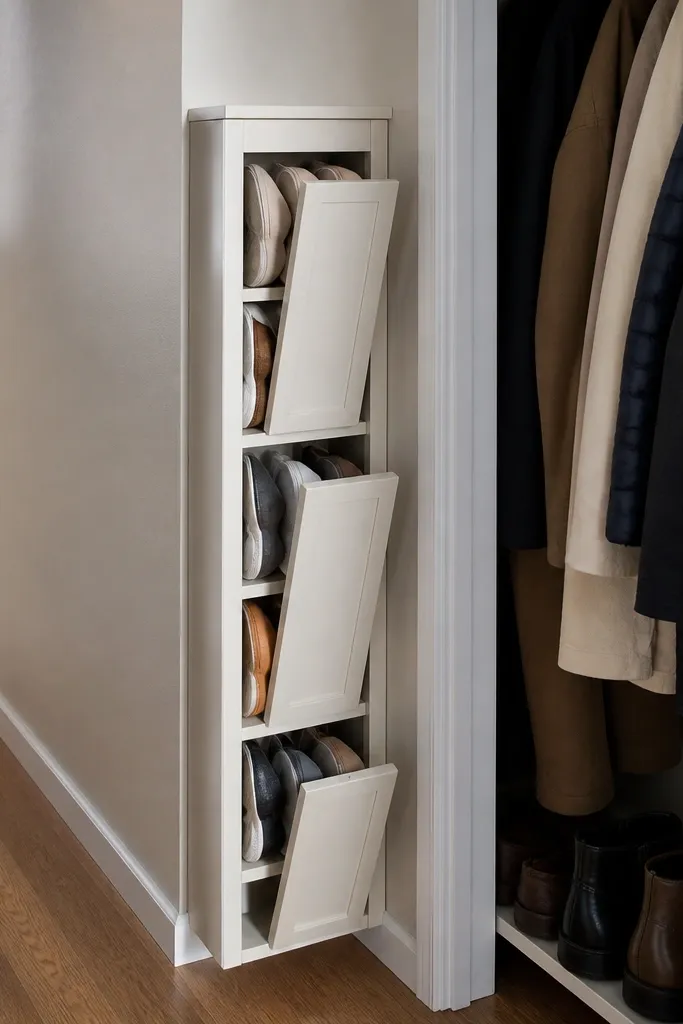
If your entry is narrow, a wide cabinet looks bulky and eats hallway space. A slim 6-inch shoe rack cabinet keeps the footprint tight while still hiding shoes behind flip-down doors that stay flush when closed. The interior is designed for sideways shoe storage, so sneakers don’t lean and become a messy wedge. It’s best for small apartments, mudrooms with limited wall width, and apartments where you need storage without visual weight.
Editor's noteAdd magnetic catches to hold doors closed quietly and keep the front seam consistent.
Build the cabinet body depth at 6 in using 3/4 in plywood, and add a back panel to keep everything square. Install flip-down doors with hinges mounted along the top edge of the opening so the doors swing down without rubbing. For shelving, use side-by-side dividers spaced about 7-8 in apart for most sneaker widths, and add a taller divider at one end for boots stored sideways. Finish the face with a thin solid-wood edge band so the frame looks clean.
Skip thisSkip thick molding on a slim cabinet — it makes the whole piece look even wider.
7. Industrial Steel-Frame Shoe Rack Cabinet with Wood Slat Doors
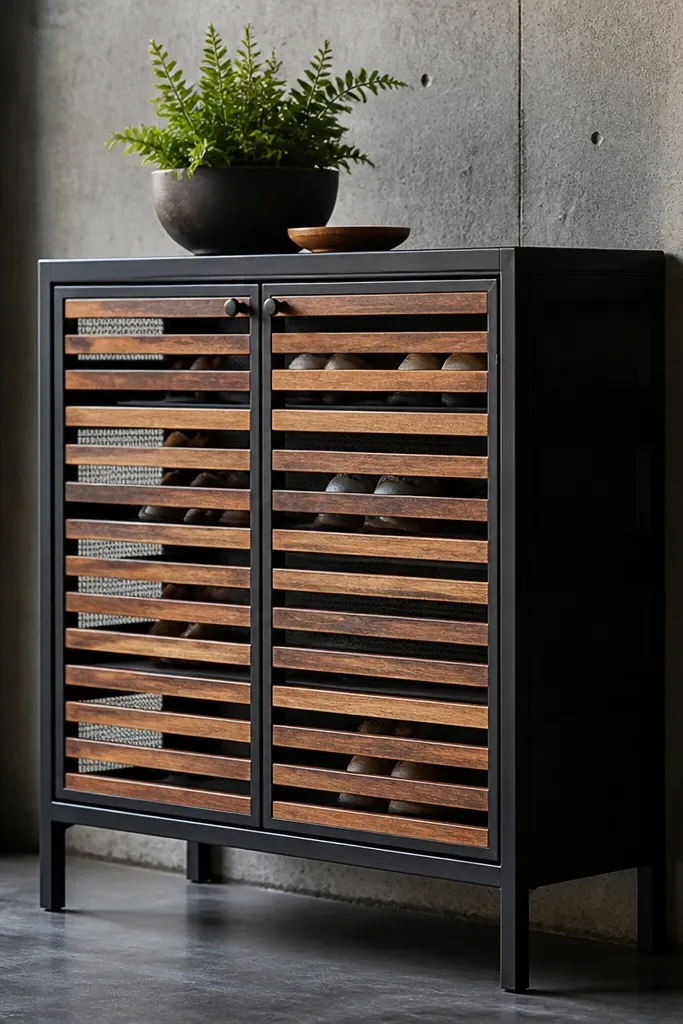
This cabinet looks like a designed entry piece because the steel frame gives it structure and the wood slat doors add warmth. It hides shoes but still lets a little airflow through, which helps when shoes are damp. The front looks great in modern spaces with concrete, black metal, or dark floors. It’s a good project if you like measuring metal and building strong, straight frames.
Build the steel frame using square tubing and weld or bolt corners, keeping the outer dimensions true. Attach wood slats to a door frame made from thin wood rails, with a consistent 1/2 in spacing for airflow. Mount the doors with heavy-duty hinges so they don’t sag after months of use. Inside, install two adjustable shelves: one at 12 in height and one at 16 in, then add a bottom tray panel to catch grit.
Paint the steel frame with an enamel made for metal and let it cure fully before adding doors.
Don’t skip a bottom grit tray — dirt works its way out through small gaps.
8. Arched Top Shoe Rack Cabinet with Curved Door Panels
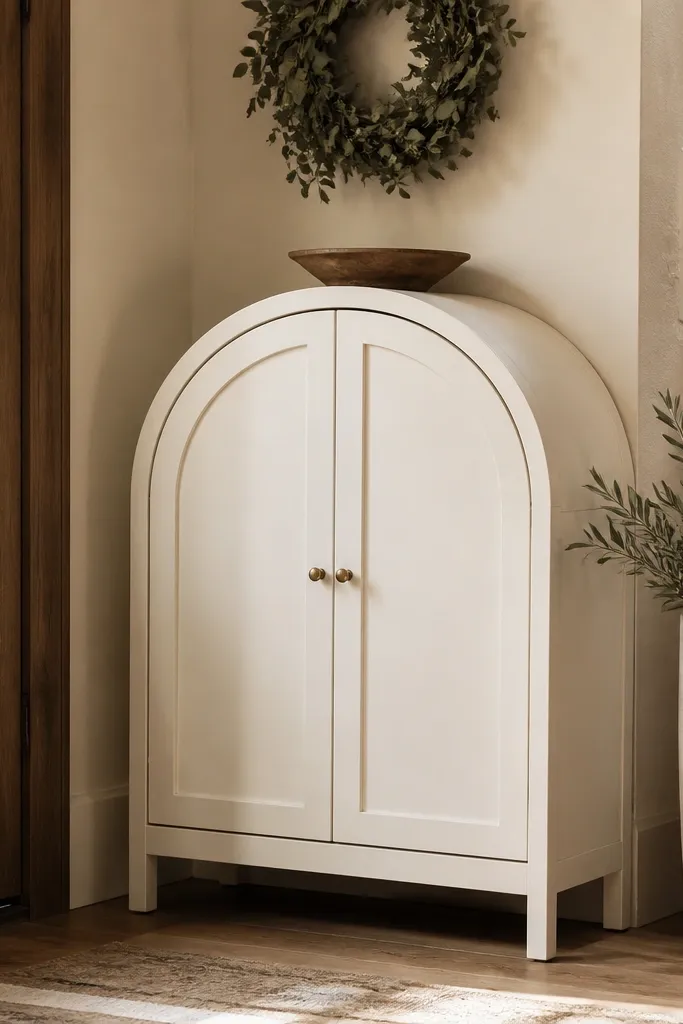
An arched top makes a shoe rack cabinet look like furniture instantly. The curve softens the entryway, especially if your home has straight lines and sharp corners. Doors hide the shoes, but the arched silhouette gives the piece personality even when it’s closed. This works well in entry halls with traditional, farmhouse, or transitional decor.
Editor's noteUse a template for the arch and mark hinge locations before you cut — curved doors punish small mistakes.
Build a rectangular cabinet box but add an arched face frame using laminated wood or MDF templates for a smooth curve. Cut two curved doors with matching arches and install them with concealed hinges designed for inset doors. Inside, add shelves at 11-12 in and a boot bay at 16 in, keeping the top curve area open so the shelves don’t look cramped. Finish with a smooth paint system and a simple knob or pull in brushed nickel.
Skip thisDon’t cram shelves under the arch — it makes the interior look lopsided and hard to use.
9. Rattan-Front Shoe Rack Cabinet with Hidden Doors Behind a Lattice Panel
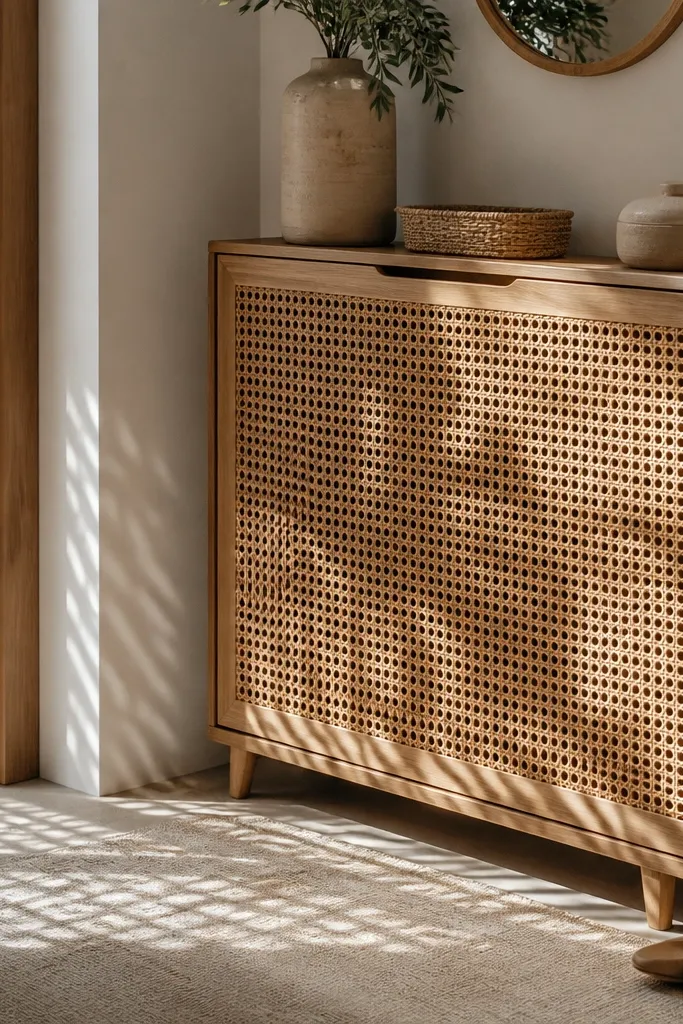
Rattan and lattice fronts look airy, but you still get full shoe hiding by placing the actual doors behind the decorative panel. The lattice adds texture so the cabinet looks warm and photogenic, while the hidden storage keeps the mess contained. This is a great choice for coastal, boho, and light-filled rooms. It also helps with ventilation because the decorative front breathes.
Build a standard cabinet box with 3/4 in plywood and add real doors inside the openings. Then frame a rattan or lattice decorative cover panel using thin strips so it sits over the front like a screen. Cut the decorative panel to cover the door seams but leave a small shadow gap so it doesn’t rub. Inside, install a boot bay at 16 in and two lower shelves at 10-12 in, then add a perforated bottom mat for airflow.
Use a removable decorative cover panel if you want easy access for cleaning dust buildup.
Don’t attach rattan directly to the cabinet without an air gap — it can warp with humidity.
10. Matte Gray Shoe Rack Cabinet with Vertical Handle Track
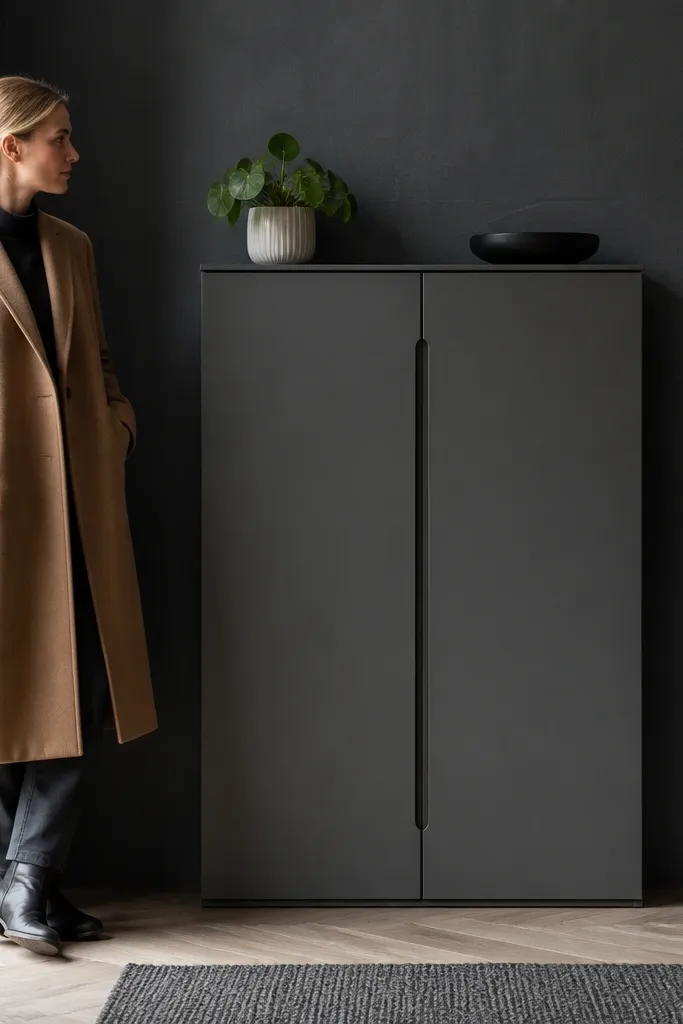
A matte gray cabinet with a vertical handle track looks clean and modern, and it hides shoes without making the entryway feel heavy. The handle track also gives you a strong design line that holds the front together visually. Inside you can keep the layout simple: fixed shelves for sneakers and one taller bay for boots. This design is great when you want a calm, minimal look with strong function.
Build the cabinet box and frame in 3/4 in plywood, then paint the carcass with a bonding primer and matte cabinet paint. Cut two door panels and mount them with concealed hinges so the face stays flat. Install a vertical handle track centered between the doors using a metal rail and screws into solid backing. Inside, set shelves for 10-12 in shoe height and add one 15-16 in boot compartment.
Mask the door edges carefully before paint so the reveal stays crisp.
Skip glossy topcoat on matte paint — it highlights every small bump and brush mark.
11. White Marble-Look Laminate Shoe Rack Cabinet with Bottom Drawer for Accessories
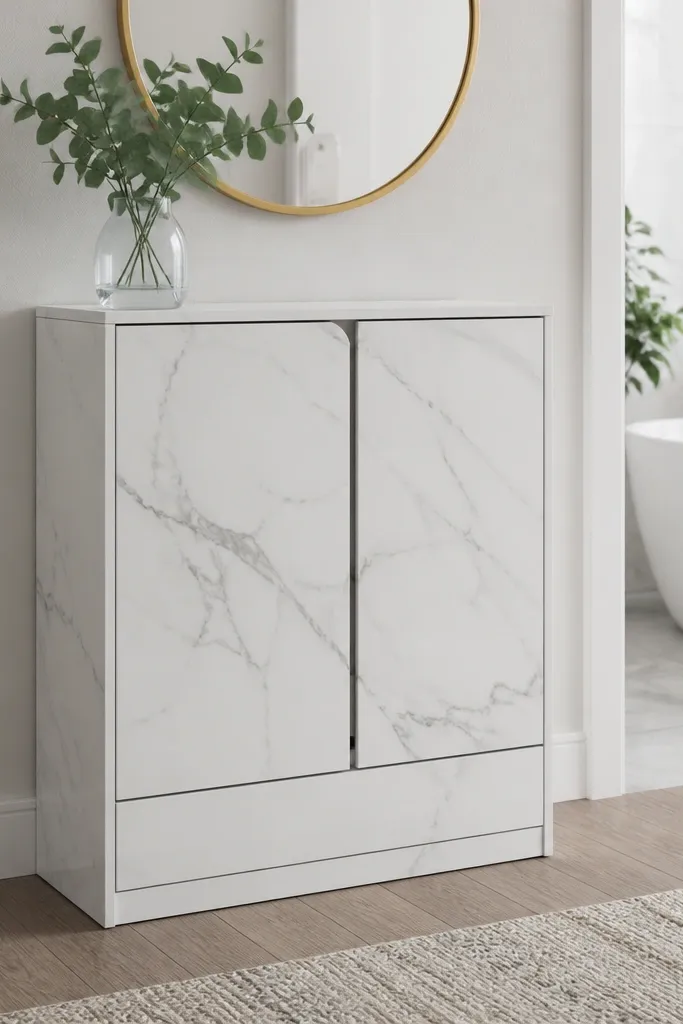
This cabinet looks like a bathroom vanity or a boutique entry console, which is exactly how you hide shoe mess in a good-looking way. The marble-look top makes the whole piece feel finished, and the bottom drawer keeps accessories like shoe polish, brushes, and insoles out of the visible chaos. The doors still hide footwear completely. It’s a strong choice for entries where you want a surface for keys and a clean place to store cleaning supplies.
Editor's noteUse double-sided tape when positioning laminate so it doesn’t shift while you smooth it down.
Build a standard cabinet body with a drawer at the bottom sized for brushes and small bottles, then place shoe shelves above. Use 3/4 in plywood for the carcass and laminate a solid top panel with marble-look sheet, trimming the edges with a matching edge band. Install drawer slides rated for your drawer weight and add a soft-close mechanism. For the shoe area, use shelves at 10-12 in and a boot bay at 16 in, then add a bottom toe-kick panel to prevent dust from drifting.
Skip thisDon’t skip a sealed top edge — water wicks into laminate seams and bubbles later.
12. Oak Frame Shoe Rack Cabinet with Sliding Barn Doors
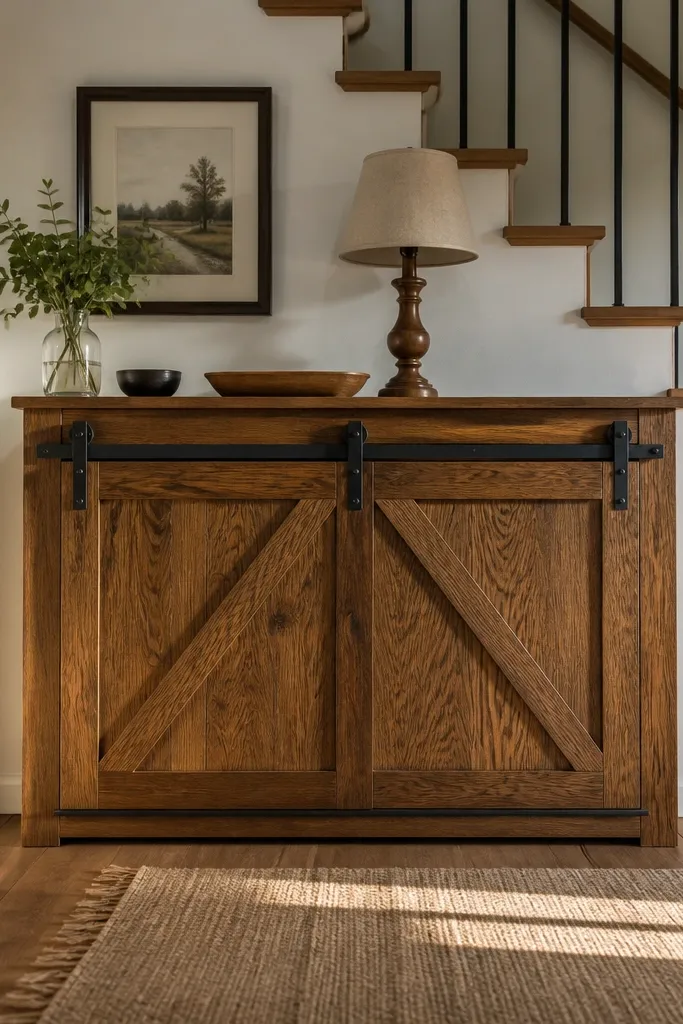
Sliding barn doors create a strong visual line and they save space because you don’t need clearance to swing doors open. The oak frame with a warm stain looks rich without looking bulky. Inside, you can use adjustable shelves and a taller boot bay so the cabinet adapts when your shoe mix changes. This is a good pick for wider entry walls where you can mount the track above the cabinet and still open the doors smoothly.
Editor's noteAdd a floor guide that keeps the doors from swaying — it makes the whole cabinet look more precise.
Build the cabinet and frame, then install a top rail that can support the barn door track load. Hang two doors with a top-mounted track; size them so they overlap the opening by about 1 in on each side when closed. Inside, plan shelves: one compartment at 16 in for boots and two shorter zones at 10-12 in. Finish the oak doors with stain and a clear coat, then add a bottom dust skirt to keep grit from sneaking out.
Skip thisDon’t mount the track too low — the doors will scrape coats or hooks and looks sloppy.
13. Built-In Look Shoe Rack Cabinet with Recessed Front and Shadow Gap
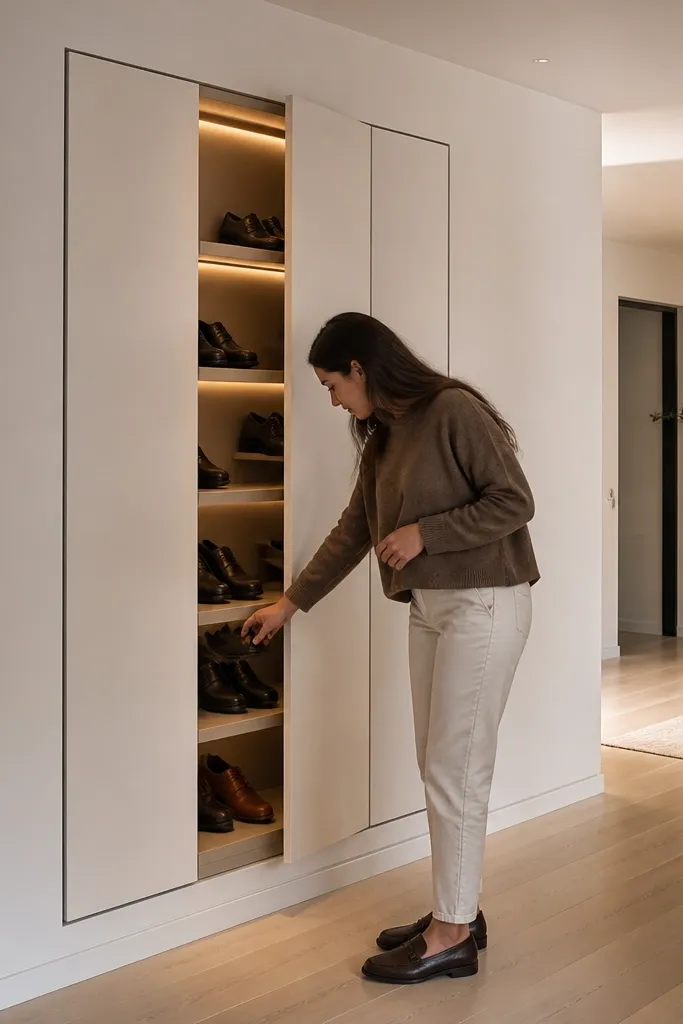
This design hides shoes while making your cabinet look like it was built into the wall from day one. The recessed front and shadow gap create a clean outline that reads architectural, not DIY. The shoes stay behind flush doors, and the thin gap helps the door open smoothly and reduces rubbing. It’s ideal if you’re renovating an entry or you can frame in a section of drywall.
Editor's noteUse a spacer board to set hinge depth — it prevents doors from sitting uneven in the reveal.
Frame a wall opening to your cabinet size, then build the cabinet carcass to fit with a consistent reveal. Use 1/2 in spacer strips to create a shadow gap around the doors, then install the doors with hinges that allow for the recessed alignment. Add shelves inside using a mix of heights: 10-12 in for sneakers and 16 in for boots. Finish by painting the cabinet and surrounding trim the same color so the seam disappears, then add a simple push latch or knob.
Skip thisSkip the shadow gap — flush doors without clearance scrape and look messy.
14. Riser-Style Shoe Rack Cabinet with Lift Shelves and Top Bench
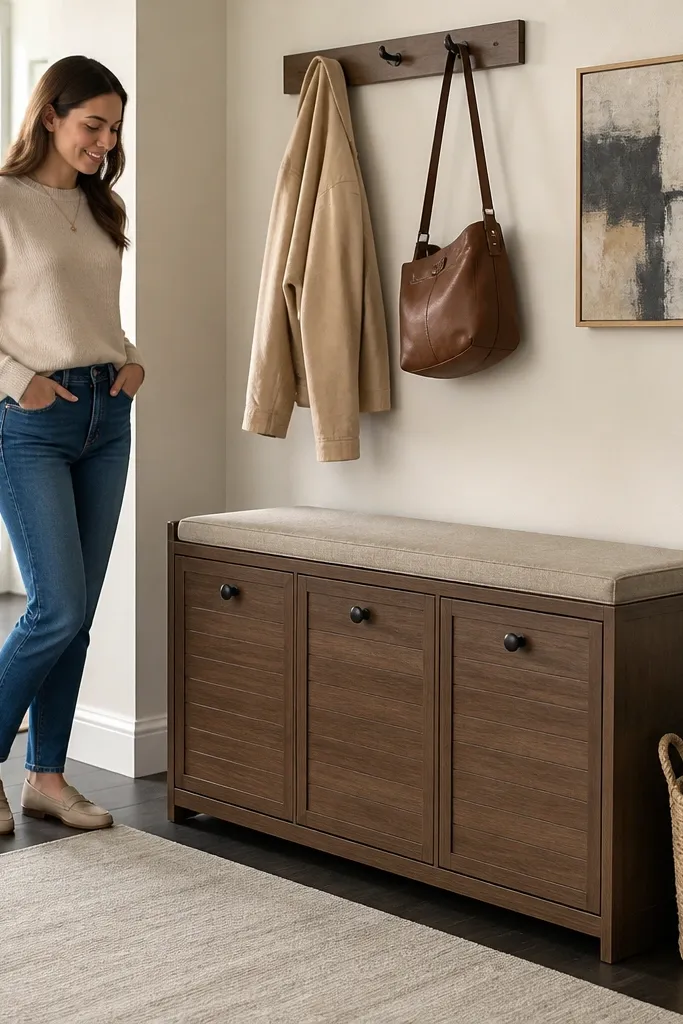
This cabinet hides shoes but also gives you a place to sit, which changes how the entry behaves. The top bench makes the cabinet feel like furniture, and lift shelves keep shoes from stacking into a lumpy pile. The riser layout makes it easy to reach pairs because each shelf comes forward with a hinge system. It’s a great fit for families who need quick shoe swaps and for entryways where you want a functional landing spot.
Editor's noteAdd a simple rubber bumper where shelves close — it prevents chip marks on the frame.
Build a cabinet with a bench top panel and add lift shelves using piano hinges and soft-close lift supports. Install internal dividers so each shelf section holds one pair neatly, and keep the main shoe shelf height around 10-12 in. Add a tall boot bay at 16 in with a fixed shelf and one deeper compartment. Finish the bench top with a durable topcoat and seal any exposed edges so scuffs don’t show.
Skip thisDon’t make shelves too thin — lift mechanisms need stiffness to stay aligned.
15. White Laminate Shoe Rack Cabinet with Perforated Back Panel for Airflow
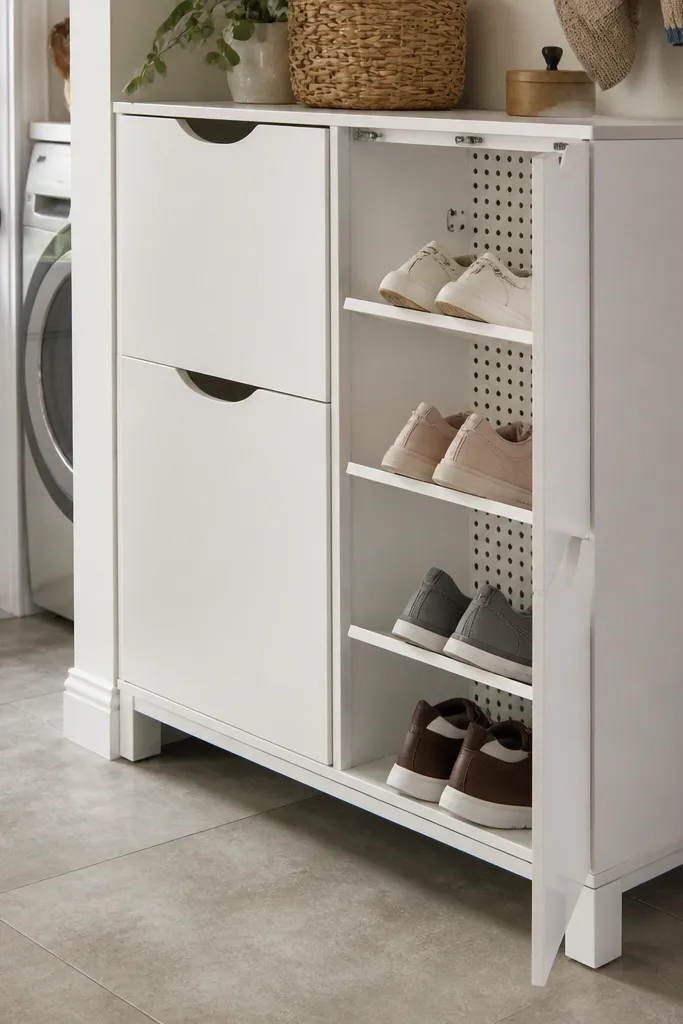
All-white cabinets look clean, but they also show dust and grime fast. This design stays good-looking because it adds airflow inside using a perforated back panel, so shoes dry without turning the cabinet into a damp smell trap. The front stays opaque and minimal, so you hide the mess. It works great in laundry-adjacent entries or anywhere shoes get wet from weather.
Editor's noteUse a removable tray so you can pull it out and wipe grit weekly without disassembling the cabinet.
Build the cabinet box from 3/4 in plywood and cover it with white laminate or paint-grade panels. Cut a perforated back panel from thin metal sheet or plastic perforated board and mount it with standoffs so air can circulate. Install shelves at 10-12 in and a boot bay at 16 in, then add a removable bottom drip tray. Seal all edges and use gasket strips around the door to keep dust from drifting out.
Skip thisSkip door gaskets — airflow designs fail if dust escapes around the seam.
16. Navy Blue Shoe Rack Cabinet with Brass Ring Pulls
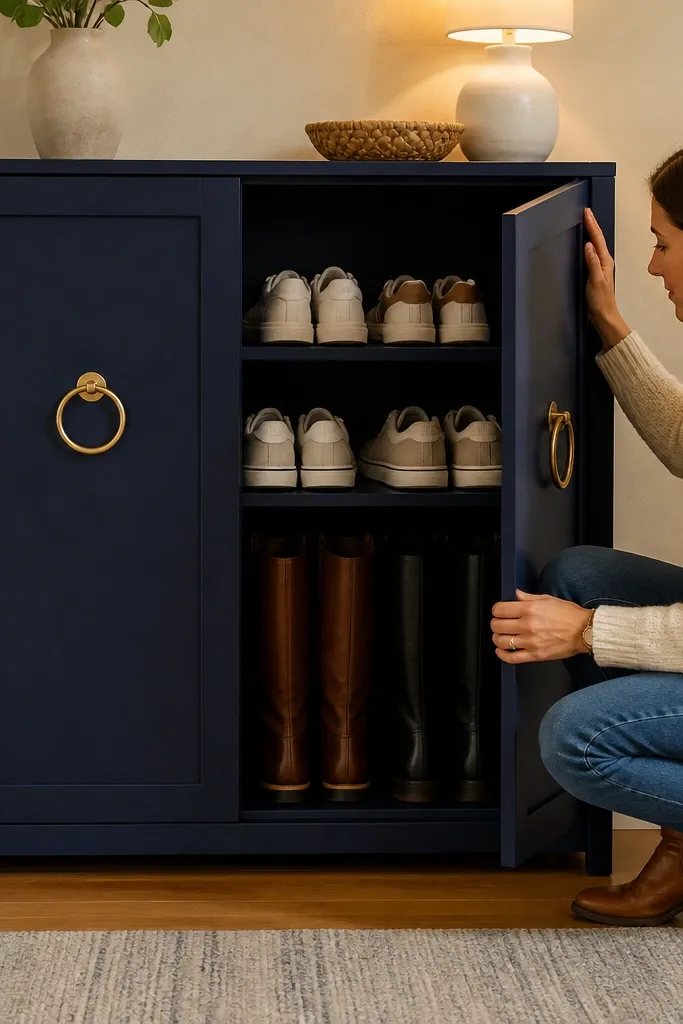
A navy cabinet with brass hardware looks sharp and makes shoe storage feel like a design choice. The ring pulls are easy to grab, even when your hands are full, and they give the doors a consistent shape. Inside, keep it straightforward: a boot bay and two sneaker shelves so you’re not constantly rearranging. This style is perfect for entries with warm wood floors, beige walls, or brass lighting.
Build the cabinet carcass and face frame, then sand and prime for a smooth paint base. Paint the doors and frame navy with a cabinet enamel and let it cure fully before adding hardware. Install brass ring pulls centered vertically on each door panel. Inside, set shelves at 10-12 in and 16 in for boots, then add a bottom panel that catches grit. Use soft-close hinges so door shutdown doesn’t slam and chip paint.
Choose ring pulls with a consistent inner diameter so they feel the same on every door.
Don’t mount pulls too close to edges — paint chips show up fast on dark colors.
17. Smoke Glass and Matte Black Shoe Rack Cabinet with Hidden Vent Slots
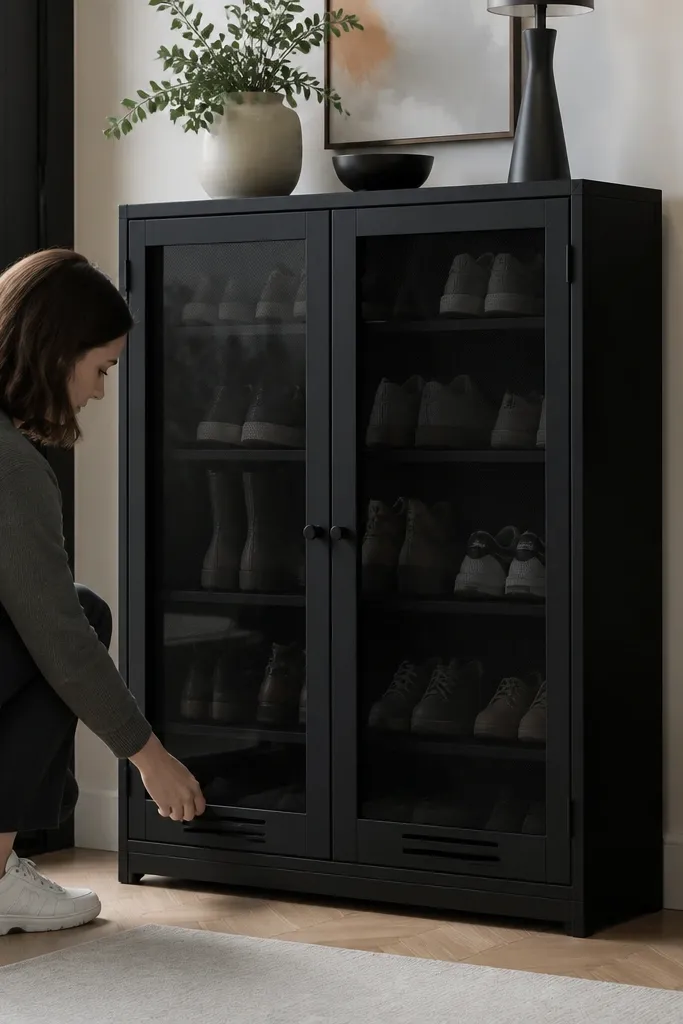
This cabinet looks modern because it uses smoke glass and matte black hardware, but it still hides the shoe mess. The smoke glass reduces the visual chaos, and the hidden vent slots help shoes dry without leaving the front looking “utility.” The result is a cabinet that looks like it belongs in a boutique apartment. It’s best for hallways where you want storage that still feels open.
Editor's noteUse a baffle behind vent slots so shoes don’t show through the openings.
Build the carcass from 3/4 in plywood and paint it matte black with a durable finish. Frame the door openings and install smoke glass using glazing beads. Add hidden vent slots behind the door line by cutting narrow channels in the back panel and adding a small internal baffle that keeps shoes from being directly visible through vents. Install shelves at 10-12 in and a boot bay at 16 in, then add a sealed bottom panel with a removable filter tray.
Skip thisDon’t use a fully clear interior — vent designs can accidentally reveal clutter.
18. Two-Stack Shoe Rack Cabinet with Slanted Top Shelves and Full Door Coverage
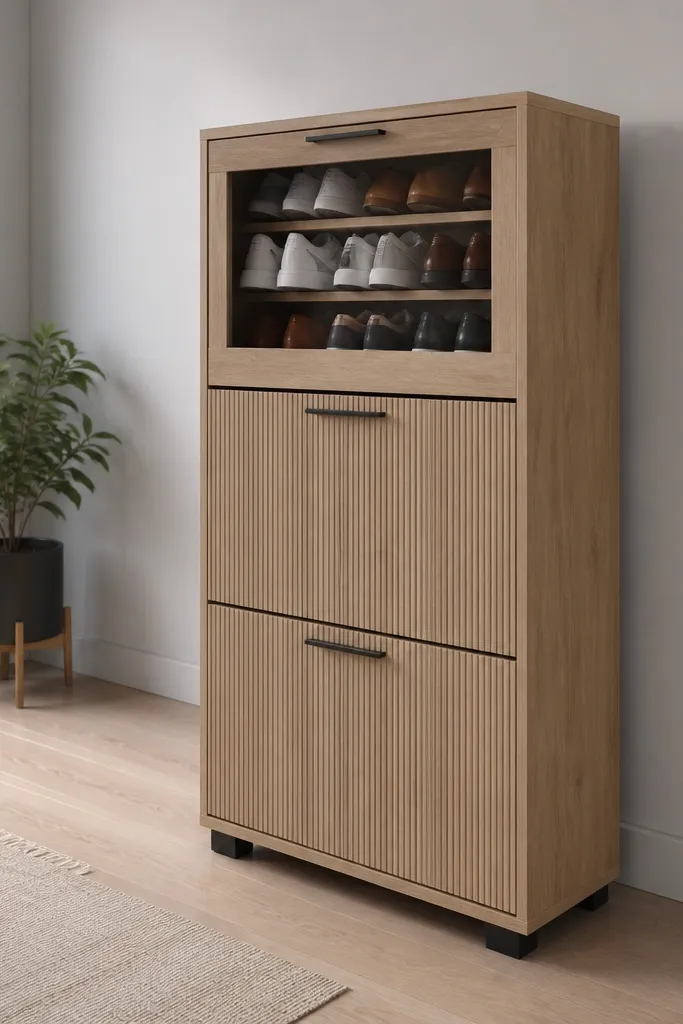
This layout hides shoes but also uses space efficiently by adding slanted shelves in the top zone. The slant keeps shoes from sliding forward, so the interior looks neat even if you toss them in quickly. Doors keep the front clean, and the two-stack layout makes it easier to separate everyday shoes from boots. This is a strong choice for families because it reduces the “pile at the bottom” problem.
Build a cabinet with a vertical divider so you get two stacks, each about 12-13 in wide. Install top shelves at a slight angle, about 15-20 degrees, so shoes sit securely. Add one lower fixed shelf at 10-12 in and a taller bay at 16 in for boots in one or both stacks depending on your needs. Use full doors across the front and add magnetic catches for alignment, then finish with paint or stain that matches your entry furniture.
Cut slanted shelves from 3/4 in plywood and add a thin lip at the back so shoes can’t creep forward.
Don’t rely on slant alone — without a rear lip, shoes still slide and the cabinet stops looking tidy.
19. Farmhouse White Shoe Rack Cabinet with Tall Side Panels and Open Shelf Center
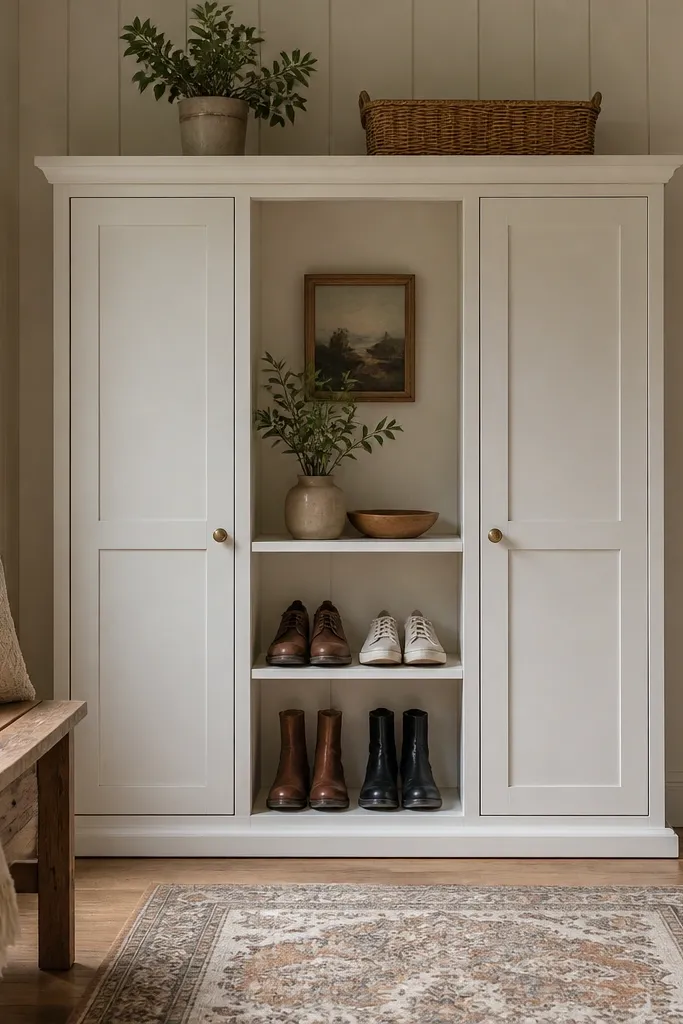
Farmhouse style can still hide shoes if you keep the open area small and framed. This cabinet uses tall side panels and a mostly enclosed interior, with a center open shelf zone for items you grab daily. The doors cover the messy bulk, and the center area stays styled because it’s limited to a few pairs. It’s perfect for a console-adjacent entry where you want a friendly look without the constant shoe clutter.
Editor's noteKeep the open center to one shelf height — too many open compartments ruin the “hidden mess” promise.
Build the cabinet carcass and face frame in white-painted plywood, then create a center open bay framed with 1x2 trim. Install doors for the left and right bays only, keeping the center visually clean. Inside the covered bays, use fixed shelves at 10-12 in and one deeper bay at 16 in for boots. Add a removable tray at the bottom for grit and finish with matte paint and simple black pulls.
Skip thisSkip wide open sections — they turn into a shoe display whether you want it or not.
20. Walnut Slab Front Shoe Rack Cabinet with No-Visible Hinges
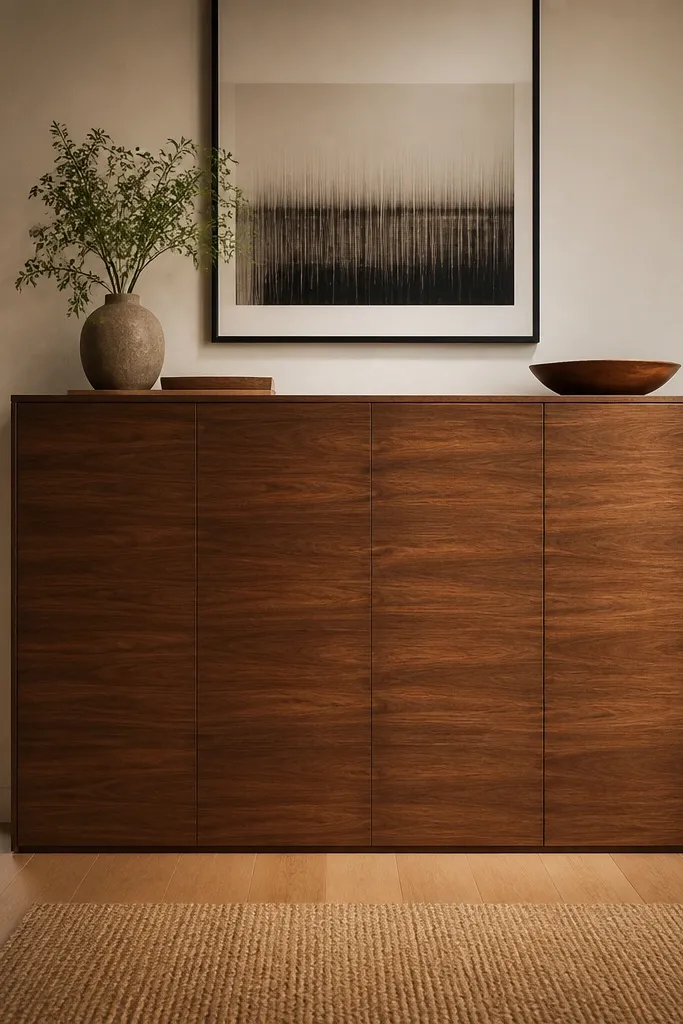
Slab doors make a shoe rack cabinet look expensive because there are no panel lines to distract. With no-visible hinges, the cabinet reads as a single clean front. Walnut tones add warmth, and the interior stays hidden behind the slabs. This design works well in modern homes with warm woods and minimal hardware. It’s also great if you hate door clutter because the front stays smooth and uninterrupted.
Build the cabinet box and face frame, then plane and finish door slabs for a flat, consistent thickness. Use concealed hinges like euro-style hinges and mount them to hinge plates so you can dial in alignment. Add a vertical pull or recessed finger edge so doors open without bulky knobs. Inside, set shelves at 10-12 in and a boot bay at 16 in, and add a bottom dust skirt. Finish with walnut stain and a clear topcoat that resists scuffs.
Use a consistent door thickness and pre-drill hinge cup holes with a jig so the alignment stays perfect.
Don’t use thin doors — slab fronts warp and you’ll see uneven gaps.



