
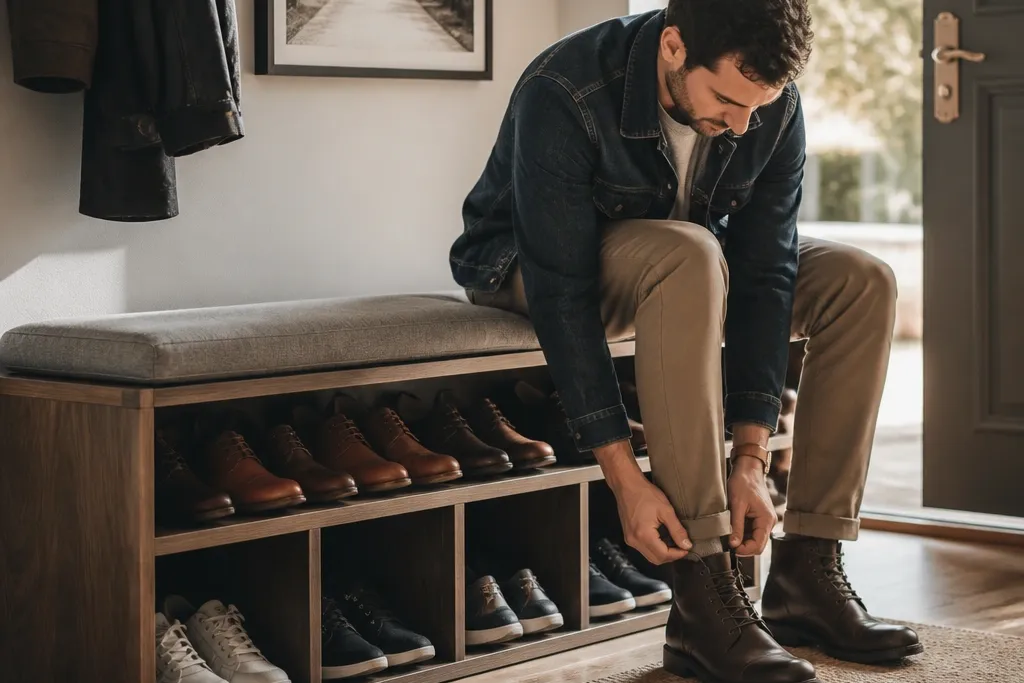
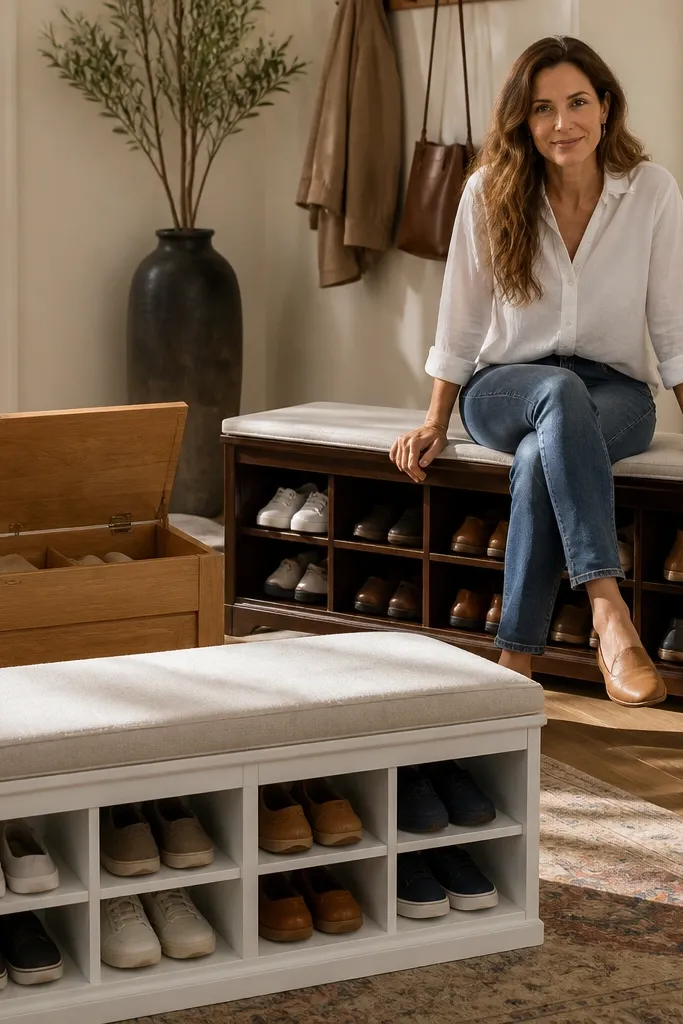
1. Walnut-Top Bench with Hidden Toe-Kick Drawer
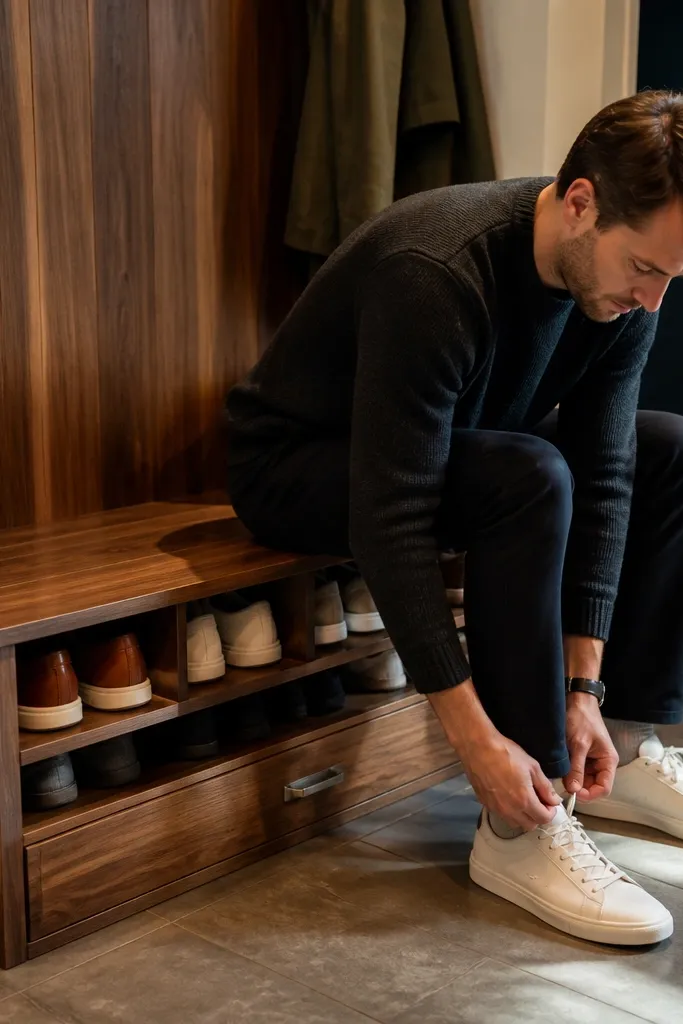
This one reads expensive because the seat top looks like a single slab and the storage stays visually tidy. The open shelves show only the upper half of shoes, while a narrow drawer under the toe-kick holds cleaning supplies and laces so the bench face stays clean. Walnut stain plus a satin clear coat makes the grain look “finished furniture” instead of plywood. It’s a solid seating bench because the seat is supported by a full perimeter frame, not just shelf brackets. Build it for a narrow entryway where you want seating without sacrificing floor space.
Editor's noteAdd felt pads to the drawer bottom so it slides quietly and doesn’t scrape the frame.
Cut a 3/4-inch plywood base frame with a 14-16 inch internal depth for shoes. Build two shelf bays using 6-7 inch shelf spacing, then add a 3-4 inch tall toe-kick drawer box centered under the seat opening. Use pocket holes to attach 1x2 cleats for shelf support, then screw the seat top (1-inch thick walnut-stained wood) over the rigid frame. Finish with edge-banding, then seal with 2-3 coats of satin polyurethane, sanding lightly between coats.
Skip thisDon’t mount the seat directly to shelf panels; the seat must land on the frame.
2. Black Steel X-Frame Bench with Light Oak Slats
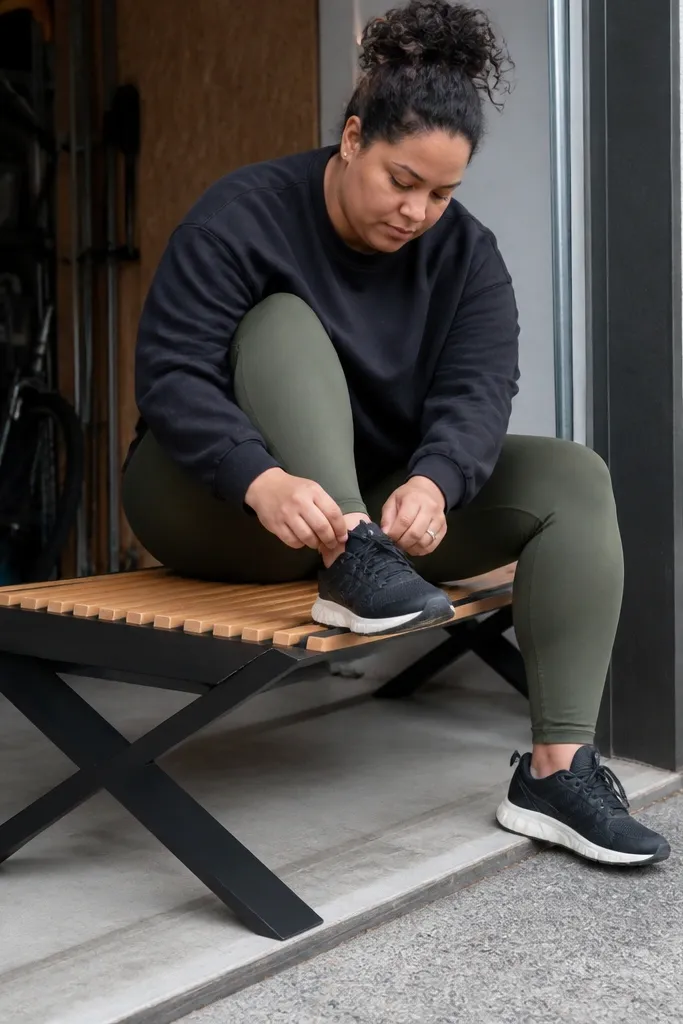
This design looks high-end because the metal structure creates crisp lines and the oak slats feel airy. The X pattern adds visual interest without extra decoration, and it also stiffens the bench so it doesn’t rack when you sit. Oak slats spaced 3/4 inch apart let air move around shoes, which helps sneakers dry out faster. The seat can be a simple plywood top with an oak veneer, or a thin upholstered cushion on top. It’s best for modern homes where you want the bench to look like a piece of furniture, not a storage box.
Editor's notePrime and paint steel with a bonding primer, then use a matte topcoat so scratches don’t stand out.
Build a steel frame using 1-inch square tube for the perimeter and 1/2-inch tube for the X braces. Set the shoe shelf area to 13-14 inches deep and place shelves at 6-7 inches apart. Cut oak slats to span between frame rails, then screw them down with countersunk screws so heads stay flush. Top with a 3/4-inch plywood seat, then add an oak veneer or paint it with a satin finish to match the metal.
Skip thisAvoid wide slat gaps; shoes tip and look messy when the support is too far apart.
3. Reclaimed Barnwood Bench with Flip-Top Shoe Lids
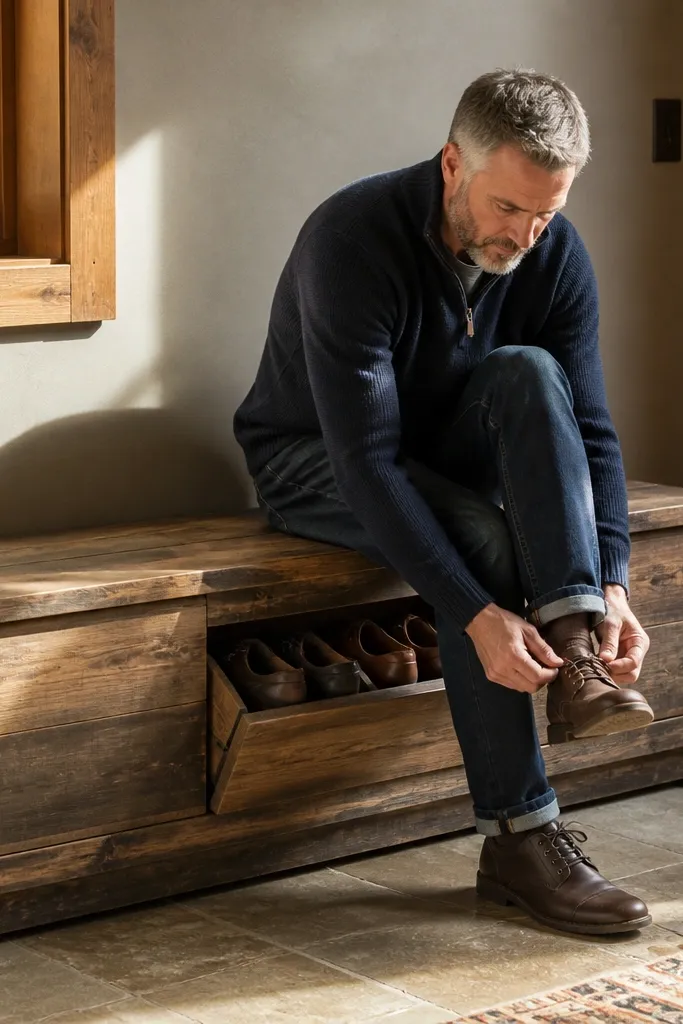
Flip-top lids make this bench look like a cabinet you’d buy, not something you built. When the lids are down, the front is clean and the bench reads as a single piece of wood furniture. When they’re open, you get a practical shoe compartment with controlled visibility. Reclaimed barnwood gives color variation and depth, and a clear matte topcoat keeps it from looking plastic. This is best if your entryway gets messy fast and you want a quick visual reset after guests arrive.
Editor's noteUse a small spacer block to keep lid gaps consistent; uneven gaps look cheap fast.
Frame a bench carcass from 3/4-inch plywood with an internal depth of 14 inches and two shelf compartments at 6-7 inches tall. Build hinged lids from 3/4-inch boards cut to fit each compartment, leaving a 1/16-inch reveal around edges. Add magnetic catches under the lids, then mount soft-close hinges if you want a quieter feel. Sand the reclaimed wood just enough to knock off splinters, then seal with matte clear finish and hardwax oil on high-wear edges.
Skip thisDon’t skip sanding the reclaimed boards; splinters on a seat edge ruin the whole “high-end” feel.
4. Upholstered Seat with Chevron Storage Front
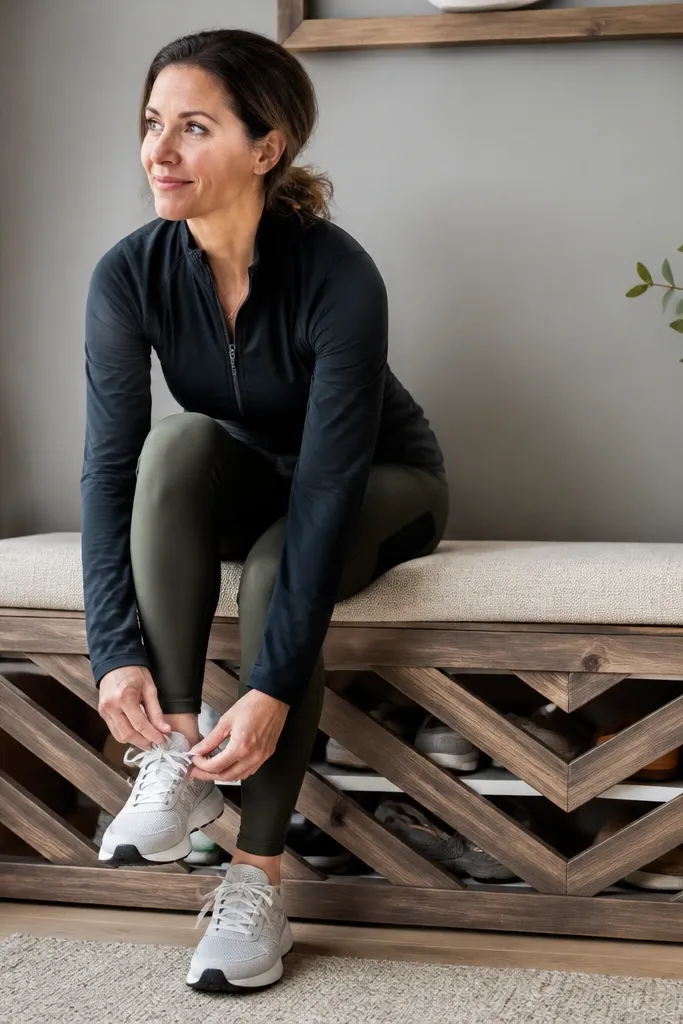
This bench is photogenic because the chevron front makes the storage look designed, not hidden. The upholstered seat gives you the “sit while you tie shoes” factor, and the storage front keeps the shoe arrangement from looking random. Use a neutral fabric like oatmeal or light gray so the wood pattern stays the star. The chevron slats also hide scuffs and minor shoe wear marks, which helps it keep looking good between cleanups. Great for a foyer where you want the bench to be a focal point.
Editor's noteUse a tight fabric weave; loose weave shows shoe scuffs and looks worn quickly.
Build a rigid plywood frame sized to your space, then create two shoe shelf zones at 6-7 inches tall with 12-13 inches depth. Cut chevron slats from 1/4-inch plywood or thin hardwood, then glue and screw them onto a front panel mounted over the openings. Add a seat base from 3/4-inch plywood, then glue 1.5-2 inches foam and wrap with fabric using a staple gun. Finish by adding a trim strip around the seat edge and installing the front panel with removable screws for access.
Skip thisDon’t make the seat foam too thick; it will feel bouncy and look like a cushion, not a bench.
5. Slatted Door Bench with Magnetic Latch
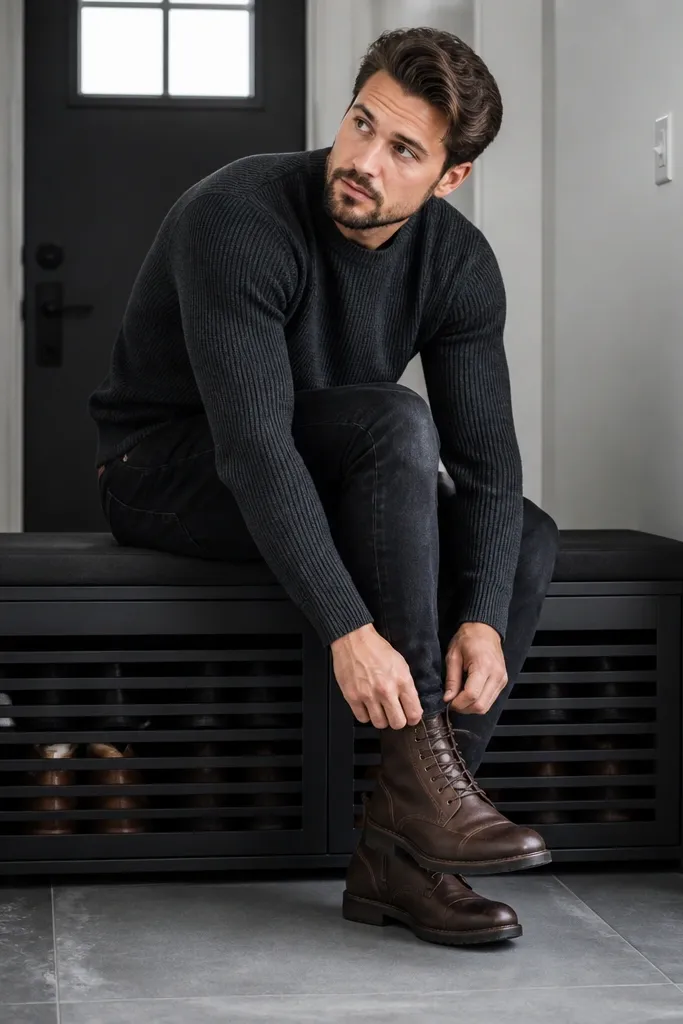
Slatted doors give you the best of both worlds: shoes stay covered, but you still get airflow. The slats look architectural and make the bench feel like a designer storage piece. Add a magnetic latch so closing feels smooth, and the bench front stays aligned. This is a great choice when you want people to see a clean bench front immediately, even if the compartments are full. Build it for shared entryways where guests don’t respect shoe etiquette.
Editor's noteUse rare-earth magnets in pairs for consistent closure across the full door width.
Construct a bench frame with 14-inch internal depth and two shelf compartments at 6-7 inches tall. Mount a slatted door panel over the openings using piano hinges or side hinges, with 1/8-inch reveals around the perimeter. Cut door slats from 1/2-inch strips, leaving 1/2-inch gap between slats for airflow. Add a strong magnet catch and a simple stop block so the door closes flush, then attach a 1-inch thick seat top secured to the frame.
Skip thisSkip the door stop; without it, doors bounce and look misaligned after a few uses.
6. Tile-Top Bench with Grout Lines as Design
A tile seat makes the whole bench look custom because grout lines act like a built-in design grid. It’s also practical: wipes clean, doesn’t stain easily, and feels cool in summer. Pair it with a warm wood base so it doesn’t look like a bathroom bench. For the shoe storage, keep shelves open so shoes dry out, and use a simple back panel so the interior looks intentional. This works well in entryways that see mud, wet boots, or frequent sock-and-shoe changes.
Editor's noteUse a grout color slightly darker than the tile so tiny chips don’t stand out.
Build a plywood seat deck on top of a rigid frame, then cover with a tile backer board screwed down in a grid pattern. Install 12x12 inch or 12x24 inch tiles with spacers, using thinset mortar and grout in a color that matches your wood finish. Keep the shoe area at 13-14 inches deep and set shelf heights at 6-7 inches. Seal grout after curing, then finish the wood base with stain and a clear coat.
Skip thisDon’t tile directly onto unbacked plywood; it cracks when the bench flexes.
7. Fold-Down Seat Bench with Pull-Out Shoe Tray
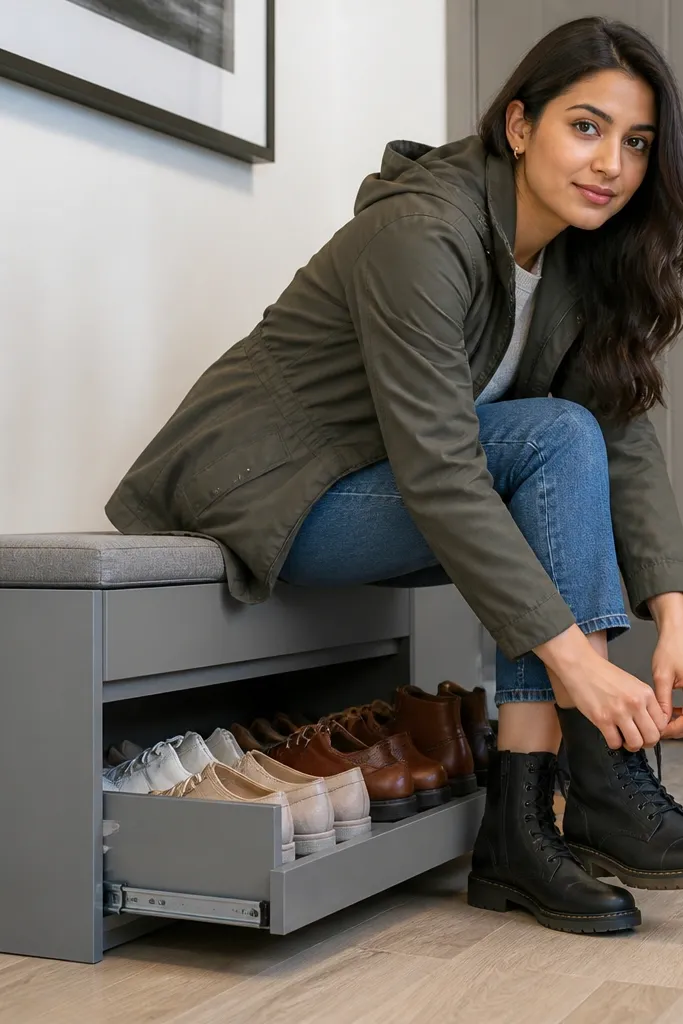
This design is pure function with a clean look: the seat folds down and hides shoes behind a pulled-out tray. When closed, it looks like a neat bench with a solid top, not storage. When opened, you get full access to shoes without digging around. Use it in small entryways where you need storage but don’t want doors swinging into the room. It also keeps shoes from being visible, which makes the space look calmer.
Editor's noteUse full-extension drawer slides so the tray actually reaches you, not just halfway.
Build a base cabinet from 3/4-inch plywood sized for one main tray, keeping internal depth around 14 inches. Mount a fold-down seat lid using heavy-duty hinges and a support stay so it locks at open height. Create a pull-out tray from 1x material on slides rated for the load, and set the tray height to match the seat when closed. Finish the top with hardwood veneer or a sealed plywood skin, then add a soft rubber bumper where the seat closes.
Skip thisDon’t rely on flimsy hinge hardware; the seat lid takes repeated weight.
8. Corner Bench with L-Shaped Shoe Storage and Rounded Seat
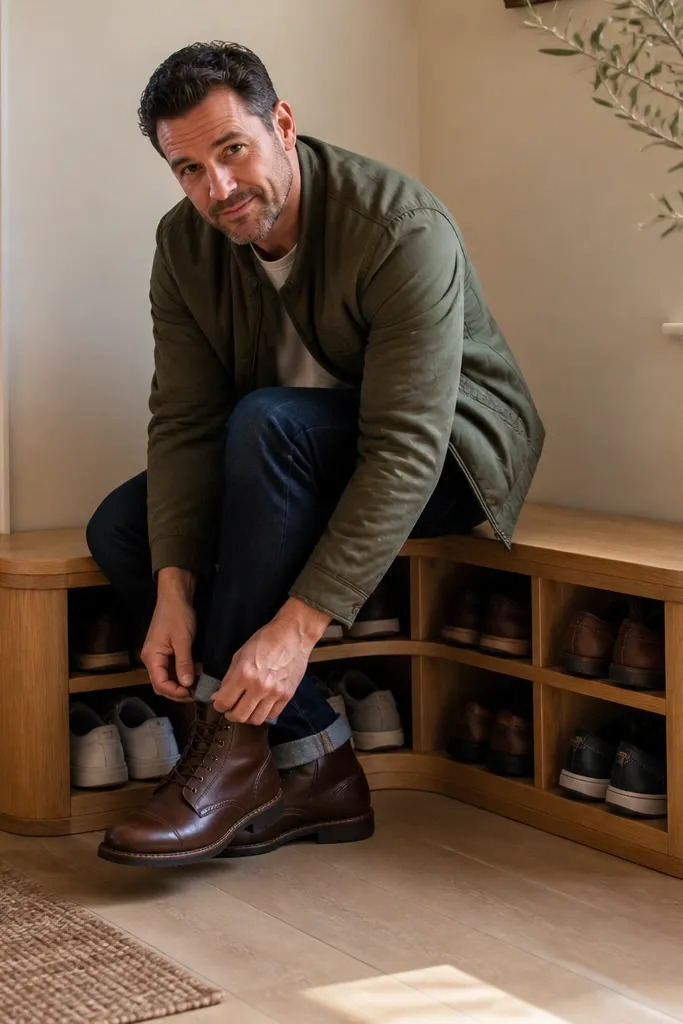
Corner seating looks high-end because it solves an awkward space and keeps the room layout clean. This bench uses an L-shaped shoe storage layout so you get more capacity without widening the footprint. The rounded front edge makes it feel friendly and prevents that sharp-cabinet look by softening the silhouette. Use a continuous seat finish so it looks like one piece of furniture. It’s ideal for apartments or foyers where a straight bench would block a walkway.
Editor's noteMeasure your corner angle and cut the inner shelf panel first; small angle errors show up in corner furniture.
Build a corner carcass from plywood with two shelf bays that meet at a 90-degree corner, each bay at 12-13 inches deep. Set shelf heights at 6-7 inches, then add a middle brace so the corner joint stays square. Create a rounded seat front using a router template or circular jig, then attach the seat top to the rigid frame. Sand the rounded edge smooth, then apply stain and a clear satin topcoat for a smooth, furniture-grade feel.
Skip thisDon’t skip diagonal bracing at the corner; corner benches wobble quickly.
9. Two-Tone Bench with Upper Open Shelves and Lower Cabinet

Two-tone designs read “designer” because the eye gets separation between storage zones. Keep the top shelves open for a neat shoe display, then close the bottom cabinet for bulky pairs or shoe boxes. The seat sits on top of the whole structure, so the bench looks like a single unit even though the storage changes. This is a great choice for people who want the bench to look good even when the lower storage is messy. Pick one dark tone for the cabinet and one light tone for the seat and shelves.
Editor's noteUse a single reference board for shelf spacing so every shelf line lands perfectly level.
Build the frame with a clear internal depth of 13-14 inches and two storage zones. Construct upper open shelves at 6-7 inches tall, then build a lower cabinet compartment at about 14-16 inches tall for boxes and bulky shoes. Use plywood for the base and add face frames for a crisp edge, then paint the cabinet with a satin enamel and stain the seat and shelves. Install soft-close hinges for the cabinet door and add a removable back panel for access.
Skip thisDon’t mix paint and stain on the same surface; the sheen mismatch looks off under entryway lighting.
10. Rattan-Front Storage Bench with Solid Wood Frame

Rattan fronts look high-end because they add texture without clutter. It keeps shoes partially visible, but the pattern disguises mess, so the bench stays photogenic even when it’s full. Use a solid wood frame so the bench feels sturdy and the seat doesn’t sag. This is a smart choice for warm, coastal, or modern-natural interiors where you want storage that looks airy. Pair a light wood frame with a natural rattan color for the cleanest look.
Build a plywood carcass with 14-inch depth and shelf heights of 6-7 inches. Frame each opening with thin strips so rattan can be stretched and stapled on the back side. Cut rattan panels to size with a slight overhang, then tension them evenly and secure with small staples and trim strips. Add a 1-inch thick seat top and finish the wood with a clear hardwax oil for a natural sheen.
Seal rattan edges lightly with clear varnish so fibers don’t fuzz from cleaning.
Avoid cheap rattan sheets that sag; you need taut panels for a clean front.
11. Walnut Veneer Seat with Hidden Lift-Out Shoe Bin
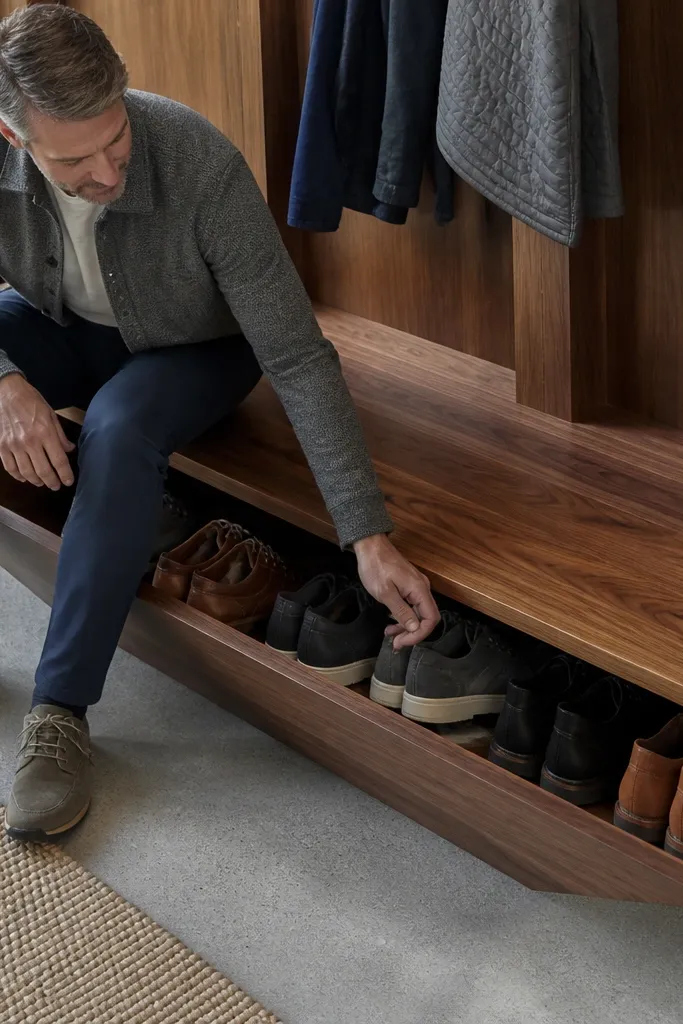
This bench looks sleek because the seat top stays smooth and continuous while storage stays hidden. The lift-out bin helps you move shoes quickly during cleaning, and it keeps pairs grouped so they don’t spill into random spots. Walnut veneer makes the seat look like a solid slab even if you’re using plywood underneath. It’s great for entryways where you want the bench front to stay “quiet” visually. Choose this if you like a clean, minimal look with one strong material story.
Build a rigid frame from 2x2 or 1.5-inch plywood strips, then create a recessed bin cavity under the seat. Make the shoe bin from 1/2-inch plywood with a front lip and add two pull handles on the sides. Cut a seat top from 3/4-inch plywood, apply walnut veneer, then attach it with screws through the frame so it can lift off. Add ventilation holes in the bin bottom and finish the wood seat with 2 coats of satin clear.
Add rare-earth magnets or a latch so the seat doesn’t pop loose when you sit.
Don’t skip ventilation holes; hidden bins trap moisture and smell builds up.
12. White Lacquer Bench with Brass Toe Beading
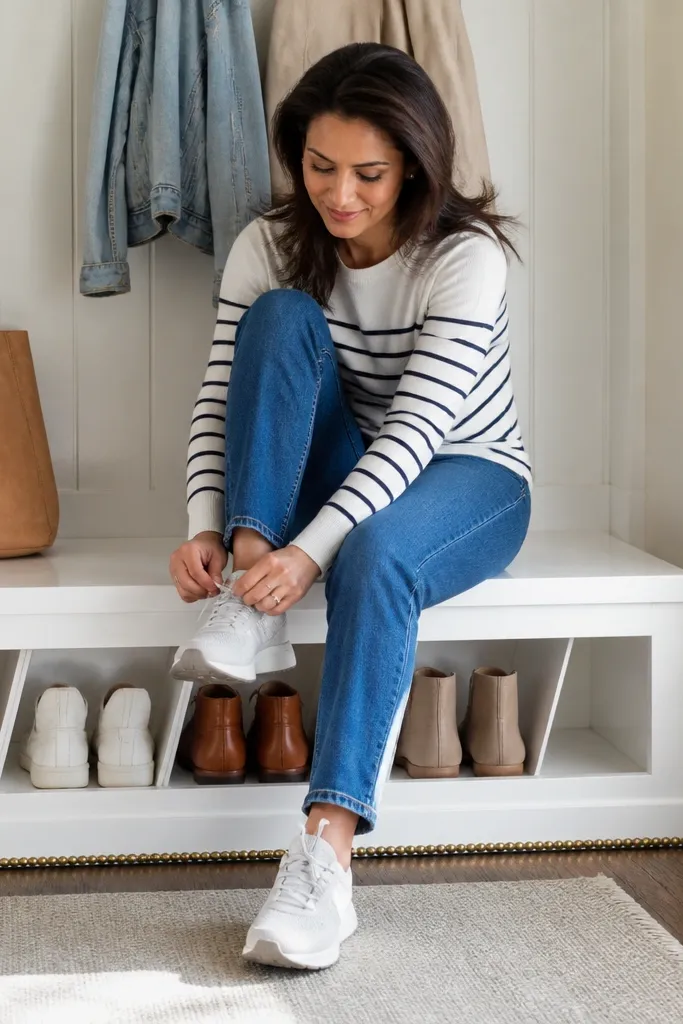
White lacquer with brass trim looks like boutique furniture. The brass toe beading creates a crisp line that frames the bench and makes it photograph cleanly, even in bright lighting. Keep the shoe storage open but use angled shelf dividers so shoes sit neatly and don’t fall forward. This is a strong pick for a bright hallway where darker wood can feel heavy. It also helps if you want a bench that matches white walls and modern hardware.
Editor's noteUse painter’s tape to mask brass trim lines; straight tape edges make a big difference in the final look.
Build a frame with 13-inch depth and two shelf compartments at 6-7 inches. Add angled dividers from 1/2-inch plywood so each shelf has a slight slope back, preventing shoes from tipping. Apply primer, then spray or roll white lacquer in thin coats, sanding lightly between coats for smoothness. Install brass toe beading along the bottom edge and add a seat top that’s thick enough to resist denting.
Skip thisDon’t rush lacquer coats; thick coats trap dust and look bumpy.
13. Dark Denim Upholstered Seat with Steel Shelf Frame
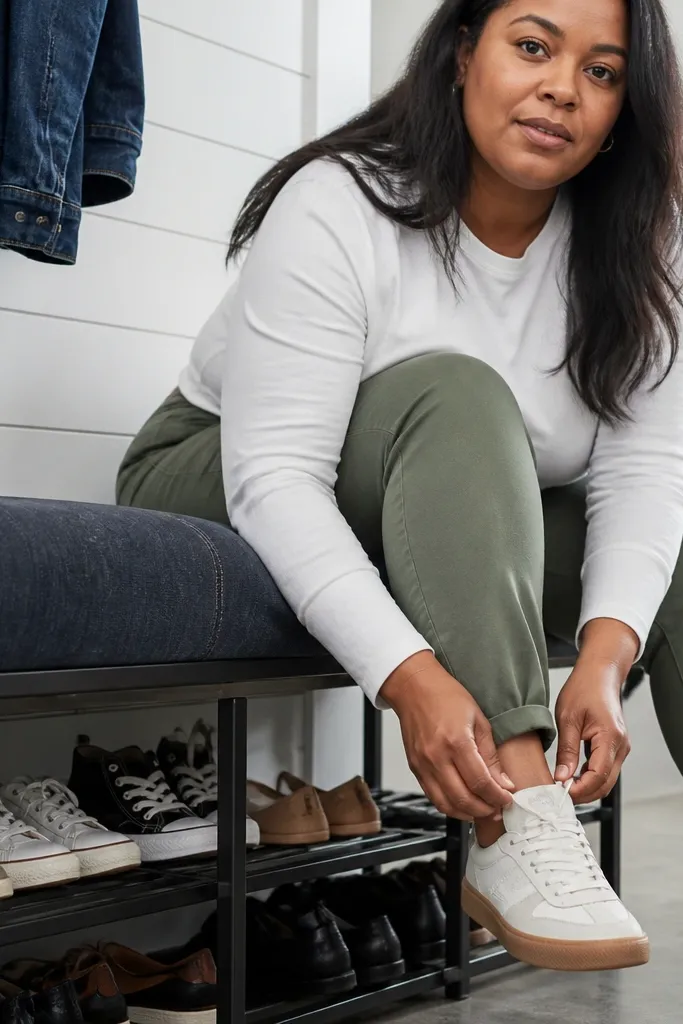
Denim upholstery reads casual but polished, especially when it’s paired with a clean steel frame. The seat looks cozy and holds up better than delicate fabrics, and it still photographs well because denim has visible texture. Keep storage open with steel shelves or steel rails so shoes stay breathable. This bench is good for families and busy entryways because denim hides minor scuffs better than smooth upholstery. Build it if you want something that looks high-end but forgives real life.
Editor's noteUse a zipper or hidden seam on the underside so you can reupholster later.
Build a steel rectangular frame and add shelf rails at 6-7 inch intervals, with 12-13 inches depth. Create a seat base from 3/4-inch plywood and add 1.5-2 inches foam, then wrap with dark denim fabric and staple underneath. Edge-finish the seat with a thin wood trim strip so the fabric doesn’t fray at corners. Seal any wood parts with a clear coat and attach seat to frame with bolts and threaded inserts.
Skip thisAvoid glossy fabric; it highlights wrinkles and looks cheap under flash lighting.
14. Recessed Lighting Bench with Glassy Shelf Finish
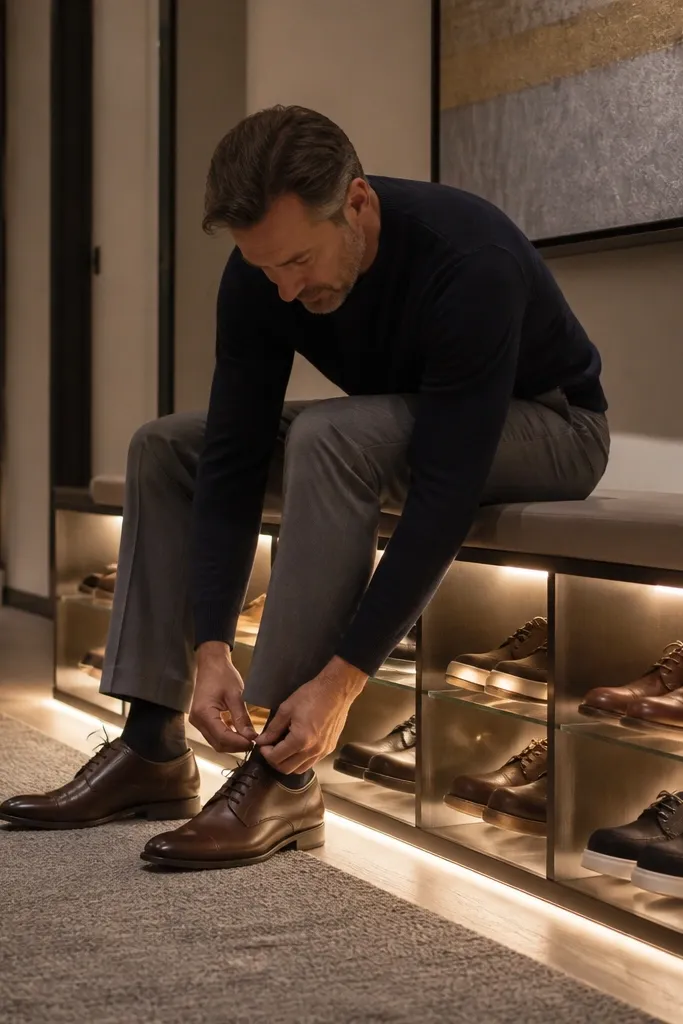
Lighting makes storage look premium because it turns “stuff” into a styled display. Recessed LED strips under shelves wash the shoe area evenly, and the bench reads intentional even when shoes are mixed. For the shelves, use a smooth clear finish or a wipeable topcoat so the light reflects cleanly. Pair the lighting with a simple seat top so the glow stays the hero. This is ideal for a hallway with dim ceiling lights where shoes are currently hard to see and hard to keep tidy.
Editor's noteUse aluminum LED channels with a diffuser; bare strips create hot spots and look uneven.
Build a bench with 13-14 inch depth and two shelf zones at 6-7 inches tall. Install LED strip channels under each shelf lip and wire to a hidden switch or plug-in driver behind a removable back panel. Finish shelves with a clear topcoat that cures hard and resists scuffs. Use a sturdy seat frame and a plywood seat top sealed with the same finish family so everything looks cohesive.
Skip thisDon’t run wires through random holes; plan a single wire route so it doesn’t snag during shelf access.
15. Patterned Laminate Seat with Open Shelf Dividers
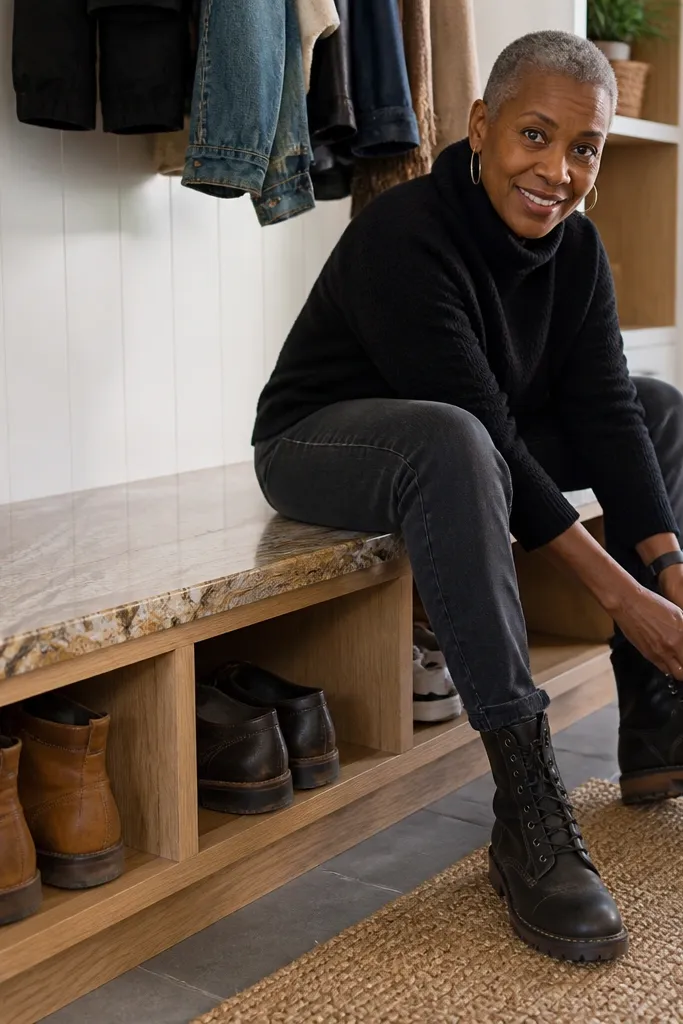
This bench looks high-end because the seat pattern is bold while the storage stays structured. A patterned laminate top (think marble-look in warm tones or a subtle geometric) makes the bench feel like a designer piece without needing real stone. Open shelves with dividers keep shoes aligned, so the bench looks curated even when you don’t have time to organize. It’s a great option if you want visual pop in a neutral entryway. Choose a pattern that complements your flooring rather than competing with it.
Editor's noteUse a laminate roller and trim with a sharp laminate trimmer bit for crisp edges that don’t peel.
Build a frame with 13-inch depth and two shelf levels at 6-7 inches tall. Add vertical dividers every 4-5 inches so each pair has a dedicated spot and doesn’t slide. Create a seat top from 3/4-inch plywood, then apply patterned laminate using contact cement or laminate adhesive. Trim edges cleanly and seal the underside to prevent moisture warping.
Skip thisAvoid thick patterns that look busy up close; choose one that reads clean from standing height.
16. Stone-Look Epoxy Seat with Waterproof Base
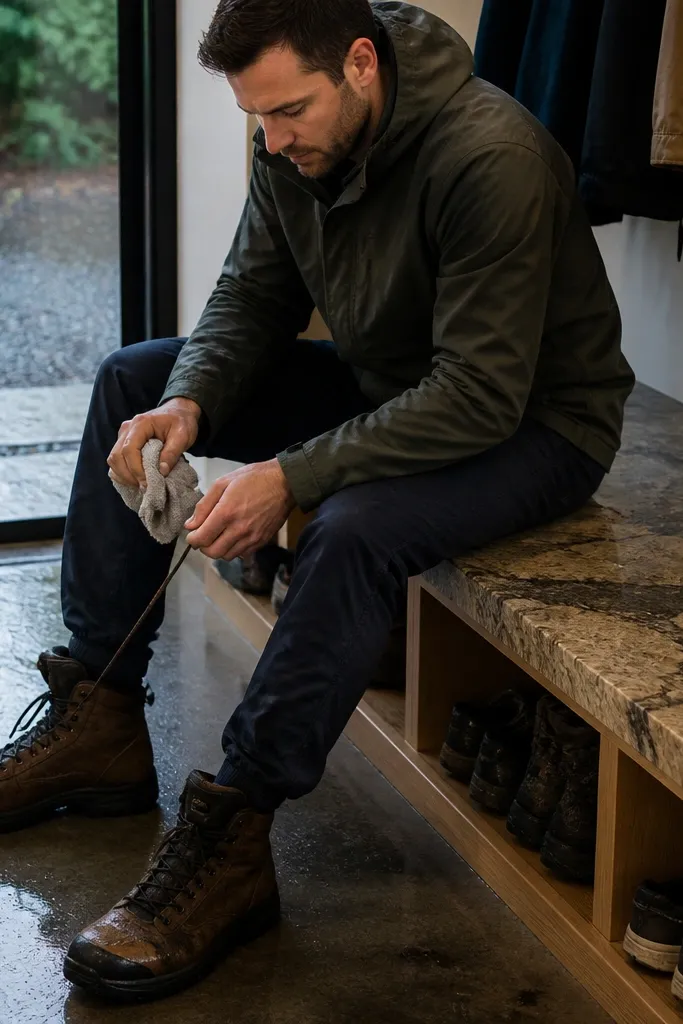
A stone-look epoxy seat reads luxury because it has depth, not just shine. It’s also practical: epoxy wipes clean and handles wet boots better than many wood finishes. Pair it with a simple wood or plywood frame so the seat stays the focal point. Keep shoes on open shelves so moisture doesn’t sit in the storage. This is a strong choice for homes with muddy winters or frequent wet footwear.
Editor's noteTape off the seam line under the seat before pouring so drips don’t harden where you don’t want them.
Build a rigid frame with 13-14 inch depth and two shelf zones at 6-7 inches. Add a waterproof seat base using exterior plywood and seal the top edges thoroughly. Mix epoxy with pigments or flakes to create a stone-like veining, then pour on a level surface and torch bubbles lightly. After cure, sand lightly, then apply a final clear coat if needed, and mount the seat securely to the frame.
Skip thisDon’t pour epoxy on an unsealed plywood edge; it will soak and create blotches.
17. Shaker-Style Bench with Raised Panel Doors

Shaker-style doors look high-end because the design is clean and the proportions feel right. Raised panels add depth, and that makes the bench look like built-in furniture even when it’s freestanding. Use doors for the lower storage and keep upper shelves open if you want a lighter look. This bench is great when you want a traditional feel but still want modern practicality. It photographs well because the door edges cast shadows, which looks intentional.
Editor's noteSet door heights using a story stick so both doors align perfectly across the opening.
Build a frame with 14-inch depth and two shelf sections at 6-7 inches tall. Construct two raised-panel doors from 3/4-inch plywood with a simple shaker frame, leaving 1/8-inch gaps around edges. Install soft-close hinges and magnetic catches for smooth closure. Mount a thick seat top (about 1 inch) and finish with stain plus clear satin topcoat for a furniture-grade look.
Skip thisAvoid using thin door panels; they warp and the raised pattern won’t look crisp.
18. Floating Bench Look with Hidden Brackets and Toe Rails
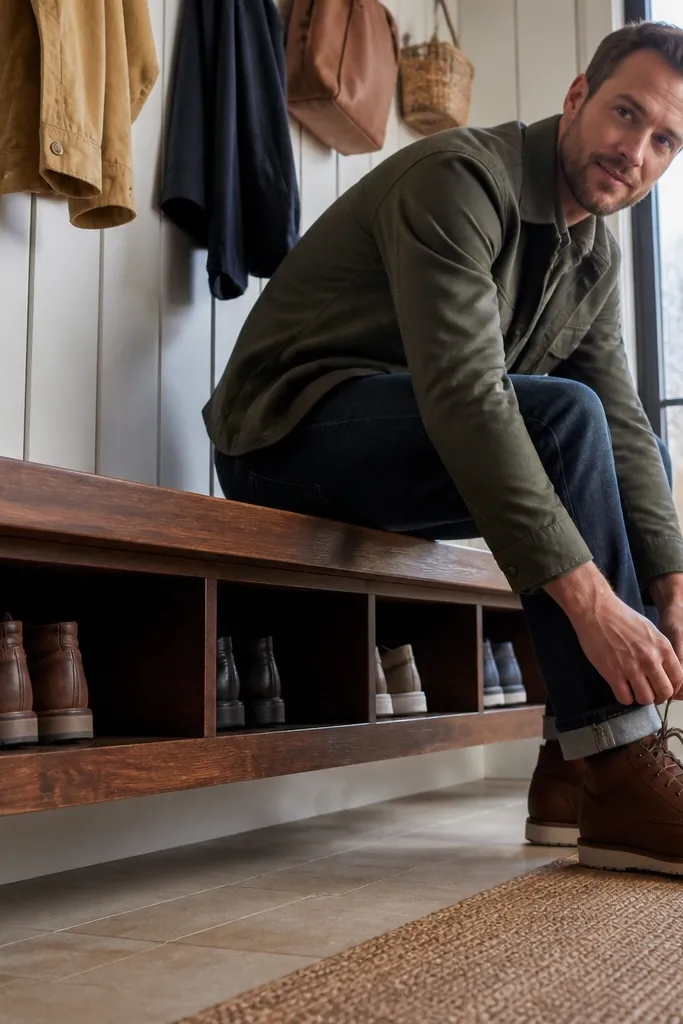
A floating bench look screams “custom millwork” if the underside is clean. The trick is hidden brackets that carry load, plus toe rails that cover the bracket line so it reads like a smooth furniture underside. Store shoes in open compartments with dividers so they don’t slide and ruin the clean face. This is best for walls you can anchor safely, like studs with proper hardware. It also makes small entryways feel less bulky because the floor stays visually open.
Find studs and mark the layout at your desired bench height, typically around 18 inches seat height. Build a bench carcass from 3/4-inch plywood and attach a back rail that aligns with stud positions. Use heavy-duty concealed shelf brackets or French cleat style hardware rated for the weight, then add toe rails along the underside to hide the bracket line. Install shelves with dividers and secure the seat top with screws into the carcass frame.
Pre-drill pilot holes into studs and use washers so the bracket sits tight and doesn’t crush the wood.
Don’t anchor only to drywall anchors; floating looks great until it fails.
19. Pallet-Wood Bench with Herringbone Seat and Steel Legs
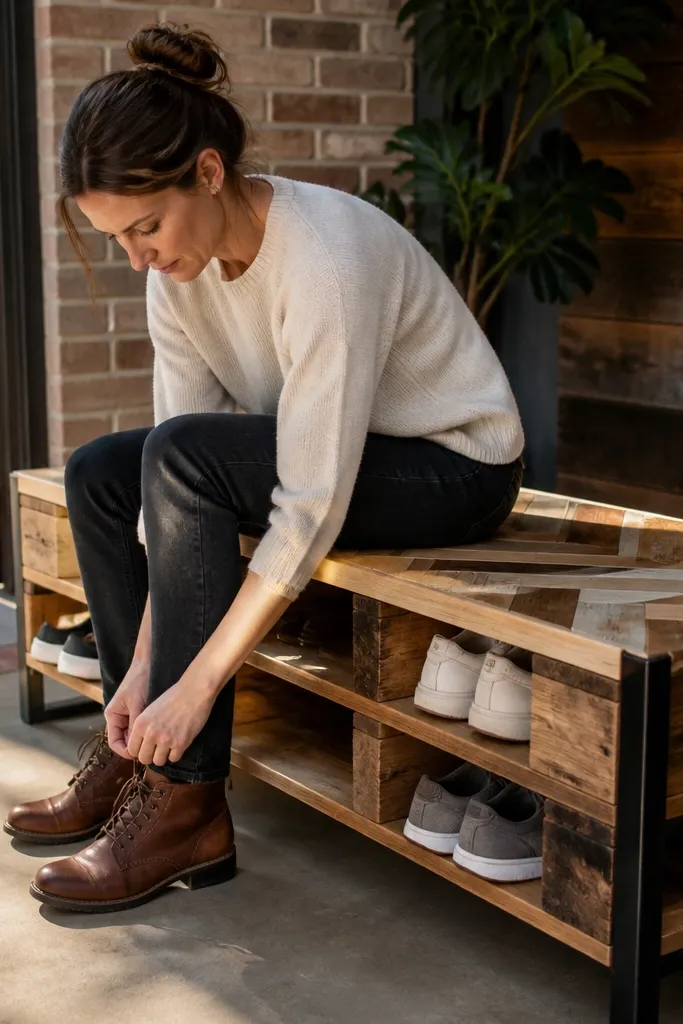
Pallet wood can look cheap, but it can also look intentional when you use it as a structural base and give the seat a patterned top. A herringbone seat top creates that “high-end” visual immediately, and steel legs keep it from looking rustic in a messy way. The open shoe shelves stay airy, and the steel legs make the bench feel lighter visually. It’s a good option if you like industrial-meets-warm looks and want a bench that hides wear well. Keep the pallet boards sanded and sealed so the grain looks even.
Use pallet boards only after stripping, sanding to remove rough edges, and sorting pieces by color. Build a simple frame with steel legs or steel angle supports so the bench doesn’t wobble. Create the herringbone seat using small strips (about 1x2 inch) glued in a checker herringbone pattern on a plywood base. Finish with stain and a clear topcoat, then assemble the shoe shelves at 13-14 inches depth and 6-7 inches tall.
Seal pallet knots with shellac before staining so they don’t bleed through unevenly.
Avoid leaving pallet nails in place; they chew through tools and show rust stains later.
20. Laminated Birch Bench with Clear Edge Banding

Clear edge banding makes plywood look like premium furniture because it shows neat lines and protects the edges. Birch plywood has a light, modern look that matches white walls, and it takes stain evenly if you want a warm tone. The bench can look minimal and still feel “high-end” because the construction details are clean. Open compartments with angled supports keep shoes from sliding forward and keep the front tidy. This is a smart project for readers who want clean Scandinavian vibes without complicated joinery.
Cut birch plywood panels to build a frame and two shelf compartments at 6-7 inches tall with 12-13 inches depth. Use an edge banding iron and clear banding tape on all exposed plywood edges before assembly. Add angled shoe stops made from 1/2-inch strips so each shelf has a slight back slope. Finish the seat with a clear satin topcoat, and seal the shelf surfaces so they wipe clean.
Use a sharp edge banding trimmer bit so the clear banding doesn’t leave a cloudy overhang.
Don’t skip edge banding; bare plywood edges look unfinished and read “DIY” instantly.



