
1. Lazy-Susan rotating shoe rack for the entryway corner
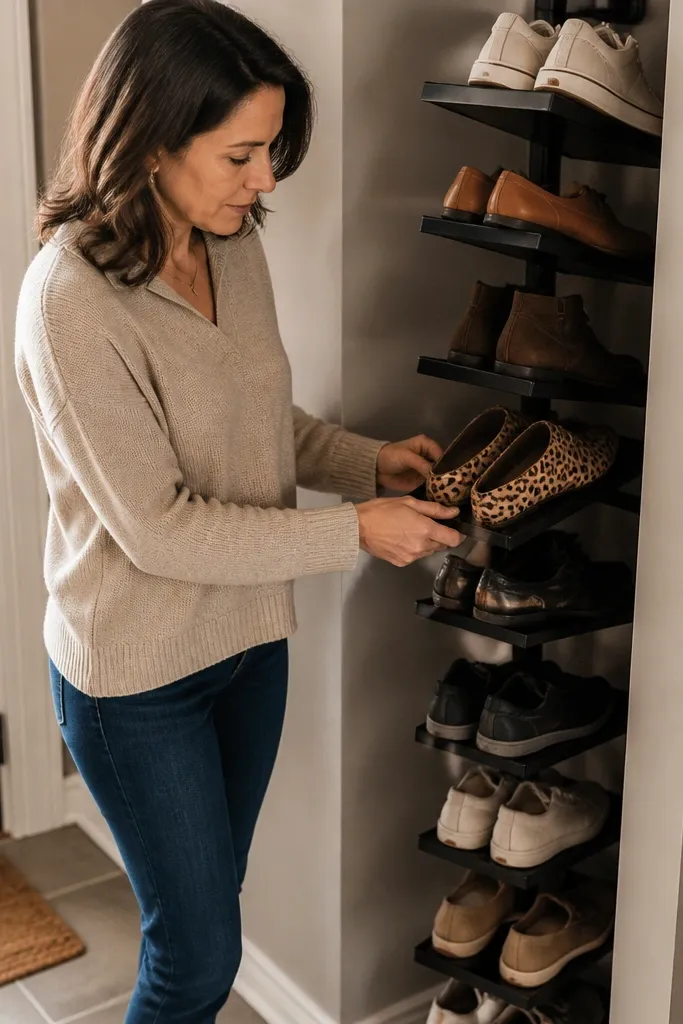
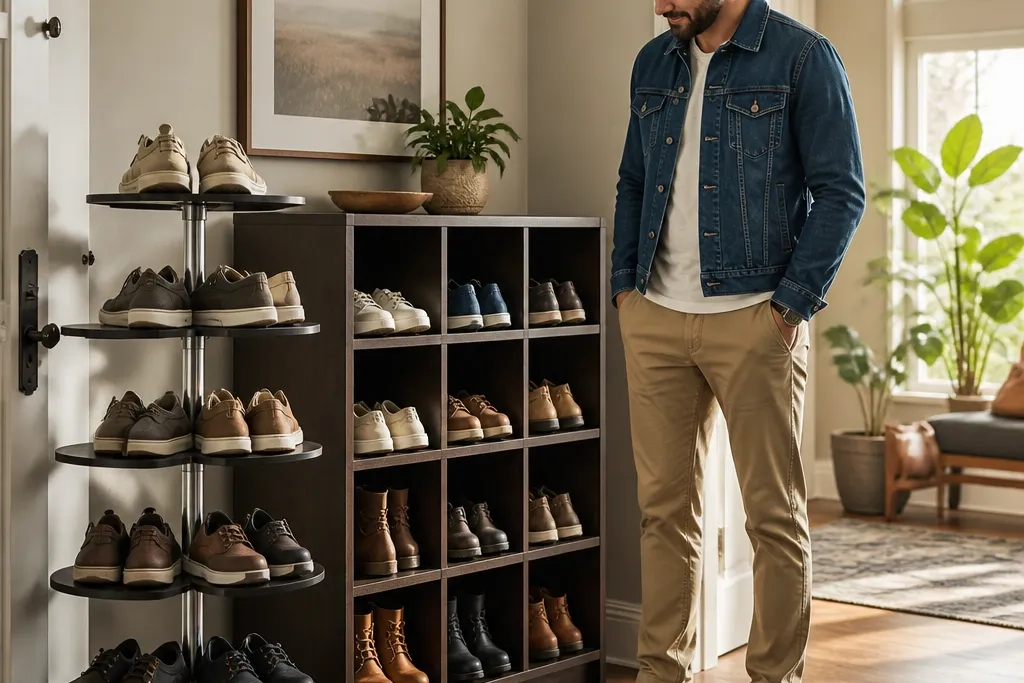
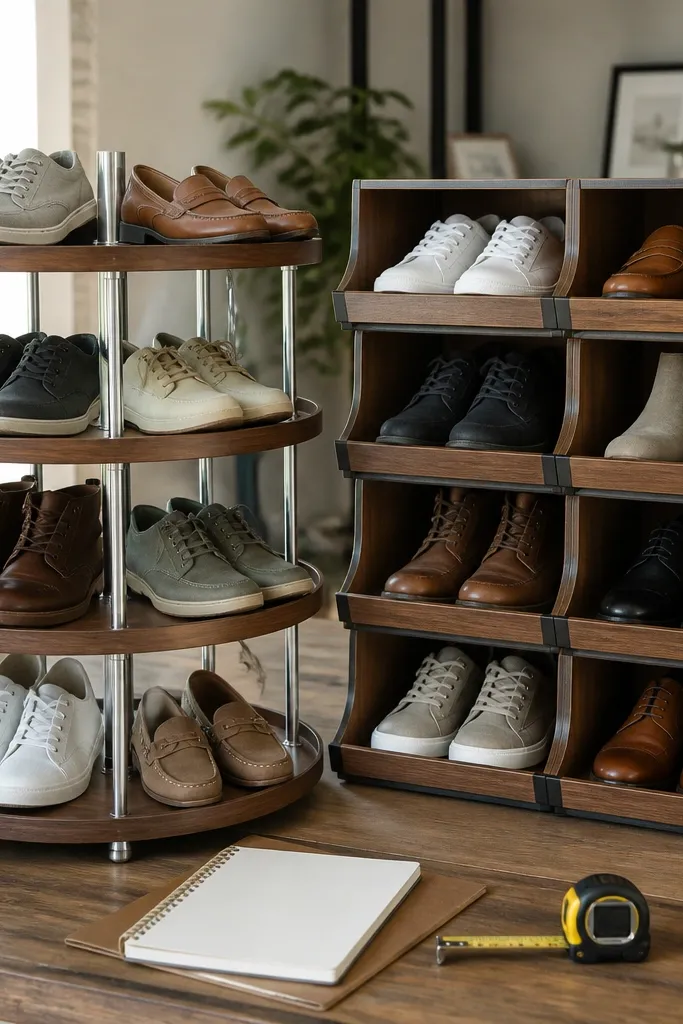
This is the “spin and grab” setup. The best version has a stable center axle and shelves that keep shoes from sliding when you rotate — usually a slight tilt and a front edge. It fixes the daily rummage problem because you can see both sides without pulling shoes out of a pile. Use it where you actually wear shoes from — entryways, hall closets, and near a front door. Expect a cleaner look because the rack holds pairs upright, and it reduces the chaos that happens when shoes sit loose on the floor.
Pick a rotating base diameter that fits your shoe width. Measure the outer footprint of the rack and keep 6-8 inches clear for the spin, especially near doors. Build or buy a Lazy-Susan top with a rated bearing, then attach 6-10 shoe shelves around it with consistent spacing for your tallest pair. Finish by adding a non-slip mat under the base and a small rubber bumper where the rack touches the floor so it doesn’t walk when you pull shoes.
If your rotating rack wobbles, the fix is usually the base — add weight low or tighten the center mount before you blame the shelves.
Don’t mount it on flimsy furniture legs; wobble ruins rotating racks fast.
2. Rotating vertical cylinder rack for a narrow closet
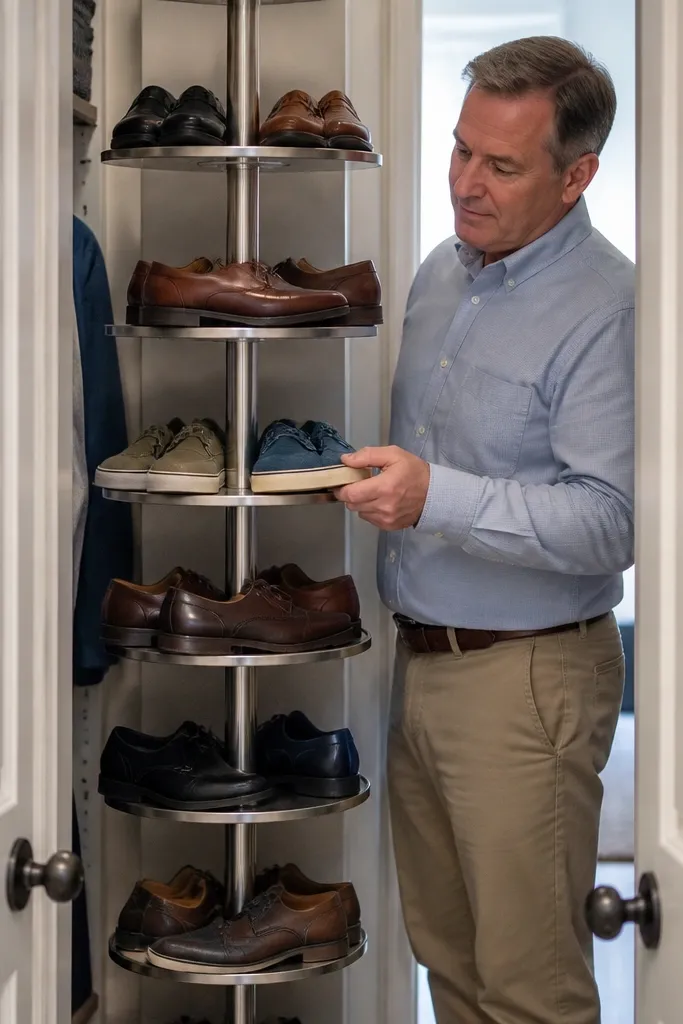
A vertical cylinder is the right answer when your width is tight but you have height. You still get the visibility benefit of rotating access, but the rack stays compact because the shoes sit around a central post. This works best for a closet where you can open doors and reach comfortably, since you’ll spin shelves at one consistent height. It also helps with airflow compared to flat stack systems, which is good if you store athletic shoes or boots.
Choose a cylinder rack size that clears the widest boots you own — measure boot shaft circumference and add 1-2 inches. If DIYing, build a central axle mount with a locking collar so shelves don’t drift. Install evenly spaced shelves with a slight downward angle so shoes rest naturally against the back edge. Secure the top and bottom with braces to prevent racking, then add felt pads on the shelf contact points to reduce scuffs.
Editor's noteKeep shelf spacing consistent and label shoe categories by height so you don’t have to re-learn where everything lives.
Skip thisSkip shallow shelves; shallow shelves make boots lean and slide when you rotate.
3. Stackable cubby rack with front lip shelves
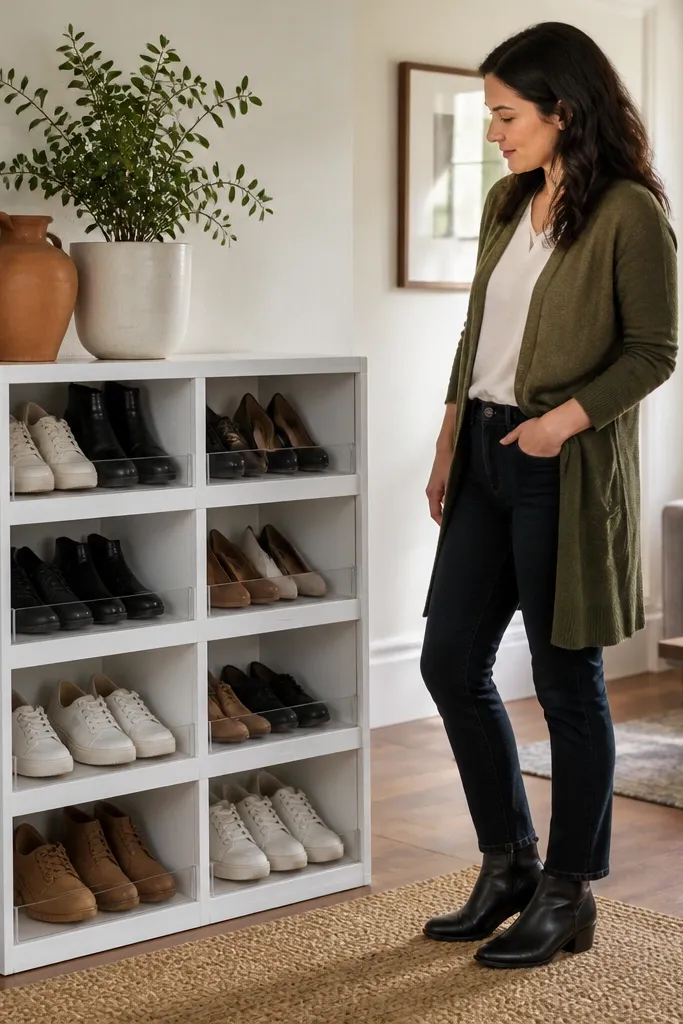
This is the cleanest stackable option because each pair has a home and gravity does the work for you. Front lip shelves stop heels from creeping out, which is the difference between “neat storage” and “constant re-sorting.” Cubby racks also let shoes dry between uses because you’re not trapping them in closed bins. It’s ideal for entryways and hall closets where you want a tidy front face and easy visibility without spinning.
Use a frame with cross-bracing so tall tiers don’t twist when you pull from the front. Cut shelves with a front lip — even a 3/4-inch lip helps — and keep shelf depth matched to your biggest sneaker. Assemble tiers so the gap between shelves clears boot soles and doesn’t crush boot shafts. Finish with a durable sealant or paint that wipes clean, then add rubber feet to stop rack creep on tile.
Editor's noteIf you have mixed sizes, build shelves at two depths: deeper for boots and shallower for low shoes.
Skip thisDon’t build shelves with slick surfaces; bare plywood makes shoes slide and spill forward.
4. Stackable shoe rack bench for mudroom drops
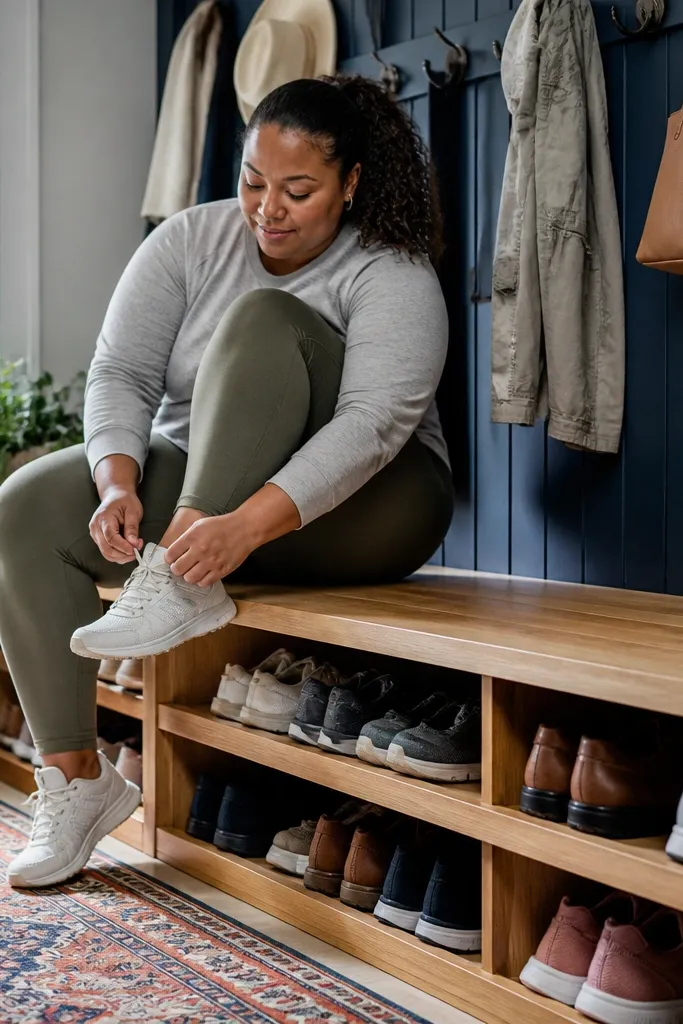
A bench + stacked shoe storage is the smartest combo for a mudroom because you handle two jobs at once: sit to put on shoes, and store them in vertical tiers. The bench top hides clutter and makes the whole area feel intentional. This is also a good solution for families because you can assign compartments by person and keep pairs lined up. Choose this if you need durability and daily use, not just a storage box.
Build a bench frame with a sturdy base — think thicker legs and cross braces — then attach stacked cubbies underneath. Use shelf lips and a back stop so shoes can’t fall forward when you reach into lower tiers. Plan your seat height around 18 inches for comfort, then keep the shoe compartments tall enough for your boot soles. Finish the bench top with a wipeable coat and add a non-slip strip so the seat stays safe in wet weather.
Use removable bins for sports shoes; they keep laces contained and make cleaning faster.
Don’t hinge the seat directly over weak shelf supports; too much flex cracks storage frames.
5. Wall-mounted ladder rack for airy stack storage
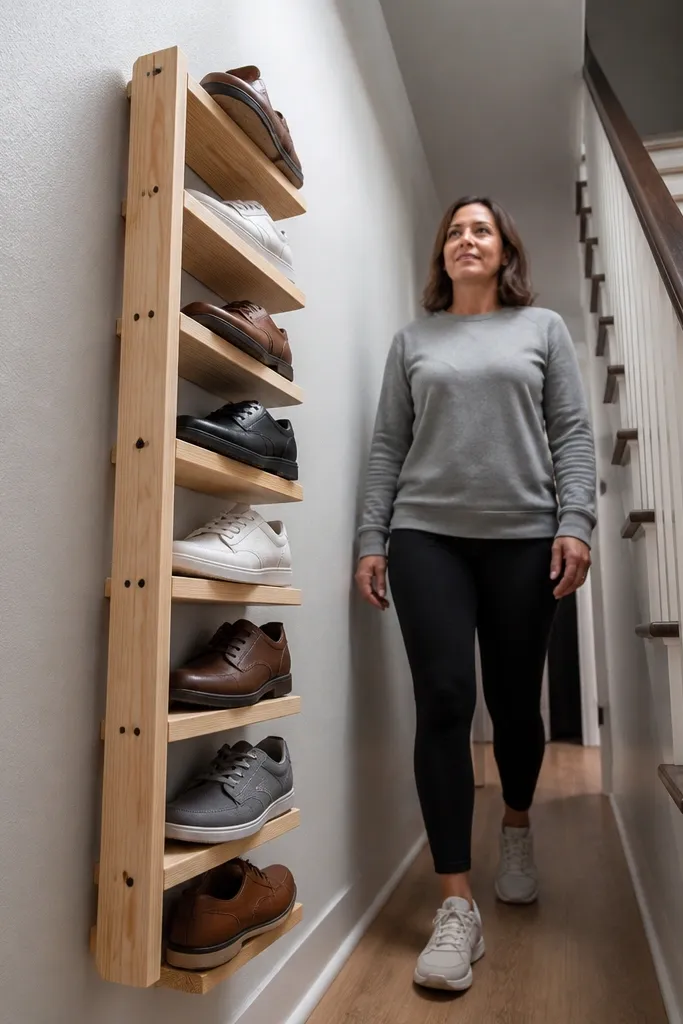
A ladder rack is a stackable storage idea that looks lighter than cubbies and keeps shoes from trapping odors. You mount it into studs, so it stays stable even when you pull from lower shelves. This is ideal for apartments, narrow hallways, and anyone who wants storage that doesn’t eat floor space. Because shelves are open, you get airflow and quick visual checks.
Find studs and mount with proper lag screws or structural screws, not drywall anchors. Space the rungs/shelves so the bottom tier clears wet shoe soles and the top tier holds low shoes without crowding. Use treated or sealed wood and sand the edges so shoes don’t snag. Add a small stop strip at the back of each shelf to prevent heel slip, then finish with a clear coat that wipes clean.
Editor's notePaint the rack the same color as the wall trim — it makes the storage look intentional instead of bulky.
Skip thisDon’t mount it at shoulder height; you’ll stop using the lower shelves and the top gets overcrowded.
6. Stackable rotating hybrid on a fixed base
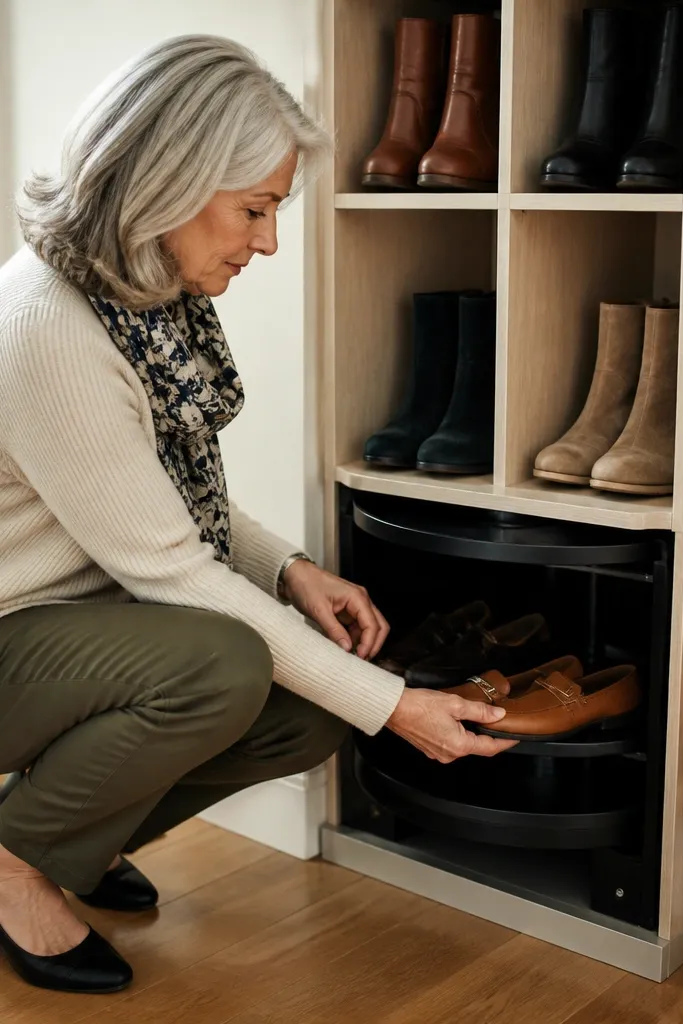
If you want the best of both worlds, go hybrid: rotating access at the base and stackable storage above. This helps when you have lots of shoes but you still want “see what you need” access for daily pairs. The key is keeping the rotating section small enough to stay stable, while the stack section stays fixed and rigid. It’s a strong choice for a closet corner where you can dedicate width and want a more customized system than a single-mode rack.
Start with a heavy fixed base that can’t tip — add weight low and anchor it if possible. Use a rotating platform for one section only, with shelves sized for frequently worn shoes. Build the stacked shelves as a separate rigid frame attached to the fixed base, then connect the rotating platform with a smooth bearing. Test rotation before finishing — if it binds, adjust the platform alignment before you mount the shelves.
Editor's noteKeep the rotating section for shoes you reach for 80 percent of the time, not your whole closet.
Skip thisAvoid making the entire rack rotate; it’s harder to keep shelves aligned and stable.
7. Rotating rack with angled shoe trays
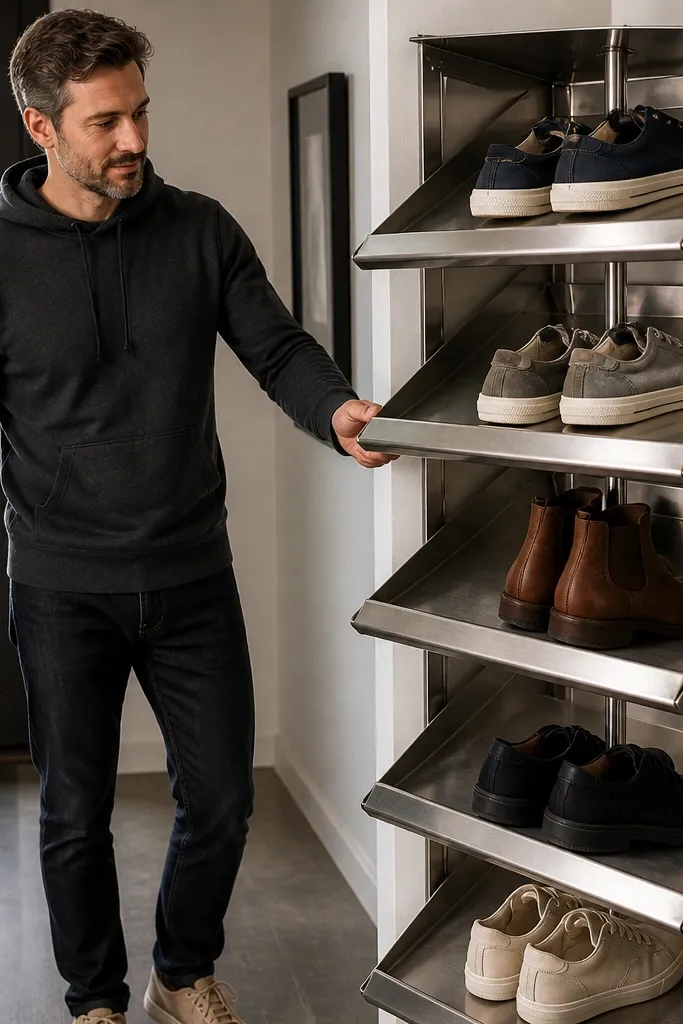
Angled trays are the secret detail for rotating racks. Flat shelves make shoes slide when you spin, especially on slick soles. With angled trays and a back stop, you get a satisfying “grab and go” experience without shoes leaning out. This works for both sneakers and boots if the tray depth matches the longest sole. It’s also easier to clean because trays capture dust in a predictable area.
Use tray boards with a consistent angle — around 10-15 degrees is a good starting point for keeping shoes seated. Add a back stop strip on each tray so shoes can’t drift when the rack rotates. Build a rotating base with a bearing that supports the total weight of loaded trays. Seal or paint the trays with a wipeable finish, then add small non-slip pads on the tray surface to reduce sliding.
Dry-fit trays with a few shoes before you lock measurements; the angle that works for sneakers might not work for boots.
Don’t use smooth laminate without grip; it makes rotation a sliding exercise.
8. Stackable metal wire rack with adjustable tiers
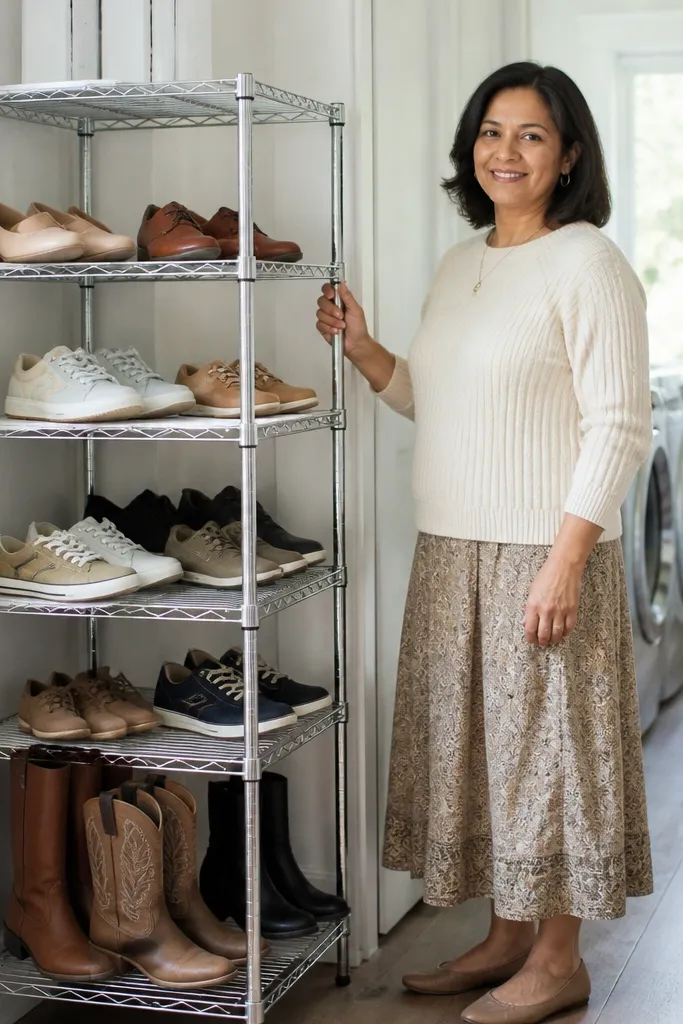
Wire racks are one of the best stackable styles for drying shoes because air moves through the shelves. Adjustable tiers matter when you have a mix of flats, sneakers, and boots — you can set spacing instead of forcing everything into one “average.” This suits laundry-adjacent storage, mudrooms, and entryways where shoes get wet. The look is clean and modern, and it’s easy to wipe down after muddy days.
Choose a wire rack with adjustable shelf heights and a footprint that fits your space. Set the bottom tier higher if wet shoes sit there, and lower tiers for flats to prevent wasted vertical space. Secure the rack to the wall if your household bumps it, especially for taller stacks. Use shelf liners if you want extra grip so shoes don’t creep forward on wire.
If shoes slide on wire, add thin rubber shelf mats cut to size instead of thick foam.
Skip racks without adjustable tiers; one spacing forces boots to dominate the system.
9. Rotating rack with pull-out front access
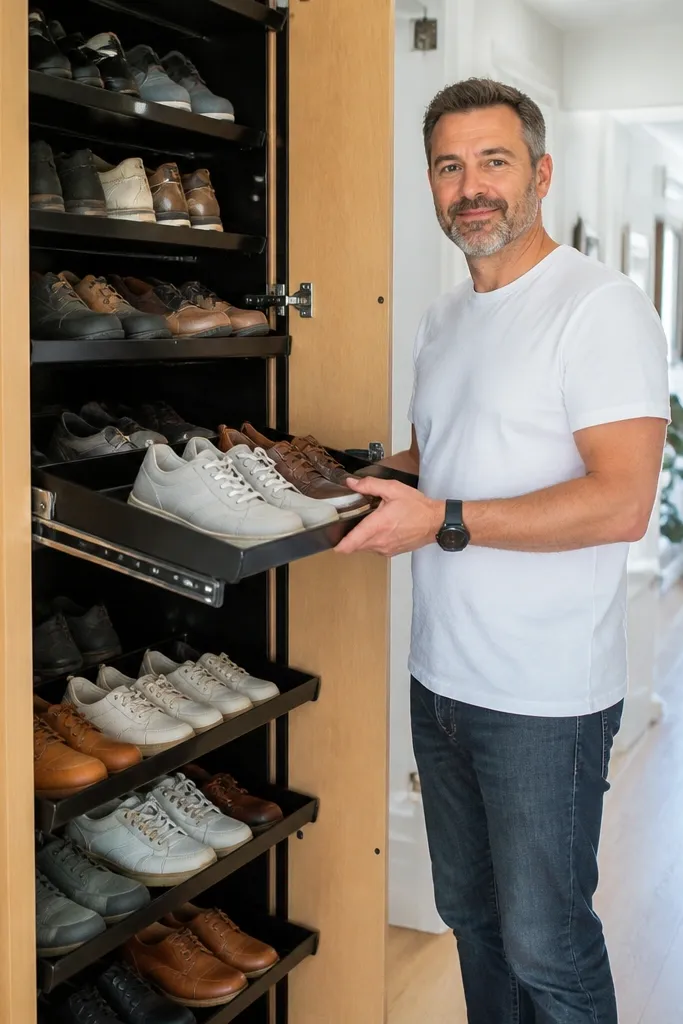
This is for people who want rotating visibility but hate reaching into a tight angle. The best versions let each shelf move outward enough that you can grab shoes without twisting your wrist. It reduces the “spin and still struggle” issue that happens when the rack is too deep. Use it in hall closets or entryways where you reach from one side only. It also keeps shoes more contained because the pull-out shelf acts like a barrier while you access.
Build shelves that mount to a rotating base with a sliding mechanism or hinge that brings the shelf forward. Use rails or smooth drawer slides rated for the weight of shoes. Install a back stop so shelves don’t drift when pulled out. Finish by adding rubber bumpers to prevent metal-on-metal chatter and to keep the shelf aligned.
Use drawer slides with full extension if you want true access; partial slides feel annoying fast.
Don’t overload shelves with boots; pull-out hardware hates sudden weight spikes.
10. Stackable shoe rack with removable fabric drawers
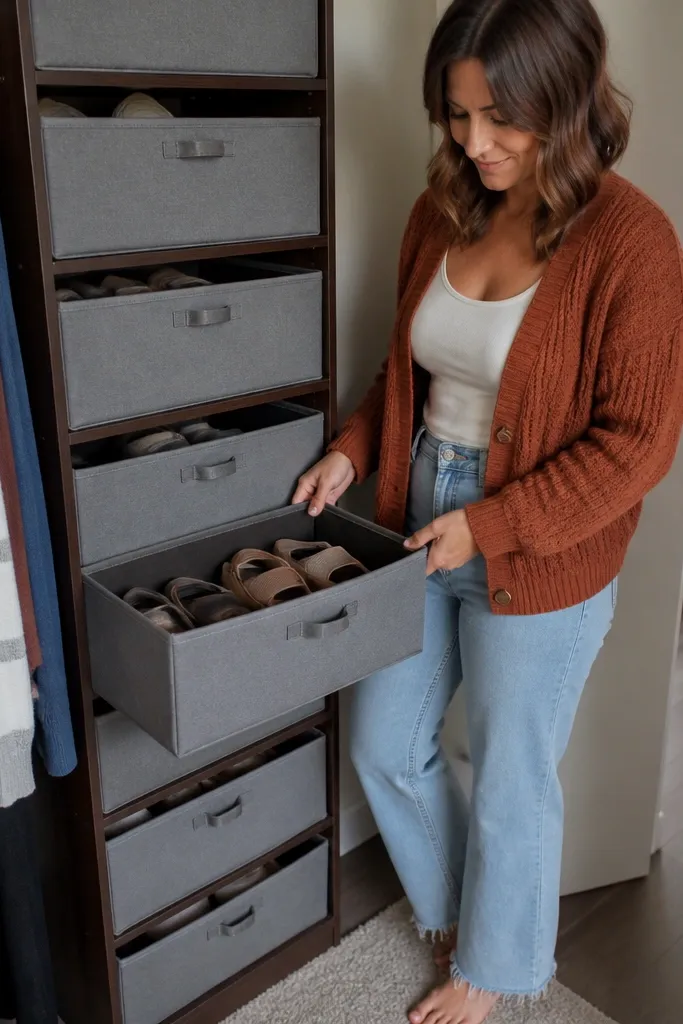
This one is about keeping the visual mess contained. Removable fabric drawers hide shoes you don’t want staring back at guests, while still letting you stack storage vertically. It’s a good fit for closets, bedrooms, and anyone with a lot of smaller shoes. The fabric also helps reduce scuffing, and you can pull drawers out to shake dust or air them out. Pair this with a rigid frame so the stack stays straight.
Build a strong frame with fixed shelf spacing, then attach drawer rails that hold fabric bins. Measure drawer height so boots sit upright or stay in separate deeper bins. Add a front lip or guide rails so bins don’t sag when partially filled. Use wipeable fabric or liner material and add mesh panels if you want extra airflow.
Editor's noteLabel drawers by shoe type, not by person, if the household shares footwear.
Skip thisDon’t use flimsy rails; sagging drawers make the whole stack look messy.
11. Rotating rack for boots with deeper compartments
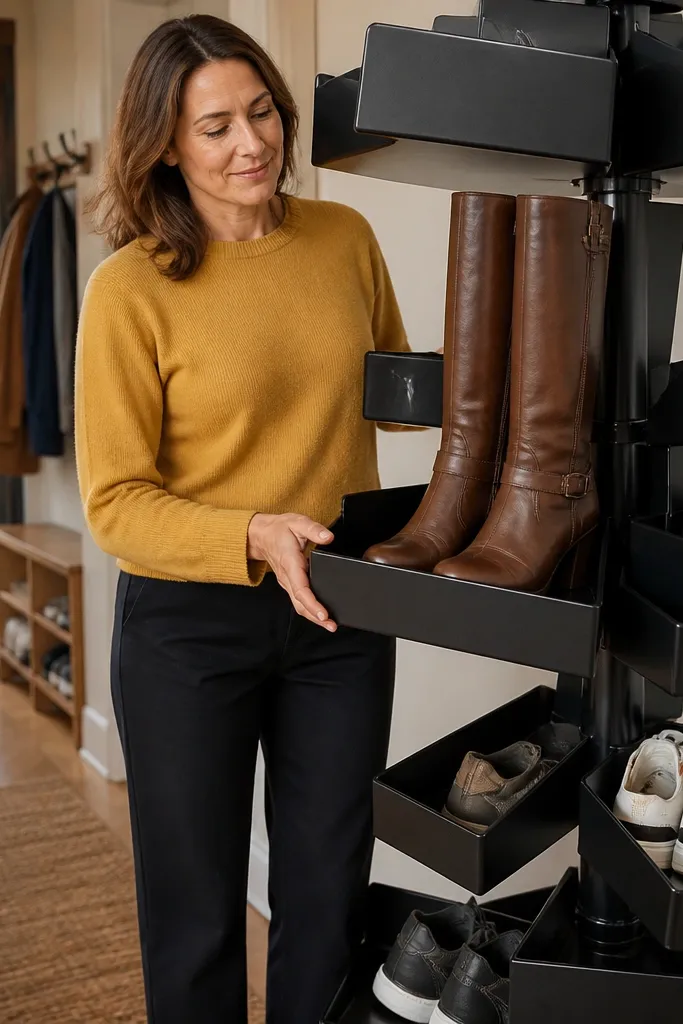
Boot-friendly rotating racks beat generic designs because boots need depth and shaft clearance. The best approach uses deeper compartments and a front shelf lip so the boot shaft stays upright instead of collapsing forward. This fixes the common frustration where boots take up space and then force your sneakers to slide around. If boots are a big part of your collection, rotating can still work — you just need the compartments built for them.
Measure your tallest boot shaft height and widest sole, then build compartment depth to fit with at least 1 inch of clearance. Use a back stop and a front lip on each compartment so boots stay seated when the rack spins. Keep shelf spacing consistent so boots don’t force other shoes upward. Use a sturdy rotating base and test by loading worst-case boots before you commit to finishing touches.
Store boot shafts with a simple boot insert or rolled towel to keep them upright and prevent creasing at the fold.
Avoid shallow rotating shelves; boots will tip out and ruin the rotating benefit.
12. Stackable modular cube rack with doors for a clean look
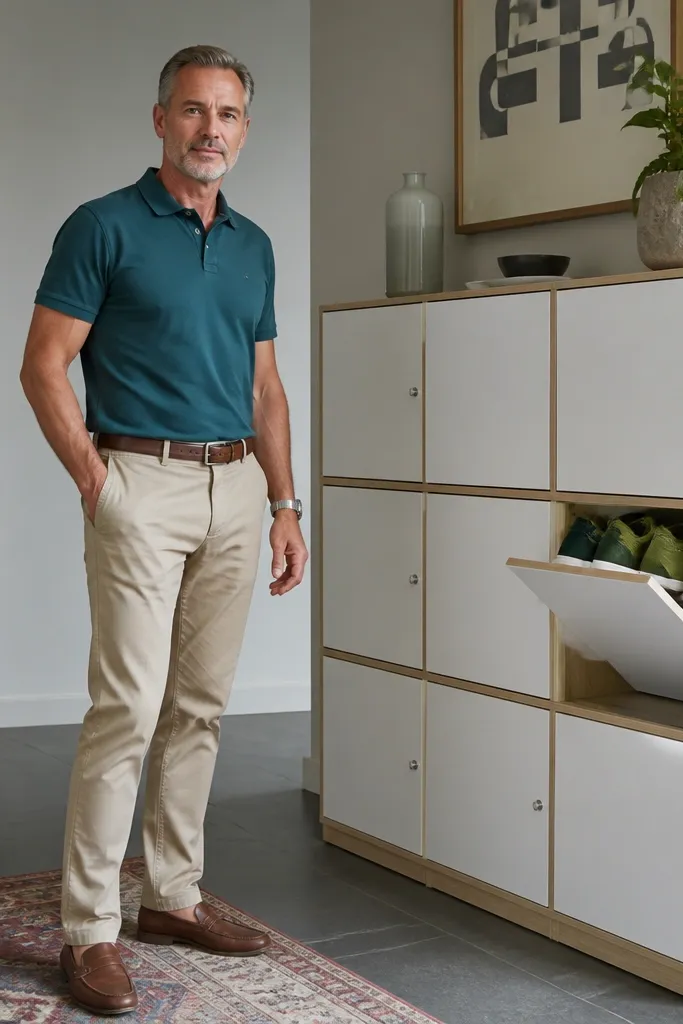
If you want a shoe rack that hides clutter, modular cubes with doors are the move. You keep the density of stackable storage but remove the visual noise. It works well in living rooms, entry alcoves, and shared spaces where you don’t want shoes on display. The door option also helps keep dust off shoes between uses. This is best when you have shoes that don’t need constant airflow, like formal shoes or sandals.
Use modular cube frames and plan shelf spacing based on your shoe height — keep taller pairs on the top or bottom depending on how you reach. Install doors with soft-close hinges if you want fewer rattles and easier daily use. Add ventilation holes near the back or sides if you store shoes that need drying. Finish with a wipeable paint so smudges wipe off quickly.
Editor's notePut a small shoe deodorizer insert in each cube if you store shoes that don’t dry fully.
Skip thisDon’t seal the cubes completely without ventilation; trapped moisture makes odor worse.
13. Rotating corner rack with adjustable shelf height
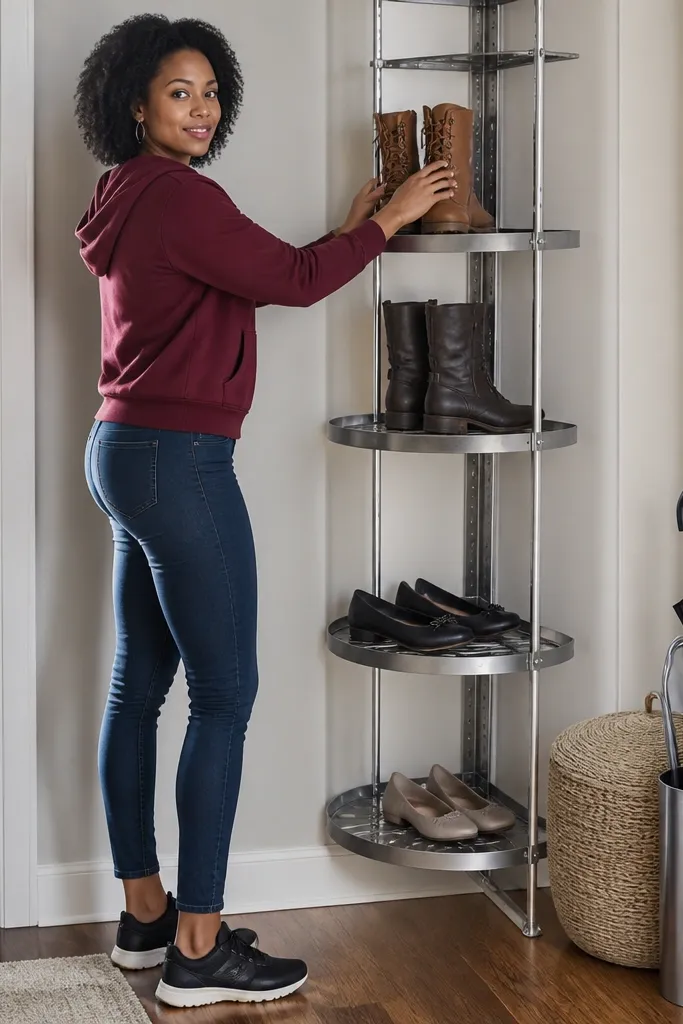
Corners are where floor-space goes to die. A rotating corner rack uses that dead space and makes shoes reachable without pulling everything out. Adjustable shelf height is what makes it work for real shoe collections instead of one-size sneakers. You can set lower shelves for flats and higher shelves for boots, then keep the rack balanced so rotation stays smooth. This is a smart pick for tight entryways where a normal rack blocks a walkway.
Choose a corner-friendly rotating design that sits flush enough to the walls to prevent wobble. Measure the corner diagonal and confirm you have a spin path that clears door swings. Build shelves with adjustable mounting holes or slots so you can reconfigure as your shoe collection changes. Anchor the base to prevent tipping, then add non-slip pads to each shelf surface.
Put boots on the lowest adjustable shelves; it keeps the rack’s center of gravity stable.
Avoid fixed-depth shelves if you own both boots and low sneakers; you’ll waste space fast.
14. Stackable shoe rack using crates with shelf liners
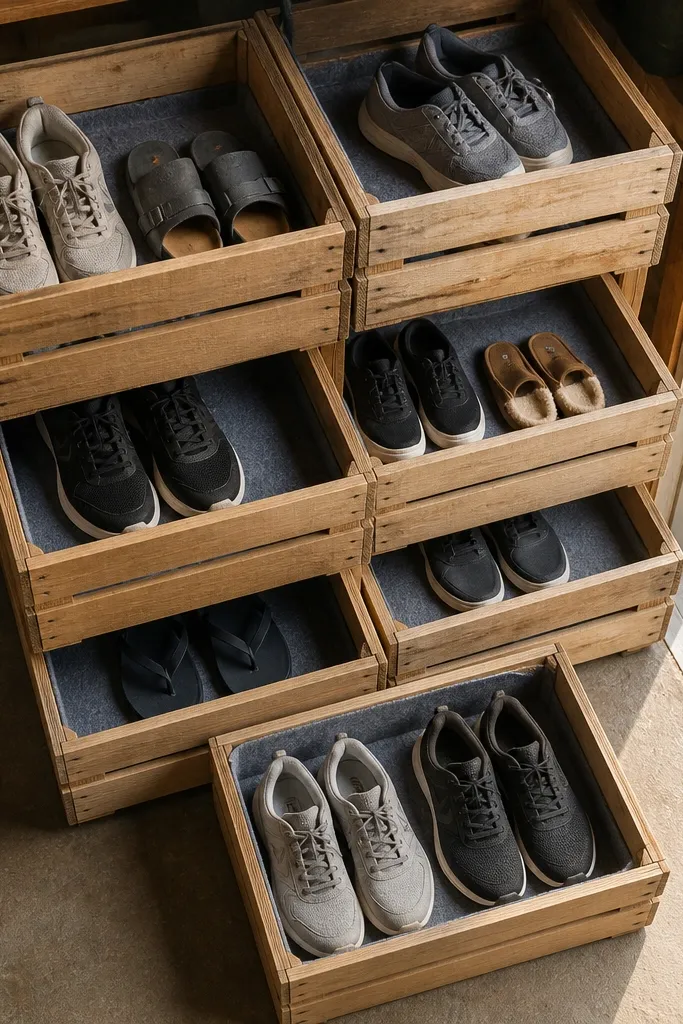
Crates are a DIY-friendly way to get stackable storage with a lived-in look, and they’re easy to modify for shoe size. The key is adding liners and spacing so shoes don’t snag on crate gaps. This works well for casual sneakers, slippers, and shoes you don’t mind being slightly visible. It’s also easy to expand later by adding another crate stack as your shoe count grows.
Pick crates with consistent dimensions and sand the edges so shoes don’t catch. Line each crate shelf with a cut-to-fit rubber mat or shelf liner, then add a thin back stop strip so shoes don’t roll forward. Stack crates with spacers if needed to create airflow and keep the stack straight. Finish with a clear coat or paint and seal the wood so it wipes clean.
Editor's noteUse two different crate depths if you want boots stored separately from low shoes.
Skip thisDon’t skip liners; crate slats make shoes slide and scuff.
15. Stackable shoe rack with angled side bins for heels and flats
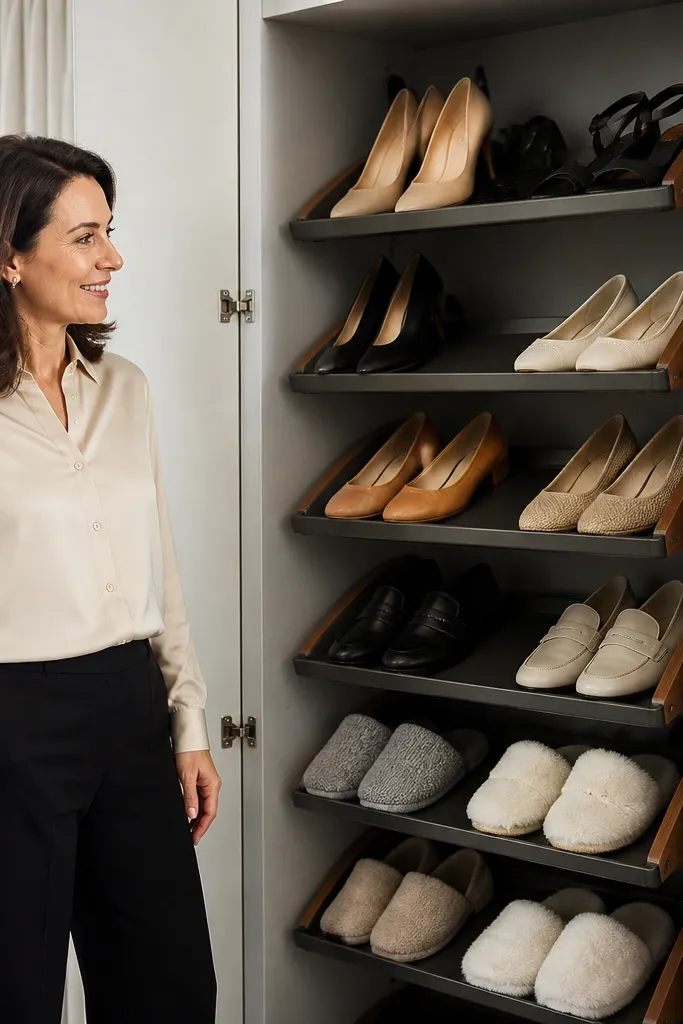
Angled bins are a stackable twist that keeps small shoes from falling forward. Flats, heels, and slippers benefit because their shape doesn’t grip a standard cubby shelf. The angle guides shoes into place, and a front lip stops them from sliding out. This setup is best in closets and entryways where you want a tidy, organized front face but you don’t need everything visible like a rotating rack. It also reduces the mess caused by shoes that tip over.
Build or buy a stackable frame and add angled inserts on select tiers. Cut inserts from plywood or use pre-made angled bins, then add a front lip and back stop so shoes seat consistently. Adjust angle based on shoe type — steeper for heels that want to tip, flatter for sneakers. Seal the inserts and add rubber feet to stop the entire rack from shifting.
Editor's noteKeep angled bins for your smallest shoes; use standard shelves for boots and bulky sneakers.
Skip thisDon’t angle every tier; too much angle wastes space and makes bulkier shoes harder to store.



