
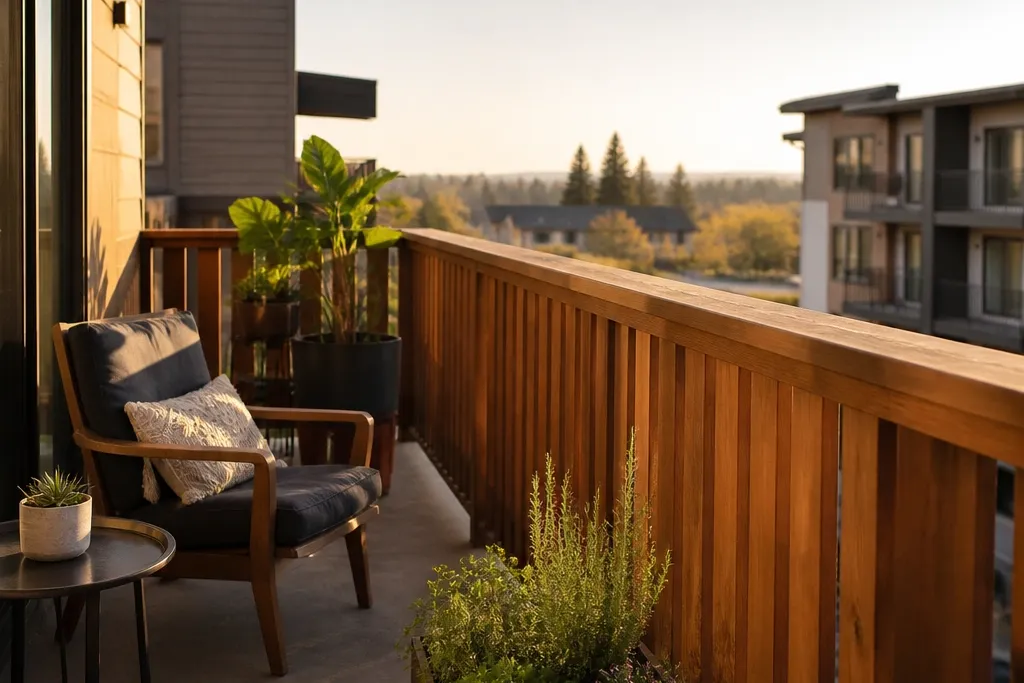

1. Clamped Vertical Slat Fence With Walnut Stain
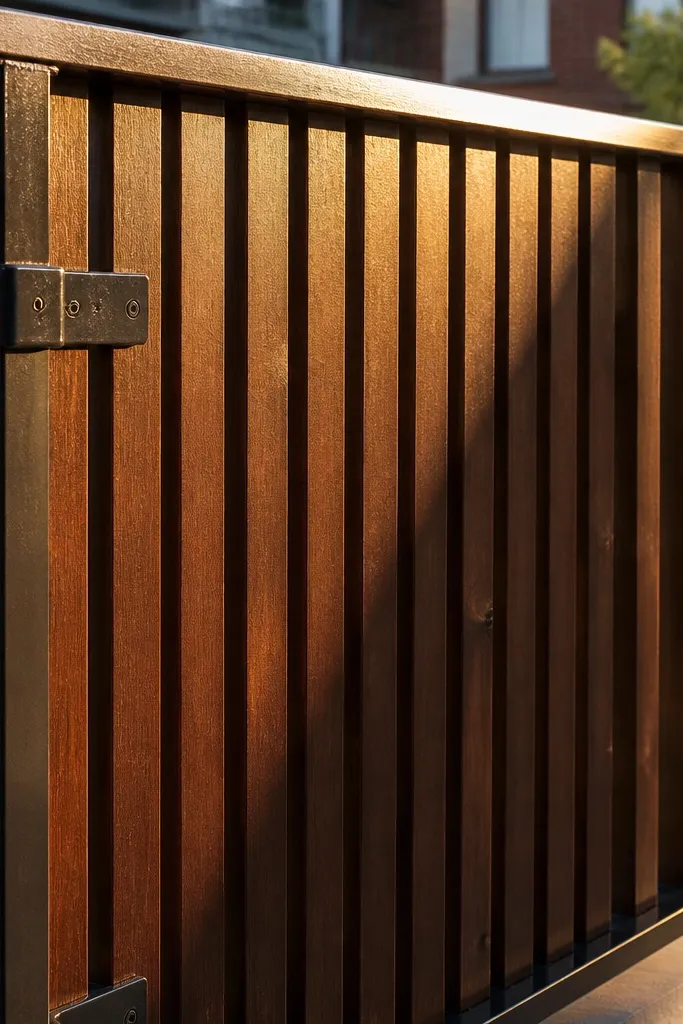
This is the cleanest warm look you can get without touching the building. Vertical slats create narrow shadow lines, so the railing looks taller and more intentional, especially in late afternoon light. Use real wood boards stained a warm walnut tone, then seal with a matte clear coat so it doesn’t glare. The build is straightforward — you’re basically making a pre-assembled “panel” that gets clamped in place. It suits balconies with existing metal rails where you can clamp to the top and sides without drilling.
Editor's notePre-stain the boards before assembly so the color is even on the cut edges.
Measure the railing run length and the height between the top rail and the bottom line. Cut boards to the full height, then space them evenly using a simple jig made from scrap plywood — start with 2-1/4 in spacing for a tight look. Build a frame from 1x2s, attach the slats to the frame with exterior screws, and pre-drill to prevent splitting. Use clamp-on railing brackets or U-bolts with rubber pads at the ends, then slide the panel into position and tighten evenly. Finish by sanding to 180 grit, stain with a walnut dye/stain, and seal with two thin coats of matte exterior clear.
Skip thisSkipping rubber pads under clamps leads to scuffs and shaky contact that looks sloppy.
2. Freestanding Cedar Screen Frame Inside the Railing
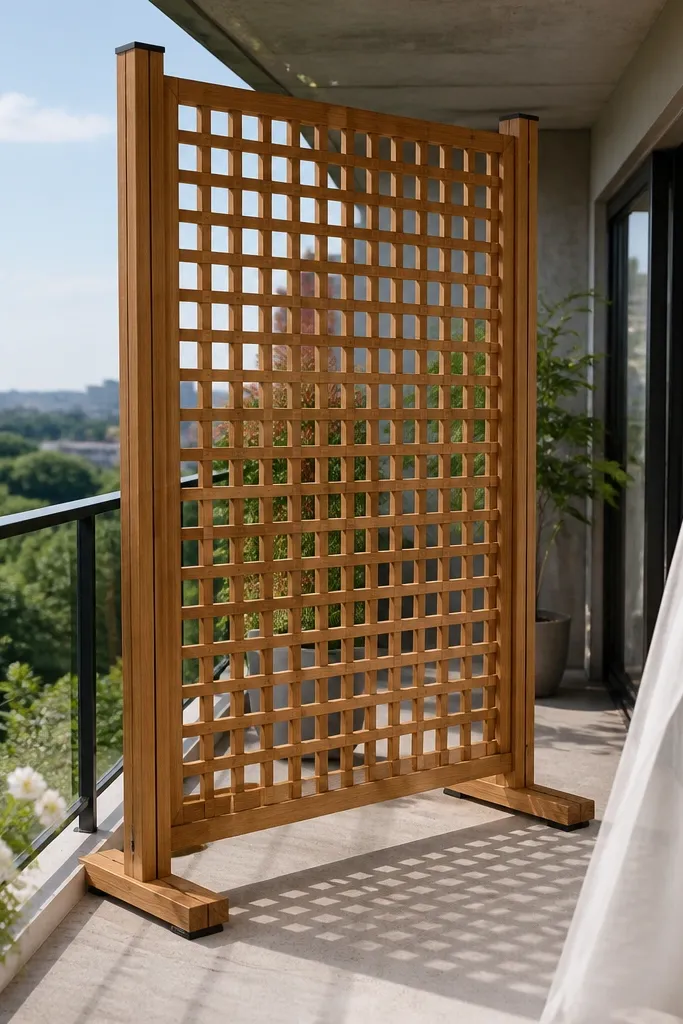
If your building won’t allow clamps anywhere, go freestanding. A cedar screen sits inside the railing line and gives you that “porch privacy” warmth without relying on the building’s structure. Cedar has a natural, honey-brown warmth that looks good even when you keep the finish simple. The shadow grid from a repeating board layout reads modern but still cozy. This works best when you have a flat space inside the railing where a frame can sit without rocking.
Measure the clear opening inside the railing and plan a frame that leaves 1/2 in clearance on each side so it slides in and out. Cut a rectangular frame using cedar 1x2s or 1x3s and add cross supports at about every 18-24 in. Attach vertical cedar slats to the frame with exterior screws, leaving 1/2 to 3/4 in gaps depending on how much privacy you want. Add foam or rubber feet on the bottom corners so it doesn’t scrape or rattle. Sand lightly, then apply a cedar-tone stain or clear exterior sealer, and test fit before final sealing.
Add two “stop” blocks on the top inside edge so the screen can’t drift sideways when someone leans on the railing.
Building it too tight means it binds in humid weather and won’t remove cleanly.
3. Diagonal "Herringbone" Wood Rail Infill
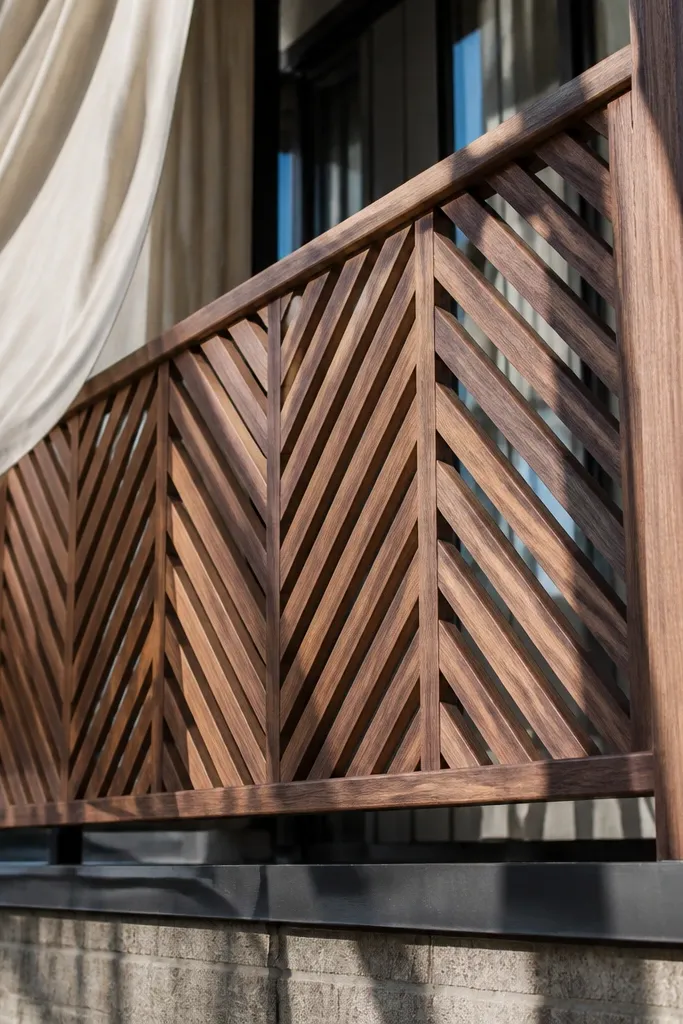
Diagonal patterns look warm because they create dynamic shadows instead of straight lines. A herringbone infill reads high-end, and it also helps break up wind flow in a way that feels more sheltered. You’re using small wood strips arranged diagonally over a simple backing frame. Keep the wood tone medium-warm (walnut or teak-look) and use a matte finish so it looks like real furniture, not glossy decking. Skill level is moderate because spacing matters, but the result photographs beautifully from both angles.
Start with a straight backing frame sized to your railing section, using 1x2s. Cut strips of 1x2 ripped down to uniform widths — 3/4 in looks crisp, 1 in looks chunkier. Mark a centerline and lay strips in an alternating diagonal pattern, aiming for 1/4 in gaps so the pattern stays airy. Pre-drill and screw strips to the backing, then add two horizontal rails at the top and bottom for rigidity. Seal after a 180-grit sanding pass with a warm stain, then matte clear coat.
Use blue painter’s tape as a temporary spacer guide so your diagonals stay consistent while you screw.
Using wide gaps makes the pattern look patchy and less “designed” in photos.
4. Lattice Panel With Rounded-Edge Boards
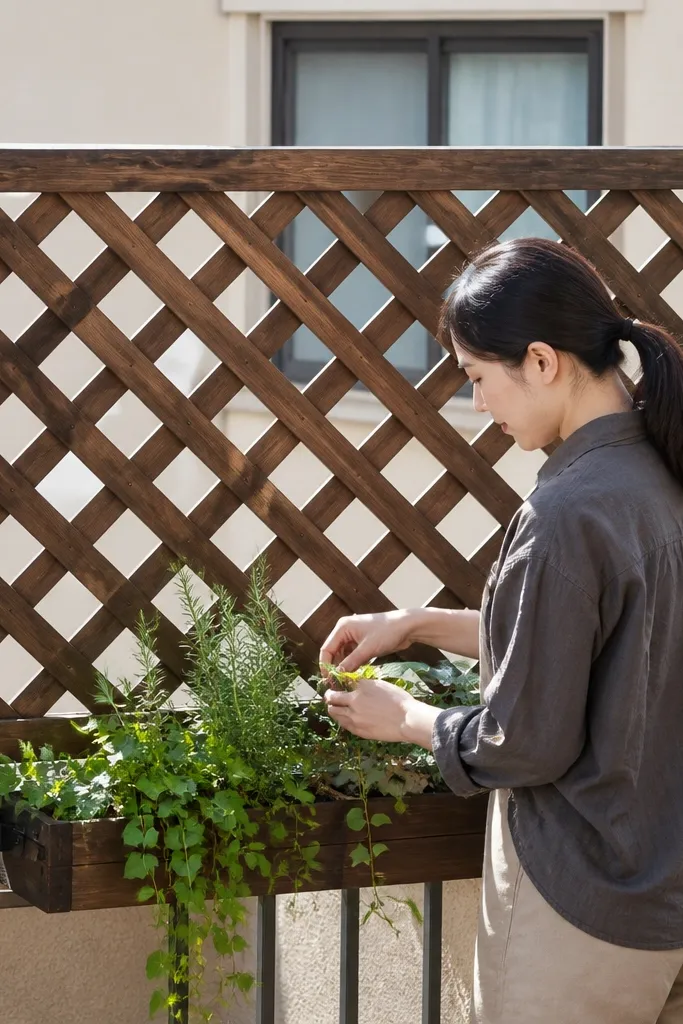
Lattice is one of the fastest ways to make a balcony feel warmer because it creates a repeating pattern of light and shadow. Rounded-edge boards make it look softer and less “construction-grade,” especially when you stain them. This option looks great even with simple mounting because the pattern does the heavy lifting visually. You’ll get partial privacy without feeling closed in. It’s ideal for renters who can clamp to the top rail and need something that still looks intentional from across the balcony.
Editor's noteStain after rounding — the rounded edges soak up color differently, so staining last makes the tone more even.
Measure the railing run and decide how many lattice squares you want. Cut a backer frame from 1x2s, then add cross pieces to form the grid — for a balanced look, aim for 6 in square-ish cells. Round the edges of the lattice strips with a router round-over bit (1/4 in radius) or sand with a block for a softened profile. Attach strips to the frame with exterior screws, then mount with clamp-on standoffs at the top and rubber-lined brackets at the sides. Sand, stain in a honey oak or walnut tone, and seal with matte exterior clear.
Skip thisLeaving raw sharp corners makes the whole panel look unfinished and catches dirt.
5. Board-and-Batten Privacy Top Rail Wrap
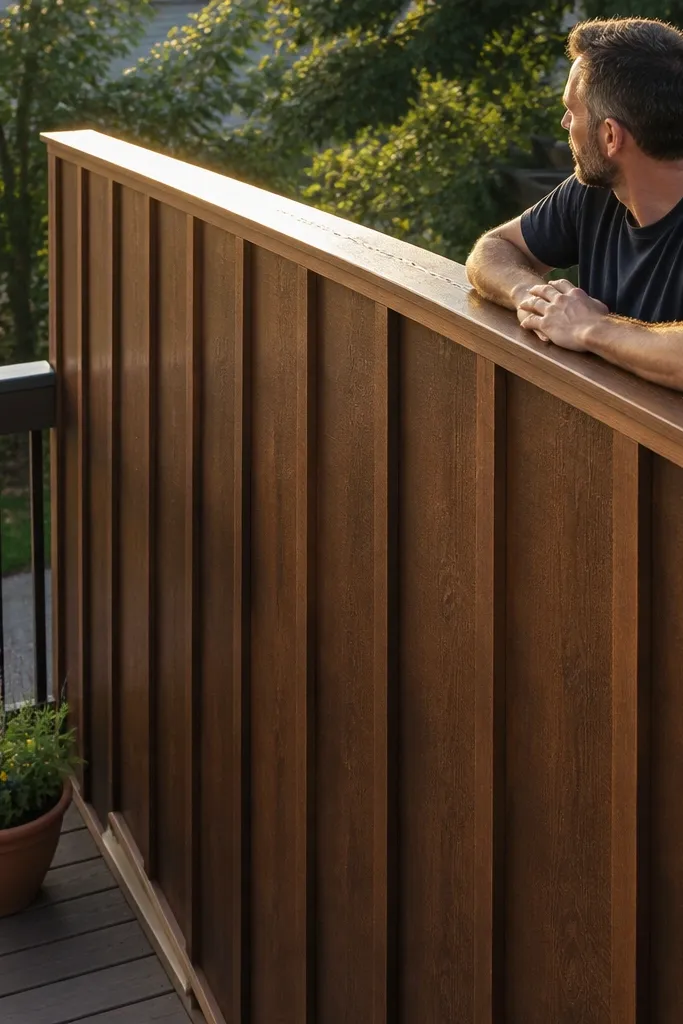
This one targets the part you touch and see most — the top rail line. A board-and-batten wrap adds warmth right where the eye lands, and it doesn’t need to cover the entire height to look full. Use vertical boards with battens over the joints so the seams look crisp. The result is a “built-in” look even when it’s modular. It’s best for balconies where you can clamp brackets to the top rail and you want a clean, renter-friendly upgrade without building a full wall.
Editor's noteIf your rail has a rounded profile, use a thin rubber strip between clamp and wood so the wrap sits flat.
Measure the top rail length and depth so your wrap sits snug without blocking ventilation. Cut a base strip (1x3 or 1x4) that matches the rail depth, then add vertical boards spaced evenly across the visible front. Add battens (thin strips, about 1/2 in wide) over the seams, centered between boards. Pre-drill and screw battens to the base frame, then attach the whole wrap to the railing using clamp brackets or strap clamps with rubber insulation. Sand 180 grit, stain warm brown, and finish with matte exterior polyurethane.
Skip thisSkipping a base strip leads to wobbly boards that look loose in close photos.
6. Tiered Timber Slat Cascade (Stacked Look)
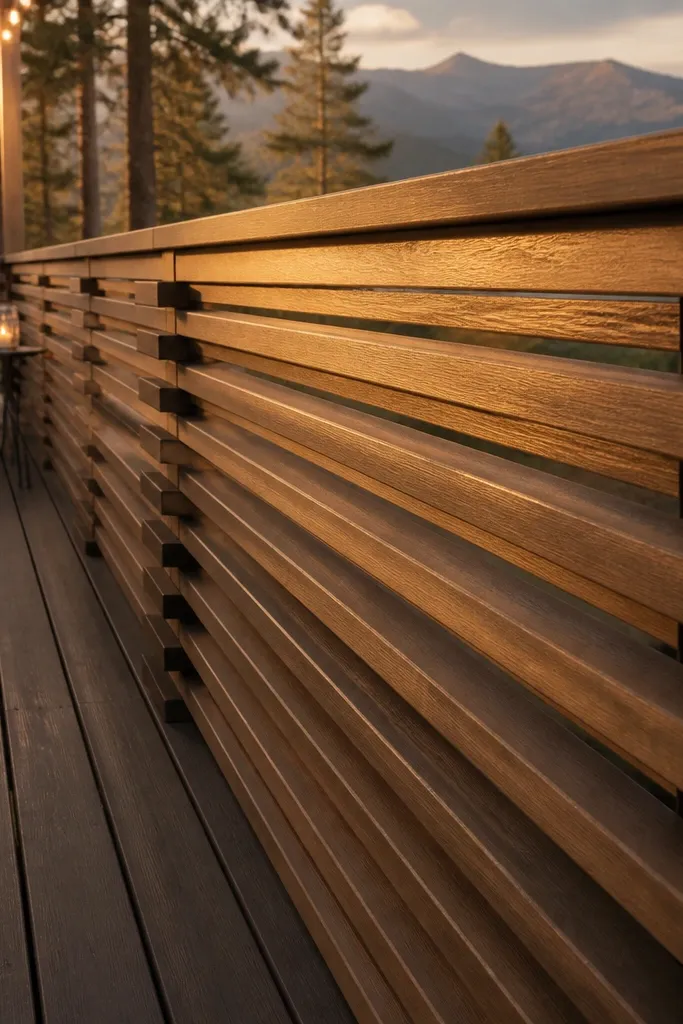
A cascade layout looks warm because it adds depth. Instead of one flat plane, the boards step forward at set intervals, so you get layered shadows and a cozy, handcrafted feel. It also helps with wind because air hits multiple angles. This is a strong choice if your balcony feels open and harsh and you want a more sheltered look without building a solid wall. The build is moderate: you’re cutting and fastening a stepped frame, but the carpentry is still manageable.
Build a rectangular base frame sized to your section, then add “step” supports every 10-12 in. Cut slats to the full width of each step and attach them starting at the bottom, moving upward with a consistent offset — 1-1/2 in per step looks great. Use exterior screws and pre-drill because stepped edges split easily. Mount the completed panel using clamp brackets at the top and side supports, with rubber shims between wood and metal. Sand to 180 grit, stain warm walnut, and apply matte clear coat in two thin layers.
Use a stop block when cutting slat lengths so every step lands flush and the cascade looks intentional.
Making the steps uneven creates a “random” look that reads cheap in daylight.
7. Horizontal Slats With Slight Gap for Wind and Light
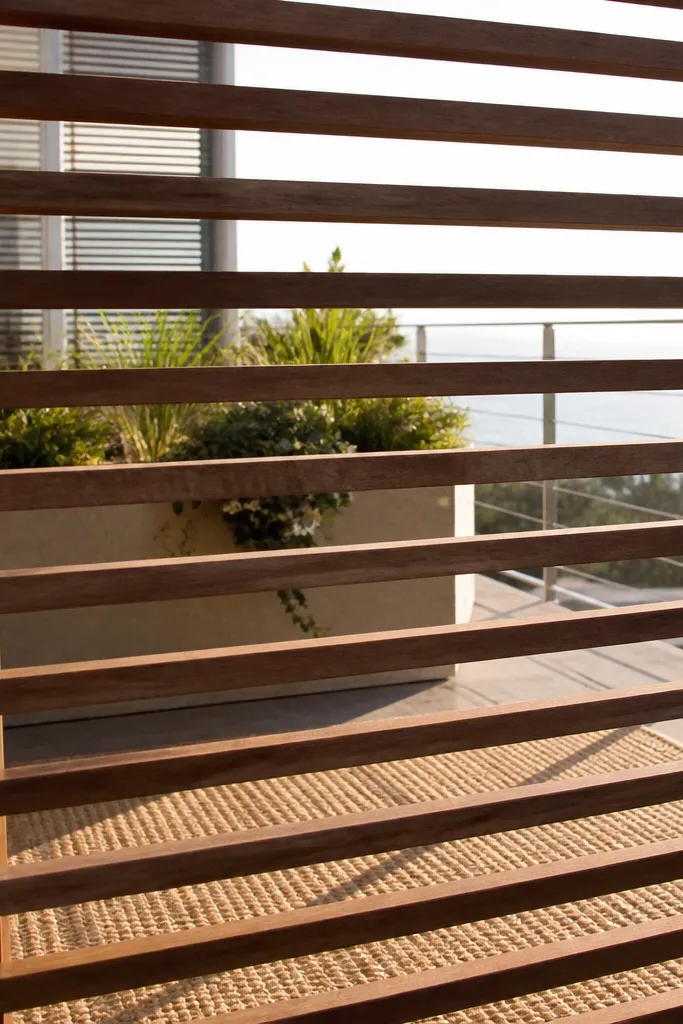
Horizontal slats warm up a balcony because they mimic the look of outdoor furniture and deck rails. This design also makes the railing feel calmer than dense vertical bars. Keep the spacing slightly open so you don’t trap wind entirely, which can reduce wobble in breezy spots. For an aesthetic win, use medium-toned wood and a matte finish so the color reads warm, not glossy. It’s renter-friendly when you use clamp-on mounts or a removable frame that sits against the existing railing.
Editor's noteDo a quick “dry fit” with a single slat spacing before you screw everything down.
Measure your railing height and choose slat thickness — 3/4 in boards look substantial without being bulky. Cut a back frame from 1x2s, then mark slat positions with a spacing jig. Attach slats horizontally with exterior screws, spacing them evenly — 3/4 in gap is a good starting point for a balanced look. Add end rails on both sides so the panel stays rigid during removal. Mount with clamp-on brackets or strap clamps with rubber liners. Sand to 180 grit, stain (walnut or teak-look), and seal with matte exterior clear.
Skip thisScrewing slats directly without pre-drilling — the first board split ruins the whole panel.
8. Smoked Oak Boards With Charcoal Stain Accent Strips

If you want warm but modern, combine smoked oak with thin charcoal accent strips. The oak provides the cozy base tone, while the dark accents create crisp lines that look designer. This is a great pick for renters because you can mount modular panels with clamps and keep the look consistent across seasons. The contrast also hides minor imperfections in spacing better than all-one-color wood. It photographs well because the dark lines create structure.
Editor's noteBrush charcoal stain with a foam brush so it doesn’t bleed into the oak tone.
Cut your main slats from oak-look boards (or any wood you plan to stain oak tone) at a consistent width, then cut accent strips about 1/4 to 1/2 in wide. Assemble a backer frame and alternate main slats with accent strips, keeping the gap uniform — 1/2 in looks clean. Pre-drill and screw through the backer so the slat faces stay smooth. Mount using clamp-on side brackets and top rail straps with rubber pads. Sand 180 grit, apply smoked oak stain to main slats, then brush charcoal stain on accent strips and seal everything with matte clear.
Skip thisUsing glossy clear coat — it makes the charcoal accents look harsh.
9. Renter-Friendly Wood Slat Panel With Magnetic Removable Sections
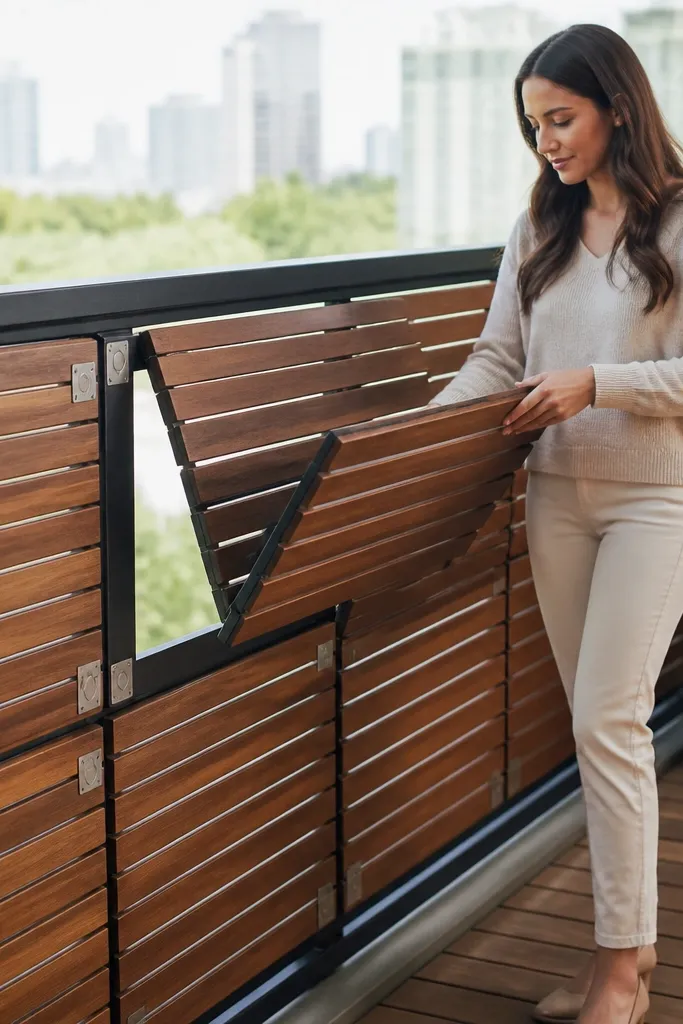
This design is for renters who want a clean look now and easy removal later. You build a panel with fixed wood sections and use magnetic plates to detach individual sections for cleaning or seasonal storage. The warm slat pattern stays consistent, while you avoid fully dismantling the whole railing. It’s also useful if you need to access building wiring or a gate mechanism near the railing. The look is best when the magnets are hidden behind thin trim strips so nothing interrupts the pattern.
Editor's noteCounter-sink the magnet recesses so the trim strip sits flush and doesn’t catch your fingers.
Build a back frame from 1x2s and attach slats with consistent spacing. Install thin metal plates on the backer at the ends of each removable section, then add matching magnets inside shallow recesses behind small trim strips. Create sections about 24-36 in long so they’re manageable. Mount the main frame to the railing using clamp-on brackets with rubber liners. Sand, stain, and seal the wood, then test removal before applying final clear coat.
Skip thisUsing weak magnets — a loose section looks bad fast when someone leans on the railing.
10. Vertical Slats in Two-Tone Stain for Depth
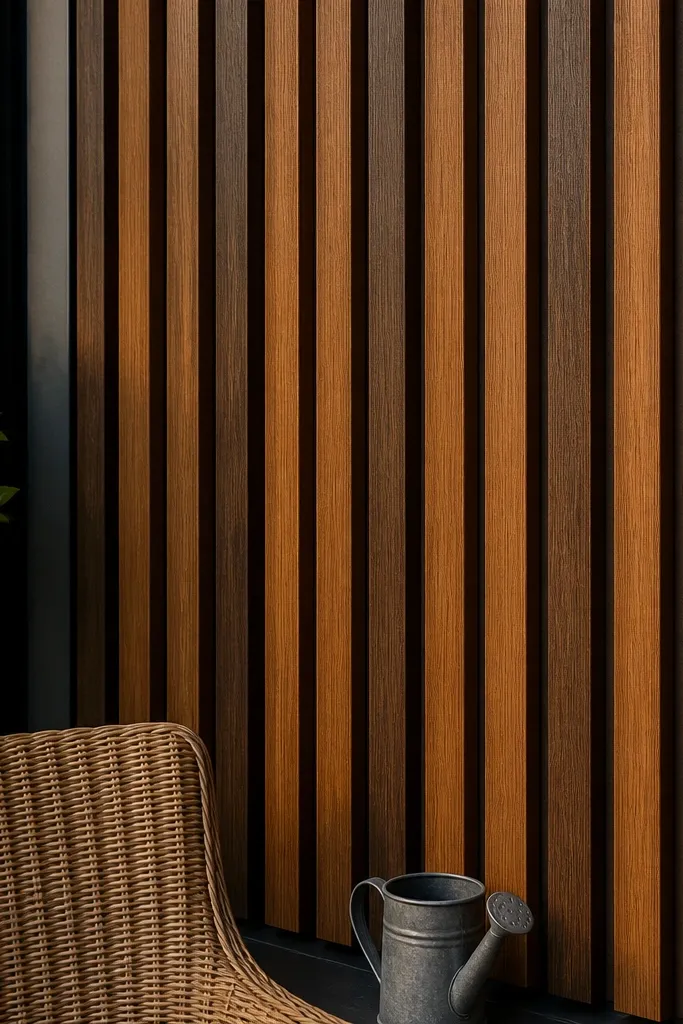
Two-tone slats look warm because they add depth without changing the basic pattern. Alternate boards in a honey oak tone with boards stained walnut, keeping spacing identical. The color rhythm makes the railing look custom even if the build is simple. This is a strong option for balconies that face bright sun, since the alternating tones reduce glare and make photos look softer. It’s renter-friendly when you use modular panels that clamp on and come off cleanly.
Editor's noteLabel stained boards on the underside so you don’t mix up the sequence mid-assembly.
Choose two stain tones that are close in warmth — honey oak and walnut work well together. Cut all slats to the same dimensions, then stain half the boards honey oak and the other half walnut. Build a panel frame and attach slats in an alternating sequence, using a spacing jig so every gap matches. Pre-drill and screw from the back frame to keep the faces clean. Seal both tones with matte exterior clear so the color stays consistent across weathering.
Skip thisStaining and sealing in thick coats — the two tones can blur together and lose the contrast.
11. Burnished Teak-Look Stain With Natural Wood Grain Facing
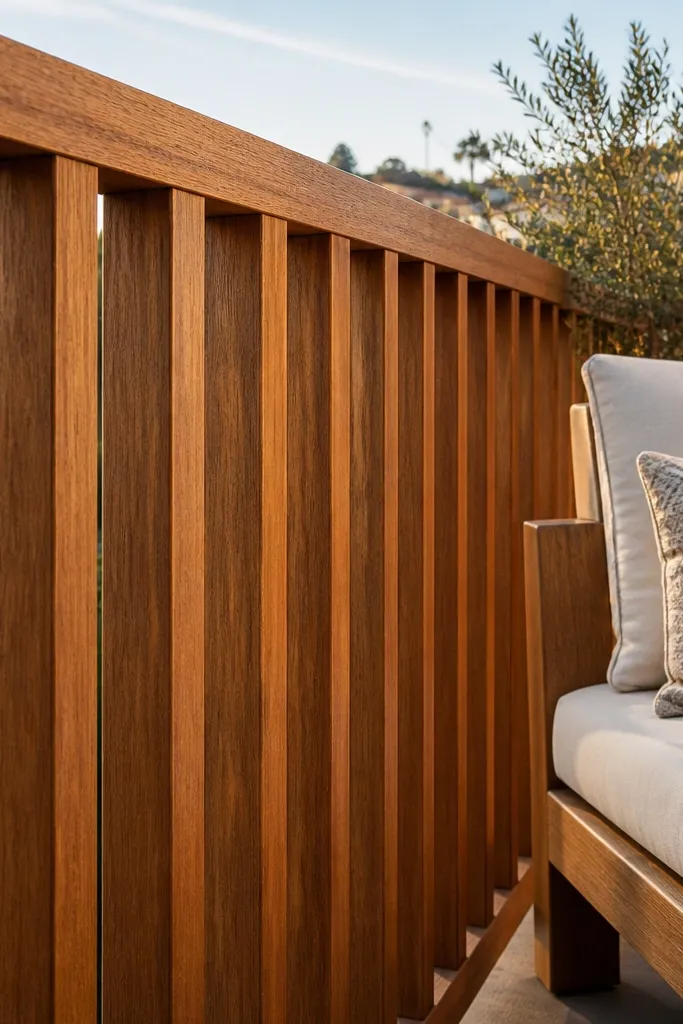
A teak-look finish is warm without going too dark. The trick is to keep the wood grain visible and avoid heavy, opaque staining that hides texture. When the grain shows, the railing looks like real outdoor furniture, not painted trim. Use vertical or horizontal slats and keep spacing consistent to make the grain pattern look intentional. This is a good renter-friendly idea when you want a timeless look that matches most patio furniture colors.
Editor's noteWipe stains with the grain direction only, then re-wipe after 5-10 minutes so it doesn’t pool.
Sand boards to 180 grit and clean dust thoroughly. Apply a teak-look stain in thin coats, wiping off excess so the grain stays visible. Let it dry fully, then seal with a matte exterior clear — two thin coats. Build your slat panel with a simple frame and attach boards with exterior screws, pre-drilling to prevent splitting. Mount with clamp-on brackets or rubber-lined strap clamps at the top and ends.
Skip thisApplying stain in one thick coat — it looks blotchy and reads cheap on camera.
12. Woven Wood Split-Rail Look Using Narrow Strips
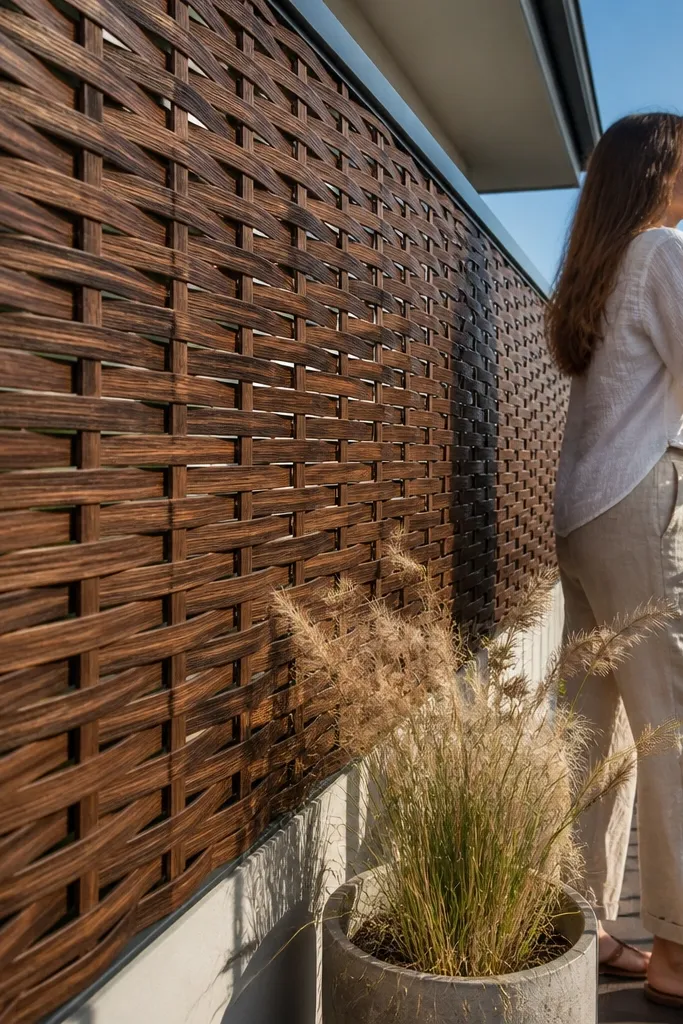
A woven strip pattern feels warm because it looks handmade and tactile. You get a “split rail” vibe, but with a tight, modern grid. This design is photogenic because the weave catches light from multiple angles, creating depth even at a distance. It’s best when you can mount a backing frame to the railing and weave strips through horizontal rails. The build is a bit more time-consuming than simple slats, but the look is worth it.
Editor's noteUse a thin spacer card (like 1/4 in) between strips while you weave to keep the weave tight and even.
Build a rectangular backing frame and add two to three horizontal rails inside it, spaced evenly. Cut narrow strips — around 3/8 to 1/2 in wide — from straight-grain wood so they don’t warp. Start weaving by inserting strips alternately over and under the horizontal rails, then pull each strip tight and align edges at the sides. Secure strip ends with small screws into the side rails, not through the faces. Sand, stain warm brown, and finish with matte exterior clear.
Skip thisUsing warped strips — the weave will open up and look uneven fast.
13. Shiplap-Style Panel With Tongue-and-Groove Boards
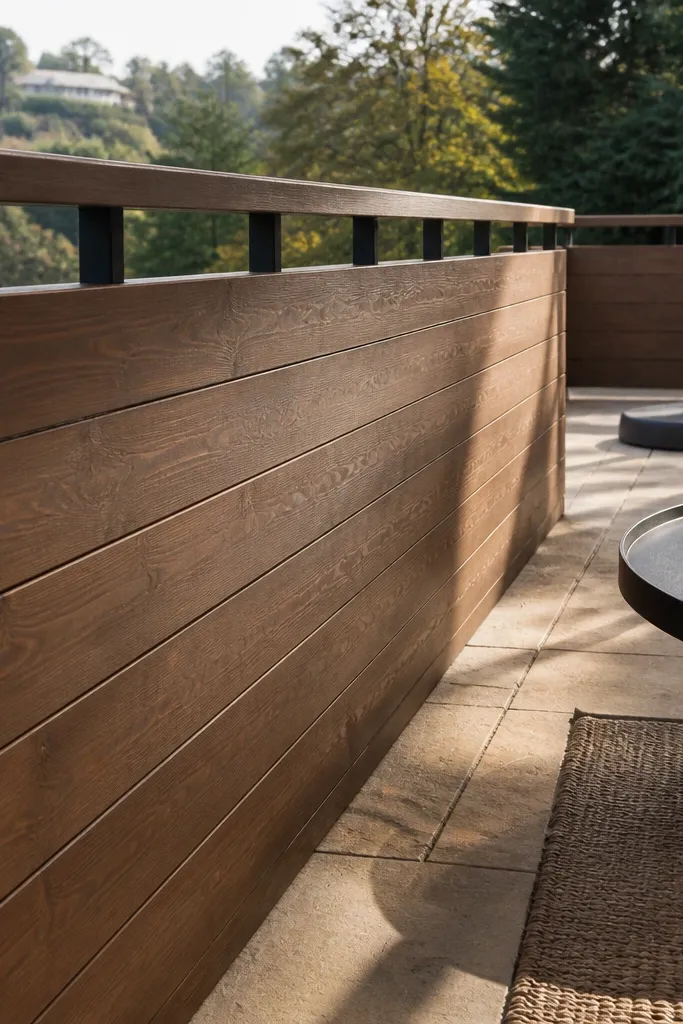
Shiplap-style boards make a balcony feel like a covered porch, fast. The groove lines create a cozy texture, and the repeating plank width looks “built” even when it’s a rental-friendly panel. Use tongue-and-groove boards if you can — the seams line up cleanly and the panel looks solid from a distance. This is a strong aesthetic choice if you want warmth without a busy pattern. It’s also easier to keep straight than diagonal designs.
Measure your panel area and choose boards with tongue-and-groove so you can lock seams. Cut boards to the needed height, then assemble onto a back frame with the tongue aligned — keep the first board perfectly square. Use exterior screws through the backer into the groove area to avoid visible screw heads. Add top and bottom rails so the panel stays flat. Mount with clamp-on brackets at the top and rubber-lined side supports. Sand 180 grit, stain warm oak or walnut, then seal with matte exterior clear.
Check squareness by measuring diagonals of the frame — it should be within 1/8 in across the panel.
Leaving gaps at the top — it makes the shiplap look like trim instead of a panel.
14. Raised Trim Frame With Center Wood Slat Grid
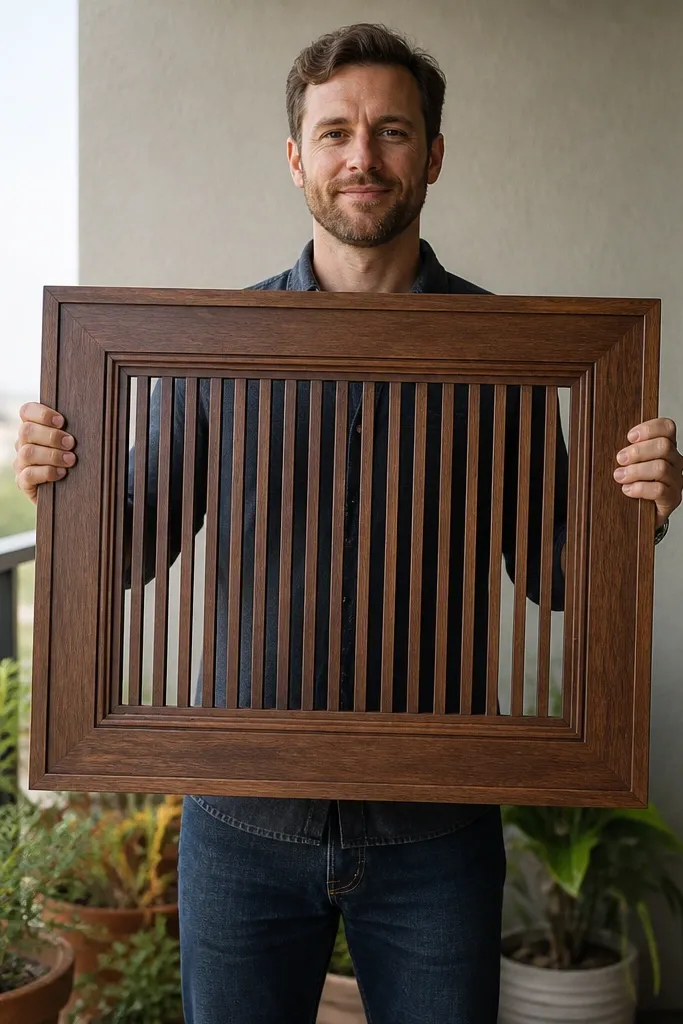
This one looks “custom cabinet” because it uses a raised trim border around a center slat grid. The trim adds structure and makes the panel look finished from every angle. The center grid keeps the warm airflow feel, so it doesn’t look like a solid wall. This is a renter-friendly win when you can clamp the outer frame to the railing and remove it as one piece. It’s also a great choice if your existing railing looks messy and you want to hide the metal behind wood.
Build an outer rectangle frame from 1x3 or 1x4 boards, then add an inner frame that holds your slats. Cut slats to fit the inner opening, and keep spacing consistent with a jig — 3/4 in gap looks clean. Attach slats to the inner frame with pre-drilled exterior screws. Add corner blocks so the inner frame stays rigid. Sand, stain the entire panel one tone, and seal with matte exterior clear. Mount the panel using clamp brackets that grab the outer frame, with rubber pads to protect the metal railing.
Use the same board thickness for trim and slats so the shadows look even.
Skipping corner blocks — the inner grid can loosen and rattle.
15. Horizontal Slats With Woven Rattan Inlay Accent
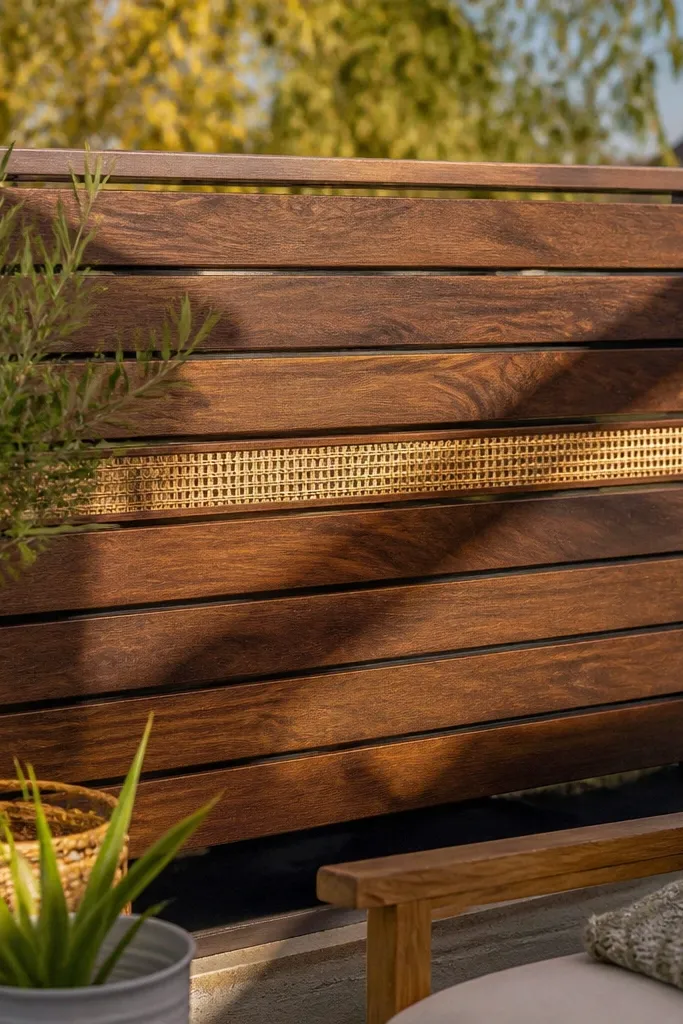
Wood plus rattan reads warm immediately, and it also gives visual texture without heavy carpentry. The base is a simple horizontal slat panel stained walnut, then you add a narrow rattan inlay strip as an accent band. The rattan catches light and makes the railing look like part of a living room, not an outdoor accessory. This is best when you want warmth but don’t want a full privacy wall. Renters can mount it with clamps and remove it for cleaning.
Editor's noteChoose rattan with tight weave so it doesn’t look wispy in daylight.
Build a horizontal slat panel using a frame and boards spaced 3/4 in apart. Leave a 2-1/2 to 3 in wide “inlay channel” area on the center section by installing two vertical rails behind where the rattan will sit. Cut a rattan strip panel to fit and secure it with small finishing nails or stainless screws through an inner trim lip. Sand and stain the wood, then seal — keep the rattan dry during finishing and seal only the wood around it. Mount with clamp brackets at top and side ends.
Skip thisSealing rattan directly — it can turn darker and feel brittle.
16. Curved Top Rail Cap With Matching Wood Slats
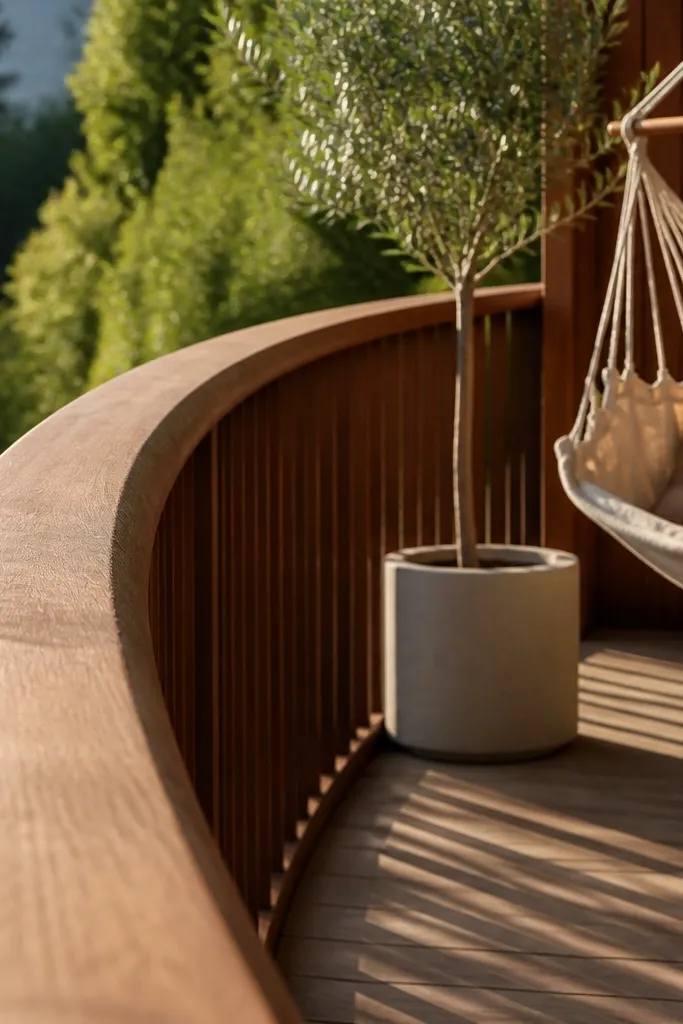
Most balcony railings are flat and a little harsh. A curved top cap instantly softens the look, and pairing it with matching slats below makes the whole upgrade feel intentional. The warmth comes from the wood tone, while the curve adds an upscale silhouette. This design is renter-friendly because you can mount the cap with clamp-on brackets and attach slats to a lightweight panel that sits under it. It photographs especially well because the curve frames the skyline behind it.
Editor's noteUse stainless screws for the slat panel — they won’t rust through the finish.
Measure the top rail length and create a curved cap using a laminated approach: glue and clamp 1/2 in thick strips around a form, or buy pre-laminated curved trim. Attach the cap to the railing using clamp brackets with rubber pads so it doesn’t scratch metal. Under the cap, build a slat panel with a simple frame that matches the cap width. Attach vertical slats to the frame, then screw the frame to small mounting tabs that line up under the cap. Sand, stain warm brown, and seal matte exterior clear.
Skip thisTrying to bend solid boards without lamination — they crack and look uneven.
17. Corner Frame Panels With Open Center for Wind
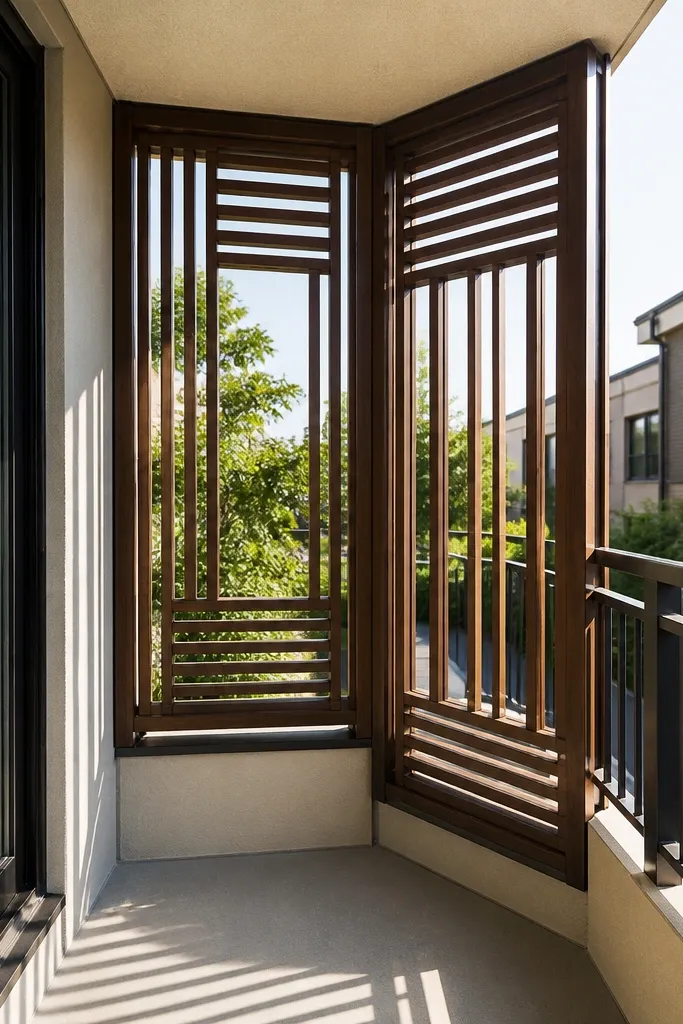
If your balcony is narrow, full panels can feel heavy. Corner frame panels give you warmth where you need it most, while leaving the center open so the space stays airy and light. The visual trick is placing wood in vertical frames at the corners, with a simple slat pattern inside each frame. This looks clean from street view and feels sheltered when you sit at the railing. It’s renter-friendly because each panel can clamp independently and remove easily.
Editor's noteKeep slat spacing slightly wider (about 1 in) so the corners look light instead of solid blocks.
Measure your balcony width and decide the panel size — 24-36 in wide corner frames work well. Build two identical corner frames from 1x3 boards, then add a simple slat grid inside each frame with consistent spacing. Mount each frame with clamp brackets that wrap the existing railing posts or top rail. Add rubber pads between wood and metal to prevent squeaks. Sand, stain warm walnut, and seal with matte exterior clear. Test that the panels don’t interfere with balcony doors or cleaning access.
Skip thisMaking the frames too tall — it can block sightlines and look boxy.
18. Wood Planter-Backed Railing Screen With Removable Boards
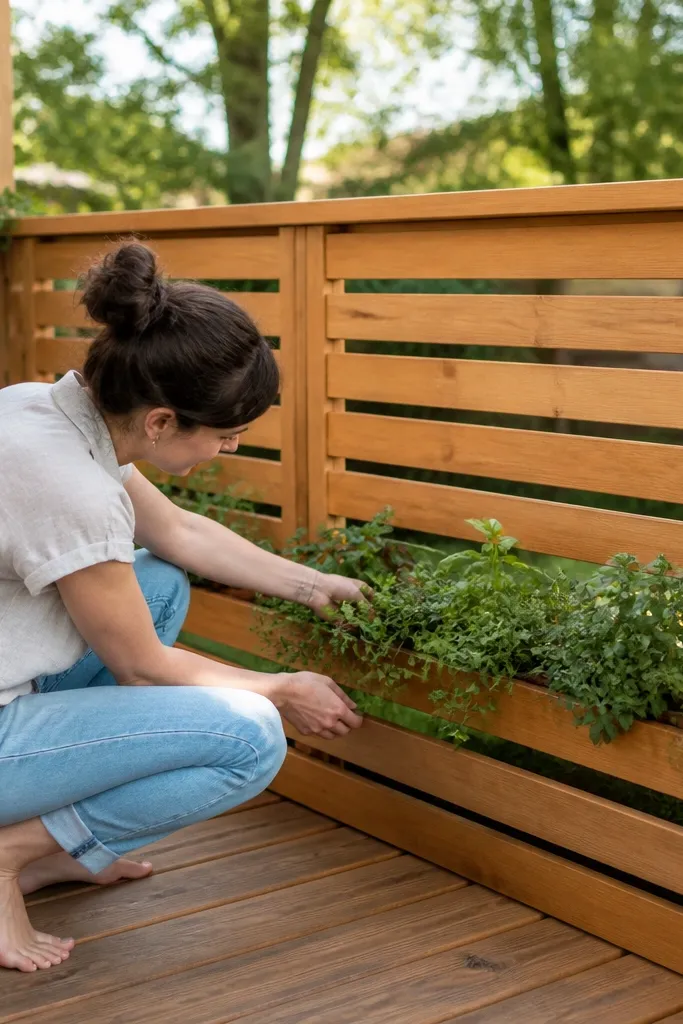
A planter-backed screen makes the railing feel warm because it brings greenery right into the design. You get a wood frame, a shallow planter trough behind the slats, and removable boards so you can water without dismantling the whole thing. Use a warm wood tone and matte finish; the plants do the rest of the cozy work. This is best for balconies where you already want planters and where you can mount a freestanding or clamp-supported frame inside the railing line. It’s photogenic because the wood texture and plant color sit together.
Editor's noteUse a drip tray liner under the trough so you don’t stain your balcony floor.
Build a rectangular frame sized to your railing section and add a shallow planter trough using a waterproof liner and drainage holes. Install vertical slats in front of the trough with a removable method — either screws into side rails you can reach, or magnets hidden behind trim. Line the planter trough with a heavy plastic or pond liner and add a small gutter-style drainage path. Mount the overall frame using clamp-on brackets or a freestanding base with rubber feet. Sand, stain warm brown, and seal the wood, keeping the liner and drainage system untouched by sealant.
Skip thisSkipping drainage — the wood will rot from the inside out.
19. Slim Reclaimed-Look Pallet Slat Panel With Frame
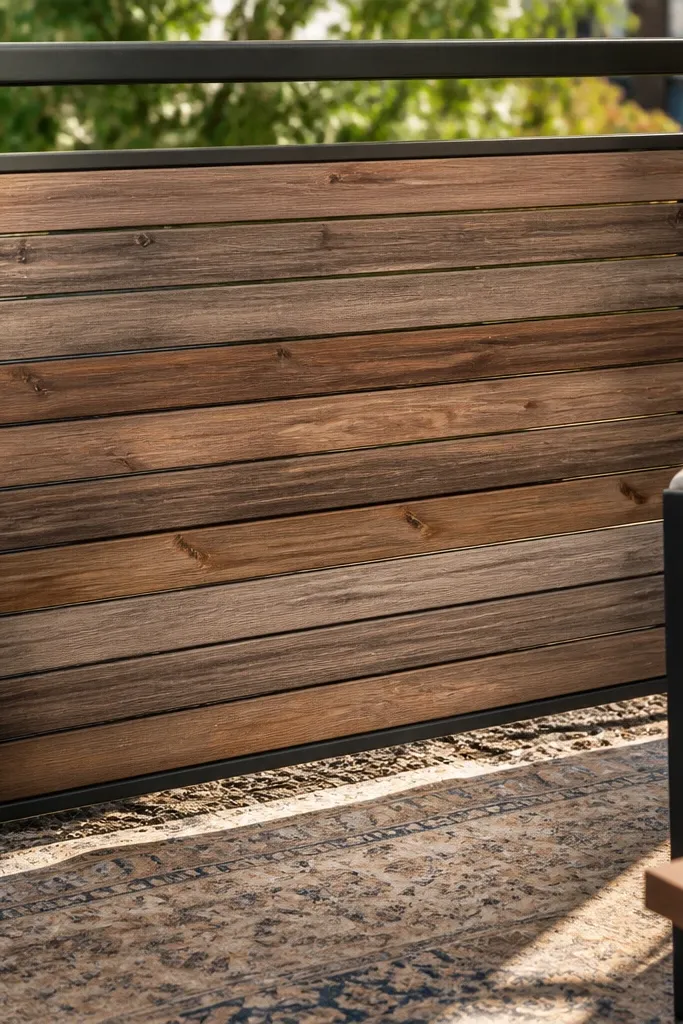
Reclaimed-look slats give you warmth fast because the color variation looks natural. The key is to avoid messy pallet boards that warp or splinter. Use slim, planed slats in a consistent thickness and mount them in a straight frame. The panel reads cozy because the grain catches light and the finish looks like outdoor furniture. This is renter-friendly when you build it as one clamped panel, not a bunch of loose boards. It suits balconies that need a warmer tone without a solid privacy wall.
Editor's noteSort slats by color before assembly so the variation looks intentional, not random.
Select pallet boards, then plane or sand them down to consistent thickness — 3/8 to 1/2 in looks best. Build a back frame and add cross supports every 16-20 in so the panel stays rigid. Arrange slats with a small gap of 1/2 in for airflow and a neat look. Pre-drill and screw through the backer so faces stay clean. Sand to 150-180 grit, apply a stain that matches the warm vibe (walnut or weathered oak), then seal matte exterior clear. Mount with clamp-on brackets at top and ends using rubber pads.
Skip thisLeaving pallet nails in — they wreck tools and can cause rust stains.
20. Wood Rope-Loop Side Ties With Vertical Slat Panel
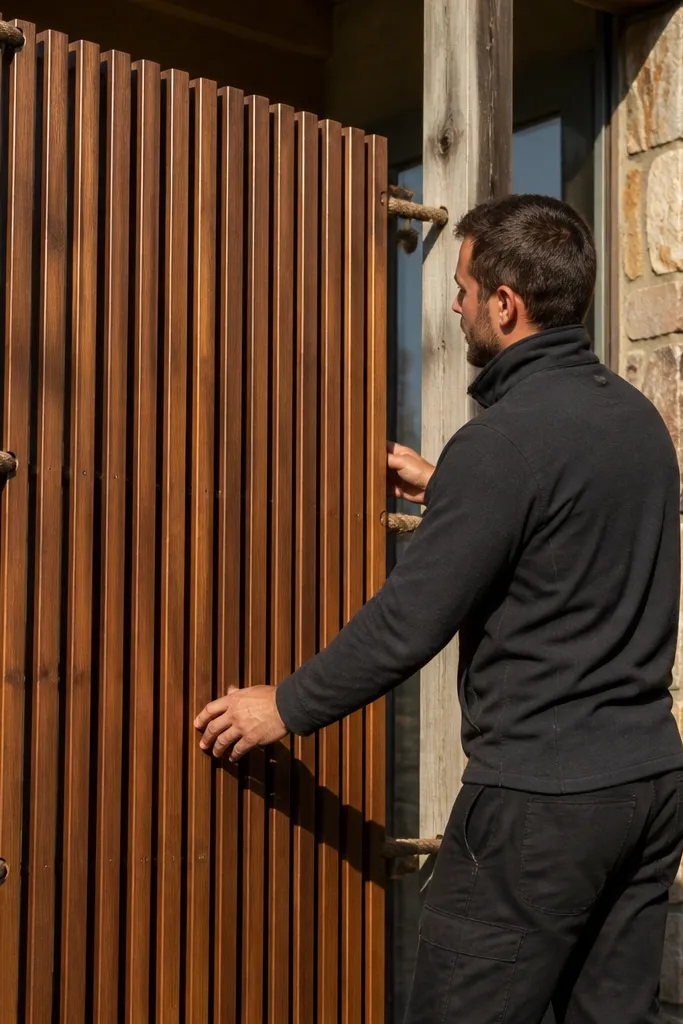
This is a surprisingly good renter-friendly approach because it uses tension and ties instead of drilling. You mount a slat panel with minimal clamp points, then stabilize it with rope loops anchored around existing posts or hardware. The rope adds warm texture and makes the whole railing feel more handcrafted. Visually, the vertical slats do the cozy work; the rope just keeps it secure and adds character. It’s best for balconies with posts or existing tie points where rope can loop without slipping.
Editor's noteUse outdoor polyester rope so it doesn’t go fuzzy or rot after rain.
Build a vertical slat panel on a lightweight frame that fits between railing posts. Mount the panel at a few points using clamp brackets at top corners and one mid support if needed. Drill small holes in the side frame rails to thread rope loops, or attach rope hooks to the frame. Tie rope loops around existing posts in a way that keeps the panel snug — use a simple bowline knot and then add a short back-tie to prevent loosening. Sand, stain, and matte seal the wood, then check that the panel doesn’t move more than 1/4 in when pushed.
Skip thisUsing stretchy rope — the panel sags and the slat alignment looks off.



