
1. Stud-Screwed Utility Rail + Removable Bins
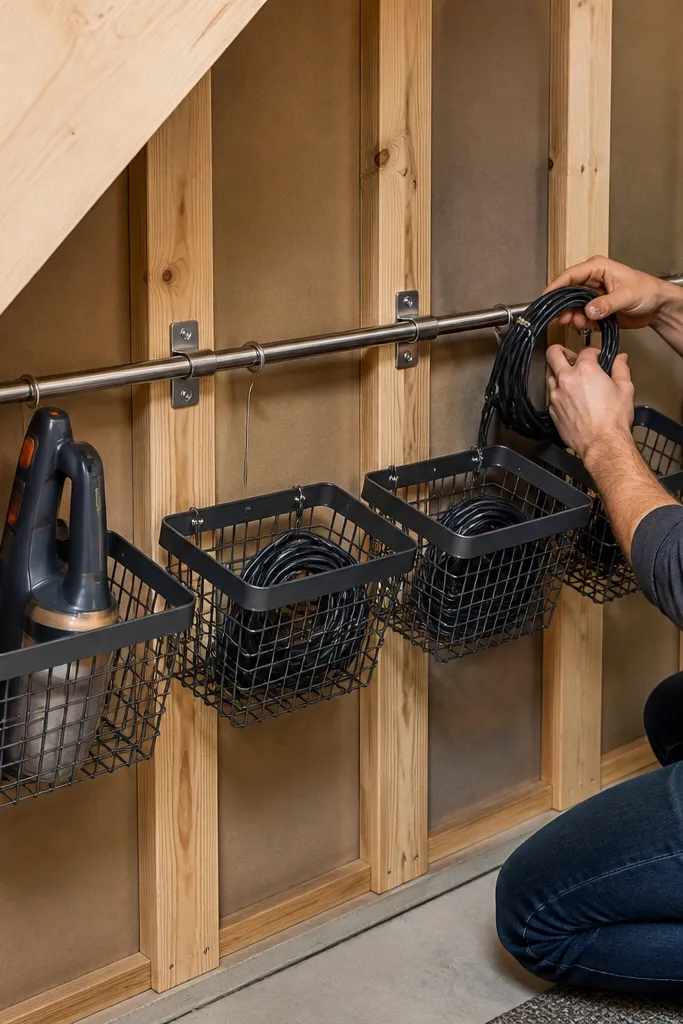
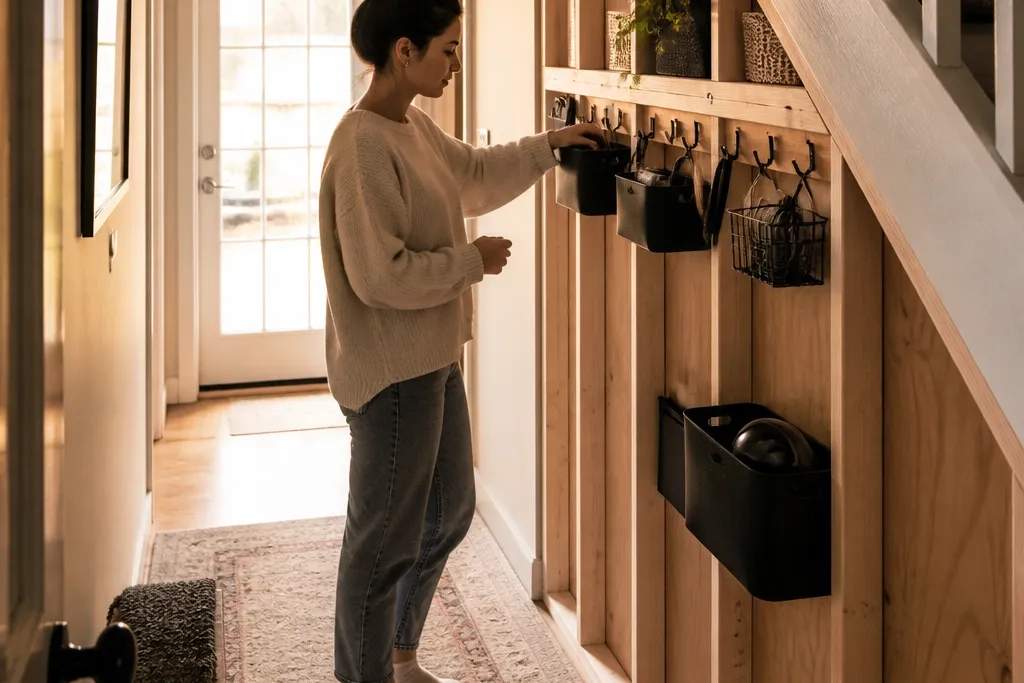
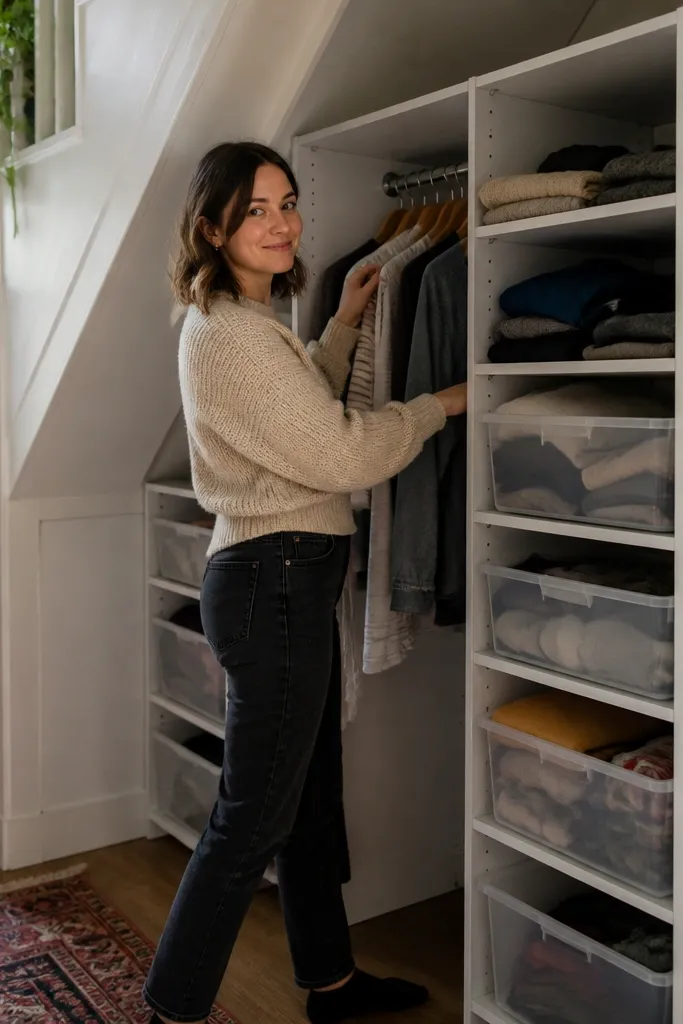
This is the cleanest renter-friendly setup when you’re storing bulky, irregular items like cleaning bottles, a small vacuum, and spare cables. The rail gives you a straight line to hang bins and accessories, while the bins keep everything contained so the under-stairs area doesn’t turn into a dumping zone. I like this approach because you can remove the bins in seconds and still leave a simple, tidy wall line behind. Finish matters too: use a painted rail or a powder-coated metal rail so scuffs don’t look messy after you move.
Editor's notePre-drill the ledger holes so you don’t split the wood, and paint the cut edges before mounting.
Start by finding studs with a stud finder and marking two vertical stud lines under the stairs. Install a 1x3 wood ledger (or a metal slotted rail) level across the studs using 2.5-in screws with washers. Space the bins so the lowest bin bottom stays above the floor by at least 1/2 in for easy cleaning. Then hang removable bin hooks or cleats that screw into the bin frame, not the wall. Finally, label bins with a label maker and add a small adhesive hook for cords so loose items don’t migrate.
Skip thisDon’t mount the rail into drywall anchors — use studs or keep it freestanding.
2. Freestanding Shoe + Boot Cabinet with Open Front
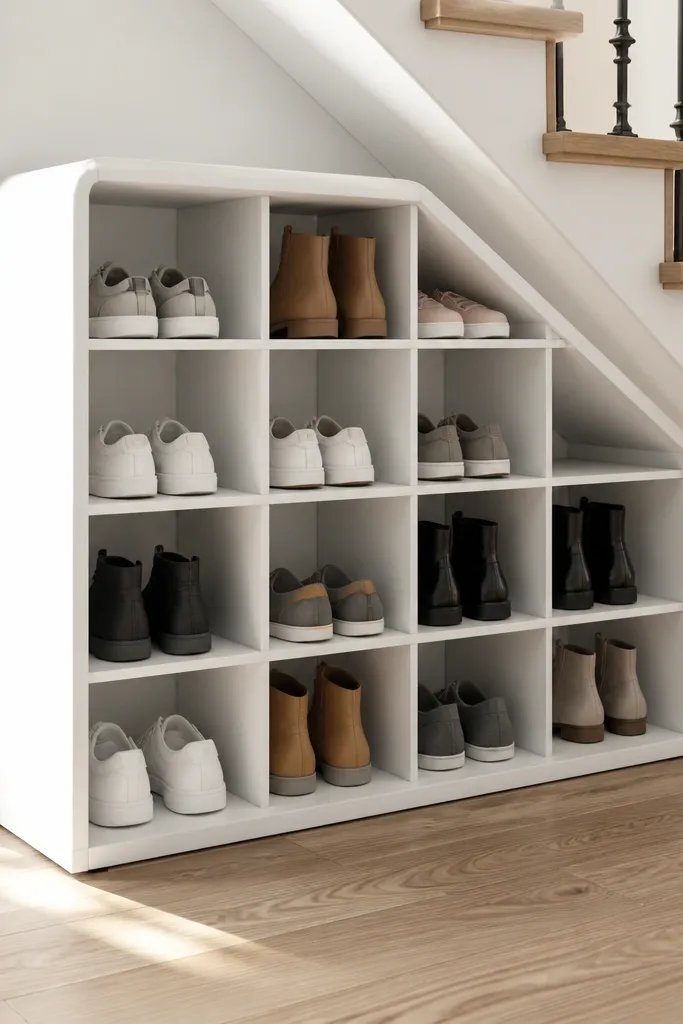
If your under-stairs space is tight, a freestanding cabinet is the move because it avoids permanent wall work. Open front cubbies keep shoes and boots visible, so you stop kicking the same pair around every morning. Use this for short boots and sneakers, not tall rain gear that needs a full vertical hang. The after looks better because you get a uniform grid instead of scattered pairs.
Editor's noteAdd felt pads under the base feet so it slides less when you grab boots.
Build a base frame from 2x2s or 3/4-in plywood so it sits stable on uneven floors. Create cubbies using plywood dividers spaced 6-3/4 in for sneakers and 10-1/2 in for most ankle boots. Leave a bottom row taller (around 12-14 in) if you store winter boots. Add a back panel only if you want it to look finished, but keep it light so it’s easy to disassemble later. Finally, seal the wood with matte poly or paint so the inevitable scuffs wipe clean.
Skip thisDon’t make cubbies all the same height if you store boots and sneakers together.
3. Pull-Out Trash + Recycling Drawer Unit
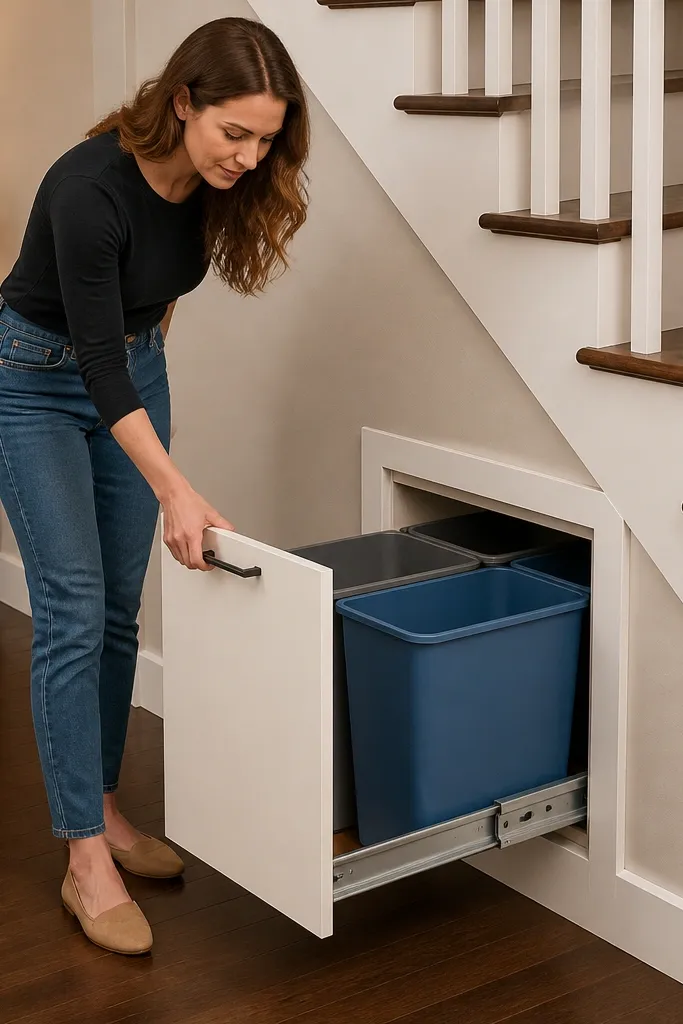
A lot of under-stairs spaces become a trash staging area because there’s no controlled place for bins. A pull-out drawer fixes that, and it’s renter-friendly if you keep it freestanding. Soft-close slides make it feel built-in, and the drawer front gives you a clean look instead of exposed plastic. This setup works great for small households where you want the bins hidden but still easy to reach.
Editor's noteUse a drawer bottom made from 1/2-in plywood and add a thin rubber mat where the bins sit.
Start by making a freestanding cabinet carcass from 3/4-in plywood sized to your under-stairs footprint. Measure the depth available and subtract 1 in for clearance so the drawer doesn’t bind when you open it. Install full-extension drawer slides to the cabinet sides, then build a drawer box with a bottom panel that can handle weight. Cut two bin openings or use bin brackets so the bins sit snugly and don’t rattle. Finish by attaching a handle or a cutout finger pull and testing the drawer with empty bins before loading it.
Skip thisDon’t guess slide length — buy slides that match your actual drawer depth.
4. Adjustable Shelving on Detachable Side Panels
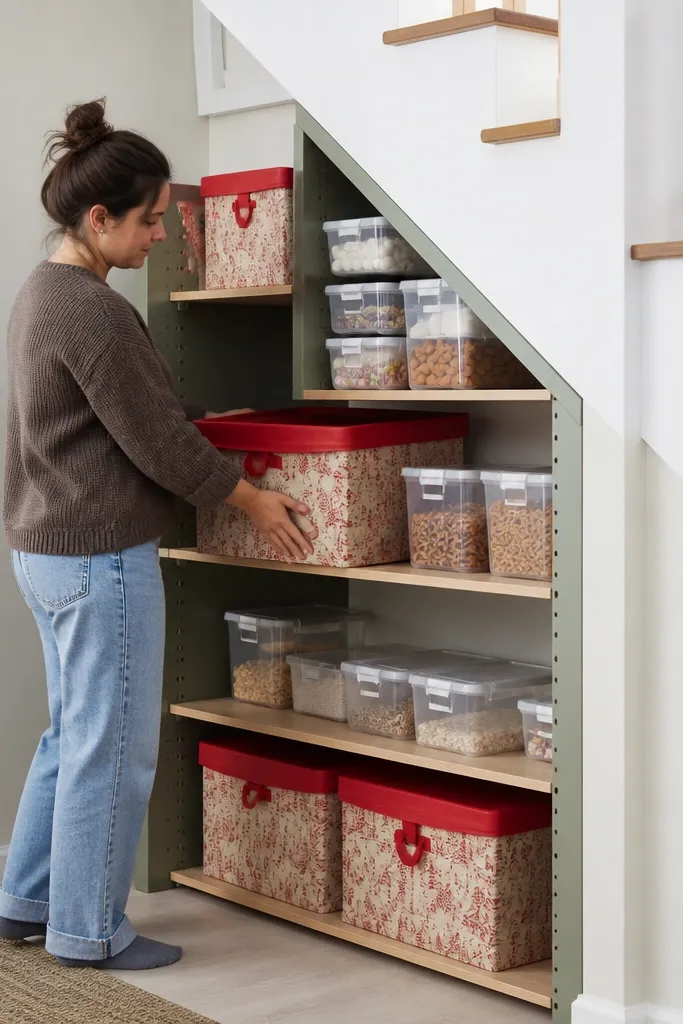
This is the best option when your storage needs change every season. Adjustable shelving lets you re-space for holiday bins one month and pantry overflow the next. The detachable side panels keep it renter-friendly because you can remove the whole unit without patching drywall. It also looks intentional because the shelf lines are straight and consistent, even in a sloped under-stairs area.
Editor's noteAdd a front lip even if the shelves are deep — it stops “bin creep” over time.
Measure the height at the widest point and plan shelf spacing around 10-12 in for bins and 7-8 in for folders or shoes. Build two side panels from 3/4-in plywood and drill a grid of holes for shelf pegs (or use a pegboard-style system). Attach the side panels to a freestanding base, or screw them into studs with removable brackets so you can take them down. Cut shelves from 3/4-in plywood and add a 1/4-in lip on the front edge so bins don’t slide forward. Finish by sealing edges and leveling the base with shims.
Skip thisDon’t use thin particleboard shelves if you’ll store heavy bins.
5. Ladder-Style Hanging Rail with S Hooks
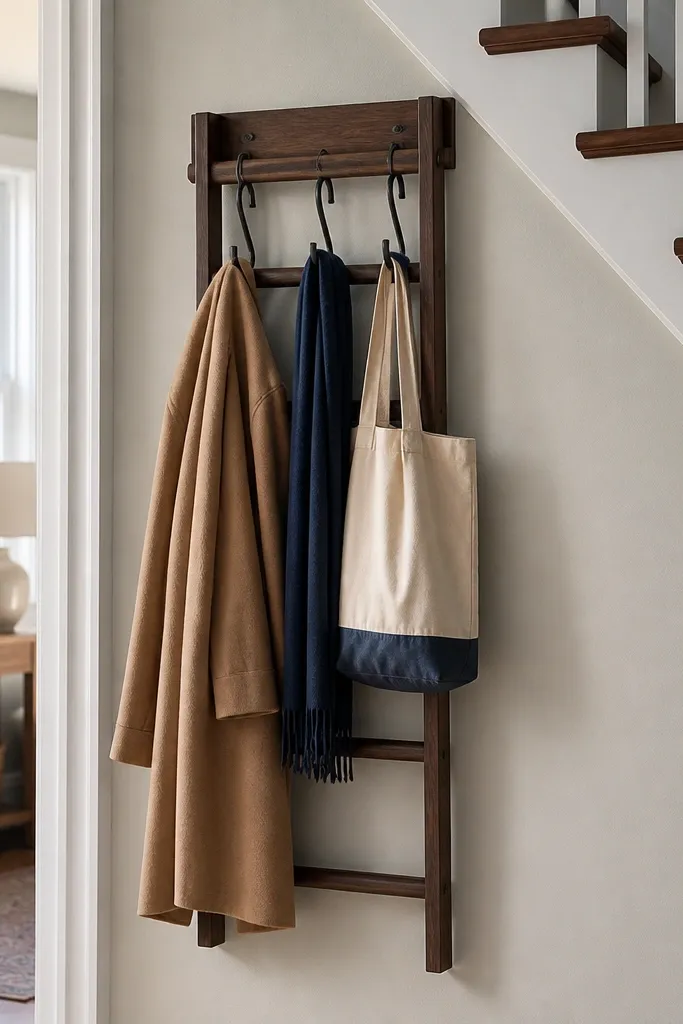
For small entry coats and everyday bags, hanging beats stacking. A ladder-style rail gives you multiple heights, so you can hang coats, scarves, and tote bags without creating one tangled mess. It’s renter-friendly when you anchor to studs with a removable mounting plate or use a floor-supported side frame. The after is clean because everything has a hook — no more coat piles on chairs.
Editor's noteUse removable hooks so you can swap the layout without redoing the frame.
Build a ladder frame from 1x3 boards with two vertical rails and 3-4 horizontal rungs spaced 10-12 in apart. If you’re using wall support, mount only the top bracket into studs with screws and keep the ladder supported at the floor with a stable base. Sand and paint before installation so scuffs don’t show. Install S hooks or small hanging clips on each rung based on what you store. Finally, add a small lower shelf or basket for hats so the hanging rail doesn’t become the only catch-all.
Skip thisDon’t mount a single-point wall hook — the ladder needs a stable base.
6. Zero-Damage Tension Rod + Over-the-Door Style Shelving
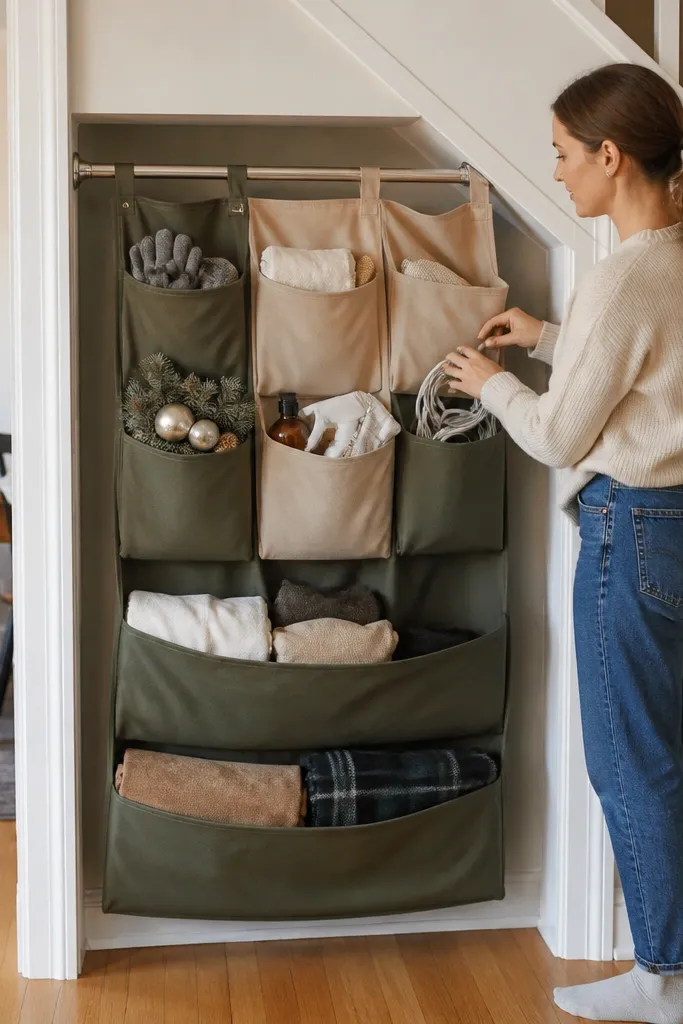
If your landlord will not allow wall anchors, tension-based storage is the only way to keep it truly renter-friendly. This setup works best for lightweight items like gloves, cleaning cloths, small holiday decor, and extra cables. The fabric pouches handle uneven under-stairs angles better than rigid boxes. You also get a quick before/after because it instantly removes clutter from the floor.
Editor's noteUse a rod with rubberized ends so you don’t leave marks on painted trim.
Measure the distance between two solid surfaces under the stairs and choose a tension rod that matches that width range. Install the rod level, then hang a set of fabric organizers with grommets or loops that clip onto the rod. Add small clip-on shelves only if the surface supports them and the shelves stay light. Keep everything within a weight limit you can lift with one hand so the tension rod doesn’t sag. Finish by adding a small label strip on each organizer section so you don’t lose track.
Skip thisDon’t load heavy bins on tension rods — sag equals permanent mess.
7. Toe-Kick Pull-Out for Vacuum, Mops, and Dustpans
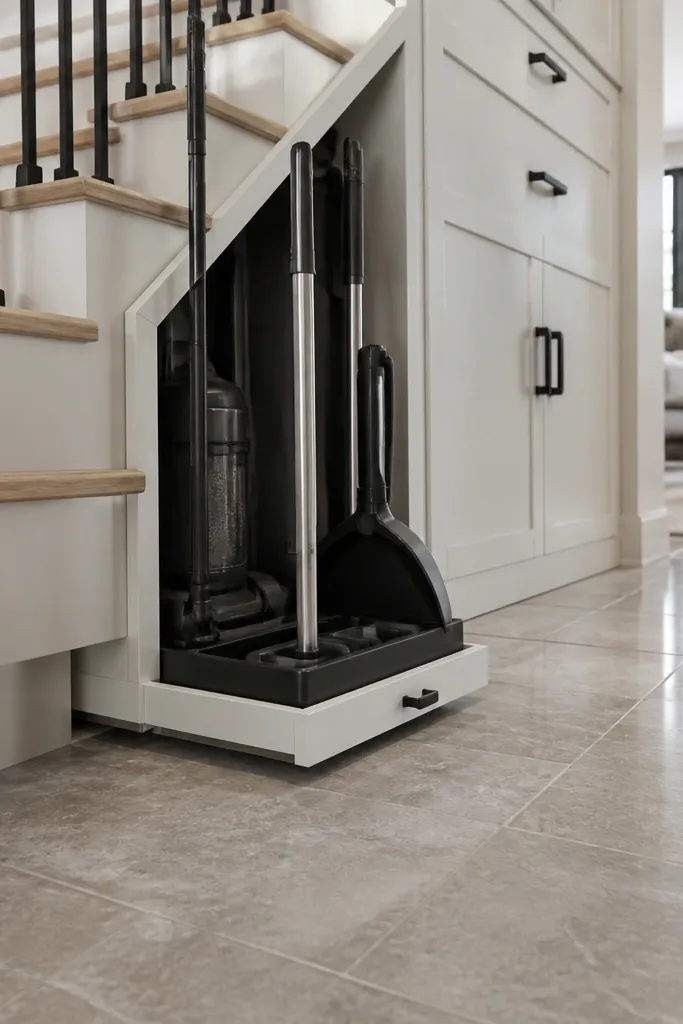
Cleaning gear is the fastest way to ruin under-stairs storage because it’s awkward and messy. A toe-kick pull-out tray keeps the gear upright and contained, so you don’t drag it across your home every time you clean. This setup makes the after look “built-in” because the tools live in a hidden compartment at floor level. Use it for vacuums, mops, and dustpans — not for heavy storage bins that need tall access.
Editor's noteAdd a small drip tray or plastic liner if your mop bucket ever leaks.
Build a narrow base cabinet section from 3/4-in plywood that fits under the stairs clearance. Install a pull-out drawer slide system rated for the weight you’ll load (a vacuum is heavy). Attach the slide brackets to the cabinet sides, then build a tray board that sits on the drawer. Add a simple strap or bungee tie points so the vacuum handle doesn’t tip when you pull the tray out. Seal the tray with a wipe-clean finish and test the pull-out with the lightest tool first.
Skip thisDon’t skip weight rating on the slides — cheap slides fail under cleaning gear.
8. Bin Wall with Hinged Front Panel
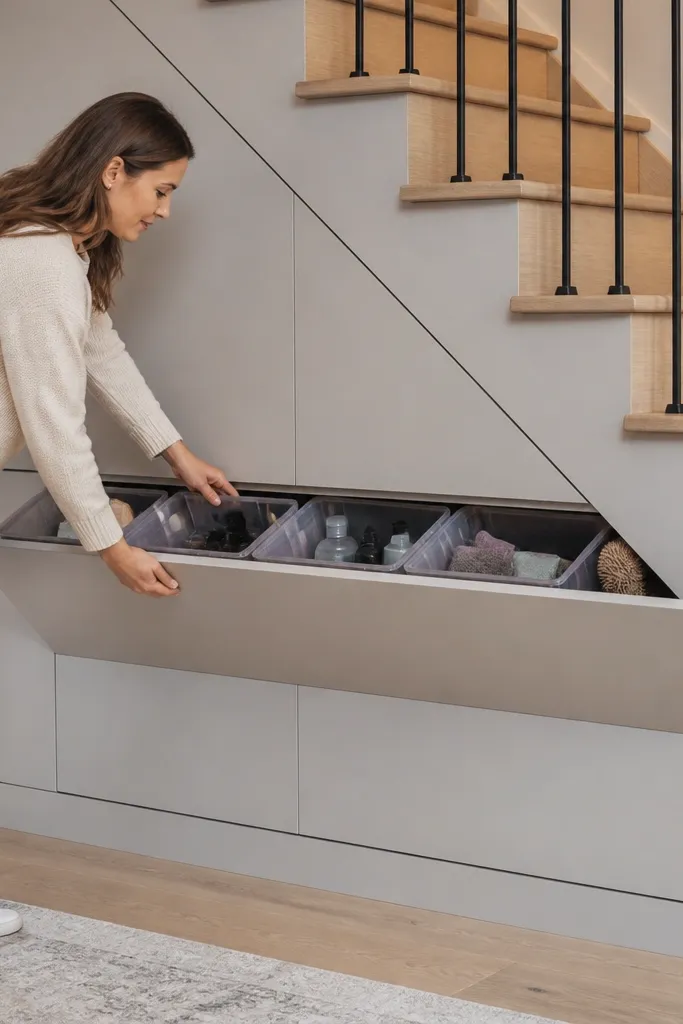
This is a smart fix when you want storage that looks tidy but you still need quick access. The hinged front hides the bins and keeps the space looking clean, especially if under-stairs is near a living area. Bin walls also stop the “everything spills out” effect because items sit inside the bin walls, not on open shelves. It’s renter-friendly when you mount the structure to studs with removable hinges and keep the panel lightweight.
Editor's noteUse a magnetic catch that doesn’t require perfect alignment — under-stairs angles rarely line up.
Measure your under-stairs width and build a freestanding bin frame from plywood that matches the footprint. Use bins with matching sizes and create dividers so each bin has a dedicated slot. Attach a hinged front panel using two hinges screwed into the frame, not into drywall. If you need wall support, use a top ledger into studs and make the panel removable with screws so you can take it down cleanly. Finish by adding a handle and magnetic catch so the panel closes firmly.
Skip thisDon’t use heavy doors that sag; hinge a light panel and keep it rigid.
9. Modular Rolling Cart Stack for Sloped Under-Stairs
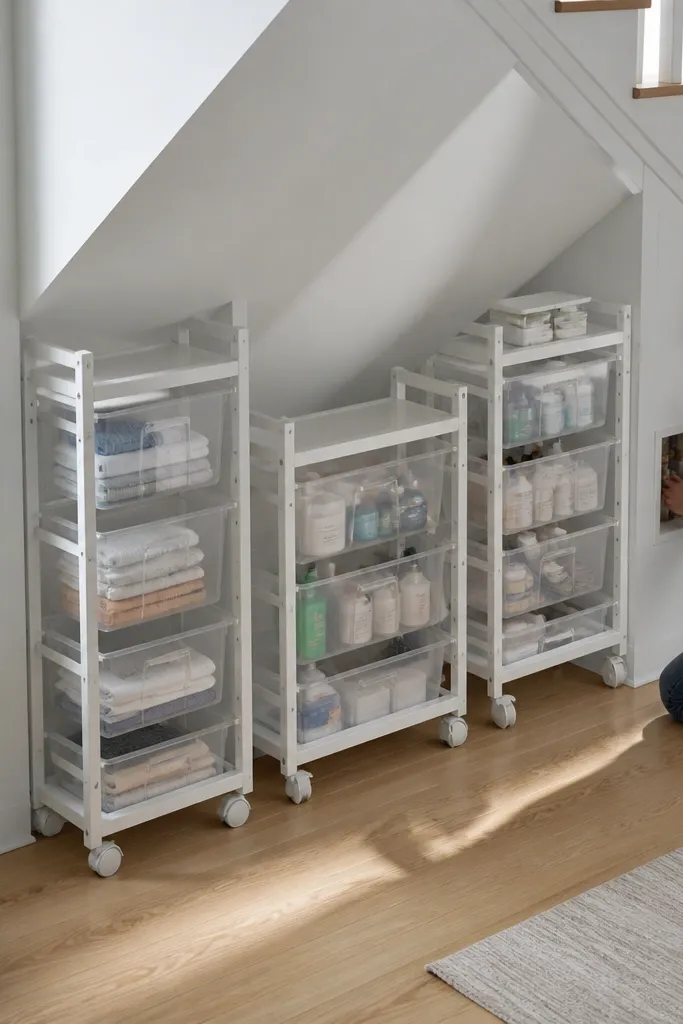
Sloped ceilings make rigid cabinets frustrating. Rolling carts solve that because they conform to small height changes and you can move them out when you need to access plumbing or wires. This is also the most renter-friendly approach because no wall mounting is required. Pick carts with adjustable shelves or modular bin inserts so you can reconfigure after moving. The after looks organized because everything is on wheels, labeled, and grouped by category.
Editor's noteUse bin sizes that stack neatly — mismatched bins create wasted gaps under stairs.
Choose carts sized to the narrowest point under the stairs, then check turning clearance so you can slide them out fully. Use carts with wire shelves or adjustable platforms so you can set bin heights between 6 and 12 in. Add a bin system: one cart for cleaning, one for seasonal items, and one for shoes. Secure bins inside carts with non-slip shelf liner or Velcro strips. Finally, apply felt or rubber wheel covers if the floor is delicate.
Skip thisDon’t buy carts with fixed shelves if you store tall items sometimes.
10. Corner Pull-Out Pantry for Cleaning Supplies
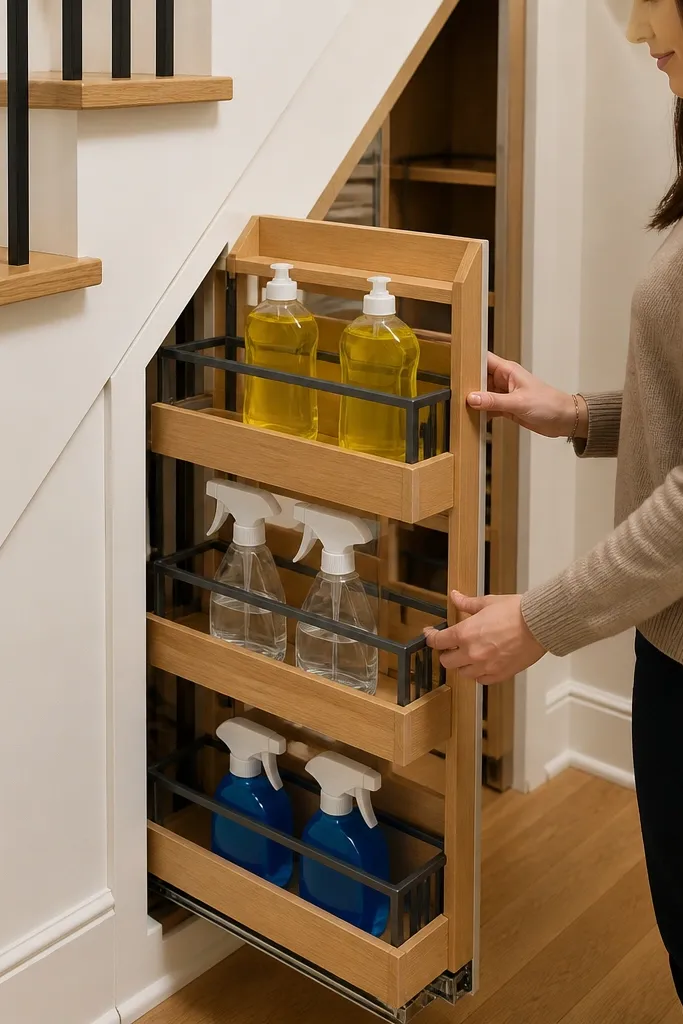
Corner under-stairs spaces waste depth, and you end up with bottles shoved behind each other. A pull-out pantry style shelf solves that by letting you access the entire back row without digging. It’s great for cleaning supplies because you can separate chemicals and keep everything contained. Renter-friendly versions can be built freestanding with a base and corner frame, then slid into the under-stairs gap.
Build a base frame sized to the corner footprint and brace it with diagonal supports so it doesn’t rack. Install a pull-out shelf using heavy-duty drawer slides mounted to the frame. Create two shelf levels: one around 8-10 in for spray bottles and one around 12-14 in for bulk items. Add a lip on each shelf edge so bottles don’t roll forward. Use a wipe-clean finish and add a small tray under any bottle that could leak.
Mount the slides slightly higher than center so the shelf clears the base during travel.
Don’t store chemicals on open wire shelves without a containment tray.
11. Under-Stairs Bench with Lift-Up Storage Lid
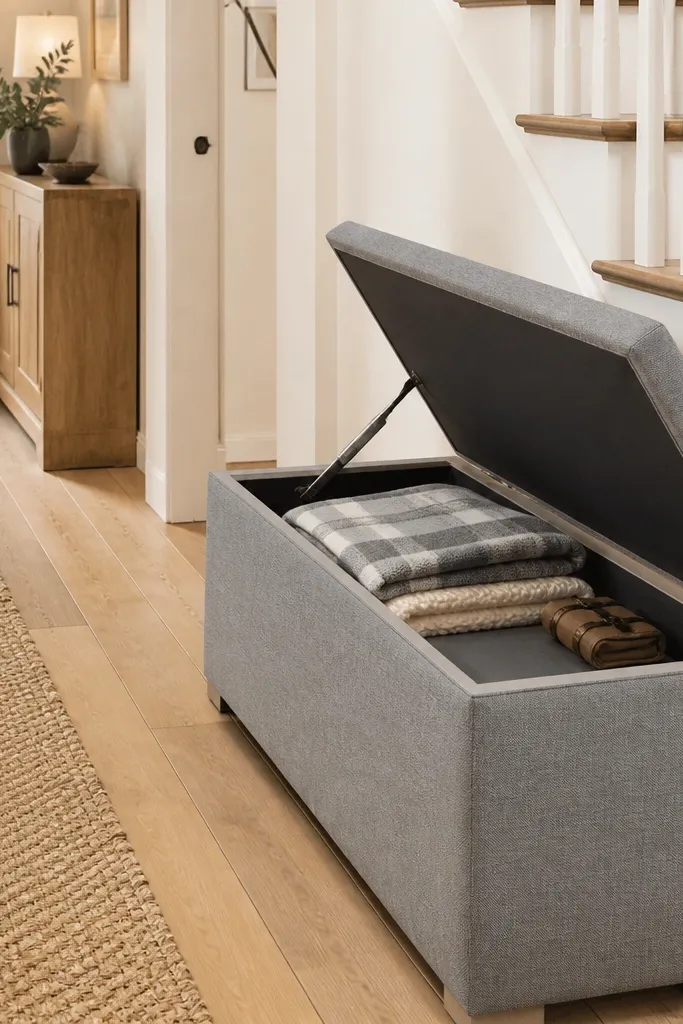
When under-stairs is visible from the hallway, a bench with lift-up storage makes the space feel finished instead of temporary. It’s also a practical solution for renters because you can build the bench as a freestanding unit that hides clutter. Keep the lid light and use soft-close hinges or a simple lid support so it doesn’t slam. Store blankets, board game boxes, or extra linens — things that look messy when left out.
Build a rectangular bench frame from 2x2s or plywood, then add a base skin so it looks clean. Cut a lift-up lid from plywood or MDF and cover it with durable fabric or paint. Add a hinge set on the back edge and a lid support mechanism so it stays open while you grab items. Inside, install two bin rails or a simple divider so boxes don’t shift. Anchor the bench only if needed for safety, but keep wall contact minimal so you can remove it later.
Use foam weather stripping on the lid edge to reduce rattles under stairs.
Don’t make the lid too heavy — renters need easy access without wrestling it.
12. Magnetic Tool Strip + Small Drawer for Odds and Cords
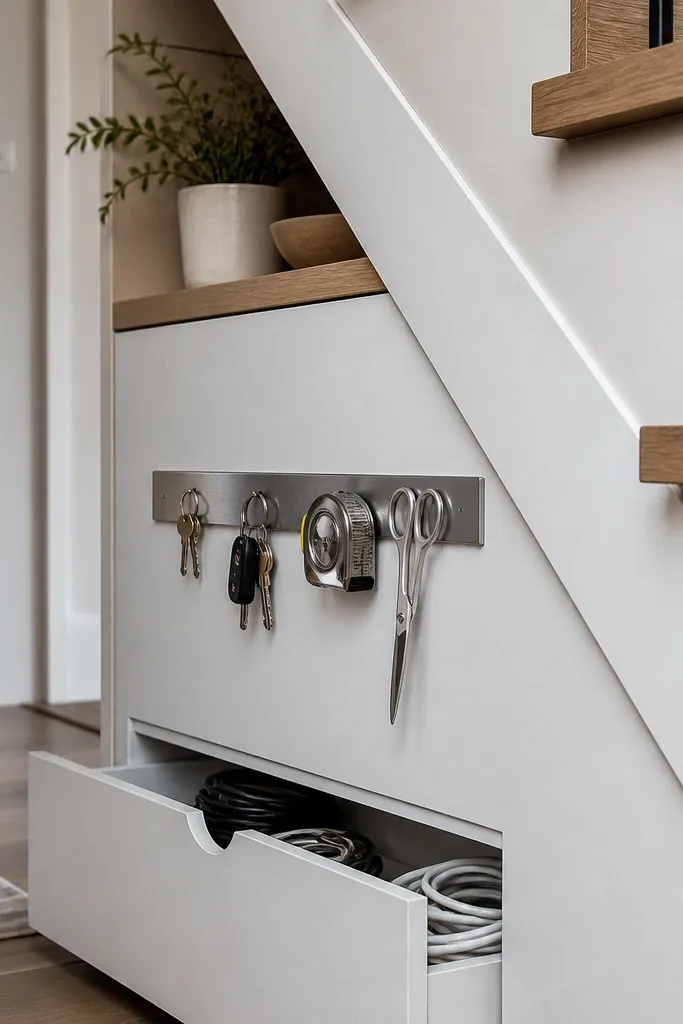
This is for the under-stairs mess that sneaks up: chargers, extension cords, tape, and little hardware pieces. A magnetic strip holds metal tools and keeps them visible, while a small drawer prevents cords from tangling. It looks orderly because the wall has one clean line and the drawer hides the clutter. If your under-stairs has a low wall section, this works better than trying to stack small bins that fall over.
Editor's notePut the drawer directly under the strip so cords drop into the drawer instead of landing on shelves.
Mount a magnetic strip onto a thin backer board first, then attach the board to studs with screws. Use a backer board that’s wide enough to cover screw heads cleanly. Build a shallow drawer box from 1/2-in plywood with a front face and install small drawer slides or a simple wooden track. Add a cord organizer in the drawer using small elastic loops or Velcro ties. Finish by labeling the drawer compartments and wiping the magnet surface clean after installation.
Skip thisDon’t mount the magnet strip into drywall only — the strip needs a solid hold.
13. Sliding Shelf Cabinet with Toe-Stop Safety
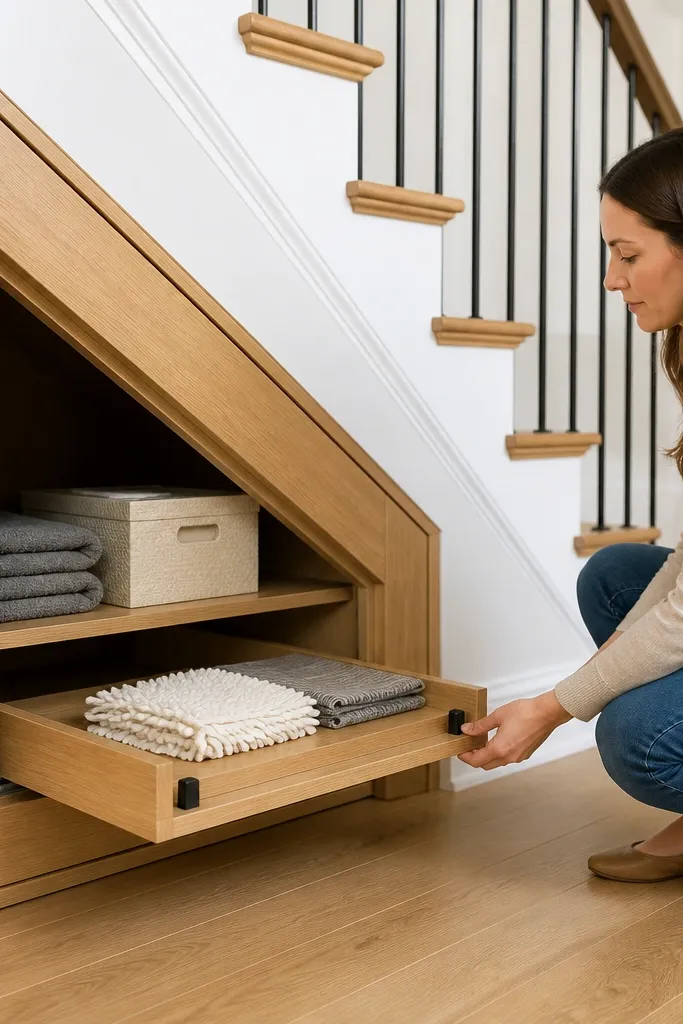
Open shelves under stairs look messy fast because things slide forward when you reach. A sliding shelf cabinet solves that by bringing the storage to you while keeping the contents safely inside. It’s renter-friendly if the cabinet is freestanding and the slide system is self-contained. Add toe-stop blocks so the shelf stops before it tips out. This setup is ideal for shoes, folded bags, or small bins where you want controlled access.
Editor's noteUse silicone spray on the slide track for smoother travel and less squeak.
Build a freestanding cabinet with side walls and a back panel so the shelf can slide. Install a slide track on the cabinet sides and attach a shelf board sized to the internal opening minus 1/4 in clearance. Add toe-stop blocks at the front corners so the shelf stops at a safe open position. Add a front lip to prevent bins from falling when the shelf reaches you. Sand and seal all edges, then test the slide with a light load first.
Skip thisDon’t skip toe stops; a shelf with no stop is a tipping hazard.
14. Corner Shelf with Removable Shelf Brackets (No Wall Damage)
If you want a classic shelf look but you’re in a rental, removable brackets keep you out of drywall repair. This design uses brackets that attach to studs with screws you can remove later, or uses a freestanding base with L-brackets that don’t require wall anchors. The small front lip keeps items from sliding in the sloped area. It’s best for books, small decor, and neatly stacked storage boxes.
Editor's noteUse a bracket system with consistent hole spacing so you can reconfigure after you move.
Measure the corner footprint and decide your shelf depth based on what you store. If you’re using stud brackets, locate studs and install bracket plates with screws, leaving them removable. Cut 3/4-in plywood shelves and add a 1/2-1 in lip on the front edge. For the renter-friendly version, build a small base frame that supports the shelf ends so the wall only stabilizes, not carries full weight. Sand, paint, and let the finish cure fully before loading.
Skip thisDon’t place heavy items on a shelf that’s only supported at the wall — use a base or deeper bracket spread.



