
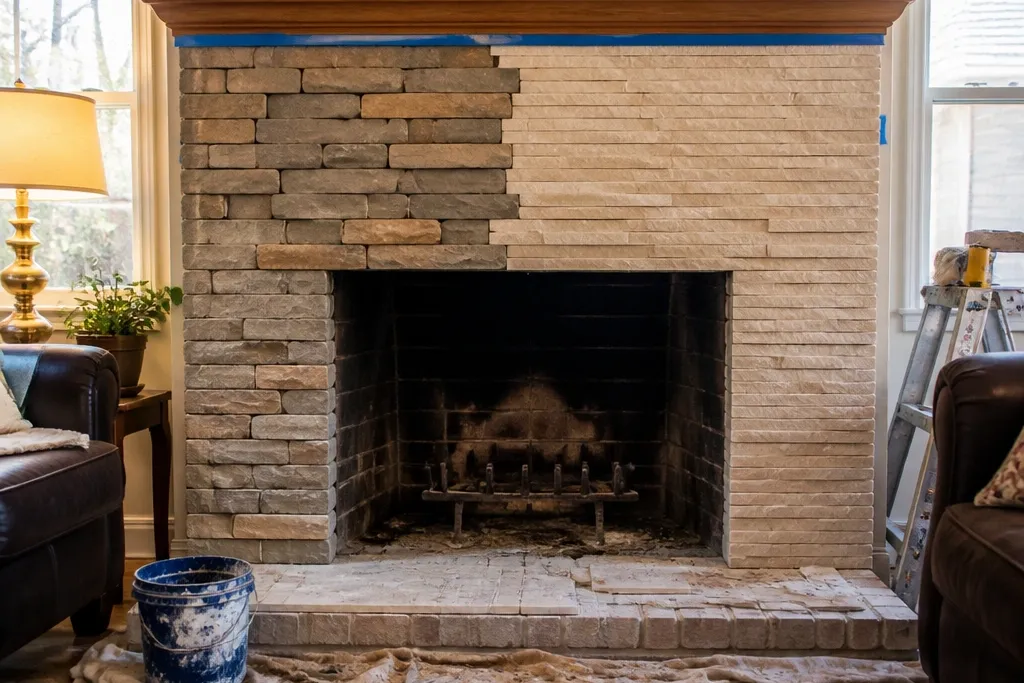
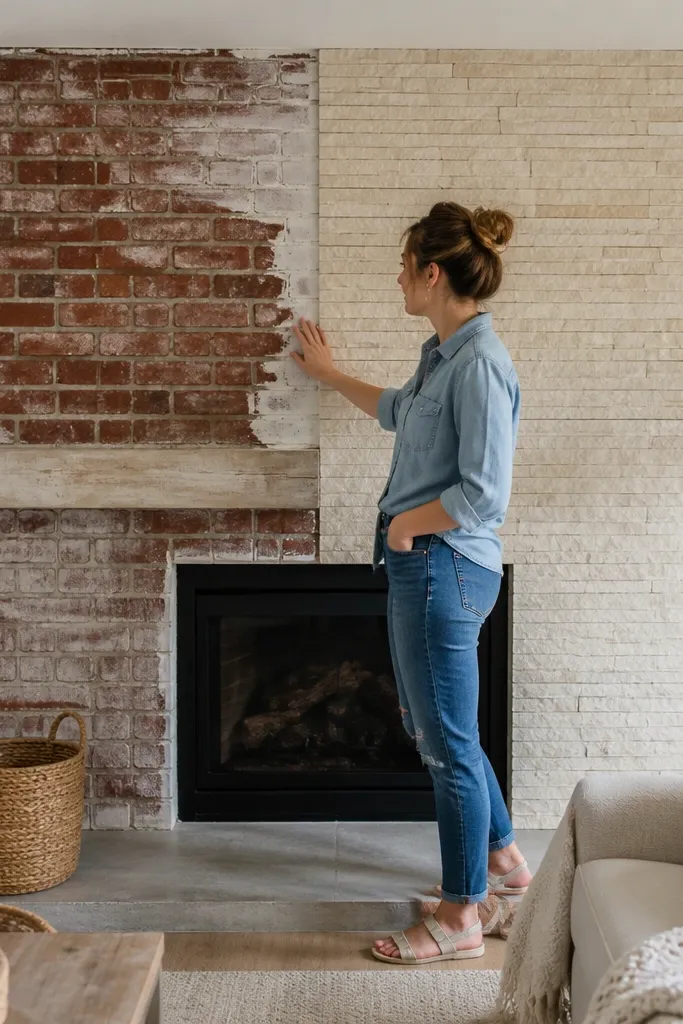
1. Cream stacked-stone panels over a cement-board face
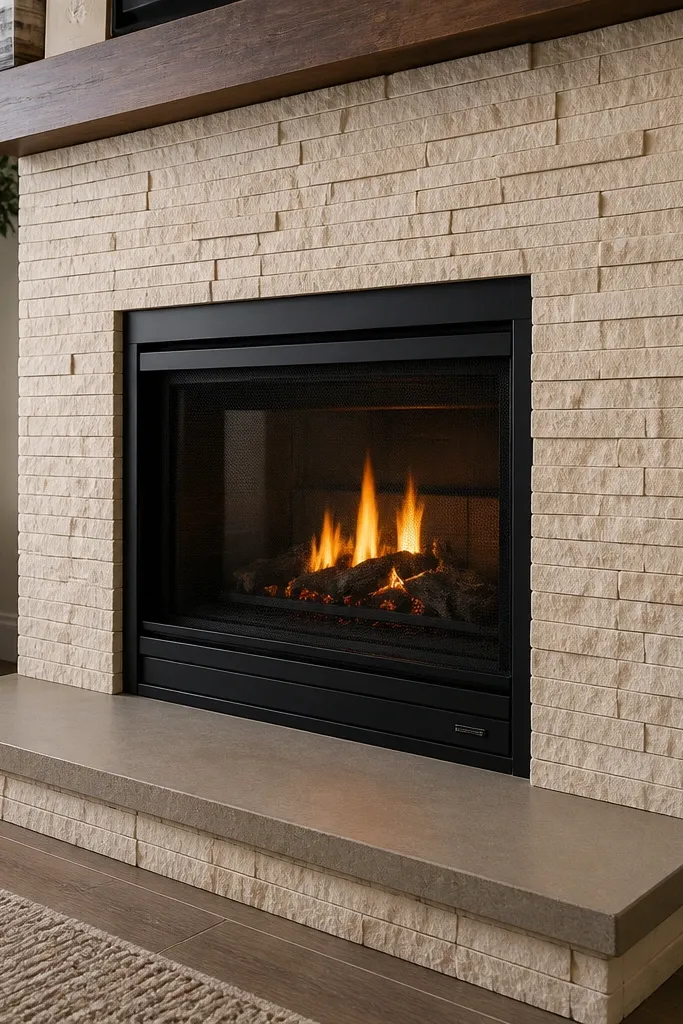
This is the cleanest “real stone” look for renters because it reads like a full surround without needing to chip the original surface. The cream tone makes the fireplace feel brighter and bigger, and the thin grout line keeps it modern instead of rustic-cottage. Install it on a cement-board layer so the finish stays flat and doesn’t crack when the wall flexes. The result is photogenic in warm lamp light and easy to wipe down after dust settles on the ledge.
First, remove dust and loose paint, then fasten cement board to the existing face using screws and anchors that match your substrate. Next, set your stacked-stone panels with thinset or the recommended adhesive for that product, keeping a 1/16-inch joint for grout. Finally, grout with a sanded grout tinted to a light tan, wipe with a damp sponge in small circles, and seal with a heat-rated penetrating sealer after cure.
Dry-lay one row on the floor and label the order so you don’t rotate stones mid-install.
Don’t glue directly to glossy paint; the surface needs a proper board layer for a durable bond.
2. Charcoal slate-look veneer with white mortar wash
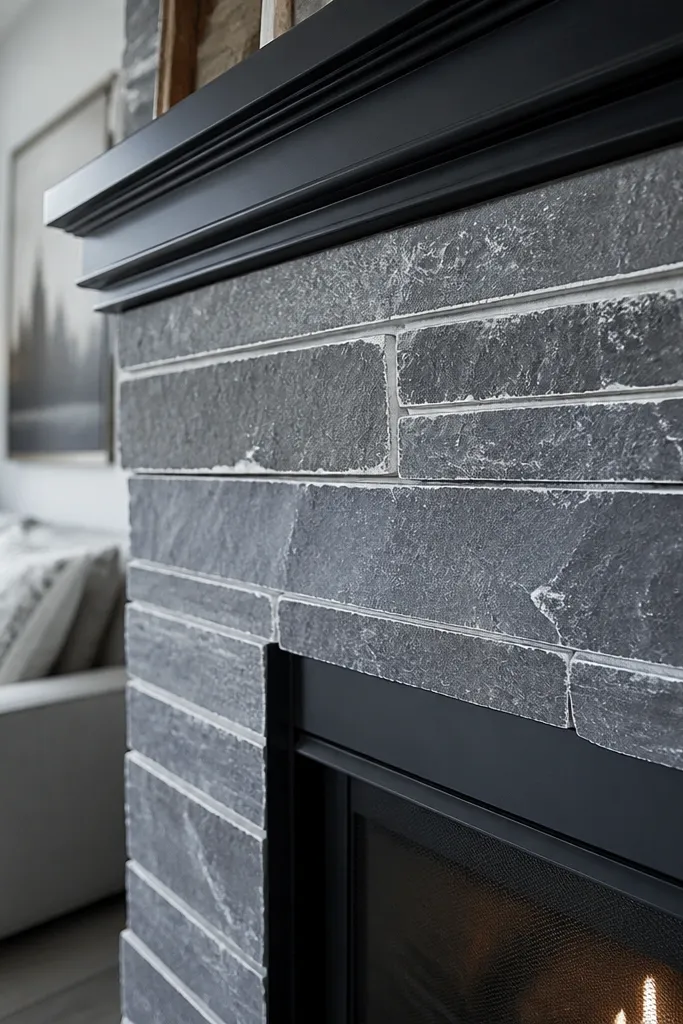
If you want drama without looking heavy, go charcoal with a white mortar wash. The contrast makes the stone edges pop and photographs like a high-end modern fireplace. You get the slate texture look while keeping the install simpler than true slate. This style also hides small seam irregularities because the wash blends transitions.
Start by installing a level backing board (cement board works well) and then apply the slate-look veneer in a staggered pattern. Mix a grout or mortar-wash tint that is close to bright white, then apply it lightly with a brush so grout lines show but the stone still looks dark. After it firms up, wipe the surface with a damp rag to remove excess while leaving edges filled. Seal once fully cured, focusing on the grout wash areas so they don’t chalk when you clean.
Use painter’s tape to mask the mantel edge so the wash lands where you want it.
Avoid full-coverage white paint over the veneer; it kills the texture and looks flat on camera.
3. Warm greige stacked stone with minimal grout joints
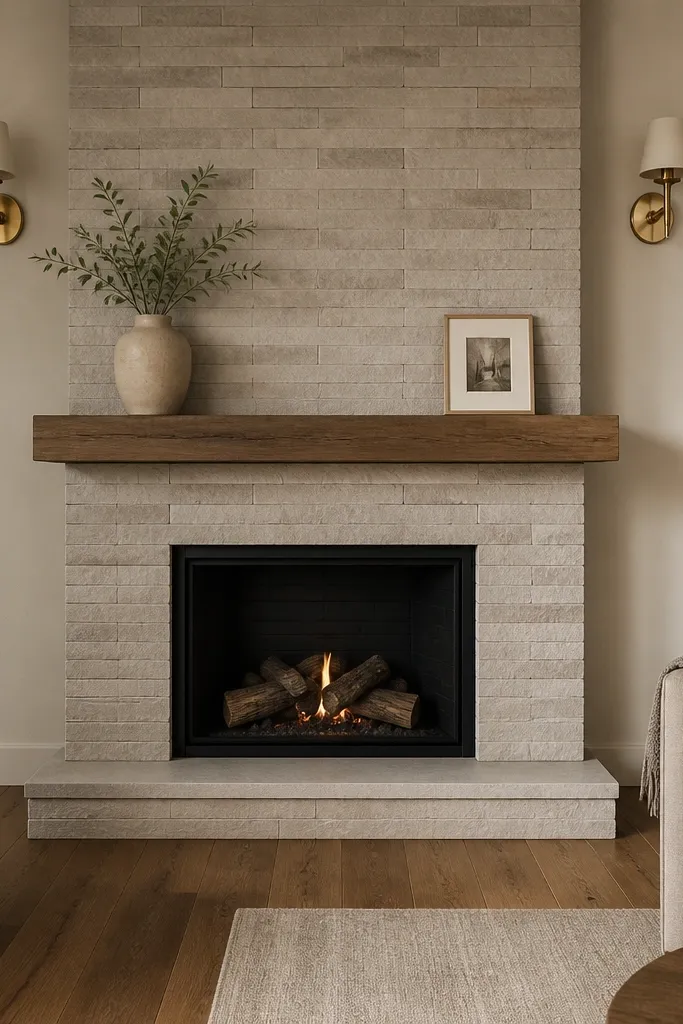
Greige is the easiest color to live with because it matches wood tones, brass, and most wall colors. The minimal grout joints make the face look crisp and architectural, not handmade. This is a smart pick when your living room has a lot going on because the fireplace becomes a quiet anchor. Under soft daylight, the stones show subtle variation without turning the whole room gray.
Editor's noteChoose grout that’s one shade warmer than you think; cool greige grout often reads muddy.
Install a backing board that stays flat, then plan a grid layout using chalk lines so your seams stay straight. Set stones with spacers or controlled joint thickness so you keep joints around 1/8 inch or less, depending on the panel design. Grout with a light greige grout, then tool it slightly into the seam so it looks pressed-in rather than smeared. Seal with a matte or low-sheen sealer that won’t create glare.
Skip thisDon’t overfill joints; excess grout makes stacked stone look like a wall of blocks.
4. Mixed light-and-medium limestone panels for a "layered" look
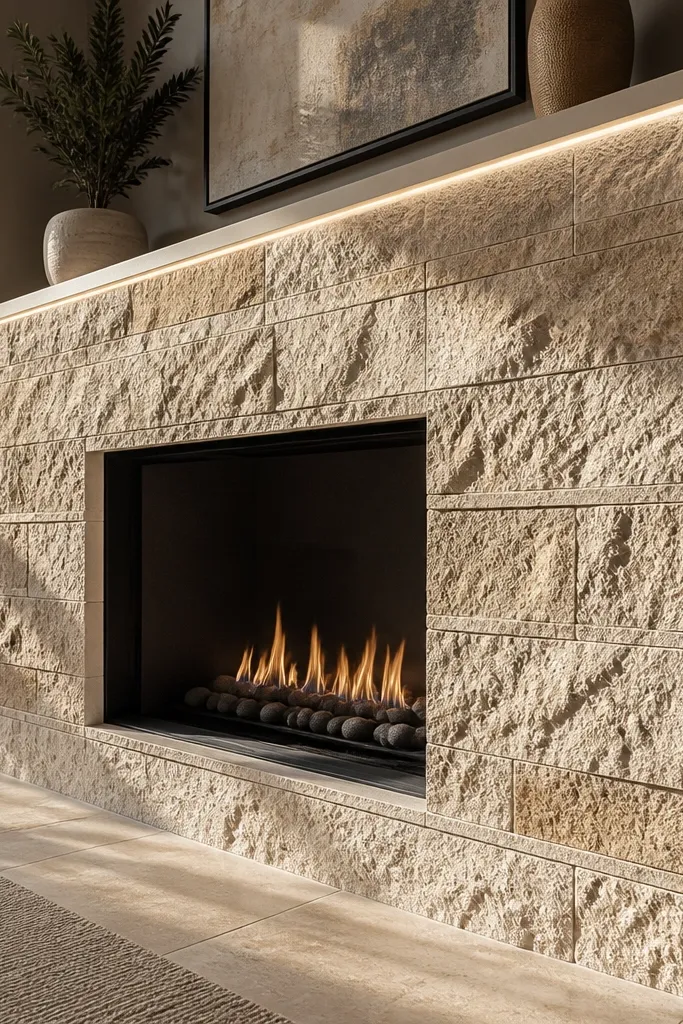
Limestone blends give you depth without needing complicated finishing. The mix of light and medium tones creates shadowing in the texture, which makes the fireplace look expensive even with simple trim. It’s also forgiving if your backing board isn’t perfectly flat because the tonal variation visually smooths minor differences. This look works especially well in living rooms with natural wood and warm white walls.
Editor's noteMix panels from different boxes so tonal balance looks intentional across the full height.
Start by selecting a panel set that includes multiple tones and dry-lay them in a mock-up so the light pieces aren’t all on one side. Attach your backing board, then install the veneer in a stagger pattern, keeping the seam stagger between 2-3 inches. Use a sand-colored grout that matches the mid-tone stones, and apply with a grout bag or float for even coverage. Wipe, let cure, then apply a penetrating sealer so dust and soot clean up without staining.
Skip thisDon’t keep the pattern too symmetrical; heavy symmetry makes stacked stone look like wallpaper.
5. Tall stacked stone with a "full-height" wrap to the ceiling
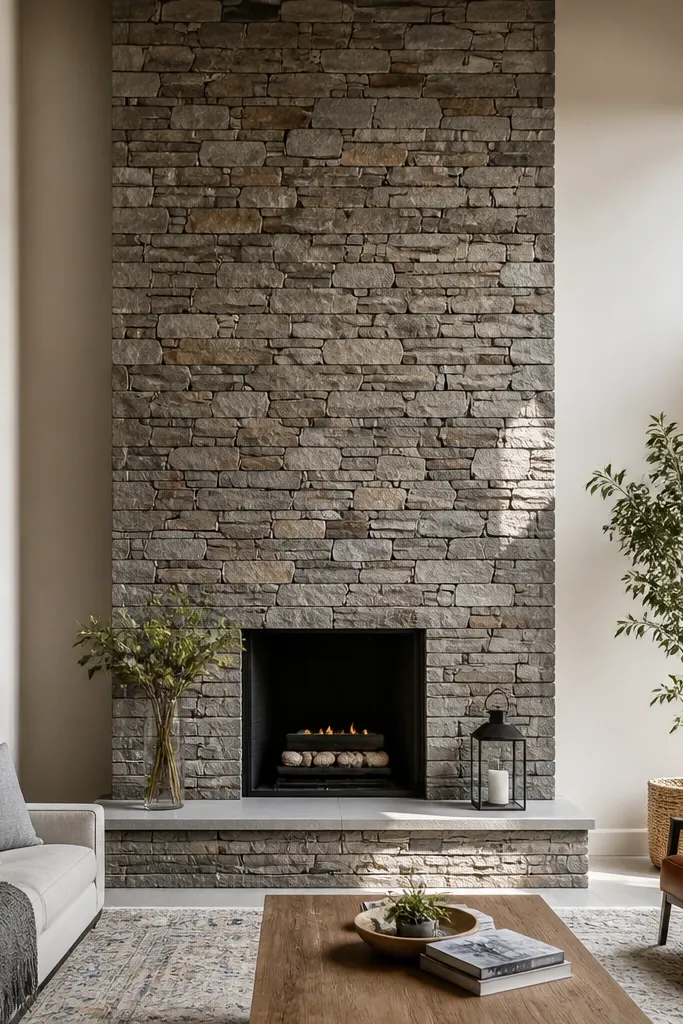
Full-height stone changes the room more than you’d expect. It gives you a strong vertical frame, and the fireplace stops feeling like a small feature stuck in the middle of a wall. For renters, this works best when you can install panels on the existing fireplace surround and keep the top edge hidden under trim or a removable finish strip. Choose a stone that has long, rectangular pieces so the vertical lines read clean.
Editor's notePlan your top cut line before you start gluing so you don’t end up with a skinny ugly row near the ceiling.
Measure the fireplace width and height, then cut your backing board sections so seams land behind stone joints. Install backing first, then veneer from the bottom up, checking level every 2-3 rows. For the top edge, add a trim cap piece or a removable edge strip so you can hide any cut lines. Grout thinly, wipe carefully, and seal. Finish by installing a mantel or edge trim that covers the highest seams.
Skip thisDon’t stop the stone mid-wall; partial-height stone often looks like an unfinished project.
6. Whitewashed brick-style veneer over a removable backing board
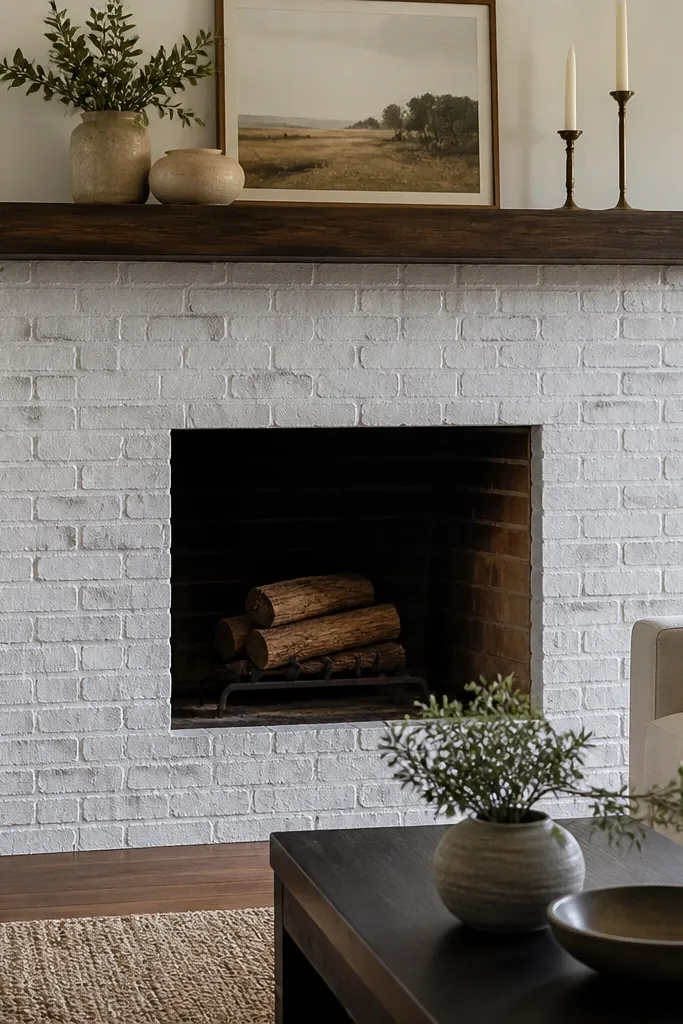
If your fireplace face is already brick or tile and you want minimal visual weight, brick-style veneer with a whitewash finish is a renter-friendly win. It looks bright, it hides minor surface imperfections, and it pairs with almost any mantel decor. The key is using a true veneer product, not paint — the texture stays real and doesn’t peel like flat coating. This style is also easier to keep clean than darker finishes.
Editor's noteWhitewash in layers: two light coats look better than one heavy coat.
Attach your removable or low-damage backing board system to the fireplace face, then install the brick-look veneer with the correct adhesive for the panel. Mix a whitewash using masonry primer plus white pigment, then apply it thinly with a rag so the brick texture shows through. Let it dry fully, then lightly touch up grout lines with a matching gray-white tint. Seal after cure so the whitewash doesn’t streak when you wipe it.
Skip thisSkip heavy paint rollers; they fill the texture and make the veneer look like a painted board.
7. Black-framed stone surround with thin metal trim edges
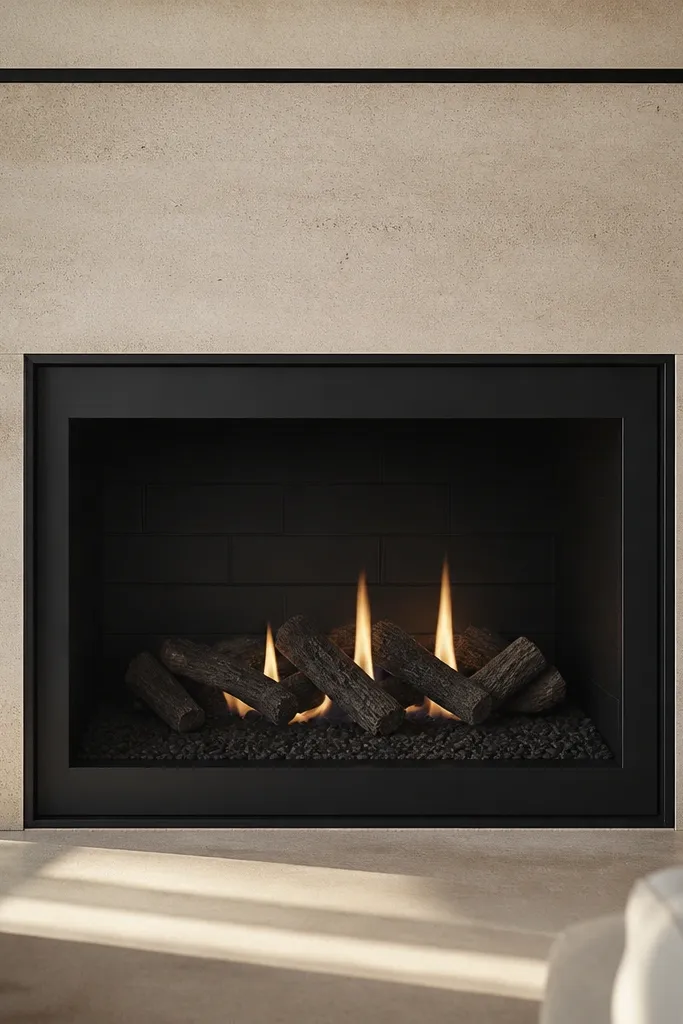
The stone looks more expensive when you frame it like a built-in. A thin black metal trim at the edges creates a modern border that makes seams look intentional, which matters a lot for renters. The stone can be light (to brighten) or medium (for warmth); the trim does the heavy visual lifting. This is a great option if your wall edges are uneven and you need a clean line where cuts meet.
Install backing board and veneer as usual, but leave a 1/4-inch reveal at the outer edges for the trim. After the stones cure, attach slim metal trim pieces using construction adhesive made for masonry and a few mechanical fasteners if the system allows. Caulk the joint between stone and trim with a paintable, heat-safe caulk. Seal the stone surface and wipe off any caulk haze.
Paint the trim before install so you don’t get caulk lines that look raw.
Don’t use regular silicone caulk; it can fail adhesion on porous stone and looks messy at the edges.
8. Sandstone half-round ledge built into the stone face
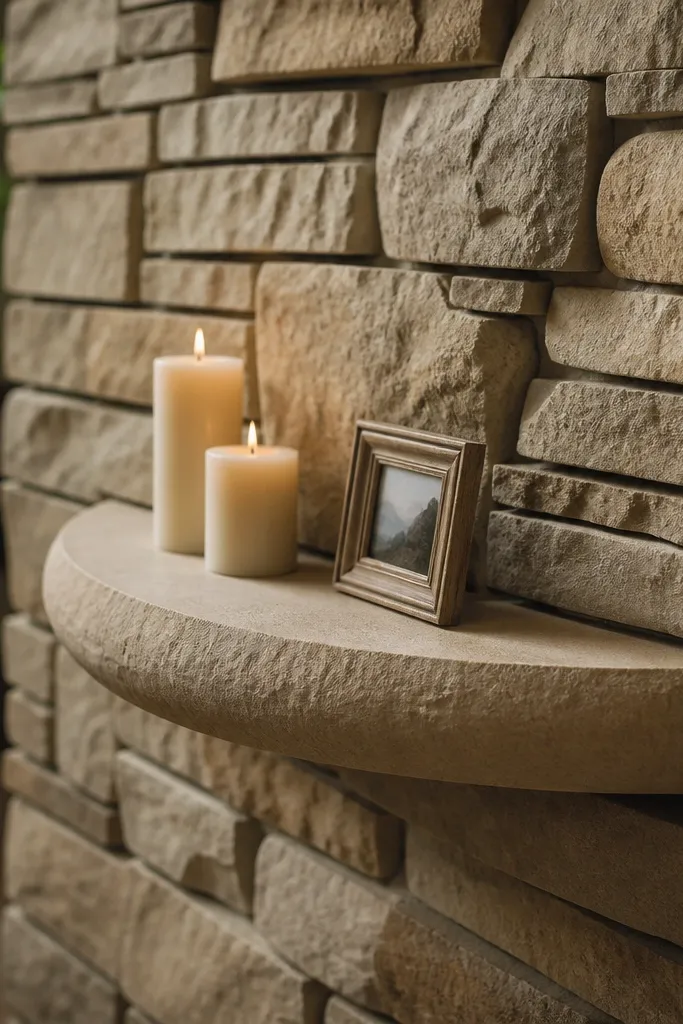
A ledge makes the fireplace look like furniture, not a wall patch. Rounded ledges catch light and create a softer silhouette, which is more photogenic than a flat edge. This approach turns your stone veneer makeover into a functional surface for candles, frames, or seasonal decor. It also helps hide the transition between veneer and mantel if you don’t have a mantel already.
Build a sturdy ledge substrate from plywood and cement board over a level frame, keeping the ledge depth consistent across the width. Install cement board on top, then veneer the face and ledge in a single continuous pattern so seams don’t fight each other. Shape corner pieces for the half-round effect or use pre-formed trim from the veneer system. Grout and seal, then test cleanability with a damp cloth before styling.
Use a straightedge and clamp the ledge frame so the ledge edge stays crisp before cement board goes on.
Don’t rely on thin veneer alone to create a strong ledge; the base needs to be rigid or it will crack.
9. Two-tone stone columns on the sides with a lighter center
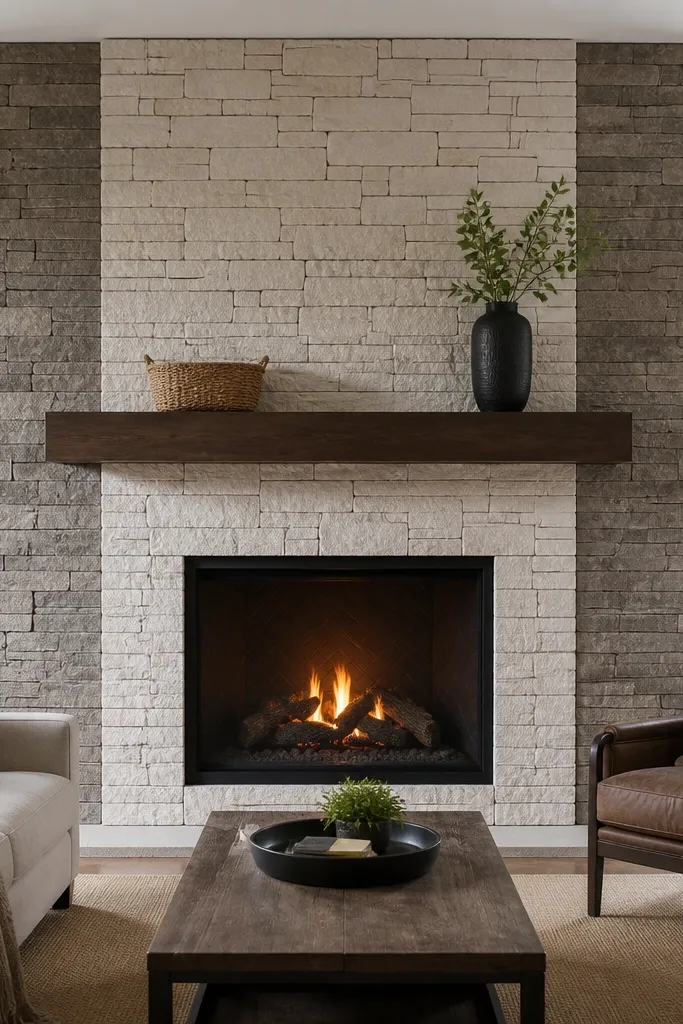
This is a clever layout trick: darker side columns make the center look brighter and more open. You get a designer look without needing complicated moldings. The two-tone effect also hides small inconsistencies because your eye focuses on the column shapes. It photographs well because it creates a frame within the frame.
Editor's noteKeep joint thickness consistent across both tones so the columns look intentional.
Plan your layout first by drawing a center rectangle on the backing board and marking where your side columns start and end. Install the lighter stone in the center section, then switch to darker stones on the left and right columns, keeping the vertical seam line aligned between top and bottom. Use grout that matches the lighter center so the contrast reads clean rather than muddy. Seal all surfaces after grout cure, then add corner trim if your cuts are rough.
Skip thisDon’t mix tones randomly; the columns need deliberate boundaries for the look to land.
10. Terracotta-leaning faux clay stone for a cozy, warm palette
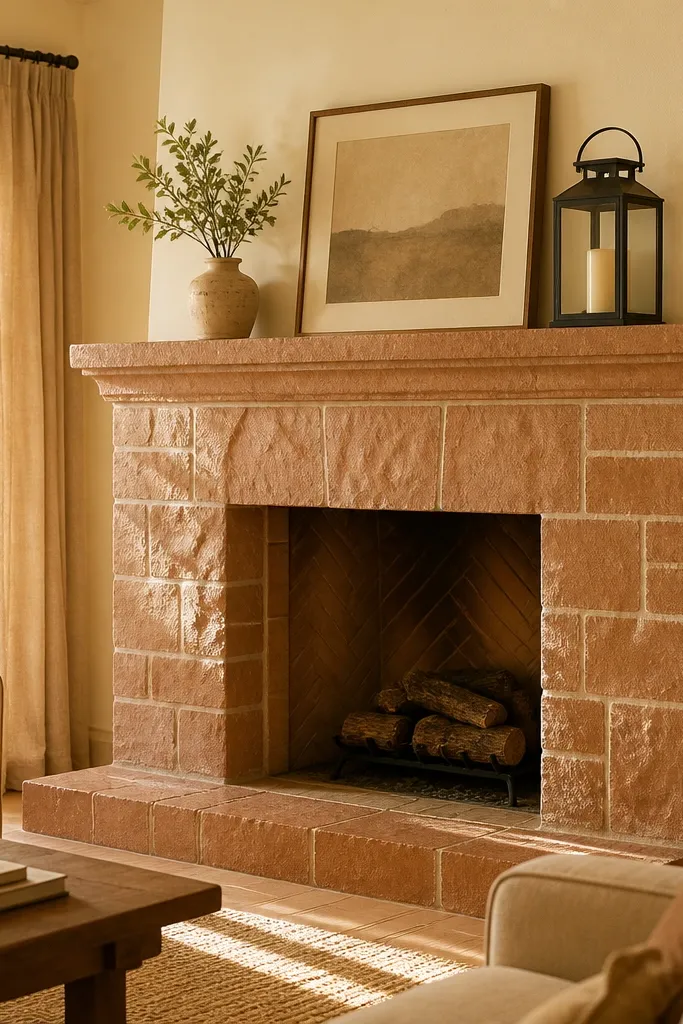
Clay-toned stone gives you warmth fast, especially if your living room has beige walls or honey oak furniture. The texture reads earthy and soft, not heavy, and it makes the fireplace feel more inviting. This style works best in rooms with warm undertones and it pairs well with black metal accessories. It’s also great if you want a “natural material” vibe without buying actual stone.
Install backing board, then set the clay-look veneer in a stagger pattern, keeping the most orange-brown pieces spread out. Grout with a sandy beige tint so the joints look like dust-filled crevices. Apply a heat-rated sealer that keeps the finish from absorbing soot and cooking odors. Let everything cure fully before you place decor on the ledge or mantel.
Choose a sealer that dries matte; gloss makes clay tones look greasy in photos.
Don’t seal before grout cures; trapped moisture can cause hazing.
11. Modern linear stone strips with a horizontal grid
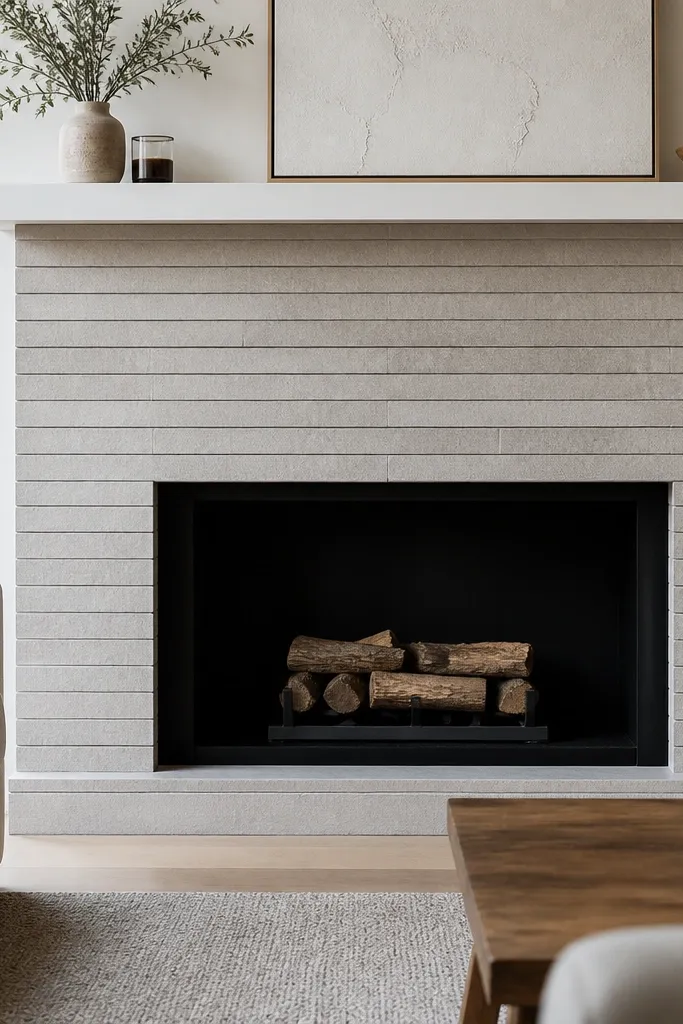
Linear strips make the fireplace feel built-in and architectural. If your room is modern — clean lines, simple furniture — this is the stone style that won’t fight your decor. The horizontal grid also makes the fireplace look wider, which is helpful in small apartments. It’s a strong choice for renters because the straight lines hide minor unevenness better than irregular stacked stone.
Editor's noteWork in sections and keep a wet rag nearby; grout smears are harder to clean off linear texture.
Use a backing board and ensure it’s flat because linear veneer shows waves. Dry-lay the bottom course and mark horizontal guide lines with a level so every strip lands parallel. Apply adhesive to the back of each strip, press firmly, and use spacers for uniform grout joints. Grout with a light gray so the lines look clean, then wipe with a damp sponge and seal after cure.
Skip thisDon’t try to “eyeball” the first row; the whole grid depends on that baseline.
12. Rustic river rock veneer with a dark grout base
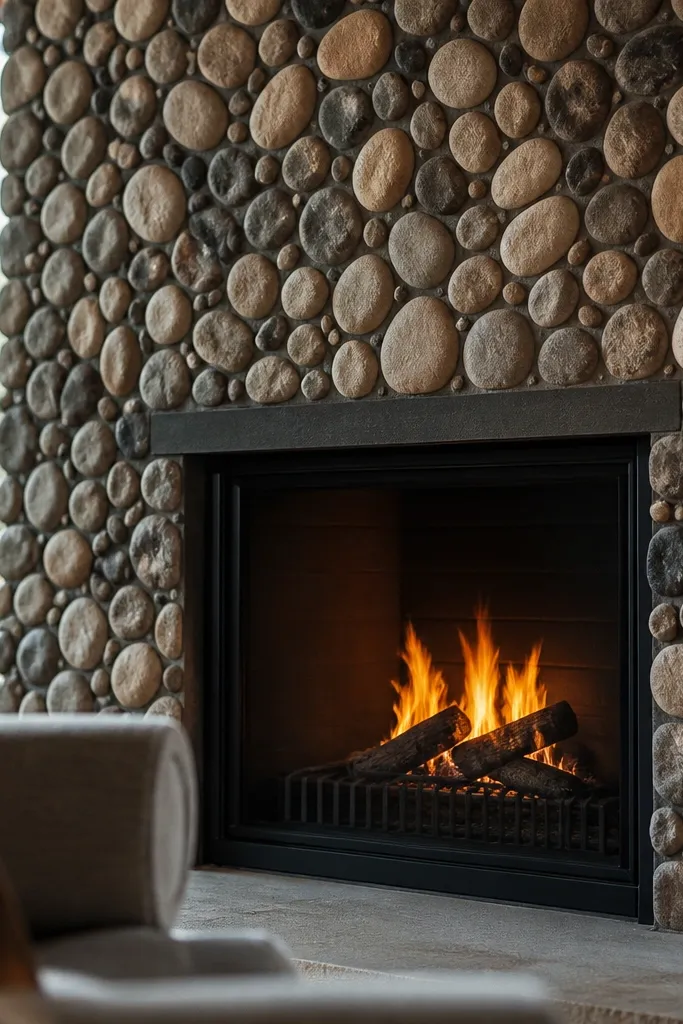
River rock veneer is one of the most photogenic looks because it creates a natural, speckled texture. Dark grout makes the stones read as a single surface instead of separate pebbles. This style works in cabins, modern farmhouse, and any room with warm lighting. It also hides small chips and unevenness better than flat stone styles.
Install backing board first, then use a thinset that supports the weight of the rock texture. Spread adhesive evenly and press each section so there are no hollow pockets behind the veneer. Mix grout to a deep charcoal and apply with a grout float, pushing into crevices. Wipe with a damp sponge carefully so you don’t remove grout from between rocks. Seal with a penetrating sealer made for textured stone so cleaning doesn’t pull color out.
Test grout color on a spare scrap; charcoal can read blue or brown depending on the stone tone.
Don’t skip sealing; unsealed river rock grout stains from soot and dust fast.
13. Limestone arches around the opening with a centered mantel
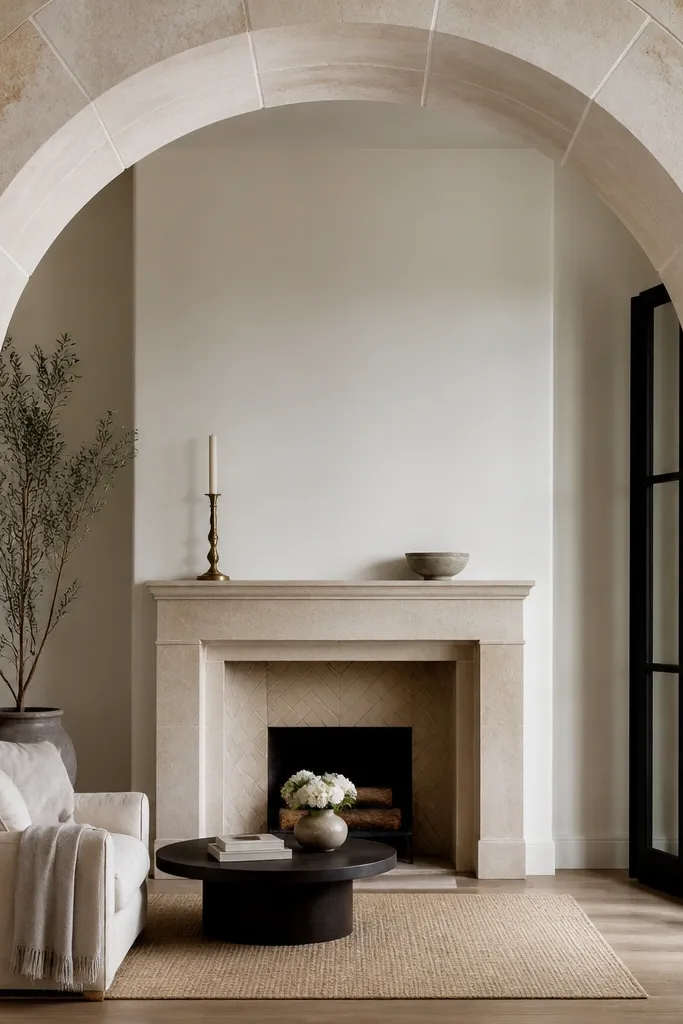
Arch detailing makes a fireplace feel custom, even when you’re working with thin veneer panels. The arch frames the opening, which is the first thing people notice in photos. Choose a limestone tone that matches your room’s warm neutrals so it doesn’t look like a costume. This is a great pick if your existing fireplace has a rectangular opening but you want softness.
Measure the opening width and height, then choose arch corner pieces or cut veneer shapes that create smooth curves. Install backing board, then place the arch pieces first so you nail the curve, using spacers to keep the seam consistent. Fill in the flat vertical sections with matching stone pieces, then grout lightly so the arch lines stay crisp. Seal and finish the mantel with a centered trim so the whole composition looks intentional.
Use a flexible straightedge or cardboard template for the curve before you cut anything.
Don’t grout before you confirm the arch alignment; small shifts show up immediately in photos.
14. Book-matched faux stone panels for a gallery-style fireplace
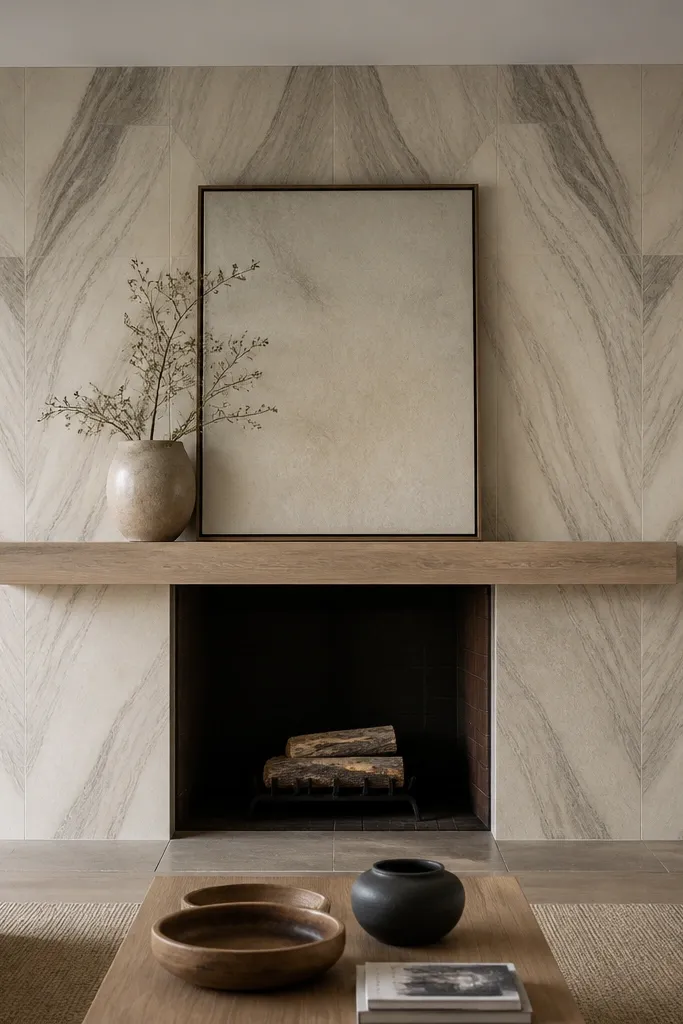
Book-matched or mirrored faux stone panels look like a slab install, which is the fastest way to make a renter-friendly makeover look designer. The veining pattern gives you movement without needing a complicated layout. This style works best when your mantel and shelves are simple so the stone pattern stays the headline. It also creates a strong focal point that holds attention even in wide shots.
Choose a faux stone panel set that allows for matching — the photos on the packaging should show veining continuity. Install backing board and then dry-fit the panels to confirm the mirror match across the center. Apply adhesive to the back of the panels or use the system’s recommended method, press firmly, and keep seams tight. Fill seams with a compatible filler tinted to blend with the veining, then seal with a finish made for faux stone so it doesn’t look chalky.
Dry-fit with painter’s tape marks on the wall so you can reposition panels without guessing.
Don’t force mismatched panels into place; the seam will look like a patch.
15. Rusty patina metal + stone mix for a modern industrial look
Stone plus metal reads industrial without going cold. The stone keeps it warm and natural, while patina metal adds that “designed” edge. This is especially good if you already have black or bronze light fixtures and you want the fireplace to match the hardware. The look photographs well because the texture contrast — smooth metal and rough stone — creates depth.
Editor's notePre-drill metal trim holes and countersink so screws sit flush and don’t snag decor.
Install backing board and stone veneer first, leaving a clean border area for metal trim. Cut metal trim pieces to size and fasten them with screws into studs or a solid backing location, then use heat-safe caulk at the stone-metal joint. Paint or age the metal finish using a product meant for metal patina if you’re starting from bare metal. Seal the stone after grout cure so the metal doesn’t stain the porous finish.
Skip thisDon’t let grout touch unsealed metal edges; it can stain and look dirty at the seam.
16. Soft pink-beige stone with warm gray grout for a calm modern feel
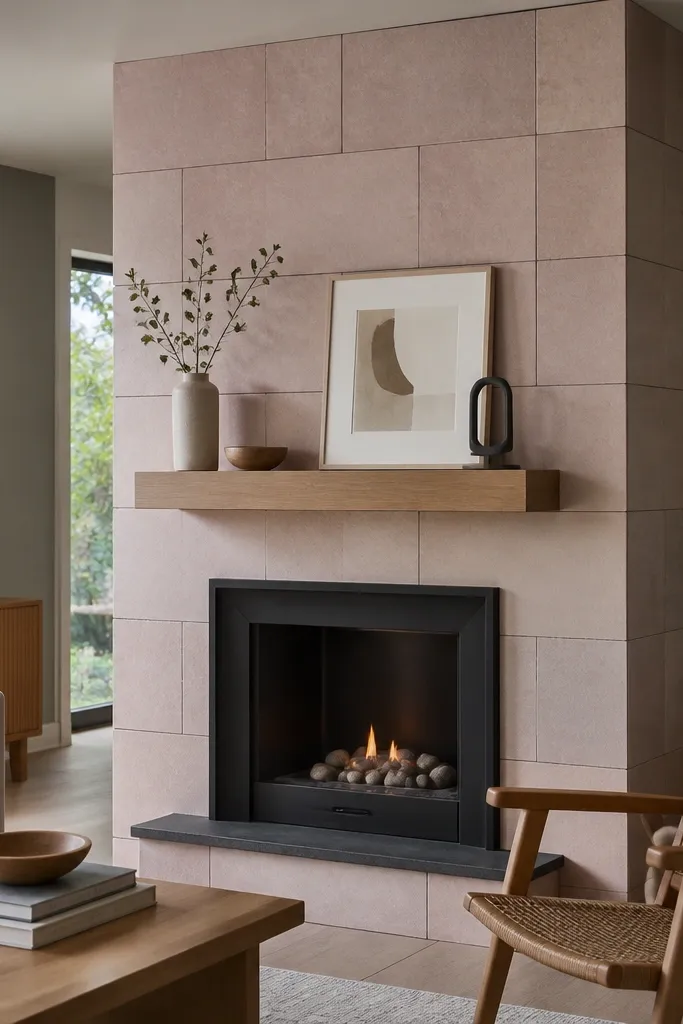
This palette makes a fireplace feel gentle instead of harsh. The pink-beige stone tone warms up rooms with cool gray walls, and the warm gray grout keeps it from looking too rosy. It’s a great option for renters because it looks good with both modern and traditional furniture. Under daylight, the stone shows subtle tonal variation that looks like real masonry.
Prep and attach backing board, then install the veneer in a staggered pattern to avoid repetitive blocks. Use warm gray grout tinted slightly toward taupe, and apply it with a grout float for consistent coverage. Wipe carefully so the grout stays in joints but doesn’t smear across texture highlights. Seal with a matte sealer that reduces glare and helps with cleaning.
Choose a sealer that says it’s color-preserving; some sealers shift beige tones toward yellow.
Don’t use bright white grout; it turns soft stone into a craft project.
17. Two-layer "thick" stone look using stacked veneer + trim caps
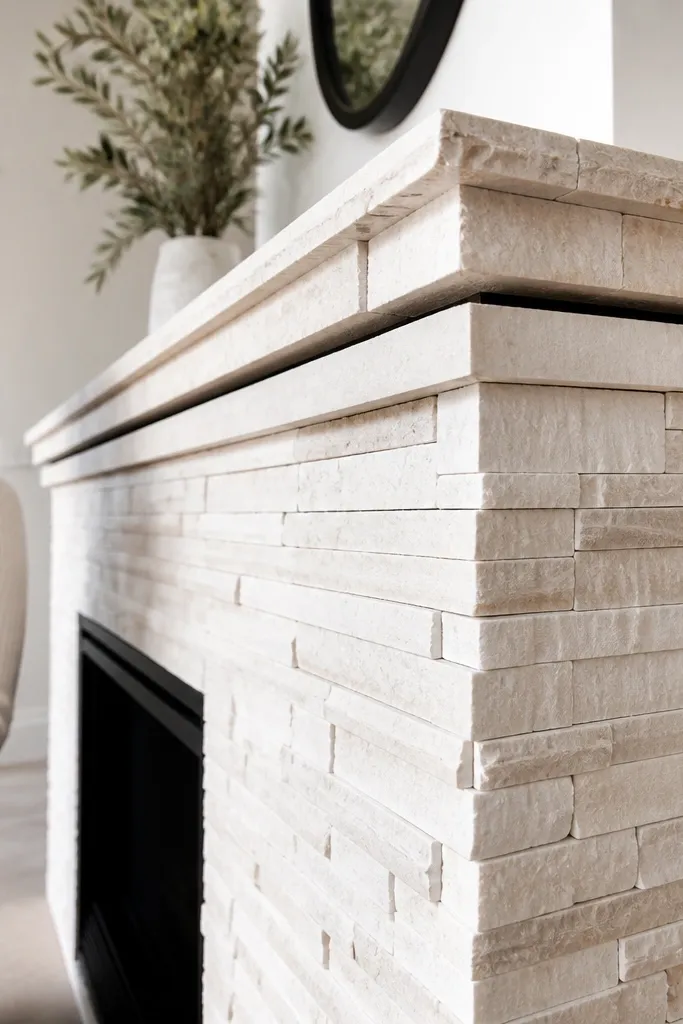
You can fake thickness with a layered edge system. By using stacked veneer on the face and adding trim cap pieces at corners and the top, the fireplace reads deeper and more custom. It’s one of the best visual tricks for small spaces because it adds dimension without changing your room layout. This works well with neutral stone colors and it makes seams look like design details.
Install backing board, then apply stacked veneer to the face with consistent joints. Next, add corner trim caps and a top cap strip after the veneer sets — those parts create the “thick stone” illusion. Use a color-matched caulk at trim seams so they don’t show as gaps. Grout only where needed and seal everything after cure so the trim edges don’t absorb dirt differently than the field stone.
Dry-fit trim caps and mark cut lines before you glue; miter corners look cleaner when you cut on a table saw or miter box.
Don’t over-caulk; heavy caulk lines make the thick look cheap.
18. Dark gray stone with a bright white modern mantel wrap
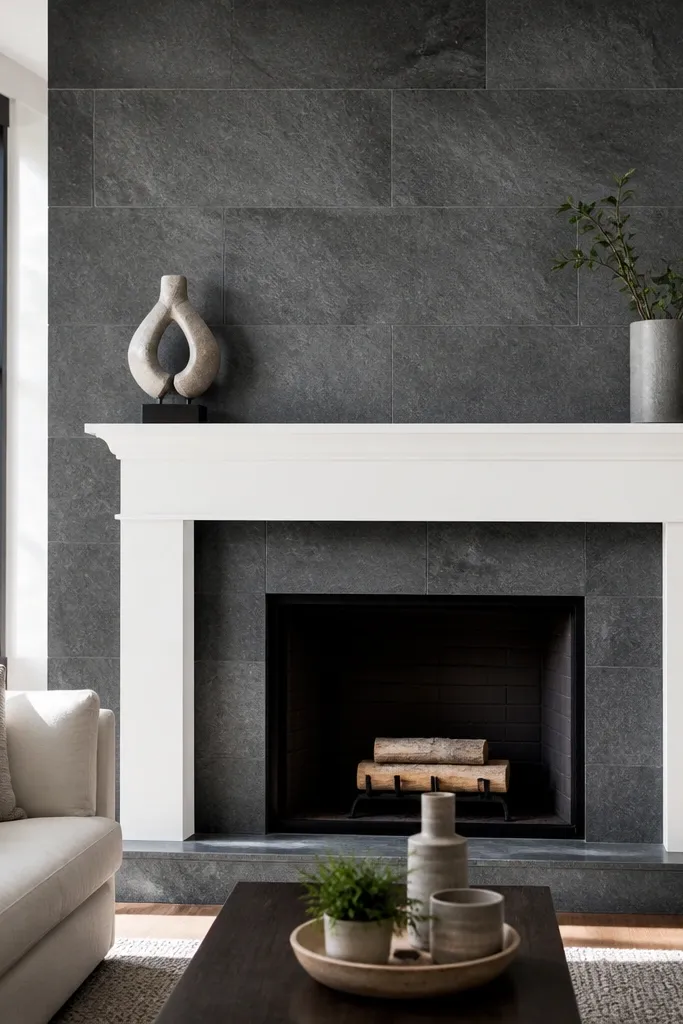
This combo is high-contrast and clean, which makes it pop in photos. The dark gray stone brings texture and shadow, while the bright white mantel wrap keeps the look modern and airy. If your mantel currently looks dated, this method upgrades it without a full replacement. The visual balance also hides minor unevenness around the fireplace opening because the mantel reads like a frame.
Editor's noteUse painter’s tape along the stone edge before you paint the mantel so you get a razor line.
Install backing board and dark gray stone veneer, then keep grout lines tight and light — around 1/8 inch. Build or wrap the mantel using a flat board surface and heat-safe paint or a pre-finished mantel cover system. Caulk the seam between mantel and stone with paintable, heat-safe caulk. After grout cure, seal the stone so soot doesn’t stain the dark finish.
Skip thisDon’t seal the mantel before the caulk cures; sealing too early can trap uncured material and crack.
19. Light stone with a removable trim surround for easy renter swaps
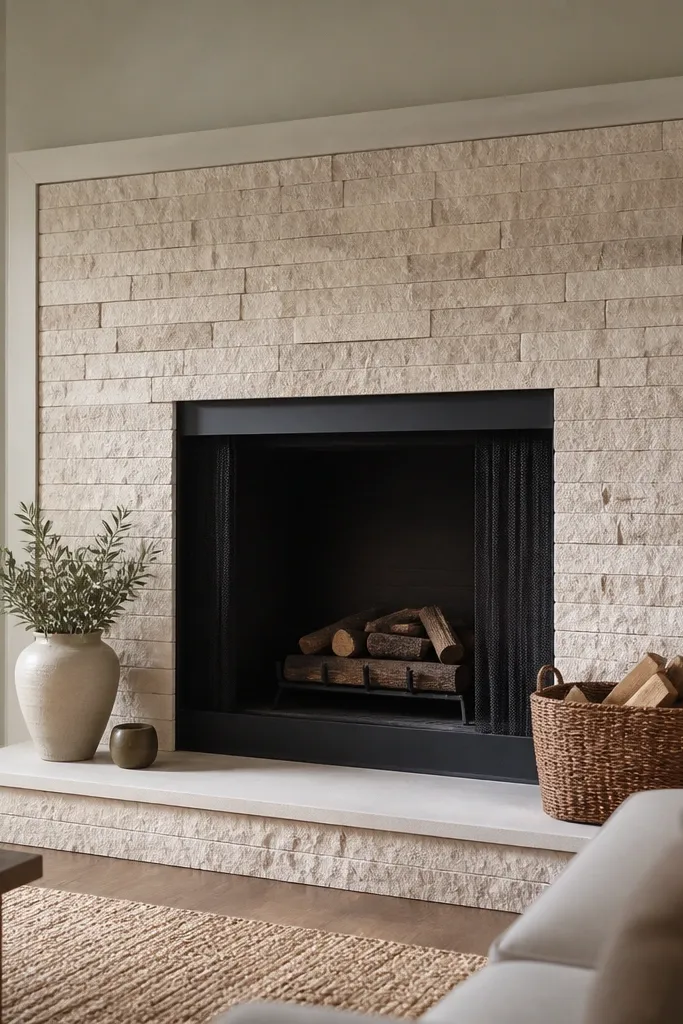
This is for renters who want options. You get the stone look, but the outer trim border is removable later, so you’re not stuck with the exact style forever. The light stone keeps the room bright and the trim hides cut edges, which makes the whole project look intentional. It’s also a practical choice if your landlord might ask for restoration.
Editor's noteUse stainless screws and label a small bag with quantities so reassembly is fast later.
Start by installing a board backing system that can be removed with screws rather than damage. Apply veneer to the face, then install an outer trim frame using screws into the studs or a fixed backing strip. Keep the trim frame design simple: straight top and sides so it pulls off cleanly later. Grout the stone field, seal it, then paint the trim to match your walls. Save the trim screws and keep a photo of the layout for reinstallation.
Skip thisDon’t glue the trim directly to the stone if you want it removable.
20. Fireplace surround with matching floor-to-ceiling stone columns
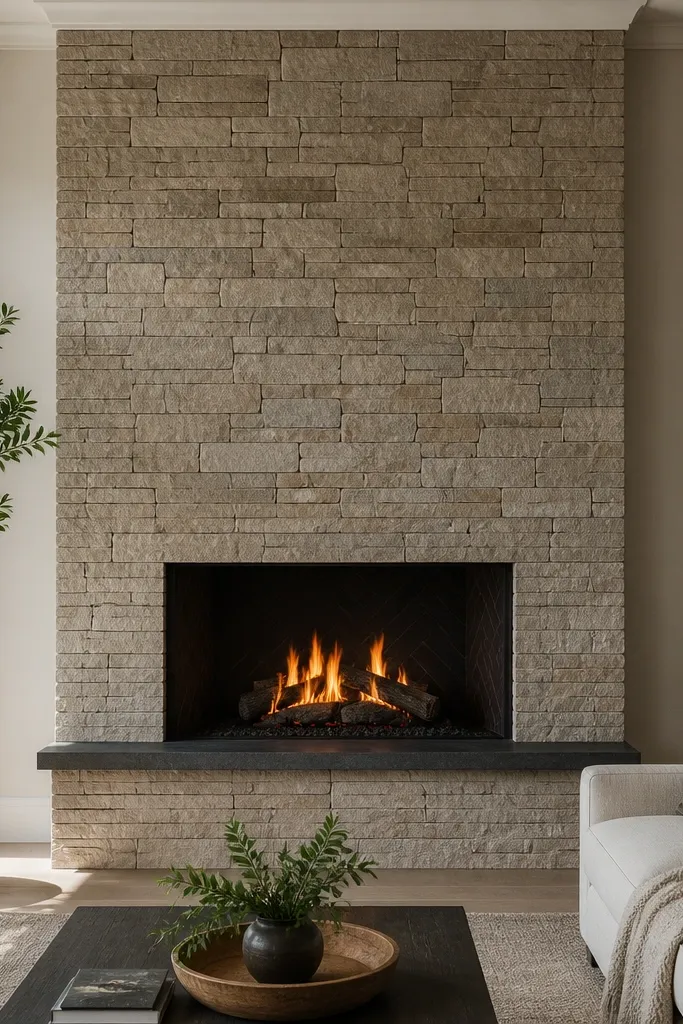
This makes the fireplace look like a built-in feature instead of a single wall panel project. Matching columns on the sides draw the eye up and frame the centerpiece opening. It’s visually striking in photos because the vertical lines create structure. This look also helps disguise any uneven wall transitions around the fireplace face, since the columns give you an intentional border.
Editor's noteUse the same stone batch for the columns so tonal variation stays consistent.
Plan column width using a tape measure and a scrap of cardboard so the columns look proportional to the opening. Install backing board for the columns first, then veneer them with the same stone and grout as the fireplace face. Keep the grout color consistent across all areas to unify the look. Seal stone and then finish column edges with trim strips if the wall isn’t perfectly straight.
Skip thisDon’t start veneering without marking the column edges; columns need straight boundaries.



