
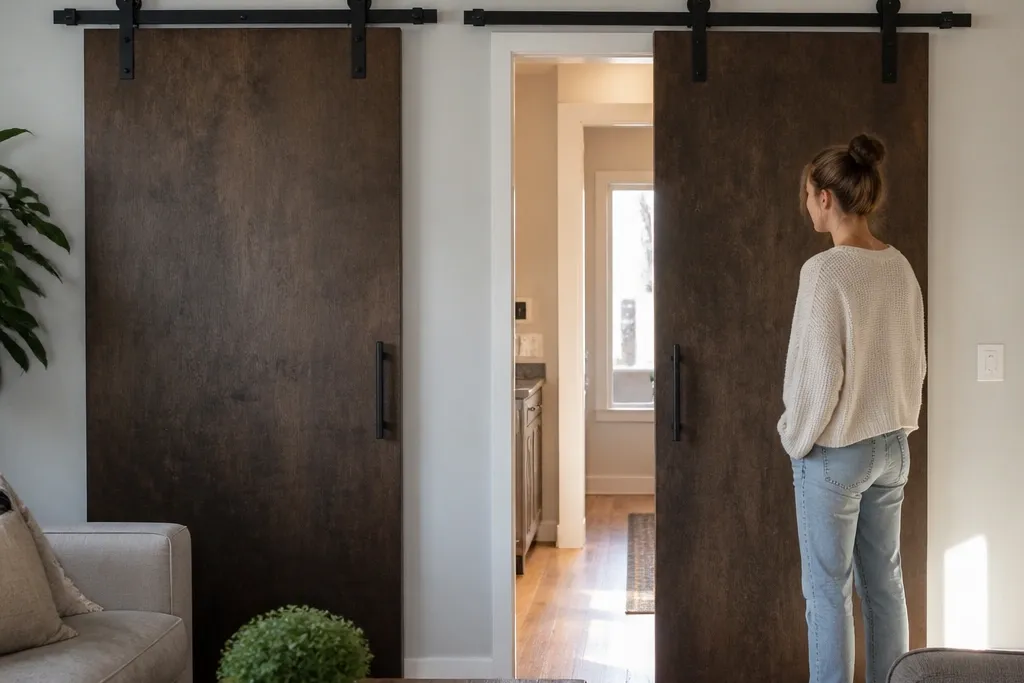
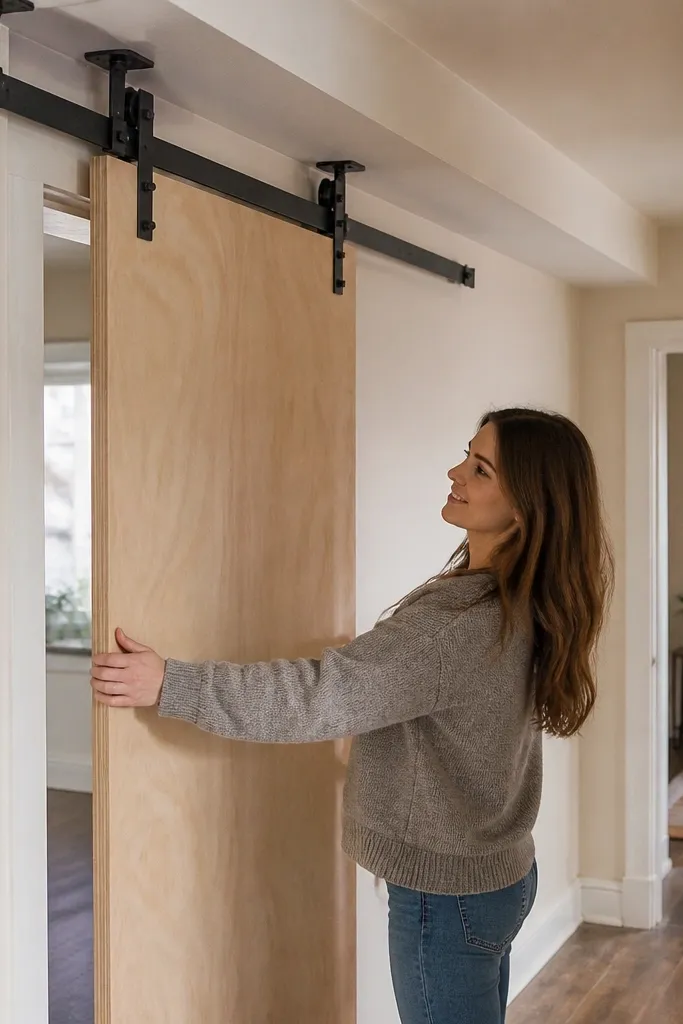
1. Beadboard slab with matte black strap hinges
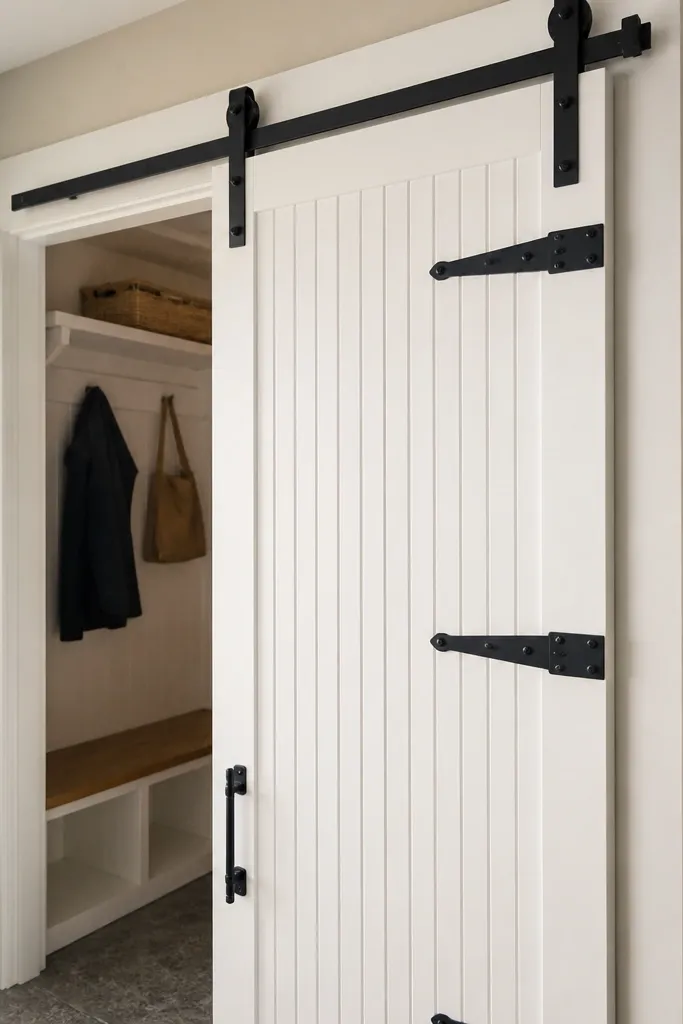
This design looks classic because beadboard reads as furniture-grade paneling, even when you build it from plywood and a simple frame. The matte black strap accents make the hardware feel designed-in instead of tacked on. A smooth, flat slab door also slides quietly, so the look stays crisp when the door is open. It works best for bedrooms, linen closets, and any doorway where you want the barn door vibe without big, rustic wood grain.
Start with a flat door panel sized 1-2 inches wider than your opening and 1-2 inches higher than your trim. Build a simple frame from 1x3 lumber, then attach beadboard sheets or beadboard-style paneling to the face with wood glue and 1-inch brad nails. Install a mid-weight barn door hardware kit on a ledger board screwed into studs, keeping the rail level with a spacer block under one end. Finally, paint the beadboard with a cabinet-grade finish (primer + semi-gloss or satin) and add the strap accents after the paint cures so you don’t gunk up the edges.
Editor's noteUse painter’s tape to mask the beadboard edges before painting — it keeps the lines sharp.
Skip thisAvoid using a glossy paint sheen; it shows roller track glare and makes the hardware look sloppy in photos.
2. Dark walnut-stain plywood with a faux framed edge
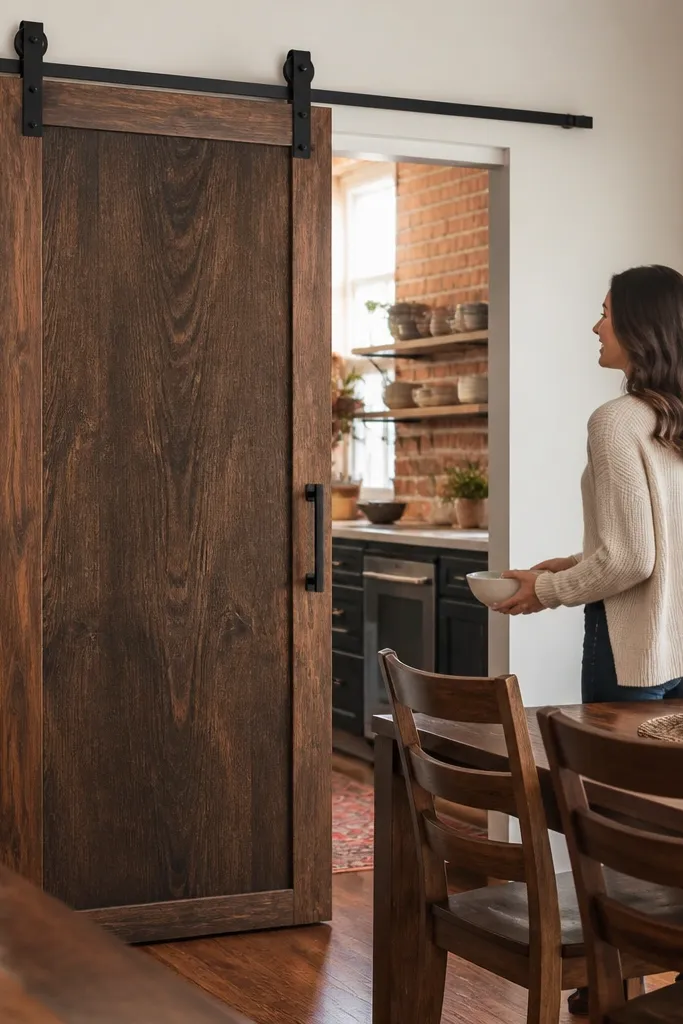
If you want a renter-friendly barn door that looks like it came from a high-end shop, go for plywood with a faux framed edge. The stained plywood gives you that deep, warm color without spending on a real solid wood door. A thin border frame (lighter or matching) makes the door read as a single piece, not a sheet of plywood. This is especially good for bathrooms or entryways where you want the hardware to look intentional and the door to look rich even with minimal decor.
Cut two vertical and two horizontal rails from 1x2 or 1x3 wood to form a rectangle frame around a plywood core. Stain the plywood face first, then attach the frame pieces so the border stays clean and doesn’t get stain on the back side of the frame. Mount the rail to a ledger board into studs, then hang the door using a standard barn door hardware kit with adjustable hangers. Slide-test the door before final tightening, then fine-tune the hanger screws so the door stays parallel to the wall.
Editor's noteSeal the stained door with two thin coats of water-based polyurethane — it keeps the stain even and resists scuffs.
Skip thisDon’t stain after the door is assembled; the joints soak unevenly and look blotchy.
3. Slatted screen door look with 1x2 vertical rhythm
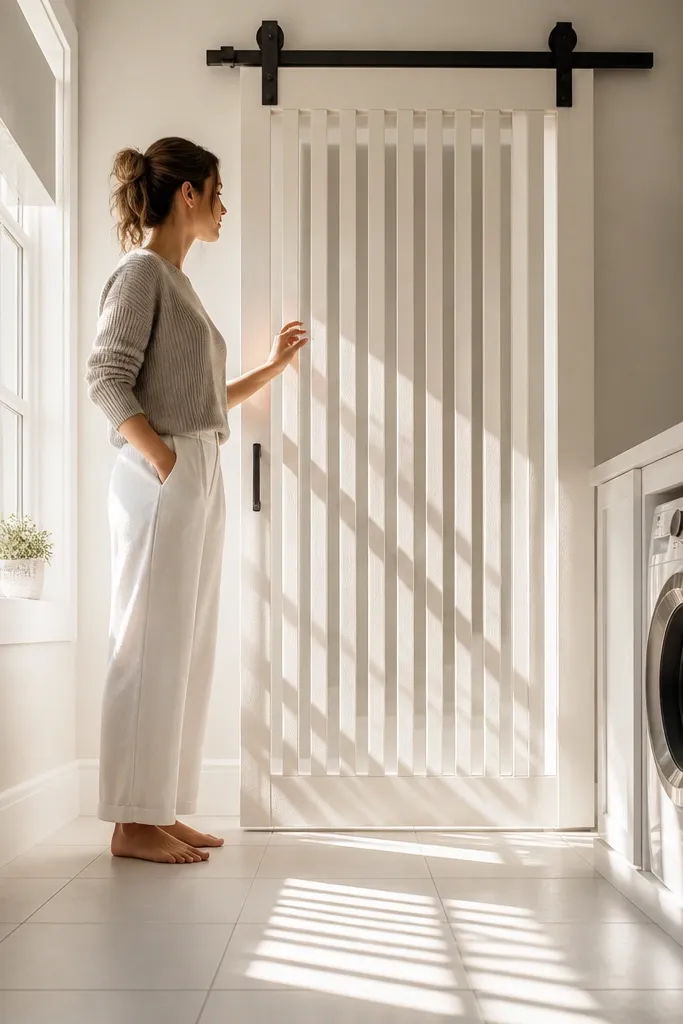
A vertical slat door reads airy and modern, but it still looks like barn hardware belongs there. The evenly spaced 1x2 boards create a consistent shadow pattern that looks great in daylight and in flash photography. Because it’s essentially a frame with slats, it’s also lighter than a solid slab, which helps with renter-friendly track setups. Use this for a pantry, coat closet, or any space where you want privacy but don’t want the doorway to feel heavy.
Build a rectangular frame from 1x3 lumber sized to your opening plus 1-2 inches overlap on each side. Space 1x2 slats evenly across the face, using a scrap spacer block to keep gaps consistent, then screw or nail each slat into the frame. Sand the faces smooth at the slat edges and finish with a paint-and-wipe method for a smooth look or a stain if you want rustic texture. Hang it on a barn door kit that matches the lighter weight, and set the rail so the door clears the floor by about 1/2 inch.
Mark one slat position, then work outward both directions — it keeps the slat pattern centered.
Skip wide uneven gaps; random spacing looks cheap fast, especially when the door is open.
4. Louver-inspired door using 1x3 angled strips
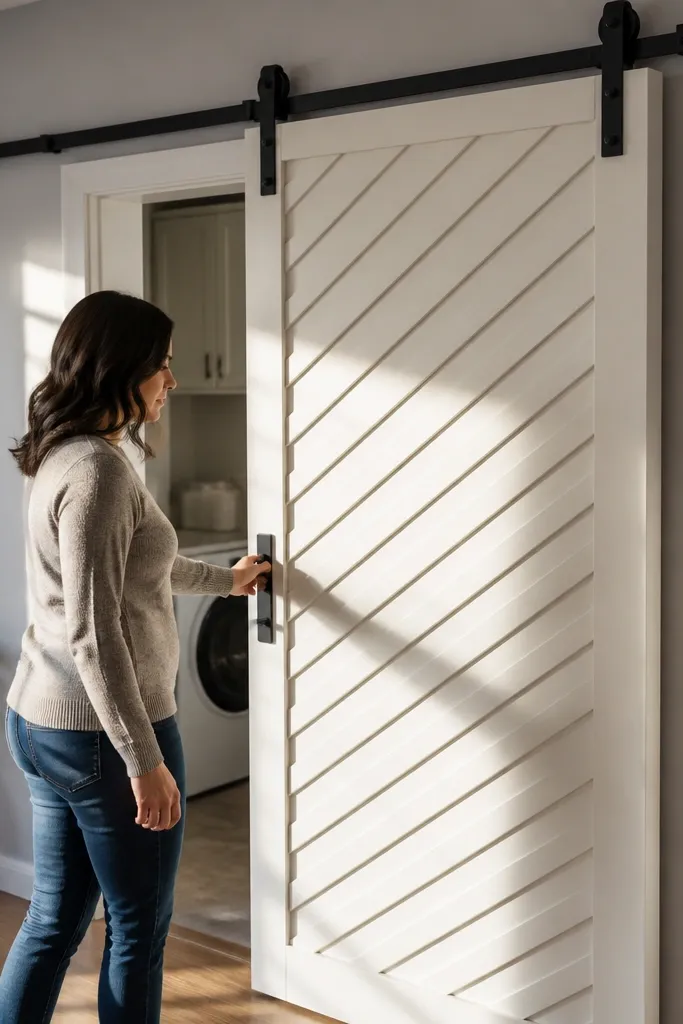
Louvers look sharp and old-school, but you can build a budget-friendly version without buying a specialty door. The angled strips catch light at different angles, so the door looks good even when it’s not fully closed. This style also adds visual depth, which is what makes it photogenic. It’s a great fit for laundry rooms or utility areas where you want airflow and a barn door look.
Create a frame from 1x3 lumber and decide your louver angle (most people like 15-25 degrees). Cut angled strips from 1x3 boards so the top edge and bottom edge are consistent, then attach them to the frame with glue plus brad nails. Sand the strip edges lightly so they don’t snag fingers through the gaps. Mount the rail to a ledger into studs and use a hardware kit with smooth rollers; alignment matters more with louver doors because the slanted surfaces show rubbing marks.
Editor's noteUse a stop block on your miter saw so every strip angle matches — it keeps the pattern clean.
Skip thisDon’t rush sanding; rough strip edges show immediately when light hits the gaps.
5. Arched-top barn door with paneled "cathedral" look
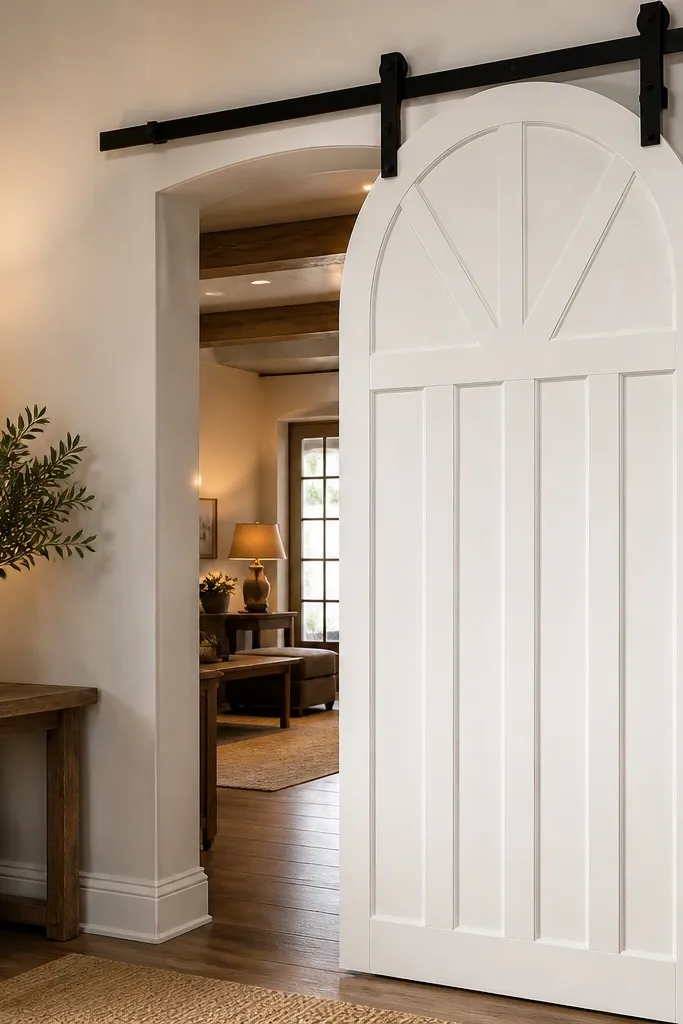
An arched-top door instantly looks designed, and it’s the fastest way to make a renter-friendly build feel high-end. The arch gives you a focal shape that reads well in photos, even with simple hardware. If you keep the panels clean and paint the door, it looks crisp instead of rustic. This works for entryways, small hallways, and any doorway where you want the barn door to feel like a feature piece.
Start by tracing an arch template on 1/2-inch plywood for the door face, then cut it with a jigsaw for a smooth curve. Build a simple rectangular frame behind it, then add two or three panel sections with flat plywood rectangles so the arch doesn’t look like a single sheet. Prime and paint with a cabinet paint system for a smooth finish. Install the rail on a ledger board into studs and hang the door so the arch clears the top trim by at least 1 inch.
Add a thin weatherstrip or felt bumper where the door meets the stop — it prevents paint chips at the contact point.
Don’t make the arch too shallow; a tiny curve looks accidental and cheap.
6. Natural edge live-wood plywood veneer look
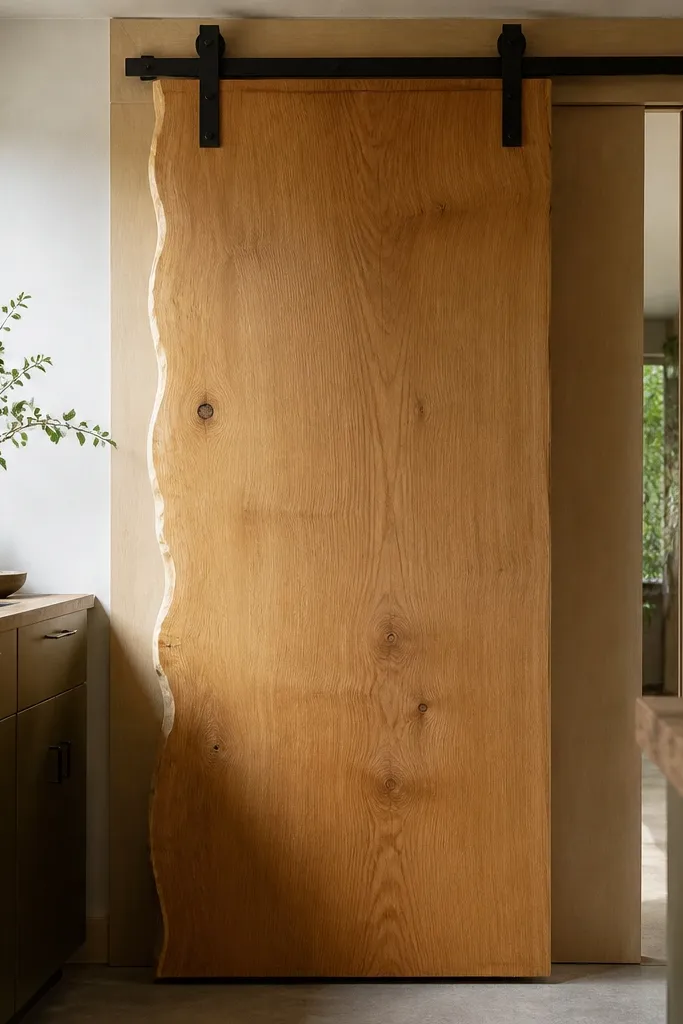
Natural edge veneer gives you character without the cost of a full slab door. The uneven edge reads organic, while the plywood backing keeps the door lighter and more stable than true live-edge timber. This style looks best when the rest of your room is simple — it’s the door doing the talking. It’s a strong choice for dining rooms, home offices, or any area where you want warmth without heavy carving.
Use a plywood core for straightness, then apply natural edge veneer to the face and trim the edges clean. Seal the veneer with a clear coat and sand lightly after the first coat so the surface feels smooth. Build the door frame from 1x3, then attach the veneered face so the veneer edge stays aligned with the frame. Mount the rail on a ledger board into studs and choose rollers that handle slightly heavier decorative doors without wobble.
Seal veneer edges first with thin coats; it prevents peeling at the most visible spots.
Avoid thick clear coats right away; they can look plasticky and catch light glare.
7. White-on-white paneled door with hidden pull
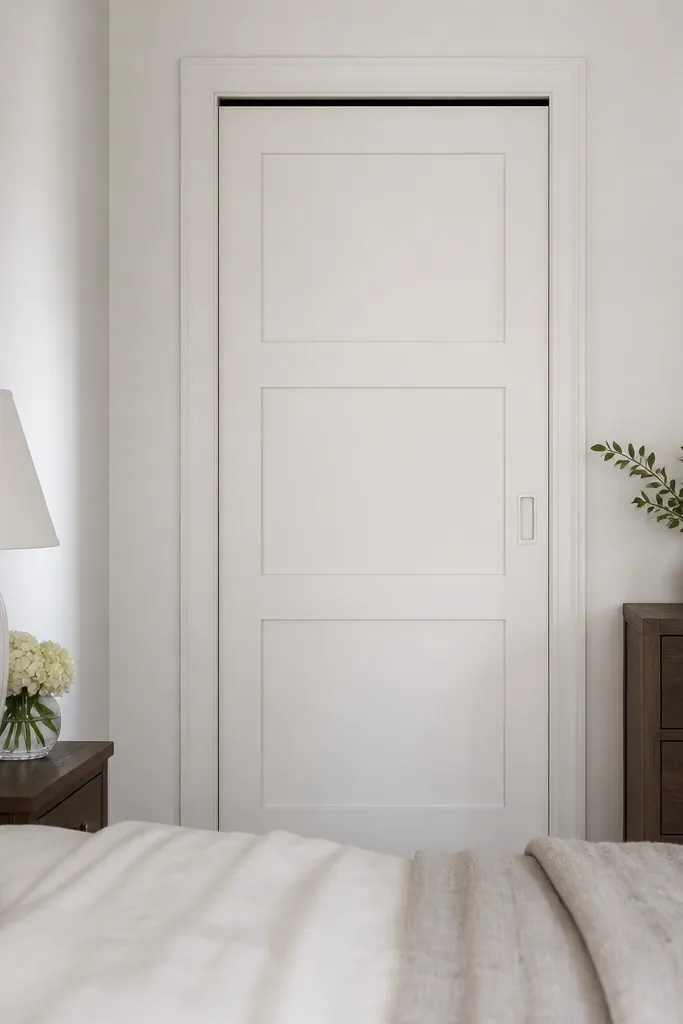
This is the cleanest renter-friendly option for people who want the barn door look but hate clutter. A white-on-white paneled door keeps the door looking like built-in millwork. A recessed pull disappears into the paneling, so the door looks tidy when closed. It’s ideal for small rooms because it doesn’t fight your wall color or trim.
Build a door slab from plywood and a simple panel layout: two vertical stiles and three horizontal rails, then add recessed panel inserts. Paint everything in the same system so seams disappear. Install the barn door rail on a ledger board into studs, then hang with a roller kit rated for the slab weight. Add a recessed pull (a finger pull or a small cutout with a chamfer) on the side that faces the room so it’s easy to open without hardware clutter.
Editor's noteUse a satin finish for walls and a semi-gloss for trim only if your trim is already shiny; otherwise match sheen across the door.
Skip thisSkip black hardware if your trim is white and shiny; it makes the door read like an afterthought.
8. Two-tone "modern farmhouse" board-and-batten
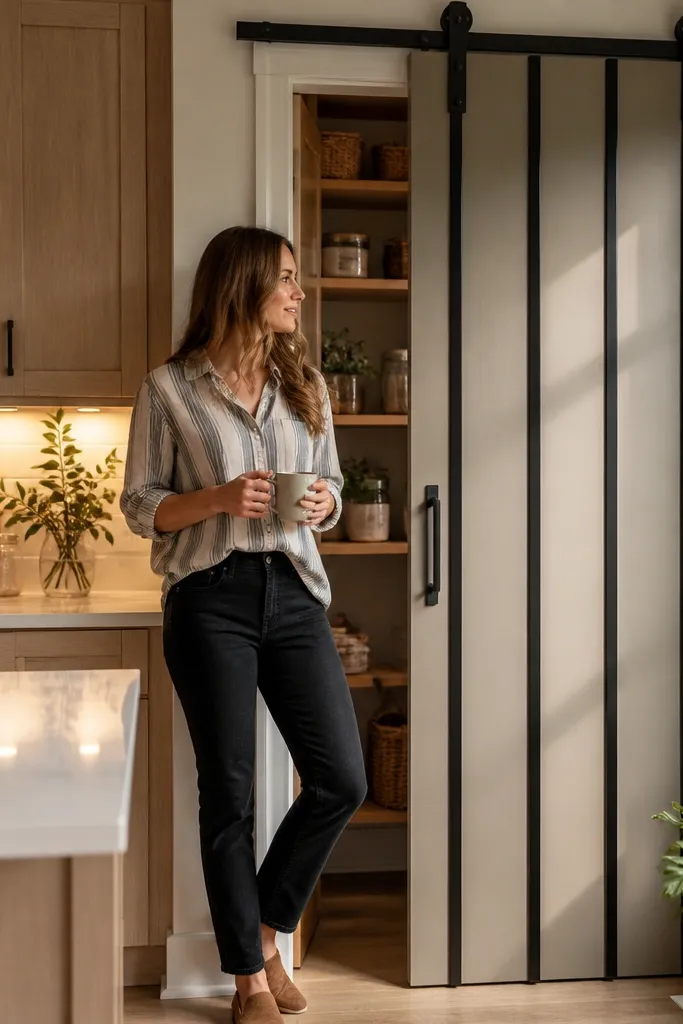
Two-tone board-and-batten is the sweet spot between rustic and modern. The battens create shadow lines, and the two paint colors add depth that looks great on camera. Keep the battens narrower than the boards so the pattern looks intentional, not chunky. This style works in kitchens, entry closets, and hallways where you want the door to look like it belongs with your trim.
Cut a flat door base from plywood, then add horizontal boards across the face and vertical battens on top. Paint the base color first, then tape off and paint the battens a second color after the first layer cures. Mount the rail to a ledger board into studs and hang the door so it overlaps the opening cleanly with 1-2 inches. Add a soft door stop on the wall side to prevent paint scuffs when you close it.
Let the first paint coat cure overnight before masking; it reduces bleed at the tape edge.
Don’t use battens wider than 1.5 inches — thick battens make the door look heavy and cheap.
9. Reclaimed-look sliding door with whitewashed plank face
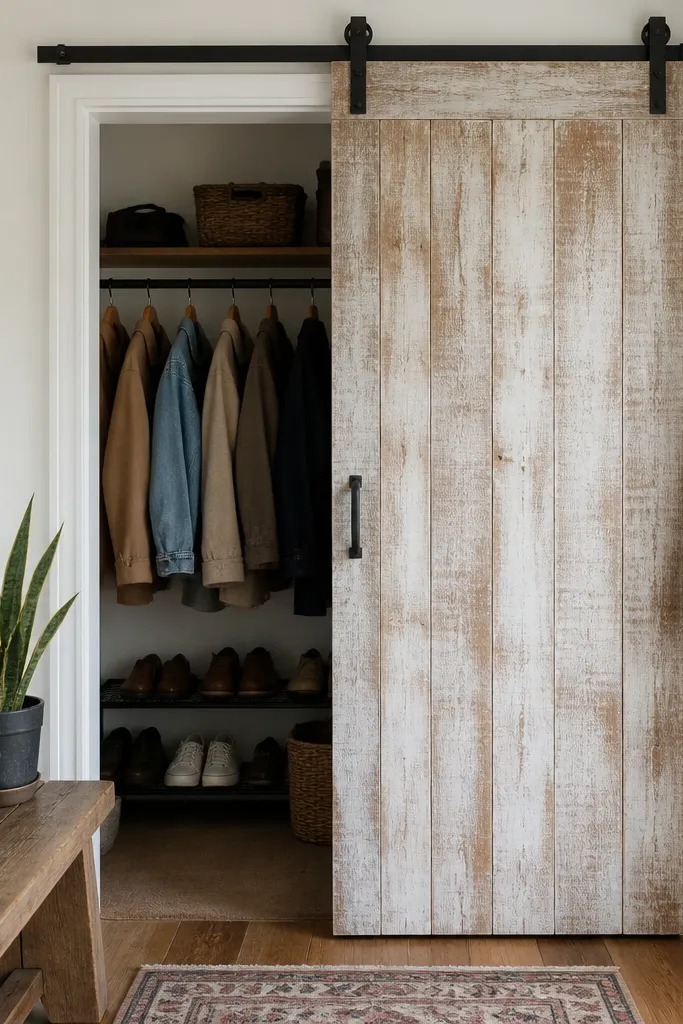
The reclaimed-look plank face makes a budget build look like it came from an old house. Whitewashing keeps it bright and renter-friendly in small spaces, while the grain texture keeps it from looking flat. This door design also hides minor edge imperfections because the plank texture is doing the visual work. It suits living room closets, pantries, and laundry rooms where you want warmth without dark heaviness.
Use 1x4 or 1x6 boards for the face, but keep them on a plywood backing for stability. Stagger the plank joints across the width so seams don’t line up. Apply a whitewash technique: mix white paint with water, brush it on, then wipe back unevenly for a natural look. Seal with a clear matte top coat to protect the texture, then mount the rail to a ledger board into studs and hang with rollers that match the door’s weight.
Editor's noteSand only the highest ridges before whitewashing; if you sand everything smooth, you lose the reclaimed texture.
Skip thisAvoid thick, opaque white paint; it kills the plank grain and looks like cheap paneling.
10. Patterned "grid" door using 1x2 frames and inset plywood
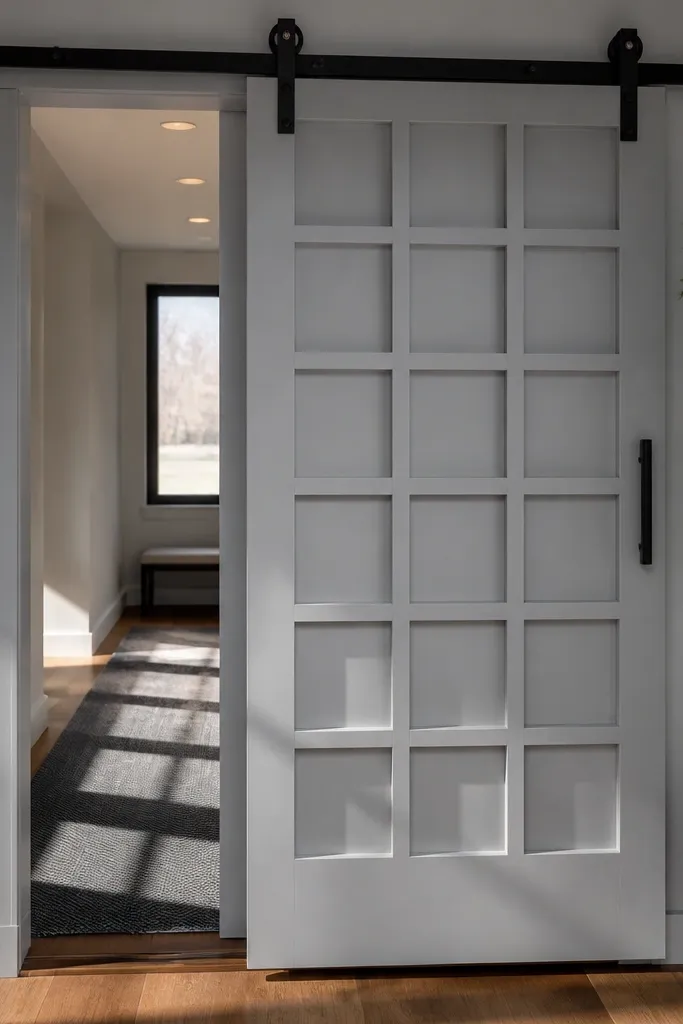
A grid pattern looks modern and architectural, which makes a barn door feel current instead of costume-y. The inset squares create contrast and depth without needing expensive materials. It also hides slight warps because the grid reads as structure. This is a great choice for renters because it’s forgiving — if your opening is slightly off, the geometric pattern still looks planned.
Cut a plywood door core to size and build a grid using 1x2 strips on top, spacing them evenly across the face. Use inset plywood squares or thin panels behind the grid openings for a layered look. Glue and nail each strip so the grid stays flat, then sand edges and paint in two tones or one tone with a satin finish. Install the rail on a ledger board into studs and hang the door so it clears the floor by about 1/2 inch. Adjust the hangers until the grid stays parallel with the wall.
Editor's noteUse a single measurement for every cell width and mark it with a carpenters square — it keeps the grid straight.
Skip thisSkip uneven cell spacing; a crooked grid screams “DIY” in a bad way.
11. Horizontal "wainscot" barn door for hallways
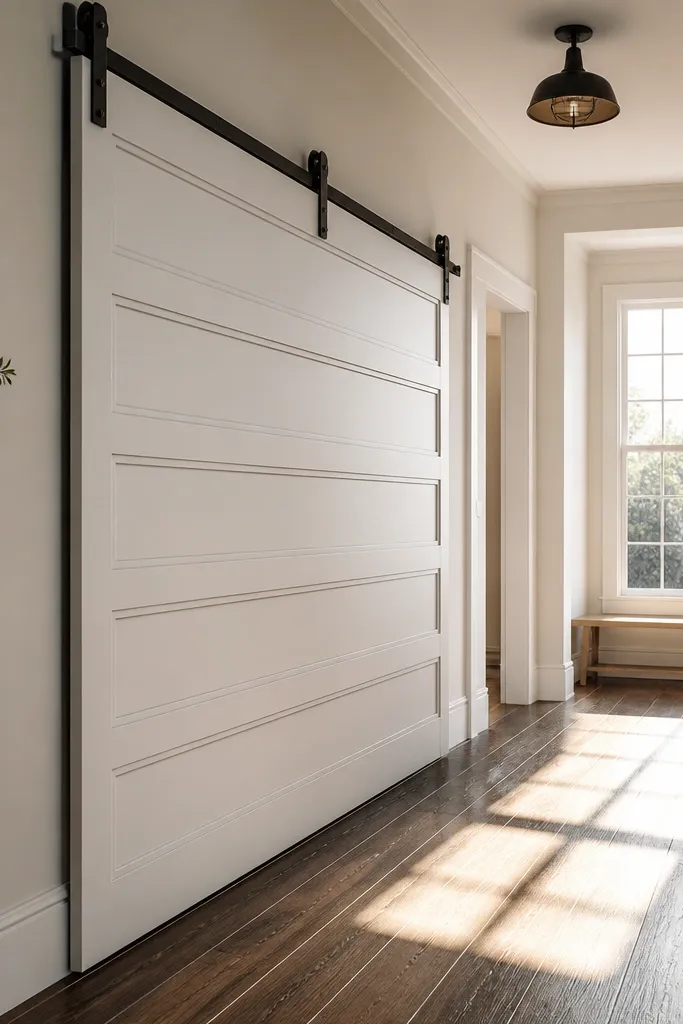
Horizontal wainscot panels read like built-in furniture, and they look especially good in hallways where doors are viewed from a distance. The line of panels guides the eye and makes the door look taller and more structured. This design also lets you keep the door lighter by using panel inserts instead of solid wood. It’s a strong pick for narrow spaces because the horizontal rhythm doesn’t overwhelm.
Build a frame and add two or three horizontal rails to create wainscot-style panels. Use plywood for the inserts and attach them with glue and finishing nails so they don’t rattle. Stain or paint the door, then add a simple top cap board to frame the top edge cleanly. Mount the rail to a ledger board into studs and set it high enough that the door doesn’t hit your baseboard when it slides. Hang and adjust so the top edge stays level as it moves.
Editor's noteAdd a thin rubber or felt strip on the wall stop — it reduces clicking noise when the door closes.
Skip thisDon’t place the top rail too low; it makes the door look like a box instead of a framed panel.
12. Textured linen-look door using shiplap strips
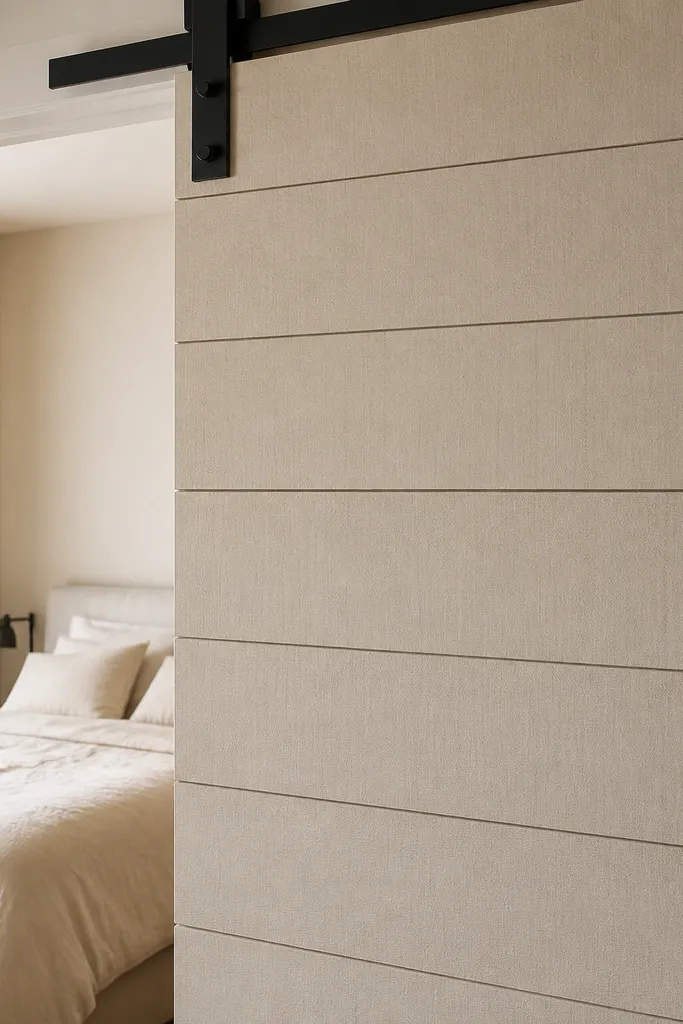
Shiplap gives you a fabric-like texture from across the room, which is exactly what looks good in photos. It’s also easy to build from standard boards and hides tiny gaps. Keep it painted matte or satin so the shadows look soft, not harsh. This style works in bedrooms and nurseries where you want barn door charm without heavy rustic character.
Cut a plywood core and attach shiplap boards horizontally across the face. Use spacers to keep the overlap consistent, then nail into the core frame behind the shiplap. Prime and paint with a smooth primer first so the texture stays even. Install the rail on a ledger board into studs, and hang the door with rollers that match the door weight. Adjust the door so it tracks straight and doesn’t scrape the shiplap edges.
Editor's notePaint after assembly, then do a light sanding between coats on the high ridges for a smoother finish.
Skip thisAvoid leaving raw shiplap edges; uneven paint thickness makes the texture look patchy.
13. Barn door with sliding "cabinet" style hardware rail
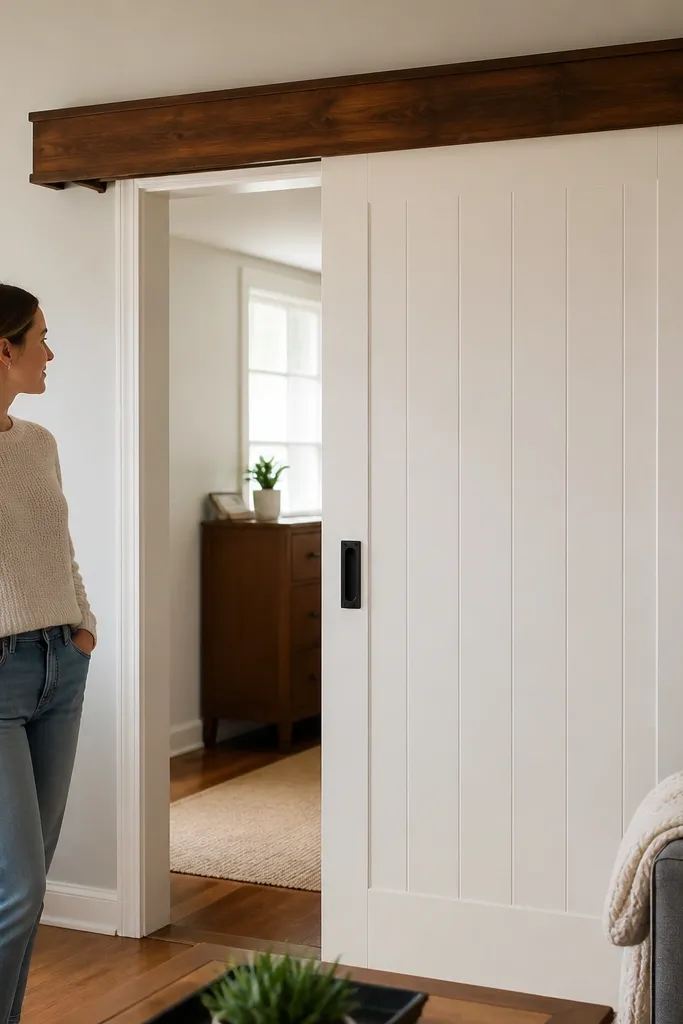
This design makes the hardware look like part of the furniture instead of a separate add-on. A decorative top rail (wood or metal) hides the ugly track area and makes the door feel custom. Pair it with a clean, simple door face like a flat slab or beadboard so the top detail is the focus. It’s a great option for renters because the visual payoff is in the front-facing trim, not in complicated wall modifications.
Build a standard barn door slab, then create a decorative top cover board sized to the rail length. Mount the barn hardware rail to a ledger board into studs, but screw the decorative cover board to the wall-mounted support points so you can remove it later. Hang the door and verify clearance with the cover board in place. Finish the decorative cover with paint or stain to match the door face, then add matching side brackets for a cohesive look.
Editor's noteUse countersunk screws for the decorative cover so the top stays smooth and doesn’t snag fingers.
Skip thisSkip hiding the track without a clean access plan; you need a way to adjust rollers later.
14. Rustic corrugated metal panel door on a wood frame
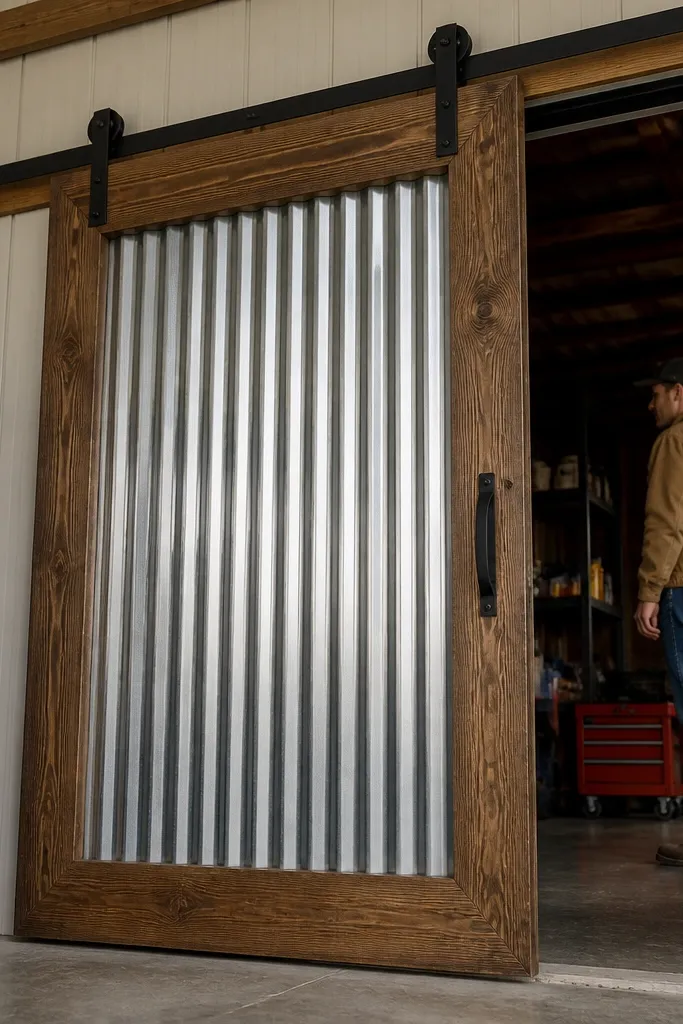
Corrugated metal makes a budget barn door look instantly industrial and photo-ready. The metal panel catches light in a way flat wood can’t, so the door has depth even when it’s open. Keep the metal insert framed in wood so it looks intentional and not like a random sheet slapped on. This is perfect for garages, workshops, and laundry rooms where you want a stronger visual contrast.
Build a wood frame from 1x3 or 1x4 lumber and cut a corrugated metal panel to fit inside the opening. Secure the metal with appropriate screws and washers, then sand the wood frame edges and finish the wood with stain or paint. Mount the sliding rail to a ledger board into studs and choose rollers rated for the metal panel’s added stiffness and weight. Hang the door and add a wall stop so the metal doesn’t clank against trim.
Editor's noteWear gloves when handling corrugated metal edges — the corners are sharp even when “deburred.”
Skip thisDon’t skip washers; metal-on-wood without them can rattle and leave ugly marks.
15. Herringbone door using small veneer strips
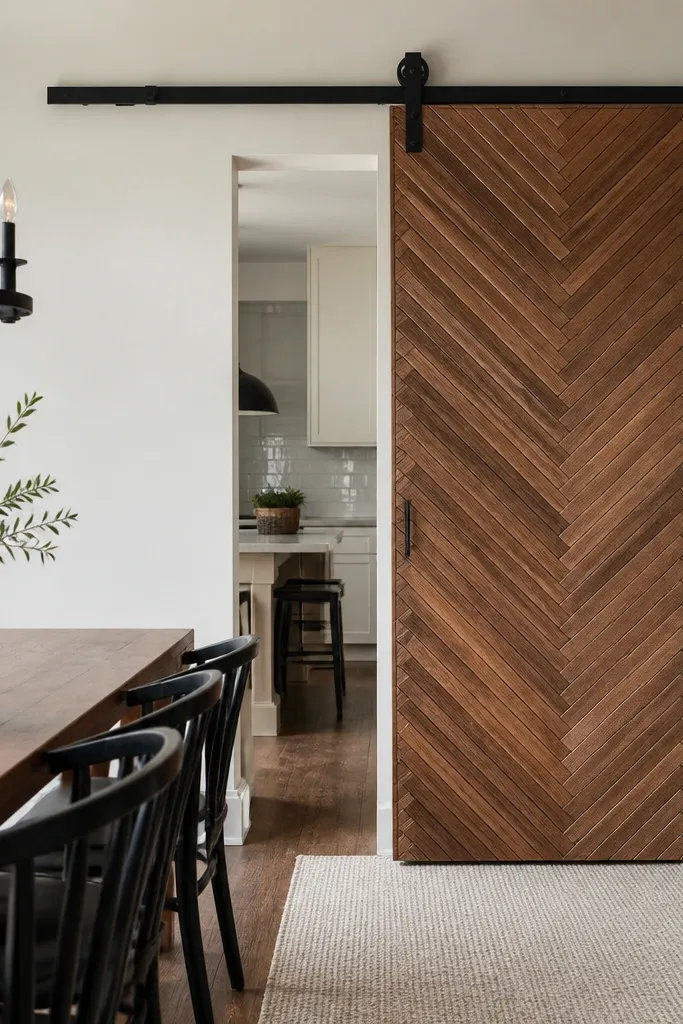
Herringbone looks expensive because the pattern reads like flooring, but you can build it on a door face with thin strips. This is one of the best “aesthetic-first” renter-friendly designs because it makes the entire door the feature, even with basic hardware. Choose a warm stain and keep the rest of the room simple so the pattern doesn’t clash. It’s a smart fit for living room closets and offices where you want visual texture without clutter.
Start with a plywood door core and add a frame around the edges. Cut thin strips (like 1/4-inch veneer or thin-lath wood) and lay them in a herringbone pattern using a jig or a straightedge to keep angles consistent. Glue the strips down in small sections so they don’t shift, then add a thin top coat to lock everything in. Mount the rail on a ledger board into studs and use a roller kit that matches the door weight. Hang and adjust until the pattern stays parallel with the wall.
Editor's noteDo a dry layout first on the floor and measure the finished width at the pattern edges — it prevents a crooked look.
Skip thisAvoid random strip widths; herringbone only looks clean when every strip is the same width.
16. Painted ombre door with simple vertical stiles
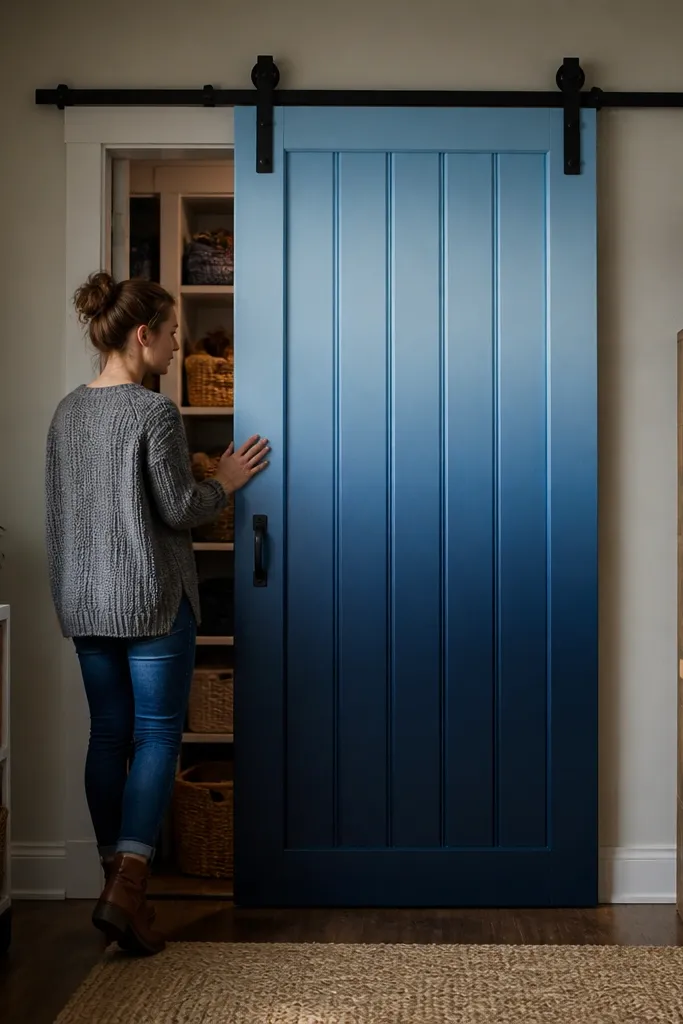
An ombre door gives you color depth without needing elaborate woodworking. The gradient looks good in daylight and makes the barn door feel like decor, not just a function. Keep the door face simple with vertical stiles so the gradient has structure. This works in bedrooms and craft rooms where you want personality but still want the door to look clean and intentional.
Build a simple panel frame and attach a plywood door face. Paint a base color, then create the ombre using a damp sponge or foam roller: blend from darker to lighter in vertical bands, working section by section. Let each layer dry before blending again so you don’t muddy the gradient. Mount the rail on a ledger board into studs and hang the door, keeping the top aligned so the ombre doesn’t look tilted. Finish with a clear top coat that matches your desired sheen.
Editor's noteTape a straight line guide before blending; it keeps the gradient edge crisp.
Skip thisDon’t try to blend the entire height at once; it turns patchy and streaky.
17. Weathered "saltbox" style door with faux hardware studs
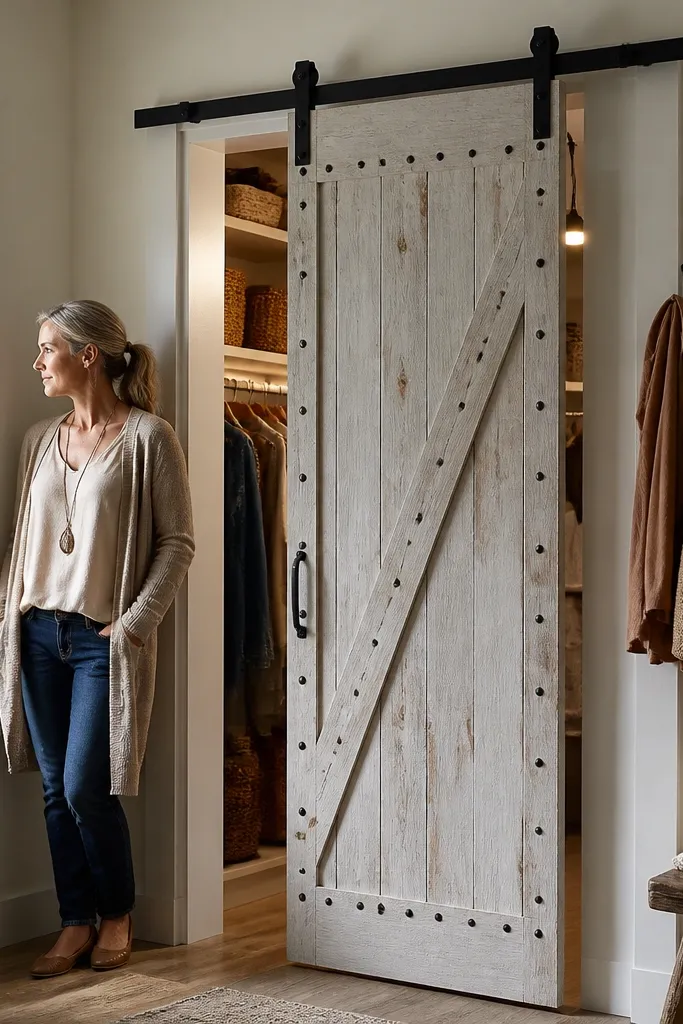
This one leans into barn door aesthetics without requiring a full reclaimed door. Weathering techniques add the worn look, while faux studs and a simple face keep it from turning into costume. The door still looks clean because the face is simple and the finish is controlled, not messy. It’s good for entry closets, basements, and spaces where you want a little attitude and a strong visual texture.
Build a simple framed door using plywood and 1x boards. Apply a base paint color, then use a light dry-brush technique with a lighter and darker paint to create controlled wear on edges and panel corners. Add faux hardware studs on the face and finish with a protective clear coat. Mount the rail to a ledger board into studs and hang the door with a roller kit that matches the door weight. Use a wall stop with felt or rubber to avoid chipping the weathered finish at contact points.
Mark panel corners and only distress those areas; it looks intentional instead of random.
Skip heavy distressing across flat centers; it reads sloppy up close.
18. Compact narrow-door design with double track for smooth travel
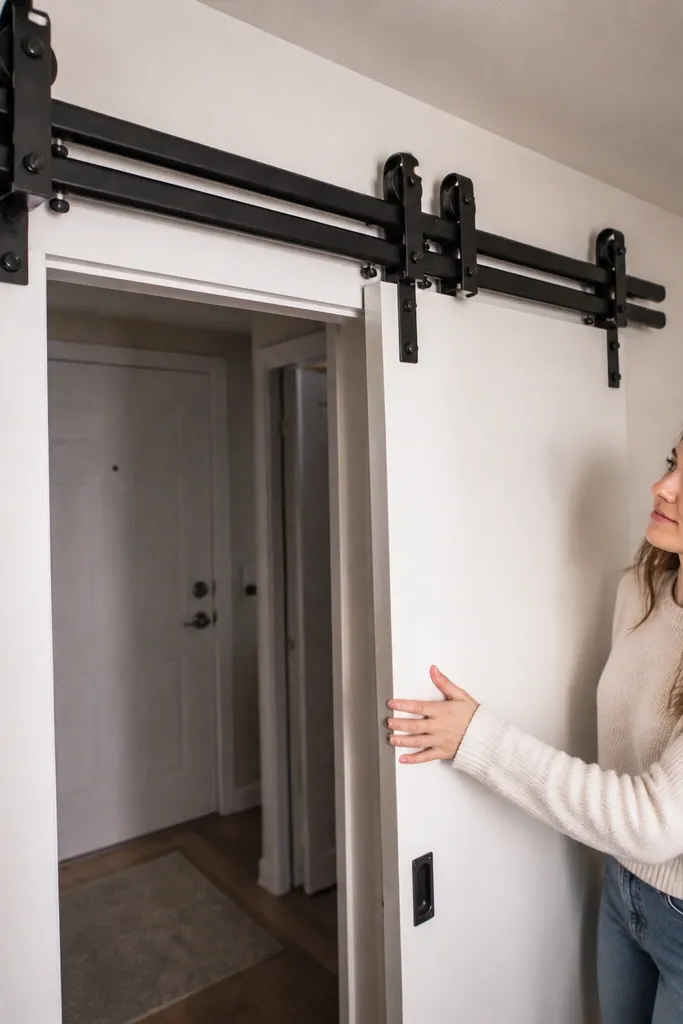
If your doorway is narrow, a standard single-rail barn door can wobble or twist as it moves. A double-track setup keeps the door stable and makes it look “engineered,” which is what you want when you’re building on a budget. This design is also great when your floor isn’t perfectly level because the rails guide the door. It’s ideal for small bathrooms, utility closets, and hall linen spaces.
Measure the doorway width and build a door that’s 1-2 inches wider for overlap, but keep it narrow enough to avoid heavy weight. Use a double-roller hardware kit with two rails or two runner points and mount both to a single ledger board into studs. Hang the door and adjust each side so there’s equal clearance at the top and bottom. Add a floor guide at the bottom edge to stop side-to-side movement and prevent rubbing on trim.
Use a laser level or long level to set the ledger — double-track setups show every misalignment.
Don’t skip the bottom guide; narrow doors show wobble immediately.
19. Sliding barn door with removable top decorative valance
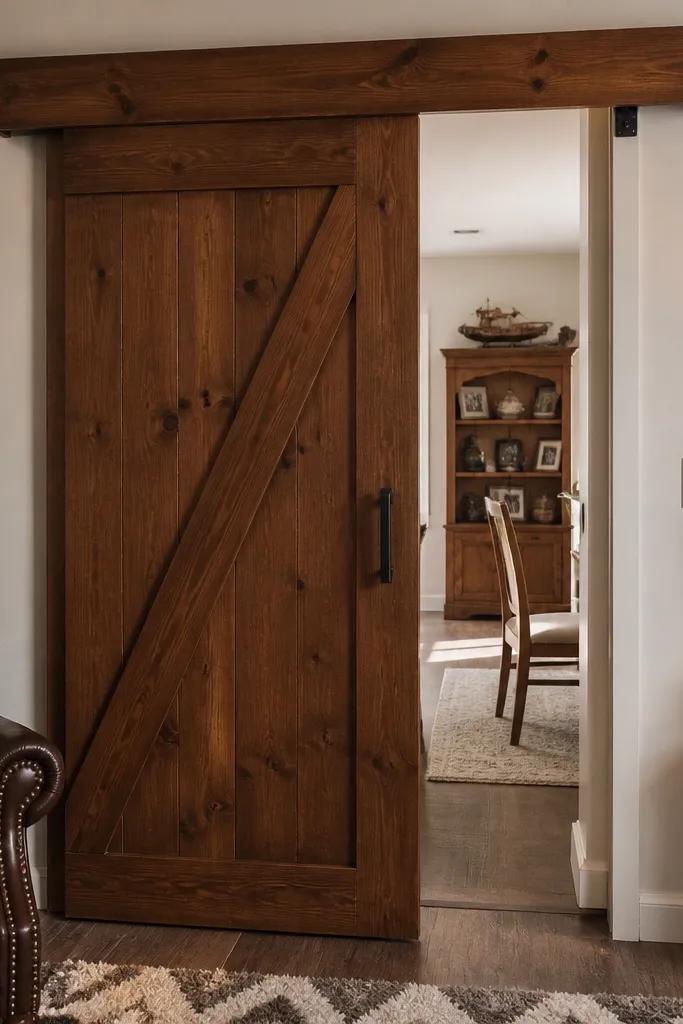
This is the renter-friendly “looks built-in” option because the track area gets covered with a decorative valance that you can remove later. The valance makes the hardware disappear visually, and that’s where a lot of cheap barn doors look wrong. Pair it with a simple stained or painted door face so the valance does the styling work. It’s perfect for renters who want the barn look but need a clean exit plan.
Build your door slab first, then install the barn rail to a ledger board into studs. Create a valance board or boxed trim piece that spans the rail length and attach it to the ledger with screws from the underside or through hidden brackets. Hang the door and test movement with the valance in place so it doesn’t rub. Finish the valance to match the door and add a soft stop on the wall so the door closes quietly without damaging the trim.
Editor's notePre-drill the valance screw holes and countersink them; it keeps removal smooth and prevents splitting.
Skip thisAvoid glue-only valance attachment; you need solid screws for removal and future adjustments.
20. Faux sliding barn door with track-mounted "frame" insert
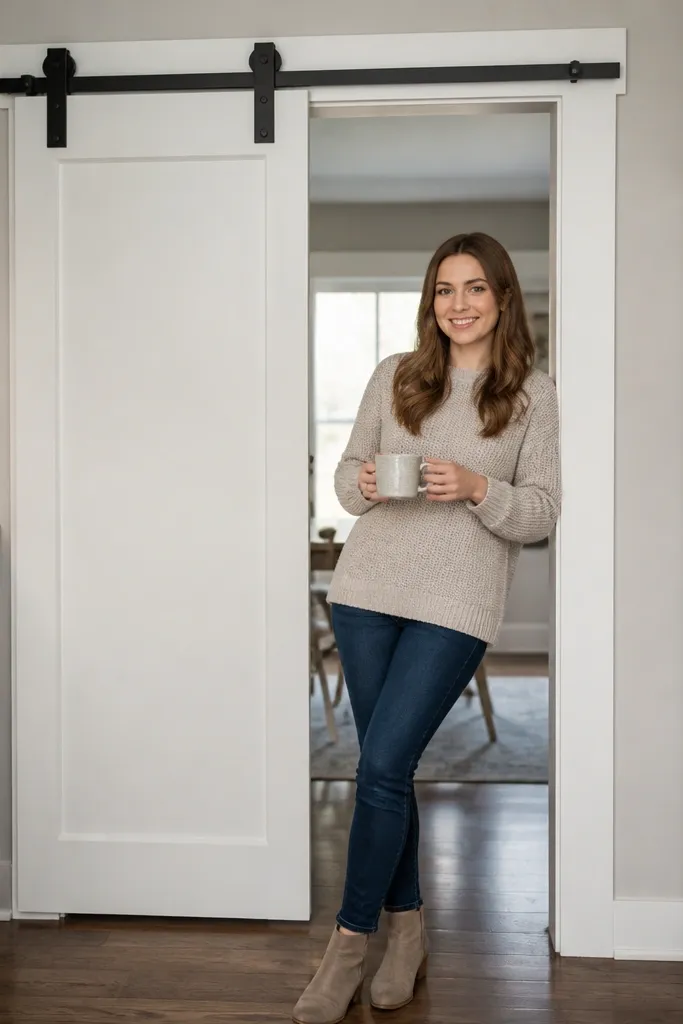
This design gives you the barn door silhouette without building a heavy full door slab. It uses a lightweight frame insert that looks like a door from the front, while staying easier to move and easier on renter-friendly hardware. The key is crisp trim around the insert so it reads as real millwork. This is a great option for renters who want the look but don’t want to wrestle a heavy door or adjust sagging rollers.
Build a lightweight frame from 1x2 or 1x3 lumber and attach a thin panel insert like 1/4-inch plywood or hardboard inside the frame. Keep the frame edges straight and sand them smooth so the trim lines look clean. Install a barn rail on a ledger board into studs, then hang the lightweight frame using hardware rated for lighter doors. Add a bottom floor guide and verify clearance so the frame doesn’t scrape as it slides.
Editor's noteUse a removable handle or finger pull inside the panel so you don’t need bulky hardware on the face.
Skip thisDon’t skip backing support behind the floor guide; lightweight frames flex and scrape.



