

1. No-Drill Boot Tray + Shoe Brush Station
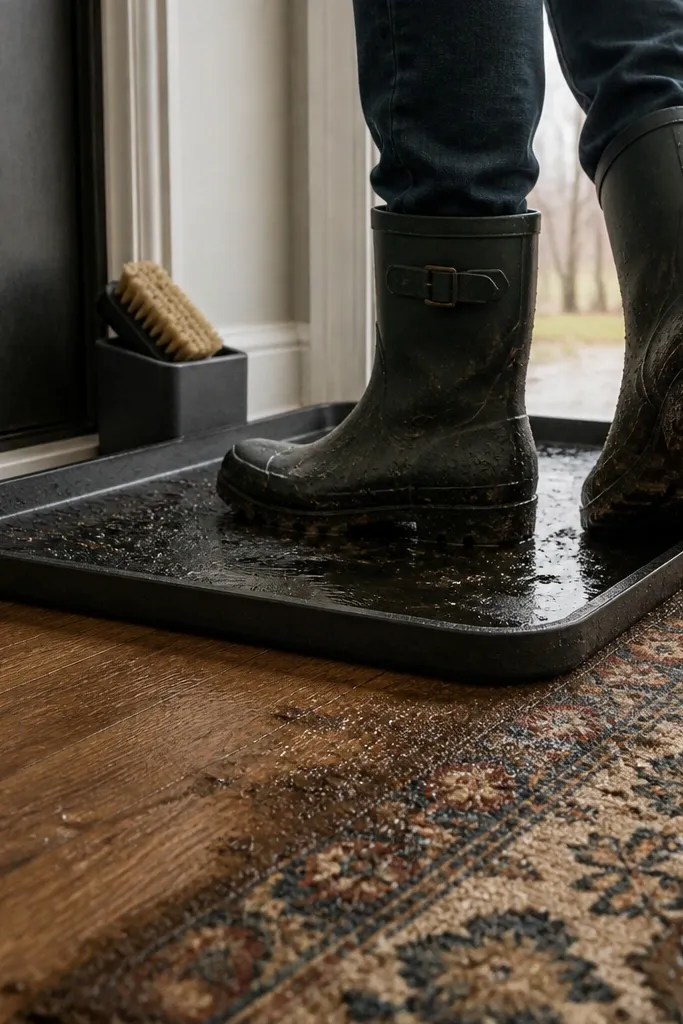
This is the fix for the entry that always looks dirty even when you “clean the floor.” A boot tray catches mud and water at the source, so shoes don’t drip onto your rug and laminate. I like rubber with raised edges because it holds puddles without slipping. Pair it with a simple brush and a small caddy so shoes get cleaned before they go into storage. It takes almost no space, and it makes the whole entry look intentional, not improvised.
Start by measuring the space just inside the door where shoes naturally stop. Buy a rubber boot tray slightly bigger than your biggest boot footprint, then place it where the door doesn’t hit it. Add a wall-free brush option by setting the brush in a small tray or bucket next to the tray. Finally, store your daily shoes on the near side of the tray so wet shoes stay on the rubber until they dry.
Put the tray on a washable mat so you can lift and rinse everything in under 2 minutes.
Skipping the tray and trying to “spot clean” later turns one wet shoe into a daily mess.
2. Adhesive Entry Hook Rail With Labelled Zones
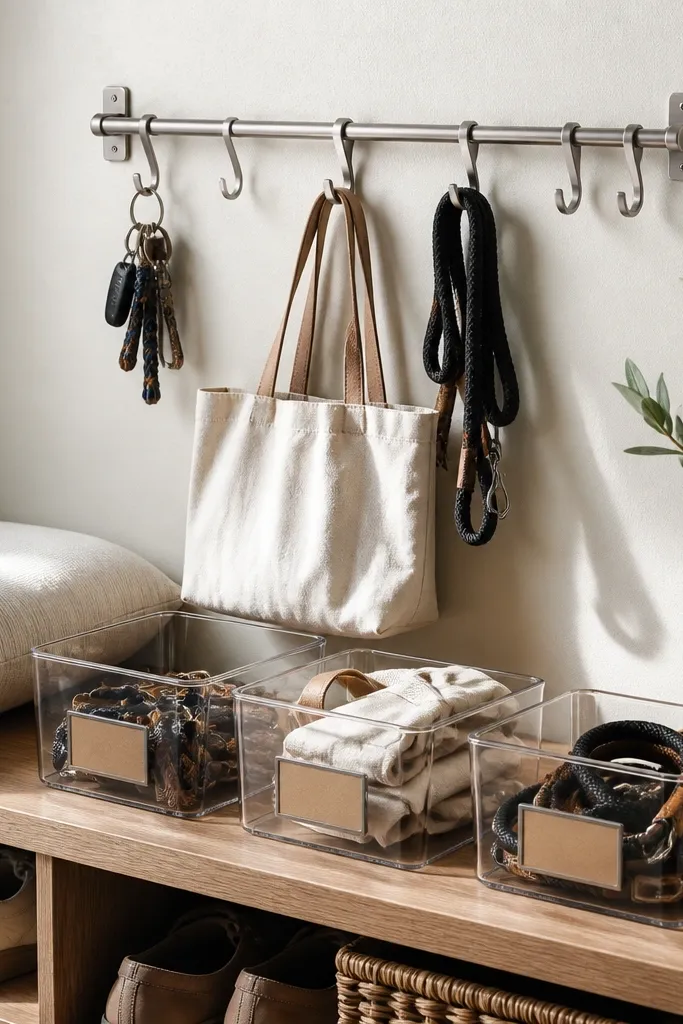
Clean the wall with rubbing alcohol and let it fully dry — no dust, no lotion residue. Mark a straight line with painter’s tape at the height where you want to grab items without reaching up. Press the hook rail onto the wall for the full manufacturer time, then wait the recommended cure period before hanging anything heavy. Once it’s solid, add a small label strip for daily items so the floor stays clear.
Most shoe storage fails because shoes get mixed with everything else. A hook rail seems like it’s for bags, but it actually protects your shoe zone by moving the small stuff off the bench and floor. The trick is to label zones so you’re not guessing where the “in-between” items go. When keychains, tote bags, and leashes stop living on your shoe pile, the entry instantly looks calmer. Choose a rail that uses strong adhesive pads so you don’t drill into rental walls.
Skip thisMounting over wallpaper seams or dusty paint is how hooks peel off and smash your entry.
Editor's noteUse painter’s tape to test layout first. If the rail blocks your coat length or door swing, you’ll hate it in a week.
3. Over-the-Door Shoe Organizer With Vent Panels
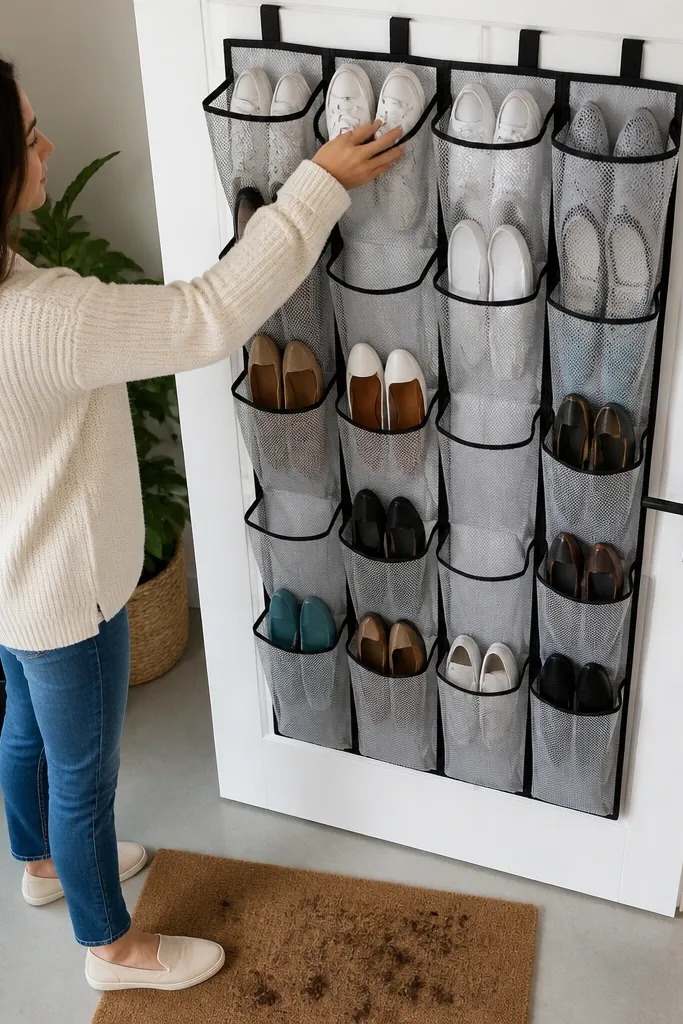
Check your door thickness and whether it has a top bar that fits the hanger hooks. Hang the organizer so it clears the floor by at least 2 inches and doesn’t bump the door when it swings. Load it with 2-4 pairs per row instead of cramming everything — pocket stretch makes it sag. If your shoes are damp, keep them in the grab zone until dry, then move them into the organizer.
If your rental entry has no wall space, an over-the-door organizer is the cleanest “before and after” upgrade. But the mistake is buying the thick felt or fully closed style that traps moisture. Look for vented panels or mesh pockets so shoes can air out between wears. This works best for sneakers, flats, and slip-ons — the shoes you wear repeatedly. When it’s done right, the floor clears up and the entry feels organized without taking up square footage.
Skip thisOverstuffing closed pockets — it looks neat for a day, then smells and warps the organizer.
Editor's noteAdd a small shoe deodorizer bag inside the organizer pocket for odor control without spraying chemicals on fabric.
4. Tension-Rod Shoe Shelf Above the Bench
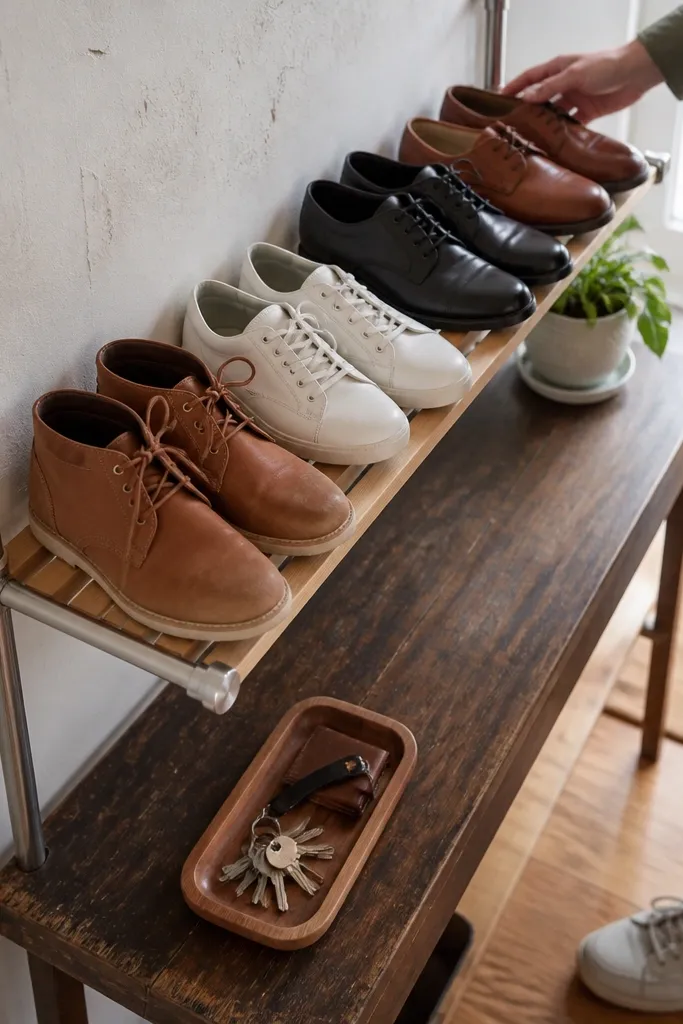
Measure the width inside the alcove or between walls, then buy tension rods that match that range. Place two rods parallel and set a lightweight shelf or wire rack across them. Test with a few pairs first, then adjust until the shelf sits level. Finish by adding a small lip or rubber pad so shoes don’t slide forward when you grab them.
This is the “use the air above the problem” solution for narrow entryways. If you have a bench, narrow console, or a small closet nook, a tension-rod shelf gives you extra storage without drilling. It’s renter-friendly because tension hardware sits inside the frame and can be removed later. The win is visual: shoes stop stacking on the floor and start living above the clutter line. I like thin boards or wire platforms because they let air move and keep shoes from staying damp.
Skip thisUsing a heavy solid shelf without checking rod capacity — sag turns into a shoe avalanche.
Editor's noteUse rubber shelf pads where the rack touches the rods to prevent squeaks and shifting.
5. Slim Rolling Cart for Daily Shoes
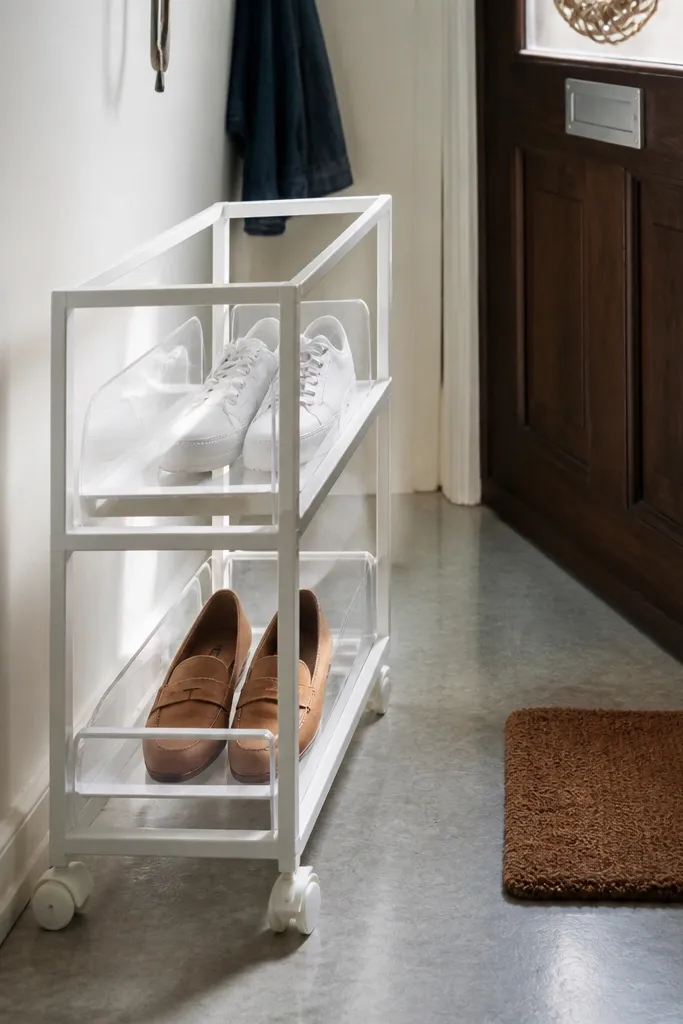
Pick a cart width that leaves at least 30 inches clearance for walking — measure your entry path. Choose a cart with wire or ventilated shelves if possible, then place it right beside the door. Add stackable bins for accessories so you don’t end up with loose items on top. Finally, set a rule: once a shoe goes into the cart, it stays there until it’s time to rotate.
A rolling cart is one of the quickest ways to stop entry chaos because it gives you one dedicated “daily” container. The mistake people make is buying a wide cart that blocks the walkway, so the floor never clears. Keep it narrow and place it next to the door where your feet naturally land. Use it for shoes you wear within the week, and keep laces, insoles, and socks in small bins on the top shelf. This setup looks tidy because shoes are stacked vertically, not scattered in a pile.
Skip thisPutting your whole shoe collection on one cart — it becomes a moving junk pile.
Editor's noteUse felt pads on the bottom wheels to reduce scuffs on vinyl and laminate.
6. Shoe Cubby Bench With Removable Slats
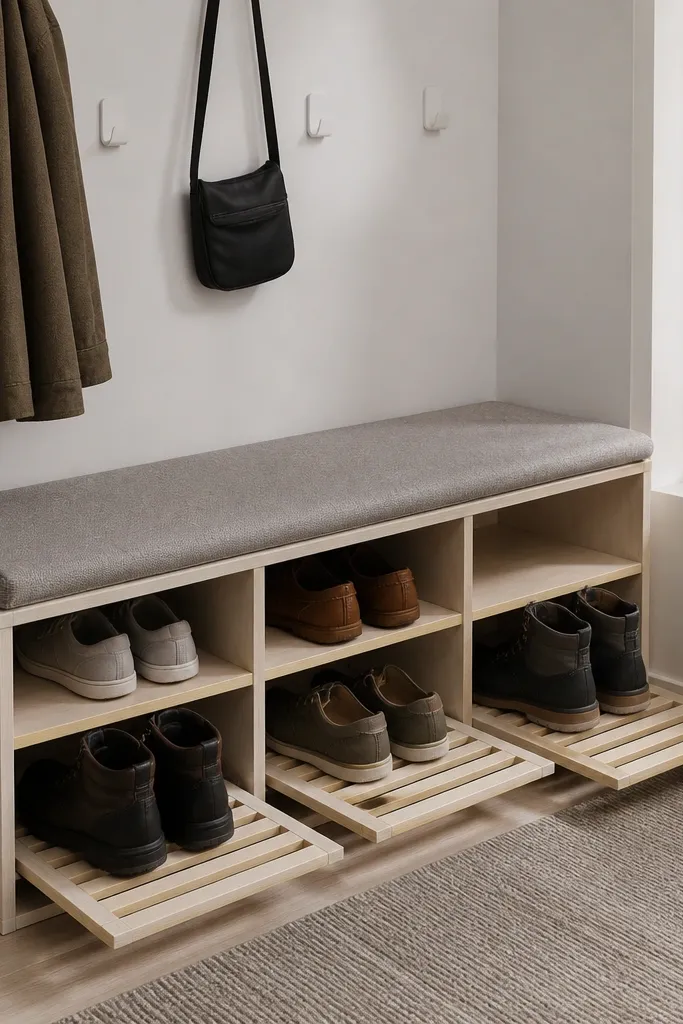
Choose a bench with open cubbies or replaceable slat inserts so you can remove them for drying. Install any add-on parts using non-permanent methods if you’re in a rental, like adhesive-backed bumpers or friction-fit dividers. Set the bench against a wall with a few inches of clearance so air can circulate. Use small dividers to separate left/right pairs and keep tall boots from leaning.
If you’re working with a small entry bench or you want to add one, pick a cubby setup that allows airflow. The common failure is closed doors or tight cubbies that trap moisture and make shoes smell like the inside of a closet. Removable slats let you pull shoes out and let the interior dry. This style also hides clutter because you’re not seeing random pairs on the floor. It’s best for apartments where you need storage but still want the entry to feel light and uncluttered.
Skip thisBuying a bench with solid closed compartments — it looks sleek until the smell hits.
Editor's noteAdd a thin layer of breathable matting inside each cubby to reduce odor and make cleaning easier.
7. Clear Over-Under Shoe Bins for One-Closet Entries
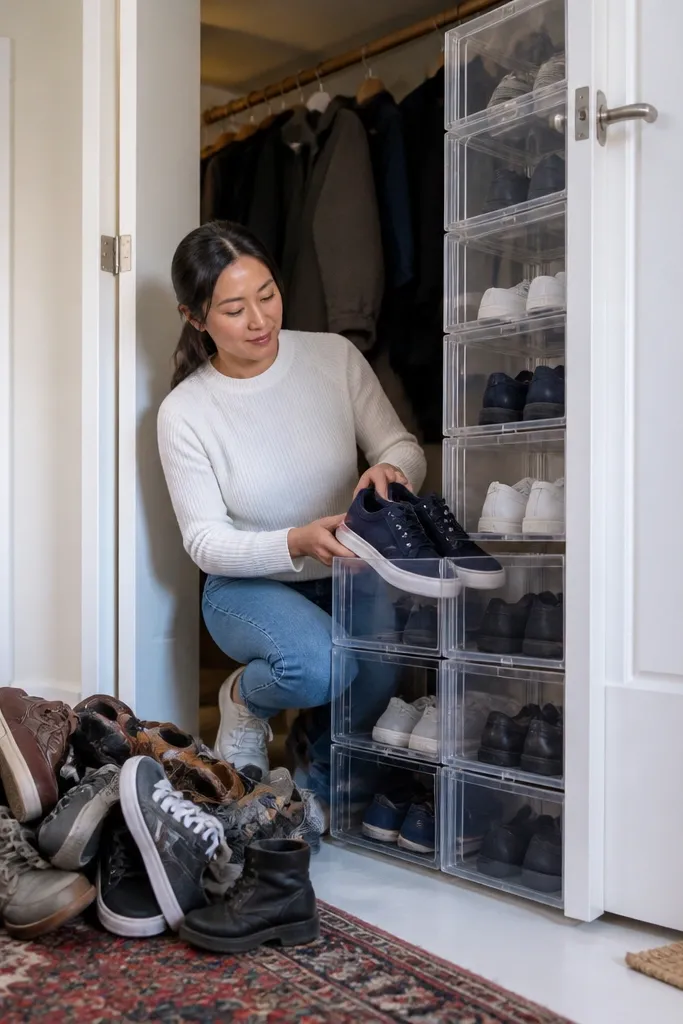
Closet storage is great until shoes turn into a mixed pile you can’t sort quickly. Clear bins fix that by making pairs visible, and stackable over-under setups double the storage without expanding the closet footprint. The renter-friendly angle is that you can use the bins without modifying walls at all. I like bins with vent holes or a grid front so damp shoes can breathe a little. This is a strong option when your entry includes a closet door or recessed area you can access daily.
Measure your closet shelf depth and height, then buy bins that fit without forcing the door to bind. Place the bins on the closet floor or existing shelf — keep them stable with non-slip shelf liner. Label bins by category like “daily” and “weekend,” then keep only 2-3 pairs per bin. When shoes are damp, store them in a separate vented bin until dry, then move them into the clear bins.
Use removable label tape so you can change categories seasonally without residue.
Using opaque bins for everything — you’ll stop sorting and the pile returns.
8. Wall-Mounted Pegboard With Removable Shoe Pegs
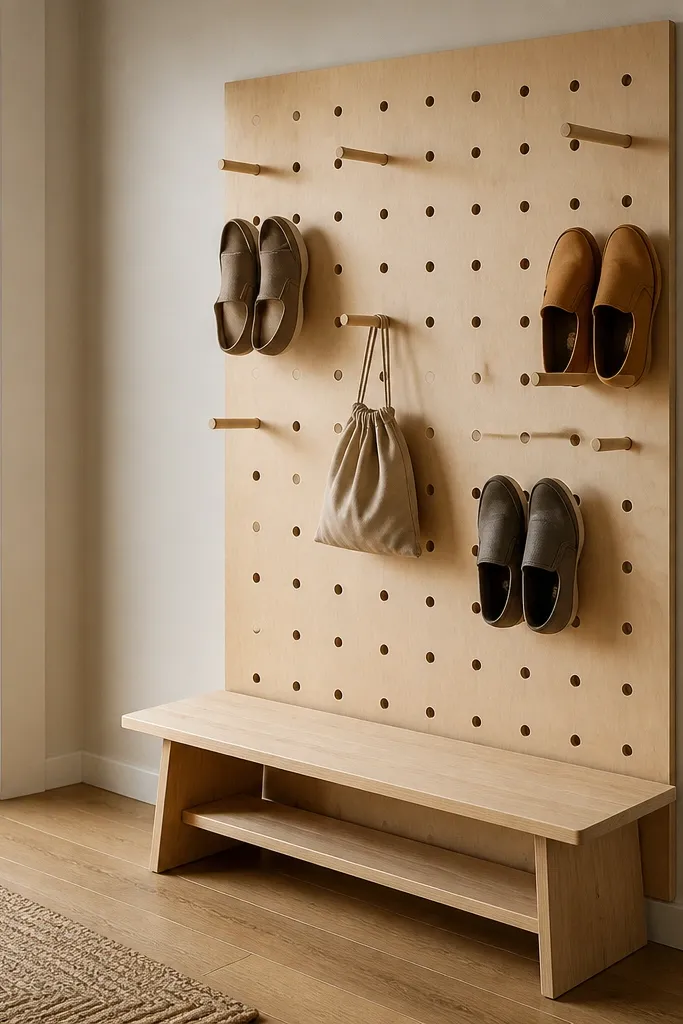
If you can’t drill, use a freestanding pegboard panel or a renter-safe mounting system that uses existing brackets. Arrange pegs in a line at a height where you can grab shoes without bending deeply. Add a second row for accessories like shoe brushes and a small bin for insoles. Hang only the pairs you wear most, then keep the rest in lidded bins elsewhere so the pegboard doesn’t become a clutter shelf.
Pegboard sounds like a workshop, but it’s one of the most practical entry systems for renters because you can reconfigure it. The mistake is mounting it permanently and then living with a setup that doesn’t fit your shoe rotation. Use a pegboard panel designed to be removable or use freestanding pegboard panels if your landlord says no. Removable shoe pegs keep shoes off the floor and give each pair a consistent spot. The visual order is the point: shoes stop looking random the second you walk in.
Skip thisHanging every pair at once — the pegboard becomes a display shelf, not storage.
Editor's noteKeep pegs spaced for the widest shoe you own. Crowding makes shoes fall and scuffs the uppers.
9. DIY Felt Shoe Wall Panels for Small Rentals
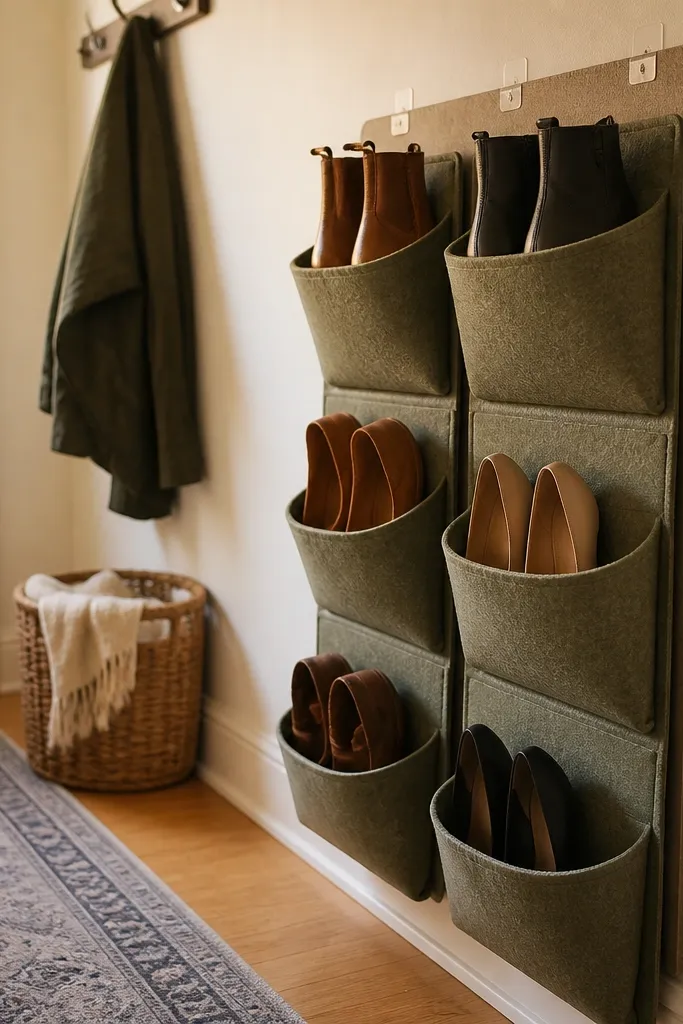
Choose felt that’s thick enough to hold pocket shape, then cut pockets in a size that fits your most common shoe type. Attach the panel to a removable backing board or hang it over the door using strong over-door hooks. Add a simple bottom hem so shoes don’t slip out. Place the panel in your “grab zone” where you take shoes off and put them back the same way every time.
For tiny entries, felt pocket panels are a smart way to store shoes without bulky furniture. They’re renter-friendly when you mount them using adhesive hooks on a removable board or hang them over the door. The mistake is using felt panels for boots that are still wet — felt holds moisture and can smell. Use them for flats, sandals, and sneakers that are dry. The pockets also prevent scuffs because shoes don’t rub against each other as much as they do in open baskets.
Skip thisStoring wet leather or boots in felt pockets — you’ll get odor and stiffness.
Editor's noteAdd a small airflow gap behind the panel by using standoff clips so the back doesn’t stay damp.
10. Shoe Slat Shelf in a Corner With Non-Slip Feet
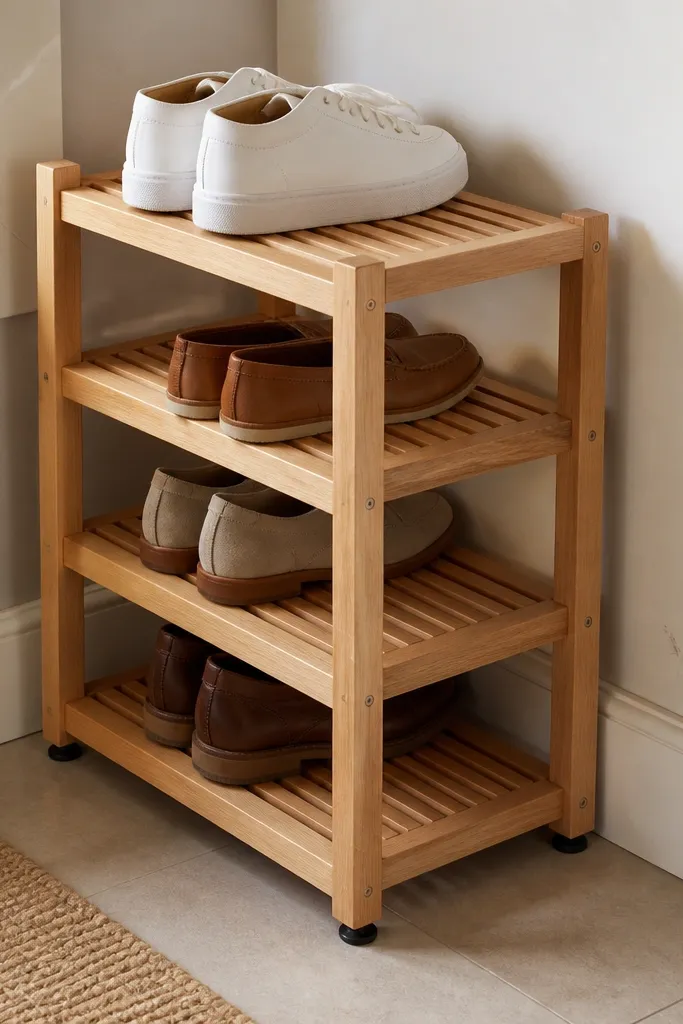
Measure the corner and choose a shelf depth that matches your widest shoe plus 1 inch. If you can’t drill, use a freestanding shelf unit or a corner shelf that uses weight and non-slip feet. Add non-slip pads under the feet so it doesn’t shift when you bump it. Place two pairs per level and reserve the top for dry, ready-to-wear shoes.
A slat shelf is the clean alternative to stacked baskets. It keeps shoes off the floor, but it doesn’t trap moisture like a solid board can. Corner placement is ideal because it uses space people ignore, and it keeps the entry walkway clear. The mistake is installing a shelf at the wrong height so shoes look like they’re “floating” and then you stop using it. Keep it low enough that you can slide shoes in without lifting them over the lip. It’s a simple upgrade with a big visual payoff.
Skip thisUsing a solid shelf with no airflow — damp shoes sit there and smell.
Editor's noteUse a slat shelf surface with a wipeable finish so mud doesn’t stain it permanently.
11. Bench Shelf Divider Rack for Sneakers and Kids Shoes
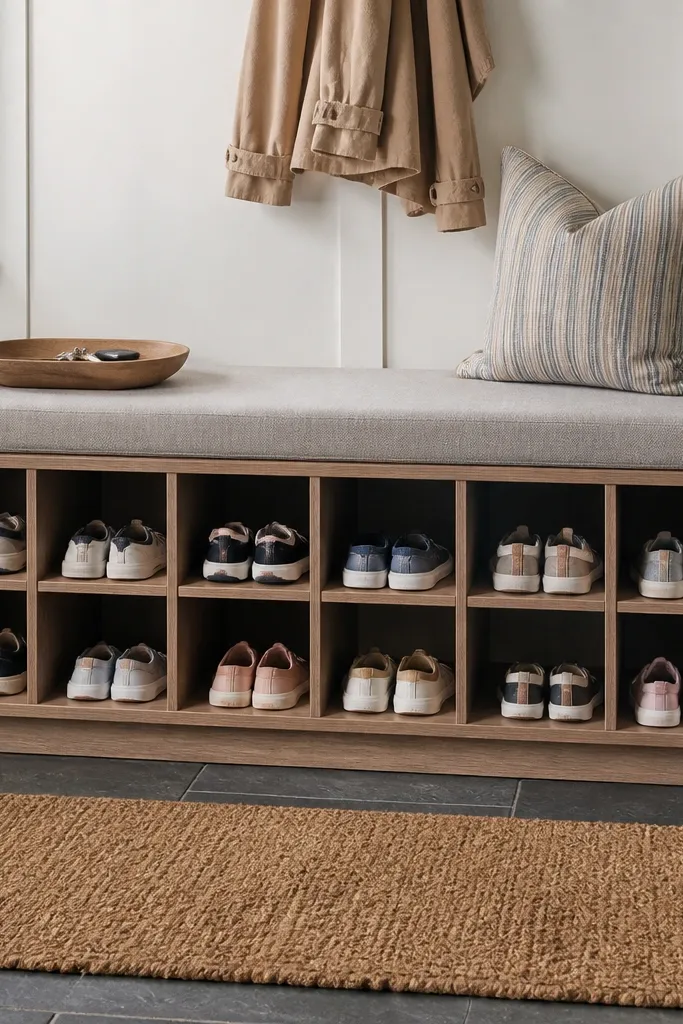
If your entry includes kids shoes, the real problem is mixing sizes and losing pairs. Dividers fix that by turning one messy stack into separate compartments. The mistake is relying on a single basket where shoes collapse into each other. With dividers, each pair has a spot, so the bench top stays clear and the floor stays empty. Use this setup for sneakers, sandals, and slip-ons, not tall boots. It’s renter-friendly because you don’t need hardware — you just need sturdy fabric or plastic dividers and a stable base.
Start by choosing a bench or shelf base that’s wide enough to hold two shoe lengths. Add dividers using Velcro straps or friction-fit inserts so they can be removed for cleaning. Keep compartments consistent: one compartment per shoe pair. Use a small label for each kid’s compartment so the system doesn’t depend on memory.
Use dividers with a slightly stiff edge so they don’t sag under weight.
Trying to store tall boots in bench compartments meant for sneakers.
12. Magnetic Boot Drying Rack for Wet Weather Entries
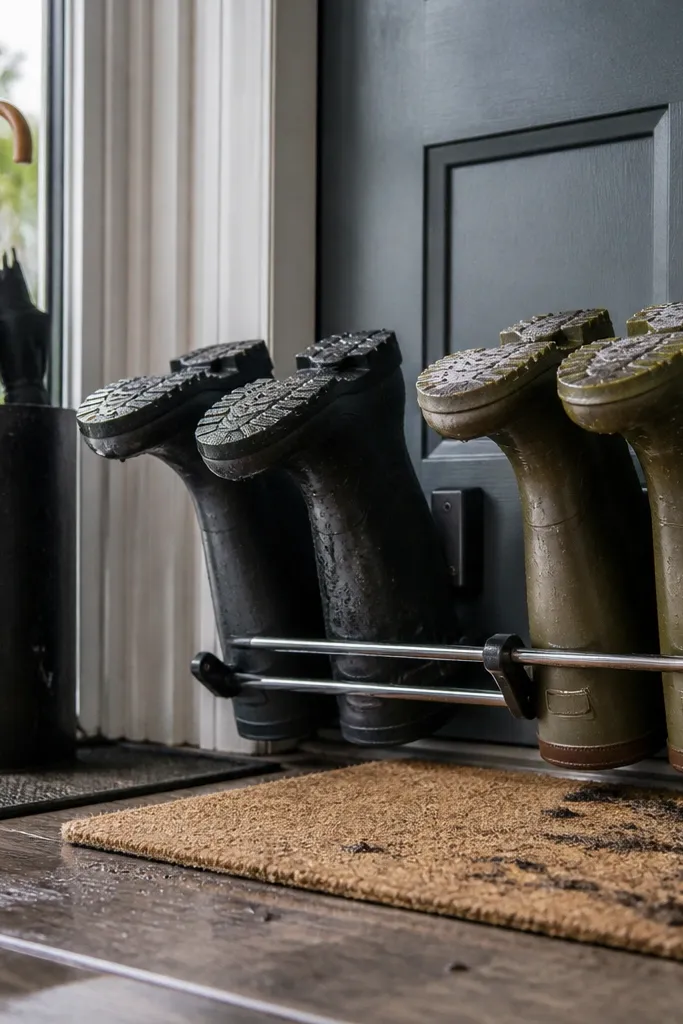
Place the drying rack in the entry area where it won’t block the main walkway. Use it only for damp shoes, not as permanent storage, so you don’t clutter the entry with drying items. Keep a towel or mat under the rack to catch drips. After shoes dry, move them into your main storage zone — bins, cubbies, or shelves — so the entry stays tidy.
Wet weather is why entries turn into a disaster zone. A drying rack setup keeps shoes separated while they dry, and it prevents that “stacked on the floor” habit that leads to smells. The key is airflow and separation — shoes can’t touch each other while drying. This works best in entryways that get rain or snow regularly, and it’s especially helpful for boots. It’s renter-friendly because it’s portable and doesn’t require permanent mounting.
Skip thisLeaving damp shoes in the same storage spot every day — that’s how odor becomes permanent.
Editor's noteUse shoe trees or rolled socks inside boots to help them dry faster and keep shape.
13. Lidded Shoe Storage Bench With Lift-Up Top and Soft Liners
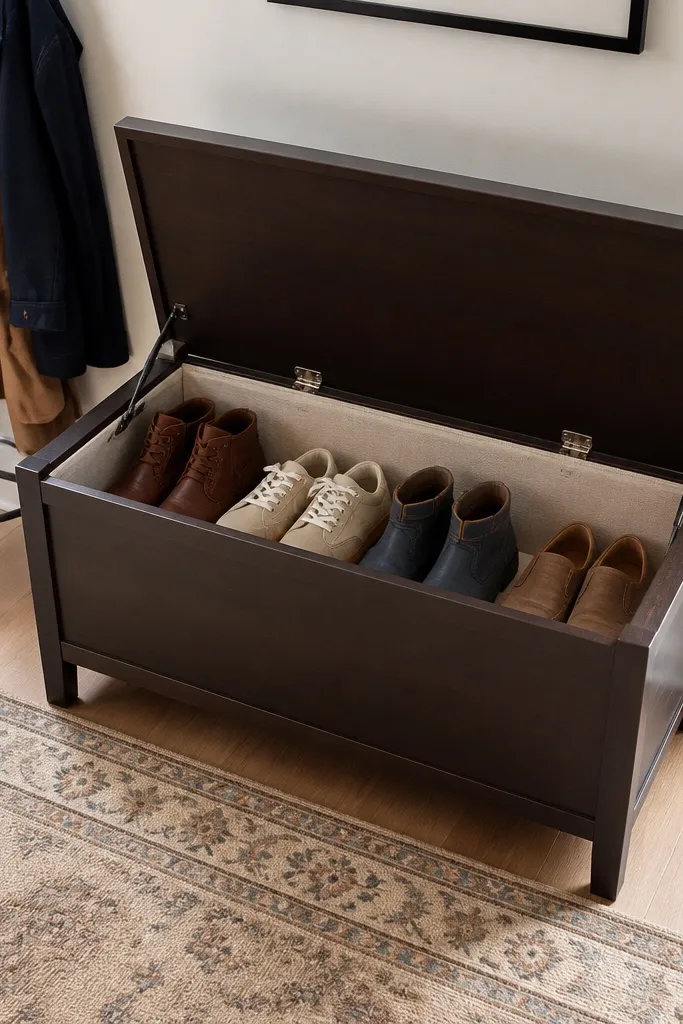
Choose a bench with a lift-up lid and enough internal height for your tallest pair. Add removable liners or a breathable mat so you can pull it out and clean it. Store only dry shoes inside; damp pairs go in the drying zone first. Keep the lid closed most of the time so you don’t create a second “open pile” problem.
A lidded bench is great when you need the entry to look clean even if you own more shoes than you want to display. The common mistake is going fully airtight — it traps moisture and turns the inside into a stink box. The fix is to use soft liners that you can remove and a bench that has a vented design or breathable interior. This is best for seasonal shoes and “not daily” pairs. If your rental entry gets guests often, this is the fastest way to make clutter disappear.
Skip thisStoring damp shoes directly in a sealed bench — the smell will seep into the liner.
Editor's noteAdd a small vented bag of charcoal or odor absorber inside, then replace it every few months.
14. Clear Shoe Drawer Organizer Under a Console
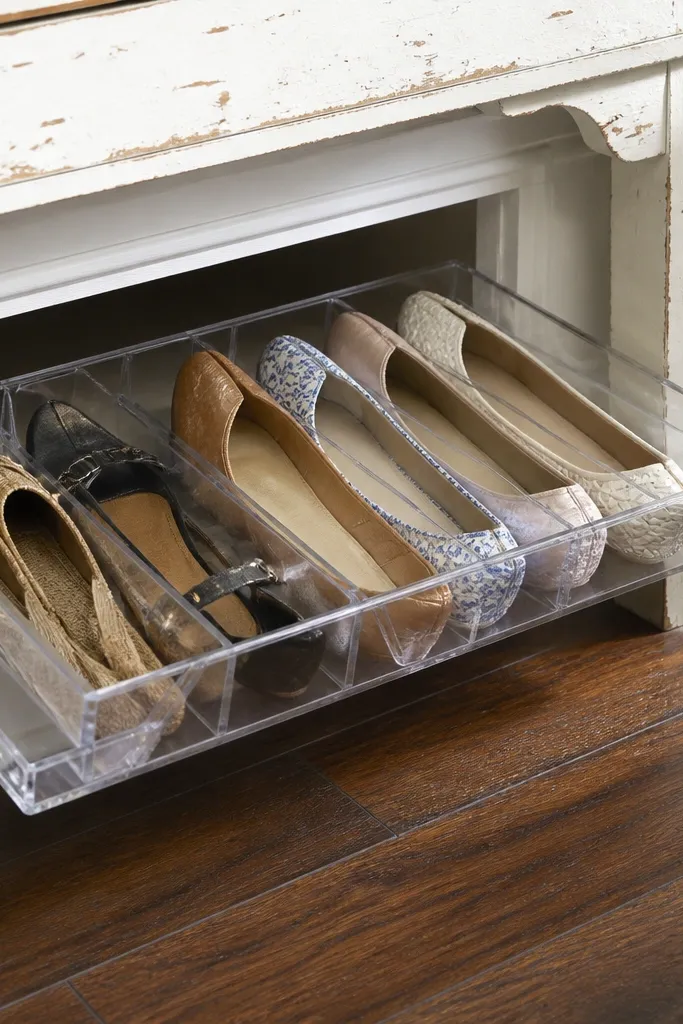
Under-console storage is a renter cheat code because it hides shoes where you don’t look. Clear drawer organizers let you see what’s inside, so you don’t dump everything out to find one pair. The mistake is buying drawers that are too deep and end up wasting space or scraping against baseboards. Instead, pick a unit that matches your shoe length and slides smoothly. This works well for entries with a narrow console, especially when you want the floor to stay empty.
Measure the space under your console and check the clearance for baseboards and cabinet legs. Buy a sliding drawer organizer with a shallow depth for flats and sneakers. Install it by placing it on the floor or on a non-slip mat so it doesn’t shift when pulled. Label the drawers by category and keep only one category per drawer to reduce searching.
Stick felt pads on the drawer corners so it doesn’t scuff the console legs.
Overfilling drawers — shoes jam, and you’ll stop using the system.
15. Stackable Shoe Cubes With Pop-Out Fronts
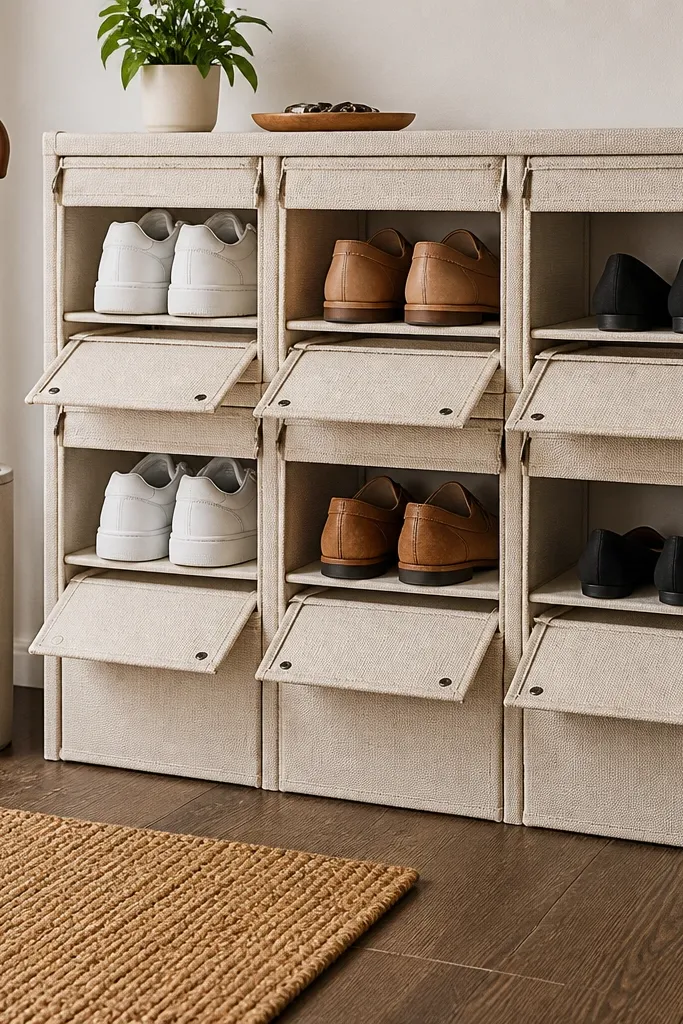
Pick cubes sized for your most common shoe type so you aren’t forcing tall boots into shallow cells. Assemble on the floor or stack on a stable shelf with non-slip pads between layers. Use pop-out fronts for ventilation and to make grabbing easy. Store 1-2 pairs per cube so the fronts close without squishing.
Fabric cubes are light, renter-friendly, and fast to rearrange when your entry changes. The common mistake is using cubes with tight, closed fronts that trap moisture. Look for cubes with pop-out or open fronts so air gets in, and keep them for dry shoes. This creates a clean grid look, so your entry doesn’t look like a pile of individual baskets. It’s a good choice for small apartments where you need storage that doesn’t feel like furniture.
Skip thisStacking too high — top cubes collapse and you end up with a mess.
Editor's noteAdd a small fabric deodorizer pack inside each cube to reduce odor build-up.
16. Pegboard Shoe Shelf on Stand for Renters Who Can't Drill
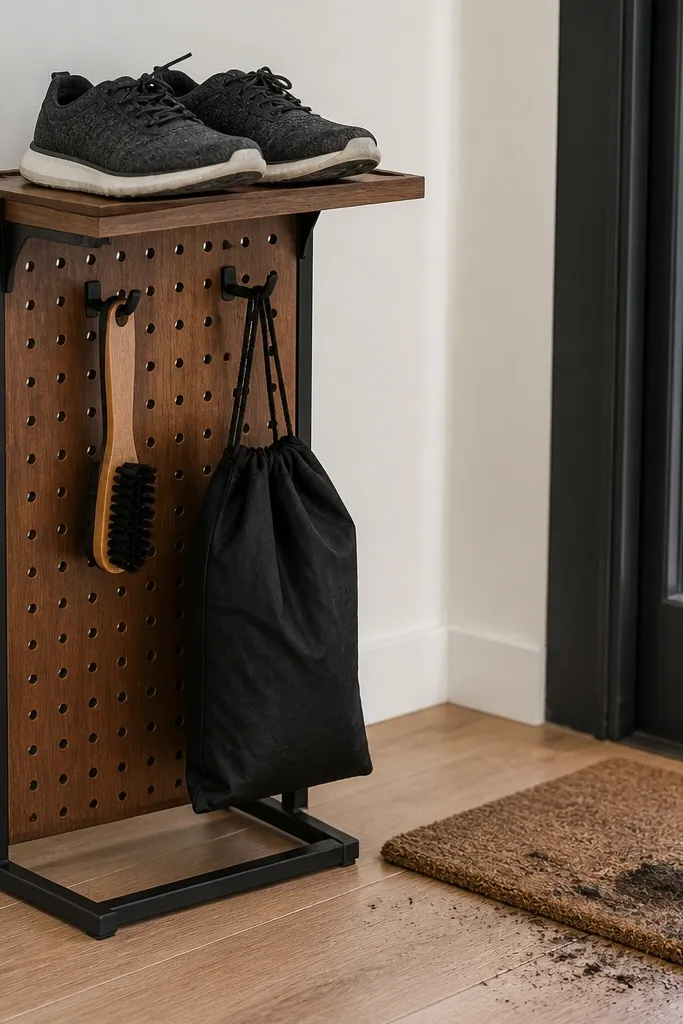
If your landlord says no drilling, you still want a system that looks structured. A freestanding pegboard stand gives you that “designed” look without anchoring it to the wall. The best approach is to combine a small shelf top for daily shoes with peg hooks below for accessories like shoe bags and brushes. The win is that shoes stop migrating to random corners. It’s also easy to reconfigure when your shoe rotation changes from summer sandals to winter boots.
Choose a stand with a stable base and shelves sized for your shoe lengths. Place it beside the door in the area you already use for shoe changes. Add hooks for bags or brushes so those items don’t land on top of the shoes. Organize by frequency: daily shoes on the shelf, off-season pairs in bins elsewhere.
Use a small tray on the bottom shelf for socks and spare laces so the stand stays tidy.
Buying a tall, narrow stand — it wobbles and turns into a constant correction job.
17. Slanted Shoe Rack With Adjustable Levels for Tall Boots
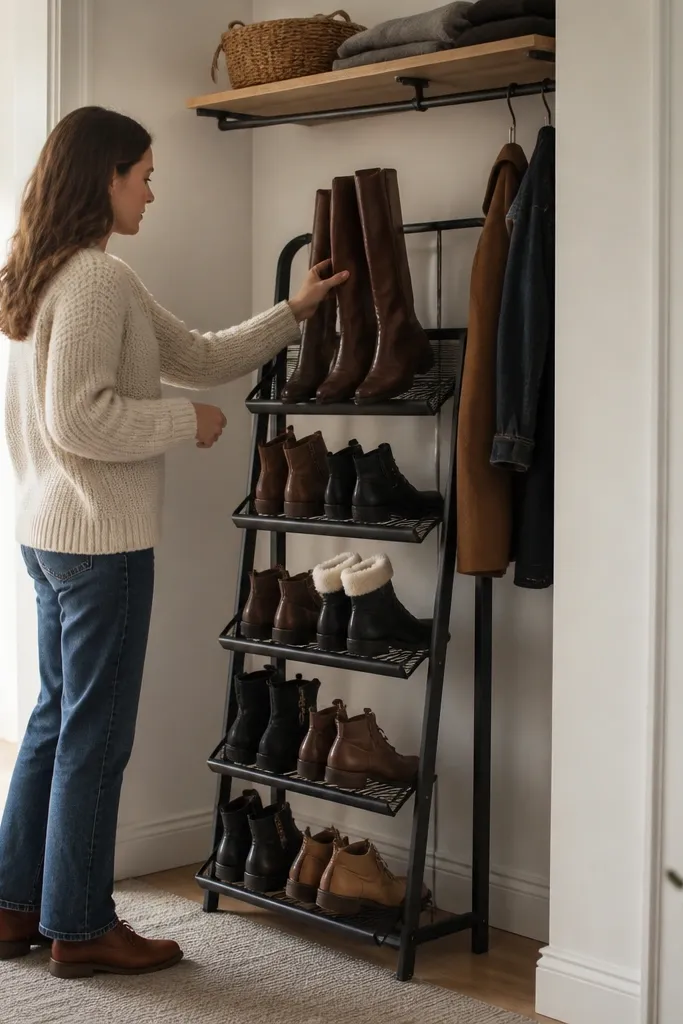
Measure your tallest boot height and widest toe area, then choose a rack with adjustable levels or removable dividers. Place the rack on a non-slip mat so it doesn’t slide when you grab a pair. Set separators so tall boots don’t press into sneakers. After loading, test by pulling one shoe at a time — if other pairs shift, the spacing is wrong.
A slanted rack makes shoes look orderly because they rest at an angle instead of leaning or falling over. The mistake is buying a rack with fixed spacing that can’t handle tall boots, so one boot knocks the rest out. Adjustable levels matter if you own both sneakers and boots. This is a strong solution for entries that have a dedicated shoe spot but not enough wall space. It’s also renter-friendly because many slanted racks are freestanding and don’t need mounting.
Skip thisFilling every slot — slanted racks need breathing room or they tip into a pile.
Editor's noteUse rubber bands or Velcro straps to keep boot shafts from flopping onto the next pair.



