
1. Box Frame with 1.5 cm Shadow Gap
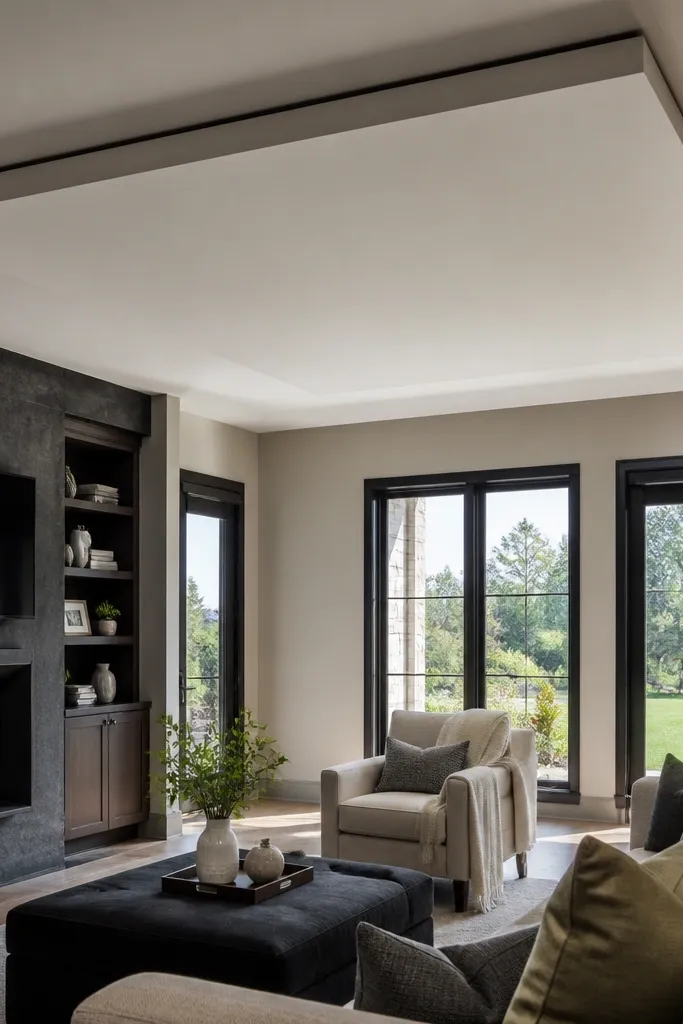
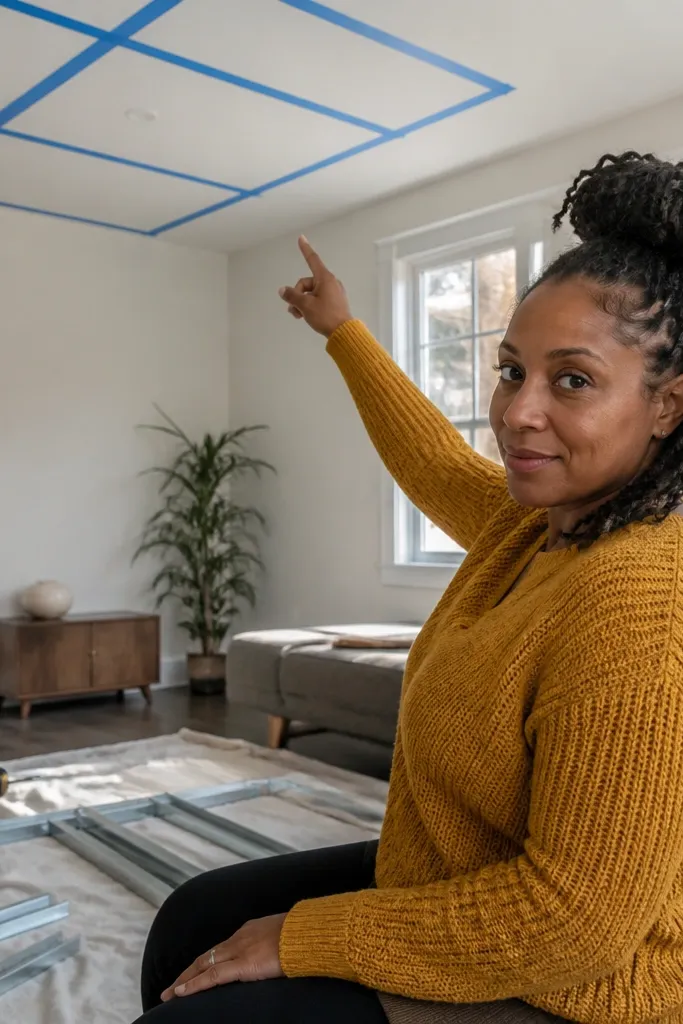
Step 1. Mark a level line 7-10 cm down from the lowest ceiling point and fix a wall ledger to studs using proper anchors. Step 2. Build a rectangle frame from metal CD/UD tracks or similar shallow steel channel, then add vertical hangers only where needed for alignment. Step 3. Leave a 1-2 cm recess behind the outer trim so you get a shadow gap; then install thin boards or PVC panels on the recessed face. Step 4. Prime, caulk the seams, and paint the whole frame matte white with the same sheen.
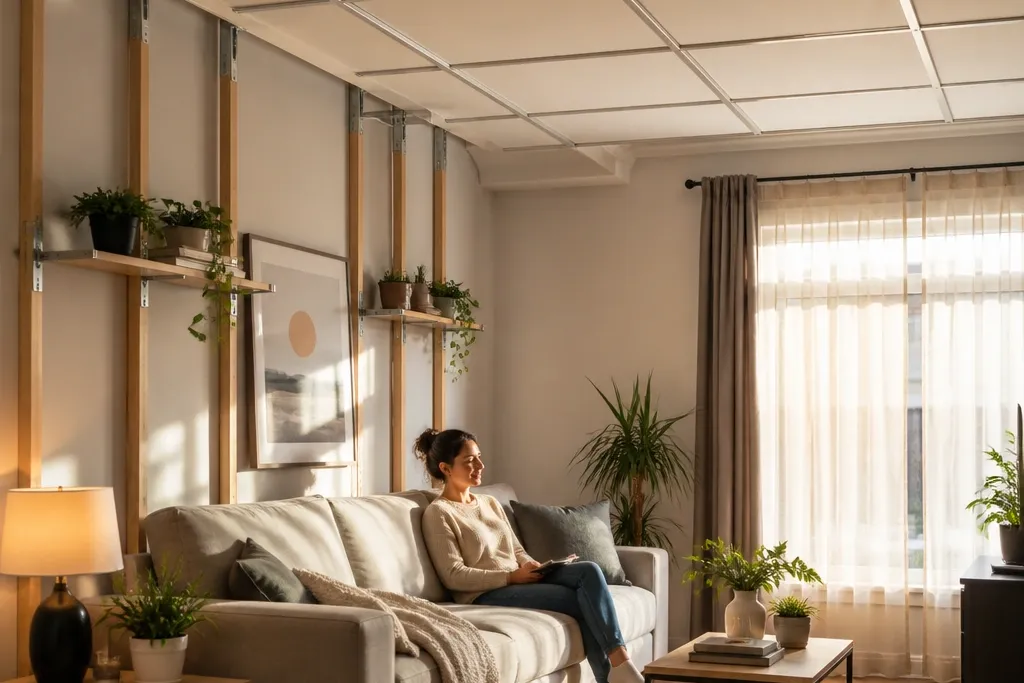
This is the cleanest renter-friendly False Ceiling Living Room look because it reads like a simple architectural molding, not a full renovation. The “box” is a perimeter rectangle around the room center, with a deliberate dark line created by a 1-2 cm shadow gap. That gap hides small ceiling imperfections and makes the frame look crisp even when your room isn’t perfectly level. It works best in living rooms with a ceiling fan or existing light — you can frame the area without covering everything. Skill level is beginner-friendly: you’re building one controlled shape and repeating it around the perimeter.
Skip thisDon’t fill the shadow gap with caulk; it kills the dark line that makes the design look expensive.
Editor's noteUse a laser level for the perimeter line — a few millimeters off looks obvious with straight box lines.
2. Cove Perimeter with Soft LED Wash
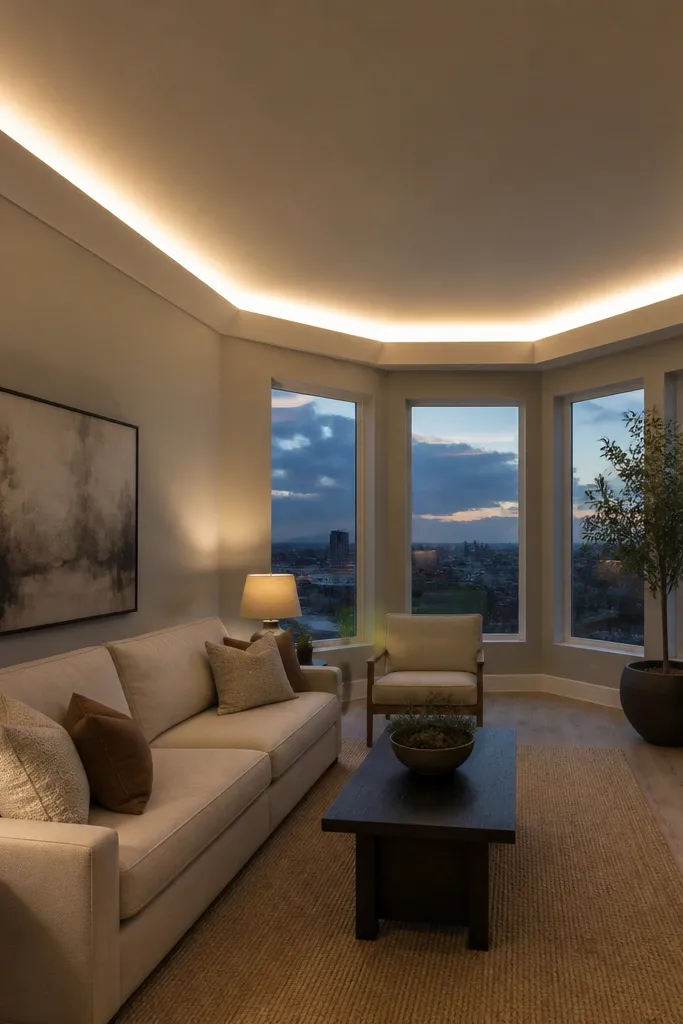
A cove perimeter is one of the most forgiving false ceiling designs because light hides uneven edges. You create a rounded or angled recess around the room, then place LED strips so the glow travels across the ceiling rather than firing straight at your eyes. In a renter-friendly False Ceiling Living Room, this is a win because you can keep the structure shallow and still get that “hotel room” feel. It also makes small living rooms feel taller since the light is spread upward. The look is photogenic because the glow line is smooth and continuous.
Step 1. Choose a cove depth of 6-9 cm for under-9-ft ceilings and draw your perimeter using a flexible batten or string line. Step 2. Install a wall ledger and build curved formwork using pre-scored MDF strips or bendable PVC trim; keep the curve tight and consistent. Step 3. Mount an aluminum LED channel inside the cove and use a diffuser; then wire to a plug-in driver or existing junction box if permitted. Step 4. Close the cove with thin panels, then paint the recess and the ceiling above it the same white for a seamless glow.
Angle the LED channel slightly toward the ceiling so the light blooms, not so it points directly downward.
Avoid bare LED strips — visible diode points make the whole project look DIY.
3. Two-Level Center Medallion with Recessed Lighting
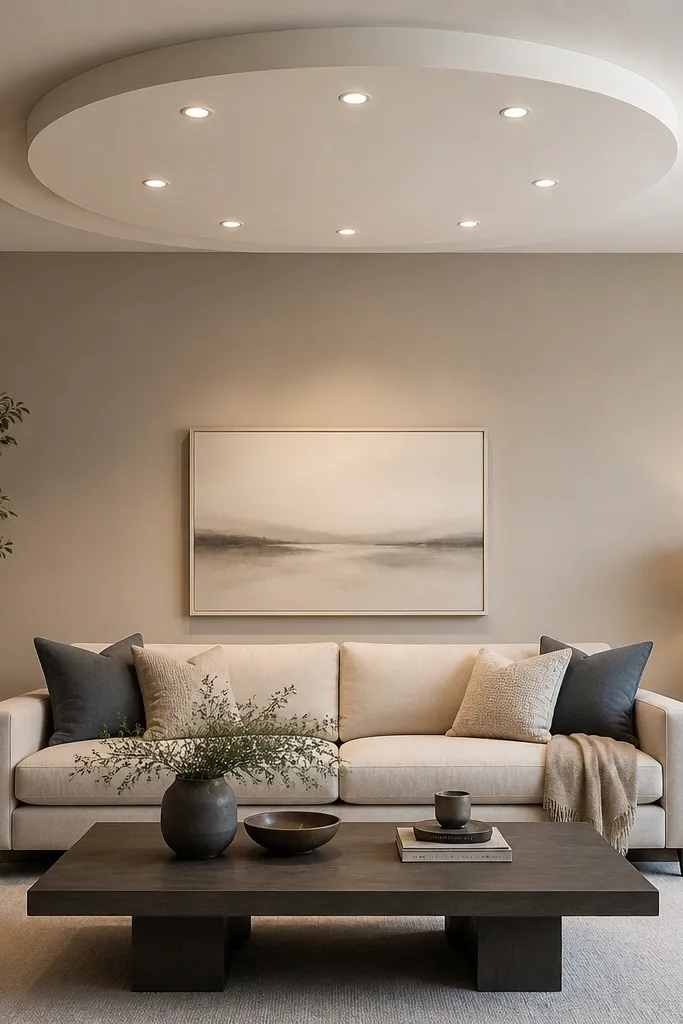
If you want something that looks custom without doing a full grid ceiling, build a center medallion with two levels. The outer ring sits lower than the ceiling, and the inner circle sits higher, so the room gets a defined “focus” area above your sofa. This design photographs well because it creates strong highlights and shadows around the circle. It’s especially good for living rooms where you have a central light or want to replace it later. Time is moderate: you’re cutting curves carefully, but the surface area is smaller than a full ceiling.
Step 1. Measure your living room center and mark a circle radius that leaves at least 60 cm clearance from walls for visual balance. Step 2. Build the outer ring frame first using metal tracks and curved ribs every 20-25 cm; screw the frame to a wall ledger. Step 3. Add the inner circle frame 4-7 cm above the outer level, then install boards on both levels. Step 4. Cut a recess channel for LED strip or add a ring light diffuser; paint all faces matte white and caulk corners.
Use a string-and-pencil compass for the circle marking; it’s faster than measuring every point and stays accurate.
Don’t make the inner and outer levels the same height — the 3D shadow effect disappears.
4. Asymmetric Wall-to-Center Beam Frame
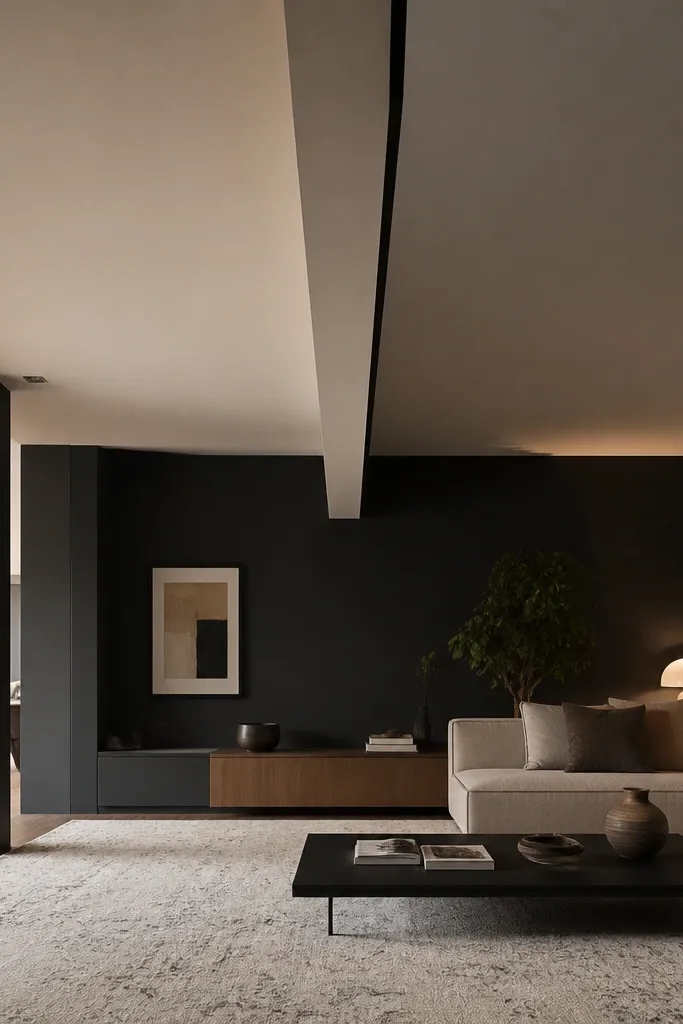
Step 1. Pick a beam line that aligns with your sofa back or TV wall; mark the beam centerline and determine a consistent drop of 7-12 cm. Step 2. Install a wall ledger along the beam start point and build the beam frame using metal channel, adding cross supports every 40-50 cm. Step 3. Add a 1-2 cm shadow gap by installing trim so the panel floats away from the outer edge. Step 4. Install an LED strip in an aluminum channel inside the beam and diffuse it; paint with matte white and match the trim color.
This is for people who are bored of square frames. An asymmetric beam — one main “spine” running from near a wall toward the center — makes a renter-friendly False Ceiling Living Room look modern and intentional. The photogenic part is the crisp shadow line along the beam edge, which gives a floating effect. It works great over a sectional sofa because the beam visually guides the eye without needing a full ceiling wrap. Skill level is medium: layout matters, but you only build one long run instead of multiple boxes.
Skip thisDon’t center it by guessing; measure from two walls so the diagonal feels deliberate.
Editor's noteKeep the beam width to 18-25 cm for a clean look — too wide reads heavy in most apartments.
5. Grid Panels with Hidden Perimeter Track
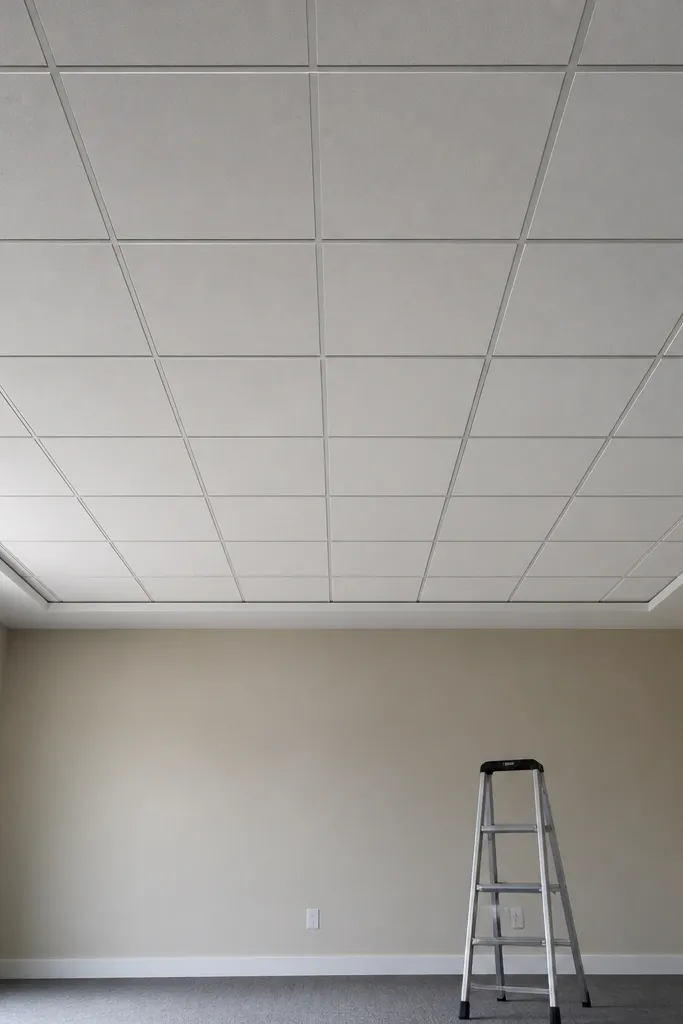
A panel grid is the best “designer” look when you want structure but don’t want a complex shape. You set up a simple square grid, then finish each cell with lightweight boards or ceiling tiles. The hidden perimeter track creates a neat border line that makes the grid look custom-made. This works well in renters' living rooms because you can build a modular frame that comes down in sections. It also hides small ceiling defects since the grid levels everything visually.
Step 1. Decide on a grid size that matches your room — 40 cm or 50 cm squares look balanced; mark a perimeter border 6-8 cm down. Step 2. Install wall ledger tracks into studs and build cross rails with hangers at 60 cm spacing. Step 3. Drop in the panel boards or tiles, keeping a 3-5 mm expansion gap between pieces. Step 4. Add trim along the perimeter with a 1 cm shadow gap, then paint the grid faces and trim matte white.
Pre-sand panel edges and use a consistent caulk color so the grid lines stay crisp after paint.
Don’t overshoot the grid size — giant squares make a small living room feel unfinished.
6. Floating Slats with Warm Wood Trim
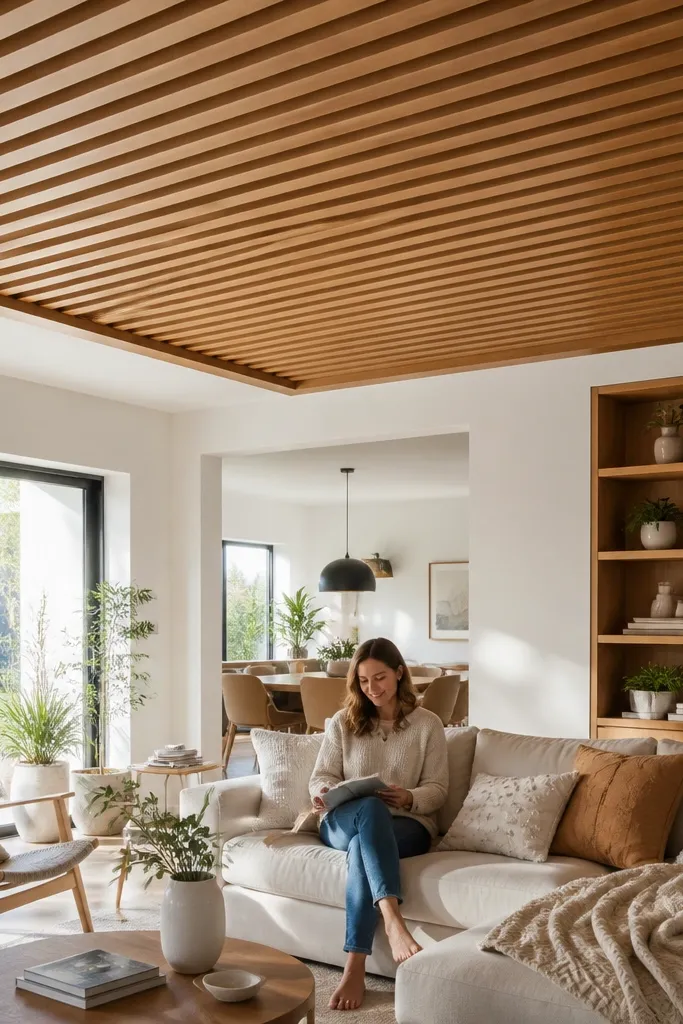
Step 1. Build a shallow ceiling grid frame using metal tracks or timber battens fixed to a wall ledger with hangers every 60 cm. Step 2. Install thin slats (about 18-25 mm wide, 8-12 mm thick) spaced 20-30 mm apart for visible shadow lines. Step 3. Use a wood-tone paint or veneer on the slats only; keep the ceiling base white so the slats pop. Step 4. Add a small LED strip at one end of the slat run for a warm wash — use an aluminum channel and diffuser.
Slat ceilings look premium because they create texture and controlled shadows without needing a full drywall finish. For a renter-friendly False Ceiling Living Room, you build a lightweight grid and attach narrow strips, leaving a consistent air gap above so the strips look “floating.” The warm wood trim (oak or walnut tone) makes the ceiling feel less sterile than all-white. It also photographs well from sofa height because you see the lines and depth. Skill level is medium because spacing has to be consistent, but materials are straightforward.
Skip thisAvoid wet glue or thick adhesive — it warps slats and shows bumps after paint.
Editor's noteUse spacers (thin strips of cardboard or plastic shims) while fastening slats so spacing stays identical across the room.
7. Recessed Shelf-Look Frame for TV Wall Accent
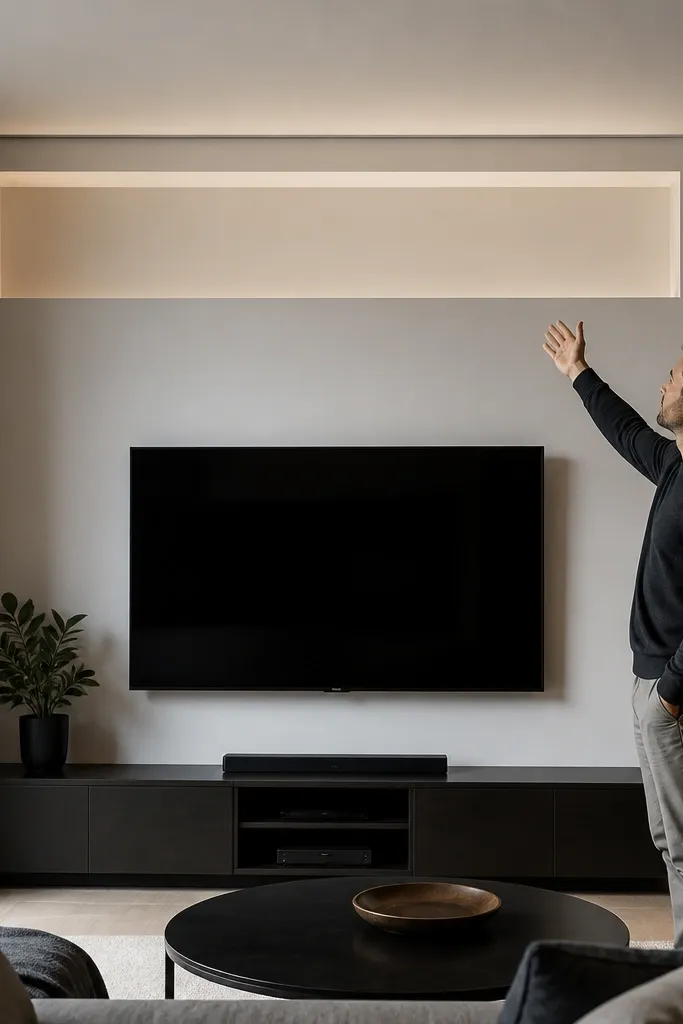
Step 1. Find the TV wall centerline and mark a rectangle that’s about 20-30 cm wider than your TV on each side. Step 2. Drop the recess 6-8 cm and install a wall ledger and frame only within that rectangle area. Step 3. Close the recess with boards, leaving a 1 cm shadow gap at the perimeter trim. Step 4. Install LED strip along the inside edge of the recess with a diffuser so the light washes the wall and ceiling edge.
This design is a smart trick for living rooms where the TV wall needs a “wow” moment but you can’t do a full false ceiling. You build a shallow recessed frame above the TV area, like a shelf under the ceiling, with a shadow gap around the recess. The look is modern and clean, and it photographs well because the light outlines the rectangle. It’s also practical: you keep the rest of the ceiling untouched, which helps with renter-friendly removal. Skill level is beginner to medium since you’re building one rectangle, not multiple levels.
Skip thisDon’t run the LED strip bare — you’ll see dots right above the TV.
Editor's notePaint the inside recess a slightly warmer white (same brand, different tone) so the LED glow looks richer without turning yellow.
8. Perimeter Crown with Beveled Trim Line
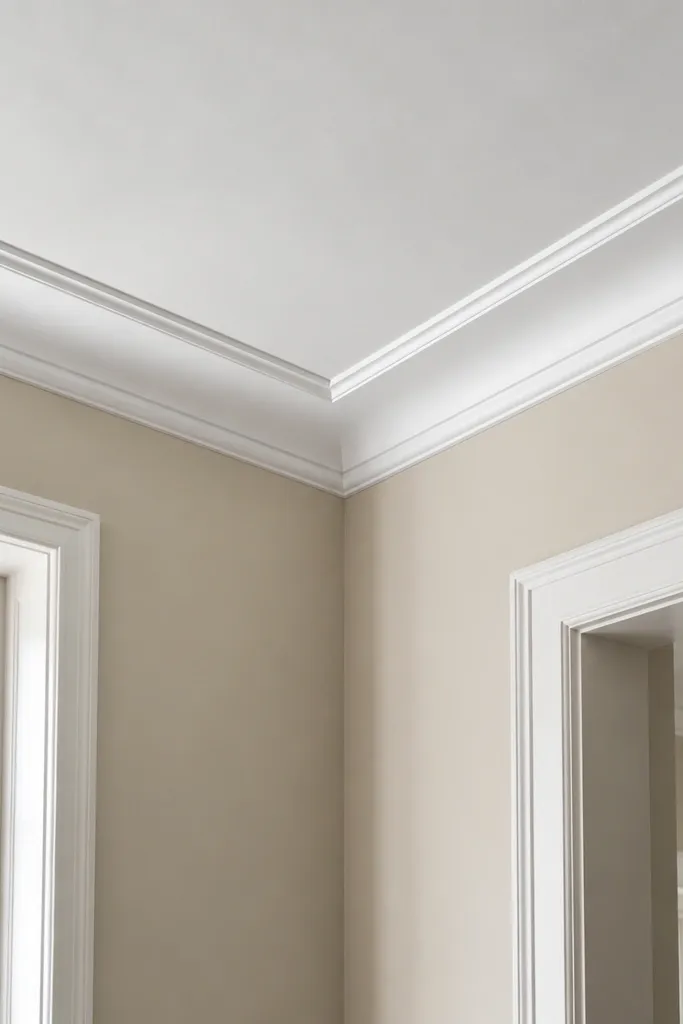
Step 1. Install a shallow perimeter ledger 5-7 cm down into studs, then build a simple ring frame. Step 2. Attach a flat board or PVC panel on the lowered face and use beveled trim along the outer edge, leaving a 5-10 mm shadow line. Step 3. Prime and paint the whole perimeter in matte white, then lightly sand the trim edges for crisp paint lines. Step 4. If you add lighting, place a small LED strip inside the shadow channel and diffuse it.
If you want a ceiling design that looks like molding, not like a construction project, use a crown-style perimeter with a beveled trim line. The key is the bevel: it creates a natural highlight and makes the ceiling edge look sharper than flat drywall. In a renter-friendly False Ceiling Living Room, this is also low risk because you can do it as a perimeter frame only. It’s a good choice if your living room has lots of corners or you don’t want to center anything. The result is subtle but very photogenic because it frames the room.
Skip thisAvoid thick caulk beads on the bevel; they smear and dull the edge highlight.
Editor's noteUse painter’s tape to mask the bevel edges so the caulk stays off the highlight line.
9. Round Corner Quarter-Cove (No Full Curve)
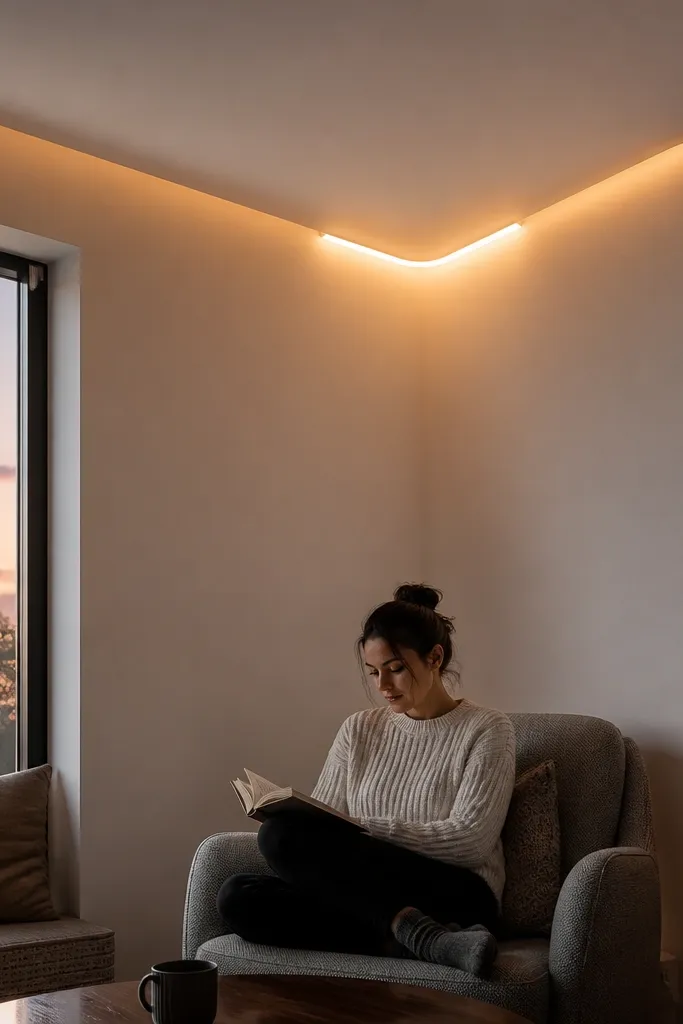
Step 1. Mark 4 corner zones and decide on a radius of 20-35 cm based on your room size. Step 2. Build a frame only along those corner arcs with flexible strips or segmented boards; keep the drop at 6-8 cm. Step 3. Add a 1 cm shadow gap at the outer edge, then install an LED strip in a channel along the arc. Step 4. Paint the ceiling and cove with matte white; use caulk sparingly at seams so the glow line stays clean.
Not every room can handle full curves, especially if you have doorways, soffits, or odd corners. This quarter-cove approach uses small rounded corners where the ceiling meets the wall, creating a gentle softness without committing to a full perimeter cove. It looks designer because the glow line is broken into arcs that still read continuous in photos. It’s also renter-friendly because you can keep the build small and remove it without disturbing the whole ceiling. Skill level is medium: you’re cutting and fitting corner pieces accurately.
Skip thisDon’t force one big arc panel — segmented arcs look better than a stretched curve.
Editor's noteCut corner pieces slightly long, then sand to fit. The last 2-3 mm is where a DIY look is won or lost.
10. Geometric Box Corners with LED Edge Lines
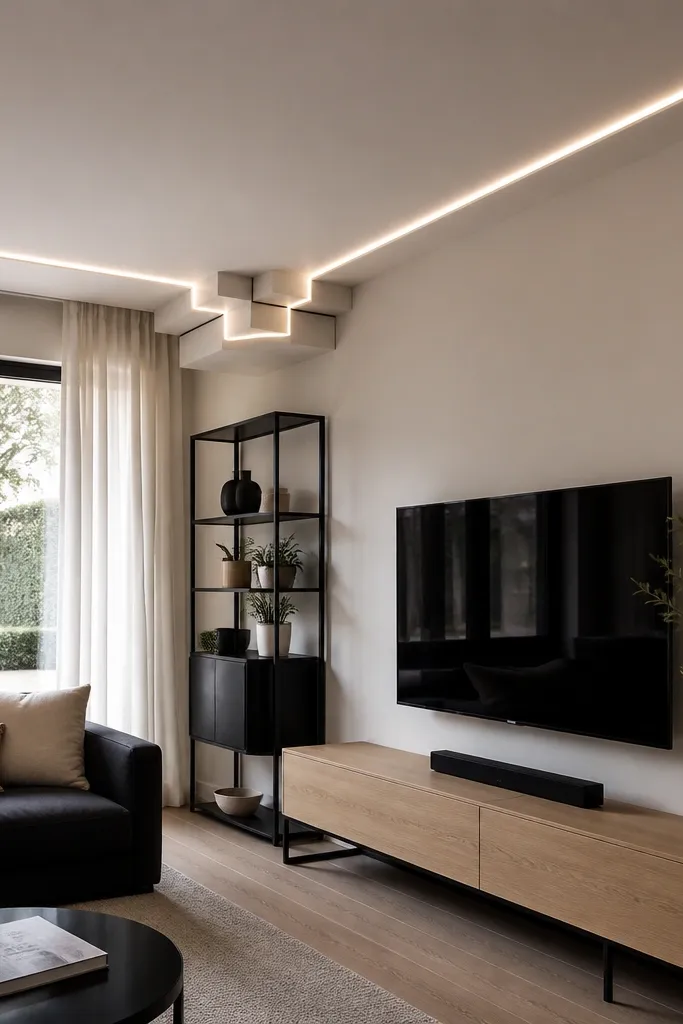
Step 1. Choose a corner drop of 8-10 cm and measure the same inset distance from each wall so the steps align. Step 2. Install wall ledger tracks and build small L-shaped frames for each corner. Step 3. Add a 1-2 cm shadow gap along the outer step edges, then close with thin boards. Step 4. Run LED strips in aluminum channels along the inner edges, use diffusers, and route wiring to a single driver location.
This design adds drama without covering the whole ceiling. You build small stepped boxes in the corners and connect them visually with slim LED edge lines. The result is a geometric framing effect that makes a plain renter ceiling look designed. It’s perfect for modern living rooms with black accents, light wood, or neutral furniture because the lines look sharp. Skill level is medium: layout and symmetry matter, but the build is still small enough to manage. The photogenic part is the corner glow and the stepped depth.
Skip thisAvoid mismatched corner dimensions; it reads immediately as sloppy in photos.
Editor's noteTest LED brightness before final paint — pick a level that looks soft, not harsh, through the diffuser.
11. Suspended Ribbon Ceiling Over Seating
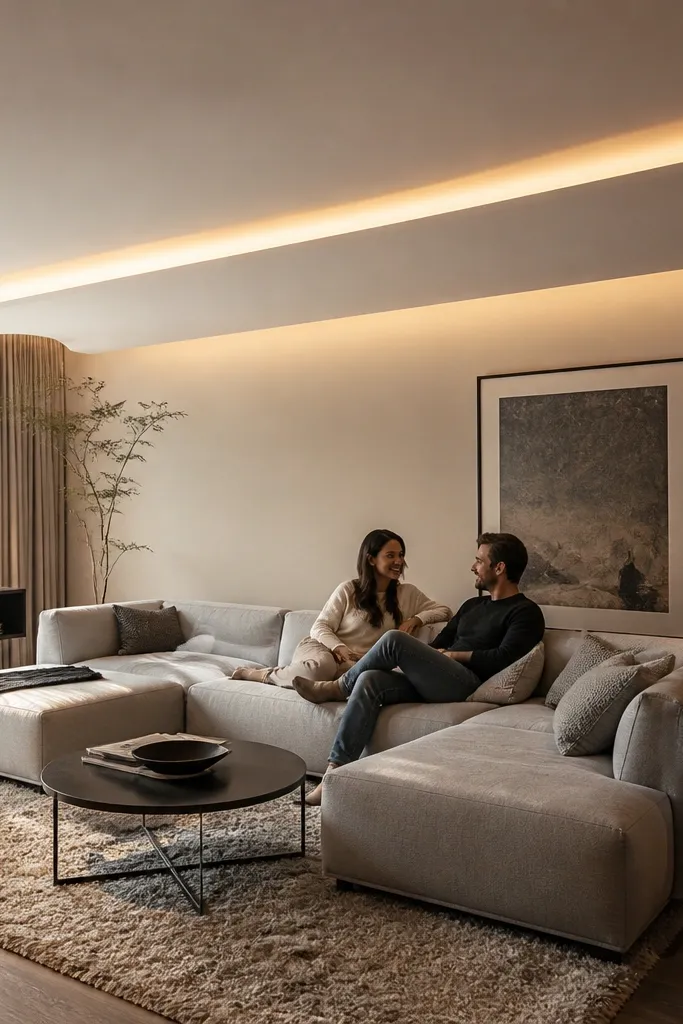
Step 1. Measure the seating area width and set the ribbon to run 20-40 cm longer than the sofa footprint. Step 2. Install wall ledger tracks along two parallel lines and build the ribbon frame using metal channel with hangers every 50-60 cm. Step 3. Close the underside with lightweight boards, then install trim that leaves a 1-2 cm shadow gap on both edges. Step 4. Add LED strip in a channel on one side of the ribbon and paint the underside matte white.
A ribbon ceiling is a sleek way to create a false ceiling look with less material and less clutter. You lower one long strip above your seating area, then keep the rest of the ceiling alone. The strip can be flat or slightly tapered, and a shadow gap makes it look suspended. This is renter-friendly because you anchor into studs and keep the footprint limited. It photographs great because the ribbon creates a strong horizontal line across the room. Skill level is beginner to medium since you’re building one controlled shape.
Skip thisDon’t mount the ribbon too low — keep the drop under 12 cm to prevent a cramped look.
Editor's noteUse a slightly tapered underside (1-2 cm narrower at the far end) for a subtle designer feel in photos.
12. Starburst Panel with Central Light Ring
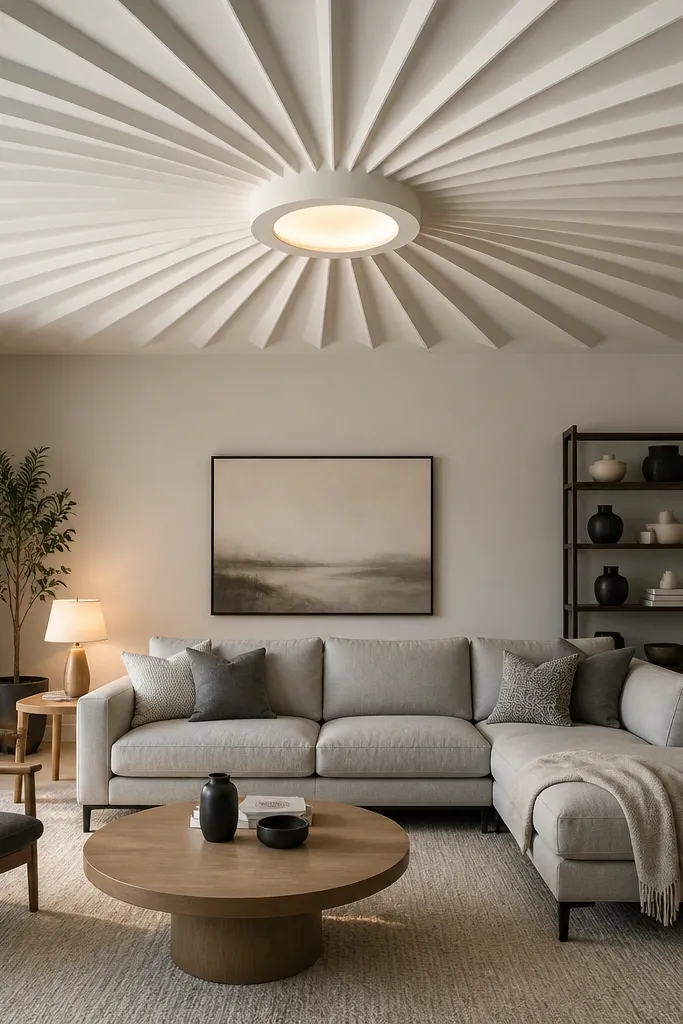
Step 1. Decide on a central circle diameter that covers the old fixture — measure and add 10-15 cm clearance. Step 2. Build a shallow ring frame and then attach angled slats or triangular panels radiating outward; use consistent angles so the starburst looks even. Step 3. Leave a 1-2 cm shadow gap between the ring and the radiating pieces so the pattern pops. Step 4. Add a diffused LED ring or small downlight insert and paint everything matte white or a soft warm white.
This is the “statement ceiling” option that still stays budget-friendly. You build a central sunburst or starburst panel around a light ring, then keep the surrounding ceiling flat. The radiating pattern creates movement in photos and makes the room feel designed even if your furniture is simple. For a renter-friendly False Ceiling Living Room, you can build this as a removable center panel frame that screws into a small perimeter ledger. Skill level is medium because you’re cutting angled pieces, but the surface area is small. It’s also a great way to hide an awkward existing light fixture.
Skip thisDon’t skip the shadow gap — without it, the starburst looks like flat wallpaper.
Editor's noteMake a paper template for the triangle/slat angles first; it saves time and keeps the starburst symmetrical.
13. Lattice Frame Ceiling with Flat Tile Inserts
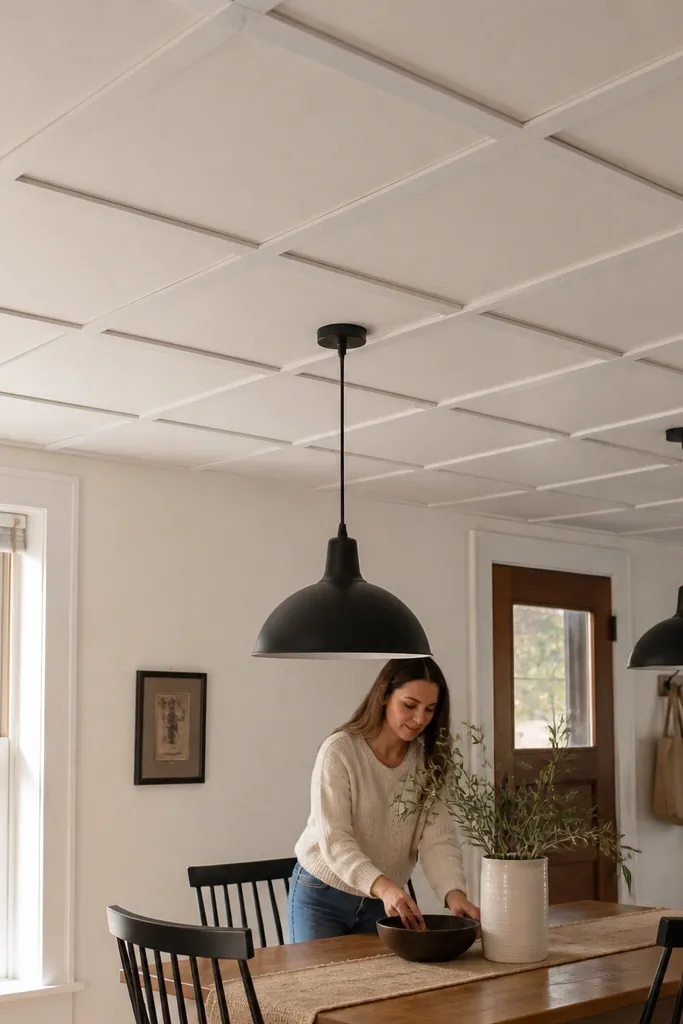
Lattice ceilings look fancy because the shadows do half the work. You create a grid frame with thin strips, then fill the inside with flat panels or tiles in the same color. The lattice lines catch light and hide minor frame irregularities. This is a good renter-friendly False Ceiling Living Room option because the frame can be modular and removed in sections. It also works in living rooms with a lot of wall art because the ceiling adds texture without adding clutter. Skill level is medium due to consistent spacing, but it’s still manageable with basic tools.
Step 1. Build a perimeter ledger 6-8 cm down and install a basic structural grid with hangers every 60 cm. Step 2. Add thin lattice strips (about 10-15 mm thick) across the grid, leaving 10-20 mm shadow channels between strips and panel edges. Step 3. Install lightweight panel inserts inside each lattice cell; keep them flat and consistent. Step 4. Paint frame and panels matte white; if you add lighting, place LED strips behind one side of the lattice for a soft edge glow.
Use identical offcuts as spacers to keep the shadow channels uniform across the room.
Avoid mixing panel thicknesses; uneven inserts show through as bumps after painting.
14. Floating Rectangle Panels with Corner LEDs
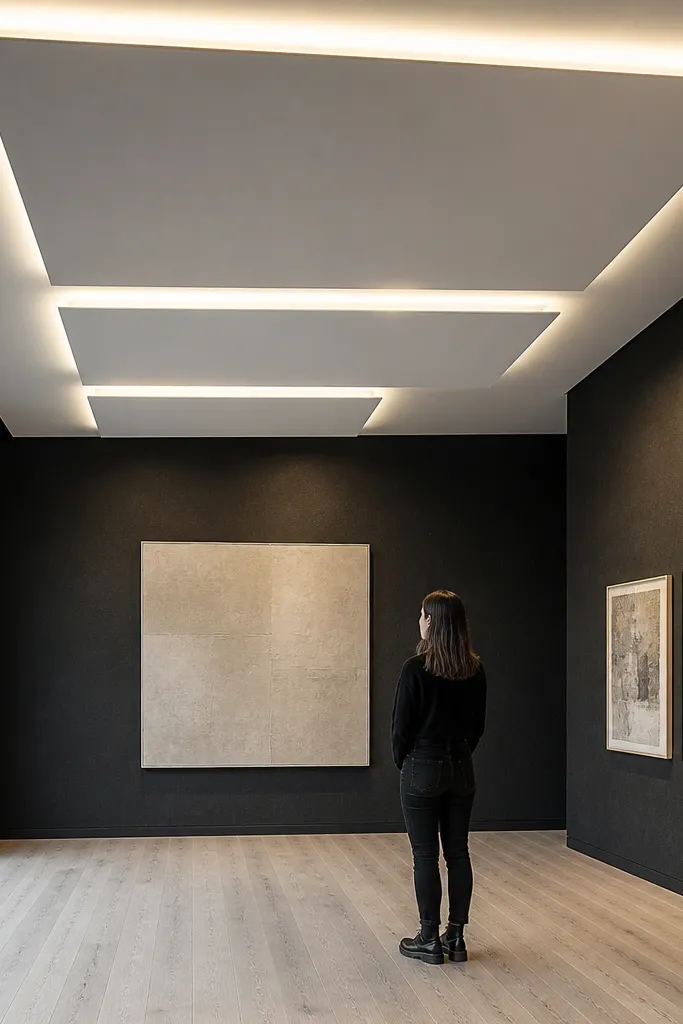
Step 1. Mark two rectangles on the ceiling area you want to design, keeping at least 30 cm clearance from walls for a balanced look. Step 2. Build a shallow frame around each rectangle, then install a recessed panel so there’s a 1-2 cm shadow gap around the edges. Step 3. Add small LED channels at the four corners of each recess with diffusers to avoid visible diode points. Step 4. Paint the recess and ceiling with matte white and touch up seams with caulk that dries paintable.
If you like clean modern lines, floating rectangle panels give you that “gallery ceiling” look. You make a few rectangular recesses, each separated from the surrounding surface by a shadow gap. Corner LEDs add a subtle halo that makes the rectangles look suspended. This works in renter-friendly False Ceiling Living Room because you can keep it to one or two rectangles and anchor only along the perimeter. It’s also great for living rooms where you want a design without covering the whole ceiling. Skill level is beginner to medium — rectangles are easier than circles.
Skip thisDon’t place LEDs in the exact corner edge — leave a few millimeters so the light spreads, not points.
Editor's noteTurn off the LEDs while painting and only install after paint cures — you’ll avoid dust sticking to the diffuser.
15. Monochrome Cove + Dark Trim Edge
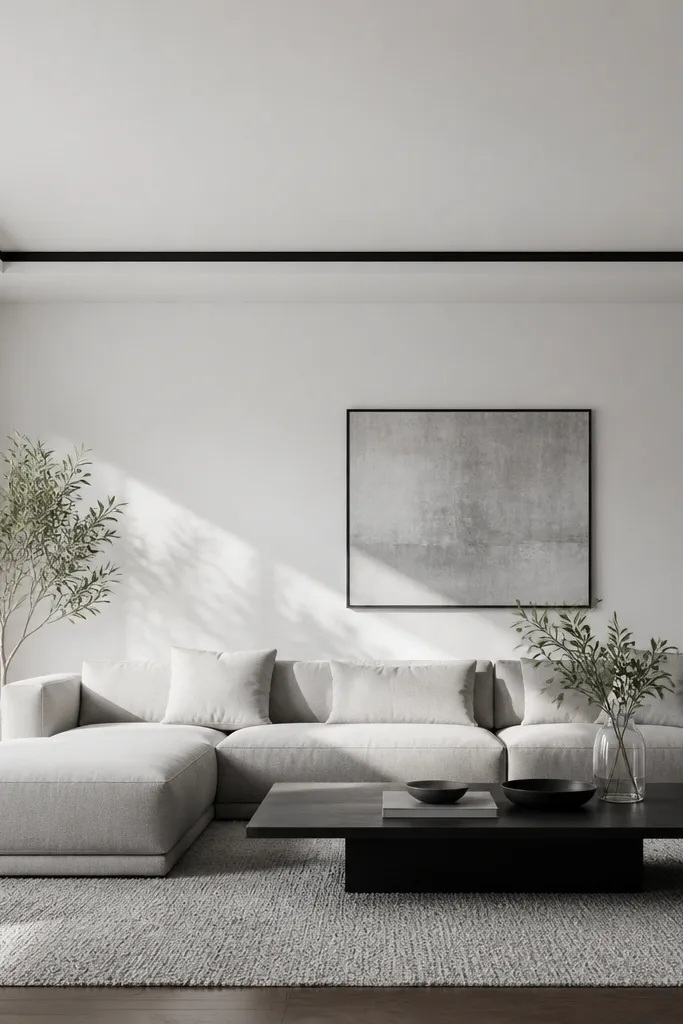
Step 1. Build a shallow perimeter cove at 6-8 cm with a wall ledger and a simple frame ring. Step 2. Leave a 1 cm shadow gap, then install a dark painted trim piece on the outer edge. Step 3. Add LED strip inside the cove using an aluminum channel with diffuser; keep wiring hidden in the frame. Step 4. Paint the ceiling and the cove recess matte white, then paint the trim with a semi-matte black for a crisp line.
This look is for renters who want drama without complicated shapes. You keep the main ceiling white, but you add a dark trim line around a shallow cove or recess. The contrast makes the shadow gap show up even in bright daytime light, and it photographs like a high-end renovation. It’s budget-friendly because you’re mostly painting and adding trim, not building multiple levels. Skill level is beginner: the construction is simple, the effect is bold. The key is using a clean, straight trim line so the design feels intentional.
Skip thisAvoid satin black on the trim if your ceiling is glossy — the sheen mismatch makes edges look messy.
Editor's noteUse foam or metal trim pieces that are paintable and rigid; flexible trim wobbles and ruins the contrast line.
16. Sofa-Centered Drop with Micro-Perimeter Lighting
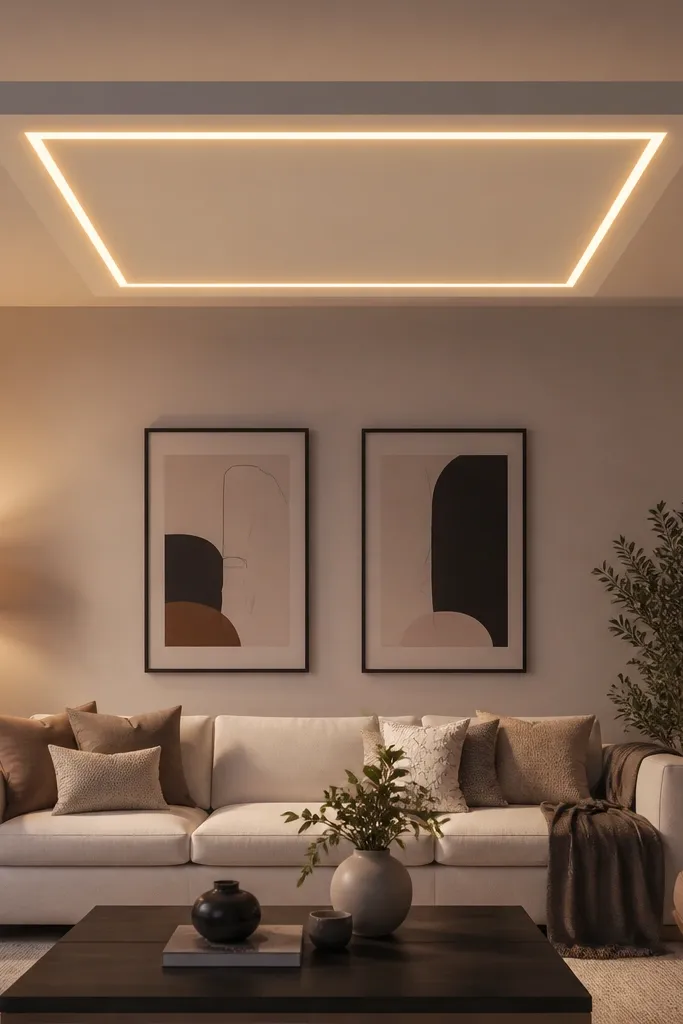
Step 1. Pick a drop size about 60-75 cm wide for small living rooms or 80-100 cm for larger ones, centered above the sofa. Step 2. Install a wall ledger around the perimeter of the drop area and build a shallow box frame 7-10 cm down. Step 3. Close the underside and install trim that creates a 1 cm shadow gap between the drop and the surrounding ceiling. Step 4. Place LED strip in an aluminum channel at the inside perimeter and diffuse it; paint everything matte white.
This is a compact false ceiling design that still looks like a full custom project. You create a small square or rectangle drop centered above the sofa, then run a micro LED perimeter around the inner recess. The light frames the opening and makes the space feel deeper. It’s a smart renter-friendly False Ceiling Living Room choice because you’re not fighting the whole room ceiling — just one focused area. Skill level is beginner-friendly if you keep the shape square. It’s also great for covering an ugly ceiling fixture without building a massive medallion.
Skip thisDon’t choose a drop size too large — if it’s wider than your sofa width, it looks heavy.
Editor's noteUse a single color LED driver (warm white around 2700K-3000K) so the light doesn’t look blue against warm walls.
17. Ceiling Coffered Squares with Narrow Beads
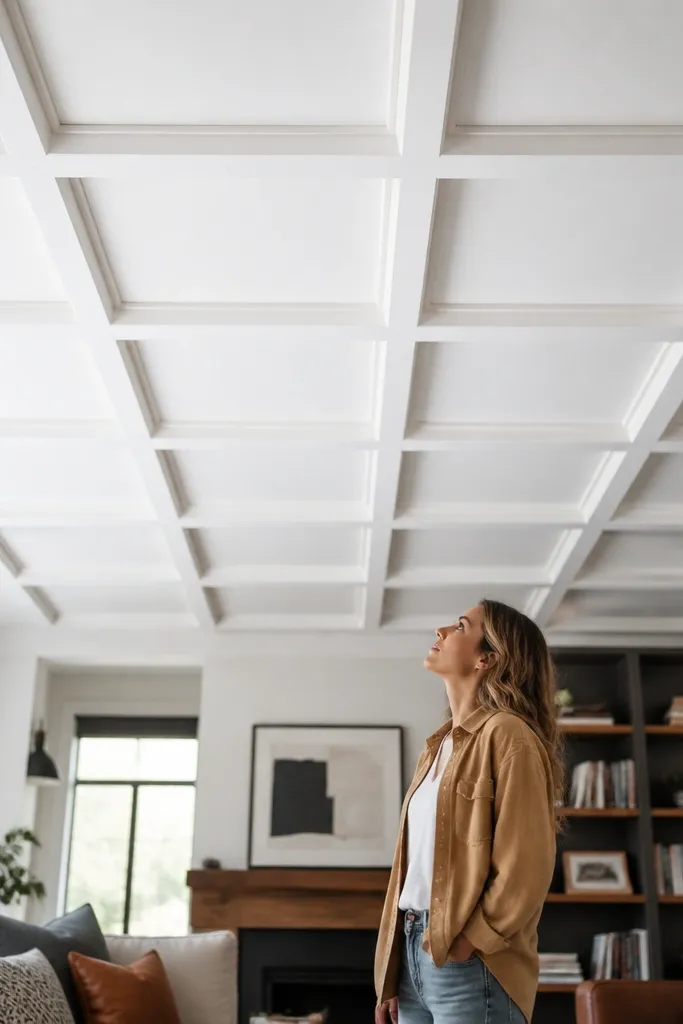
Coffered ceilings read as classic and expensive, but you can build a budget-friendly version with narrow bead strips and lightweight panels. You create a grid of small squares, each framed with thin borders, then keep the inside flat. The shadows between beads and panels are what make it look real. For a renter-friendly False Ceiling Living Room, this works because you can limit the coffer area to the main ceiling field and avoid touching the perimeter too much. It’s photogenic because the square pattern adds structure to otherwise plain living rooms. Skill level is medium because spacing and alignment matter.
Step 1. Mark a coffer field area and decide on square size — 35-45 cm squares look right for most apartments. Step 2. Build a flat base layer using lightweight boards on a shallow grid, then install narrow bead strips (10-15 mm wide) to form the borders. Step 3. Leave a 2-3 mm gap between beads and panels so light catches the separation line. Step 4. Paint with matte white; if you want lighting, add LED strip in channels along one side of the coffer field for subtle edge glow.
Dry-fit beads without glue for one square first — confirm the spacing looks even before committing to every line.
Don’t overfill gaps with thick filler; it makes lines disappear after paint.
18. Half-Moon Recessed Channel for Dining Corner
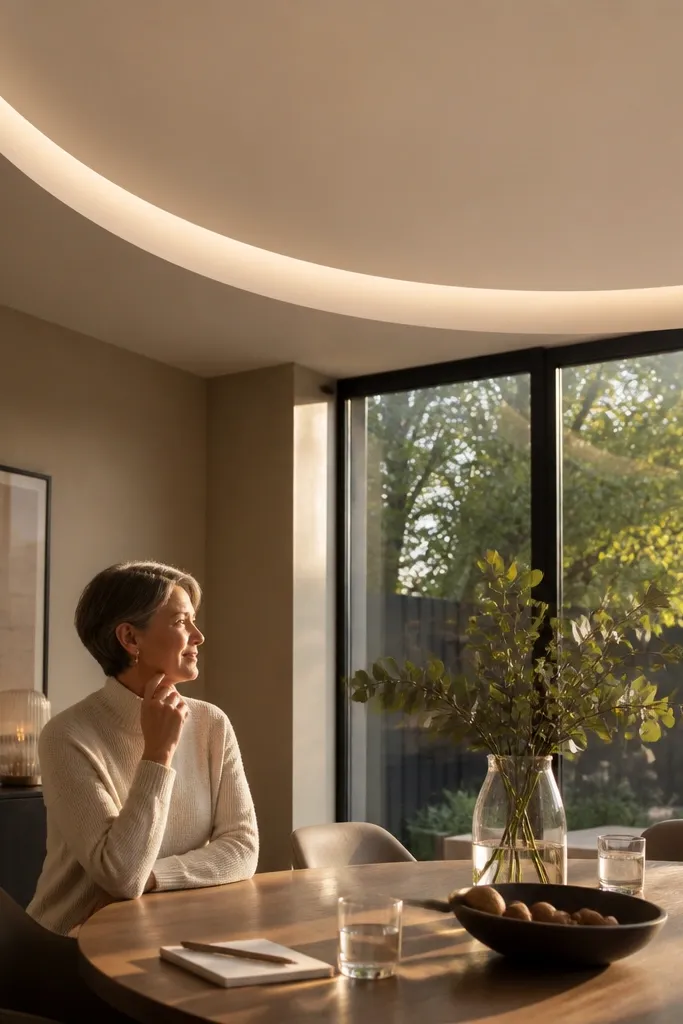
A half-moon recess is a clean way to add curve without building full circles. Place it above a dining corner or reading nook, and the arc draws attention to that zone. The recessed channel plus LED diffuser gives you a smooth glow that looks expensive in photos. This design is renter-friendly because you can limit the frame to a single curved recess area and anchor into studs along the run. Skill level is medium: you need accurate arc layout, but it’s still smaller than a full medallion.
Step 1. Mark the arc radius using a string compass and choose a recess drop of 6-9 cm. Step 2. Build a curved frame from metal tracks or segmented ribs every 15-20 cm, anchored to a wall ledger. Step 3. Install a recessed board face and add trim that leaves a 1 cm shadow gap around the perimeter. Step 4. Mount LED strip in an aluminum channel inside the recess with a diffuser; paint matte white and caulk only the board seams.
Use a flexible sanding block to fine-tune the arc edges before paint — it prevents a visible wobble in the glow line.
Avoid installing the LED channel too close to the board edge; heat and bright spots show through the diffuser.
19. Ceiling Triangle Accent Frames (Modern Minimal)
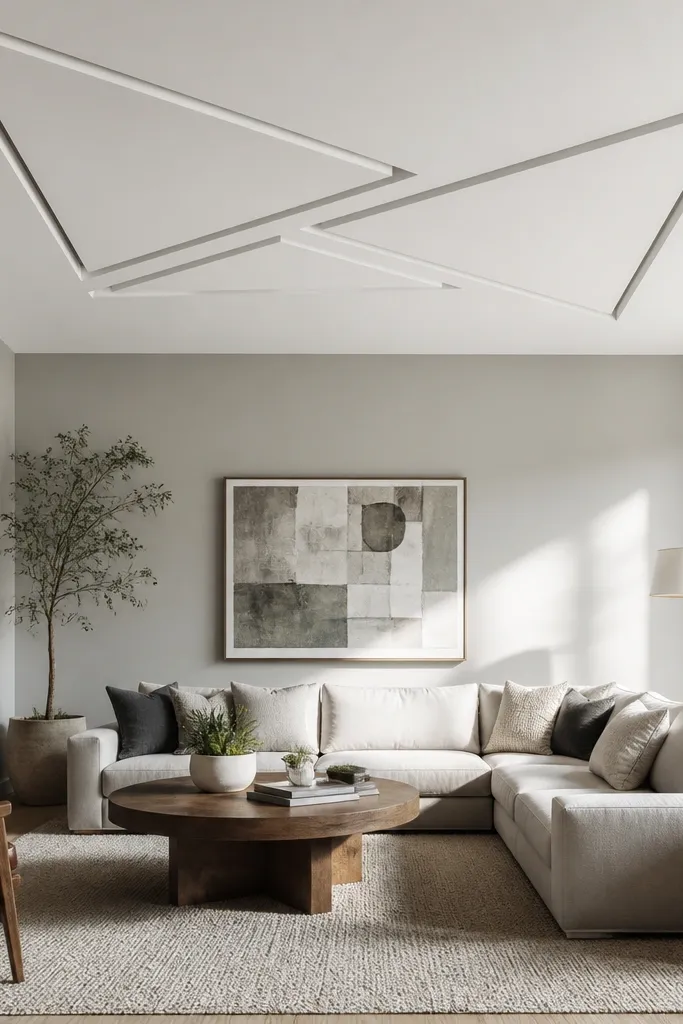
Triangles look modern and graphic, and they’re surprisingly budget-friendly because you’re building frames, not large panels. You place two or three triangle recess frames over a seating area, each separated by a shadow gap. The look works well when your walls are simple and you want the ceiling to add pattern without clutter. It’s renter-friendly because you can anchor only where the frames sit and keep the rest of the ceiling untouched. Skill level is medium: layout is the hardest part, not the construction. The design photographs well because it creates strong geometric highlights.
Step 1. Mark a triangle pattern on the ceiling field using a ruler and tape measure; keep triangles large enough to read from sofa height (at least 50 cm per side). Step 2. Build frames from thin metal track or timber battens, leaving a consistent 1-2 cm shadow gap around each recessed face. Step 3. Close the recess with lightweight boards and install LED strip strips inside one side of each triangle for edge glow. Step 4. Paint everything matte white and keep wires hidden inside the frame channels.
Use painter’s tape to outline the triangles and check from two angles before you build — perspective changes how geometry reads.
Don’t make triangles too small; tiny shapes look like random patches instead of a designed pattern.
20. Ceiling Step Waterfall with One LED Channel
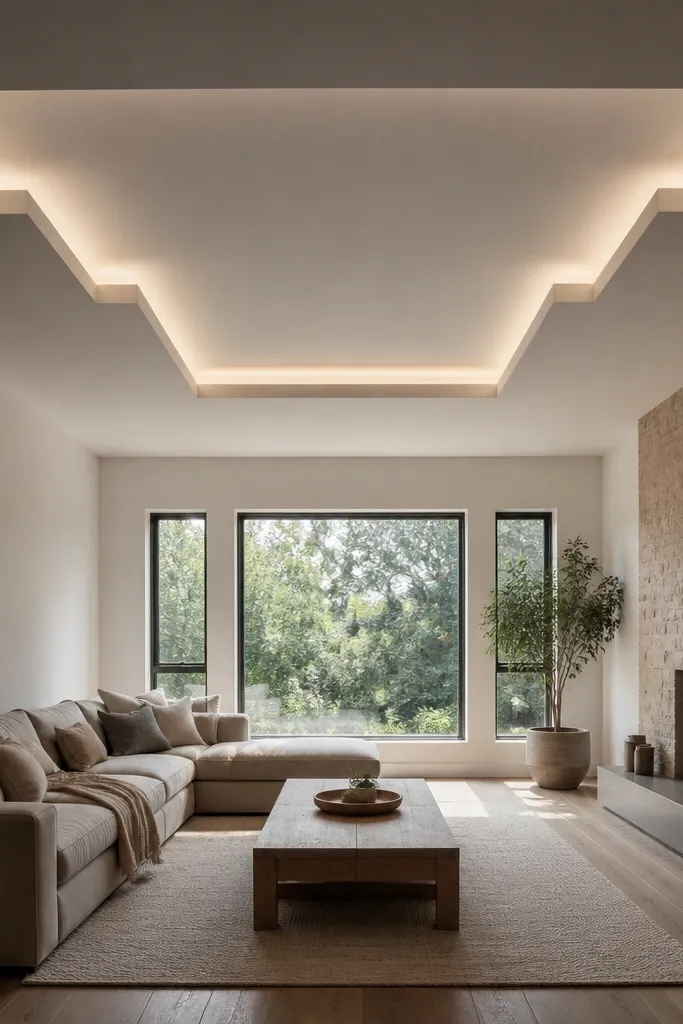
A step waterfall ceiling drop creates a flowing look without needing curved boards. You build one side slightly lower, then step down in two or three levels toward the center, and add one LED channel to light the steps. It’s visually striking and gives depth that reads well in wide-angle photos. For a renter-friendly False Ceiling Living Room, keep it to a single zone above the sofa or TV wall so the build stays manageable. Skill level is medium because you’re planning multiple drops, but the materials are the same as other false ceiling frames.
Step 1. Pick a total drop of 12-18 cm, then split into 3 steps (example: 5 cm, 6 cm, 7 cm) so each level is obvious. Step 2. Install wall ledger along the highest step line and build frame supports for each step, keeping the same spacing across the run. Step 3. Close each step with panels, leaving a 1 cm shadow gap between levels so the steps separate visually. Step 4. Install LED strip in an aluminum channel along the vertical face of one step, then diffuse and paint matte white.
Use straight aluminum angle trim at the step edges; it keeps corners crisp even if the room ceiling isn’t perfect.
Avoid stacking steps with no shadow gaps — the levels blend into a flat blob.



