
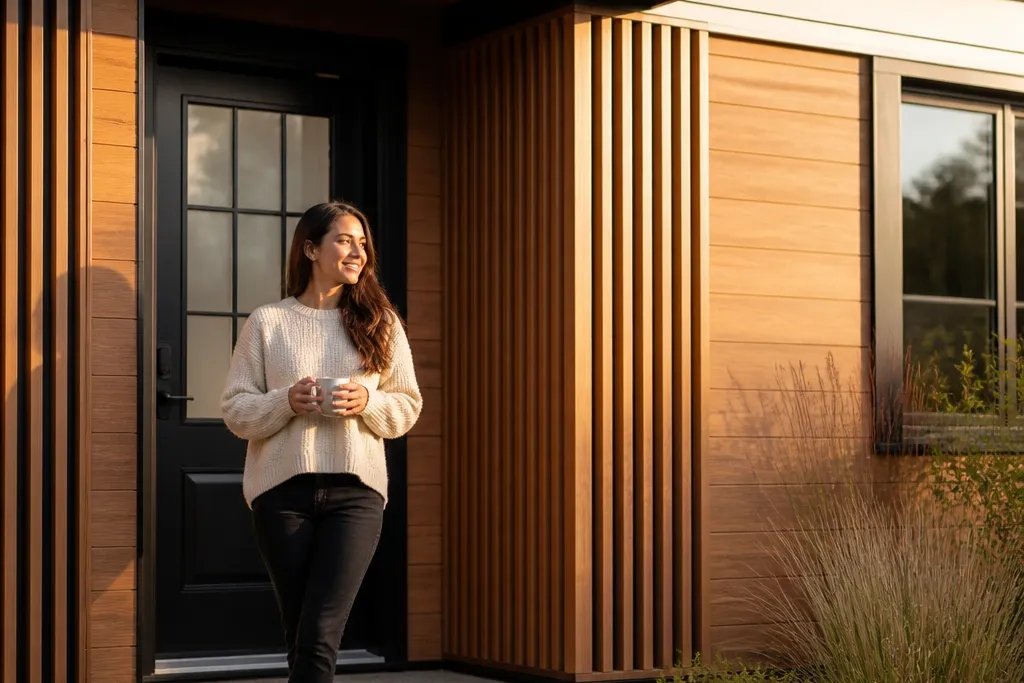
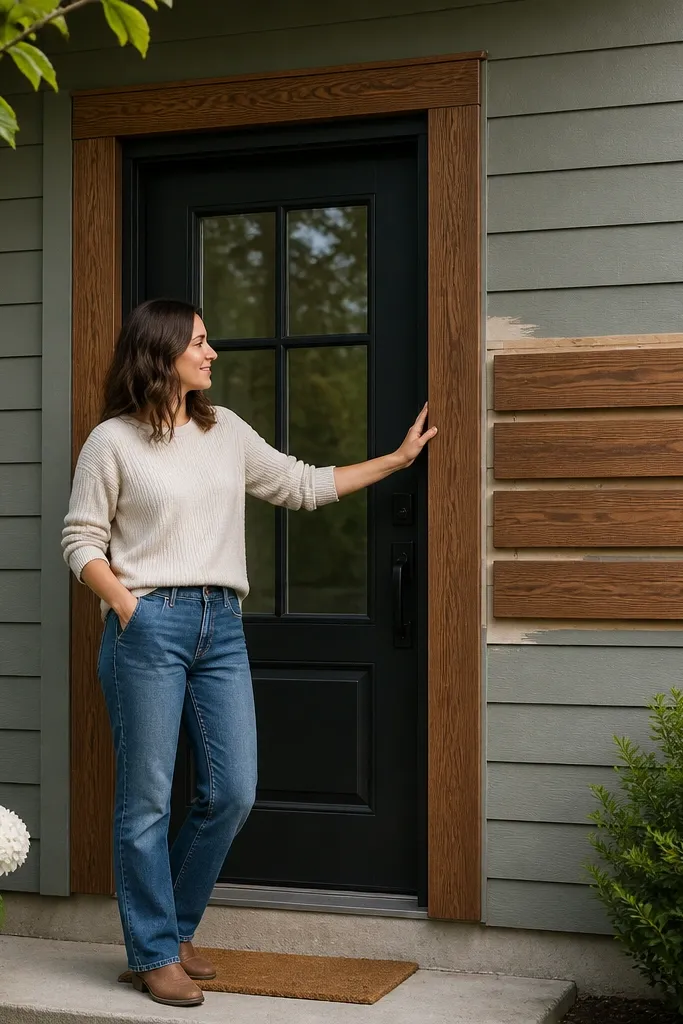
1. Adhesive Wood-Slat Vertical Screen on a Trim Frame
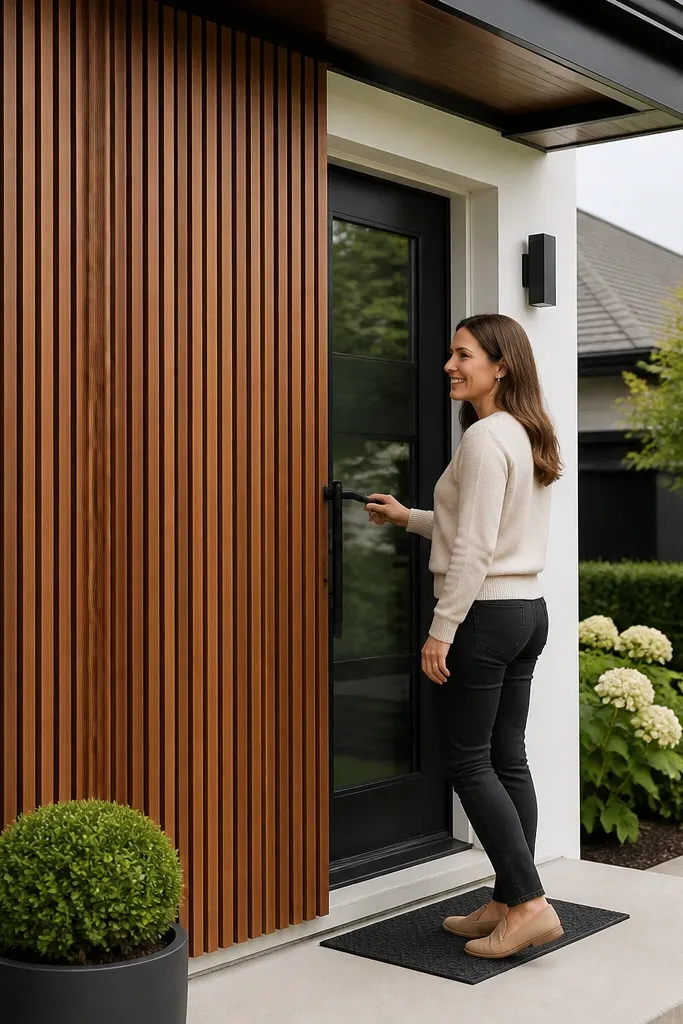
Measure the visible panel width and decide your spacing. Build a frame using 1x2 wood strips or rot-resistant composite strips, keeping the frame depth around 1 in. So it doesn’t look bulky; pre-paint the frame matte to match your slats. Use adhesive mounting strips rated for exterior use to attach the frame to trim, then press firmly for the full cure time. Cut 1/2 in. Slats (or 3/4 in. Wide slats) to the full height and leave a 3/4 in. Shadow gap by using spacers while you fasten. Finish by sanding edges lightly and applying an exterior matte topcoat that matches the slat color.
This is the renter-friendly modern facade trick: you create a clean vertical screen that looks like built-in wood cladding without attaching to the main siding. The secret is the frame. Mount a shallow, removable trim batten grid to existing trim or a primed door-side surface, then attach lightweight slats to that frame. The slats create strong vertical lines, and the gaps cast shadows that make the facade look like real architecture instead of stick-on decoration. It’s best for small facade zones like the entry wall, porch side, or the area beside a front door where you can control alignment.
Skip thisDon’t glue slats directly to textured siding; the surface bumps will telegraph as uneven gaps.
Editor's noteDo a dry layout with painter’s tape first; if the verticals drift by even 1/4 in., it reads sloppy in photos.
2. Removable Board-and-Batten Panels with Snap-in Rails
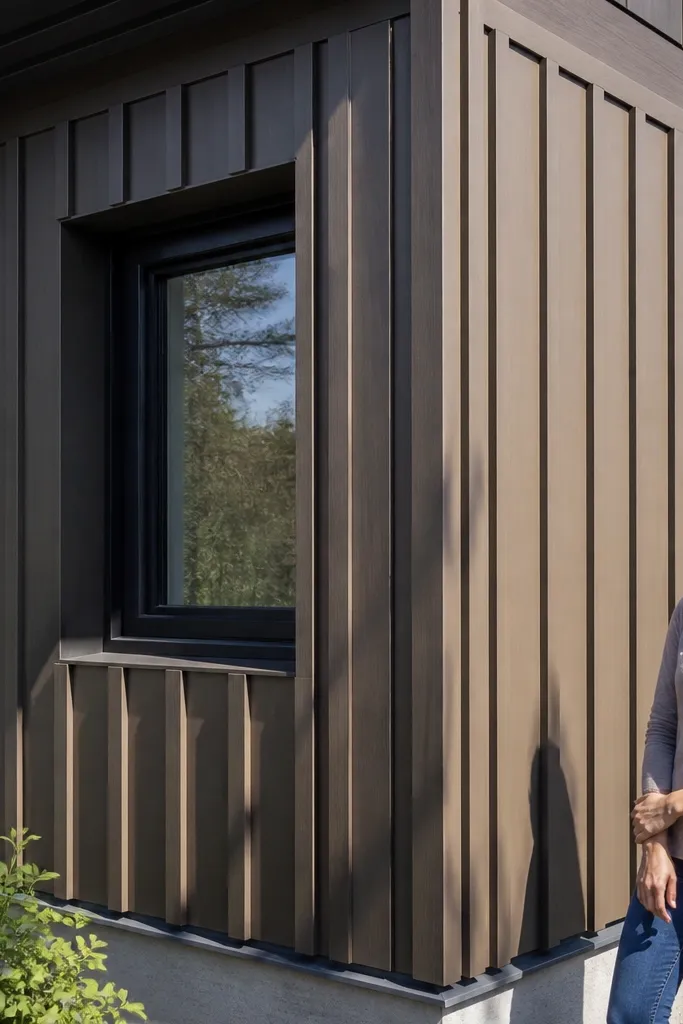
Start with a base layer panel: use exterior plywood or a rigid composite sheet cut to your grid size (for example, 48 in. Wide x 36 in. Tall). Paint the base matte warm gray. Mount two level horizontal rails to trim using removable hardware or exterior adhesive mounting strips; keep the rails spaced so your vertical battens can sit centered. Cut battens to the panel height and attach small snap tabs or use a thin kerf slot so the battens slide into the rails. Finish by sealing cut edges and adding a matte topcoat to all wood surfaces.
Board-and-batten is modern when you keep it geometric and controlled. This version is modular, so you can install it as removable facade panels that don’t require drilling into the main exterior. You build two horizontal rails that stay mounted, then snap vertical batten strips into place. That gives you the classic board-and-batten look but keeps your renter friendliness intact. Choose a warm gray base and darker battens for a high-contrast, editorial look. It works great for a single wall section or for covering a dated entry soffit area without committing to full siding replacement.
Skip thisDon’t mix batten widths; inconsistent widths make the facade read like DIY clutter instead of a planned grid.
Editor's noteKeep battens uniform width, then vary spacing instead of width if you want the look to stay modern.
3. Corner-to-Window Wood Frame Grid (No-Siding Drilling)
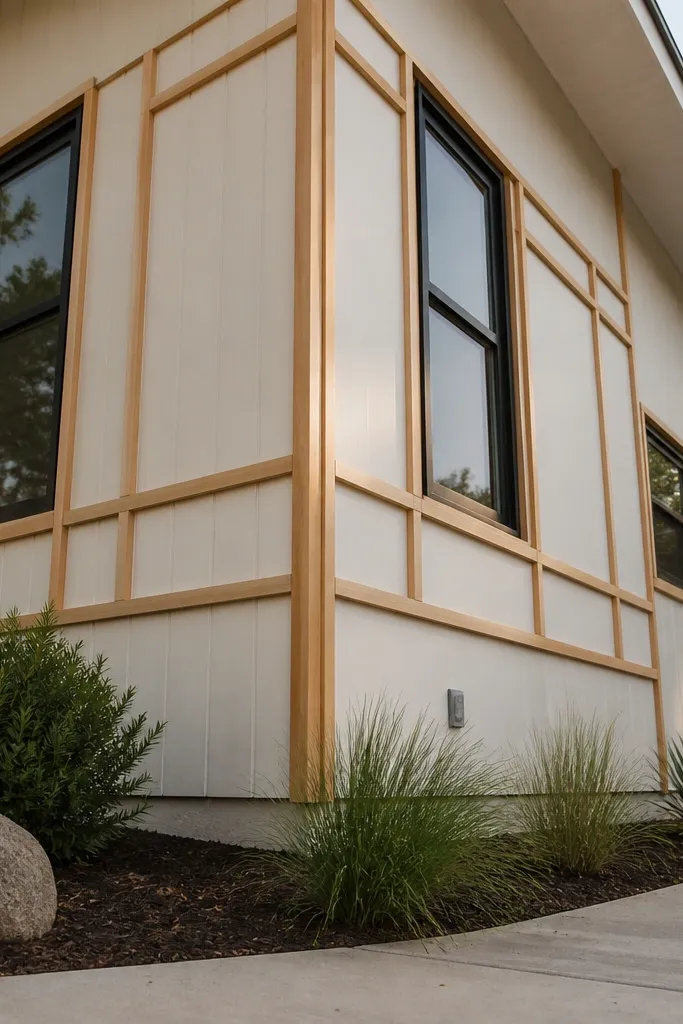
Plan a grid that starts at corners and runs around the window trim; measure each run and keep strip widths consistent, like 1-1/2 in. Wide. Cut horizontal and vertical strips and pre-finish them before install to avoid messy edge touch-ups. Mount the strips using exterior-rated adhesive mounting strips on painted trim surfaces; if you can’t use adhesive, use small hardware on existing trim boards only. Use a level and spacer blocks to keep the gap between strips consistent at about 3/4 in. Finally, seal ends and re-check the window reveal so the frame doesn’t block drainage or trim gaps.
This idea gives you the modern facade “architect frame” look while staying renter-safe. You’re not covering the whole wall. You’re outlining the visible facade geometry with wood strips that frame corners and window openings. The grid makes the facade feel designed, and the shadow lines between strips add depth that reads well from the street. Use dark brown or near-black stain to make the lines pop against a lighter house color. Skill level is moderate because alignment matters, but the build is straightforward: it’s mostly cutting and mounting strips.
Skip thisDon’t cover window weep paths with wood; keep the frame off any area that needs water to escape.
Editor's noteMark your strip lines with a laser level or a long straightedge; eye-balling around windows always drifts.
4. Slanted Wood Canopy Over Door with Removable Side Mounts
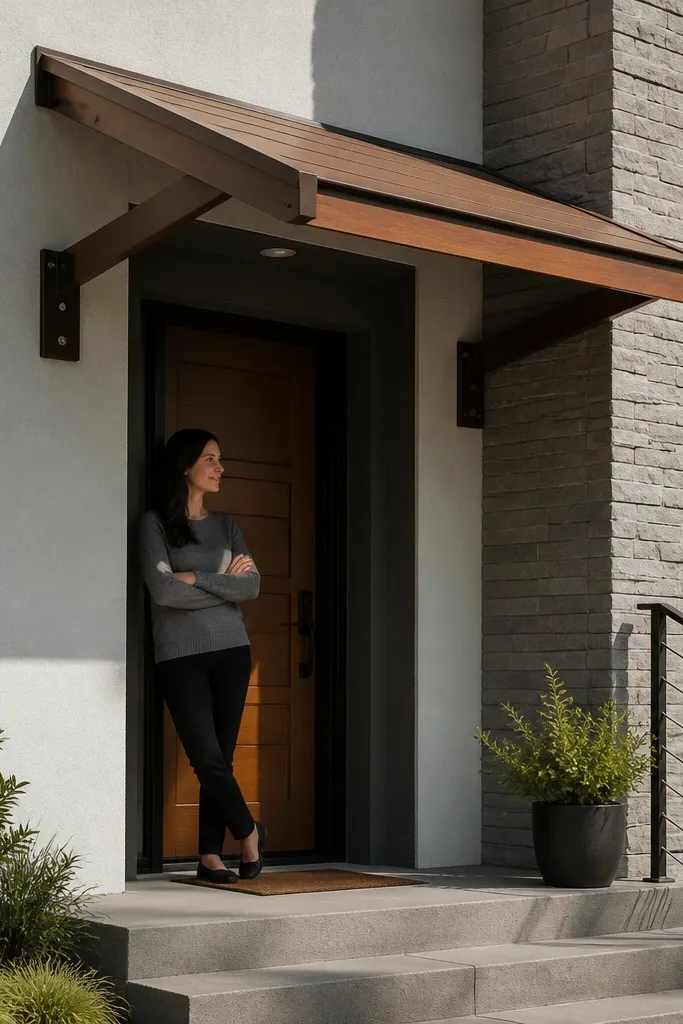
Measure the door width and decide canopy overhang; a clean look often uses 12-18 in. Of overhang past the door width. Build a simple rectangular frame with 2x2 or 1x3 wood members, then add slats on the underside if you want the wood texture. Attach two side mounting brackets to trim using removable exterior hardware; keep them symmetrical so the canopy slope reads straight. Bolt the canopy frame to the mounts, then add fascia boards to hide the frame edges. Seal all cut wood ends and apply an exterior matte topcoat with UV protection.
A slanted canopy instantly makes a facade look modern because it adds a new plane and a strong silhouette. This version is renter-friendly by using removable side mounts attached to trim or masonry with landlord-approved methods, then using a lightweight canopy frame that bolts together. The wood look reads warm and intentional, especially when the canopy underside is the same matte color as your slats. It also solves a practical problem: it reduces rain splash on the door area and keeps the entry zone visually grounded. Best for renters who want a statement without touching the siding everywhere.
Skip thisDon’t build a canopy without a drip edge; water will wick under the front fascia and stain the facade.
Editor's noteUse a drip edge on the front lip; it makes the canopy look finished and prevents water from soaking the wood grain.
5. Shiplap Accent Wall Panel with Spacer-Controlled Lines
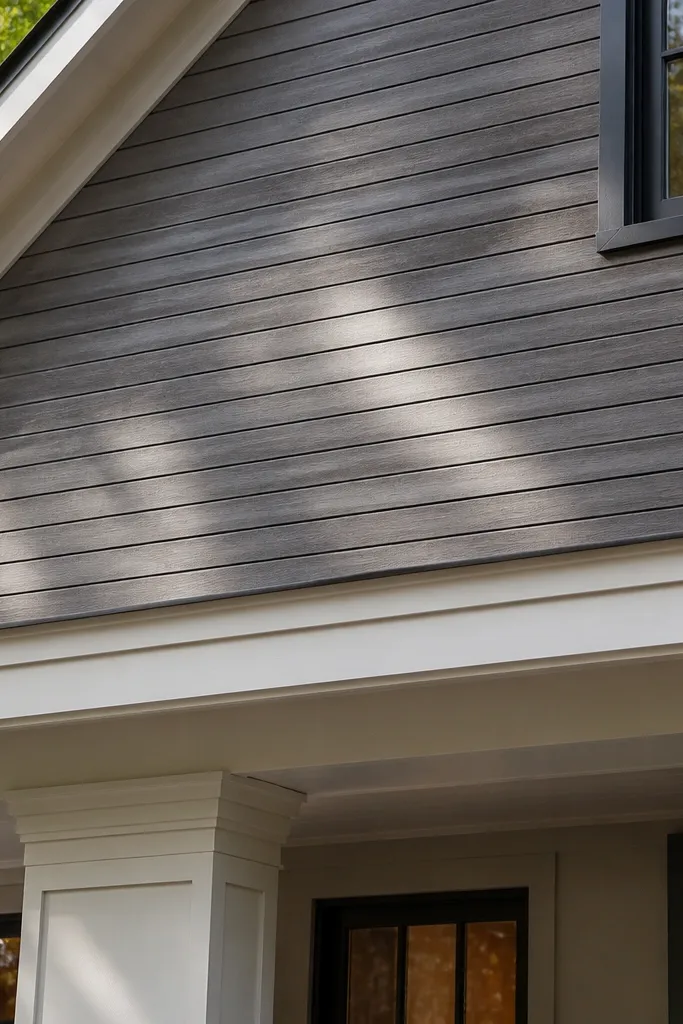
Choose shiplap width around 5-1/2 in. Or 6 in. And keep the reveal consistent; use pre-primed exterior shiplap boards if you can. Mount horizontal backing battens to the wall using exterior adhesive strips or trim screws into existing trim boards. Use 1/4 in. Spacers (or a consistent shiplap tongue/reveal depth) so the groove spacing stays even across the panel. Install boards from bottom to top, checking level every 3-4 rows. Seal seams and apply two coats of exterior matte paint or stain designed for siding exposure.
Shiplap can look modern when the planks are skinny, the spacing is tight, and the finish is matte. This idea focuses on a single accent zone, like the wall next to a door or the facade segment above a porch. The boards add texture, but the controlled gap keeps it from looking rustic. For renter-friendly builds, mount a backing sheet or battens to trim, then attach shiplap planks to the backing so removal is possible later. It looks great in photos because the light catches the grooves and creates depth without needing complicated shapes.
Skip thisDon’t leave gaps uneven at corners; it’s the first thing people notice when they see your facade in daylight.
Editor's notePaint the backing battens first; it prevents dark shadows from showing through the gaps at certain angles.
6. Wood Slat Louvered Porch Divider (Ventilated and Modern)
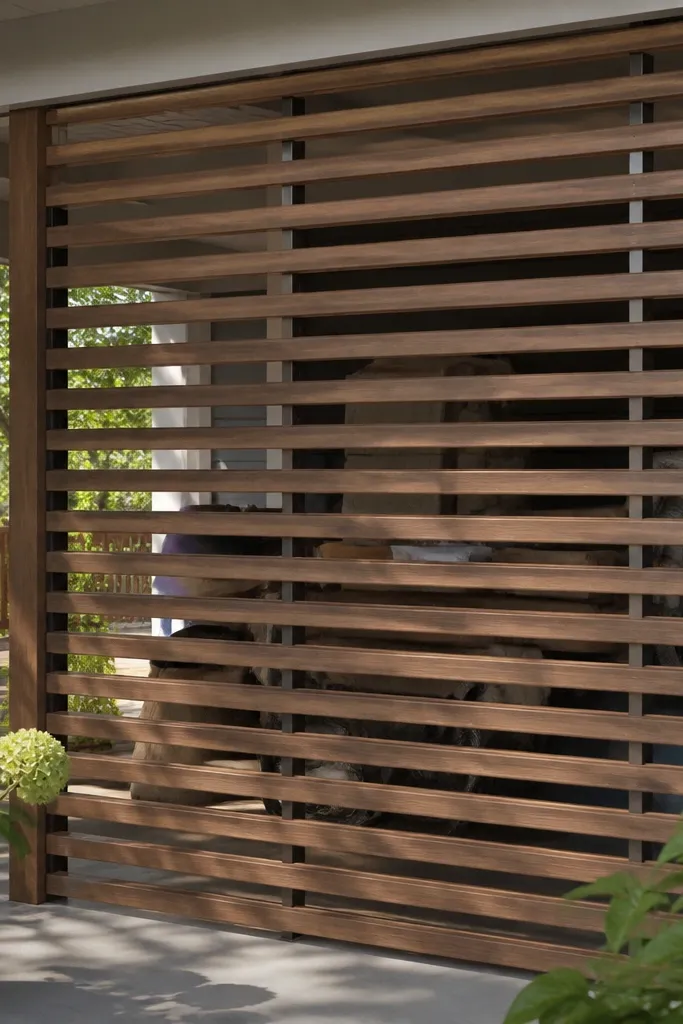
Decide panel size first, like 48 in. Tall x 60 in. Wide, and build a rectangular frame using 1x3 or 1x4 boards. Mount angled slats at 15-30 degrees; 20 degrees is a good starting point for readable shadows without making the slats look too aggressive. For renter-safe installation, use adjustable clamps around porch posts or attach to existing non-siding structural elements. If you’re freestanding, add two feet bases and use rubber pads beneath to avoid scuffs. Finish by sanding edges, sealing all sides, and applying a matte exterior topcoat.
Angled louver dividers look designer because they create motion and hide clutter behind them. This is a modern facade idea you can use on a porch, entry side, or small yard-facing wall where you want privacy and style at the same time. The wood slats are mounted at an angle to cast long shadows, and the spacing lets air pass, which reduces moisture buildup. For renters, you can build it as a freestanding panel set on non-damaging pads or mounted to existing posts with removable clamps. It’s visually striking and practical, which is why it photographs so well.
Skip thisDon’t angle the slats randomly; keep one angle for every slat or the pattern looks messy.
Editor's notePre-drill slat screw holes and countersink slightly; it keeps the face clean and prevents splitting.
7. Modular Wood Panel Skins Over Existing Facade Sections
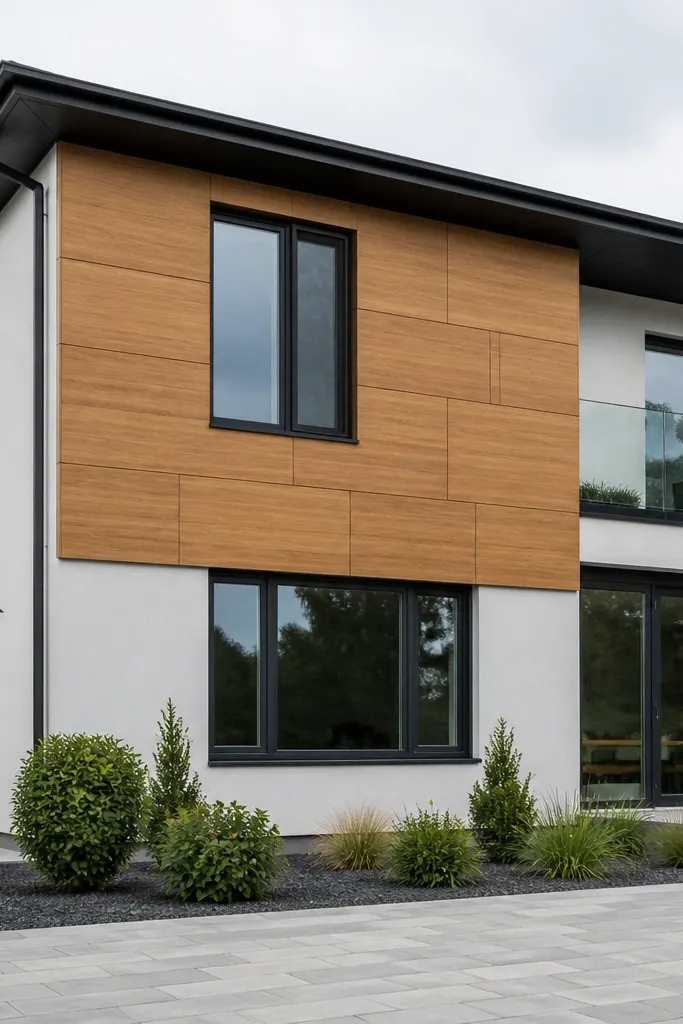
Measure the facade area and lay out a grid of rectangles; for a modern look, use consistent panel sizes like 24 in. X 24 in. Or 24 in. X 36 in. Build a mounting grid with shallow battens that align to trim or safe mounting points. Install the backing grid with exterior-rated adhesive strips or removable screws into trim boards. Attach each modular panel with hidden screws from the back or through the panel edges into the battens. Finish by sealing panel edges and applying two coats of matte exterior paint or stain.
If you want the look of a full wood facade without committing, use modular wood skins. You cover a facade section with repeat rectangles and keep the seams consistent, which reads modern and intentional. This approach is renter-friendly when you mount a lightweight backing grid to trim and then screw the modular panels to that grid in removable sections. The panels can be real wood or composite slats, but the finish should be matte and uniform. It’s a strong choice for covering a dated wall area while keeping the rest of the house unchanged. It also gives you the most “facade transformation per hour” because you’re installing big, flat sections.
Skip thisDon’t use different panel sizes in one elevation; it reads like patchwork instead of a designed facade.
Editor's noteUse spacers between panels to create a consistent 1/2-3/4 in. Seam shadow; that seam is what makes it look architectural.
8. Renter-Friendly Exterior Wood Trim Around a Single Elevation Bay
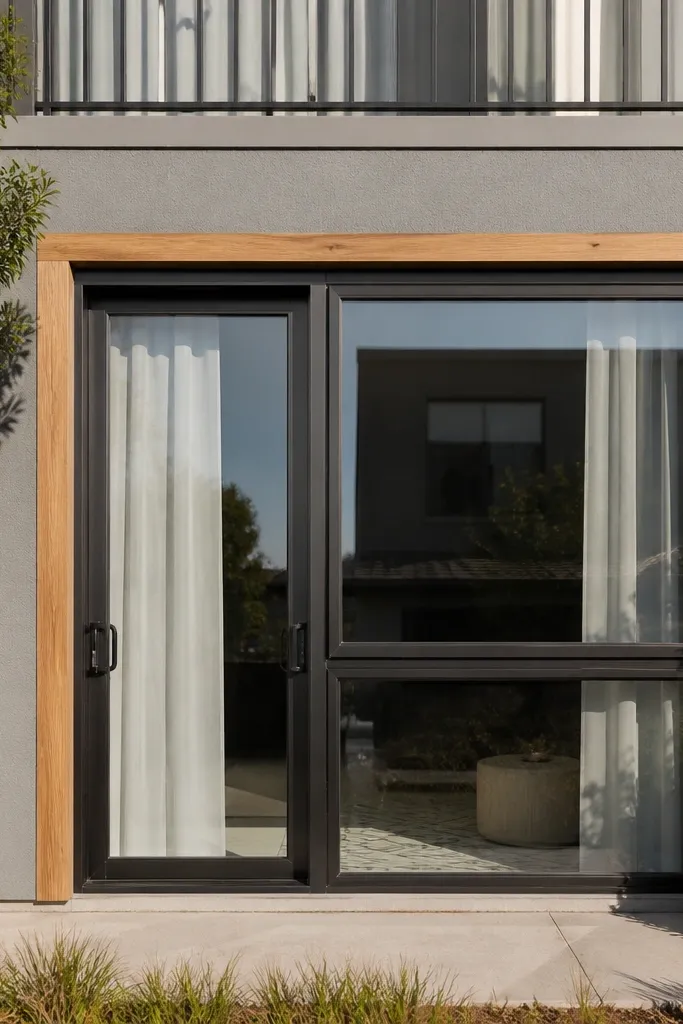
Choose a bay width based on what you can frame cleanly, like the section between two windows or around the entry area. Cut trim strips to widths like 1-1/2 in. And 3/4 in. For a layered look. Pre-stain and seal the trim boards so the edges match. Apply exterior-rated mounting adhesive to the back of thin trim strips on painted surfaces, then press and hold for full bond time. Use painter’s tape jigs to keep corners aligned while the adhesive cures. Seal all joints with exterior caulk in the matching color.
Sometimes the most modern move is framing, not covering. A wood trim border around one facade bay can make the whole house look sharper because it creates a clear boundary and a deliberate pattern. This is renter-friendly because you can mount thin trim strips over existing paint lines with adhesive or small removable fasteners, usually staying away from siding seams. Pick a warm walnut or honey-brown stain on matte finish so it looks like real installed wood, not decorative trim. It’s a great option for renters who want a photo-ready facade upgrade with minimal labor and zero siding replacement.
Skip thisDon’t frame over textured siding; the texture creates gaps that show up as dark lines in photos.
Editor's noteUse mitered corners only if you can cut them accurately; otherwise, use butt joints and hide them with a small corner block.
9. Wood Slat Stair-Step Facade Band (Horizontal Modern Accent)
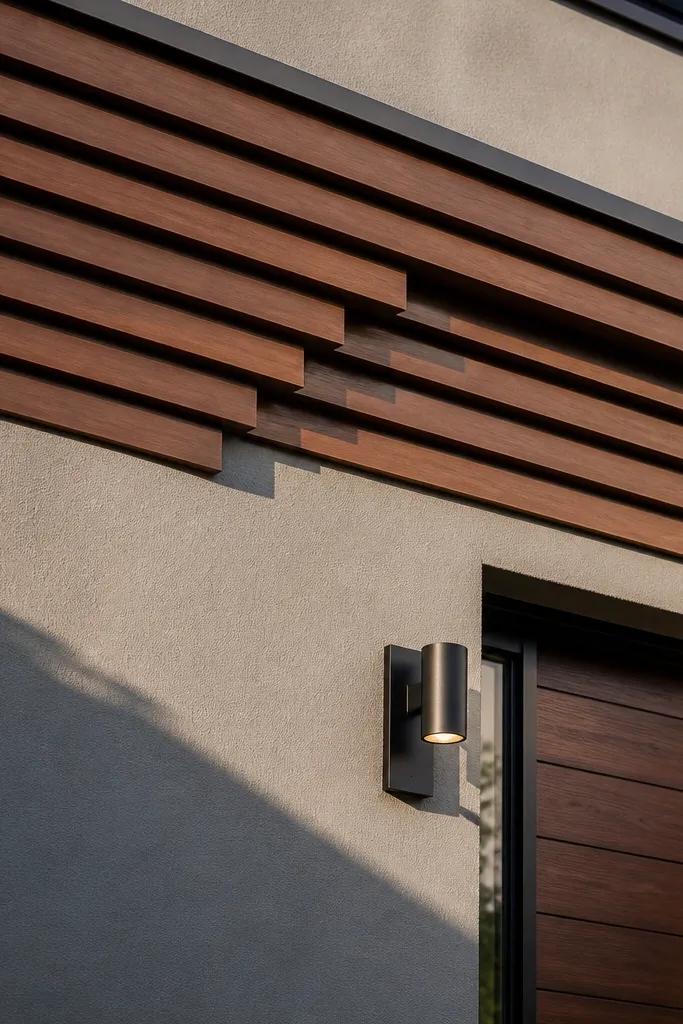
Horizontal accents make a facade look modern by adding a graphic band, especially when the band is broken into steps. This is a renter-friendly way to get a bold design without covering the whole wall: you build a “stair-step” band out of wood slats or thin boards and mount it to trim. The band gives you a strong composition line that looks great even with limited installation points. Use matte black-brown or warm gray to keep it contemporary, and keep the slat thickness thin so it stays sleek. It’s ideal for covering a small section above a window or along a porch rail area.
Pick a mounting height and measure the run length across the facade section. Cut slats to a consistent thickness like 3/4 in. And a consistent width like 2-1/2 in., then decide your step offset like 3 in. Per row. Mount two level guide strips to the wall using exterior adhesive or trim screws, then build the stepped slat band by fastening slats to the guide strips. Keep each step aligned using spacers and a straightedge so the band doesn’t look crooked. Seal and topcoat the band before installation if possible; at minimum, seal cut edges.
Stagger the steps so the top edges line up visually; it reads cleaner than random offsets.
Don’t make the steps too small; if the offset is under 1-1/2 in., the pattern reads like uneven boards.
10. Vertical Wood Ledger with Hidden Fasteners (Clean Modern Lines)
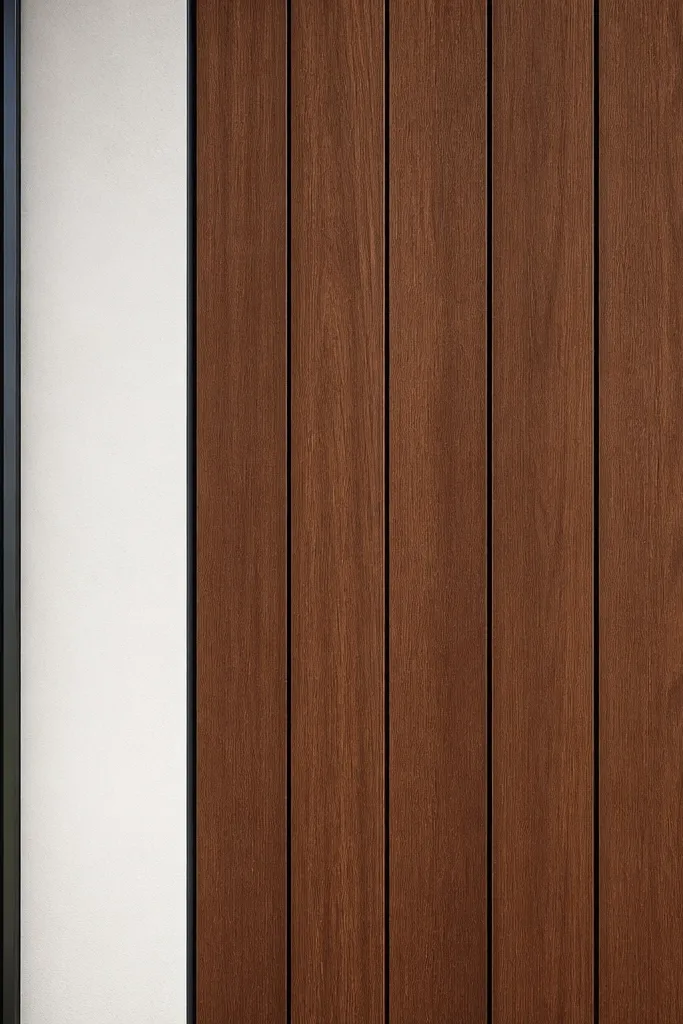
Choose board width around 2-1/2 to 4 in., and keep thickness around 1/2 to 3/4 in. Build a mounting subframe with horizontal battens spaced so you have solid attachment points, like every 16-24 in. Mount the subframe to trim using removable hardware or exterior adhesive strips rated for outdoor paint surfaces. Install vertical boards with a hidden fastening method such as face-screw through a tongue/reveal or use slat clips if you’re using a compatible system. Sand edges, seal, then apply matte exterior topcoat in your chosen wood color.
This is a straightforward modern facade look: vertical ledger boards with hidden fasteners and tight alignment. It’s visually strong because vertical lines pull the eye upward and make the wall feel taller. For renters, the cleanest version is built on a removable mounting layer — think lightweight back battens attached to safe trim or a freestanding panel system near the facade. Hidden fasteners keep the face smooth, which is what makes it look like a real installation instead of a DIY accent. Use a matte finish and uniform board width for the modern effect.
Skip thisDon’t skip sealing the board backs; moisture gets trapped behind verticals and discolors the finish.
Editor's notePre-drill and countersink every hole so the wood face stays unmarked.
11. Two-Tone Wood Panel Reveal with a Dark Shadow Line

Two-tone facades look modern because they separate planes and create a graphic contrast. This project uses a light wood or light warm-gray base and a darker wood for the vertical or horizontal reveal strips, with a dark shadow line between them. The look is clean, photogenic, and very renter-friendly because you install it as layered panels rather than replacing siding. Choose matte finishes so the seam reads as a shadow, not a shiny gap. This is a great option for renters who want a high-end look without complicated carpentry — it’s mainly measuring, painting, and careful spacing.
Select a base panel material like exterior plywood or rigid composite sheet and cut it to your section size. Paint the base matte light warm gray or a pale cedar tone, then let it cure fully. Cut reveal strips in a darker stain or paint color and pre-seal them. Mount the base panel first to a removable subframe, then add reveal strips with consistent spacing using spacers that create a 1/2-3/4 in. Shadow gap. Seal edges and caulk joints lightly to keep the seam crisp.
Use the same caulk color as the darker tone so tiny gaps don’t show as white specks.
Don’t use glossy paint on the seam area; it catches light and makes every installation line obvious.
12. Wood Lattice Privacy Screen with Modern Square Openings
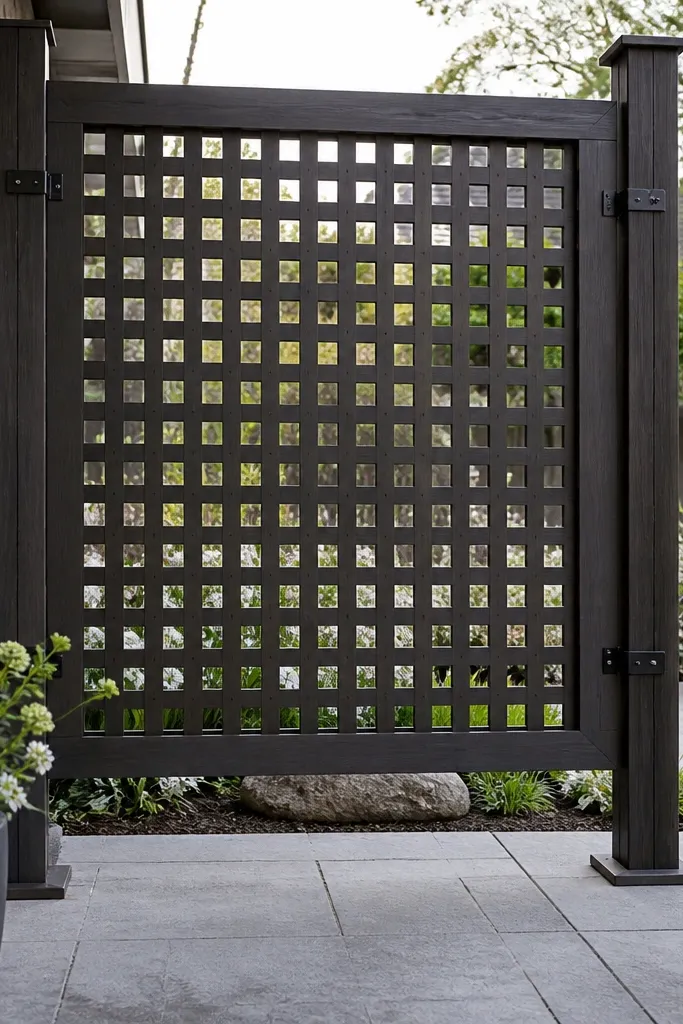
Build a rectangular frame from 1x2 or 1x3 boards and then install cross members to create square openings. Cut the grid members so the squares are consistent, like 4 in. Or 6 in. Wide, depending on your panel size. Pre-stain and seal the wood so the finish looks even. Mount the panel using clamp-on brackets or removable screws into posts or trim boards, not into siding. Leave a small gap at the bottom so the screen doesn’t trap moisture against the ground or porch surface.
Traditional lattice can look country. Modern lattice looks intentional: square openings, clean edges, and a matte finish that matches the rest of your facade. This project is renter-friendly because you can build a freestanding screen panel that mounts to posts with clamps or attaches to existing porch rails with removable brackets. The square grid gives you a crisp pattern that looks good from the street and keeps the entry side from feeling exposed. Choose a dark walnut or black-brown stain for the most modern look against lighter exterior paint.
Skip thisAvoid rounded decorative lattice profiles; keep it square and simple for the modern facade effect.
Editor's noteUse a scrap spacer jig for every intersection; it keeps the squares identical and makes it look factory-made.
13. Horizontal Wood Slats on a Renter-Friendly Cleat System
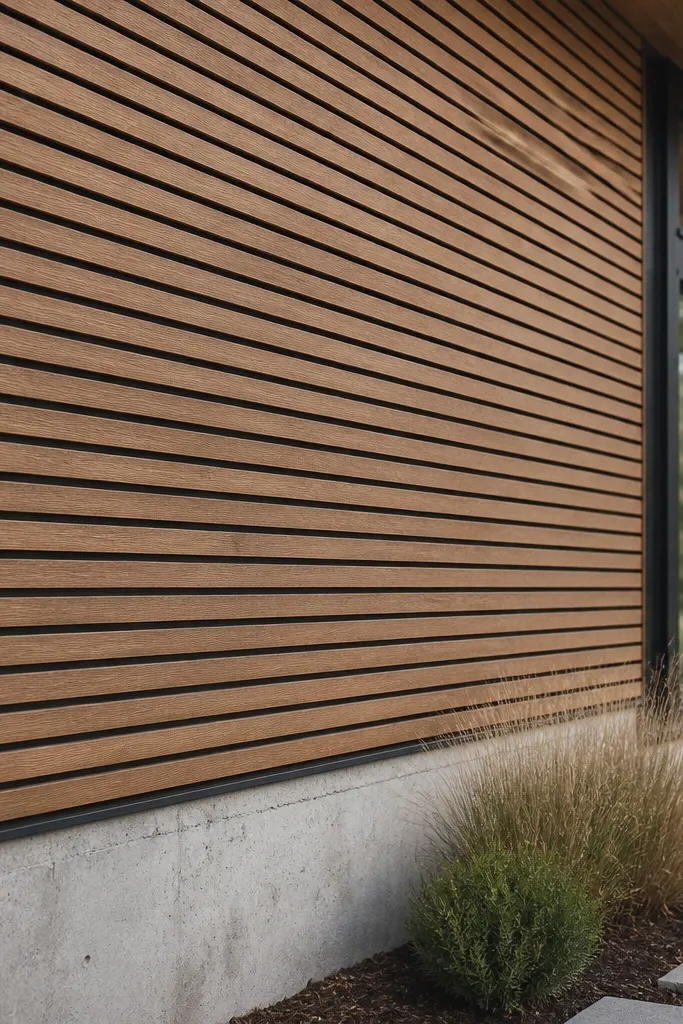
Horizontal slats give a modern facade the “clean band” look and hide imperfections in the wall behind them. This cleat system is renter-friendly because you mount a shallow rail grid to safe points, then the slats attach to that grid. It’s easier than full siding replacement and it looks sharp because the lines run straight and consistent. Use a matte finish and keep slat spacing equal so the shadows form a regular rhythm. This idea fits best when you have a longer run of wall to cover, like a porch side or a section between two corners.
Mark a level baseline and install two or three horizontal cleats spaced to catch studs or solid trim backing. Mount cleats with exterior adhesive strips on painted trim or removable screws into trim boards where allowed. Cut slats to length and install them from bottom to top, using 1/2-3/4 in. Spacers to keep gaps consistent. Pre-drill slats to prevent splitting and attach with exterior screws or hidden clips to the cleats. Seal cut ends and apply matte exterior topcoat after installation to unify the sheen.
Check alignment with a string line every 5 slats; one drift becomes obvious in photos.
Don’t leave slat gaps random; the shadow rhythm is what makes this look modern.
14. Wood Panel Shutters Look with Removable Hinged Frames
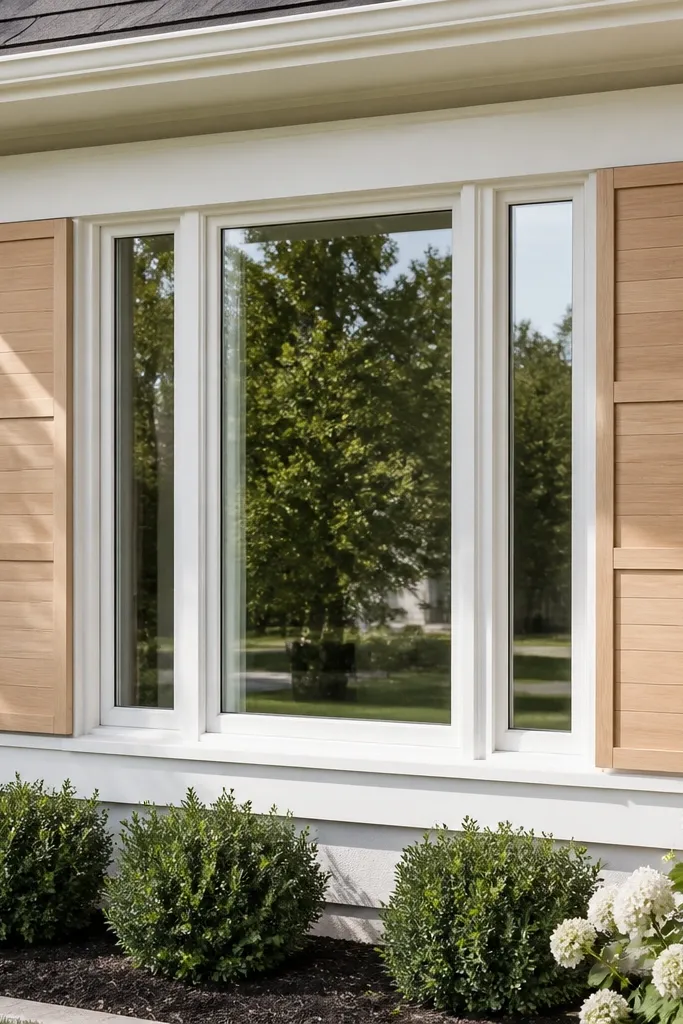
Measure the window area and build two identical frames sized to sit inside the trim line, leaving a small clearance so nothing rubs during weather changes. Use 1x3 or 1x4 boards and pre-finish them matte in your chosen wood tone. Install mounting brackets or hinge points to the trim using approved renter-safe methods; keep them small and hidden. Insert panels and secure with removable fasteners like quarter-turn latches. Seal all wood edges and check that the frames don’t block any window weep gaps.
Shutter-style facade accents look modern when you use flat panels, straight lines, and a matte finish. This project creates the shutter look using removable hinged or bolt-on frames so renters don’t have to install permanent trim into siding. Mount a frame around the window opening area, then insert flat wood panels or slatted inserts for depth. The result is a photogenic, structured facade detail that adds character without covering the entire wall. It’s best for window bays where you already have trim edges you can mount to safely.
Skip thisDon’t mount shutters directly over window trim caulk lines; you can trap moisture and cause peeling.
Editor's notePaint the frame behind the shutter insert the same color as the outside; it keeps the look clean from angles.
15. Half-Height Wood Cladding with Vertical Reveal Strips
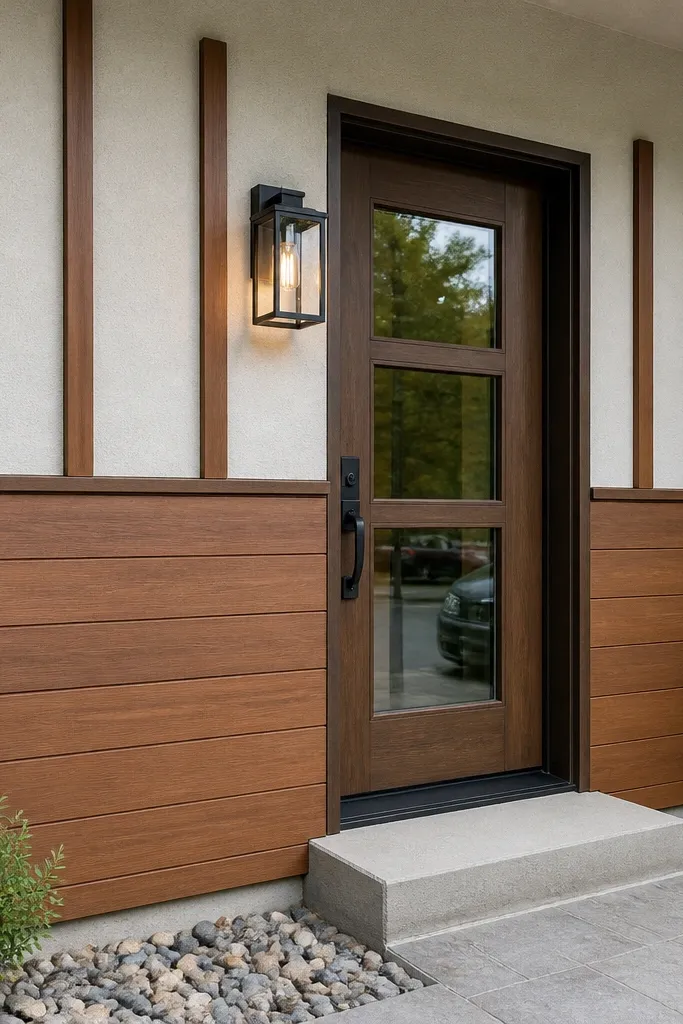
Half-height cladding looks modern because it creates a strong horizontal baseline and leaves the rest of the facade clean. This idea pairs a lower wood cladding section with vertical reveal strips that add rhythm without overwhelming the entry. It’s renter-friendly when you mount the base panel to a removable subframe and keep fasteners in a trim zone. The contrast between the cladding and the wall color makes it easy to read the design from across the street. Choose warm gray base wood with darker vertical reveals for a crisp, modern look.
Decide your cladding height, like 36 in. To 48 in., based on your porch or entry wall proportions. Build a subframe using horizontal battens and attach it to safe mounting points on trim or siding edges. Install a base cladding sheet like exterior plywood or rigid composite cut to your section, then add vertical reveal strips over seams. Space reveals evenly with 3/4 in. Shadow gaps and use pre-drilled holes for straight fastening. Seal edges and apply matte exterior finish so the panel reads as one unit.
Use a level ledger strip at the top of the cladding so your vertical reveals start perfectly aligned.
Don’t skip sealing the underside of the base panel; that’s where water collects in shaded entry areas.
16. Wood Slat Feature Wall for Mail/Planters Area (Facade Utility)
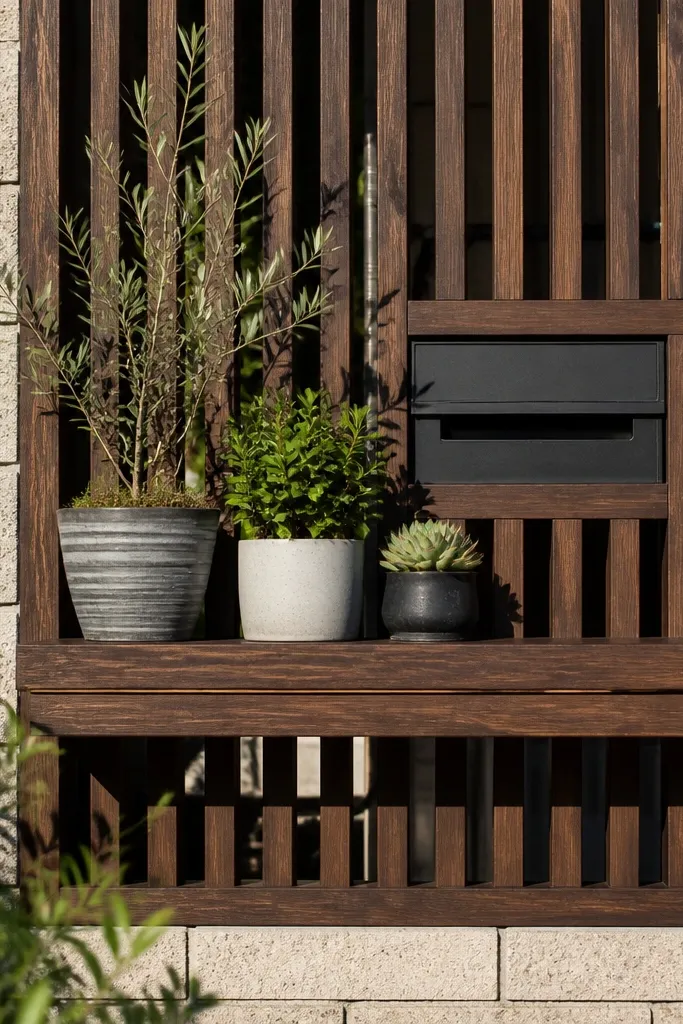
A utility feature can look high-end if the design is consistent. This facade idea uses wood slats to frame a mail slot, small planter area, or entry storage zone, creating a modern backdrop that hides clutter. The slats act like a visual filter: they break up the hard edges of mailboxes and planters into a cohesive design. For renters, build it as a removable panel system that mounts to nearby posts or trim, not directly over siding seams. It looks great in photos because the slats create a strong texture plane behind practical items.
Measure the utility area and build a rectangular slat frame with an outer border strip width like 2 in. Cut slats to cover the area and keep spacing consistent at 1/2-3/4 in. Pre-finish the slats matte and seal edges. Mount the frame to safe points using removable brackets or screws into trim boards where allowed. Add a small shelf or backing board behind the slats if you need a mail/planter surface, then seal any exposed wood. Finally, check that the opening and clearances for the mail or containers stay functional.
Plan for airflow behind planters; leave a small gap between the back board and the wall.
Don’t cover vents or drainage points with a slat panel; you’ll create moisture problems behind it.
17. Wood Edge Banding on a Rigid Panel for a Facade Accent
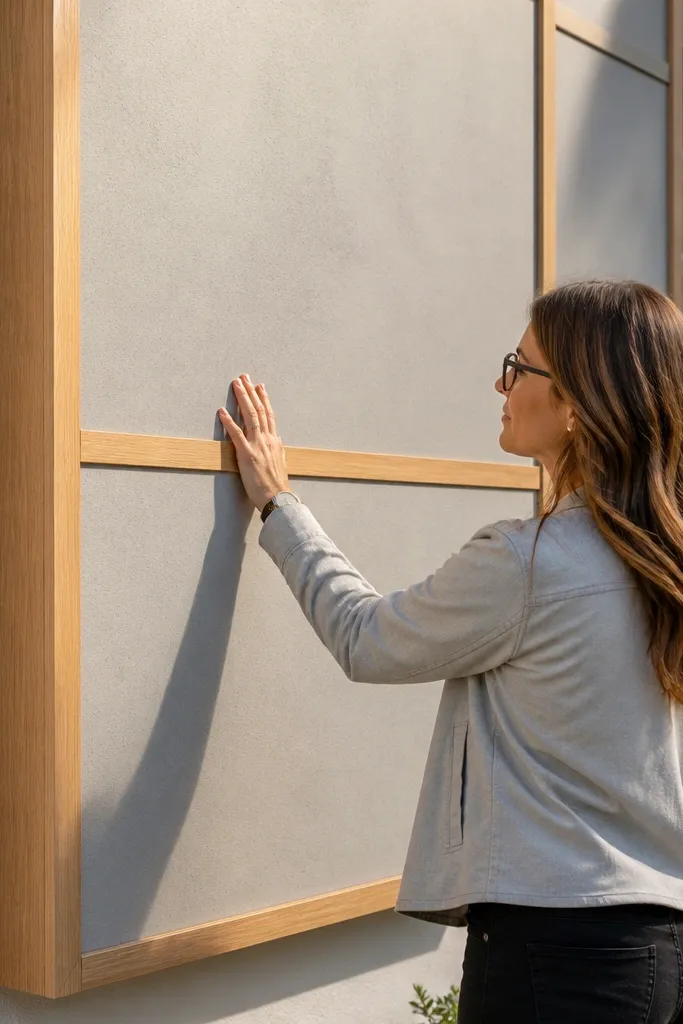
Cut a rigid panel material like exterior plywood or composite to the size of your accent section. Mount it to a removable subframe using trim-safe methods so you can take it down later. Cut edge banding strips to wrap the perimeter and any internal seam lines; pre-finish and seal the banding first. Attach banding with exterior wood glue and small brad nails or screws through the back edge. Fill and sand nail holes, then apply matte exterior topcoat to the entire assembly for one consistent finish.
Edge banding is the cheat code for a modern look when you want clean lines without complicated framing. You mount a rigid panel to your facade section (on a removable backing grid), then add wood edge banding strips around the perimeter and across seams. The wood edges create a “designed” border that reads like millwork. This is renter-friendly because the panel can be removable, and the edge banding is lightweight. Choose a matte finish in a warm wood tone and keep the panel color neutral so the wood reads modern, not rustic.
Skip thisDon’t use thin banding that flexes; it warps and creates uneven shadows along the edges.
Editor's noteUse a router or sanding block to chamfer the banding edges slightly; it makes the facade look sharper and hides minor alignment gaps.
18. Stacked Boxwood-Style Wood Planters Integrated Into Facade Panels
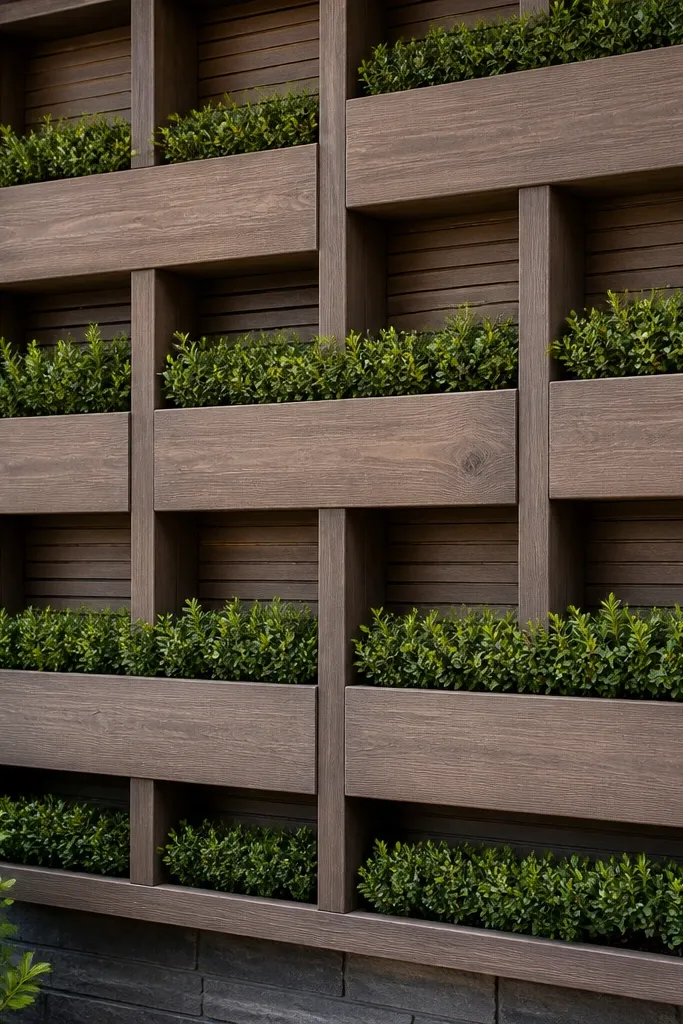
Stacked planters integrated into wood facade panels look modern because they add depth and a repeating rhythm. This isn’t about greenery alone; it’s about the box geometry. You build a modular wood panel with built-in planter boxes and slat backing so the whole unit reads like one architectural element. It’s renter-friendly if you mount the unit to fence posts or trim with removable brackets and keep the build lightweight enough to detach. Use matte black-brown or warm gray wood finish so the planters look like intentional facade millwork. It’s a great idea for an entry side where you want curb appeal without covering the entire wall.
Build a slat backing frame first with vertical slats spaced 1/2-3/4 in. Cut planter box units from exterior-rated wood or use separate planter liners inside fixed frames to simplify waterproofing. Assemble boxes onto the backing frame with exterior screws and seal all interior seams with waterproof sealant. Mount the whole unit to safe points on posts or trim using removable brackets. Add a drain layer in each planter liner and keep a small air gap behind the planter so moisture doesn’t sit against the wall. Finish by sealing exterior faces with matte exterior topcoat.
Use separate plastic planter liners so you don’t have to seal every interior joint like a tank.
Don’t seal the planters airtight; plants need drainage or the liners will rot quickly.
19. Modern Wood Panel Over Garage Side with Vertical Reveal Shadow Joints
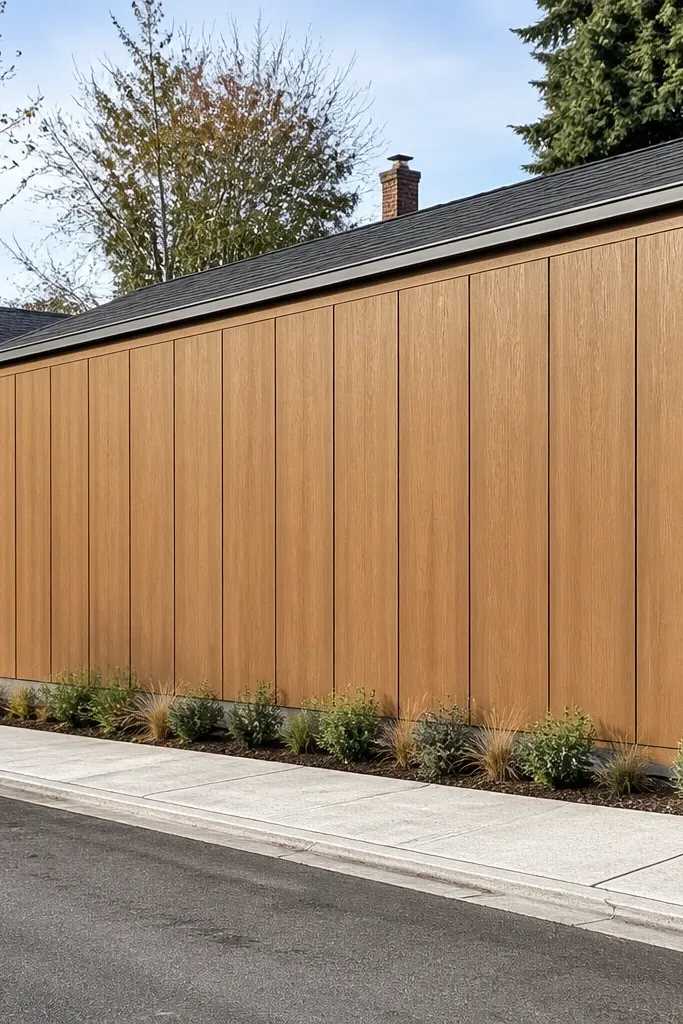
Plan your panel sizes based on the wall width and available mounting lines; start with panels around 24-36 in. Wide. Install a shallow grid of battens on safe mounting points, keeping the grid level and spaced so each panel edge lands on a batten. Attach panels to the grid with exterior screws through the panel edges, leaving the faces clean. Then add vertical reveal strips over the seams using spacers to keep 3/4 in. Shadow gaps consistent. Seal edges and apply a matte exterior topcoat to unify the whole cladding look.
A garage side wall is often blank and boring. A vertical wood panel cladding with reveal shadow joints fixes that fast and looks modern from the street. This idea is renter-friendly when you treat it like an overlay system: mount a shallow grid to trim or posts, attach large wood-look panels, then add vertical reveal strips to hide seams. The reveals create the shadow gaps that make the surface look like real wood cladding. Choose a matte walnut-brown or warm gray to keep it contemporary. It’s ideal for renters who have one side elevation they can access easily and want the most impact per project.
Skip thisDon’t skip checking the wall for bumps; if the grid isn’t level, panels will warp visually even if they’re level on paper.
Editor's noteKeep the reveal strips straight by snapping chalk lines before you install; it’s faster than measuring every strip.
20. Renter-Friendly Wood Slat Mailbox Surround with Vertical Columns
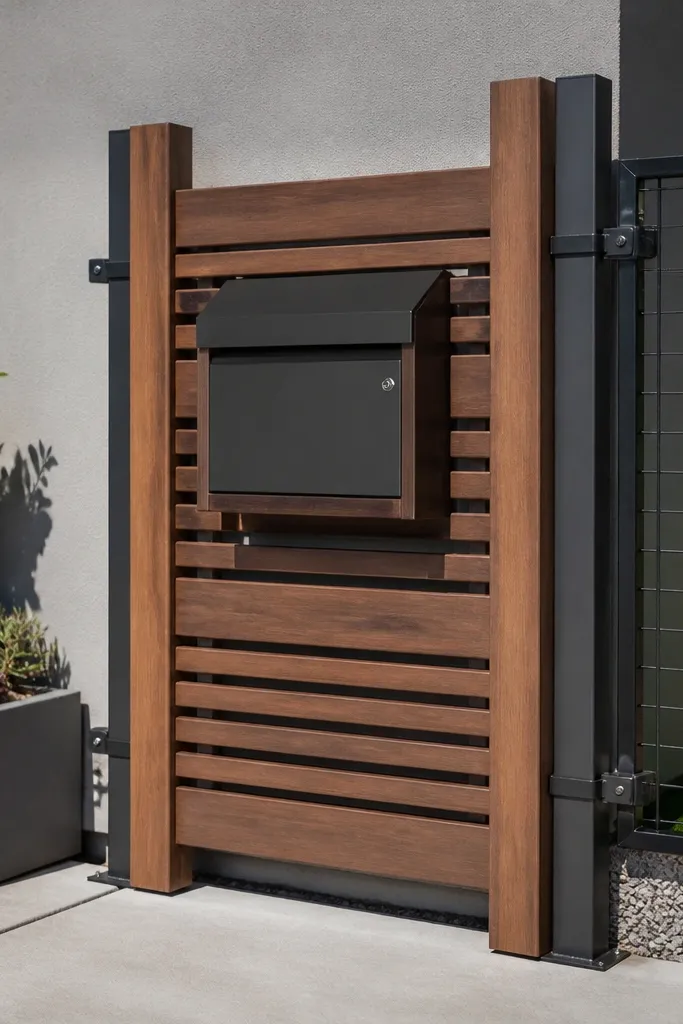
Mailbox surrounds are tiny, but they’re visible and very photogenic. A modern wood slat surround with vertical columns turns a basic mailbox area into a facade feature without covering large wall sections. This design works for renters because you can mount the surround to a post or fence frame with clamps or removable brackets, then keep wood attachments lightweight. The slats add a modern texture plane while the vertical columns frame the mailbox like a mini architectural bay. Choose a matte dark stain so it looks crisp and intentional.
Measure the mailbox and build a surround frame with two vertical columns and a top border, leaving clearance for door opening and mail access. Add slats between columns with consistent spacing at 1/2-3/4 in. Pre-finish and seal all wood pieces before assembly to reduce weather exposure time during install. Mount the surround to existing post or fence frame using clamp brackets or removable hardware. Secure slats with exterior-rated screws and countersink them slightly so the face stays clean. Finish with a matte exterior topcoat and touch up any cut edges.
Use a scrap spacer block to set the slat gaps; it prevents the “wide/narrow” look that ruins modern symmetry.
Avoid attaching to thin fence panels with screws; the surround will loosen and wobble.



