
1. Peel-and-stick faux panel border in matte black
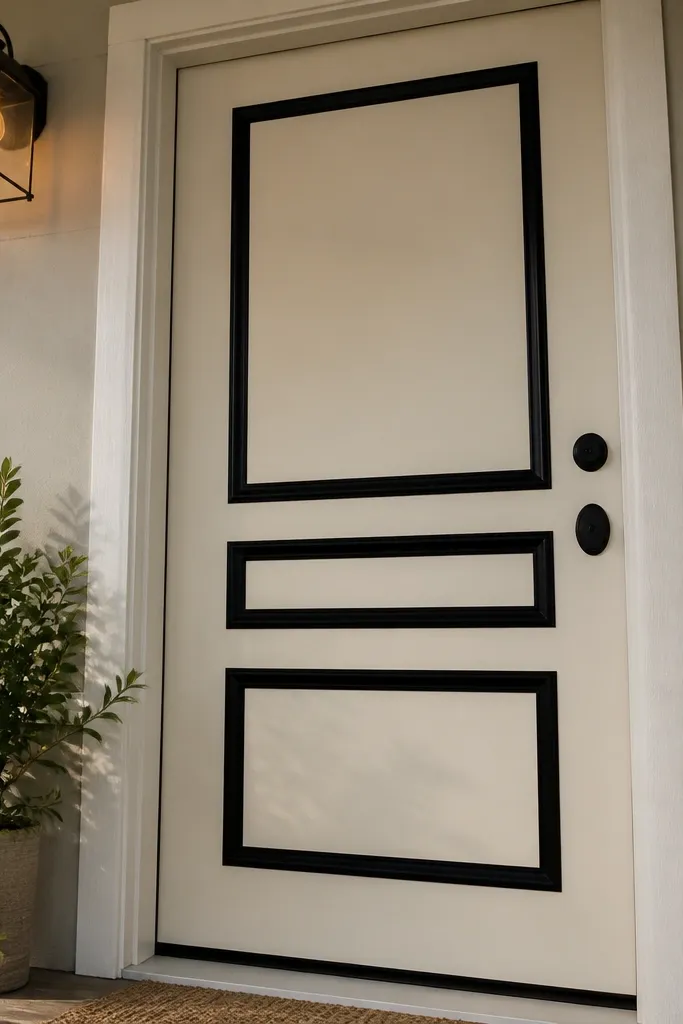
This is the fastest way to make a plain door look designed. The peel-and-stick trim creates a built-in panel border that gives your entrance structure even if the slab is flat. Matte black reads crisp against wood, painted doors, and even off-white entryways, and it photographs well in both daylight and porch light. You get the “custom trim” look without touching the landlord’s hardware. Skill level is beginner: measure, press, and trim cleanly.
Editor's noteWarm the trim slightly with a hair dryer before sticking so it lays flat on minor texture.
Start by wiping the door with a degreaser and drying it fully. Measure a centered rectangle border that leaves about 3-4 inches of clear space around the knob and any existing panels. Apply the trim in straight runs, pressing firmly along each seam, then use a sharp utility knife to remove excess at corners. Finish by rubbing over the trim with a plastic card to lock the adhesive contact.
Skip thisDon’t apply over dust or hand oils — it’s the #1 reason edges lift.
2. Removable door wrap in a warm greige woodgrain
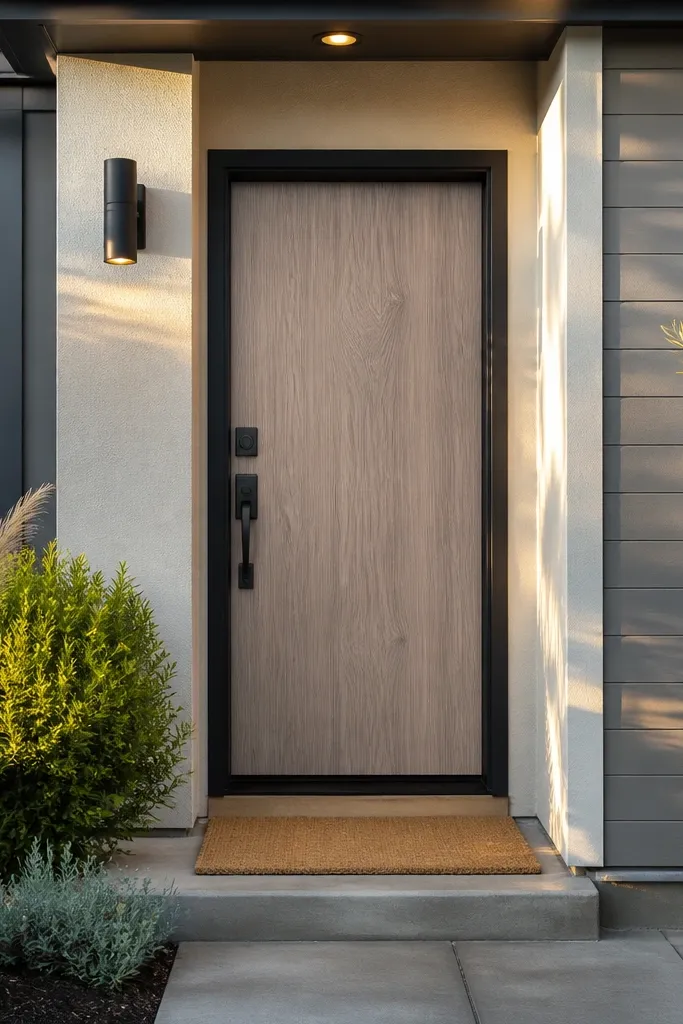
A door wrap gives you a whole new finish without paint fumes or landlord drama. Woodgrain patterns in warm greige look natural next to brick and siding and they hide minor scuffs better than flat paint. This is a strong pick if you want texture that shows up in photos — the grain catches light and makes the door feel deeper. Choose a wrap made for doors so it’s thicker and less likely to wrinkle around edges. Plan for careful alignment around the knob cutout.
Editor's noteUse painter’s tape to mark a straight top reference line before you start peeling the backing.
Clean the door with degreaser, then let it dry completely. Measure the door slab height and width and cut the wrap with a little extra at the edges. Peel a small section and apply from the top down, smoothing with a squeegee as you go to prevent bubbles. Use a craft knife to trim around the knob and any hardware, then press the edges again along the perimeter.
Skip thisDon’t stretch the wrap — stretching creates waves and makes edges look uneven.
3. Adhesive faux shiplap stripes in soft white
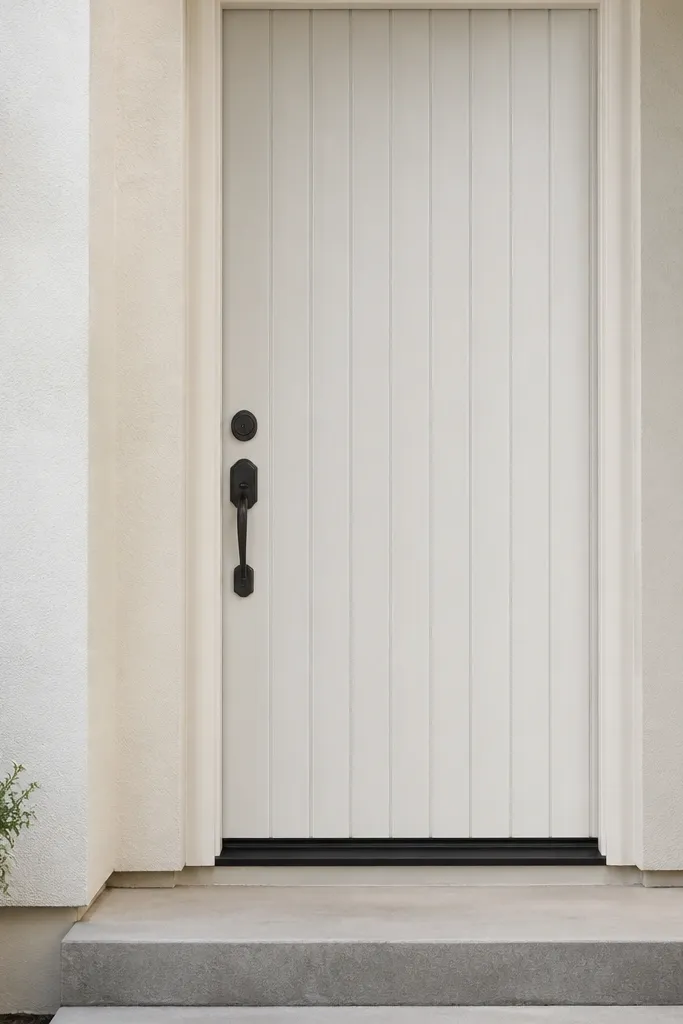
Raised shiplap stripes make a renter-friendly main entrance door design look like a weekend renovation. Soft white is forgiving and bright, and the stripe texture reads clearly from the street. The visual trick is spacing: keep the stripes consistent and use a simple layout so it feels intentional instead of decorative stickers. This works best on doors that are currently flat and dull. It’s a great option when you want texture but don’t want the mess of real wood.
Editor's noteUse a metal ruler and a sharp blade for clean cuts at the sides and around the knob.
Wipe the door with degreaser and dry it thoroughly. Mark your centerline and decide on stripe width and spacing — for a standard door, 2-1/2 to 3 inches stripe width with 1/8 to 1/4 inch gaps looks balanced. Apply each strip one at a time, using a ruler to keep edges straight. After the final strip, press all seams and run a fingertip along edges so adhesion bonds fully.
Skip thisSkip the “eyeballing” step — crooked stripes look obvious in photos.
4. Magnetic front door house numbers on a removable plate
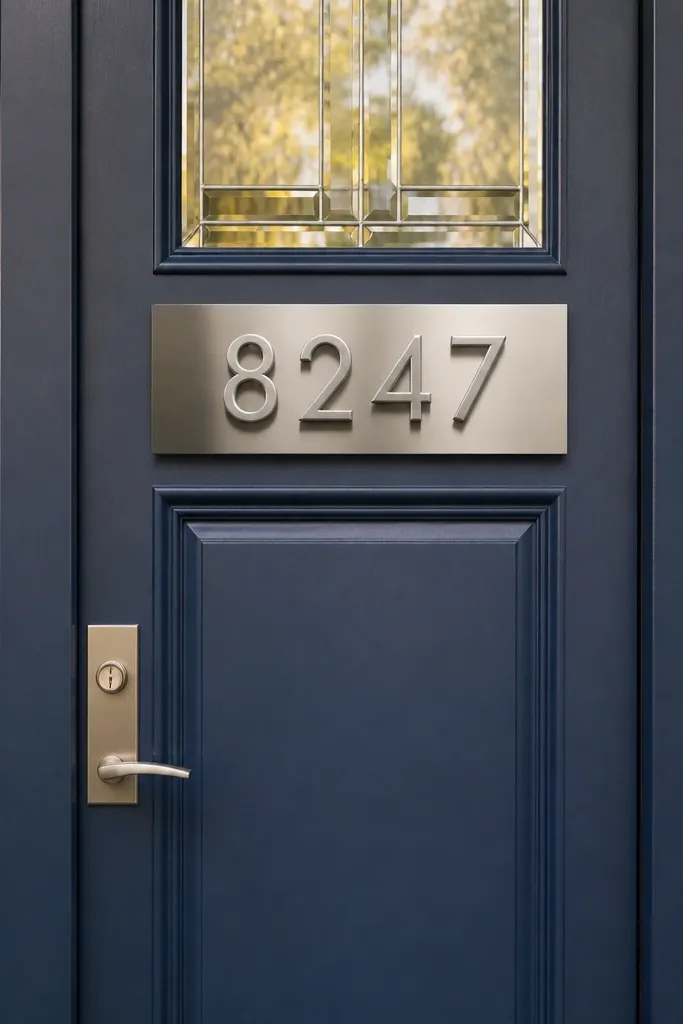
House numbers change the entrance read fast. If your door is plain, a bold number set gives you instant curb clarity and a styled look. Magnetic numbers let you keep everything renter-friendly without drilling — just place the plate where you want it. Choose a finish that matches other hardware in your entry, like matte black or brushed nickel. This idea is small but it’s the most photogenic “before and after” for minimal effort.
Editor's noteIf the door has a textured finish, use a thin felt pad under the plate to improve magnetic contact.
Pick a number style with thick strokes so it stays readable in photos from a distance. Clean the door surface with degreaser and dry it, then test the magnetic plate placement before committing. Mark the final spot with painter’s tape and place the plate. Attach the numbers to the plate and check alignment against the door frame lines.
Skip thisDon’t place numbers too low — keep the center of the number around 60 inches from the ground.
5. Removable wreath rail using command-style hooks
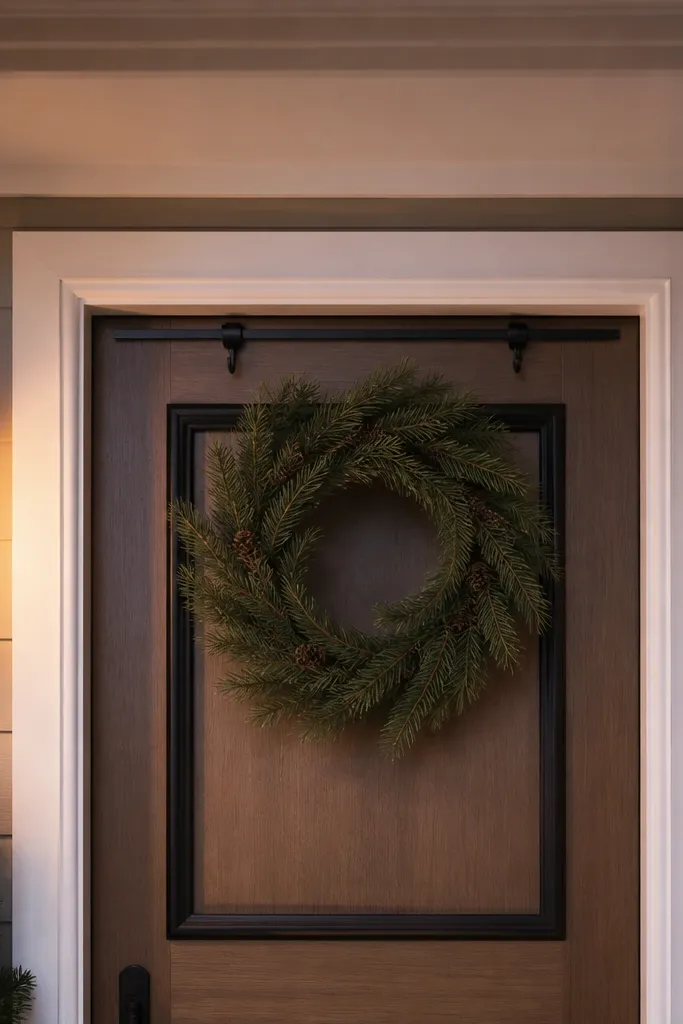
A wreath rail makes your door look styled year-round, even when you swap decor. The key is the rail itself — it lets the wreath sit centered and level, instead of sagging from random hooks. For renter-friendly main entrance door design, choose hooks rated for your door material and weight, then use a slim rail or ring system that doesn’t require screws. This is photogenic because the wreath becomes the focal point and frames the center of the door.
Editor's noteUse a level tool or even a phone level so the wreath hangs straight in photos.
Clean the mounting area with degreaser and let it dry. Position two hooks above the centerline so the rail will hang straight, then press firmly for the full recommended time. Hang the rail, then add your wreath and adjust the height so the bottom sits about 6-10 inches above the doormat. If you’re using a heavier wreath, test the weight on a lighter setup first.
Skip thisDon’t mount on peeling paint or dusty residue — hooks fail fast on poor prep.
6. Door sweep + threshold paint for a clean color line
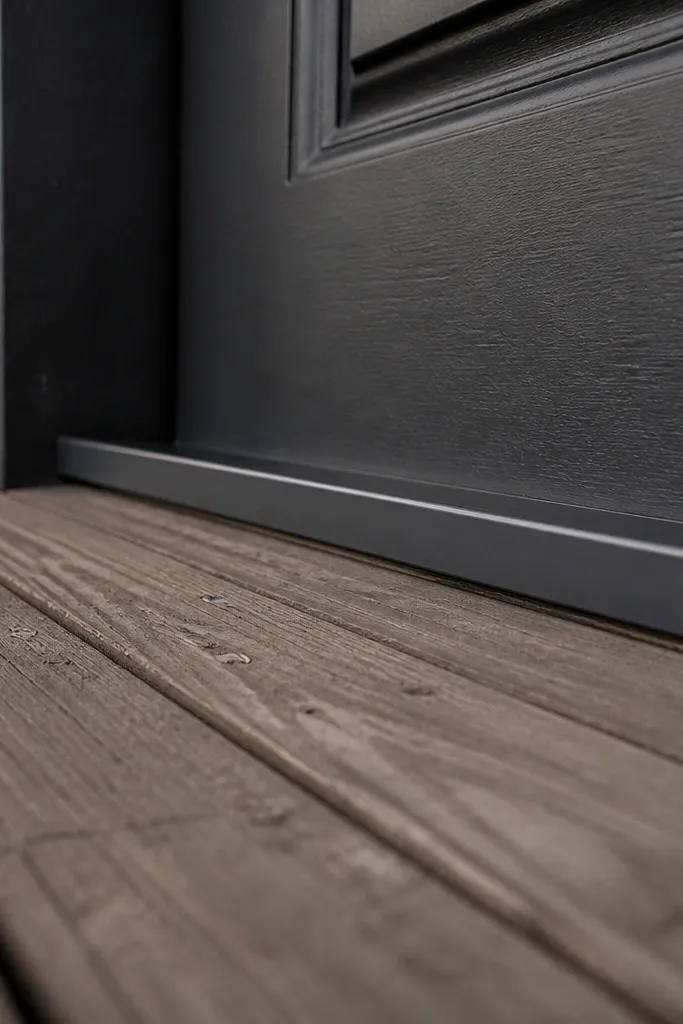
A lot of “cheap” curb looks come from the bottom edge. When the threshold looks tired, the whole entrance reads unfinished. Replace the old door sweep with a new one, then paint the threshold edge or trim so it lines up with your door color story. This is renter-friendly because it’s usually removable at the door sweep level and doesn’t require frame drilling. It’s also one of the most noticeable changes in winter because it tightens drafts and keeps the entry cleaner.
Measure your existing door sweep length and choose a replacement that matches your door width. Remove the old sweep carefully and install the new one using the manufacturer’s method for your type. Tape off the threshold edge and paint with exterior paint rated for concrete or wood, depending on your surface. Let it cure fully before closing the door repeatedly.
Choose a semi-gloss for the threshold edge — it wipes clean and looks intentional under porch lights.
Don’t paint over chalky old paint — scrape and spot-prime first.
7. Removable glass film for a frosted privacy glow
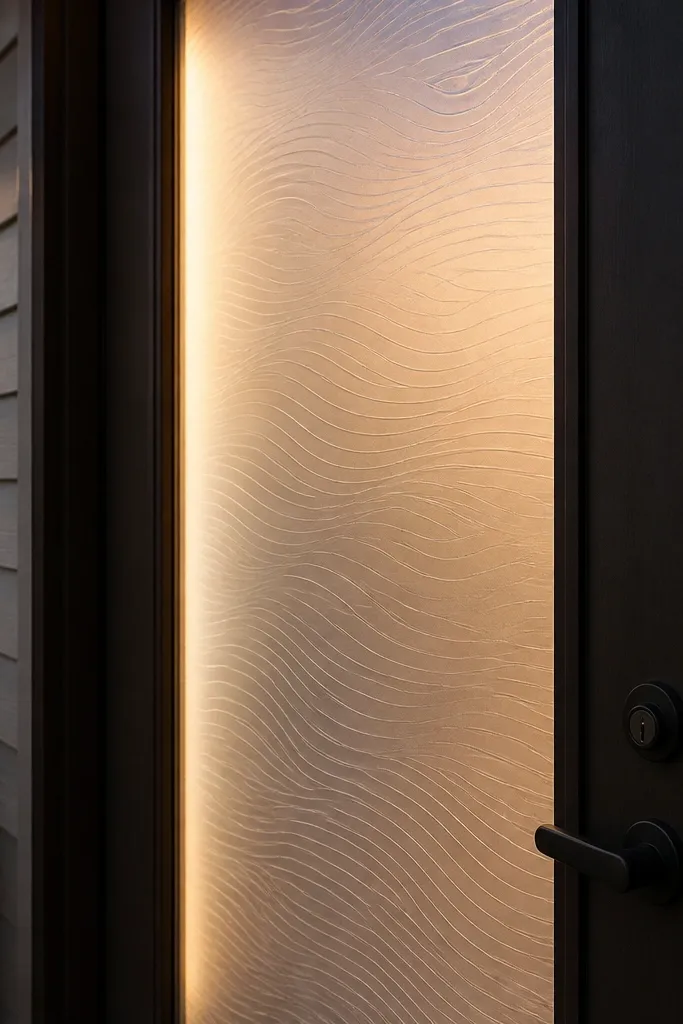
If your door has sidelights or a glass panel, glass film is the easiest “design upgrade” that still feels renter-friendly. Frosted film adds privacy and creates a soft glow effect that looks great in evening light. Choose a simple pattern like a subtle ripple or a modern geometric etch — busy patterns can look dated fast. The look is photogenic because it turns harsh reflections into a smooth, even surface. It also hides fingerprints and smudges.
Editor's noteUse a microfiber cloth to polish the edges after squeegeeing so the border looks crisp.
Clean the glass with a glass cleaner and dry completely. Measure the glass panel and cut the film with a little extra margin. Apply using the wet method if the film instructions allow — spray the glass lightly, position the film, and squeegee out water. Trim edges with a sharp blade and press corners firmly.
Skip thisDon’t rush the squeegee step — trapped liquid creates bubbles that won’t fully disappear.
8. Stick-on molding frame around an existing door insert
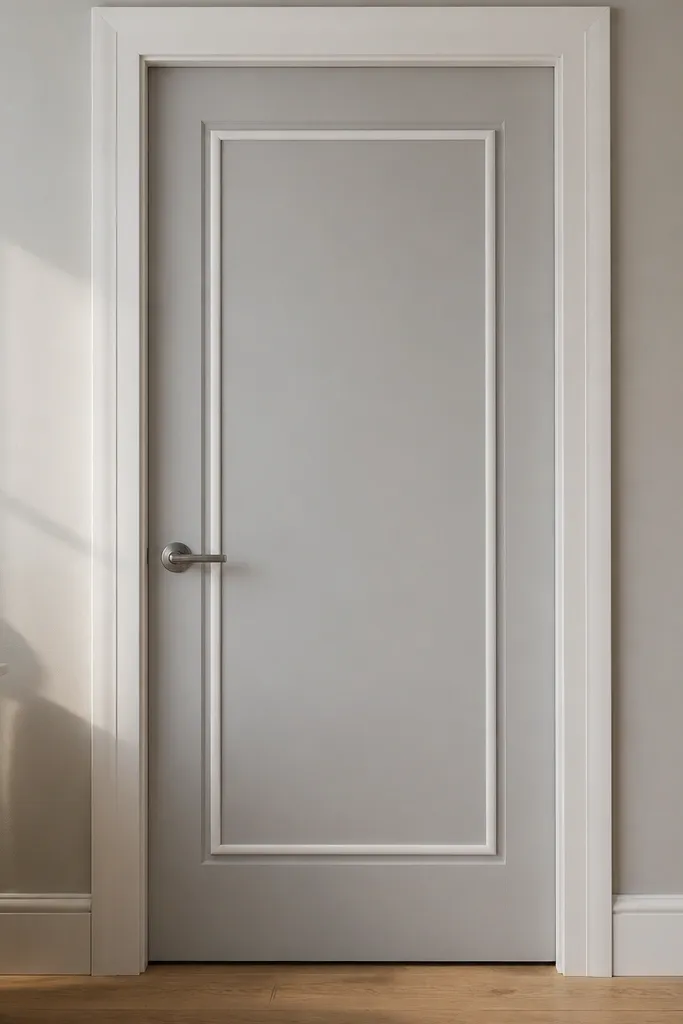
This idea works when your door already has an inset, grid, or recessed panel. You add a second “frame” inside it so the eye reads a finished design, not a random door shape. It’s renter-friendly because the molding is adhesive and you can remove it later. Pick a molding profile that’s not too thick — 1/2 inch to 3/4 inch height reads upscale without looking heavy. This is one of the most photogenic upgrades because it creates depth lines that show up from the sidewalk.
Clean and dry the door surface where the molding will sit. Measure the inset area and decide on a frame width that leaves consistent margins on all sides. Apply molding strips one by one, starting with the longest sides, then add corners and trim with a 45-degree cut for tight joins. Press down hard along the full length and check alignment before moving to the next piece.
Use blue painter’s tape to hold corners in place while you press seams.
Don’t use thick molding on a small inset — it can overwhelm the door.
9. Color-blocked door with removable vinyl panels
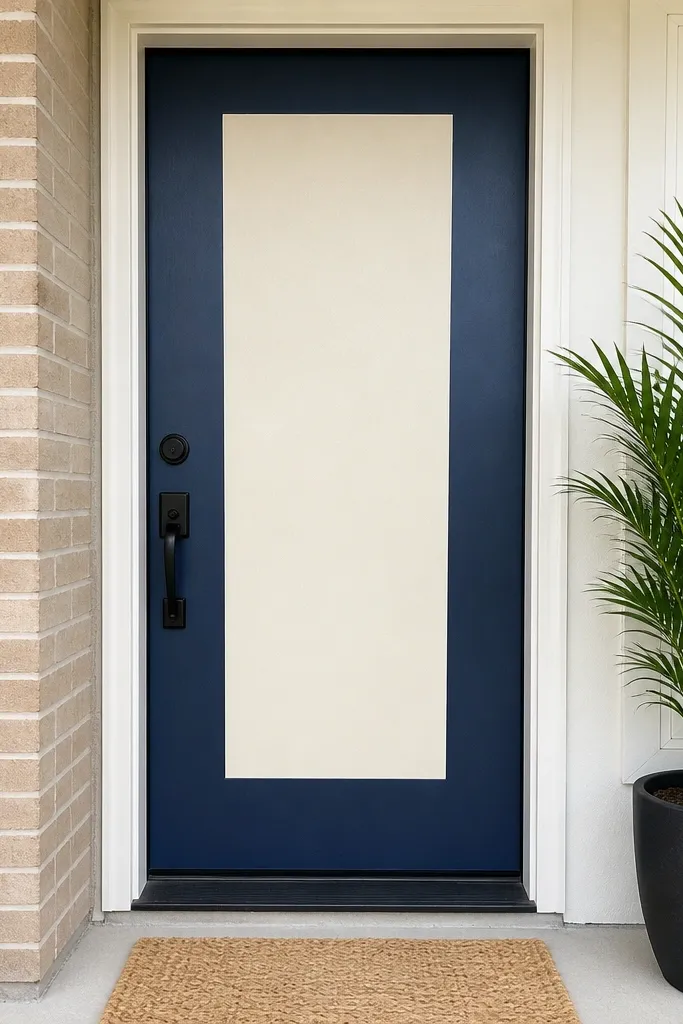
Color blocking makes any entrance look intentional, even if you’re stuck with a rental door. The trick is using removable vinyl panels in two complementary colors so the door looks like a custom facade. Pick a dark base and a bright accent, like deep navy with a warm cream panel, or black with terracotta. Straight tape lines are what make it look “designer,” not like a craft project. This is best for flat doors and door sections where you can keep edges crisp around hardware.
Editor's notePress the vinyl with a soft squeegee, then run your thumbnail along edges to seal contact.
Clean the door with degreaser, then tape your design lines using painter’s tape. Cut vinyl panels to size slightly larger than the taped area, then press the vinyl into the tape boundaries. Remove tape slowly after you’ve pressed the vinyl edges firmly. Finish by trimming around the knob and lock area with a sharp blade.
Skip thisDon’t choose colors that don’t repeat elsewhere — match the accent in the mat or wreath ribbon.
10. Raised faux corbels on the top corners
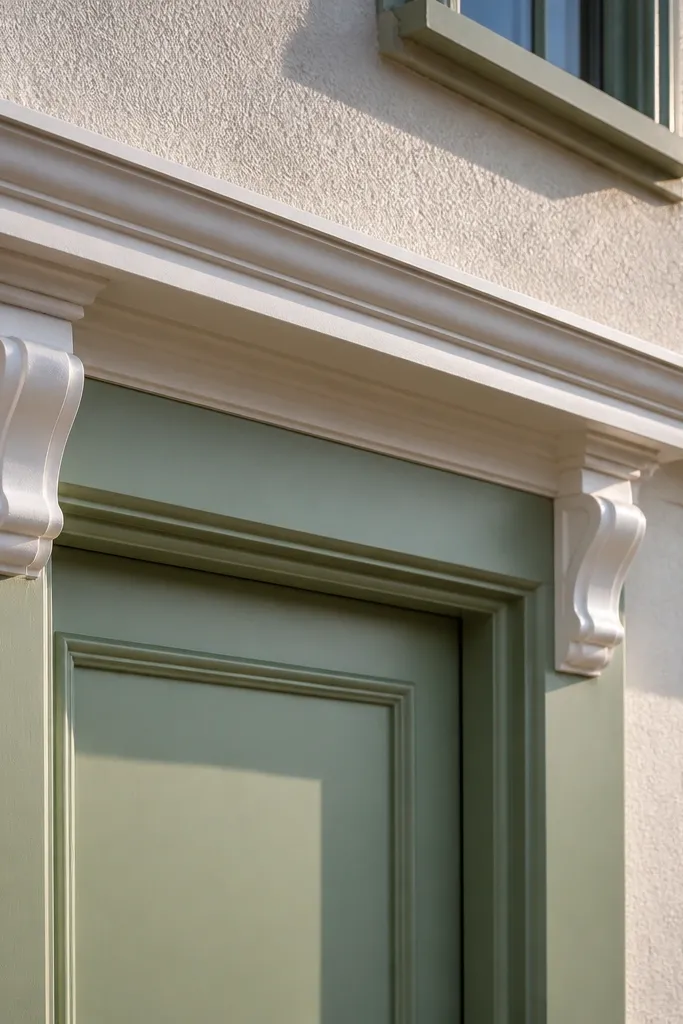
Small architectural details make a renter-friendly main entrance door design feel custom. Faux corbels placed at the top corners add a “mantel” effect, especially if your door has a window or central panel. White corbels look clean against most door colors, and the slight shadow they cast improves the look in direct sun. Use this when you want a classic touch without committing to a full trim overhaul. Installation is simple and reversible if you use adhesive-backed pieces.
Editor's noteMeasure twice: corbels that are off by even 1/2 inch look wrong in photos.
Clean the door surface and let it dry. Position corbels symmetrically, using measurements from the door frame or existing panel lines so they match. Peel and stick each corbel, pressing firmly for the full adhesive set time. If your corbels are lightweight, you can skip extra reinforcement; if they’re heavier, follow the included mounting method.
Skip thisAvoid placing corbels where rainwater drips — adhesion fails over time.
11. Matte paint look using removable door-safe coating
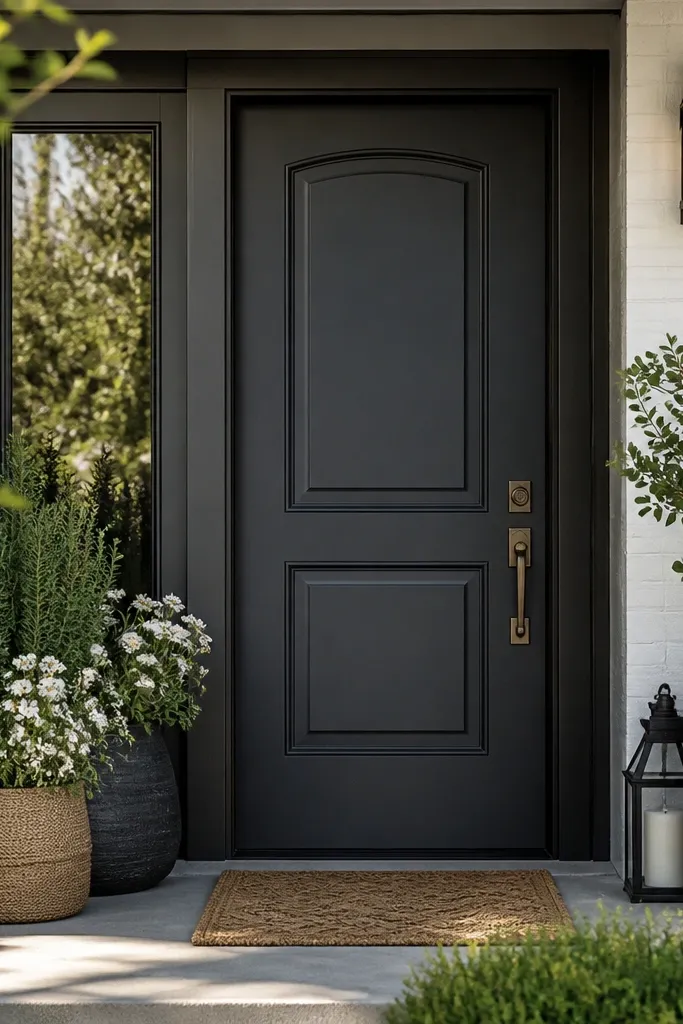
If you want the deep, smooth look of paint but without permanent commitment, a door-safe removable coating can get you there. Matte finishes hide minor imperfections and make the door look expensive in daylight. Choose a color that works with your exterior — black, charcoal, deep green, or warm cream all photograph well. This is for renters who can remove the coating later and who can prep carefully. The result is a uniform finish that makes all your decor look coordinated.
Editor's noteUse a foam roller for the smoothest matte finish with fewer streaks.
Clean the door with degreaser and remove any residue. Mask off the knob, lock hardware, and any glass with painter’s tape. Apply the removable coating in thin, even coats, following the product’s dry time between coats. After the final coat cures, remove masking slowly and check edges for any touch-ups needed.
Skip thisDon’t paint over moisture — even a damp door creates patchy spots.
12. Faux wood slat vertical panel with peel-and-stick backing
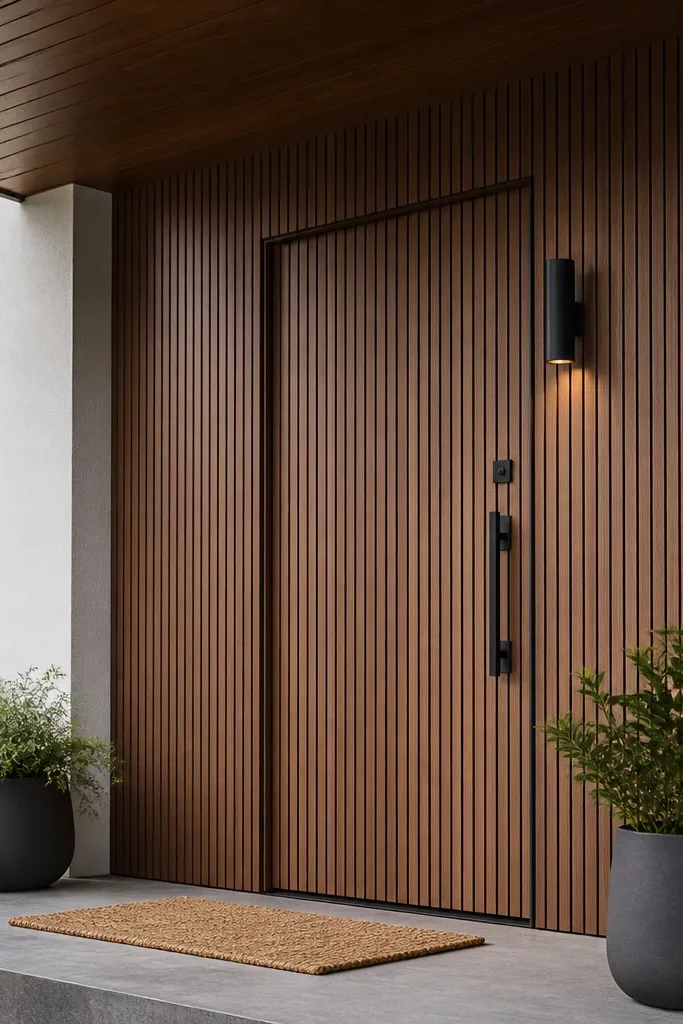
Vertical slats add height and make a door feel taller and more expensive. Faux wood slats with peel-and-stick backing create a strong texture that catches light and looks great in both shade and sun. Warm brown slats work especially well with black hardware and natural fiber mats. This is a strong move for a renter-friendly main entrance door design because it gives you real depth without permanent carpentry. It also hides minor dents and scratches better than flat paint.
Editor's noteUse a guide line with painter’s tape to keep the first slat perfectly straight.
Clean and dry the door slab where the slats will go. Plan your slat width and spacing so the pattern lands centered — for most doors, 1-1/2 to 2 inch slats with thin gaps looks balanced. Apply slats from the center outward to keep symmetry, pressing each strip down firmly. Cut around the knob and any inset areas, then seal edges with gentle pressure.
Skip thisDon’t stack slats too close — tight gaps can make the pattern look like a sticker sheet.
13. Removable porch light shade in a warm brass tone
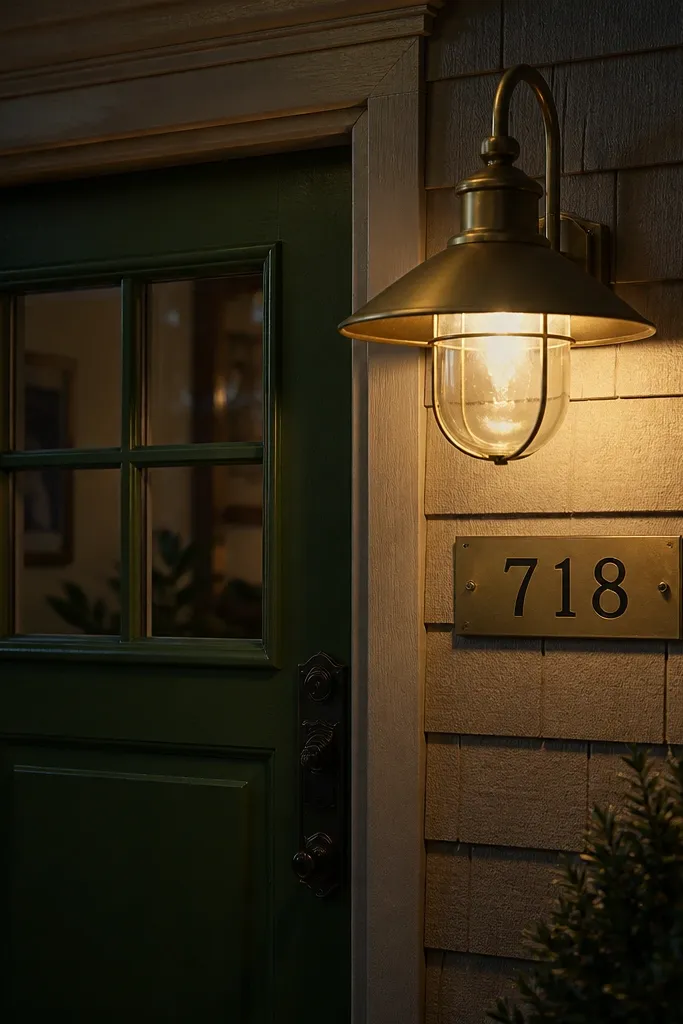
Lighting is what turns a rental door upgrade into a real “designed” entrance. A warm brass-toned shade or lantern-style cover makes the door look styled at night, which is when most people actually see it. If your landlord allows it, use a plug-in or removable fixture cover that doesn’t alter wiring. The look is photogenic because you get a warm halo and the doorway shadows look intentional. Pair the light with a matching doormat color for a cohesive entry.
Editor's noteUse a warm bulb around 2700K to 3000K for the most flattering door color.
Choose a removable fixture cover or plug-in lantern that matches your current light size. Turn off power if you’re working near wiring, then install according to the product instructions without drilling. Aim the light so it washes the door surface, not just the porch floor. After installation, test at night and adjust placement so the door face gets the glow.
Skip thisDon’t pick a cool blue bulb — it makes vinyl wraps and faux wood look gray.
14. Door frame magnetic screen door trim look
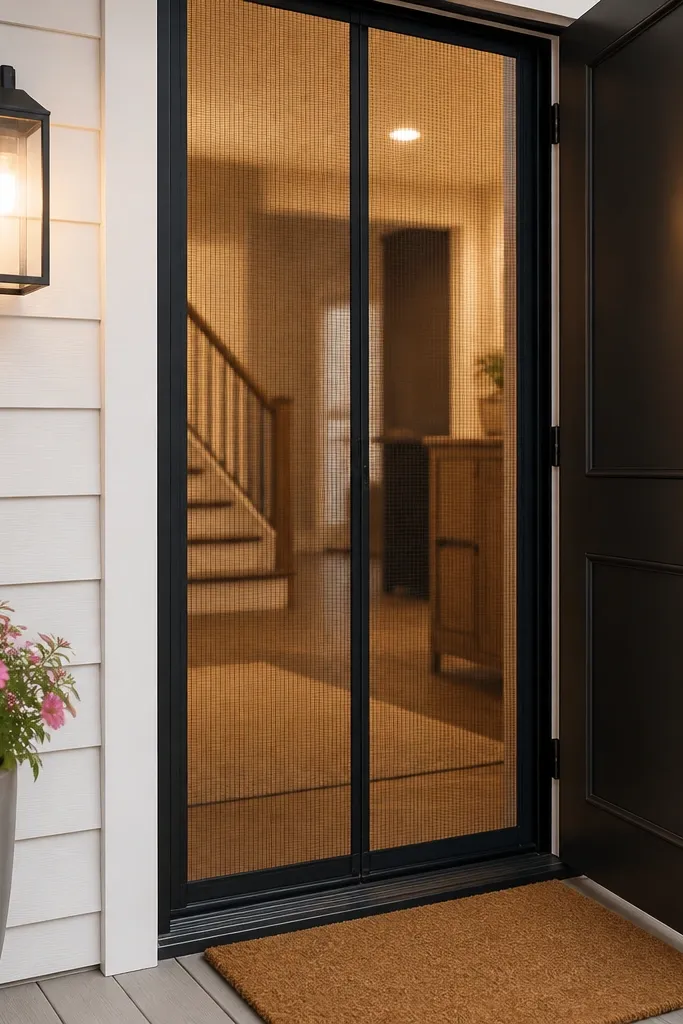
Some renters hate their main entrance because of functional hardware — like a screen door that looks bulky. A magnetic screen with a clean trim line can visually tidy the entry while keeping airflow. For renter-friendly main entrance door design, choose a screen with a slim frame and a color that matches your door hardware. The screen becomes a crisp border, which helps the door look more intentional even when it’s open. This is best for apartments or homes where the entry is used daily.
Editor's noteClose and open the screen a few times before final adjustments so magnets settle evenly.
Measure the door opening width and height carefully, then buy a magnetic screen kit sized for your opening. Clean the mounting surface areas and install the magnetic strips or frame per instructions. Set the screen panel so it sits straight and the gaps are even on both sides. Add small matching trim pieces if your kit allows to hide seams.
Skip thisDon’t install on warped or dusty trim — magnets won’t hold and the screen will sag.
15. Textured doormat + threshold border in matching tone
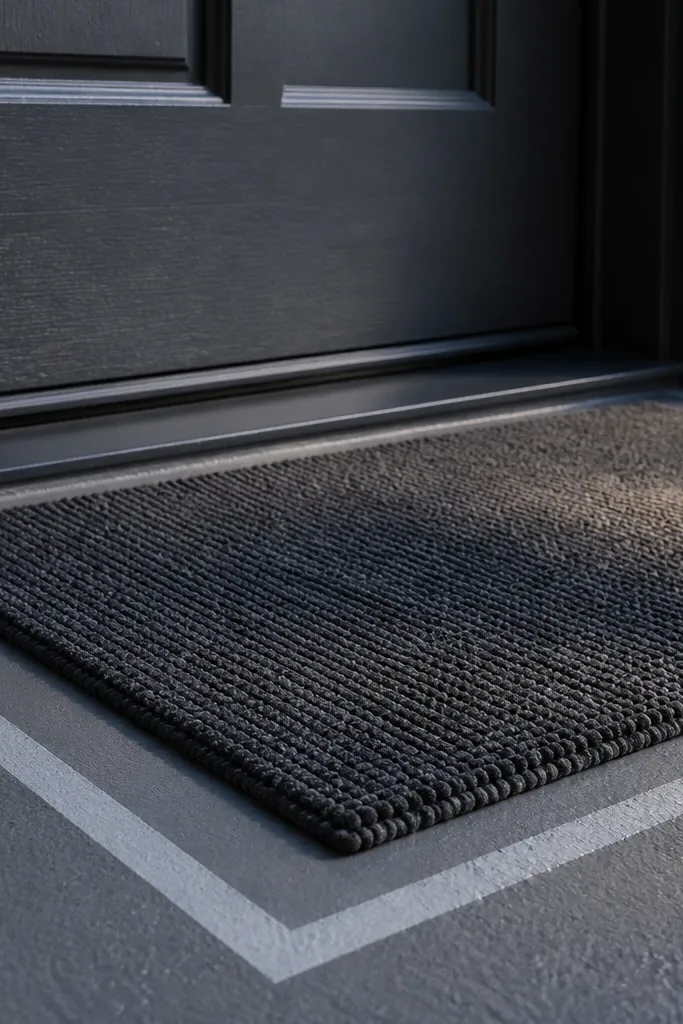
This is the unglamorous upgrade that makes the whole entrance look finished. A thick textured mat in a color that matches your door frame creates a clean base line, and it photographs better than thin mats that curl. Add a simple threshold border paint line or tape line to make the mat look like it’s framed. It’s renter-friendly because it doesn’t require changes to the door itself, just a crisp edge at the bottom. Choose coir or rubber-backed mats for durability and a look that holds up outdoors.
Editor's noteChoose a mat with a low, tight weave for a cleaner look in photos.
Pick a mat size that leaves about 1 inch of space on both sides of the door swing area. Clean the threshold, then tape a straight border line along the edge you want to frame. Paint with exterior trim paint and let it cure before placing the mat. After the border is dry, place the mat centered and check that the door clears it.
Skip thisDon’t use a mat color that clashes with the door hardware finish.
16. Door glass window corner decals in matte finish
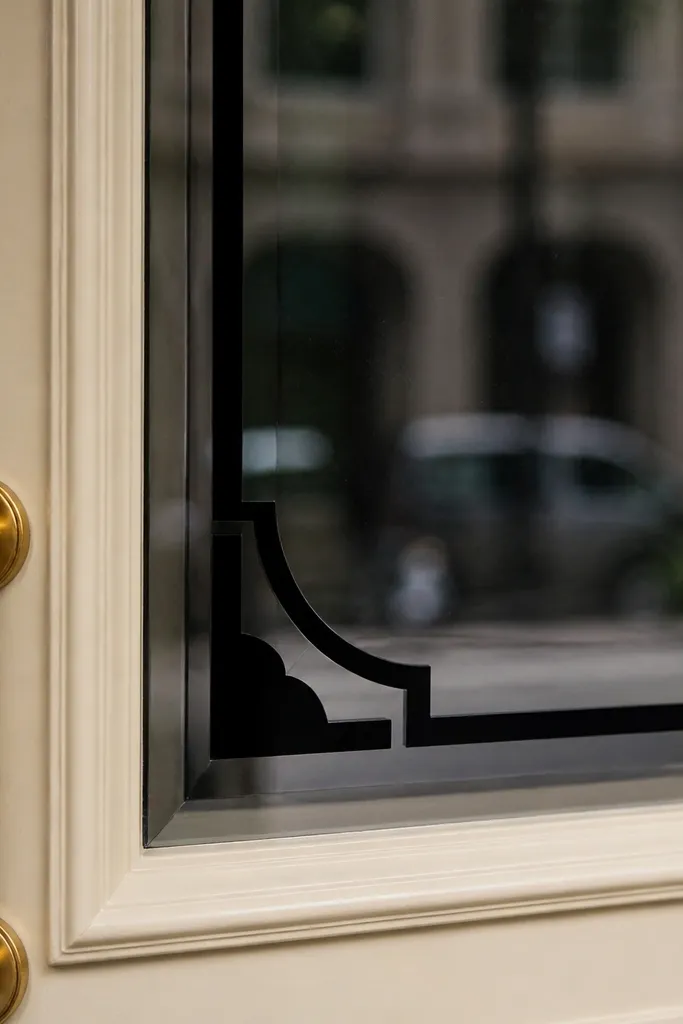
Corner decals are small, but they change the whole glass look. Matte decals in black or deep green add a modern, tailored vibe without turning the glass into a sticker wall. This idea works when you want renter-friendly main entrance door design upgrades that don’t cover the entire panel. The result is photogenic because the decals catch light at the edges and create a framed window effect. It’s also easy to remove if you switch styles later.
Editor's noteIf the glass is slightly curved, warm the decal with a hair dryer before pressing to reduce lifting.
Clean the glass thoroughly and wipe dry so the adhesive grabs. Measure the window corners and choose decal sizes that fit within the glass area without touching the edges. Apply one corner at a time, aligning using a ruler and pressing down firmly along the edges. Repeat for the other corners and smooth any raised edges with a plastic card.
Skip thisAvoid glossy decals — they reflect in a way that looks cheap on camera.
17. Removable curtain-style door swag for a soft frame
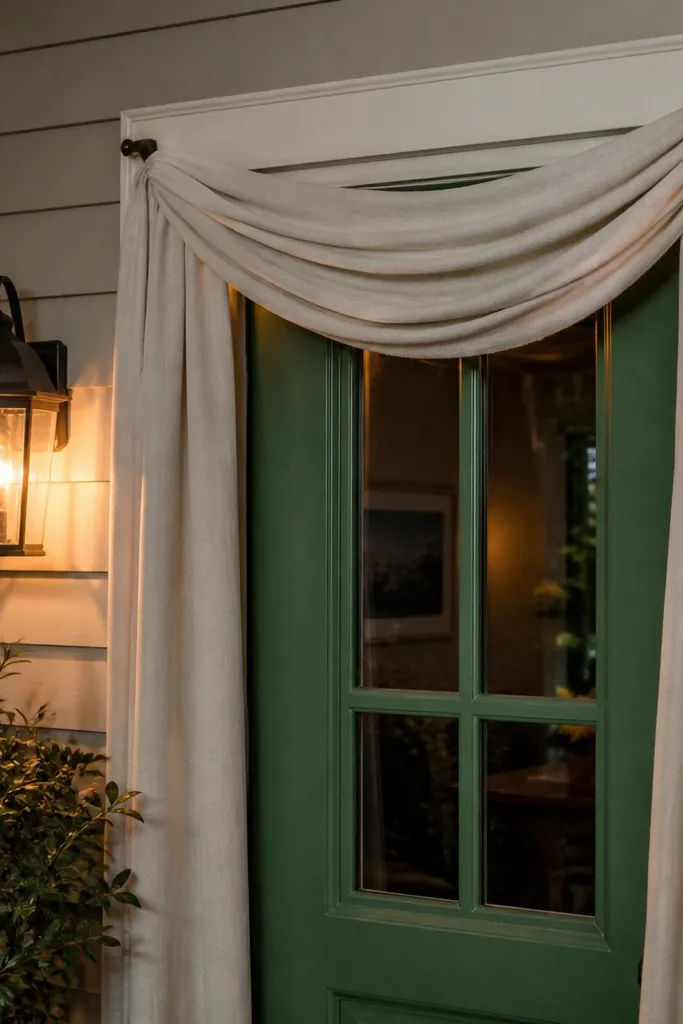
A door swag makes a rental entrance look styled without changing the door surface. It frames the top of the door and gives you a layered look that reads cozy in photos. Use a tension rod or adhesive-backed curtain rod designed for rental use, then hang a fabric panel in a color that matches your exterior trim. This is best for doors with sidelights or a window area where fabric can frame the space. Keep it simple: one fabric, one color, and a clean drape.
Editor's noteIron or steam the fabric before hanging so the drape looks crisp from day one.
Choose a tension rod or rental-safe adhesive rod sized to your door width. Clean the rod mounting area and install the rod at the height that leaves space for wreath decor. Hang a single fabric panel or swag using rings or clips, then adjust the drape so it falls evenly on both sides. Tie with a ribbon to create symmetry and press the fabric lightly so it holds shape.
Skip thisDon’t use slippery polyester — it slides and looks uneven within a week.
18. Matte faux leather door knocker with adhesive base
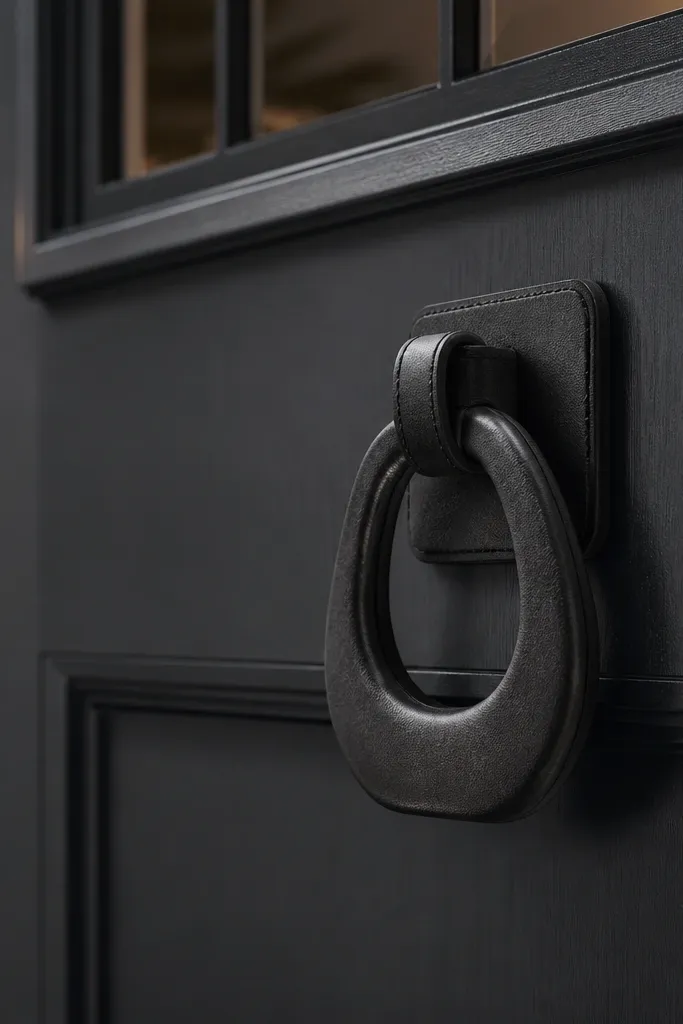
A knocker is one of the most visible details and it photographs like jewelry. For renter-friendly main entrance door design, choose a knocker that installs with adhesive base or a clamp mechanism, not screws into the door. Matte faux leather or matte metal finishes look modern and hide fingerprints better than shiny chrome. This works best on doors with a flat panel where the knocker can sit centered. Add a matching door number style and you get a cohesive “entry set” look.
Clean the spot where the knocker base will sit with degreaser and dry fully. Position the knocker so it aligns with the centerline of the door, then mark the placement with painter’s tape. Apply the adhesive base using the product’s instructions and press firmly for the required time. Avoid using the knocker for the first few hours if the adhesive needs cure time.
Use masking tape to hold it in place while the adhesive sets so it doesn’t shift.
Skip glossy finishes on sunny doors — glare makes the detail look washed out.
19. Two-tone door handle and lock cover wraps
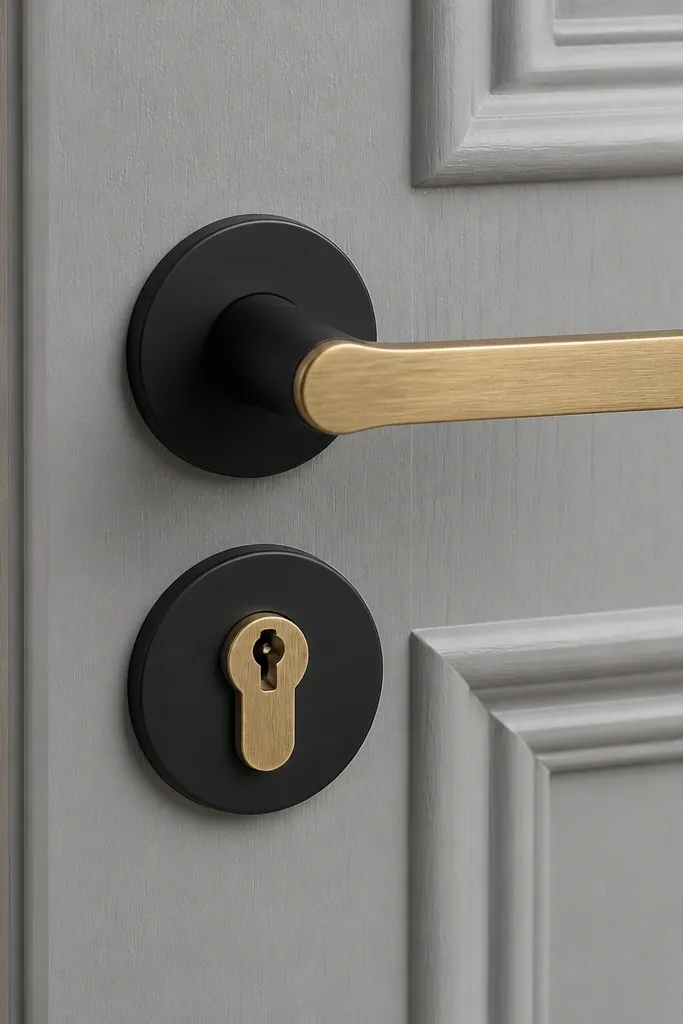
If your door hardware looks mismatched, the entrance looks unfinished even when everything else is cute. Hardware wraps are an easy renter-friendly main entrance door design upgrade because they cover existing knobs and levers without removing anything. Choose a finish that matches your trim color, like matte black covers on brushed steel hardware. The visual payoff is high because the handle area sits right where people focus when approaching the door. It also helps the door look newer and more deliberate.
Editor's noteWarm the wrap slightly with a hair dryer so it conforms to curves cleanly.
Clean the knob and lock area with degreaser and dry completely. Select wrap covers that match your knob shape and size. Peel and apply starting at one edge, smoothing as you go to avoid wrinkles. Trim any excess carefully with a sharp blade and press around seams so it grips.
Skip thisDon’t apply over fingerprints or grime — the wrap will lift at edges.
20. Removable arch-top door frame decal in soft sage
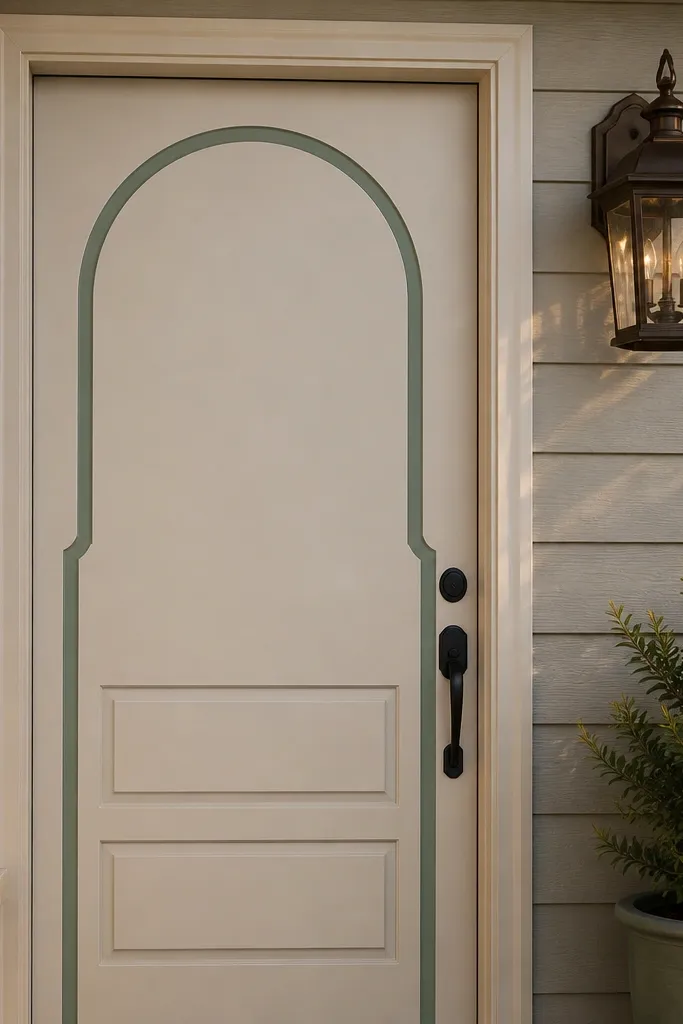
This renter-friendly main entrance door design adds a clean, custom-made frame look without touching the door. The arch shape draws the eye up and makes even a basic flat door feel styled, especially if your entry gets a lot of afternoon sun. Use a matte vinyl decal in soft sage to get that calm, designer color that looks good next to warm wood, black hardware, or white trim. It works best on smooth-painted doors, metal doors, or doors with a simple inset panel where you can stick a crisp outline. Plan on about 1 to 2 hours total, and it’s a great pick if you want impact but you cannot commit to paint or trim work.
Editor's noteUse a hair dryer on low for 10 to 15 seconds while you smooth the vinyl — it helps the decal sit flat around any tiny texture.
Clean the door surface with an alcohol wipe (or isopropyl alcohol on a lint-free cloth) and let it fully dry. Measure the door area you want framed and cut an arch template out of cardboard: aim for a 6 to 8 inch vertical height above the top edge of the door insert (or the top of the glass if your door has one). Transfer the arch outline onto transfer paper or peel-off backing, then apply the decal starting at the center top and smoothing outward with a plastic squeegee. Seal the edges with a thin pass of removable vinyl transfer tape if your kit includes it, then press again along the whole outline. If you want a double-line look, apply a second, thinner arch line 1/4 inch inside the first after the first one is set for 10 minutes.
Skip thisDon’t stick vinyl over dust from porch cleaning or sunscreen residue — it will lift at the edges within weeks.



