
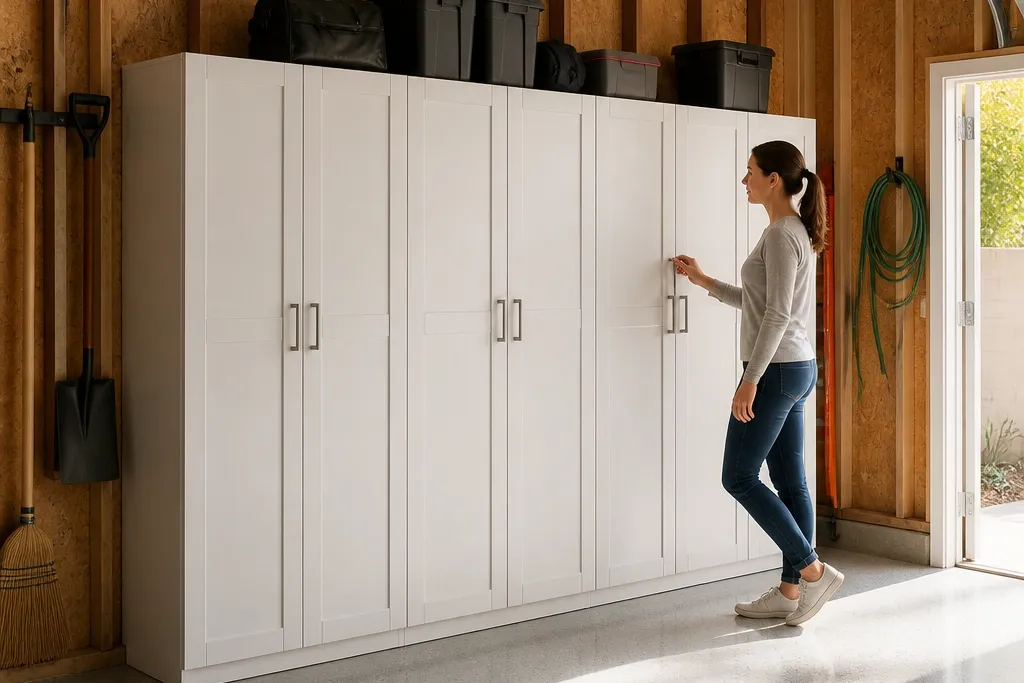
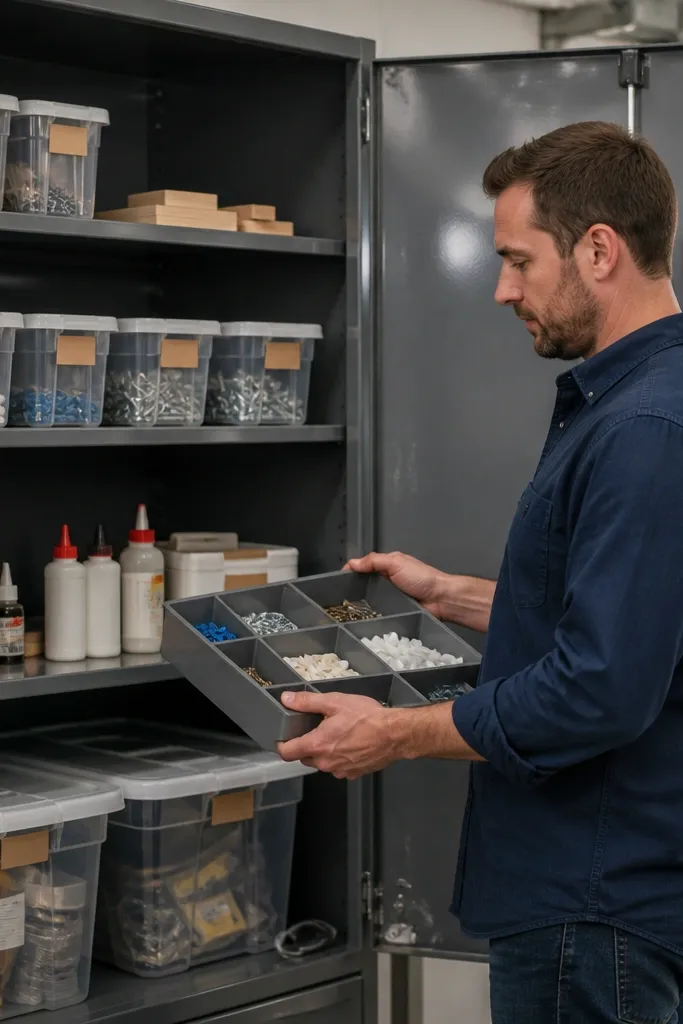
1. Shaker Door Cabinet Wall with Removable Cleat Mount
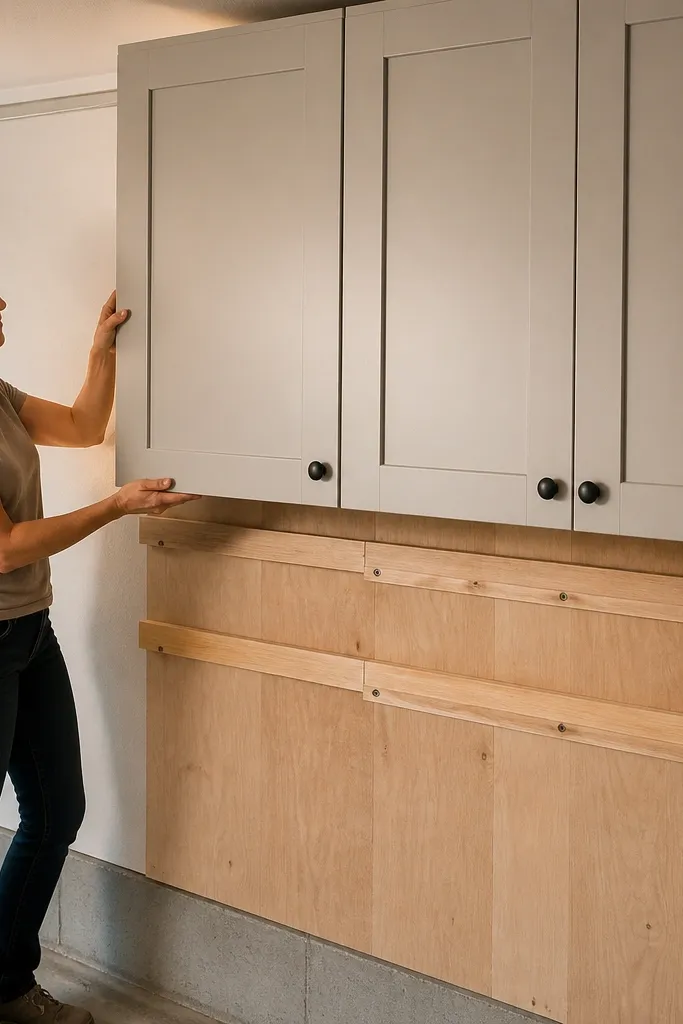
This is the “real kitchen, but for the garage” look. Shaker doors hide mess behind crisp lines, and the consistent 1/8-inch reveal makes the wall look finished even in harsh overhead lighting. The removable cleat mounting is the part that makes it renter-friendly — you attach cleats to a plywood backer that you can remove later without ripping drywall. Build the run with a uniform cabinet height (for example 34 1/2 inches to the top of doors) so your eye reads straight lines instead of a patchwork of boxes.
Editor's noteMark each hinge and pull position with a template before you ever open a drill bit.
Start by cutting a plywood backer sheet to match your cabinet run width and height, then mount cleats to the backer (one on the wall side, one on the cabinet side). Screw the backer to the wall using removable anchors rated for the load you’re carrying, and keep the cleat level with a laser or long level. Build each cabinet carcase from 3/4-inch plywood, add shaker door frames, then hang cabinets onto the cleats. Finish by adding magnetic catches or soft-close hinges and aligning hardware so every door pull sits at the same height.
Skip thisDon’t mount directly to drywall — the doors will sag and the whole look goes crooked fast.
2. Tall Utility Pantry Cabinets with Glass-Free Fronts
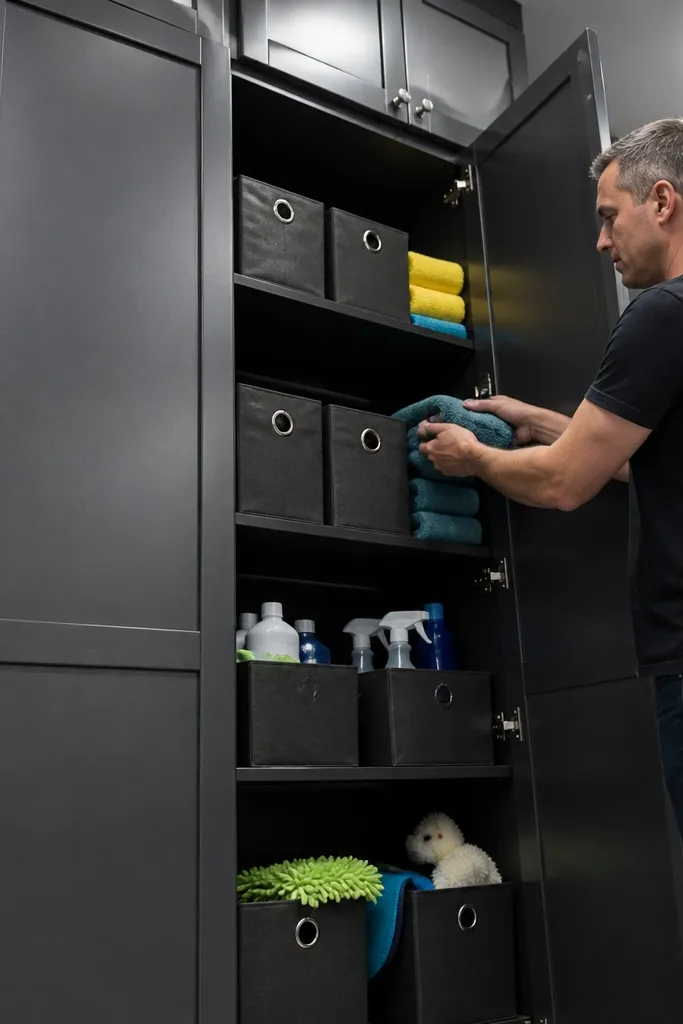
Tall cabinets make the garage feel less like storage chaos and more like a room with zones. Use solid doors instead of glass because garage dust shows up on any transparent surface, and solid panels keep the wall visually calm. Keep the cabinet face consistent and repeat the same knob style across every door for a clean, furniture-like look. This setup is great for renters who want to store seasonal items, spare parts, and bulky consumables without constantly reorganizing.
Editor's noteUse adjustable shelf pins with a consistent spacing so you can reconfigure later without re-drilling door fronts.
Build two to three tall cabinets with 3/4-inch plywood carcases and 1/2-inch backs, sized to your wall space (a common look is 18-inch or 24-inch wide cabinets). Install adjustable shelves at 12-inch or 16-inch centers so you can fit bins and cans without dead space. Hang the cabinets on a rail or cleat system, then add a bottom toe-kick so the base reads intentional. Finish with a durable paint or hard-wearing garage enamel and seal the inside edges where moisture can hit.
Skip thisSkip tiny shelves — they force clutter to spill and your cabinets stop looking neat.
3. Base Cabinets with Toe-Kick Lighting Channels
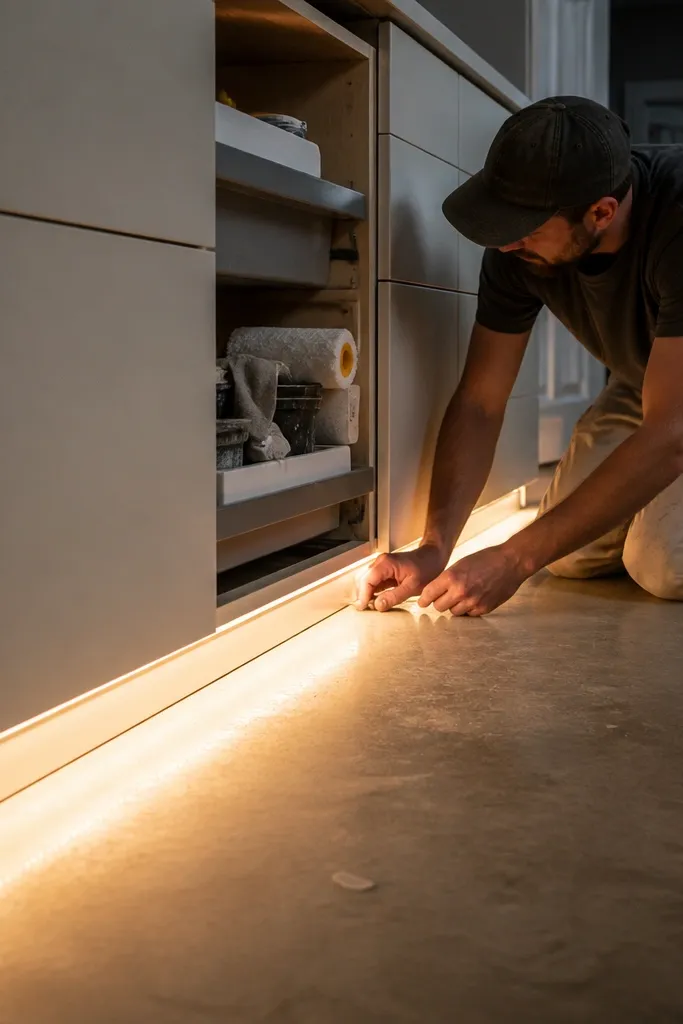
Low base cabinets make the garage look “styled” because you can control the light. A toe-kick LED strip gives you a soft glow under the cabinets, which hides floor mess and makes the door lines look sharper. This is also practical: you see where bins land without shining a harsh flashlight. It’s a strong renter-friendly move because you can mount the base cabinets to a cleat rail at the wall, then strap the top to a stud or anchor point for safety.
Editor's noteUse a frosted diffuser lens for the LED so the light spreads instead of showing pixel dots.
Plan your base run height around a 4-inch toe-kick, then build cabinet carcases with a 3/4-inch plywood frame. Route or attach a 1/2-inch channel under the cabinet face frame for the LED strip diffuser, and run the wiring in a shallow notch behind the back panel. Mount cabinets to a wall cleat at consistent height, then add a simple toe-kick panel in front. Finish by adding a diffuser cover and a dimmer switch so the glow stays warm, not blue.
Skip thisDon’t mount LEDs directly behind bare plywood — you’ll see hotspots and it looks cheap.
4. Corner Cabinet Carousel for Small Parts
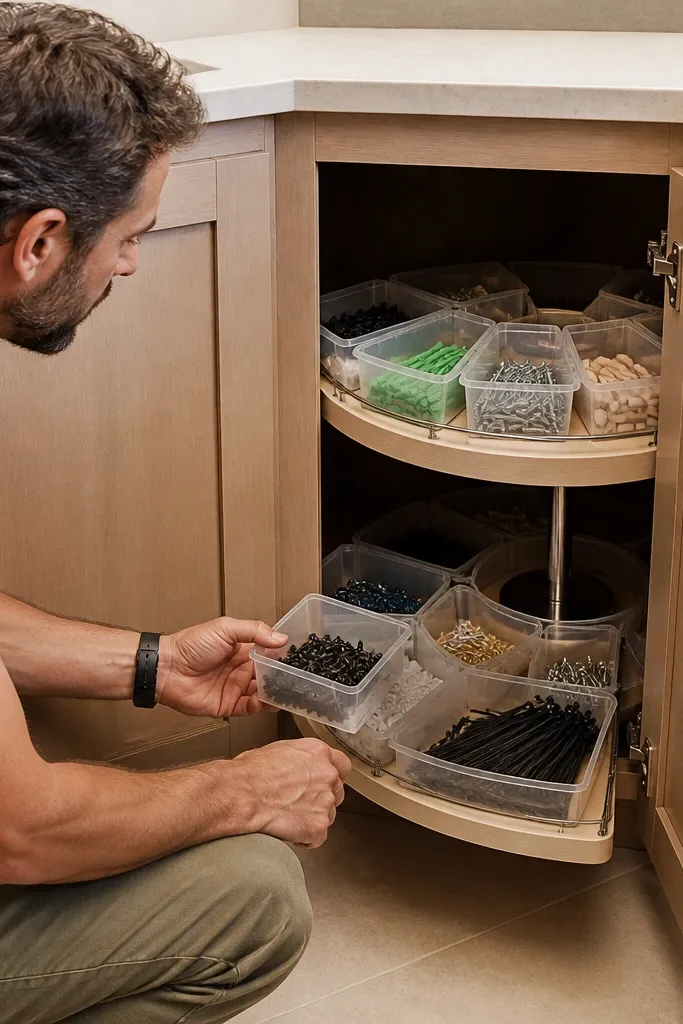
Corners are where garages lose their mind. A corner cabinet carousel puts small parts in a tight circle so nothing gets buried, and the rest of the wall stays clean because the cabinet doors stay closed. The look is sleek when you match the corner cabinet door style to the rest of your run. This is ideal for renters because the carousel hardware is a bolt-in insert, and you can remove the cabinet later without destroying the wall.
Editor's notePaint or seal the inside of the cabinet before you mount the carousel — it’s hard to get a smooth finish once hardware blocks your hands.
Build a corner cabinet carcase with a right-angle frame sized to your carousel ring (measure the carousel insert footprint first). Install a rotating base plate inside the cabinet and mount the carousel platform using the manufacturer’s bolt pattern. Add a standard shaker door front with hinges aligned so the reveal matches your other cabinets. Mount the whole cabinet to a cleat rail or wall rail system, then add a pull-out tray label system for fast sorting.
Skip thisDon’t guess the carousel size — one wrong measurement makes the door bind and the rotation gets stuck.
5. Overhead-Style Cabinetry with Drop-Down Tool Storage
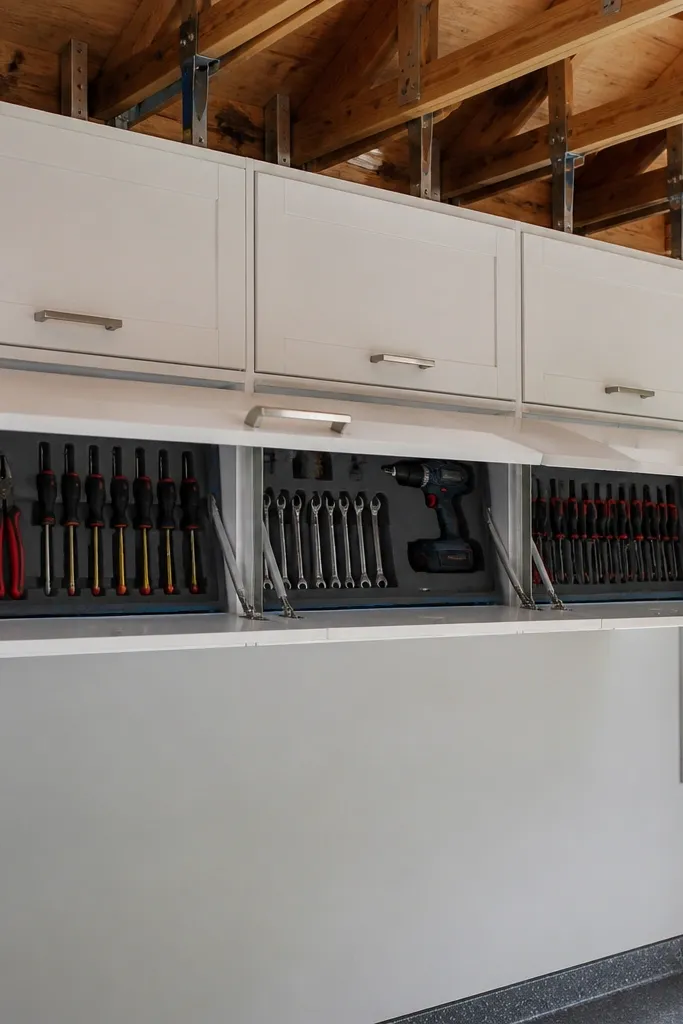
If your garage ceiling is tall enough, overhead cabinets make your wall look intentional and keep the floor open. Drop-down fronts look sharp and make the storage feel like a built-in system. This idea also protects renters because you’re using cabinetry on the wall, not stacking everything on shelves that collect dust. Choose solid fronts and keep the hardware consistent so the whole run reads clean.
Editor's noteUse a hinge mounting jig or square to keep door alignment — dropped-down doors show every crooked line.
Use 3/4-inch plywood for the cabinet carcase and install a backing board where the hinge screws go so the load spreads. Build the door as a shaker-style panel with a 1/8-inch reveal and install the drop-down hinge hardware. Mount the cabinets to a rail system anchored into studs or rated anchors, and use anti-tip brackets so the doors don’t stress the mounting points. Finish with a durable topcoat and add a magnetic latch so the door closes tight.
Skip thisSkip the backer board — hinge screws in thin plywood fail under repeated opening.
6. Slim 6-Inch Vertical Cabinets for Paint Cans and Adhesives
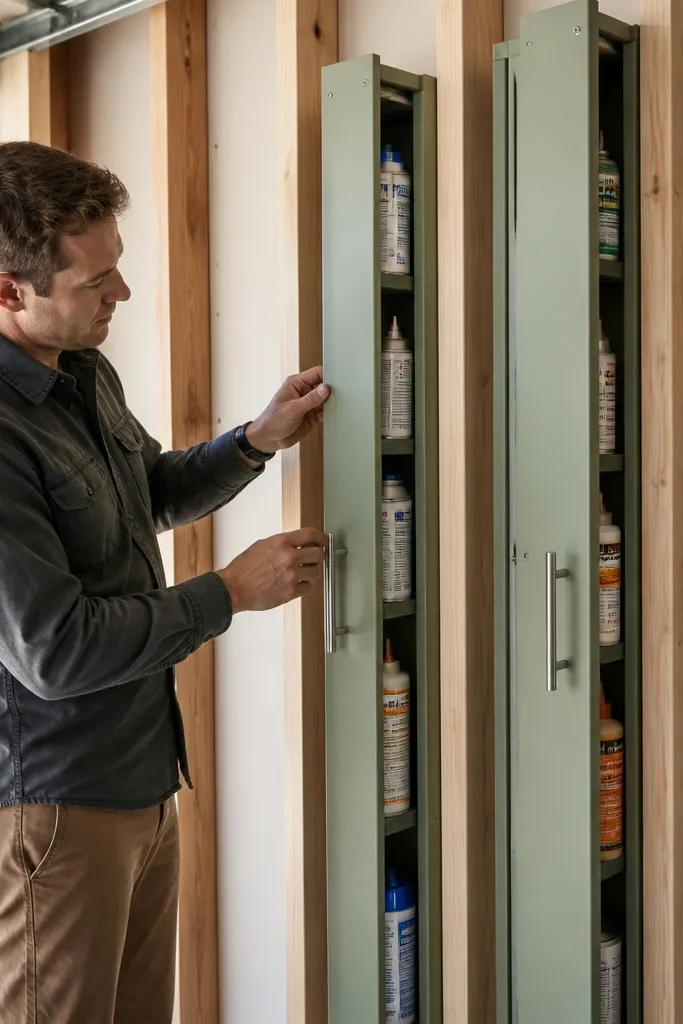
Slim cabinets are the secret weapon for renters because they turn awkward wall space into real storage without taking over the garage. A 6-inch or 8-inch wide cabinet looks clean when you keep the door width consistent and use a simple pull handle. Store paint cans, adhesive bottles, and spray products in vertical holders so you stop stacking and knocking things over. The look stays neat because each item has a slot, and the cabinet doors keep everything dust-free.
Editor's noteLabel the door inside edge with a small color-coded sticker so you can find items without opening every door.
Build narrow carcases from 3/4-inch plywood and add a 1/2-inch back for stiffness. Install vertical dividers spaced to match your can sizes, aiming for 2-3 mm clearance so bottles slide in without scraping. Mount with a cleat rail at the wall and add a bottom shelf for small accessories. Seal inside surfaces and add a simple vent gap if you store solvent-type products.
Skip thisDon’t make dividers too tight — scraped labels and stuck bottles ruin the neat look.
7. Two-Tone Cabinet Run with Matte Black Hardware
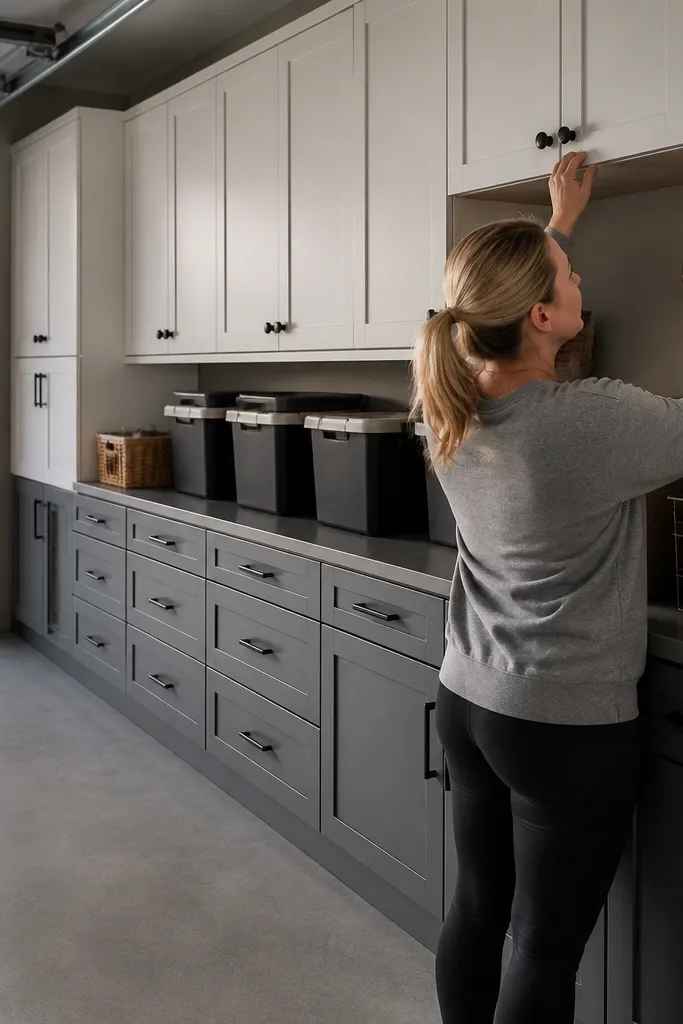
Two-tone cabinetry makes a garage look like a design project, not a storage dump. Pick one cabinet color for bases and a different shade for uppers, then keep hardware matte black across everything. The contrast gives you visual hierarchy: you can see where the everyday bins live versus where the infrequent stuff goes. This is renter-friendly because you can paint cabinets after assembly and mount with a cleat system, so you aren’t stuck with wall color matching.
Assemble carcases first in plywood, then sand and prime all surfaces with a bonding primer. Paint bases one color and uppers another using a foam roller for a smooth finish, then let cure fully before installing doors. Add shaker doors and consistent pulls, keeping pull height the same across the wall. Mount the finished cabinet run on a single level rail line so the two tones line up cleanly.
Use a paint sprayer only if you can control overspray — otherwise foam roller + light sanding between coats gives a cleaner garage finish.
Don’t mix hardware finishes — brushed and matte together looks messy even when the cabinets are new.
8. Garage Cabinet Bank with French-Style Shallow Bins
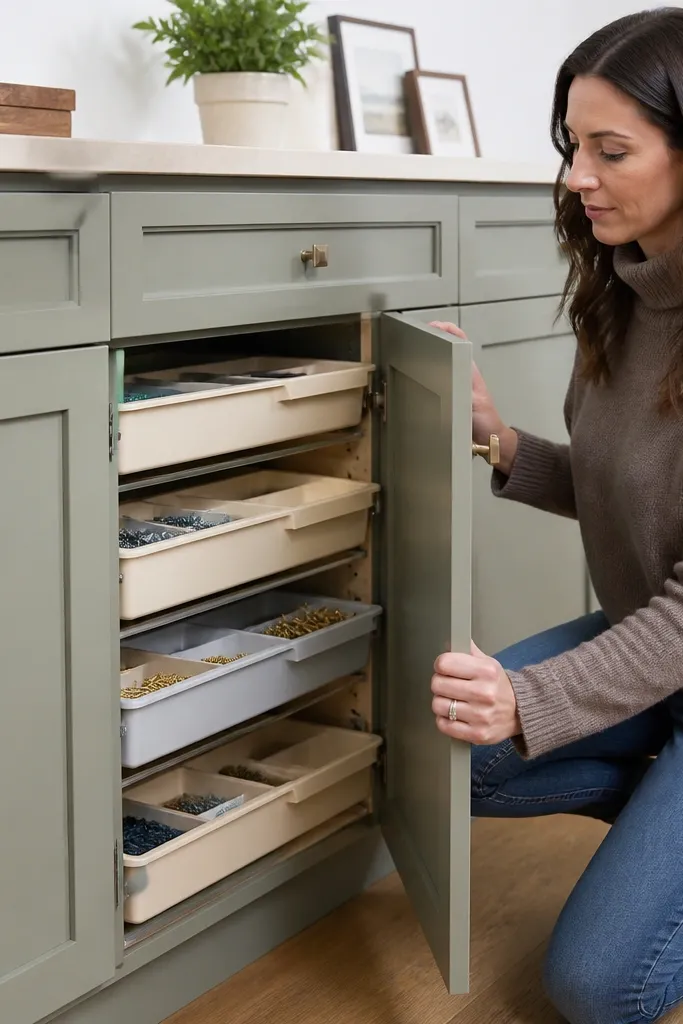
Closed doors look tidy, but they still need smart interiors. Shallow pull-out bins inside a cabinet bank keep screws, fasteners, and small tools visible when the door opens, while the exterior stays clean. The look is especially good when you use matching bin colors or neutral labels so the inside doesn’t look chaotic. This setup works for renters because the bin slides are removable and the cabinets can be disassembled later.
Build a cabinet bank with consistent widths, then install a fixed shelf frame at the height where you want the bin bottoms. Mount soft-close drawer slides to the bin frames and screw into the cabinet interior using pre-drilled holes. Keep bin depth shallow (around 10 to 12 inches) so the door clears and the bins don’t force the interior to look bulky. Finish by adding a simple magnetic latch and a label strip on the inside of each door.
Use 1-inch label tape with a contrasting background for legibility in garage lighting.
Skip deep bins — they hide stuff and the cabinet ends up as a junk drawer.
9. Pegboard-Backed Cabinet Doors for Tool Grab Zones
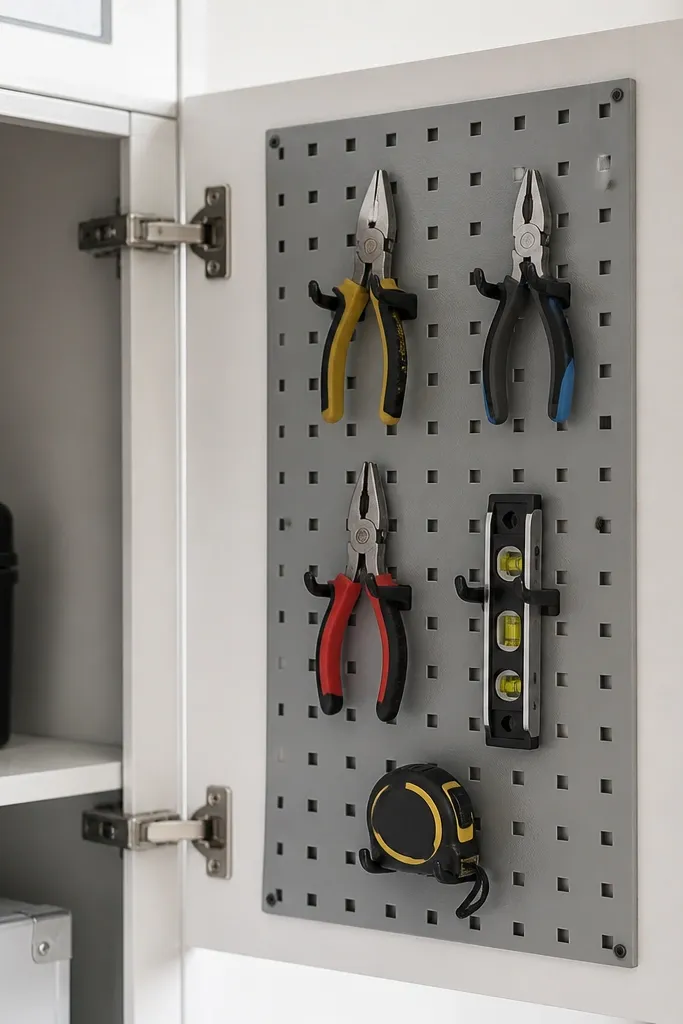
This is the cabinet version of a tool wall. Instead of storing tools randomly in drawers, you mount a pegboard insert inside cabinet doors so you get a tidy, grid-like look when you open them. It keeps your most-used hand tools in one spot, and the door hides everything when closed. It’s renter-friendly because the pegboard insert is modular — remove the doors later and you’re not stuck with permanent wall chaos.
Build cabinets with a standard door frame, then cut a pegboard panel to fit inside the door. Install a backing strip so the pegboard screws bite, then attach hooks and tool holders to the pegboard. Mount the cabinet to a cleat or rail system and keep the door hinge alignment consistent with your other doors. Finish with a latch that holds the door open securely if you want it to stop mid-swing while you grab tools.
Use a single hook style for the whole door so the grid looks intentional, not random.
Don’t overload hooks — too many tools makes the door look cluttered even when it’s “organized.”
10. Cabinet + Slatwall Panel Combo for a Gallery-Like Look
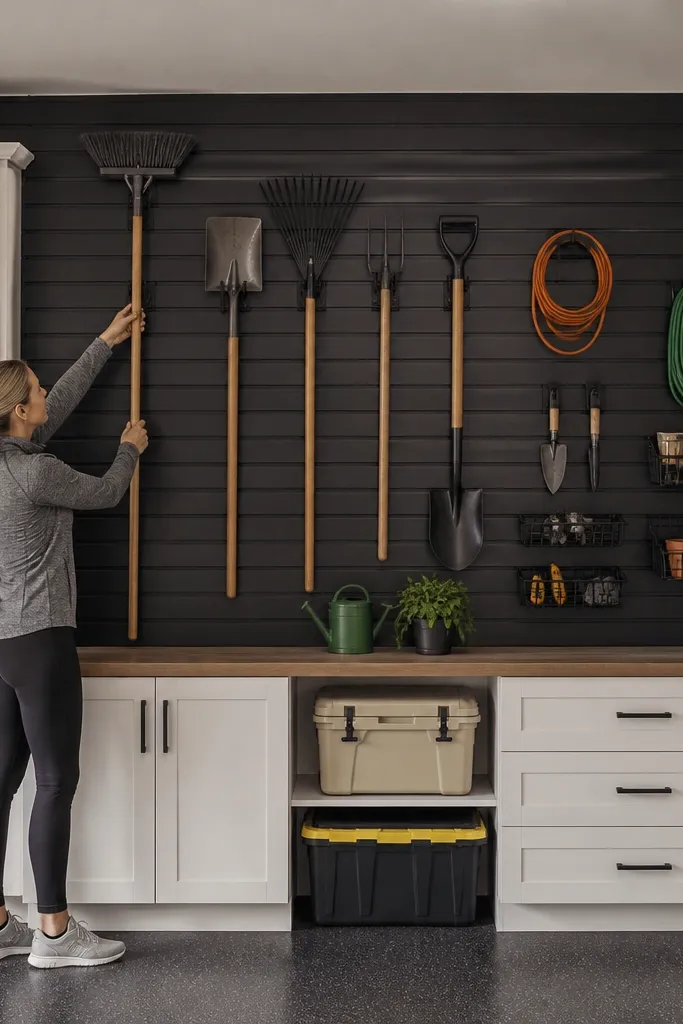
A cabinet wall looks best when you add one controlled open zone. Pair base cabinets with a slatwall panel so you can hang long-handled tools, cords, and small organizers in straight vertical lines. The cabinets hide the messy bulk storage, and the slatwall gives you that clean, grid aesthetic that photographs well. This is renter-friendly if you mount the slatwall with removable anchors and keep the cabinet mount on a cleat line.
Editor's noteChoose one slatwall accessory color (black or white) so the wall reads cohesive.
Install a slatwall panel first on a level line using anchors you can remove later. Build base cabinets aligned to the slatwall edge so the face frames form one straight plane. Add simple door pulls and keep hardware spacing consistent with the slatwall accessories. Finish by using matching hangers and labels so the open area doesn’t turn into a “random tools” wall.
Skip thisSkip mixed accessory styles — different hook shapes make the slatwall look busy even when tools are spaced.
11. Locker-Style Cabinets with Numbered Door Labels
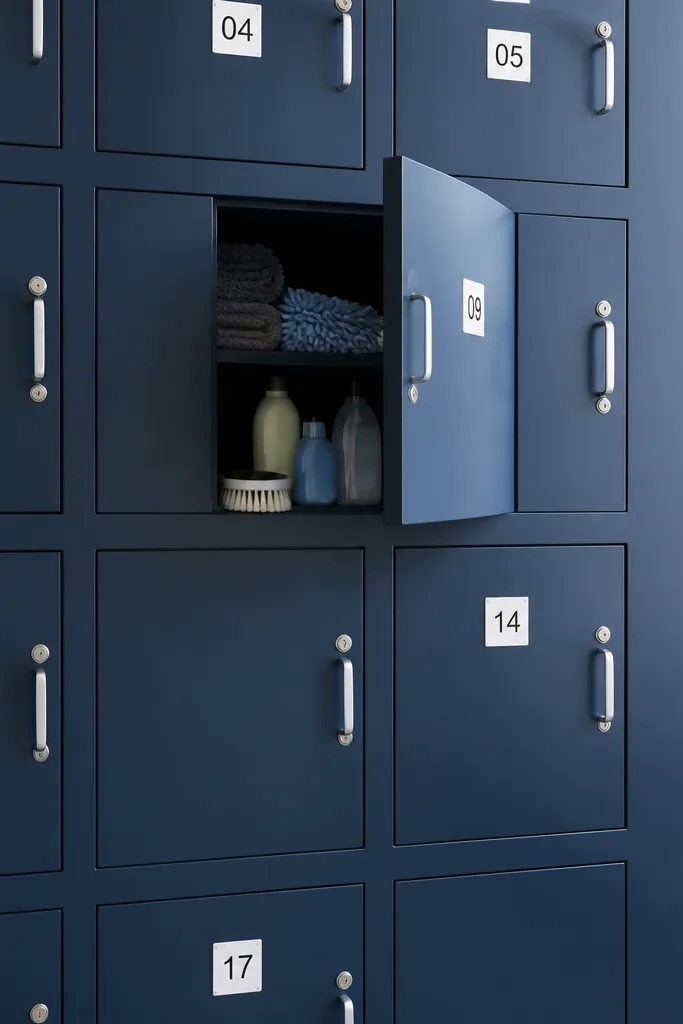
Locker-style cabinets look crisp because they break storage into small, repeatable sections. Numbered labels make it easy to keep order without constant reorganizing, and the doors hide the mess between uses. This is great for shared garages or for anyone who wants a “system” look — everything has a spot and the wall looks patterned. Keep the doors uniform and use one handle style so the pattern reads clean.
Build a grid of small cabinets with consistent door widths, like 12-inch or 15-inch sections, using 3/4-inch plywood carcases. Install shelves inside each section or add pull-out trays for smaller items. Mount the grid to a cleat rail at a single height, then align every door reveal with shims. Add numbered labels on the inside edge of the door and a simple label plate near the handle so you can find items quickly.
Use a label printer with matte label stock so it doesn’t glare under garage lights.
Don’t label only the inside — closed doors make you forget where things go and the pattern breaks.
12. Cabinet with Hidden Trash and Recycling Pull-Out
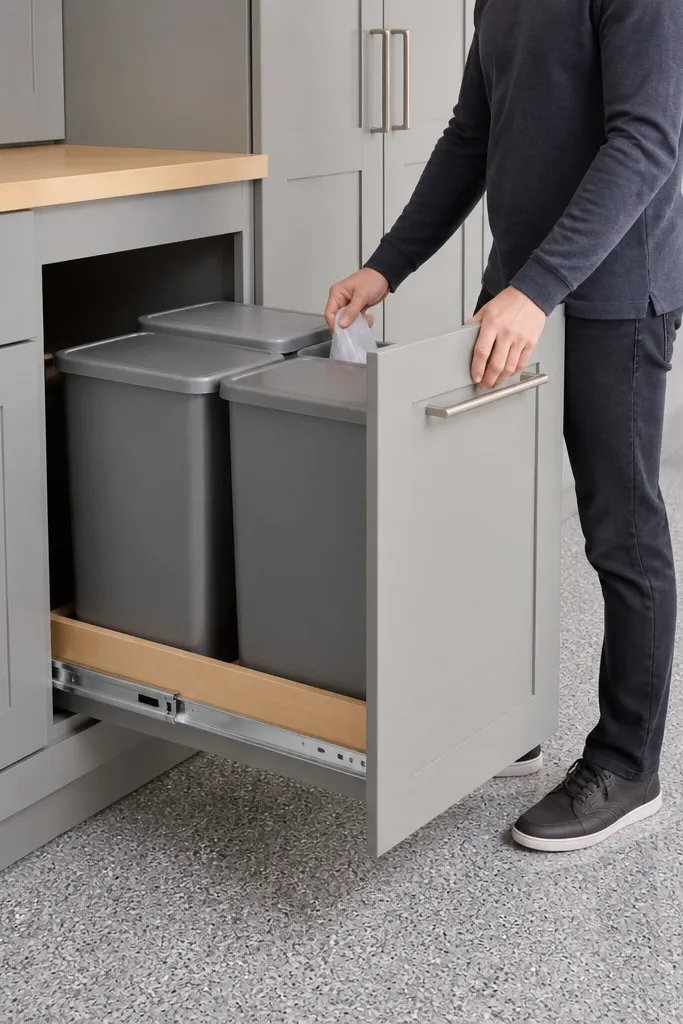
Garages look messy because trash and recycling live in the corner. A hidden pull-out bin inside a cabinet keeps the floor clear and the wall clean, which instantly upgrades the look. Use a cabinet door with a flush pull or a long bar handle so the front stays sleek. This works well for renters because you’re not building a permanent trash enclosure; you’re adding a removable cabinet unit with a controlled mount and a standard door front.
Editor's noteUse a removable bin liner and a drip tray inside so spills don’t stain the cabinet floor.
Build a base cabinet with an internal opening sized for a 13-gallon bin and enough clearance for the pull-out slide. Install heavy-duty drawer slides rated for the bin weight and mount the bin to the slide platform. Add a simple door front with soft-close hinges and a magnetic latch. Mount the cabinet to a cleat rail, then add a toe-kick so the bin area looks built-in, not like a utility cart.
Skip thisSkip the drip tray — a small leak turns into a visible stain behind the door.
13. Tall Cupboard with Adjustable Pegboard Shelves
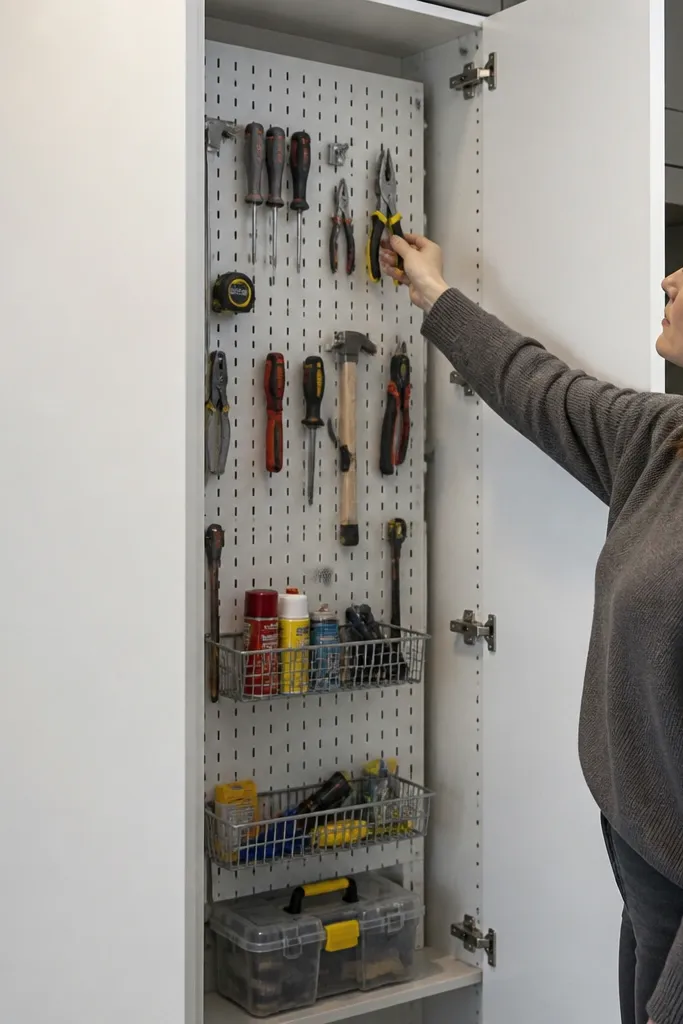
This cabinet idea keeps storage flexible without looking sloppy. A tall cupboard with adjustable pegboard shelves lets you change hook spacing as your tools change, but the door front still looks clean and consistent. The pegboard inside creates a neat grid that’s easy to scan when you open the door. It’s a strong renter-friendly choice because the cupboard is a self-contained unit mounted to cleats, not a wall full of holes.
Editor's noteUse consistent hook colors and sizes inside so the pegboard grid looks uniform.
Build the cupboard carcase from 3/4-inch plywood and install a pegboard panel system on adjustable rails inside. Cut pegboard shelves to fit and attach them with brackets that allow height changes in 1-inch increments. Add a shaker door front and install hinges aligned with your other cabinets. Mount to a wall cleat rail, and strap the top to an anchor point for stability.
Skip thisDon’t mix peg sizes and random hook types — the inside stops looking intentional.
14. Cabinet Pantry for Car Care with Spill-Resistant Trays
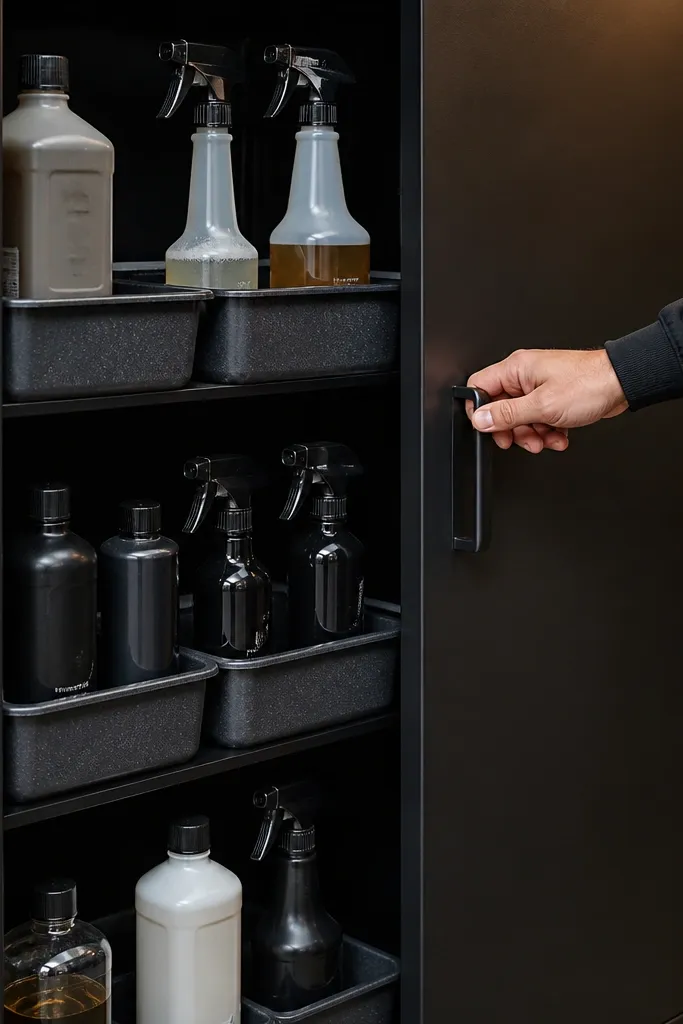
Car care products make garages look grimy fast because leaks happen. A cabinet pantry with spill-resistant trays keeps bottles contained and keeps the cabinet interior neat even after a busy weekend. The aesthetic comes from consistent tray rows and a clean door front that hides the mess. This is renter-friendly because trays are replaceable and the cabinet can be mounted with removable anchors and cleats without permanent plumbing or wall changes.
Editor's noteKeep microfiber storage in a separate tray with a lid so it stays dust-free.
Build a base cabinet with shelves sized for shallow trays (around 2 to 3 inches deep) and add a removable tray system on top of shelf rails. Use a tray material that wipes clean, then label each tray by category: wash tools, wax/polish, and microfiber storage. Mount the cabinet to a cleat rail and add a door soft-close hinge to keep it quiet. Seal the shelf tops and corners so any drips wipe without soaking into raw wood.
Skip thisDon’t store bottles directly on bare plywood shelves — stains show through fast.
15. Slim Upper Cabinets with Crown Detail and Hidden Wire Channels
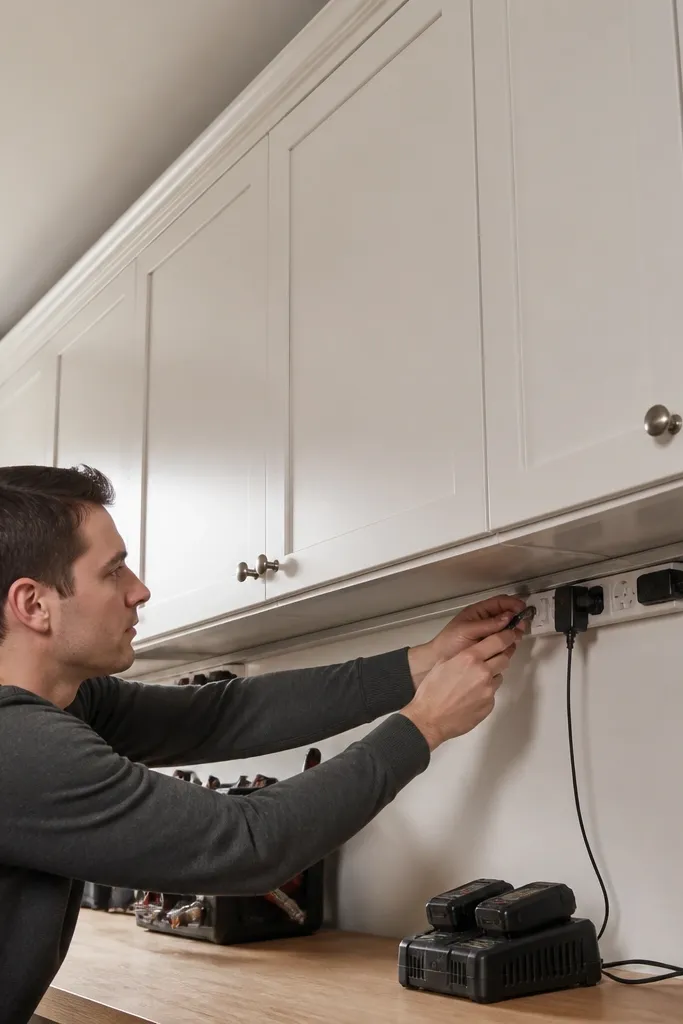
Slim upper cabinets look sharp because they frame the wall without making it feel heavy. Add a simple crown trim and you get that “built-in” vibe, even in a rental. Hidden wire channels inside the cabinet keep chargers, battery tenders, and small power strips from turning into a tangled mess. The look stays clean because cables disappear behind the door, and the cabinet fronts remain uninterrupted.
Build slim upper cabinets at 10 to 12 inches deep with 3/4-inch plywood carcases and 1/2-inch backs. Add a shallow crown strip on the top front edge and keep the door reveals consistent. Cut a 1-inch wire channel into the back panel area and install a grommet where cords pass. Mount the cabinets using a level rail anchored to studs or rated anchors, then add a power strip inside on a removable bracket.
Use Velcro cable ties inside the channel so you can re-route cords later without cutting anything.
Don’t drill random holes in cabinet backs — you’ll end up with visible gaps and frayed cords.
16. Freestanding Cabinet with Faux Built-In Face Frame
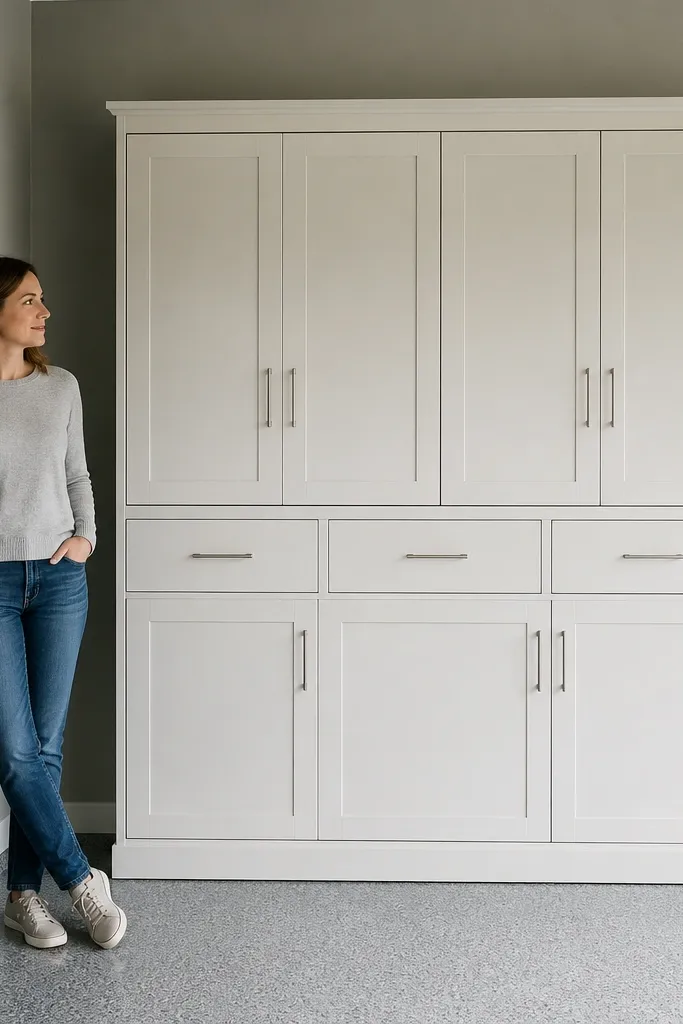
If you want zero wall drilling, freestanding cabinets with a face frame are the easiest way to get the built-in look. Add a consistent face frame around the carcase and align it with your wall’s visual lines, and it reads like it belongs there. This is perfect for rentals where you’re worried about anchor placement or you’re leaving soon. The aesthetic comes from matching the face frame to the door style and keeping the top edge straight.
Editor's noteUse floor-matching shims behind the back edge so the cabinet doesn’t rock and loosen over time.
Assemble the cabinet carcase from 3/4-inch plywood and add a face frame that covers the outer edges. Use adjustable feet so the cabinet levels on uneven garage floors. Add shaker doors with consistent reveals and install hardware at the same height across all doors. Place the cabinet against the wall, then strap it to a stud with a removable anti-tip strap for safety.
Skip thisSkip leveling — a slightly tilted cabinet makes every door line look off in bright light.
17. Cabinet Drawer Bank for Hand Tools with Matte Drawer Fronts
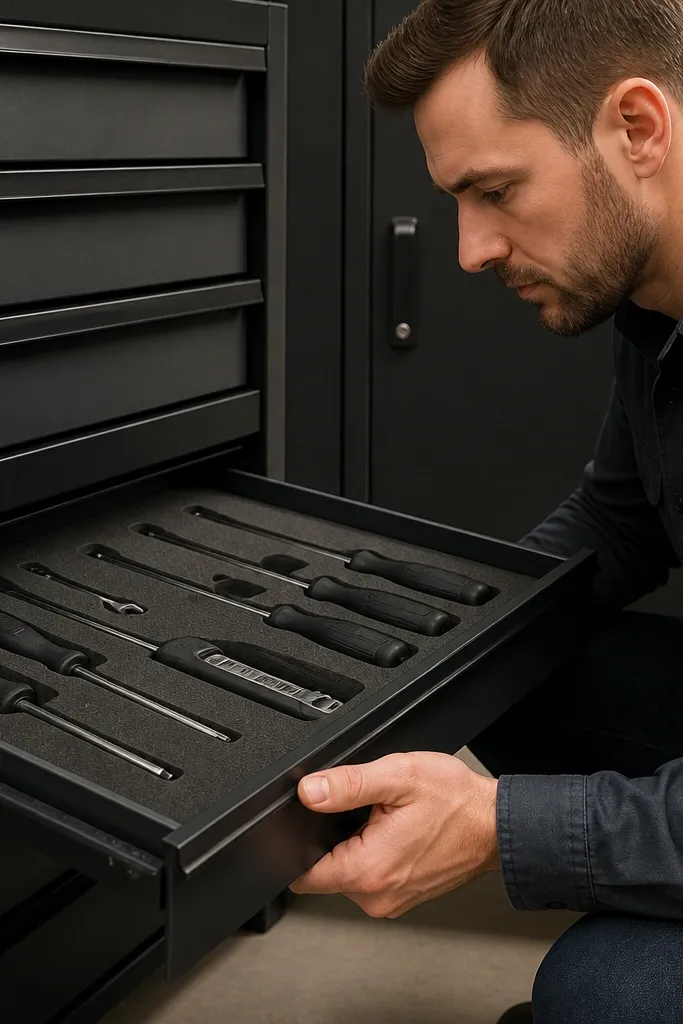
Drawers can look messy if the fronts are shiny and the interiors are chaotic. A drawer bank with matte fronts and foam tool inserts looks clean because each tool has a cutout and the drawer closes into a uniform plane. The look is especially photogenic because you can see the drawer face pattern, then the door stays closed when you’re not using it. This setup is renter-friendly when you mount the upper frame to a rail and keep the drawer slides aligned so nothing binds.
Editor's noteDo a dry fit with every drawer before finishing — matte paint hides alignment problems until it’s too late.
Build a drawer bank carcase from 3/4-inch plywood and install full-extension slides at the correct height for drawer clearance. Make drawer boxes from 1/2-inch plywood and add matte finish to the front panels. Cut foam inserts or use adjustable drawer dividers so tools sit in place without rattling. Mount the cabinet frame to a cleat rail and test drawer travel before you add foam.
Skip thisDon’t overload foam — if tools force the foam, the drawer won’t close smoothly.
18. Garage Cabinet with Sliding Door for Oversized Ladders and Gear
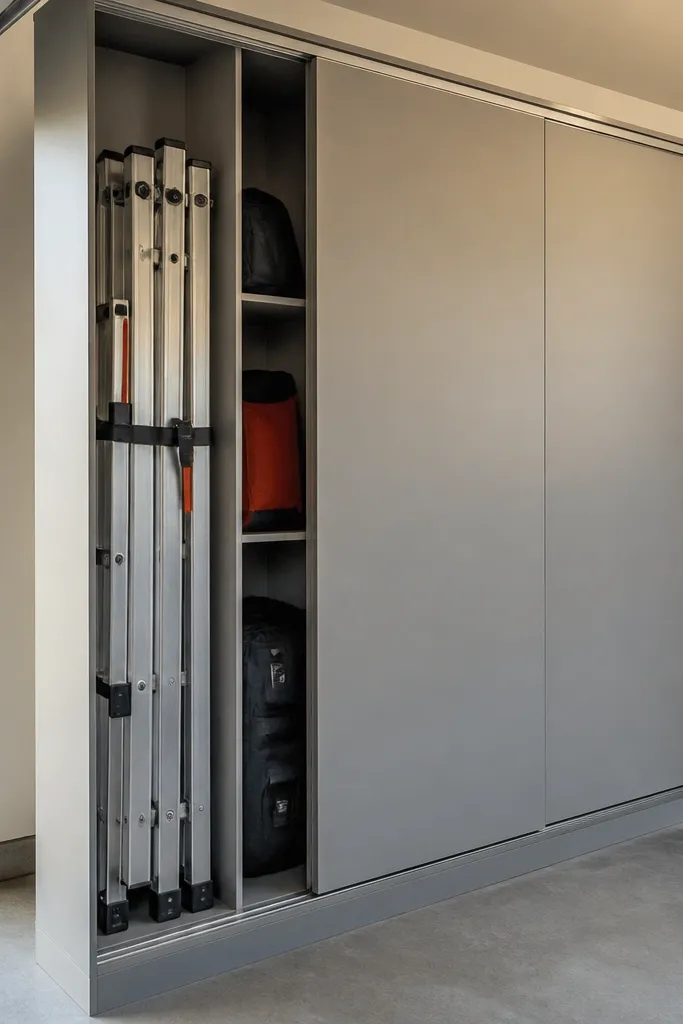
A sliding door cabinet keeps the front clean and handles bulky items better than hinged doors. It looks sleek because the door panels create one continuous line, and it’s great when you have a tight walkway where swinging doors would hit. Store oversized gear like extension cords, seasonal sports items, or extra bags behind the sliding panel so the wall stays tidy. This is renter-friendly because the tracks attach to the cabinet itself and the cabinet mounts to a rail system.
Build a wide cabinet carcase using 3/4-inch plywood and install a track rail on the top inside edge. Use a sliding door panel size that overlaps the opening by about 1 inch so light doesn’t leak through the seam. Mount the cabinet to a cleat rail and add a floor guide to keep the door from wobbling. Finish the door panel with a durable paint and add a simple pull handle on the outside face.
Add a soft-close bumper to the track so the door lands quietly and doesn’t rattle.
Skip the floor guide — without it, the door drifts and the seam looks sloppy.
19. Cabinet with Integrated Pegboard Drawer Fronts
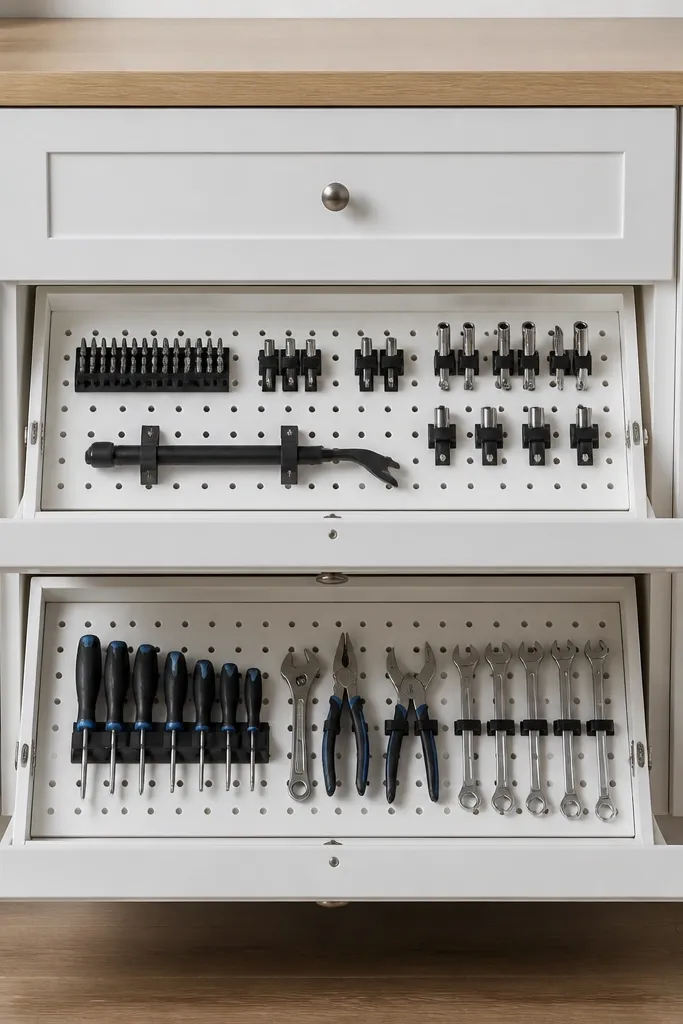
Pegboard drawer fronts make small tool storage look like a clean workshop wall while staying inside a cabinet. The outside still reads as a cabinet system because the fronts match the door style and hardware. When you open a drawer, you get a grid where hooks and small holders are placed in a controlled pattern. This is renter-friendly because the pegboard inserts are removable, and you can swap tool layouts as your needs change.
Editor's noteUse pegboard spacing that matches your most-used hook size so you don’t end up with a weird empty grid.
Build standard cabinet drawer boxes, then cut pegboard inserts to fit the drawer front area. Mount hooks and small tool holders onto the pegboard, then attach the pegboard to a frame so it stays square. Paint or seal the pegboard edges and keep the drawer pulls consistent with the rest of the cabinet run. Install the drawer slides, then mount the cabinet to a cleat rail and confirm drawer clearance.
Skip thisDon’t leave pegboard raw — unsealed pegboard looks dull and stains from oils show up quickly.
20. Cabinet Wall with Concealed Soft-Close Hinges and Hidden Latches
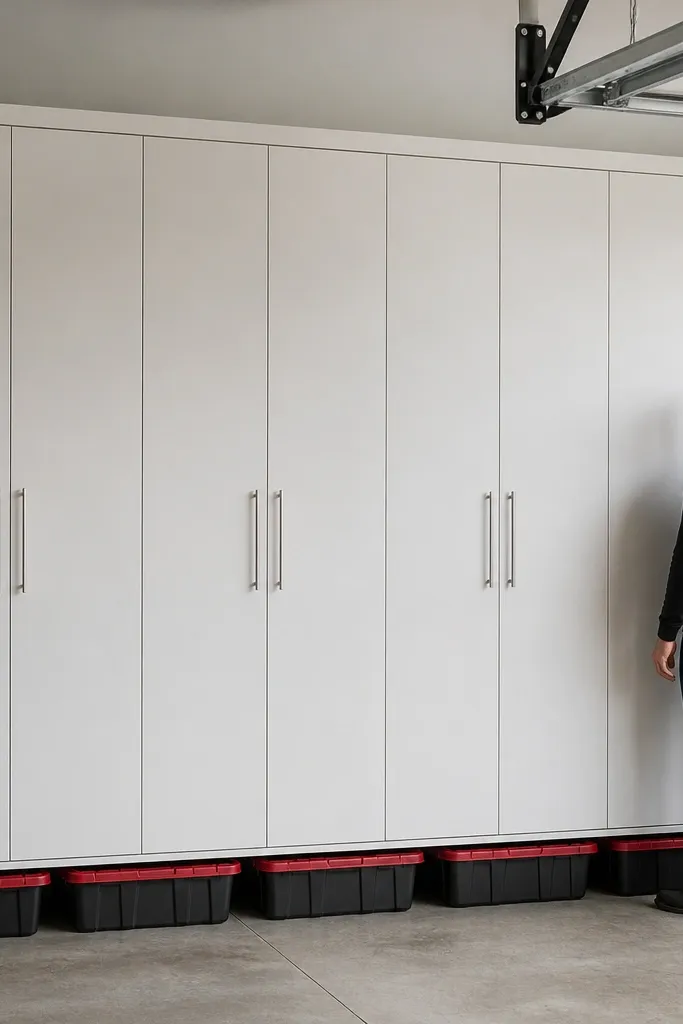
If you want the cabinets to look expensive, hide the messy parts. Concealed soft-close hinges and hidden latches keep the door fronts smooth, which looks clean in photos and in daily use. The look works because the door plane stays uninterrupted — no exposed hooks or bulky hardware. This is renter-friendly because concealed hinges don’t require complicated wall modifications; you’re just building a proper cabinet carcass and mounting it straight.
Editor's noteMeasure door-to-door reveals with a single spacer strip so you don’t chase alignment by eye.
Choose concealed hinges rated for your door weight and install them with a hinge jig so every door sits at the same height and depth. Use a hidden magnetic latch or spring latch inside the frame so the exterior stays flat. Build the carcases from 3/4-inch plywood and add a back panel for squareness. Mount the cabinet run to a cleat rail, then adjust hinge screws until every door reveal matches across the wall.
Skip thisDon’t skip cabinet squaring — a slightly racked frame makes hidden latches impossible to align.



