
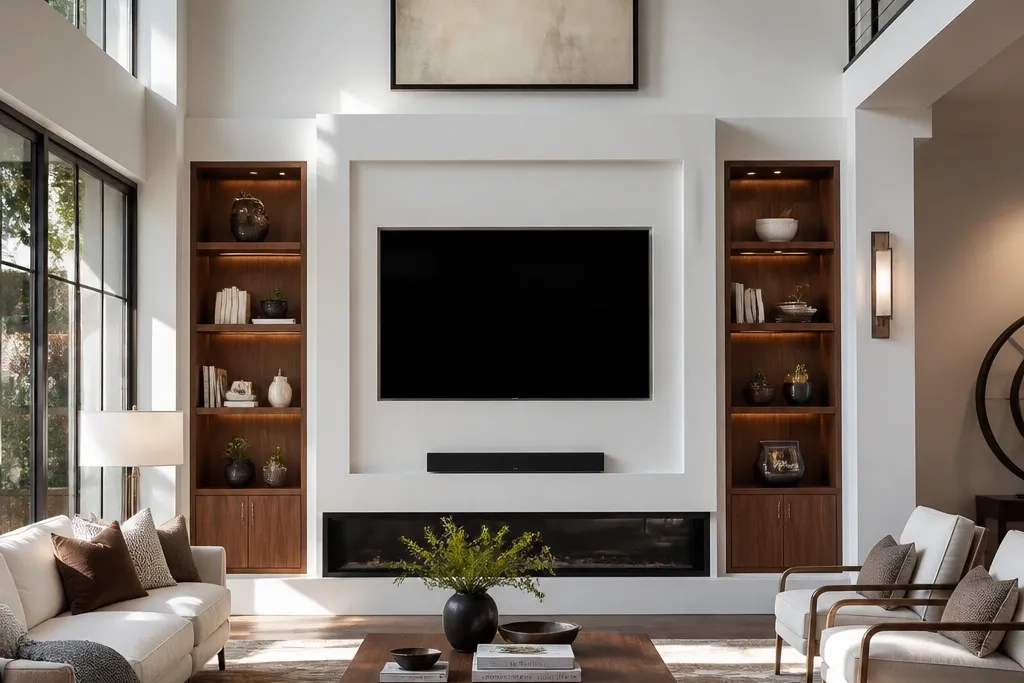
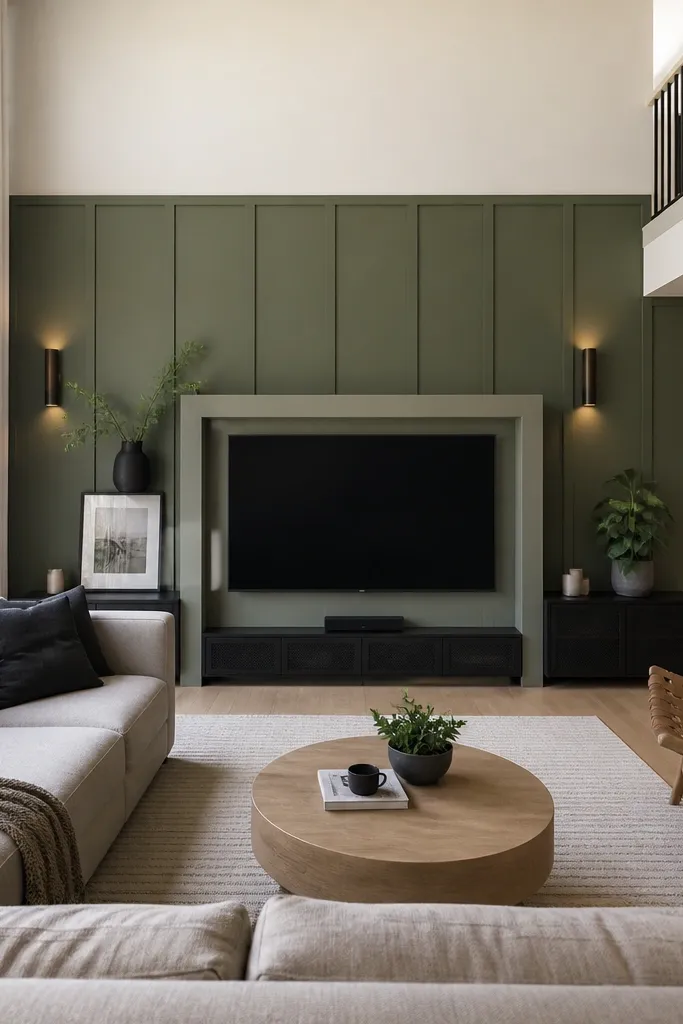
1. Freestanding media frame with faux built-in trim
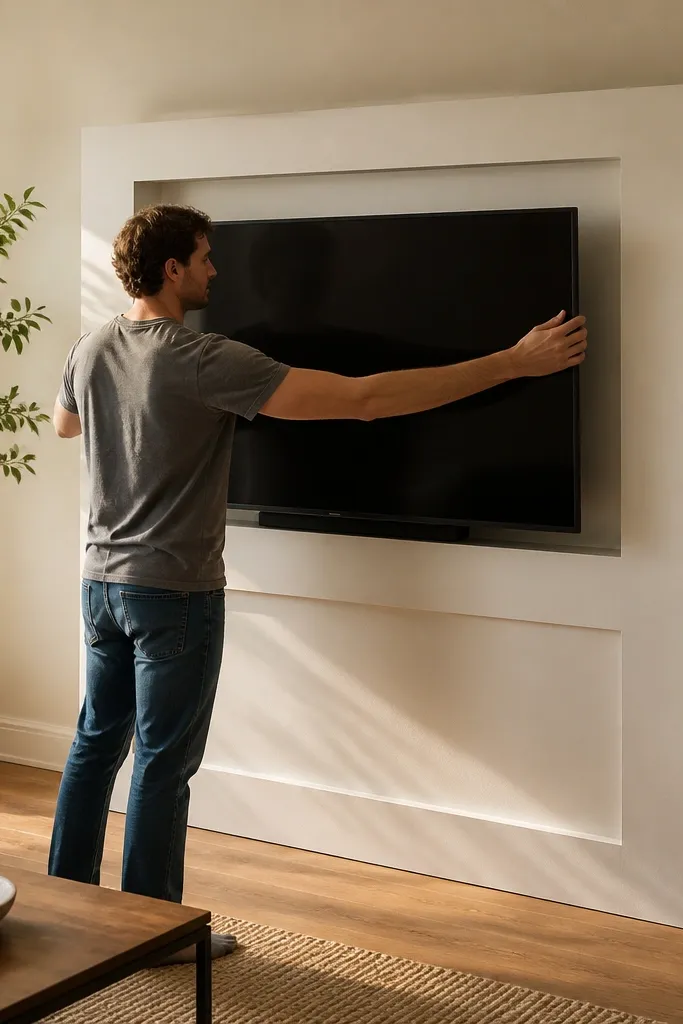
This look is the cleanest path to a renter-friendly Double Height Living Room TV Wall because it avoids drilling into the wall for the main structure. You build a tall rectangular “frame” from paintable boards, then mount the TV to a sturdy internal rail so it feels built-in. The trim gives you that crisp edge that reads expensive in photos, and the open center lets you hide the cable channel behind the TV. Use matte white or warm off-white so the frame doesn’t glare under overhead lighting. Skill level is medium — you need straight cuts and solid joins — and it takes about a weekend for a typical 60-75 in TV and a 7-8 ft tall frame.
Step one: build a freestanding back panel from 3/4 in plywood or MDF sized to your TV plus at least 4 in on each side. Step two: add a centered internal mounting rail using a double-layer cross brace so the TV mount has full support; attach the TV mount to that rail with the manufacturer’s hardware. Step three: frame the front with 1x2 trim strips (or 1x3 for a chunkier look), paint, then attach the cable raceway to the back so cords disappear behind the TV. Finish by leveling the unit with shims under the base so the trim edges look straight even on imperfect floors.
Sand the trim edges lightly before painting and use a primer meant for MDF so the white stays uniform.
Don’t mount the TV directly to thin trim — the mount must land on the internal rail.
2. Ceiling-to-floor vertical slat TV column (removable rail)
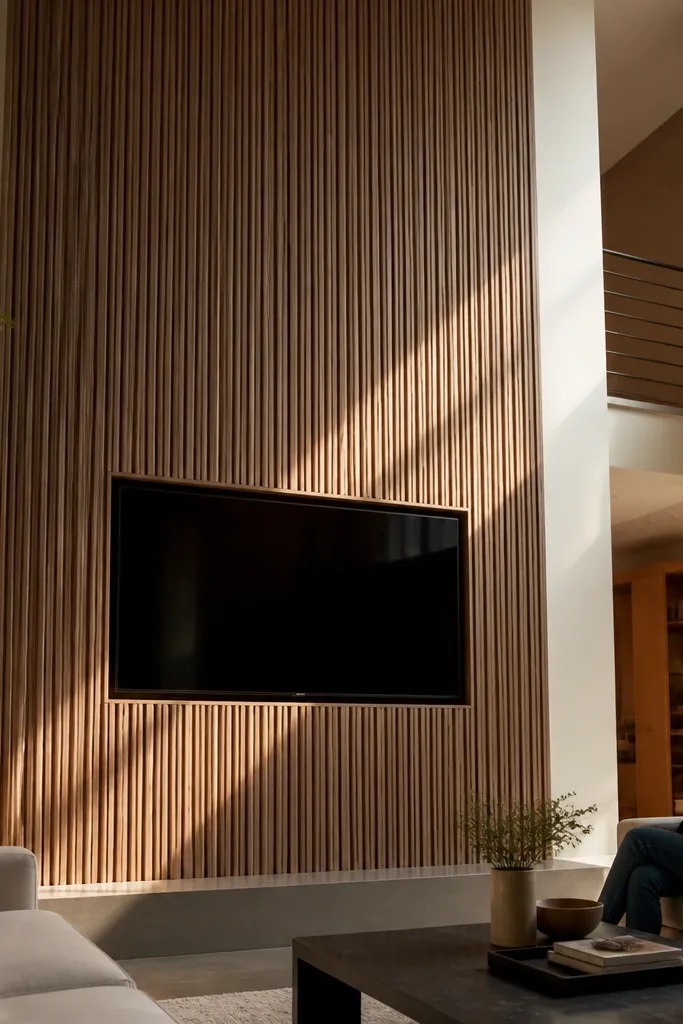
Vertical slats make double-height walls feel “designed” fast, and they photograph beautifully because the shadows shift with light. This version is renter-friendly because you mount a slim, removable rail system to studs or a mounting board you can undo cleanly, then attach slats to the rail. The TV sits centered on a hidden mounting plate, while the slat column extends upward to visually anchor the space. Pick real wood slats (oak, walnut) for warmth or paintable slats for a crisp modern look. This project is ideal if your wall already has good paint and you want minimal mess — you’re building a feature, not a whole wall.
Step one: locate studs with a stud finder and mark two vertical stud lines; install a removable ledger rail (thin plywood strip) at the TV mount height and another for the upper slat support. Step two: attach a TV mounting plate to the rail using a level and the TV’s VESA pattern; then build a slat frame with 3/4 in spacers so slats sit evenly. Step three: pre-finish the slats (stain or paint), attach them to the slat frame using small screws from the back, and add a magnetic cable cover behind the TV so you can access cords later. Finish by checking for plumb along the slat edges — slight tilt shows up in tall spaces.
Use 1/2 in slat-to-slat gaps for a shadow line that looks intentional rather than cluttered.
Don’t rely on adhesive slats for this — tall slats need mechanical fastening for straight alignment.
3. Tall arch-top TV niche with peel-and-stick veneer
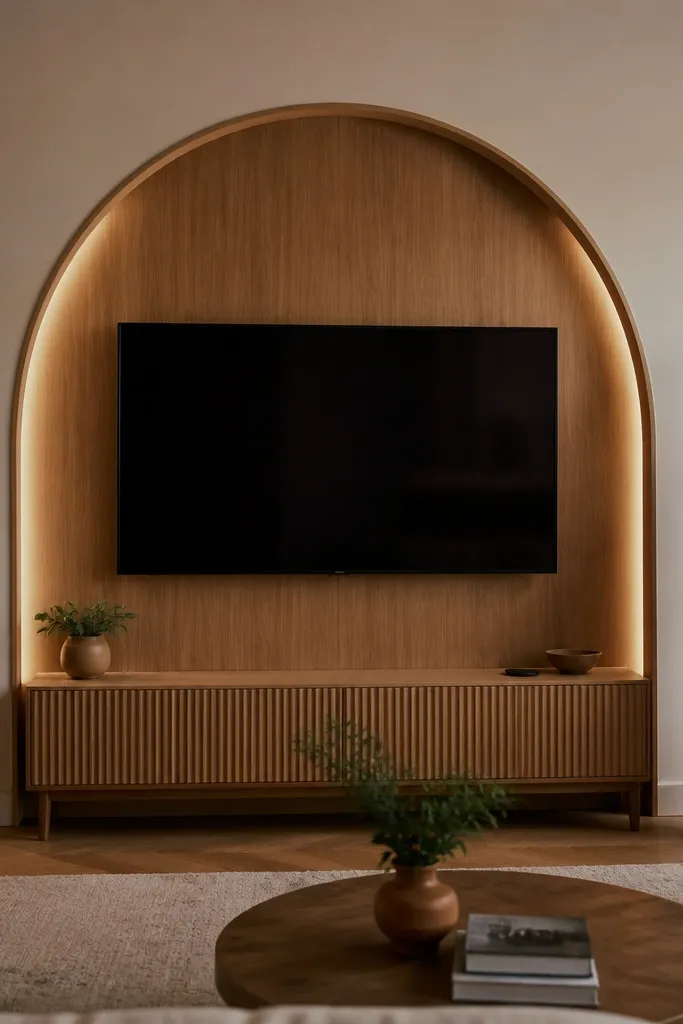
An arch-top surround turns a basic TV into a focal piece, and it’s especially effective in double-height living rooms because the curve guides the eye upward. For renters, you create a removable “niche” panel that sits in front of the wall and uses a backing board and French cleats or rail brackets to take down cleanly. Peel-and-stick veneer works well here because it’s forgiving on curved edges if you take your time with heat and smoothing. Keep the interior backing matte (painted MDF) so the veneer doesn’t look like a sticker — the contrast reads high-end. This is a great mid-skill project if you can cut an arch template and you’re comfortable using a jigsaw.
Step one: cut a backing board and a separate front surround panel with an arch top using a template; aim for at least 2 in of border around the TV. Step two: mount a French cleat or two removable rail hooks to the wall at the stud points, then hang the backing board first so the weight is supported. Step three: apply peel-and-stick veneer to the front surround, warming the edges with a hair dryer and smoothing with a plastic scraper to avoid bubbles. Finish by installing a slim TV mount to the backing board and adding a hidden cable channel behind the TV.
Editor's noteTrace the arch using painter’s tape on the MDF first; the tape edge acts like a visual template while you cut.
Skip thisDon’t stretch the veneer tight across the arch — it will crease and lift at the curve.
4. Two-tone vertical panel wall with removable top canopy
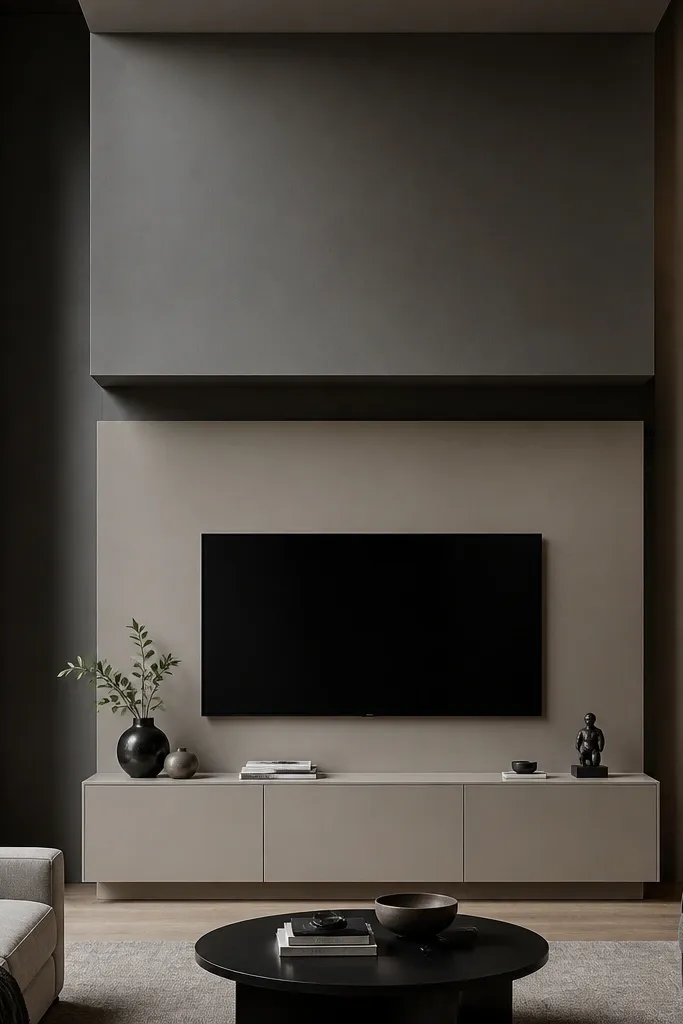
This idea makes the TV wall feel like a built-in architectural bay without committing to a permanent build. The trick is a two-tone panel layout: one tone for the main vertical area and a different tone for a top canopy that reaches toward the upper ceiling. In photos, that canopy frames the screen and makes the wall treatment look taller than it is. For renter-friendly Double Height Living Room TV Wall setups, the canopy is removable — you mount it with a rail so you can remove it without touching the main panel. Use matte paint for both tones and keep the contrast subtle, like warm greige against soft white.
Step one: build a removable vertical panel backing from 1/2 in MDF with a centered TV opening; attach it to the wall using a rail and shims so it sits flat. Step two: add batten strips (paint-grade wood strips) to create vertical lines; prime and paint the panels in your two-tone scheme. Step three: build a lightweight top canopy box from 3/4 in MDF, mount it to a separate upper rail, and connect it with hidden magnets or screws so it’s truly removable. Finish by installing a cable raceway on the back of the main panel and covering it with a magnetic strip.
Editor's notePaint the panel edges too — taped-over edges look cheap in double-height photos.
Skip thisDon’t use high-gloss paint — it shows patch lines and glare from ceiling fixtures.
5. Floating shelf stack with hidden media box
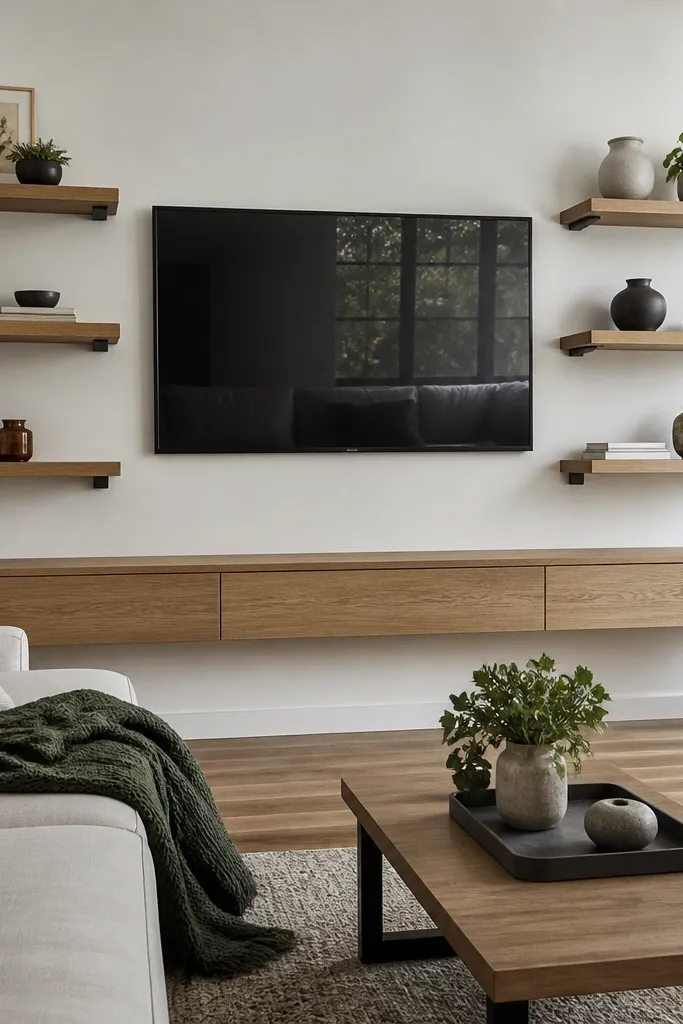
A stacked floating shelf layout is one of the best renter-friendly Double Height Living Room TV Wall ideas when you want a functional, styled look. You build a hidden media box behind the TV for consoles, then use floating shelves on either side and above to create a gallery feel. The shelves visually “spread” the TV area upward, which matters in double-height rooms where a single small TV can look lost. Keep shelf spacing tight: 10-12 in between shelf planes looks intentional and photo-friendly. This project is beginner to intermediate if you use a stud-mounted rail and pre-drill everything.
Step one: mark stud locations and install a continuous horizontal mounting rail at the top shelf height; use short vertical supports for the side shelves. Step two: build a media box from 1/2 in plywood with an open back for ventilation; hang it behind the TV opening using the same rail system so removal is simple. Step three: install shelf boards with hidden brackets, then add a thin cable raceway that runs down behind the TV. Finish by adding a magnetic cover for the media box access so you can swap devices without disassembling shelves.
Use shelf brackets rated for your shelf depth and item weight, then keep the shelves at 8-10 in deep for a clean look.
Don’t center the TV without centering the shelf stack — misalignment is obvious at double height.
6. Matte black framed TV with light oak backer
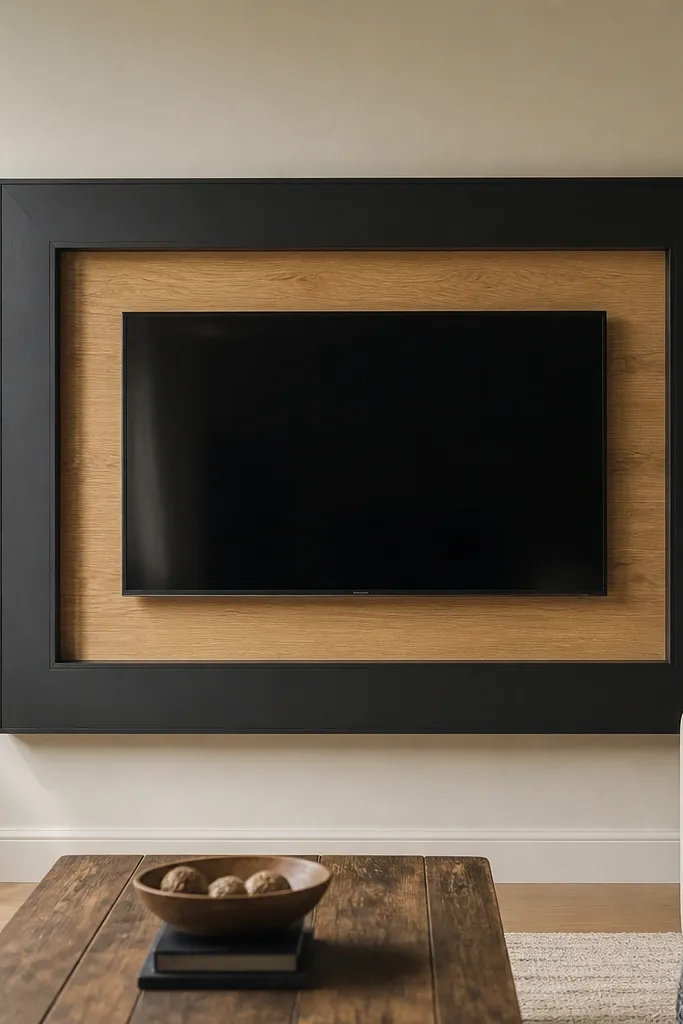
This is a high-contrast look that reads sharp even when your room lighting is messy. You create a matte black rectangular frame around the TV and place a light oak backer behind it, so the screen area has depth. The oak backer hides cables and gives a warm tone that balances black without feeling heavy. In double-height rooms, the black frame acts like a strong border, while the oak adds texture that photographs well. Build time is about a weekend, and the skill level is intermediate because you need clean straight edges and consistent spacing.
Step one: cut a backing board sized to your TV plus 6 in margins; attach it to the wall with a removable rail or cleat system. Step two: build a black frame using 1x2 or 1x3 boards; pre-prime and spray or roll with a matte finish so it looks even. Step three: add a hidden cable chase in the backing board by routing a shallow channel and covering it with a removable panel. Finish by mounting the TV to a centered internal crossbar so the frame only surrounds, not supports, the weight.
Editor's noteUse foam weatherstripping between backing and frame to prevent tiny gaps from showing as shadow lines.
Skip thisDon’t paint directly over MDF without primer — it can drink paint and look patchy.
7. Renter-friendly slatted surround with fabric acoustic backing
This one looks designer and helps with sound around the TV wall, which matters in double-height rooms that ring. You build a removable slatted surround, but instead of bare backing you add a fabric acoustic panel behind the TV zone so the wall looks soft and intentional. The slats create the vertical architecture; the fabric gives a warm, muted background that reduces glare and makes the TV feel less “stuck on a wall.” It’s a renter-friendly Double Height Living Room TV Wall option because the slat frame mounts to a rail and the acoustic panel is held in with removable fasteners. Skill level is intermediate and the time is 1-2 weekends depending on frame size.
Step one: mount a rail to studs at the TV height and install a second rail higher for the top of the slat frame. Step two: build a shallow frame box (about 1-2 in deep) and insert acoustic fabric panels cut to size; secure the fabric with staples to a backing board. Step three: attach vertical slats to the frame with uniform spacing and leave an access gap for cords behind the TV mount area. Finish by adding a removable cable raceway cover that matches the fabric tone so it doesn’t stand out.
Editor's noteChoose a fabric that’s matte and dark enough to hide cable shadows — light fabrics show every silhouette.
Skip thisDon’t stretch fabric too tight; tension makes wrinkles that show in tall, even lighting.
8. Tall corkboard-style panel behind TV with framed edges
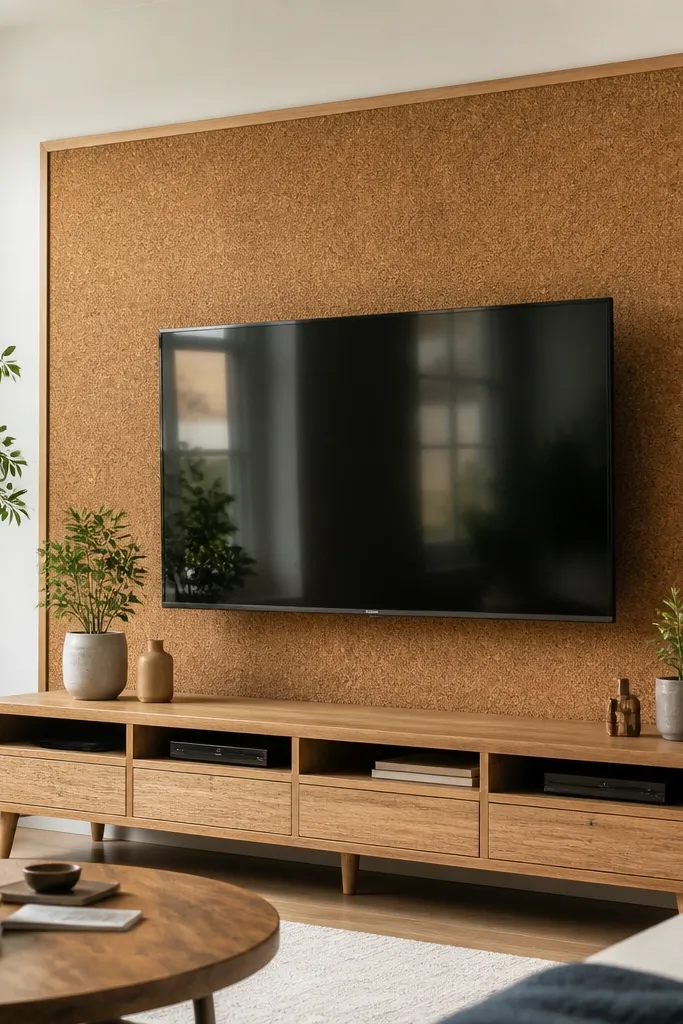
If you want a renter-friendly TV wall that looks textured and warm, cork panels are a smart choice. The texture reads as “designed” from across the room and hides minor wall imperfections because the cork panel sits in front of the surface. Frame it with simple trim and mount the whole thing on a removable cleat so you can take it down without stripping paint. In photos, the cork’s matte surface reduces glare and makes the TV feel anchored. This idea is best for rooms with harsh ceiling lighting or where you want a cozy look instead of shiny modern.
Step one: cut cork sheets to a tall rectangle sized to your TV plus border; glue or staple the cork to a backing board like 1/2 in MDF for stability. Step two: attach a cleat system to the wall using stud points, then hang the cork panel backing so it sits flat. Step three: frame the edges with 1x2 trim, paint or stain the trim, and add a centered TV mount plate to the backing board. Finish by routing cables through a pre-cut hole and covering it with a removable fabric or wood panel section.
Editor's noteSeal the cork edges with a thin coat of clear matte so the border stays clean over time.
Skip thisDon’t skip a backing board — loose cork panels warp and look wavy in tall views.
9. Stone-look peel-and-stick tile TV surround with matte black border
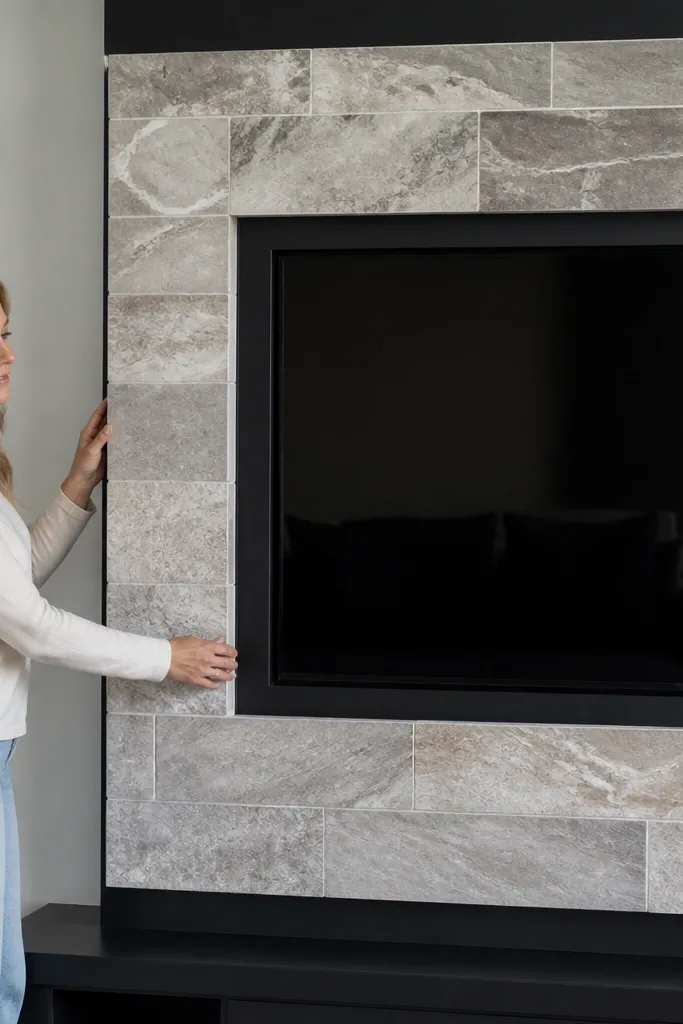
Stone-look materials photograph like a real feature wall, but you keep it renter-friendly by using peel-and-stick tile only on a removable board. The look works because the stone texture adds depth, while a matte black border keeps the TV area crisp and modern. For double-height living rooms, this reads dramatic without you needing a full permanent renovation. Build it as a panel you hang on a rail — that’s the key. Skill level is intermediate because you need careful cutting around the TV opening and you must keep the pattern aligned.
Step one: build a removable backing board from 3/4 in MDF and cut a centered TV opening with a clean router or jigsaw finish. Step two: apply stone-look peel-and-stick tiles to the surround area, working from the center outward to keep the pattern lines symmetrical. Step three: install a matte black frame over the tile edges to hide seams and protect the corners. Finish by mounting the TV to an internal crossbar attached to the backing board, and add a removable cable cover behind the screen.
Editor's noteDry-fit the tile layout before sticking anything — stone patterns show misalignment instantly at distance.
Skip thisDon’t tile directly onto painted drywall if you need this to remove cleanly.
10. Mirror-backed TV wall with removable frame (bright, airy)
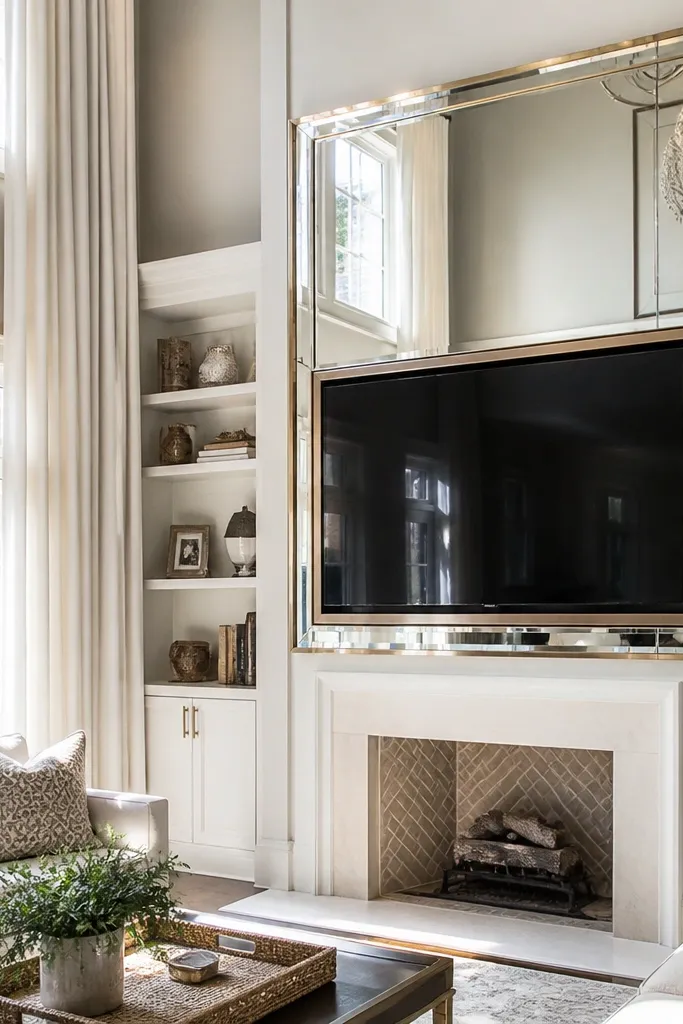
A mirror-backed TV wall makes double-height rooms feel brighter because it bounces light up and out. It also helps the TV area look larger and more intentional when the room feels dark or empty. This is renter-friendly when the mirror is mounted to a removable frame with safety backing — you never want loose mirror sheets on a wall. Keep the frame slim and matte so it doesn’t look like a bathroom. The look is sleek, modern, and very photogenic under natural light.
Step one: build a removable framed panel from 1x3 or 1x4 boards and mount a sheet of mirror-safe acrylic or film mirror to the inside (safer than glass). Step two: attach a rail or cleat to studs and hang the framed mirror panel in front of the wall where you want the TV zone. Step three: install the TV mount to a separate internal mounting plate behind the mirror frame so weight isn’t carried by the mirror material. Finish by adding black cable raceways behind the TV to avoid shiny cable silhouettes.
Editor's noteUse acrylic mirror or mirrored film — it’s safer and easier to cut for TV openings.
Skip thisDon’t place real glass mirror directly into a removable frame without safety backing — it’s a real hazard.
11. Tall gallery grid with removable hanging rails
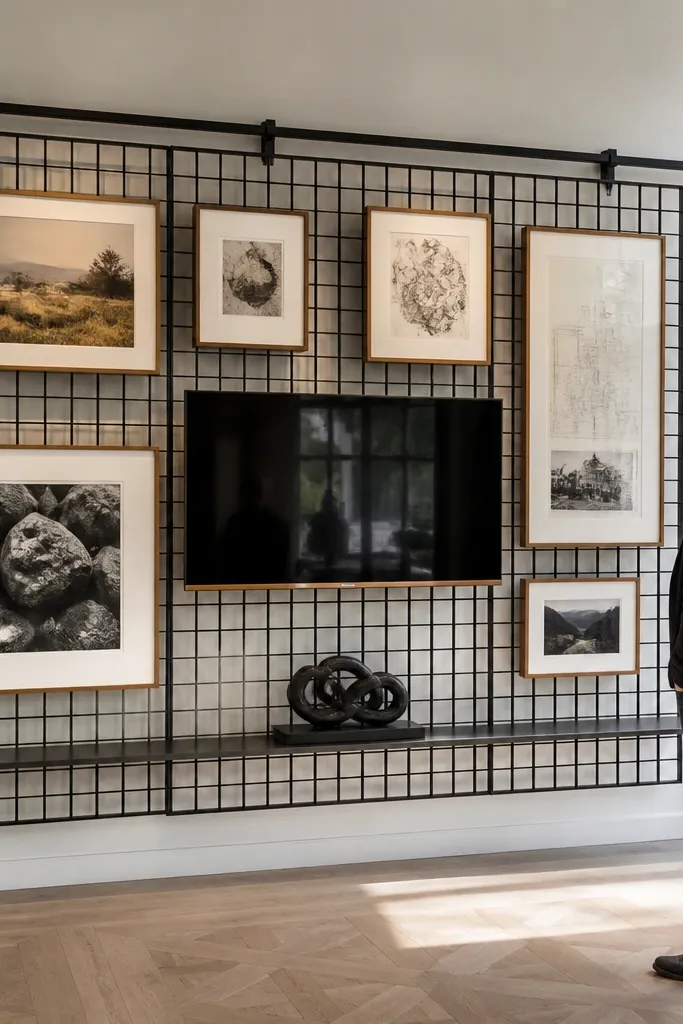
This idea gives you a museum-wall look without painting or building a permanent wall. You mount a tall metal grid or wood batten grid to a removable rail, then hang framed panels around a centered TV. The grid makes the double-height wall feel structured, and the frames let you change decor seasonally without touching the TV setup. For renters, the key is that the grid is removable and the TV mount is separate from the decorative frames. It’s photogenic because the eye reads repeating lines from floor to ceiling.
Step one: install a removable vertical mounting rail to studs and attach a horizontal track so the grid is stable. Step two: build or buy a grid of rectangular frame openings; mount the frames to the grid using hooks or small brackets so you can swap them. Step three: mount the TV to a centered plate attached to the rail, not to the decorative frames. Finish by routing cables through the center mounting zone and covering them with a hidden access panel that matches the grid color.
Editor's noteKeep the frames the same width (like 1 in) to avoid a messy look at double height.
Skip thisDon’t use random frame sizes — the repeating grid is what makes it look designed.
12. Wood framed TV panel with hidden cable spine
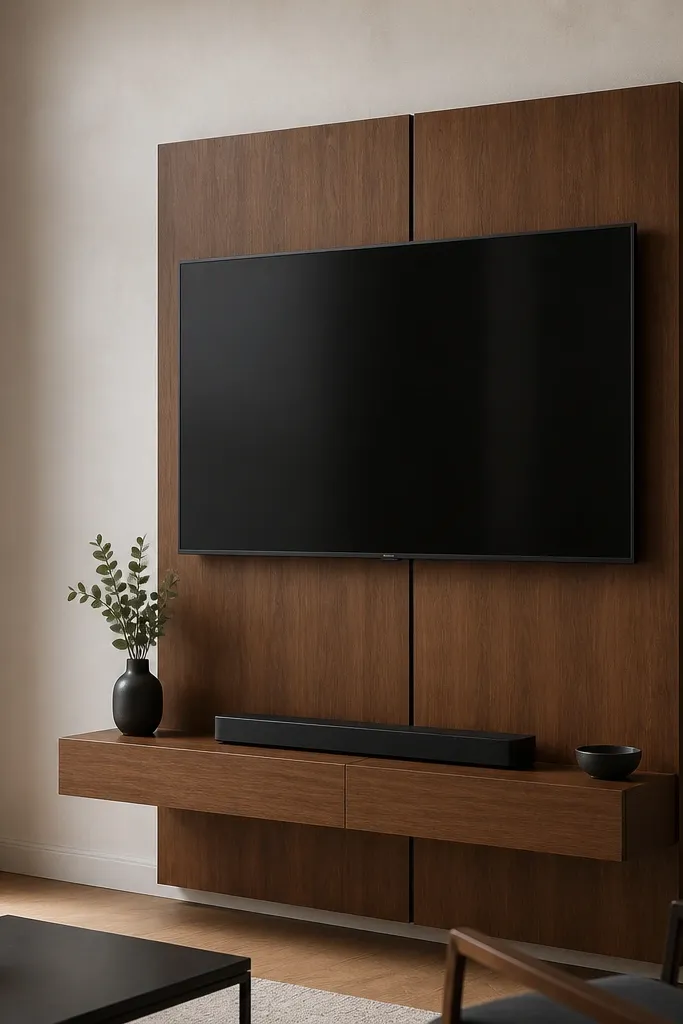
A wood-framed panel with a visible-feeling but hidden cable spine is clean and very photo-friendly. The cable spine runs vertically behind the TV, so cords don’t drape down and ruin the “built-in” illusion. In a double-height living room, the vertical line looks intentional and matches the room’s height. This project is renter-friendly because you mount the panel with a rail and you can remove the panel without breaking drywall. Use walnut or oak veneer on a painted backing for that warm, modern finish.
Step one: cut a backing panel from 3/4 in MDF and add a vertical internal channel for cables using a router or stacked spacers (about 1 in wide). Step two: install a removable wall rail and hang the panel; then mount the TV to a centered internal crossbar. Step three: build a wood frame around the panel using 1x2 or 1x3 boards, veneer the frame face, and add a removable magnetic cover over the cable spine. Finish by test-fitting all devices so you can reach the ports once the panel is on the wall.
Paint the inside channel black — it hides the cable mess when someone looks from the side.
Don’t let the cable spine end above the TV — you want a straight path behind the screen.
13. Renter-friendly TV wall with fabric-wrapped columns
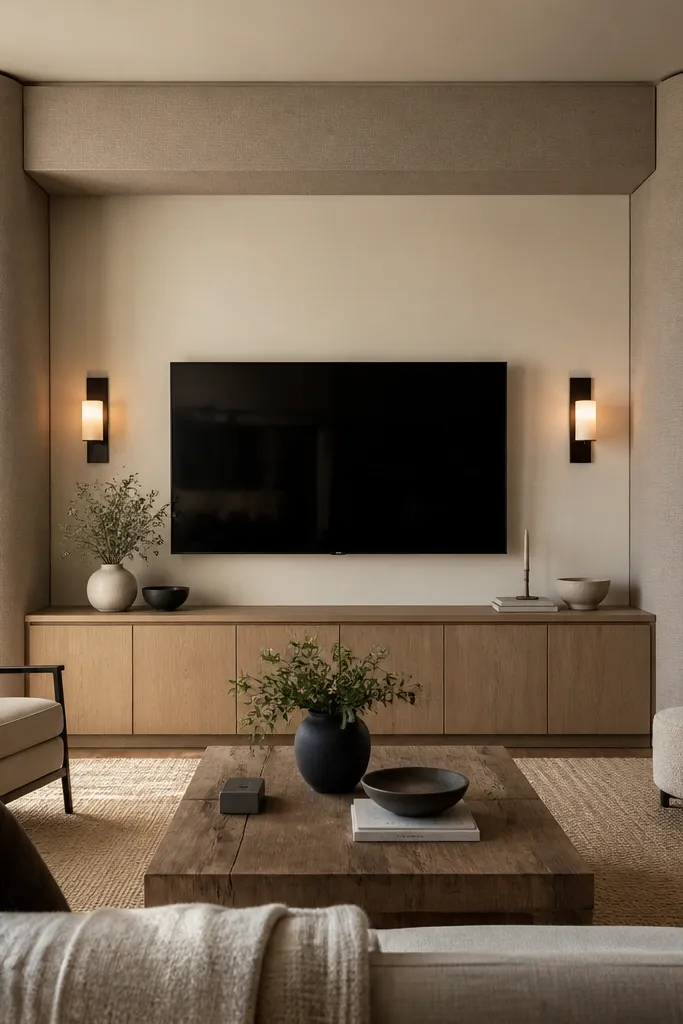
Fabric-wrapped columns look soft, expensive, and they tame glare, which is a big deal in tall rooms with lots of light. You create two tall vertical columns flanking the TV opening, then connect them with a simple top beam so it reads like a designed archway. Renter-friendly installation is straightforward: mount the top beam and bottom base to studs or anchors, then keep the fabric covers removable. This is a great choice if your room has bare walls and you want it to feel more lived-in without adding clutter. Time is about one weekend for a medium-size TV zone.
Step one: build two vertical column frames from plywood strips (about 6-8 in wide) and a top beam frame; mount the frames to a stud-backed rail so the structure is stable. Step two: wrap the column frames with upholstery fabric stretched tight over a thin batting layer, then staple the back edges neatly. Step three: cut a centered opening panel (wood or MDF) for the TV mount and attach the TV mount to the internal plate behind the opening. Finish by adding a removable cable cover that matches the fabric color so the cords never stand out.
Use charcoal or warm gray fabric with a tight weave — it hides dust and looks consistent in photos.
Don’t use thin fabric without batting — it shows frame lines and wrinkles at double height.
14. Matte plaster-look panel with removable TV mount plate
A matte plaster-look panel gives you that high-end gallery feel without the mess of real plaster. You build a removable panel with a plaster-look coating system (or peel-and-stick plaster texture board) and mount the TV to a separate plate inside. The best part for renters is the clean removal: you can detach the panel and leave the wall behind it untouched. In double-height rooms, matte texture absorbs light, so the TV looks integrated instead of pasted onto paint. This is an intermediate project because the surface needs careful smoothing for a realistic look.
Step one: create a removable backing panel from MDF and add an internal mounting plate where the TV mount screws will land. Step two: apply plaster-look coating or textured board over the visible area, then sand lightly after curing to remove ridges. Step three: attach the panel to a removable wall rail and install the TV mount to the internal plate through the TV opening. Finish by adding a hidden cable raceway and cover plate that matches the plaster texture color.
Use a matte clear coat over the final finish if your texture system recommends it so it stays uniform and clean.
Don’t skip sanding — bumps show hard shadows in tall spaces.
15. Oversized picture frame TV wall with removable inner mat
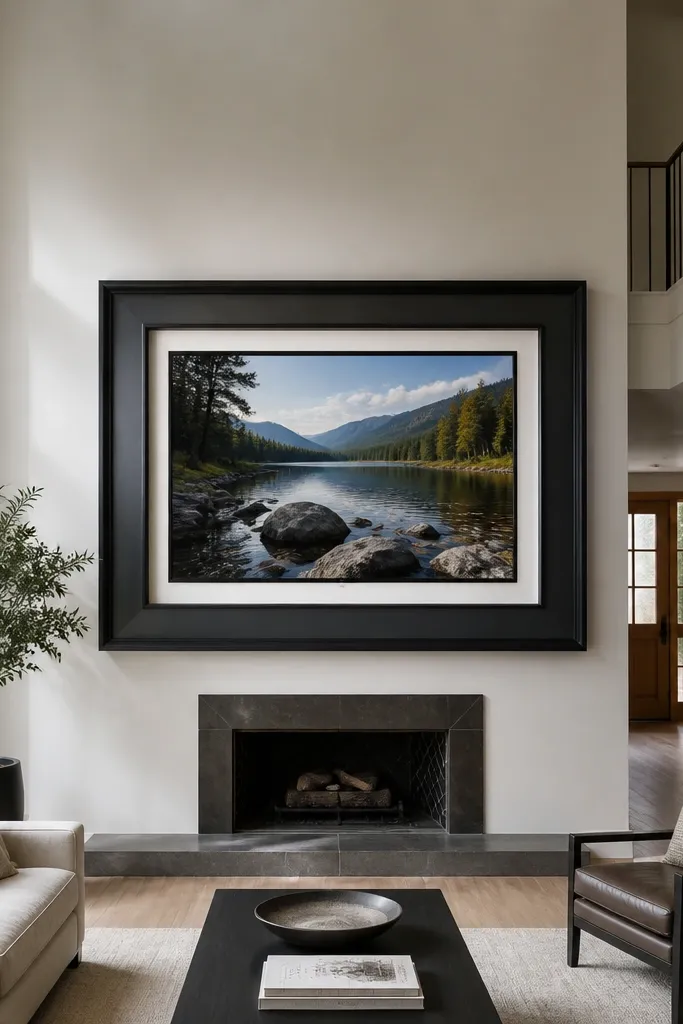
This is the easiest way to make a renter-friendly Double Height Living Room TV Wall look intentional: treat the TV like a piece of art. Build one oversized outer frame, then add an inner “mat” area that makes the screen look centered and bordered. The frame is the design — you can keep the mount hardware hidden behind the inner mat panel. For a photogenic result, pick a frame finish that contrasts your wall paint, like black frame on light walls or oak frame on warm white walls. Skill level is beginner to intermediate depending on cutting accuracy, and it takes a few days for paint and drying.
Step one: measure the TV and design an outer frame border that’s at least 6 in wide on all sides; cut the outer frame from 1x4 boards and miter corners if you want crisp edges. Step two: build an inner mat panel from MDF with a TV opening that leaves a 1-2 in margin around the screen; attach the TV mount to an internal support board behind the inner mat. Step three: mount the whole assembly to a removable rail or cleats and secure the frame corners with wood glue plus small brads. Finish by painting or staining the frame and adding a removable cable cover behind the TV.
Editor's noteUse a spacer behind the TV opening so the screen sits 1/2-3/4 in forward, reducing glare from the back panel.
Skip thisDon’t make the border thin — thin frames look flimsy in double-height photos.
16. Renter-friendly TV wall with floating lightbox under-shelf
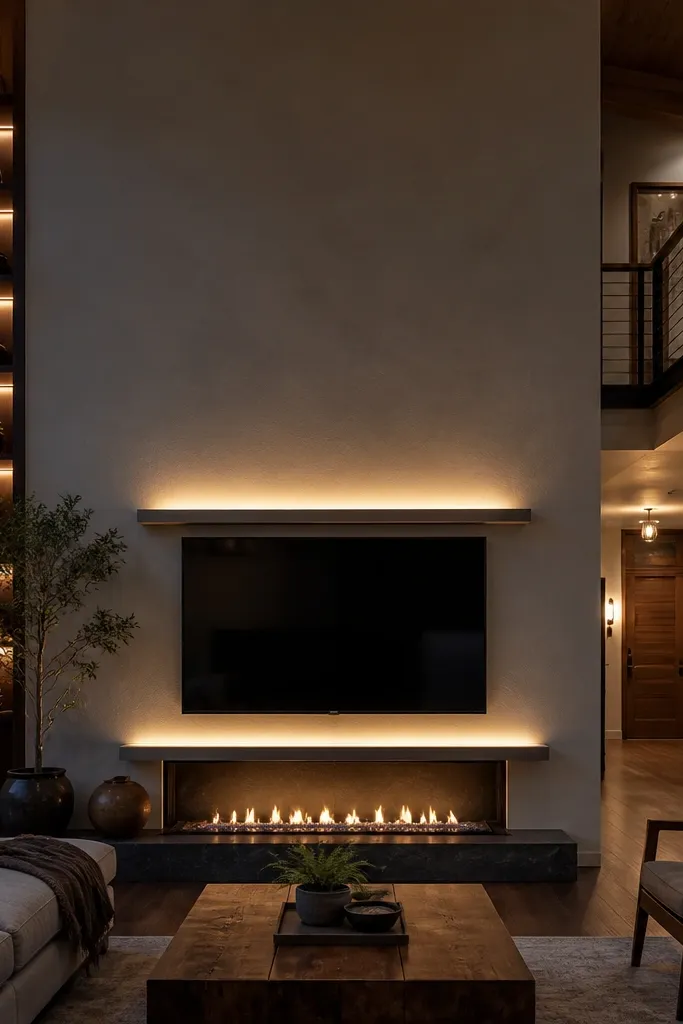
A lightbox effect under a floating shelf makes the TV wall look layered and expensive, and it’s one of the most photogenic double-height setups at night. You mount the shelf structure to studs, then build a shallow lightbox underneath with warm LED strips and a diffuser. The TV sits centered above, and the glow visually lifts the whole zone off the wall. For renters, the lightbox cover should be removable so you can access the power supply. Choose warm 2700K-3000K LEDs and matte diffuser plastic so the light doesn’t show dots.
Step one: install a removable shelf rail system to studs and mount the shelf boards at the design height, keeping the shelf depth around 10-12 in for a clean look. Step two: build a shallow under-shelf lightbox (about 2-3 in tall) and mount LED strips to the inside with a diffuser panel in front; route wires through a hidden channel. Step three: mount the TV to a centered plate above the lightbox and add a removable access panel for the power supply. Finish by testing brightness with the room lights on and off before sealing everything permanently.
Editor's noteUse an LED strip dimmer so you can match the glow to your ceiling lights without changing the look.
Skip thisDon’t skip a diffuser — bare LED dots look cheap under a tall ceiling.
17. Reclaimed-look paneling with removable TV-centered opening
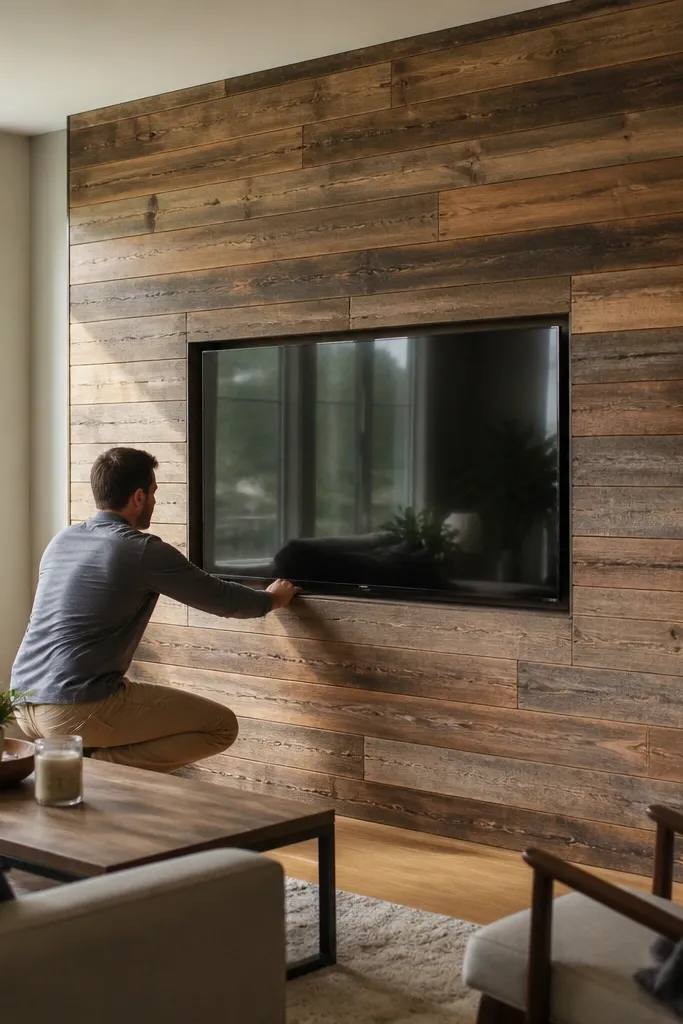
Reclaimed-look paneling makes the TV wall feel grounded and textured, which helps in double-height spaces where smooth paint can feel too empty. You build a removable panel system that covers the area around the TV, then cut a centered opening for the screen and mount plate. The advantage for renters is you’re not altering the existing wall — you’re hanging a feature panel. Use a matte finish on the wood-look boards so the texture shows without glare. This is intermediate work because you need careful layout and straight installation so the pattern doesn’t drift.
Step one: build a removable backing panel from plywood, then attach reclaimed-look boards (thin planks or slats) to the backing in a horizontal or vertical direction you like. Step two: cut the TV opening in the center, then mount the TV to an internal crossbar attached to the backing. Step three: hang the whole panel with a rail system to studs, and add trim around the opening to frame the TV. Finish by adding a cable chase behind the mount and a removable cover that matches the panel finish.
Editor's noteStagger plank ends by at least 6 in so the “reclaimed” effect looks real and not repetitive.
Skip thisDon’t align plank seams perfectly around the TV opening — it creates a rigid, boxed-in look.
18. Renter-friendly Double Height TV Wall with Removable Bookshelf Sides
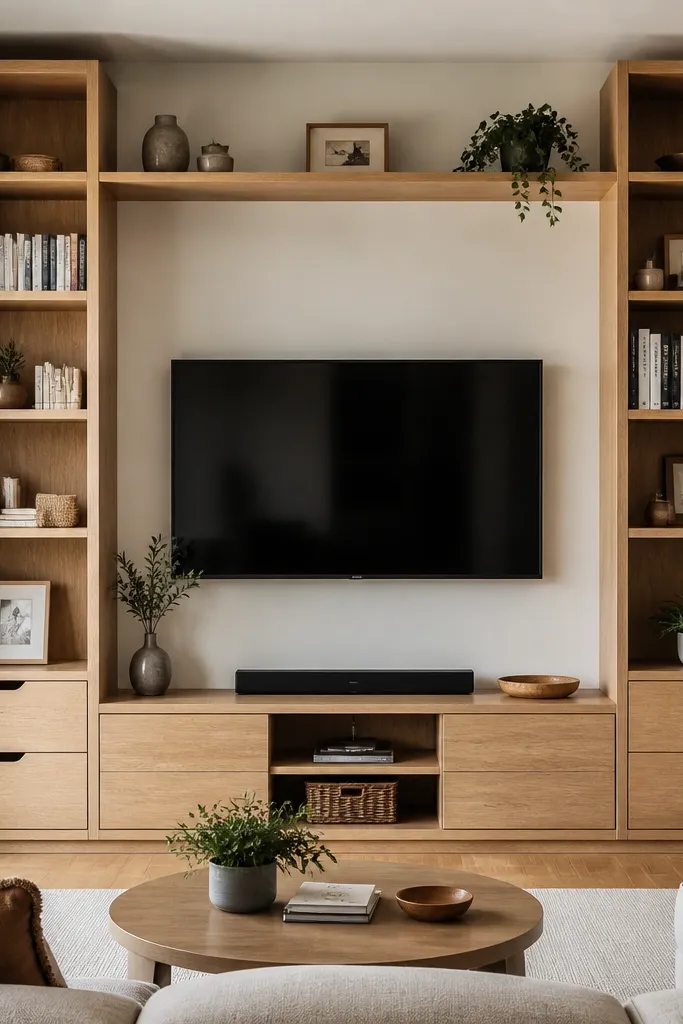
This layout gives you that double-height, built-in look without committing to permanent wall changes. The TV sits in a clean center opening, while two tall shelf towers flank it and visually “frame” the height. You get storage for books, games, and small decor, and the whole surround can come down when you move. It reads expensive because the shelves run close to the ceiling and the center opening stays crisp and flat. It suits rentals, apartments, and any living room where you want a statement wall but can’t drill into studs for a full built-in.
Build two matching side towers from 3/4-in plywood or MDF with a melamine finish (or paint-ready primed MDF). Each tower should be about 12 in deep, and you want the combined width to leave a 48- to 54-in gap for the TV center opening. Use a simple “French cleat” or heavy-duty wall cleat system on the back of each tower so you can remove them later; mount the cleats into studs at least 16 in on center. For the center, cut a flat backer panel (1/2-in plywood) sized to cover the TV area, then wrap the edges with 1x2 trim so it looks like a recessed niche. Finish by painting the entire surround in matte off-white (or matching your wall) and add cable management behind the center backer before the towers go up.
Editor's noteUse 1/4-in reveal lines around the center opening so the TV looks “installed” instead of pasted on. Label the cleats (left/right) with painter’s tape so re-hanging is fast.
Skip thisDon’t rely on drywall anchors for the shelf towers — they need stud-mounted cleats.
19. Double Height TV Wall with Fabric-Covered Ceiling Banners and Flush Center Panel
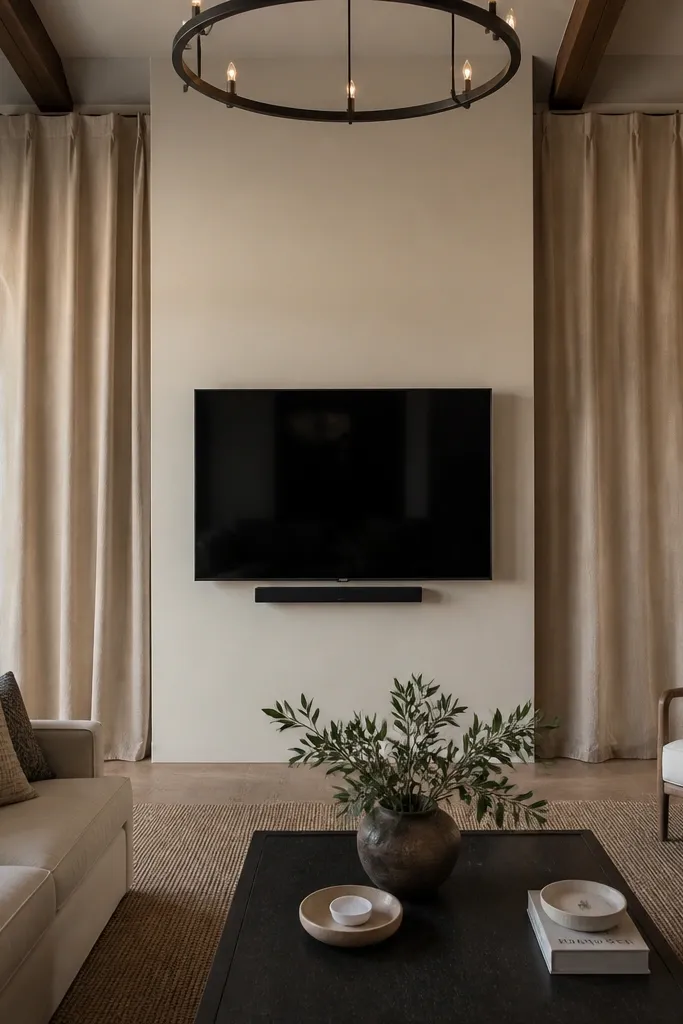
This is the soft, designer look for double-height walls — it makes the TV area feel intentional, not stuck on a blank wall. A flush center panel holds the TV at a clean height, and fabric banners drape from a ceiling rail to create movement and vertical drama. The fabric also helps absorb some sound, which is a bonus in echo-prone rooms. It works especially well in renters' spaces because the center panel is removable and the ceiling rail can be installed with a small number of precise mounts. Choose this when you want the wall to look styled even when the TV is off.
Start with a 1/2-in-thick plywood or MDF center panel sized to the TV, leaving a 2-in margin around the screen for a recessed look. Paint the panel matte and attach a removable TV mounting plate to the back using existing TV mount hole patterns. Install a ceiling rail system for fabric — a single 1x2 ledger or a metal track anchored into studs — placed so the fabric starts about 6-10 in above the TV top edge. Cut two fabric panels (sheer linen, cotton voile, or textured blackout-lining blend) so each one lands near the TV sides and tapers visually toward the center. Attach fabric to the rail with small grommets and rings or clip-on drapery hooks, then finish by adding a thin trim strip around the center panel edges to hide hardware lines.
If you want a clean drape, steam the fabric and hang it dry for 24 hours before final positioning on the rail.
Don’t skip a removable mounting plate — mounting directly to the center panel makes future moves messy.
20. Double Height TV Wall with Vertical Light Strip Reveal and Detachable Face Frame
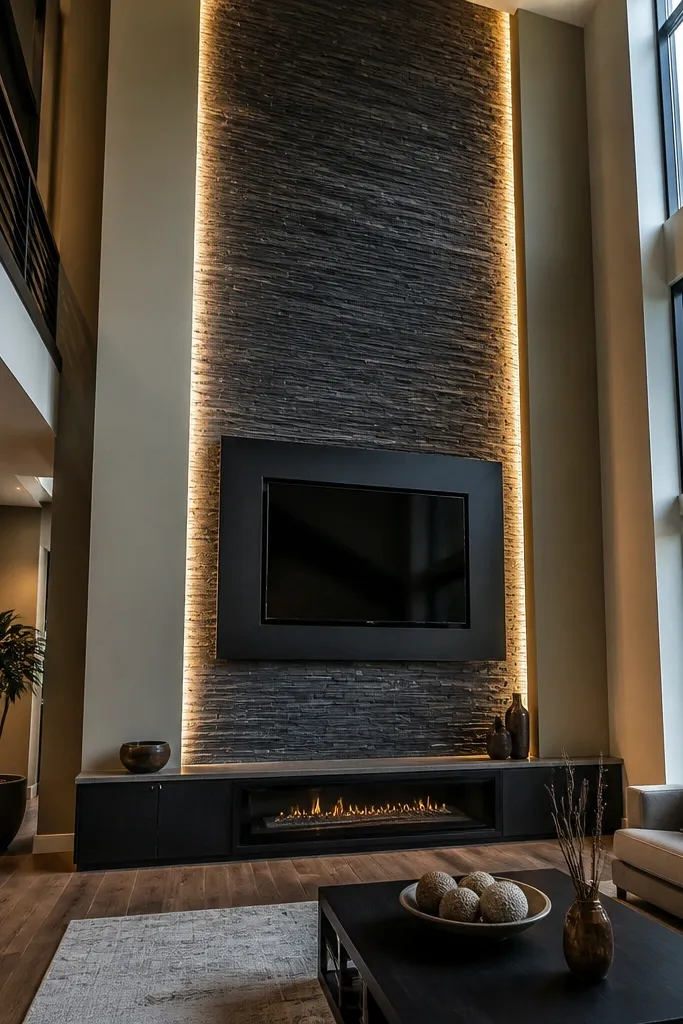
This one looks like a showroom feature wall because the light sits in a reveal gap, not on the wall surface. The TV is set behind a detachable face frame that creates a crisp border, while two vertical light channels run up the double-height space. It’s photogenic because the shadows and glow make the wall depth obvious in daylight and at night. It’s renter-friendly if you anchor the back structure to studs and keep the front frame removable with magnets or screws. Pick this for modern interiors that need a clean, high-contrast focal point.
Cut a back mounting grid from 2x2 or 1x2 furring strips, anchored to studs at the same height range as your TV plus 10-12 in. Build a detachable face frame from 1x3 MDF or pine, with a 1/2-in-deep recess so the TV sits back from the frame line. Create two vertical light channels using 3/4-in spacers and a diffuser strip (use a rigid aluminum channel with frosted cover if you want the glow to look smooth). Mount LED strips inside the channels with double-sided LED tape and connect them to a driver hidden behind the back panel. Finish the face frame with primer plus matte paint, then attach the frame to the back mounting grid using concealed screws or strong magnets with alignment dowels so you can remove it cleanly.
Use frosted diffusers and set the LED channel so the light points inward at about a 10-15 degree angle — it prevents visible diode dots.
Don’t run bare LED strip directly against the face frame; without a diffuser, you’ll see hotspots and uneven brightness.



