
1. Drop-Leaf Corner Desk with Shelf Backing
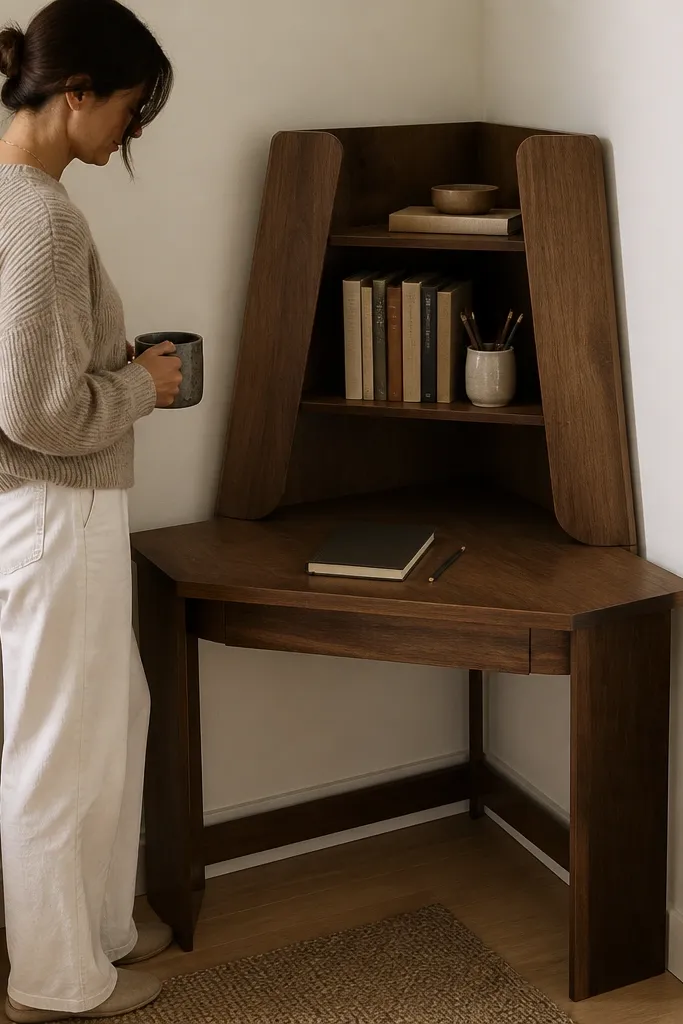
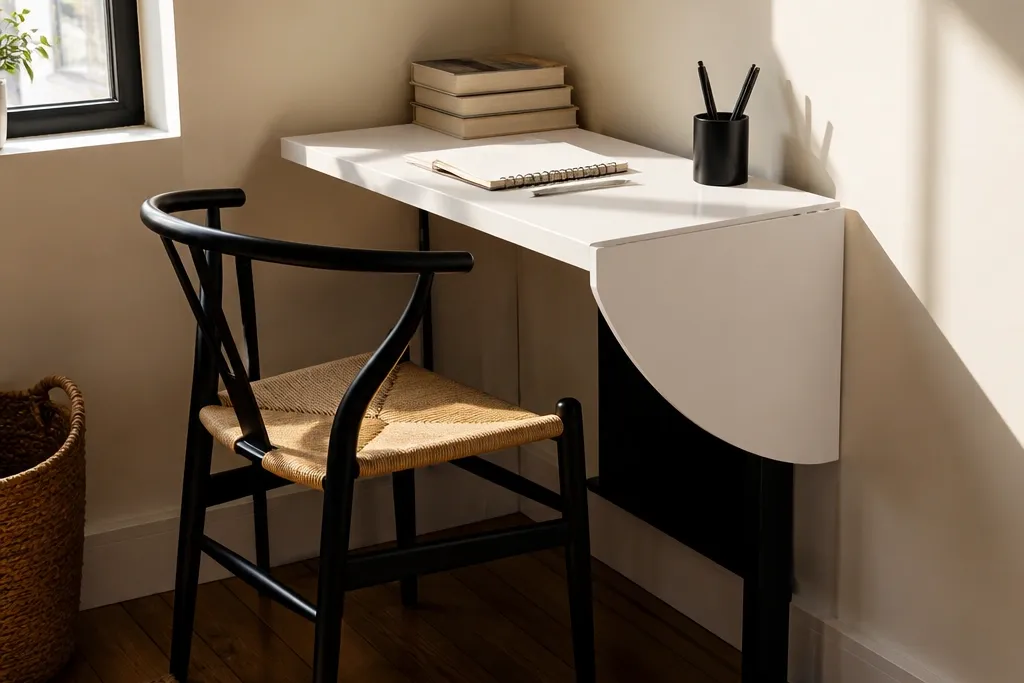
This is the corner solution for renters who want a real desk without sacrificing floor space. When the leaves are up, the corner looks like built-in shelving; when they drop, you get a usable writing surface that still feels tidy. The shelf backing gives you instant organization for books and a pen cup, so the desk doesn’t turn into a pile. Use a warm wood top with a matte finish and black or dark hardware so it photographs clean and doesn’t look shiny or cheap. It’s a mid-effort project, but the result looks custom and stays functional for years.
Start by choosing a corner width and cutting two drop-leaf panels sized to land flush when opened. Install a back cleat or ledger on the wall at the correct desk height (28-30 inches from floor to top when leaves are down). Mount the leaf hinges to the wall-side ledger and the adjacent panel so the leaves swing down evenly; add a small stop block to prevent wobbling. Finally, attach a fixed shelf behind or above the hinge area, then sand, stain, and seal the top so it resists daily marks.
Add a simple rubber bumper on the underside of each leaf so the desk closes quietly and doesn’t chip the finish.
Don’t skip a proper stop block — without it the leaves sag and the top looks crooked fast.
2. Floating L-Shape Corner Desk with Cable Channel
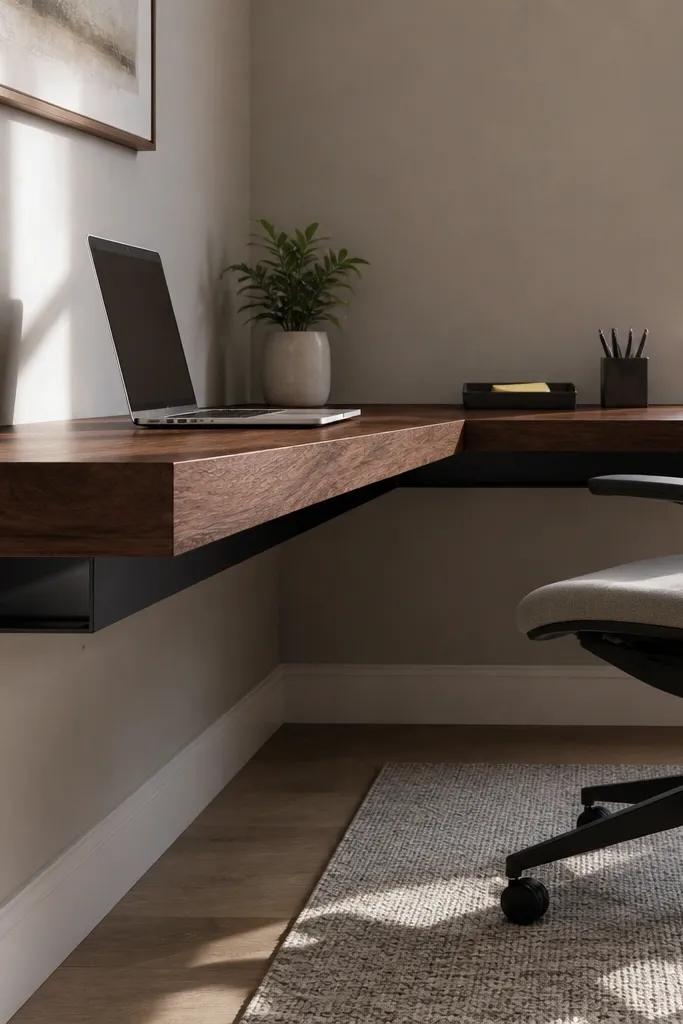
A floating L-shape desk makes a small corner look intentional because the surface visually hugs the wall. You get two usable planes — one for the laptop and one for notes — without needing a bulky corner cabinet. For renters who can drill, this is a clean, modern look that still feels practical because the underside stays open for legs. A cable channel keeps cords from becoming a messy vertical line in photos and in real life. It’s also easier to wipe down than a freestanding desk with legs.
Mark two wall segments that form a right angle and find studs where your desk will land. Cut a desktop board for the long run and a second board for the short run with a tight seam at the corner. Install a row of sturdy brackets (or a continuous French cleat system) under each run and test level before tightening. Add a slim adhesive or screw-in cable channel along the back edge, then mount a small wall shelf above for books and a task light.
Editor's noteUse a matte clear coat on the top and a satin finish on the brackets so glare doesn’t ruin the photo look.
Skip thisDon’t mount brackets without checking stud placement — drywall-only floating desks wobble and look bad immediately.
3. No-Drill Clamp-On Corner Workbench
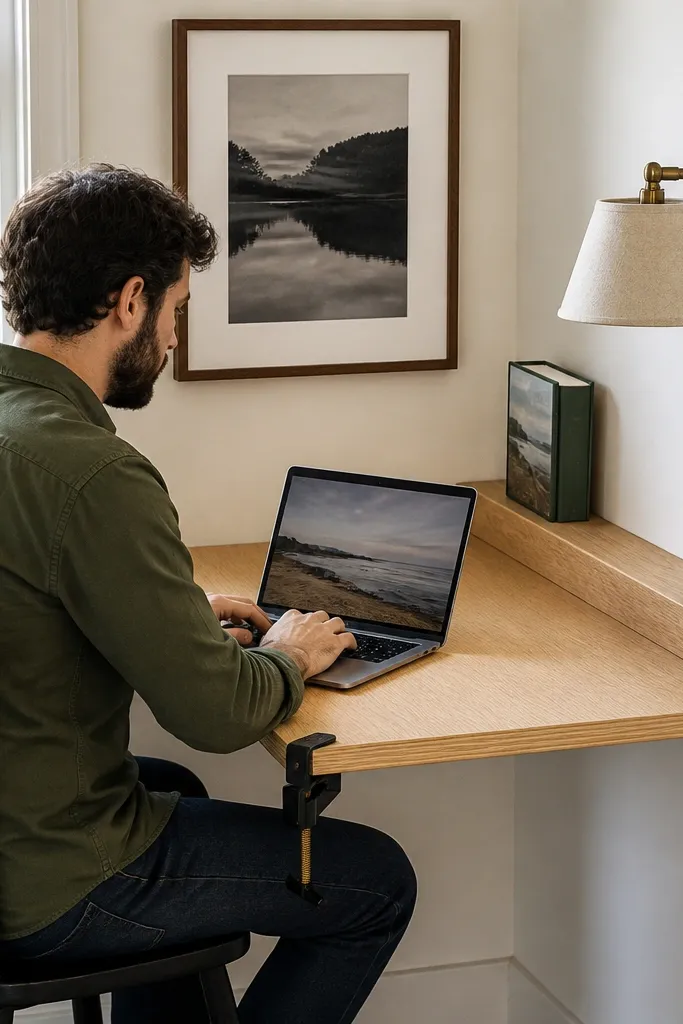
If you can’t drill, clamp-on is the most straightforward way to get a desk that looks built-in. The trick is using a rigid wood board and proper clamp points so the top doesn’t flex when you write. This setup looks sharp because the board sits flush and you can style the corner with a slim shelf unit or a book ledge. Choose a board with rounded edges and a consistent finish so it reads as furniture, not a temporary hack. It’s fast, renter-friendly, and still gives you real work surface.
Buy a thick hardwood or plywood board (around 3/4 inch) and sand the edges so they feel smooth. Use heavy-duty pipe clamps or specialty corner clamps rated for your board thickness, and position them so they grip studs or solid wall framing where possible. Place the board at your target desk height (28-30 inches) using a temporary spacer under the board while you tighten. Add a small L-bracket shelf or a corner ledge unit on top if you want extra storage, then seal the board with a durable matte varnish.
Editor's noteClamp on a strip of felt or rubber where metal touches the wall to protect paint and keep the board from shifting.
Skip thisDon’t use thin particleboard — it sags under writing pressure and the whole look collapses.
4. Corner Bookshelf Desk Hybrid with Flip-Up Top
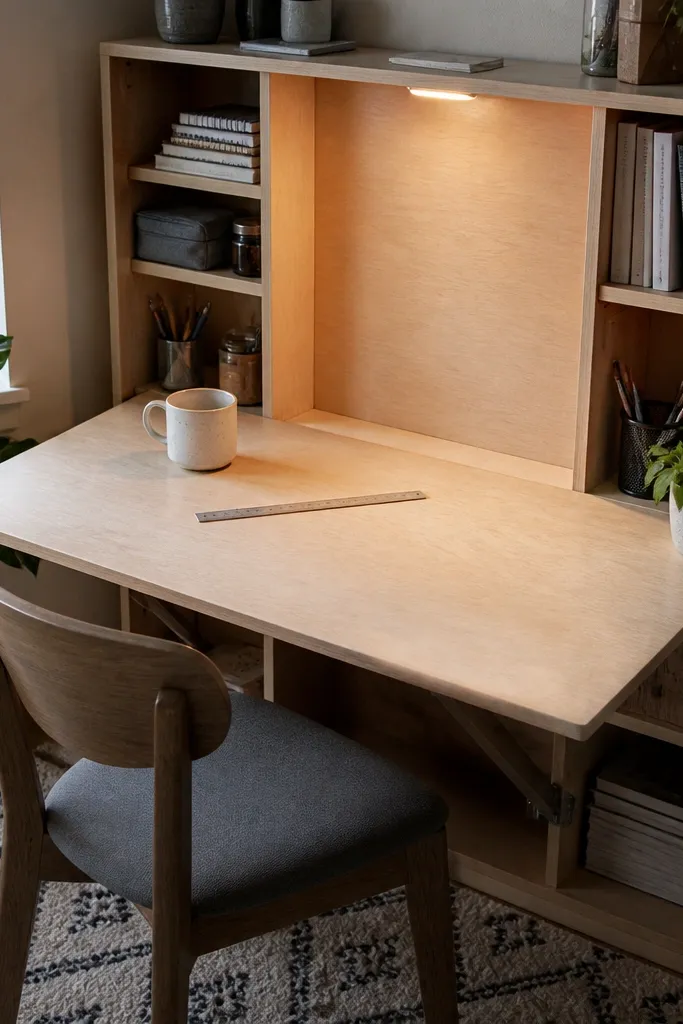
This is the corner idea for people who live out of books and want the desk to disappear when you’re done. A shelf-first unit makes the corner look designed even when the top is up, and the flip-up surface gives you a clean work zone without a permanent footprint. The open cubbies are ideal for organizing notebooks, art supplies, and a small printer without cluttering the floor. Visually, it looks like furniture because the proportions match a bookshelf, not a random desk wedged in. It’s a great choice for study setups where the “desk” is used in bursts.
Build or buy a corner bookshelf frame with two side panels and a backing that supports a hinge mount. Cut a flip-up top panel sized to cover the center opening when closed, leaving a small lip for a clean shadow line. Install a heavy-duty piano hinge along the back edge and add a support prop or latch to hold the top at a safe angle. Finish by sanding all edges, painting or staining the frame, then adding a small tray inside for pens and a cord route hole near the hinge.
Keep the hinge line straight and level — a slightly off hinge makes the top sit uneven and the whole look feels DIY in a bad way.
Don’t place the hinge too low — it makes the work surface feel cramped and forces your body into an awkward angle.
5. Rolling Corner Cart Desk with Drawer Insert
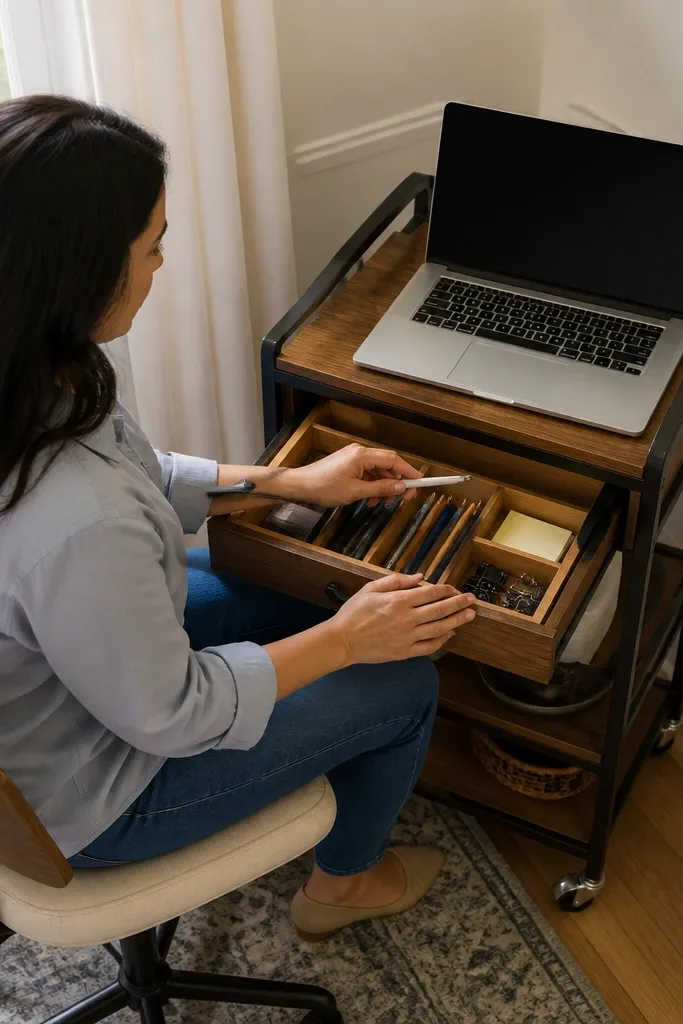
A rolling cart is the most renter-friendly way to get a corner desk that can vanish when you need space. You can tuck it into the corner, then pull it out for a focused work session. The drawer insert is the secret — it keeps small items off the top and makes the corner look neat even when you’re not working. Choose a cart with a sturdy top shelf and add a laptop tray or a cut-to-fit board so the work surface stays flat. This option photographs well because the cart is compact and you can style it with matching bins and a single color scheme.
Pick a rolling cart with at least two shelves and a flat top; aim for a footprint around 16-20 inches deep. Add a drawer organizer insert on the top shelf or install a small sliding drawer system using drawer slides rated for the cart load. Cut a laptop/work board to the cart size and screw it down or use non-slip matting so it doesn’t shift while typing. Finish the look by lining shelves with matching fabric or paper liners and adding a small cord hook on the side.
Editor's noteUse locking casters on at least two wheels so the cart doesn’t creep when you push your chair in.
Skip thisDon’t rely on a flimsy top tray — wobbly surfaces make the setup feel cheap and ruin the aesthetic.
6. Corner Banquette Desk with Lift-Top Cushion Storage
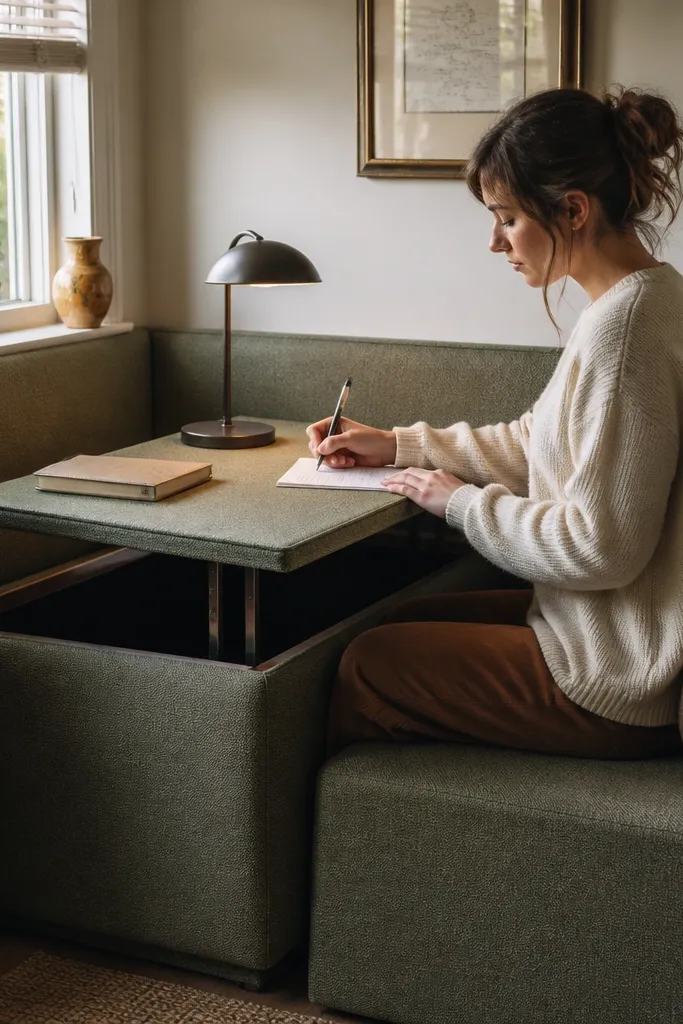
If your corner already has a bench, turn it into a study spot without adding another table. A banquette desk is visually calming because it matches the room’s seating line, and the lift-top cushion storage keeps clutter hidden. The desk surface can be a hinged tabletop that swings up from the bench or a fixed top with a slim lip. This is perfect for small apartments where you want seating and studying in one zone. It looks great in photos because it reads like furniture you’d buy, not a desk hack.
Start by measuring the bench length and choose a tabletop thickness that matches the cushion height so the top aligns with a comfortable writing surface. Build a hinged top from plywood with foam-cushion clearance, then add a gas strut or prop to hold it open safely. Add a simple interior storage tray under the cushion lift so notebooks and chargers stay contained. Upholster or cover the front edge in the same fabric as your bench for a seamless look, then seal the tabletop with a durable finish.
Add a magnetic catch under the tabletop lip so it closes flush and stays aligned.
Don’t make the tabletop too narrow — under 14 inches wide feels cramped for writing and styling.
7. Ikea-Style Corner Countertop with Stud-Mounted Legs
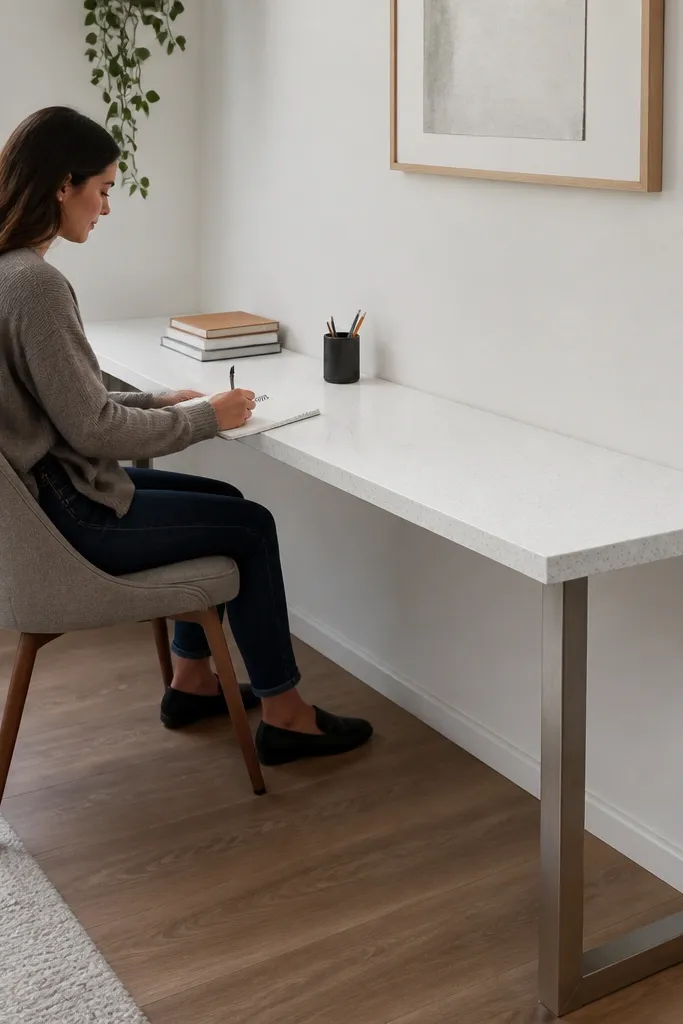
This approach gives you a real desk feel without building a full custom cabinet. A countertop-style top looks crisp and modern, and if you mount legs to studs, it stays solid for daily use. The corner shape is what makes it work — you can place a shallow desk run along one wall and keep the other side open for a chair. It’s also photogenic because the underside stays light and uncluttered. If you want a renter-friendly project that looks store-bought, this is the path.
Buy or cut a countertop panel sized to your corner, typically 24-30 inches deep for comfort. Locate studs on both walls and mount a ledger or leg plates so weight transfers into the framing. Install two sturdy legs or a leg frame with adjustable feet to level on slightly uneven floors. Add a slim back splash strip or cable organizer along the wall-side edge, then finish by sealing the top and rounding the front edge for comfort.
Use adjustable leveling feet — small floor slopes make desks look crooked even when the top is level.
Don’t place legs only on drywall — the wobble shows in every photo and gets worse fast.
8. Corner Shelf Desk with Pull-Out Keyboard Tray
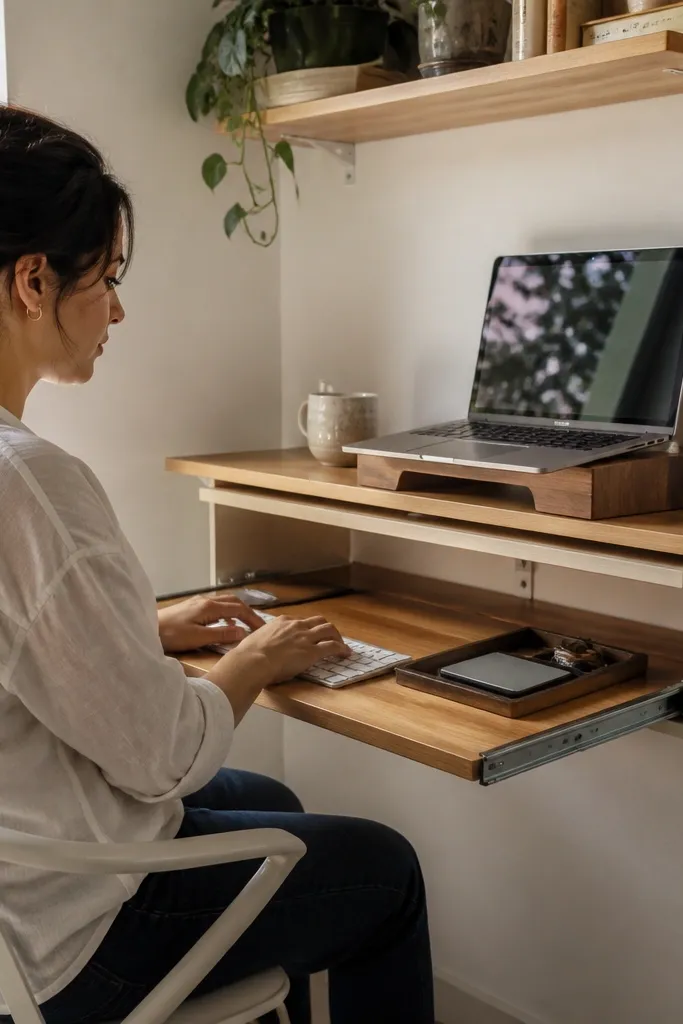
This is the best option for laptop-heavy studying in a tiny corner. The shelf holds the screen at eye level, and the pull-out keyboard tray gives you a proper typing surface without eating floor space. It’s visually clean because the “desk” is mostly wall-mounted lines, so the corner reads as minimal and styled. You can add a small monitor riser and a slim lamp, and you’ll get a setup that looks like a design studio rather than a temporary workstation. The project takes some careful measuring, but it’s worth it for the footprint.
Mount a floating shelf at your target desk height with enough depth for a laptop or monitor stand. Install a keyboard tray on rails under the shelf so it pulls out smoothly and clears your knees. Measure the tray travel so it doesn’t hit the chair when extended. Finish by adding a monitor riser or book stack on the shelf, then route the charging cable through a small hole or adhesive channel on the wall.
Editor's noteUse a tray with soft-close rails so the whole setup feels quiet and premium.
Skip thisDon’t mount the shelf too low — if the screen sits below eye level, the corner setup loses its appeal fast.
9. Ladder-Shelf Corner Desk with Desk Top on Rails
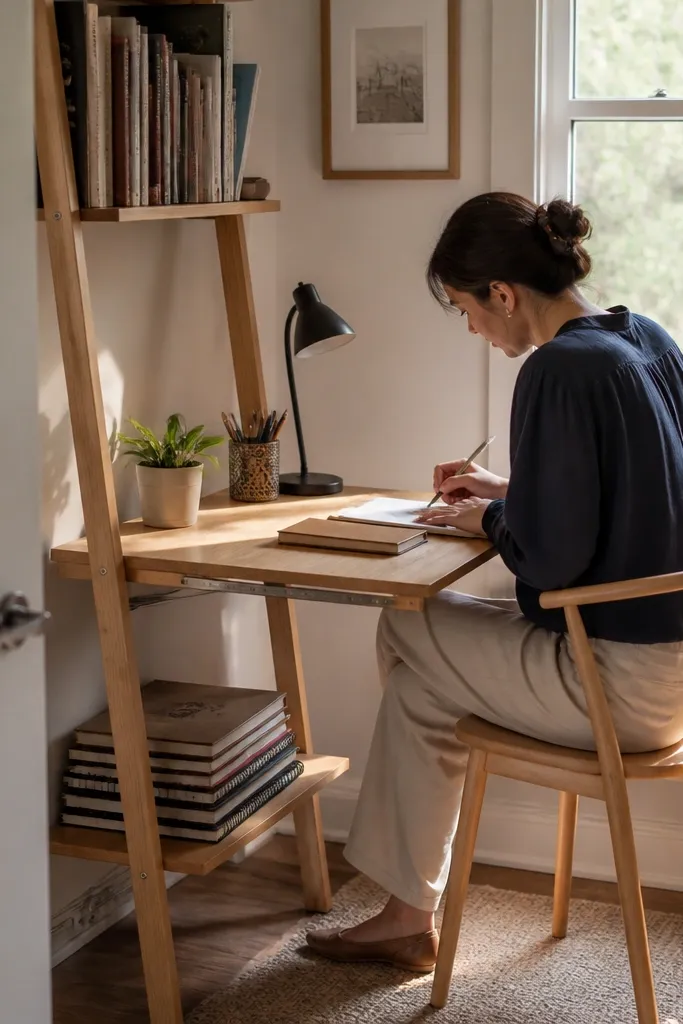
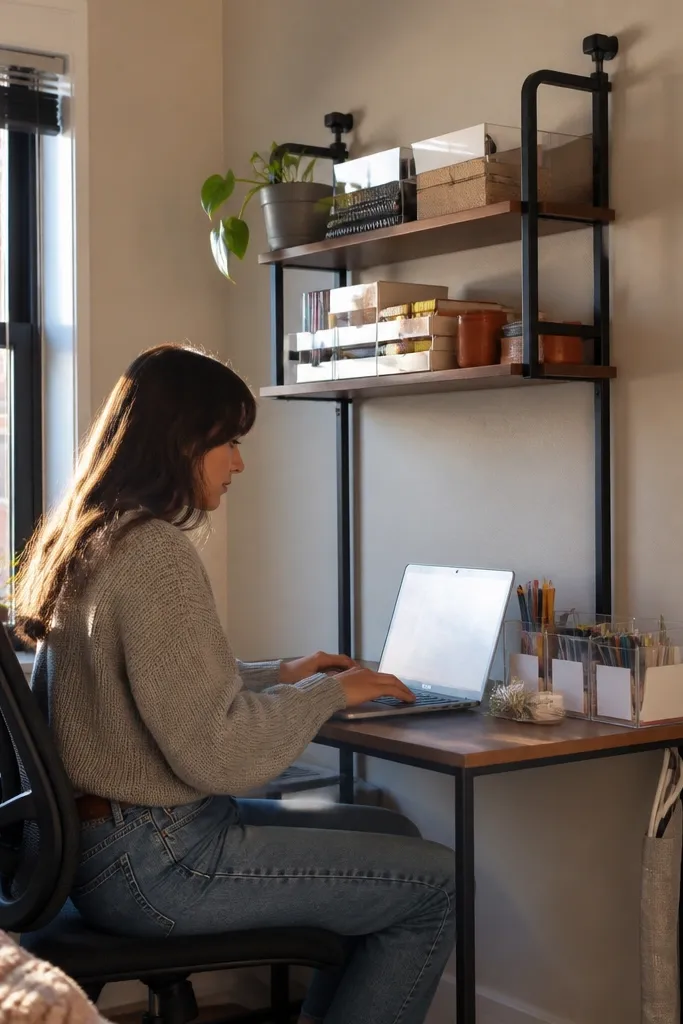
A ladder shelf in the corner looks airy, and it makes the desk feel lighter than a bulky cabinet. Add a desk top that sits on rails or brackets so you can fold it down or remove it when you need space. The shelving gives you vertical storage, keeping your tabletop clear for notebooks and a lamp. This is a good choice if you want the corner to look good even during downtime. The look is modern and structured, especially when you use consistent wood stains and black metal.
Build or buy a ladder shelf unit that fits your corner and anchors to wall studs. Add two metal rails or sturdy brackets at the height you want the desk surface, leaving clearance for chair legs. Cut a desk top panel and attach it so it rests securely on the rails; if you want a removable top, use threaded inserts and knobs. Stain or paint the wood surfaces, seal the top, and finish by adding a cable hook on the side rail.
Keep the desk top removable if you can — it makes cleaning the corner and maintaining the finish easier.
Don’t overload the shelves right above the desk — heavy books can make the corner look top-heavy and messy.
10. Corner Desk with Angled Reading Nook Lighting
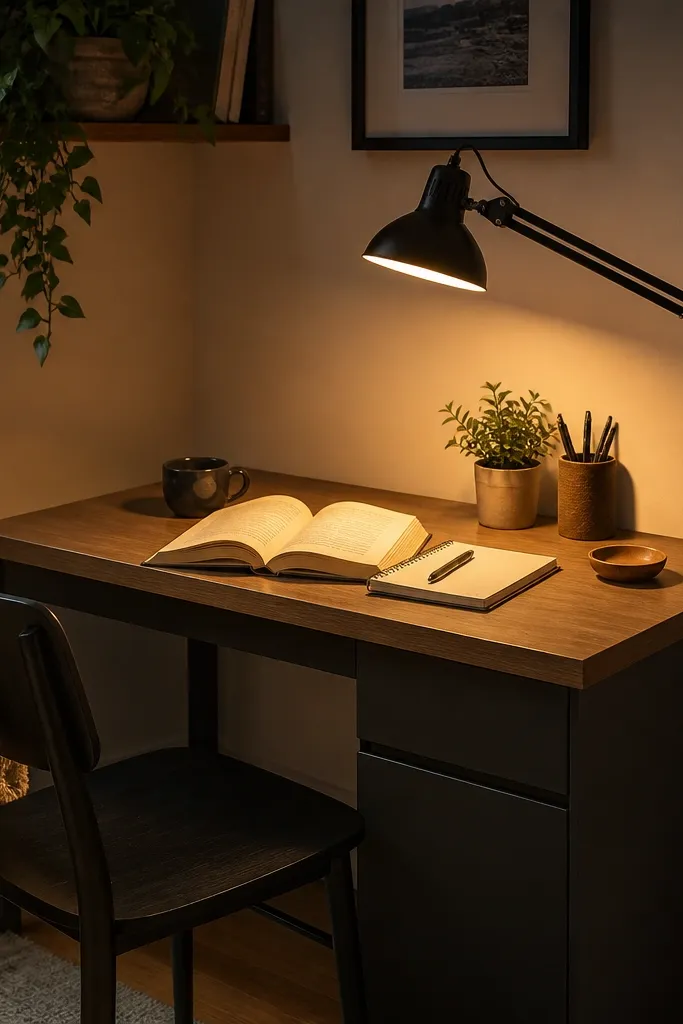
This idea is about making the corner look styled, not just functional. A desk surface plus angled lighting makes the whole setup feel intentional, and it’s what makes photos look warm instead of harsh. You can use any small corner desk base, then add a wall-mounted or clamp lamp aimed across the work area. Pair it with a slim wall shelf for books so the light hits spines and creates a clean visual gradient. The project is easy — lighting placement is the whole game — and it makes even a basic table look expensive.
Choose a lamp that can aim — go for an adjustable arm or a wall sconce with a swivel head. Mount or clamp it so the light beam lands on your work surface, not behind your monitor or above your head. Add a slim shelf above the corner desk and place two or three books with consistent spine color so the light shows them. Finally, route the cord along the wall edge with adhesive clips and secure it so it doesn’t droop.
Use a 2700K bulb for the warm look; neutral 4000K bulbs can make wood and skin tones look off in corner lighting.
Don’t aim the light straight down — it creates glare on screens and makes the corner look flat.
11. Corner Desk Built from a Salvaged Door Slab
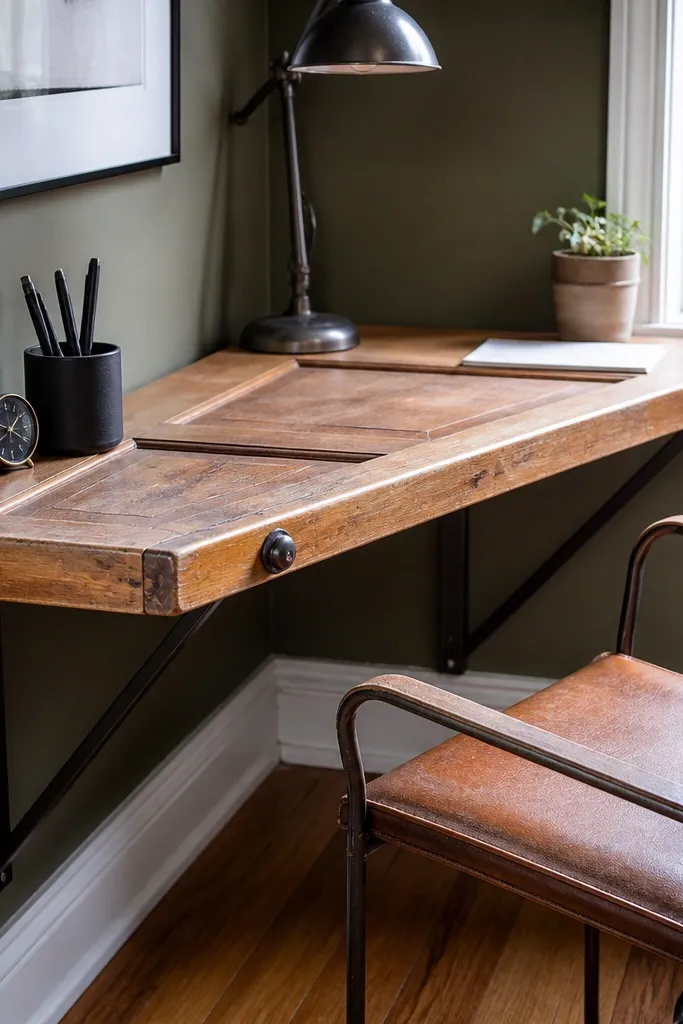
A door slab desk gives you instant character without the clutter of drawers and cabinets. In a corner, the slab shape reads like a single piece of furniture, and the architectural frame detail makes it photogenic from multiple angles. The look is best when you keep the hardware modern — think black brackets or slim metal legs — so the mix feels designed, not random. For renter-friendly Study Table Ideas, the trick is mounting the slab using removable hardware and keeping the finish durable. This project takes sanding and careful sealing, but it’s the most “wow” option on a budget.
Pick a door slab that has a flat working side and cut it to your corner dimensions, leaving a slight overhang for visual balance. Sand thoroughly, then fill old hardware holes with wood filler and sand again so the surface is smooth. Mount using two or three wall-mounted brackets into studs, plus a front support leg if you want extra stability. Seal with a hardwearing topcoat like polyurethane or a water-based clear that cures hard, then add a small back lip to stop books from sliding off.
Match stain tone to your floor trim using a sample wipe on scrap wood — door color can swing warm or cool.
Don’t leave the slab unsealed — raw wood scuffs and looks worn fast under daily study.
12. Corner Desk Using a Wall-Mounted Folding Table
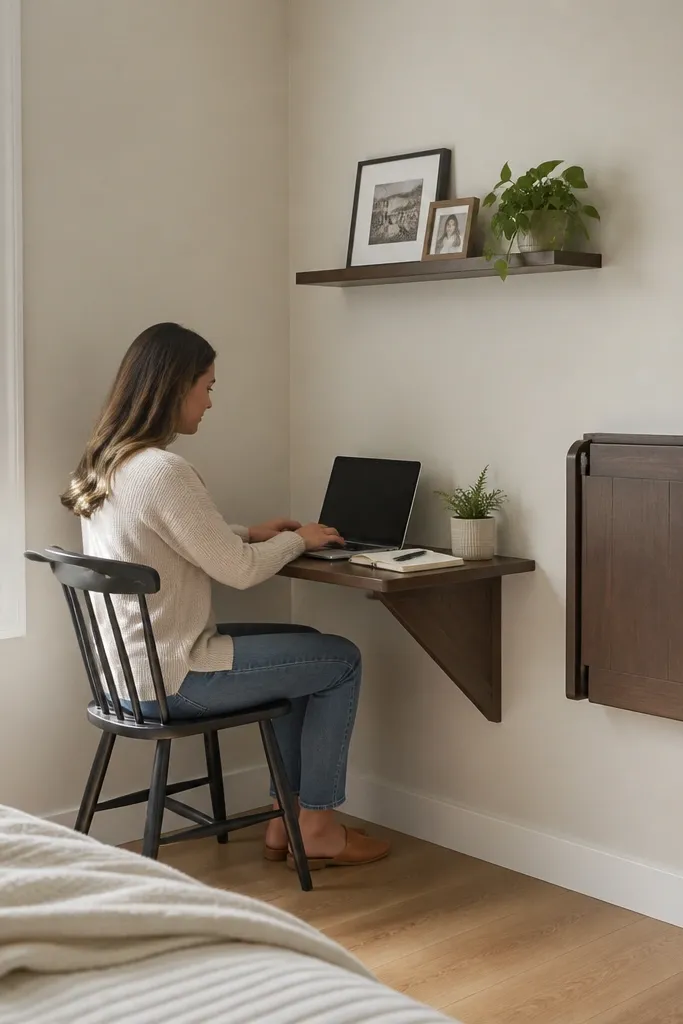
A folding table is the cleanest renter solution for “I need a desk sometimes.” In the corner, it disappears when folded, so you don’t feel like you’re living next to a temporary workstation. When open, it gives you a writing surface that’s straight and stable enough for laptop work. Add a small wall shelf above it and you get a complete station that looks intentional rather than bare. This option is great for studios and one-bedroom apartments where the corner shifts between study, crafts, and guests.
Choose a folding table kit rated for the tabletop size you want and make sure the bracket mounts into studs. Measure the corner so the folded position doesn’t block baseboards or door swing. Install the bracket at the correct height so the tabletop lands around 28-30 inches when open. Add a small stop rail or chain so the table opens smoothly and doesn’t slam; finish by sanding and painting the tabletop edge if needed.
Editor's noteUse a removable desk mat on top — it hides minor scratches and makes the surface look uniform.
Skip thisDon’t mount it only to drywall — the folded leverage is enough to loosen fast.
13. Corner Desk with Pegboard Side Panel and Shelf
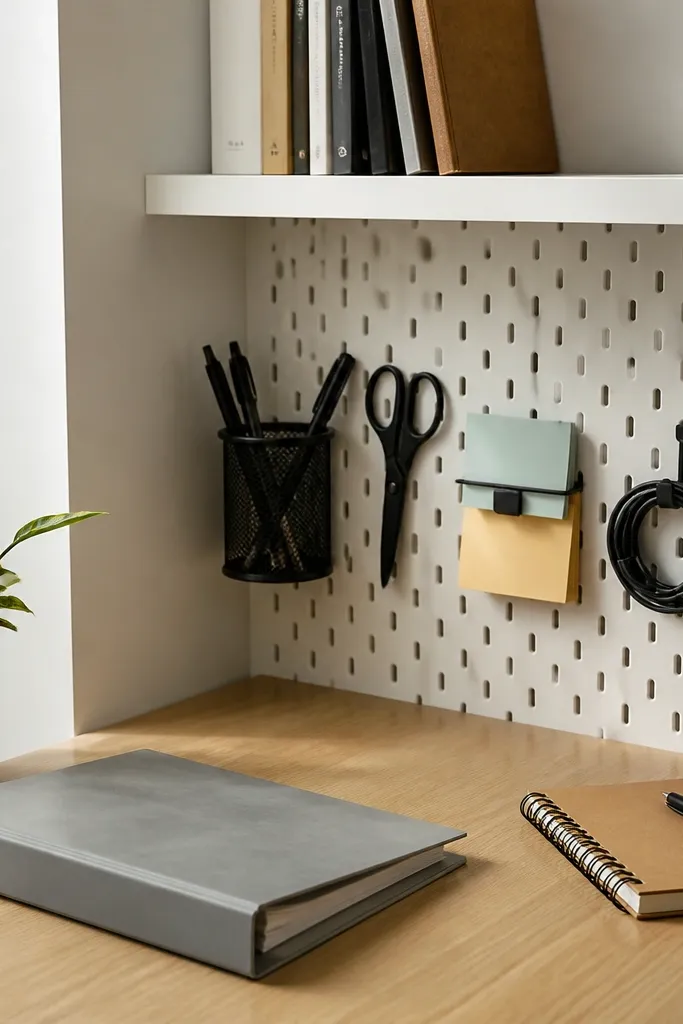
Pegboard next to a corner desk makes the setup look organized even when you’re mid-project. Instead of stuffing supplies into drawers, you hang what you need — pens, scissors, sticky notes, and a small cable reel. The corner placement matters because pegboard sits vertically, so you keep table space clear and the corner reads as a system. It also photographs well because the grid creates clean visual structure. This is a renter-friendly project when you use removable anchors or mount to studs where possible.
Measure your desk’s side gap and cut or buy a pegboard panel sized to fit the corner beside the chair. Mount into studs if you can; otherwise use rated wall anchors designed for pegboard loads. Add a small shelf above the pegboard for books and a clip-on task light for consistent illumination. Finish by painting the pegboard in a matte color that matches your room trim, then hang tools using color-coded hooks.
Editor's noteKeep hooks and shelves all one color — it makes the pegboard look like built-in storage.
Skip thisDon’t hang heavy items on the top row — pegboard bows and the shelf line looks off.
14. Corner Desk with Slim Under-Shelf for Shoes-Free Storage
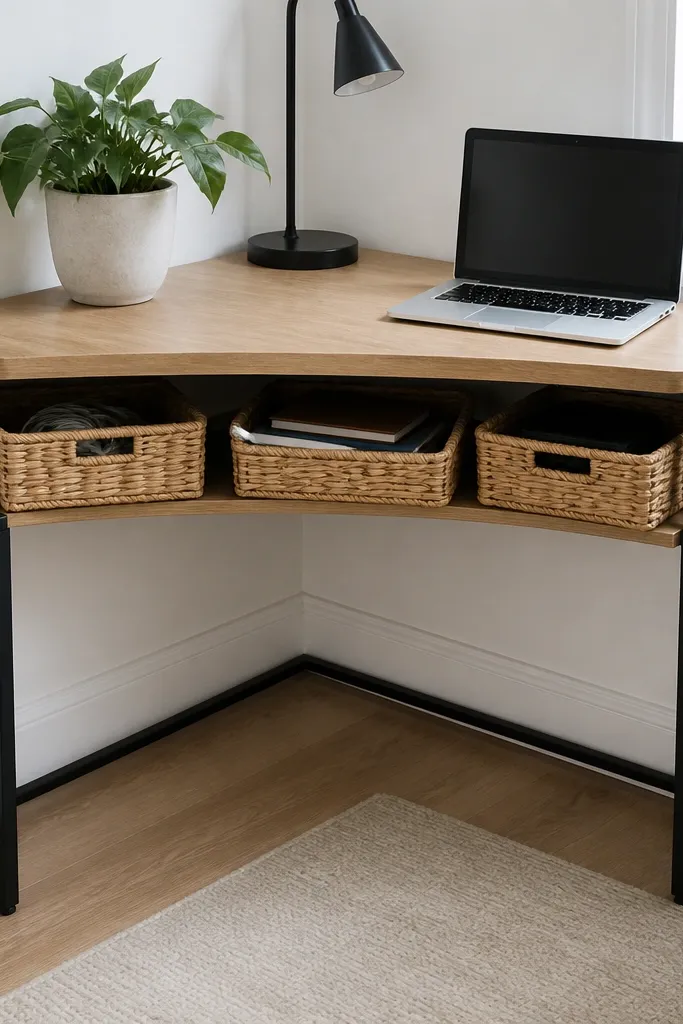
This is the “study desk that doesn’t swallow your floor” idea. Instead of adding drawers, you add a slim under-shelf that holds baskets for notebooks, cables, or a small printer. In a corner, the open leg space makes the desk feel lighter, and the storage stays out of sight until you need it. The look is clean because the shelf line is horizontal and the baskets keep everything uniform. It’s renter-friendly when you use non-marking pads or install into studs with minimal hardware.
Build a shallow desk base or use a small table, then add a slim under-shelf at about 6-10 inches above the floor depending on your chair clearance. If drilling is allowed, mount the shelf brackets into studs and use a shelf board with a sealed edge so it wipes clean. Add baskets that match your room color and set them so their top aligns under the desk for a neat silhouette. Route a single cable down the back corner and secure it so it doesn’t cross the leg space.
Editor's noteUse shallow baskets with fabric sides — they hide messy paper edges and look better than open plastic bins.
Skip thisDon’t set the under-shelf too low — it blocks chair movement and makes the corner feel cramped.
15. Corner Desk with Mirrored Back Panel for Extra Light
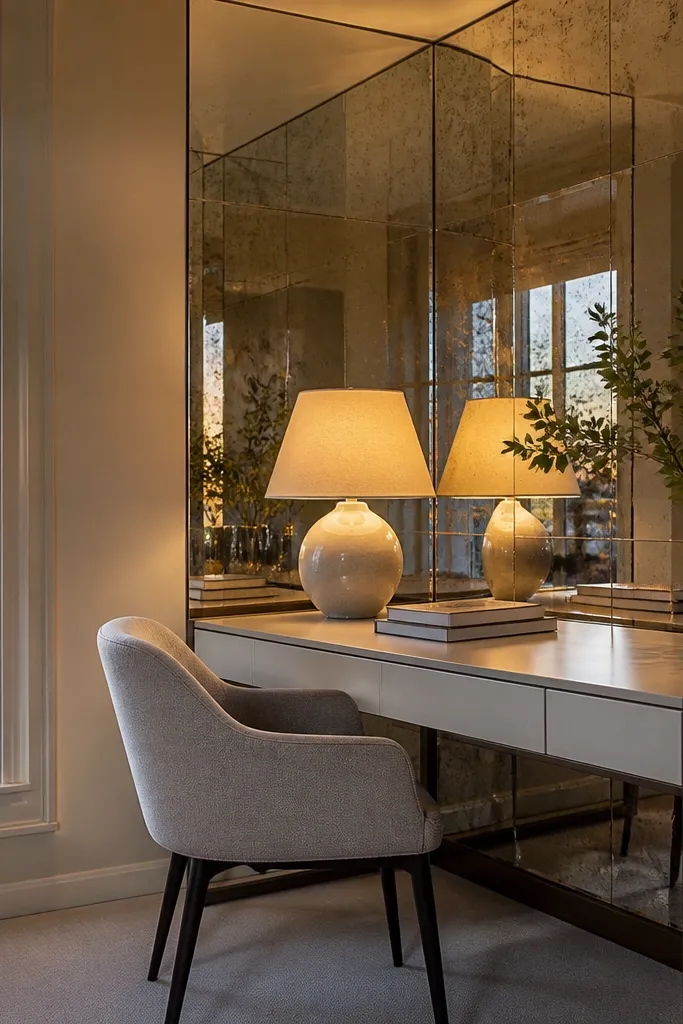
A mirrored back panel turns a dull corner into something that looks brighter in photos and in daily life. You’re using reflection to cheat the space, and the result is a desk that feels more open without changing your floor plan. Put the mirror behind the desk area so it bounces light off your lamp and makes books look sharper. This works best with a simple desk top and a clean cable route, so you don’t amplify mess. It’s a renter-friendly project if you mount the mirror with removable hardware or use a lightweight mirror panel.
Choose a lightweight mirrored acrylic panel or a small mirror tile sheet designed for wall mounting. Clean the wall area and apply removable mounting strips rated for the panel weight, or mount into studs with small standoff brackets. Position the panel so it sits behind the main work zone, not where you’d see glare from the room. Style the desk with two matching planters or a consistent book stack so the reflection looks intentional. Finish by adding a warm lamp and a cable hook on the desk side to keep the reflection clean.
Angle your lamp slightly toward the mirror so it reflects light onto the work surface, not into your eyes.
Don’t mount a heavy glass mirror with only adhesive strips — it’s a safety risk and can pop off.



