
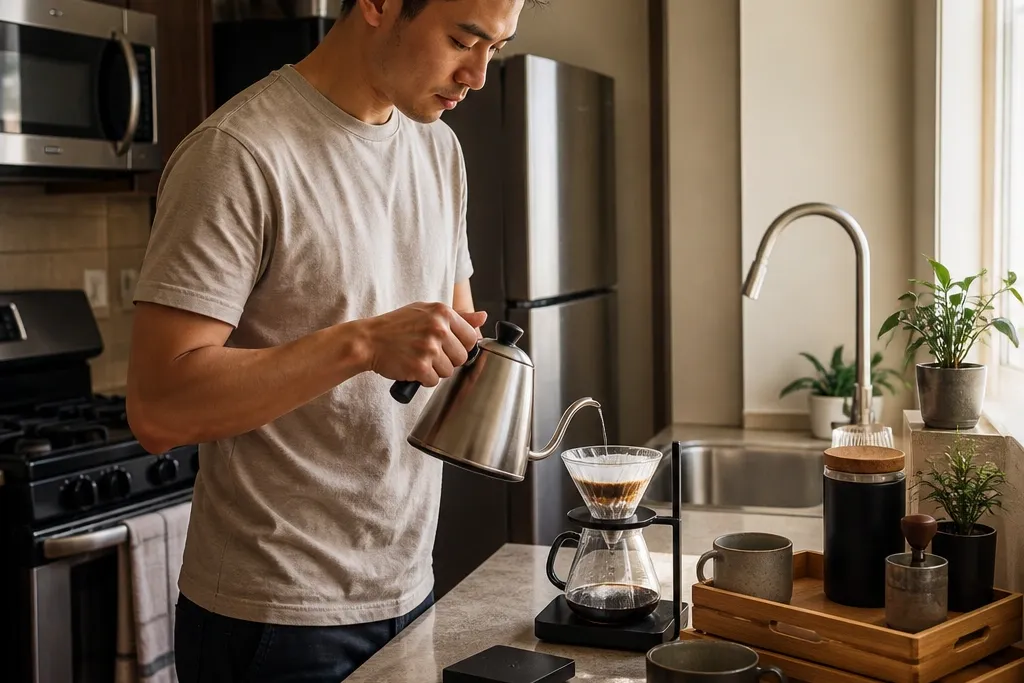
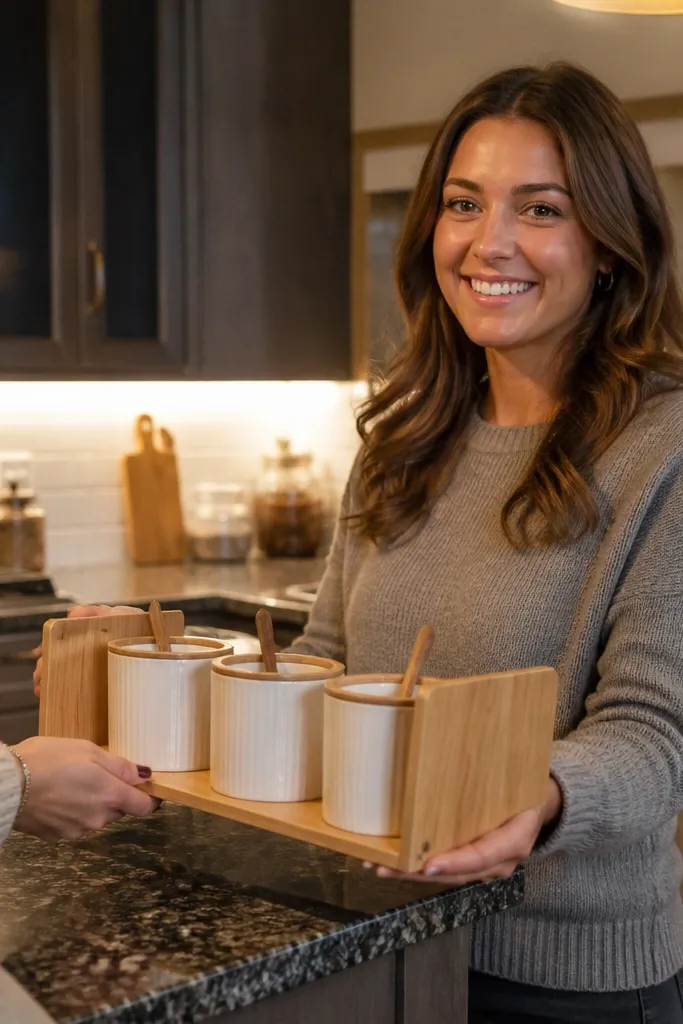
1. Trays-on-Tracks Coffee Station (Freestanding Rail + Removable Trays)
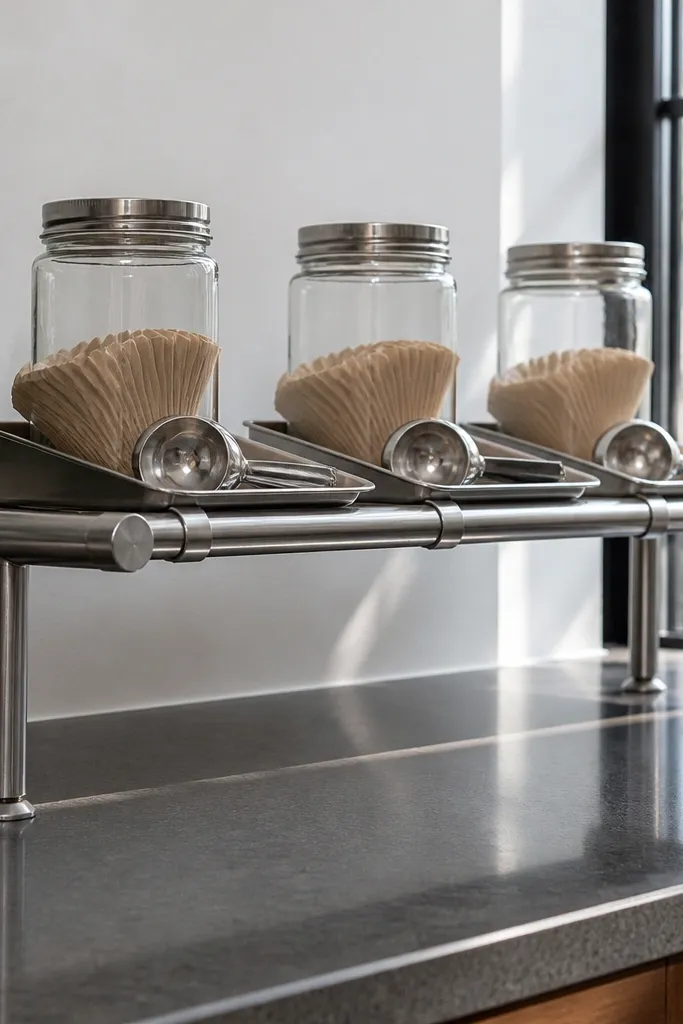
This setup looks like a mini coffee bar because the visual weight stays vertical and contained. A freestanding rail keeps you from drilling into cabinets, and the removable trays let you pull everything out for cleaning without disassembling your whole kitchen. Choose a rail finish that matches your hardware — brushed nickel or matte black — then stick to two tray colors max so it reads cohesive. It’s especially good for narrow kitchens where the counter is too tight for a cart but you still want a defined “station” area.
Start by buying a freestanding shelving rail system that’s stable on your floor (not a wobbly tower). Place it where your daily workflow happens — usually between the sink and the outlet, if you have one. Add two or three shallow trays, leaving the top tray for cups and the bottom tray for beans, filters, and a scoop. Finally, line each tray with a non-slip mat and attach small label tags to jars so the station looks intentional every day.
Use cork or felt under the trays to cut noise when you slide jars around.
Avoid a rail that only rests on the edge of a countertop — stability matters more than looks.
2. Countertop Coffee Corner with Sliding Drawer Insert
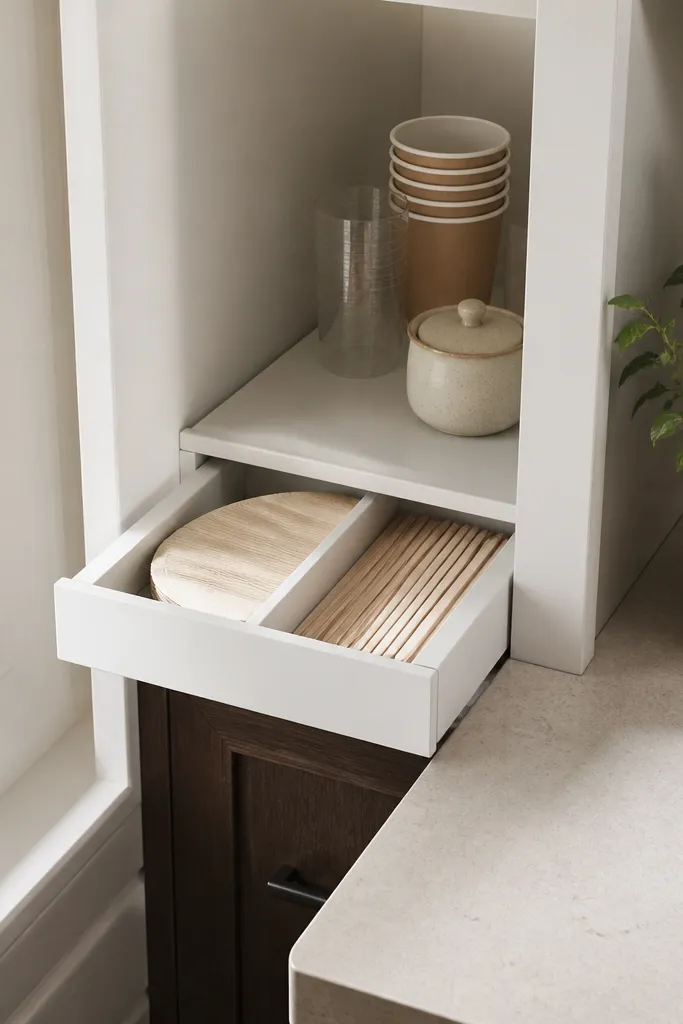
If your counter is tiny, a sliding drawer insert creates hidden storage while keeping the front area styled. You get a clean face for cups and a neat “tool drawer” for filters, spoons, and cleaning wipes. This is renter-friendly because you’re not attaching anything to cabinets — you’re using the space you already have. The look is tidy because your clutter stays behind a drawer front, not spread across the counter.
Measure the available counter depth and width, then buy a ready-made shallow drawer organizer or build a simple one from plywood and a drawer slide rated for light loads. Place it on the counter where you want your coffee zone and leave 1-2 inches of clearance to open it comfortably. Add a heat-safe mat inside the drawer for drippers or kettle placement, and use small bins for filters and stir sticks. Finish by adding a tray on top for the daily items: beans, cup stack, and one scoop.
Editor's noteLine the drawer with a washable silicone mat so spills wipe up instantly.
Skip thisDon’t put your kettle or dripping hot parts directly on wood — always use a heat-safe layer.
3. Lidded Jar Stack on a Pegboard Shelf (No Cabinet Drilling)

Pegboard reads “maker” and “styled” at the same time, and it’s a great place to hang cups and keep coffee tools off the counter. Use a standalone pegboard panel or a freestanding pegboard frame so you’re not drilling into walls. The real aesthetic win is the jar stack: matching lidded containers look neat even when your kitchen is small. This works well in rentals where you want structure but you can’t commit to permanent shelves.
Get a freestanding pegboard frame sized to your corner or backsplash-adjacent area, then place it where you can reach it comfortably while brewing. Mount a small shelf on the pegboard for jars, or use peg hooks for cup storage and a bottom tray for filters. Use three to five identical lidded jars in a single finish family (clear glass with black lids is an easy look). Add a small label strip with brew type names so the station stays organized.
Stick to one color for lids and one for labels. Your eye loves repetition.
Skip mixed jar sizes without a plan — the stack looks chaotic fast in small spaces.
4. Magnetic Spice-Cup Rail for Pods and Measuring Spoons
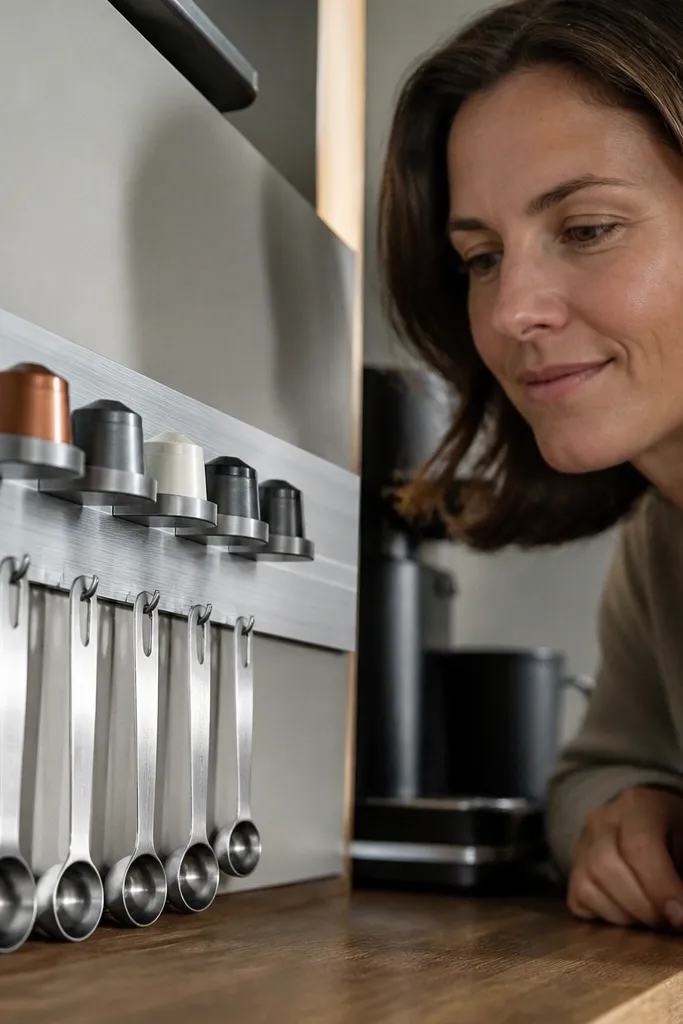
This is a clean, modern fix when your coffee setup is mostly pods or pre-measured options and you need quick access. A magnetic rail holds small cups for measuring spoons, scoop tools, and stir sticks, keeping them off the counter. It also looks sharp because the items are lined up — no random spoon pile near the coffee maker. This is renter-friendly because you can use a magnetic surface only if you have a metal fridge or buy a non-permanent stand that holds the rail.
Choose a magnetic rail designed for small spice cups, then test it on your metal surface for firm hold. If you don’t have a metal surface, use a freestanding base that holds a rail upright. Add small magnetic cups and load them with your daily tools: one spoon for beans, one for sugar/creamer, one for stir sticks. Finish with a slim tray underneath for pods or packets so everything stays aligned.
Editor's noteUse a small drop of rubber tape under cup bases to reduce clinking and scratching.
Skip thisAvoid overloading the cups. If they sag or slide, the look becomes messy immediately.
5. Heat-Safe Pour-Over Stand with Foldable Drip Mat
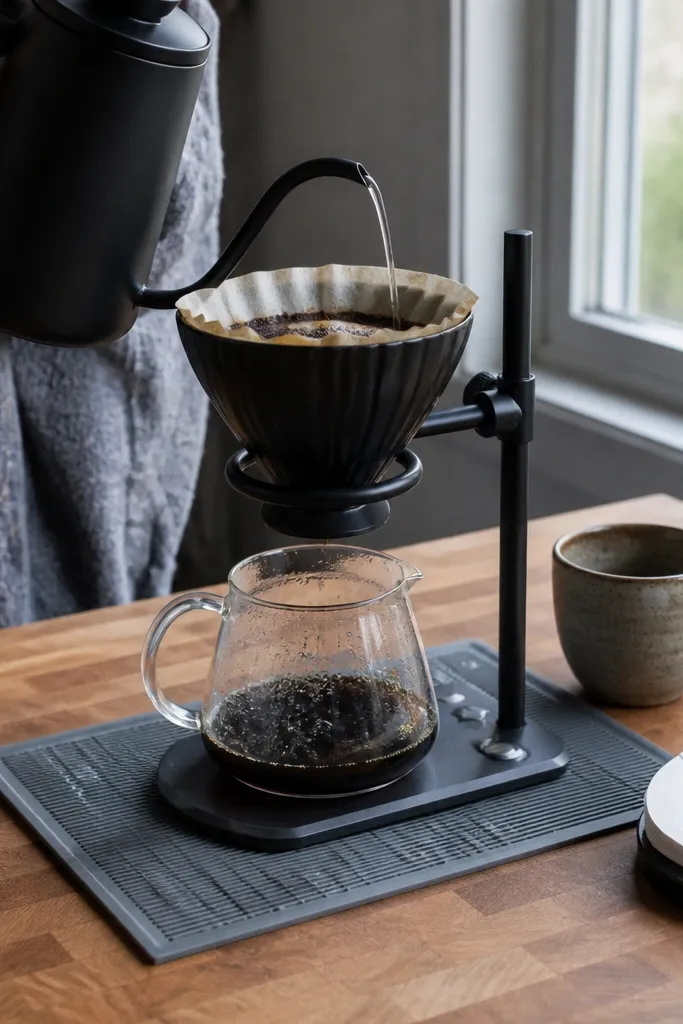
This option looks intentional because it turns brewing into a visible ritual rather than a countertop mess. A heat-safe stand holds your dripper at the right angle, and a foldable drip mat keeps water off surfaces while staying neat when you’re done. It’s great for renters because you don’t need permanent installation and you don’t need a dedicated machine footprint. The aesthetic is all about materials: matte stoneware cups, a wood or metal stand, and a neutral mat.
Pick a pour-over stand with a stable base and a heat-safe surface rating, then choose a dripper that matches your brew style. Put a foldable silicone or rubber drip mat under the stand so cleanup is wipe-and-go. Place your “brew set” in one container: dripper, filters, kettle thermometer (optional), and a small brush for grinds. When you set up, keep everything within a 12x18 inch area so it reads like a designed station.
Editor's noteUse a small ceramic cup for your used grounds basket so the cleanup zone looks like part of the decor.
Skip thisDon’t rely on paper towels for drips — they look messy and they soak through.
6. Rolling Micro-Cart with Cabinet-Style Front Baskets
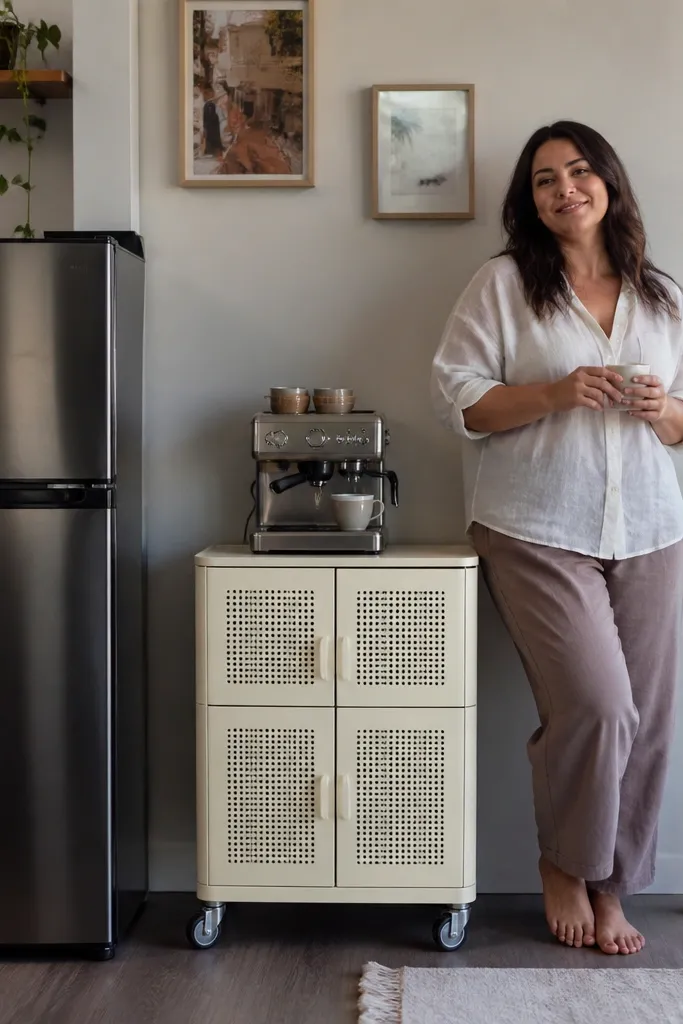
A micro-cart is the most reliable way to create a coffee station in a small space without touching the walls. The look improves when the cart has cabinet-style baskets or fronts instead of open bins. You get a “closed storage” vibe while still having everything reachable. It’s perfect for renters because it moves — you can roll it away when you clean or when guests arrive.
Buy a slim rolling cart with 2-3 shelves and enough clearance for your kettle or coffee maker footprint. Add baskets with matching finishes (wicker or fabric with liners) so the front looks uniform. Use one shelf for cups, one for brewing tools, and one for overflow beans/filters. Add a non-slip mat on the top shelf and secure cords with a clip or hook on the cart frame.
Editor's noteChoose a cart with wheels that lock. Your coffee station should not drift when you pull jars.
Skip thisSkip carts with wire-only shelves if you hate dust. You’ll see it every day.
7. Over-the-Sink Clip Shelf with Cup Hooks
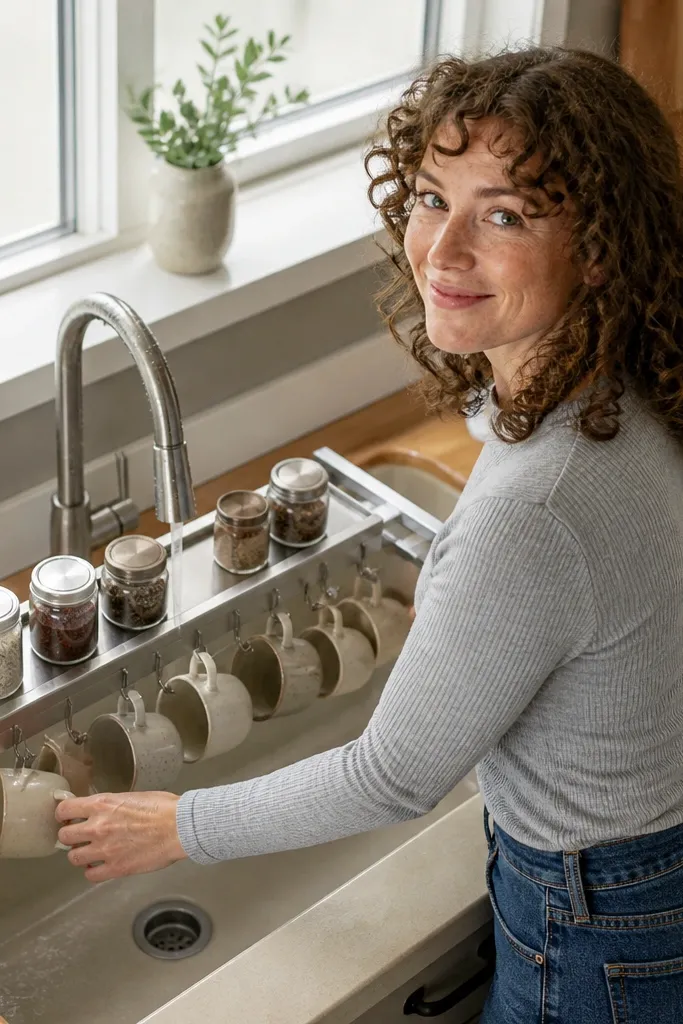
This is a smart use of vertical space that looks clean because it frames your coffee items near water. An over-the-sink clip shelf gives you a dedicated coffee “face” without drilling into anything. Add a few cup hooks and a small shelf tray for jars, and it becomes a mini bar that looks styled instead of random. It’s best for rentals where your outlets and counter are constrained, but your sink area is still usable.
Select an over-the-sink shelf with sturdy clips that can handle your shelf load without wobbling. Attach cup hooks to the underside or side rails if the model supports it. Place two or three jars, a small canister for filters, and your cup stack on the shelf area. Add a water-resistant tray liner so splashes don’t stain the shelf, then keep your kettle placement off the shelf and on a heat-safe area.
Editor's noteUse a small clear acrylic organizer for tea packets or sweeteners so the shelf stays visually tidy.
Skip thisDon’t put anything you’ll bump into while washing — keep the shelf items higher than sink splatter level.
8. Adhesive Wall Shelf with Paint-Safe Guard Rails
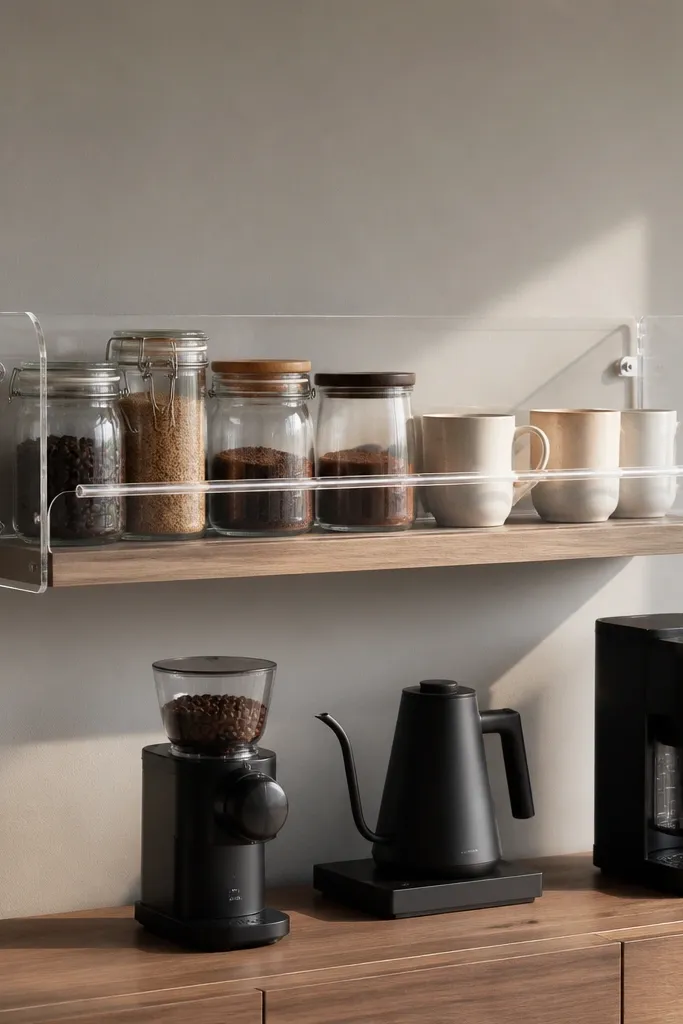
When you want the look of built-in shelving without the landlord drama, an adhesive shelf with guard rails is the best compromise. Guard rails matter because coffee items are heavy-ish and you don’t want jars sliding forward. The look is clean: jars line up, cups sit in a row, and you get a dedicated coffee wall zone. This works best over a counter or beside a coffee maker where you can reach it without leaning over hot equipment.
Choose a paint-safe adhesive shelf system rated for the weight of your items and your wall material (smooth painted drywall vs tile matters). Clean the wall with isopropyl alcohol, let it fully dry, then press the shelf in place for the manufacturer’s recommended time. Add guard rails if your system includes them, then load the shelf with three jar sizes max plus a cup stack. Keep brewing tools in a tray below so you don’t overload the shelf and so the station stays photogenic.
Use museum putty or removable adhesive pads for small jar stops so glass doesn’t rattle.
Skip overloading. A shelf that creeps forward ruins the look and the safety.
9. Pegboard + Clear Acrylic Front Organizer for a "Retail" Look

This one looks like a coffee shop because you can see everything neatly organized behind a clear front. It’s the fastest way to make renter-friendly coffee station ideas look “finished” even when your inventory changes. Clear acrylic fronts keep packets, sugar, and stir sticks from spilling out, and they protect from kitchen dust. It’s a great choice for people who buy lots of single-serve items and need a system that still looks clean.
Use a freestanding pegboard frame or a small pegboard panel you can place on a counter edge. Attach clear acrylic organizers in a grid pattern for packets, sweeteners, and stir sticks. Place your larger items — jars, scoop, filters — on a small shelf above or below the acrylic grid. Finish by adding a label on each compartment so the station looks organized in the background even when you’re not brewing.
Editor's noteKeep the acrylic fronts smudgeless with a microfiber cloth after you refill.
Skip thisDon’t label with messy handwriting. Use printed labels for a cleaner look.
10. Floating Corner Shelf with Detachable Coffee Tray Insert
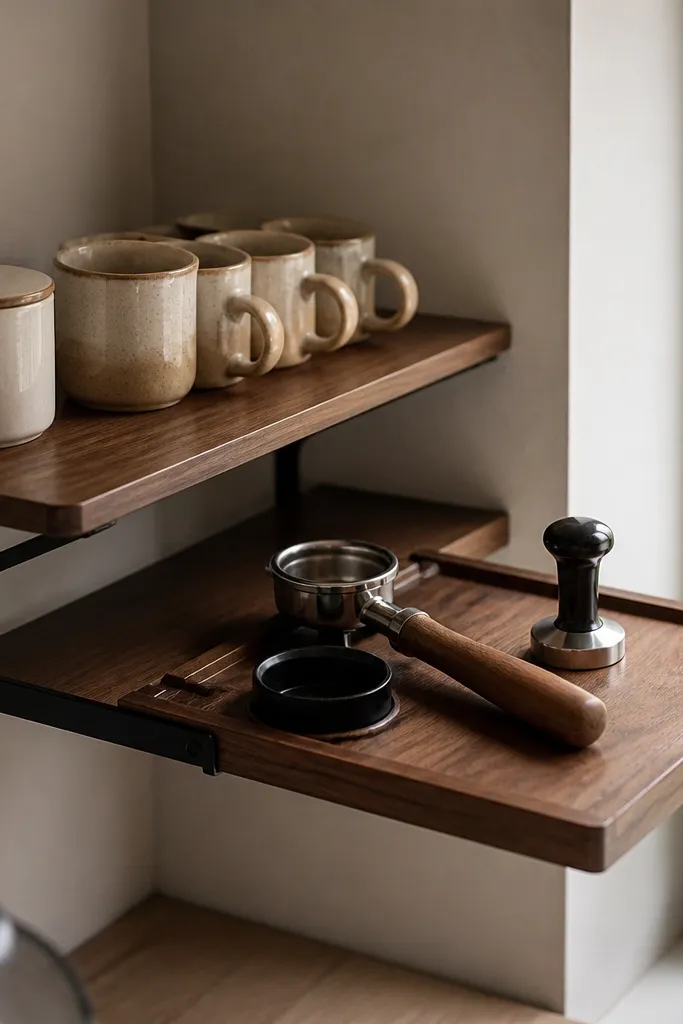
Corners are where small coffee setups go to die — until you give them a dedicated shelf and a detachable tray. This idea looks great because the shelf holds the “display” items while the tray holds the daily workflow. You get the best of both worlds: a clean corner view when you’re not brewing and a functional station when you are. It’s renter-friendly if you use a corner shelf that clamps or uses removable adhesive mounts on the wall.
Pick a corner shelf system that clamps to a frame or uses removable mounts rated for your wall type. Install it so the shelf lip sits at about cup height when you pull the tray out. Build a tray insert from a simple wood rectangle with a raised edge (about 1 inch high) so items don’t slide. Load the tray with grinder, beans container, and cups, then keep filters and stir sticks in a small compartment bin on the tray.
Use non-slip shelf liner on the tray bottom so it doesn’t slide when you carry it.
Avoid placing the shelf too low. If your cups sit below eye level, the station looks cramped.
11. Curtain-Rod Coffee Station with Hanging Mug + Packet Pocket
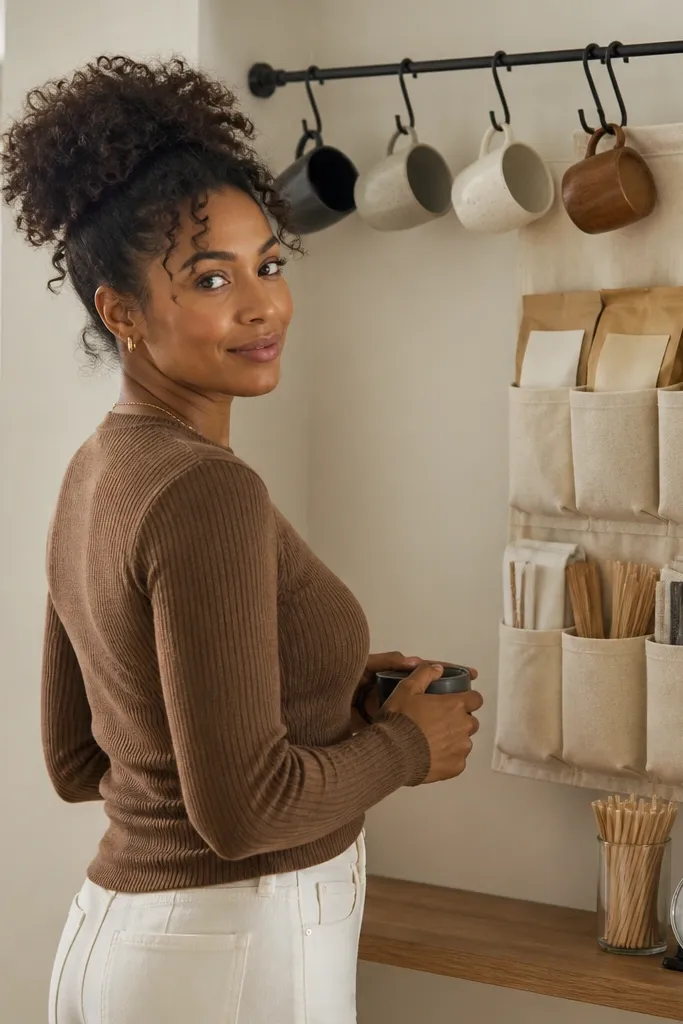
This is one of the best renter-friendly coffee station ideas for people who want vertical storage without mounting anything to walls. A curtain rod or tension rod can hold mugs and a packet organizer, turning a blank corner into a styled coffee wall. The look is airy, and it doesn’t require a ton of counter space. It’s especially good for studios or kitchens where your only free surface is near a window or between cabinets.
Install a tension rod or use a small curtain rod bracket setup that doesn’t require drilling if your rental allows it. Hang mug hooks or a simple mug rack sleeve, then add a fabric pocket organizer for filters, sweeteners, and stir sticks. Put a small tray below for the kettle or pour-over base so you have a heat-safe landing zone. Keep the hanging items limited to 4-8 mugs or the visual clutter starts to creep in.
Editor's noteChoose hooks that match your mugs' metal finish so the whole thing looks intentional.
Skip thisSkip a rod that sags. A droopy rod makes everything look messy even if your jars are neat.
12. Cabinet-Door Coffee Organizer with Flip-Down Tray
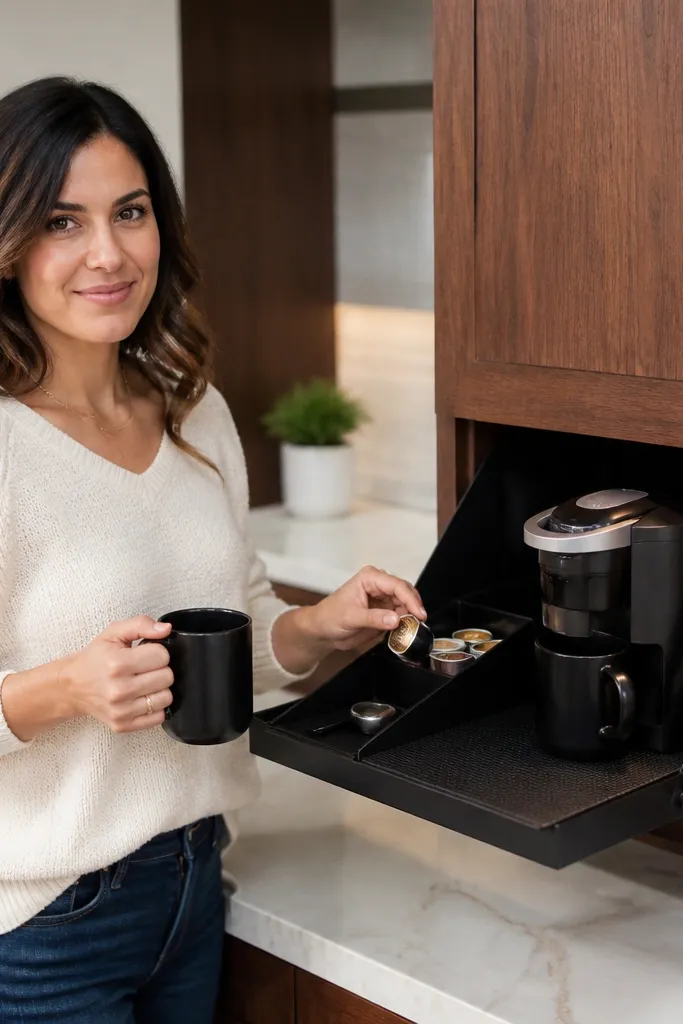
This is a smart solution when your counter is too small and your landlord won’t allow wall shelves. A flip-down door tray keeps your coffee zone behind the cabinet door, then swings out when you brew. It looks clean because the front of the kitchen stays uncluttered, and you only reveal the station when you need it. This is ideal for compact kitchens where you want a photo-ready setup but you also want a fast “put it away” button.
Buy a flip-down organizer tray sized for your cabinet door width and check it clears your door hinges. Attach the organizer to the inside of the door using the included hardware (measure hinge clearance first so it doesn’t bind). Add a small cup rack on the tray and use a lidded container for filters and sweeteners so nothing spills. When you close the door, everything stays hidden — when you open it, you have a complete brewing face.
Use rubber bumpers on the door so the tray closes quietly and doesn’t rattle jars.
Don’t install it on a door that already has heavy items attached. The hinge wear shows over time.
13. Pegboard Coffee Station with Matching Canisters and a Ground Bin
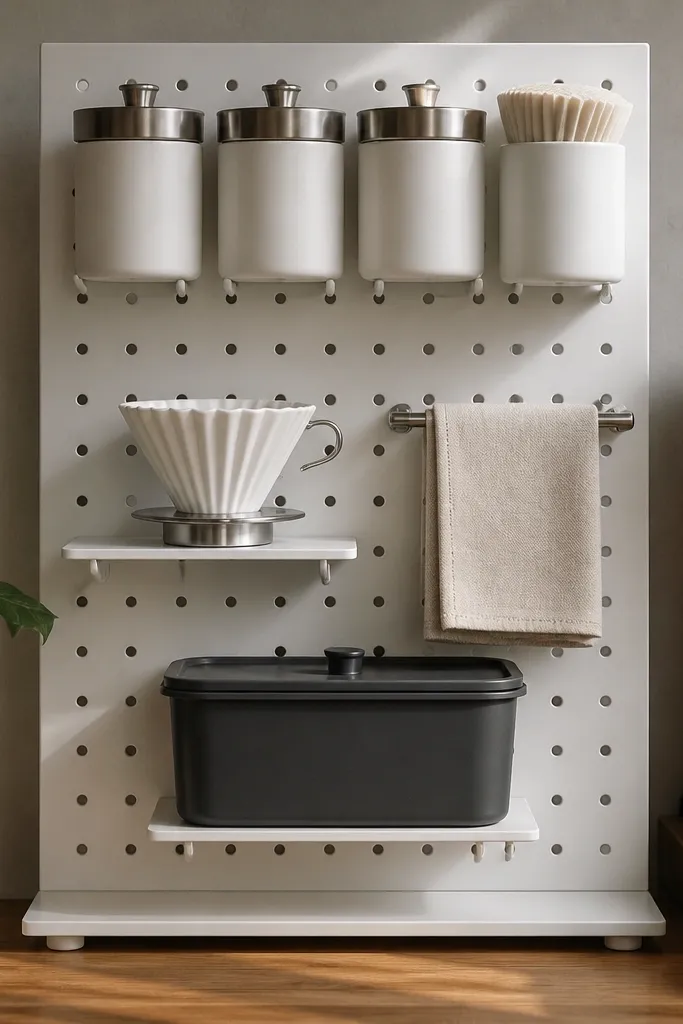
This version looks like a designed kitchen moment because it uses a consistent container set and a dedicated grounds bin. You get a clear workflow: beans and filters up top, brewing tools in the middle, and used grounds in a bin that stays contained. Pegboard gives you flexible placement without permanent shelves. It’s a strong option for renters because you can adjust the layout as your coffee routine changes.
Use a small freestanding pegboard frame and mount a row of hooks plus a shelf for canisters. Choose matching canisters with the same lid style and finish, then fill them with beans (or pre-ground), filters, and sweeteners. Add a small lidded bin for grounds and place it at the bottom so drips don’t travel across the board. Finish by adding two hooks for your scoop and a small brush so the station stays visually neat between brews.
Editor's noteGroup items by frequency: daily tools in the center row, overflow in the bottom bin.
Skip thisSkip placing wet tools on the pegboard. Put them on a wipeable tray instead.
14. Stovetop-Safe Coffee Zone with Standing Wooden Risers
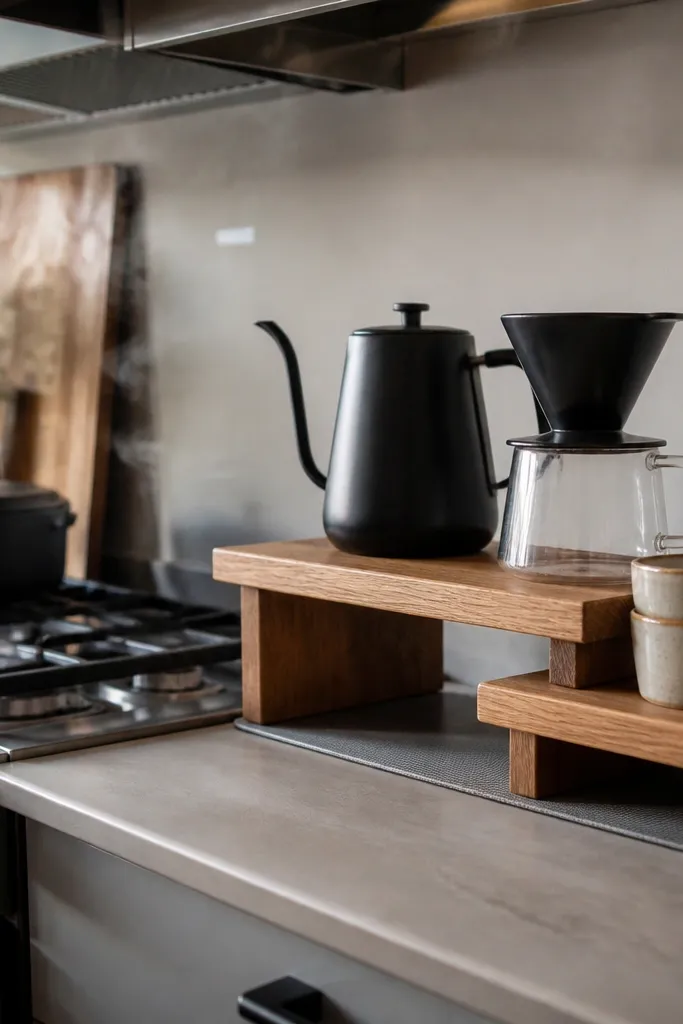
If your kitchen layout puts your best counter near the stove, you need a station that looks intentional and stays safe. Standing wooden risers create a “stage” so your dripper, kettle, and cups sit on a dedicated surface instead of living on the same spot as everything else. It’s photogenic because the height difference makes the coffee items look curated. This is renter-friendly because it’s freestanding — no drilling, no adhesive, no permanent changes.
Choose a heat-safe base mat and two wooden risers tall enough to separate hot items from the surface below. Place the risers on your counter and set a tray on top where your dripper and cups will sit. Keep your daily items in a single canister set: one for beans or grounds, one for filters, one for sweeteners. Set the kettle on the heat-safe mat behind the tray so steam doesn’t hit cups directly.
Use a tray with raised sides so spills stay contained and don’t migrate into the risers.
Don’t stack anything above the risers that you’ll bump while cooking.
15. Banquette Coffee Station with Pull-Out Drawer Under a Reversible Top
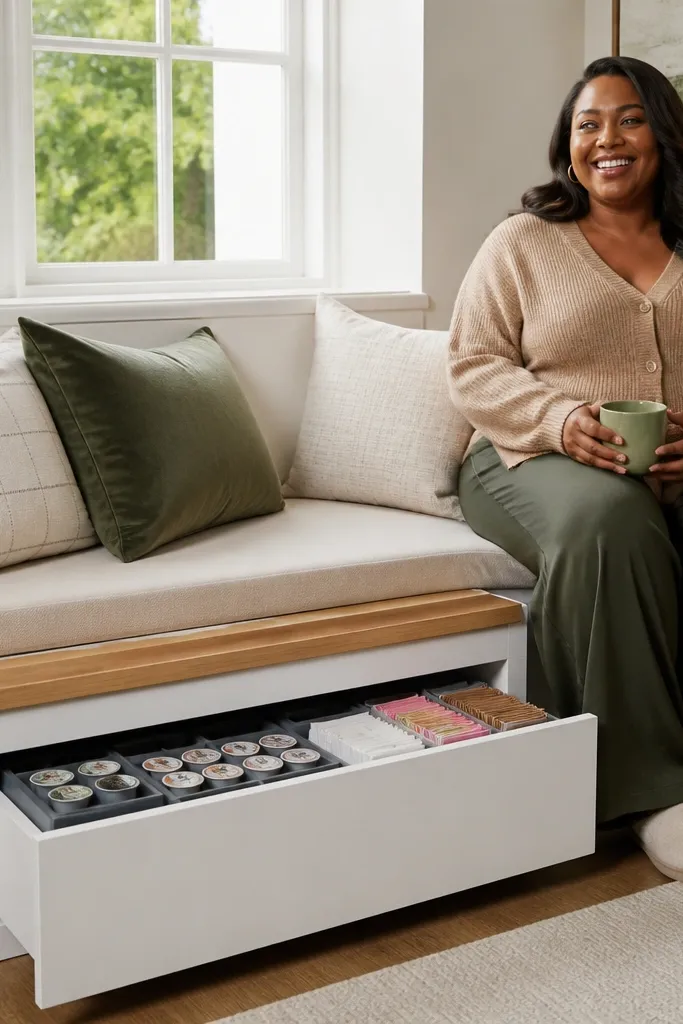
This is the renter-friendly move for people who have a banquette, window seat, or narrow built-in bench and hate empty counter clutter. You get a hidden storage drawer for pods, filters, and sweeteners, plus a flat top you can flip to create a different look depending on the day. The visual payoff is clean — the coffee area looks like part of the furniture, not a bunch of separate organizers. Build it with simple wood and drawer hardware, no drilling into walls, and it works in tiny kitchens because the coffee lives where you already sit. It suits small apartments, galley kitchens, and awkward corners where floor space is limited but seating exists.
Build a shallow drawer box that slides under the bench top: use 1/2 in plywood for the sides and bottom, and cut it to fit the available clearance (leave 1/4 in gap front-to-back so it doesn’t scrape). Install full-extension under-mount drawer slides on the underside of the bench frame — measure the slide length against the drawer depth first, then mount with a level so it sits square. Make a reversible coffee top panel from 3/4 in plywood with a removable finish: one side is a wipeable laminate or peel-and-stick countertop sheet, the other side is a cork sheet for hot items and a softer look. Add a small lip on the front edge (about 3/4 in tall) so mugs don’t slide off when you set them down. Finish by sealing the wood edges with polyurethane or a water-based clear coat, then test the drawer pull with a full load of pods and a couple of ceramic mugs.
Editor's noteUse a scrap piece of plywood as a spacer when mounting drawer slides so your drawer stays perfectly aligned even if the bench frame is slightly out of square.
Skip thisDon’t mount the slides by eyeballing the height — a drawer that’s even 1/8 in off will scrape the first time you pull it empty.



