
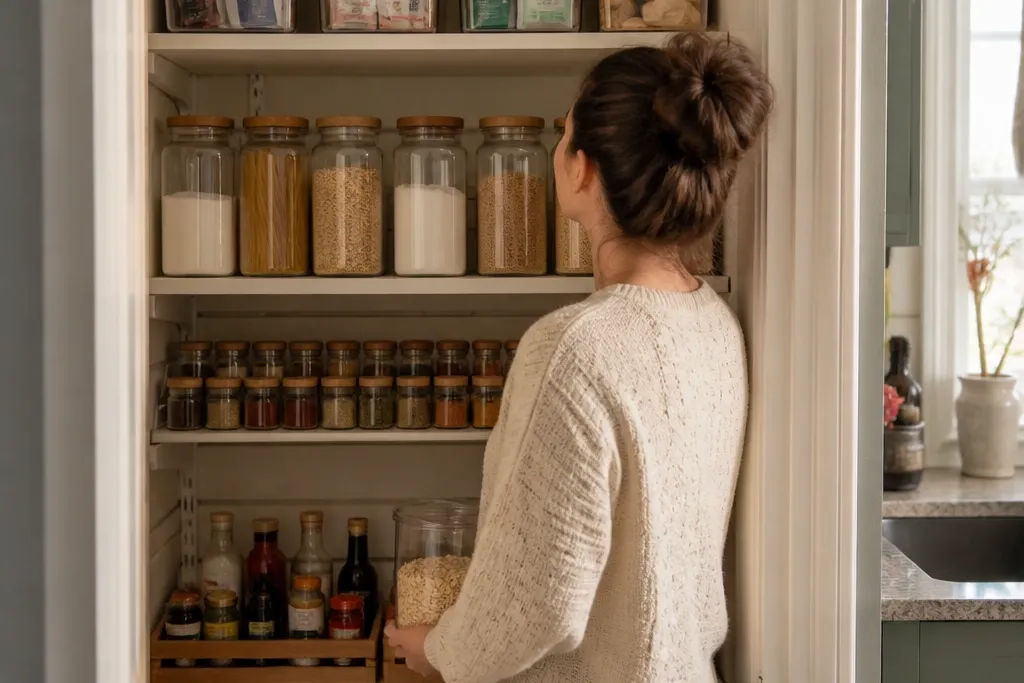
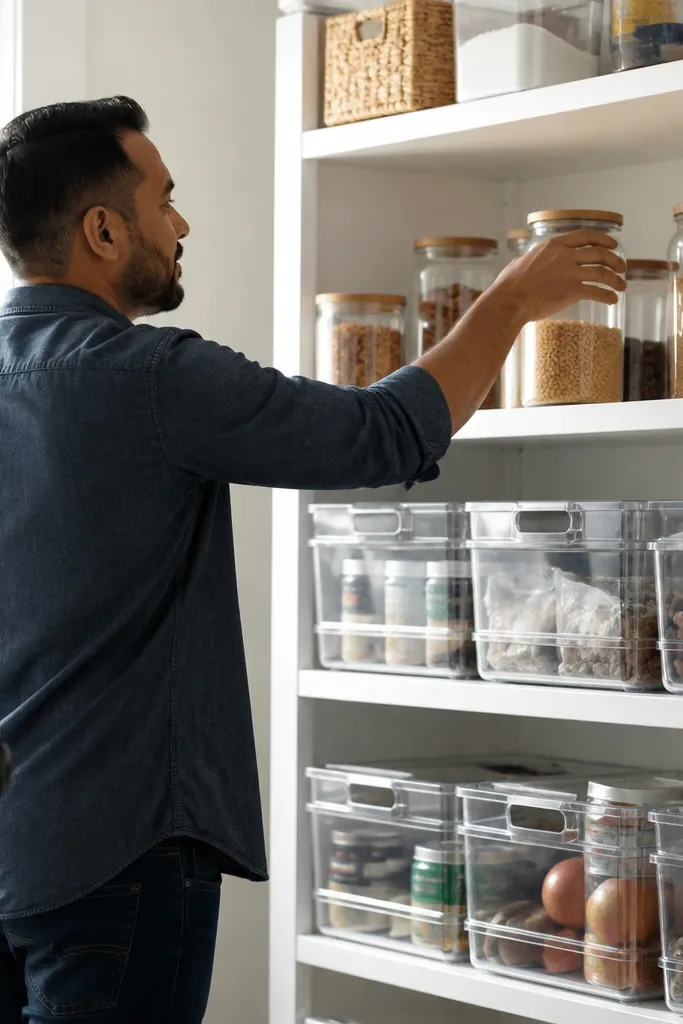
1. Pull-Forward Acrylic Snack Tiers
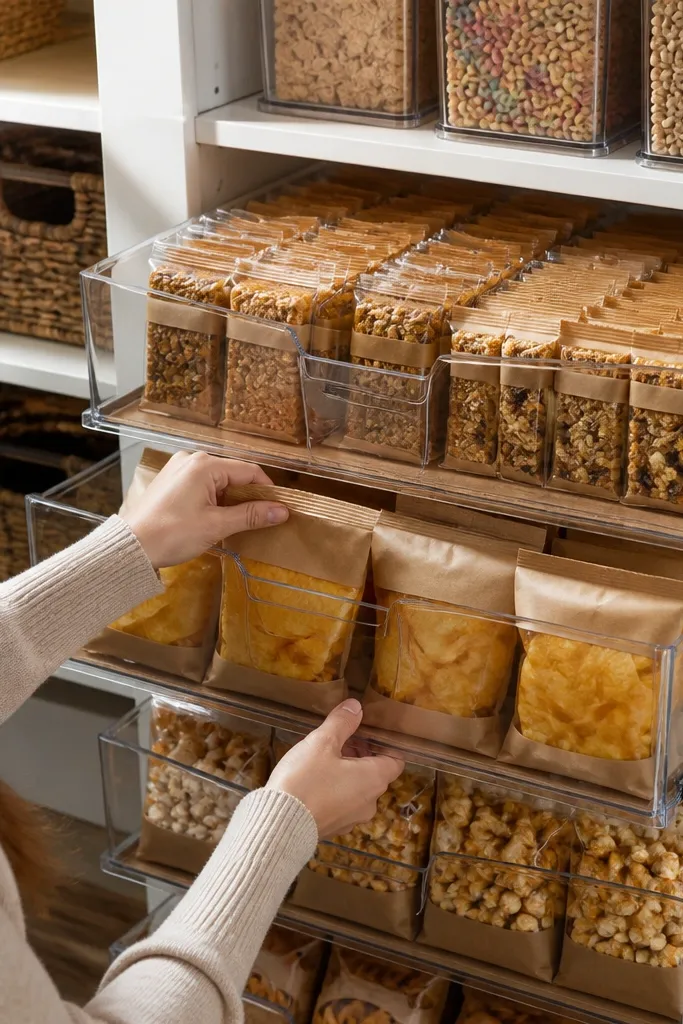
Start by measuring the shelf opening and choosing tiers that leave a small gap on each side for easy removal. Line the shelf with a non-slip liner, then set the bottom tier first and test that you can pull it out with one hand. Add the second tier only if it doesn’t force items to tilt; if it does, use one tier and a wider bin instead. Label each bin on the front face with a short category name so you can restock fast. Finish by placing heavier boxes on the bottom tier and lighter items on top.
This is the cleanest way to make a pantry look organized when you snack constantly. Pull-forward acrylic tiers keep everything visible and aligned, so the shelf reads like a neat display instead of a jumble of bags. Clear bins also let you spot what’s running low without opening doors or digging in corners. Use them for snack packs, single-serve drinks, and trial-size items that usually create clutter. The look stays tidy because the containers create straight lines and consistent label placement.
Skip thisDon’t fill bins past the front edge — overstuffing makes labels peel and bags fall out.
Editor's noteUse painter’s tape to mark the exact shelf positions before you place the tiers, so everything lines up straight on day one.
2. Stacked Glass Jar Rows with Matching Lids
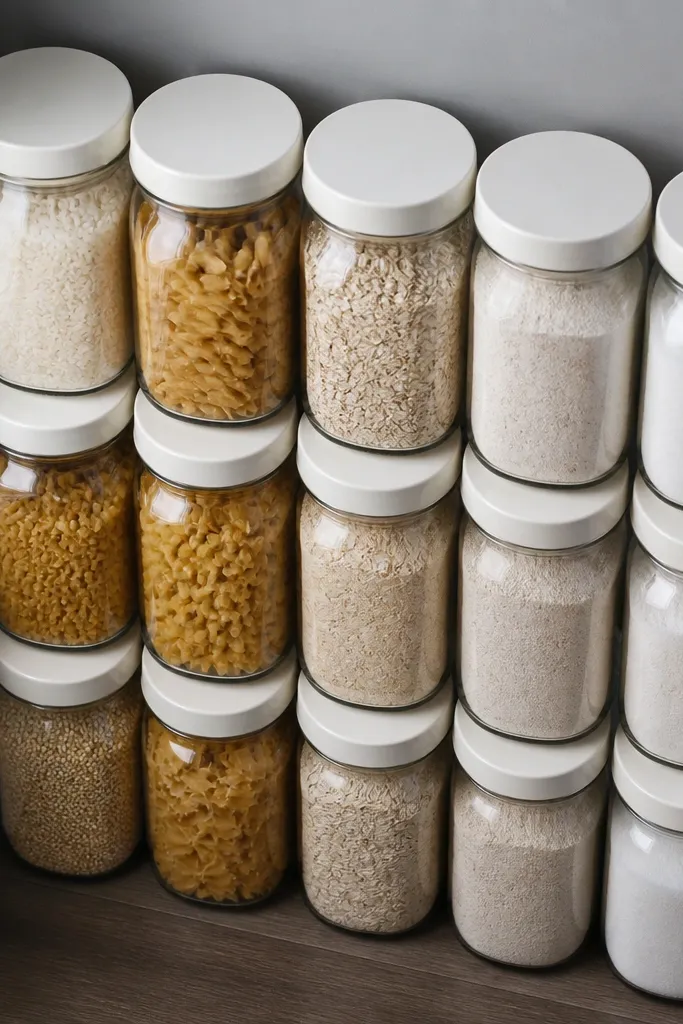
Pick jars that match in height, then group items by how fast you use them so the most-used jars sit at eye level. Wash and fully dry everything, then transfer dry goods using a funnel to avoid dust and spills. Add labels directly on the jar front with a label maker or waterproof label tape; keep the text size consistent. Stack jars in rows, and use a shelf liner under the bottom row to prevent sliding. Leave a small gap between rows so you can lift lids without bumping.
Matching glass jars turn a pantry into something you’d actually want to open. The uniform lids and consistent jar shapes create a visual rhythm that hides the fact you’re storing a lot of stuff. This setup is best for dry goods you use daily: rice, pasta, oats, flour (if you keep it sealed), and sugar. It also makes the pantry easier to rotate because you can see what’s older at a glance. If your shelves look uneven or crowded, jars fix that by standardizing the footprint.
Skip thisDon’t use different jar sizes in the same row — it makes the shelf look crowded even when it’s organized.
Editor's noteChoose lids with the same finish (all white or all black) so your pantry color palette stays calm.
3. Tension-Rod Spice Shelf Behind the Front Shelf
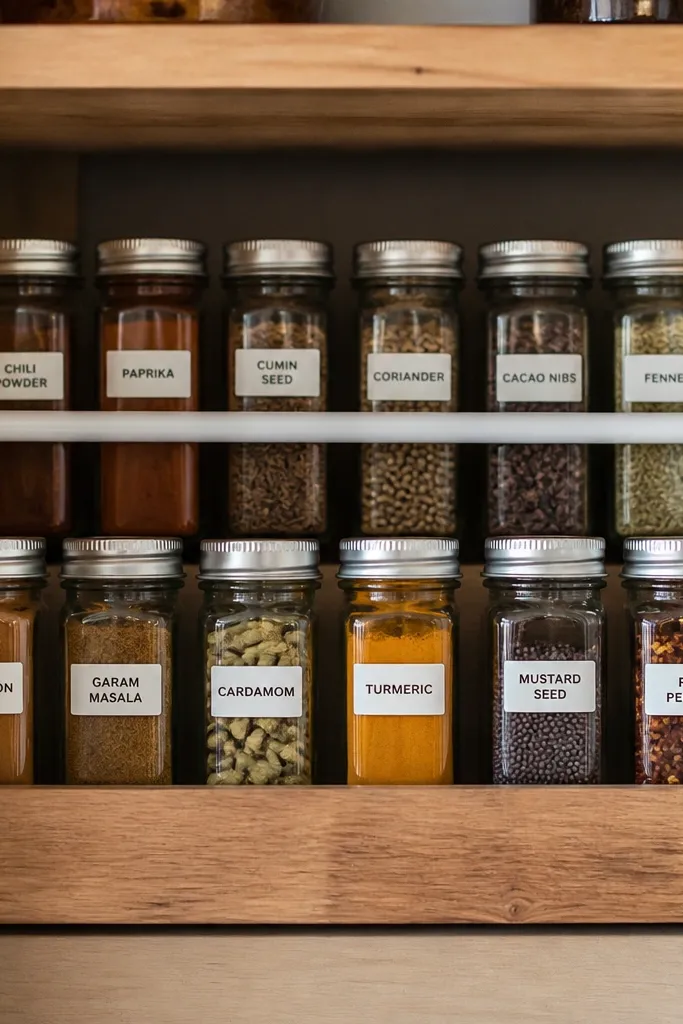
Measure the inside width between pantry sides and buy a tension rod that can extend within that range. Place the rod horizontally under the main shelf lip, then slide small jars onto the rod-supported area using a shallow tray or rod clips. Use a tray with a raised edge so jars don’t slip off when you reach in. Arrange by frequency: top row for everyday spices, bottom row for occasional ones. Wipe the rod ends and shelf edges so the rod grips cleanly.
When pantry shelves are shallow, spices end up stacked awkwardly or shoved in the back. A tension-rod shelf creates a second storage layer without drilling, and it keeps jars upright and readable. This is renter-friendly because it uses the existing shelf frame as the anchor point. The look is compact and tidy since all spice labels face forward. It also prevents the “spice avalanche” where bottles topple when you pull out a bin.
Skip thisDon’t overload — if jars touch each other, labels get smeared and lids stick.
Editor's noteUse rod clips meant for tension rods so the jars don’t rattle and scratch your shelves.
4. Wipe-Clean Fabric Drawer Bins for Baking Backups
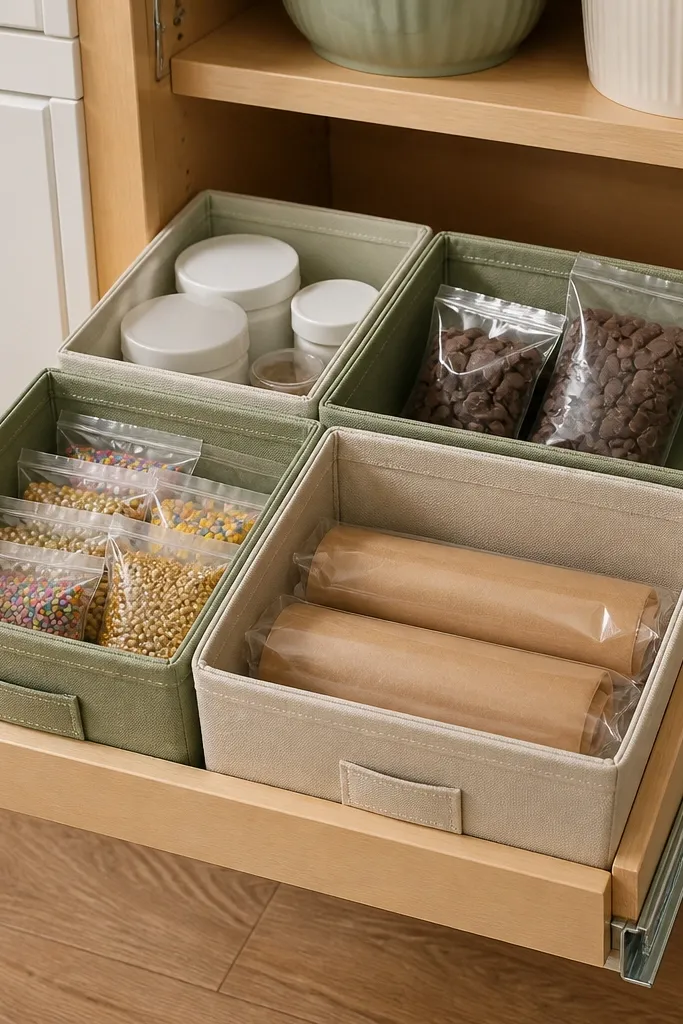
Choose two or three bin sizes that match your shelf depth and keep them all the same height where possible. Put a non-slip shelf liner underneath so the bins don’t slide when you pull one out. Sort baking items by type, then place the most-used bin at the front of the shelf. Add labels on the bin front using heat-transfer vinyl or waterproof label tape. Fold any loose packaging flat before placing it inside so the bin stays tidy.
Fabric bins give you the “soft” look that still handles kitchen mess. They’re great for backups like baking powder, chocolate chips, sprinkles, and extra parchment — things that are hard to display in jars. The bin edges create neat blocks of color, especially if you choose a consistent fabric tone like oatmeal or sage. This setup also hides the bulky packaging that makes a pantry look chaotic. It’s renter-friendly because it doesn’t require hardware and it adapts to uneven shelves.
Skip thisDon’t stuff bags upright inside fabric bins — they collapse and make the front look messy.
Editor's noteUse a simple label template with the same font size across every bin so the shelf looks styled, not random.
5. Shelf Divider Board for Vertical Bag Organization
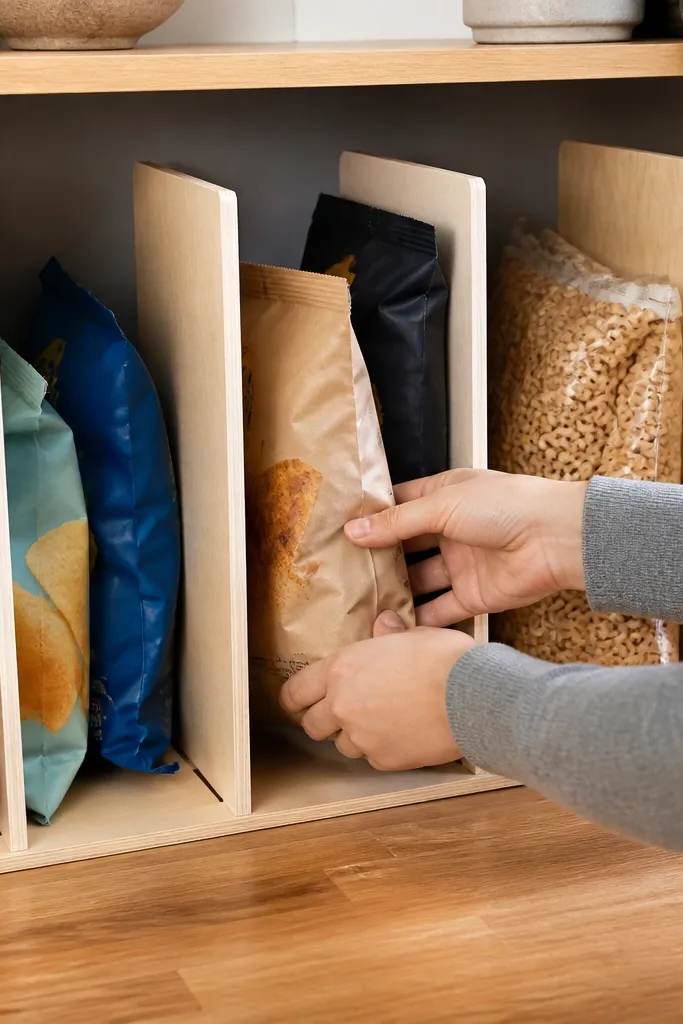
Cut a sheet of thin wood or acrylic into divider panels that fit your shelf width, or buy adjustable shelf dividers. Place a shelf liner down first, then position the divider board so it sits snugly without pushing shelves out of level. Use small removable adhesive pads on the underside edges if needed for grip. Create lanes wide enough for the thickest bag you store, and leave one lane for overflow. Load bags vertically with labels facing forward.
If your pantry holds bags, dividers make it look instantly more intentional. A divider board creates vertical lanes so chip bags, snack bags, and cereal packets stand up instead of leaning and spilling into each other. This is one of the best renter-friendly apartment pantry organization ideas because it uses removable liners and lightweight boards rather than permanent installs. The look is clean because you get straight edges and consistent spacing. It also makes restocking faster since you can slide items into an open lane.
Skip thisDon’t skip a liner — without grip, the dividers shift and your “lanes” turn into a pile.
Editor's noteChoose divider thickness that matches your bag thickness; too thick wastes space, too thin bows when you insert bags.
6. Under-Shelf Pull-Out Basket for Everyday Oils
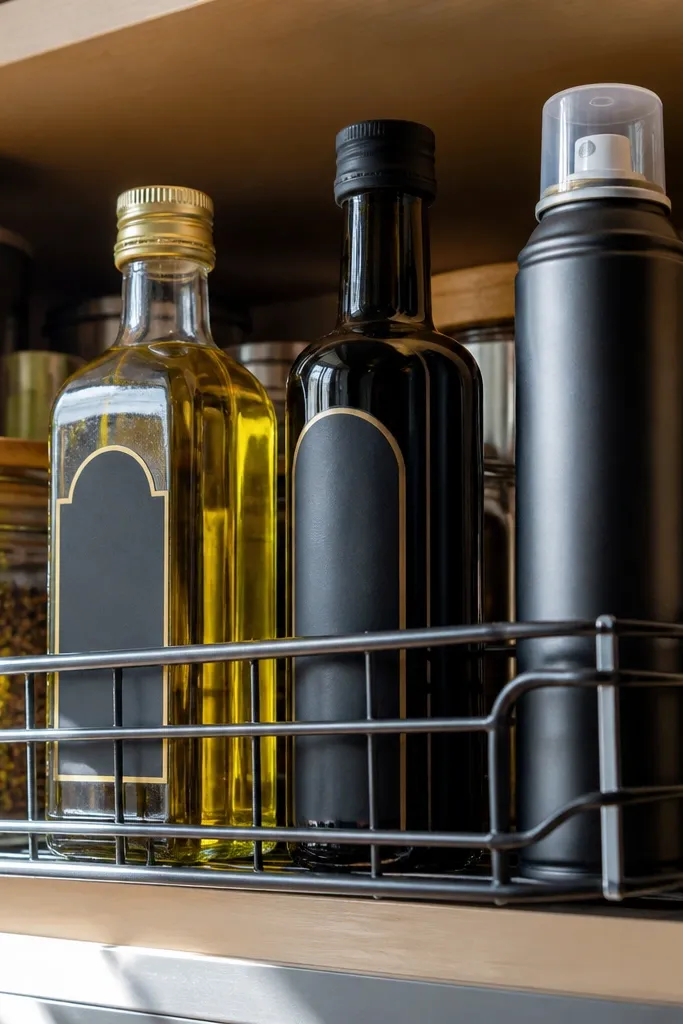
Under-shelf storage makes the pantry look bigger because it uses the space you’re currently wasting. A pull-out basket holds bottles like olive oil, vinegar, and cooking sprays so they don’t take over the main shelf. The look is tidy because the bottles stay in one contained row and you don’t see chaotic labels behind bins. It also keeps frequently used items within reach without digging into the back. This works especially well in renter apartments where shelf space is limited.
Measure the underside clearance and pick a basket that slides out without hitting shelf lips. Attach using shelf-safe hardware or strong adhesive rails designed for shelving (no drilling into trim). Add a non-slip mat inside the basket so bottles don’t clink and slide. Place bottles with labels facing out, and keep the heaviest one toward the back. Test pull-out action before loading full weight.
Use clear acrylic bottle labels so you can keep the same front-facing look even when labels wear off.
Don’t mount a basket too close to the shelf edge — you’ll lose clearance and bottles will scrape.
7. Corner Lazy Susan for Condiments and Extras
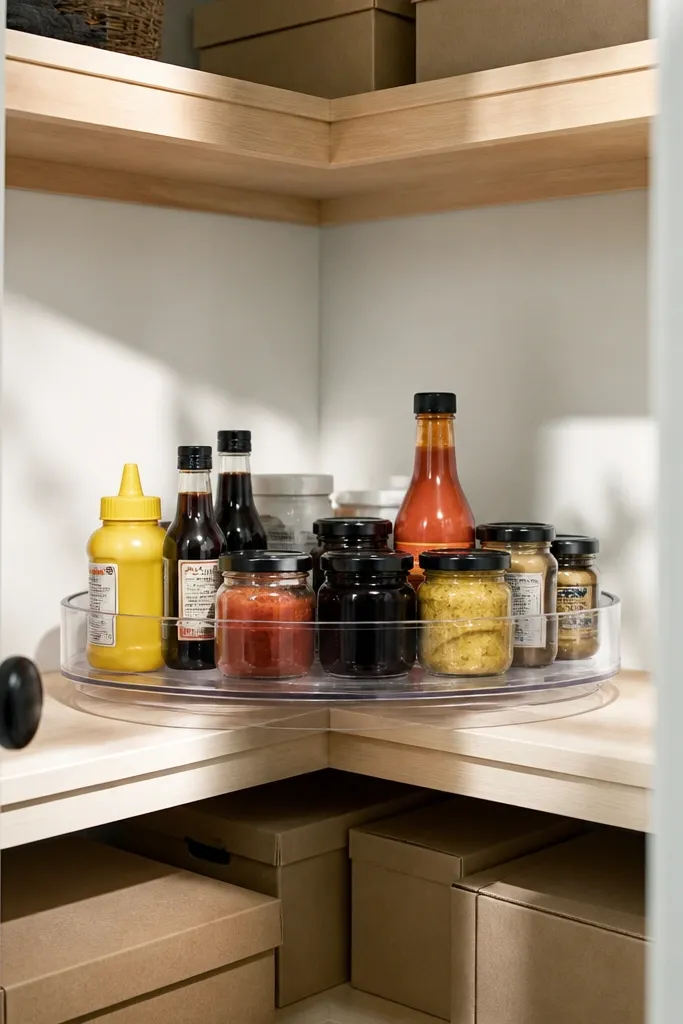
Measure the corner shelf diameter and choose a lazy Susan that fits with a few millimeters of clearance. Place the turntable on a non-slip mat so it doesn’t rotate unexpectedly when you grab items. Group condiments by category — baking, pasta, stir-fry, and snacks — then place the most-used jars at the outer edge for easiest reach. Use small matching containers for packets so everything looks uniform. Spin and test access before you fully load.
A corner pantry always hides stuff. A lazy Susan fixes that by letting you spin condiments and sauces into view without pulling everything out. It’s photogenic because the contents sit in a neat circle with consistent labels facing outward. This is a renter-friendly apartment pantry organization idea because many lazy Susans are freestanding and don’t require mounting. It’s also great for small spaces where you can’t fit long bins. When the pantry stays visible, you buy less duplicate stuff.
Skip thisDon’t use random tall bottles in the middle — they tip forward when you spin.
Editor's noteUse a thin rim of masking tape to mark the “front” position so the turntable always stops in the same orientation.
8. Label-First Pantry System with Color-Coded Tape Bands
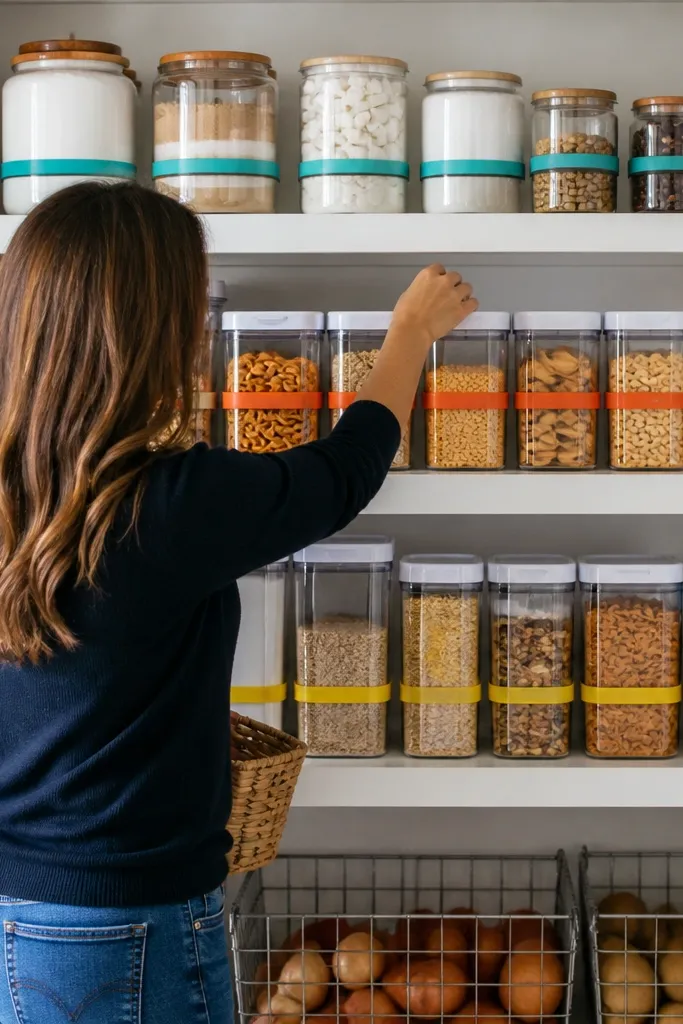
Pick 4 categories you actually use: baking, breakfast, pasta/rice, and snacks. Choose one color tape band per category and apply it to the same spot on every container (for example, a 1-inch strip at the top of the label area). Add a text label under the band with the item name and size (like “Oats 32 oz”). Keep jar lids and bin fronts consistent so the colors line up. When you restock, you only need to match the band color, not invent a new label style.
Most pantries look messy because labels don’t match and categories aren’t obvious. Color-coded tape bands make it fast to find what you need and keep the shelf visually consistent. You’ll get a clean look even if you’re using mixed containers because the color system unifies everything. This is renter-friendly because it uses tape and printable labels, not built-ins. It also helps you rotate food correctly since you can see what belongs together. The aesthetic payoff is strong because the labels become a design element, not an afterthought.
Skip thisDon’t mix handwriting styles across containers — it makes the pantry look like a bunch of half-finished projects.
Editor's noteUse waterproof tape for label bands so steam from boiling water doesn’t peel them off.
9. Magnetic Knife-Safe Pantry Tool Strip for Scissors and Bag Ties
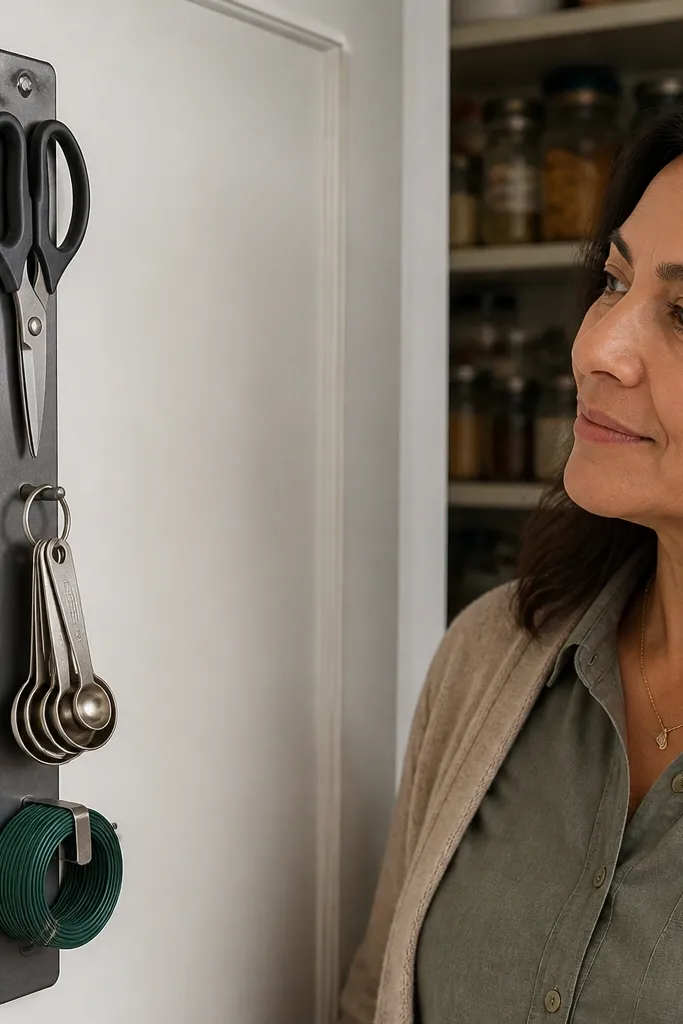
Choose a magnetic strip that fits your pantry door width and won’t interfere with hinges. Clean the door surface and attach using the manufacturer’s adhesive method, or use a non-damaging mounting system if the door surface is textured. Add a small tray or magnetic hooks for bag clips and scissors. Store measuring spoons in a small magnetic holder so they don’t rattle. Keep one spot for everything so you don’t end up with scattered tools on the shelf.
The pantry always gets clutter from tools you never have in the right place: scissors, bag clips, measuring spoons, and twist ties. A magnetic strip on the pantry door keeps those items in a clean vertical line, so the shelves stay clear. This idea looks sharp because the strip creates a single organized “utility” zone. It’s renter-friendly because magnetic hardware doesn’t require drilling. It also makes closing bags and clipping opened items faster, which prevents the messy, stale look.
Skip thisDon’t overload with heavy tools — if the strip sags, the look turns sloppy fast.
Editor's noteUse a strip with a smooth edge so it doesn’t snag packaging or scratch your door when you pull it open.
10. Stackable Drawer Crates for Cans and Boxes
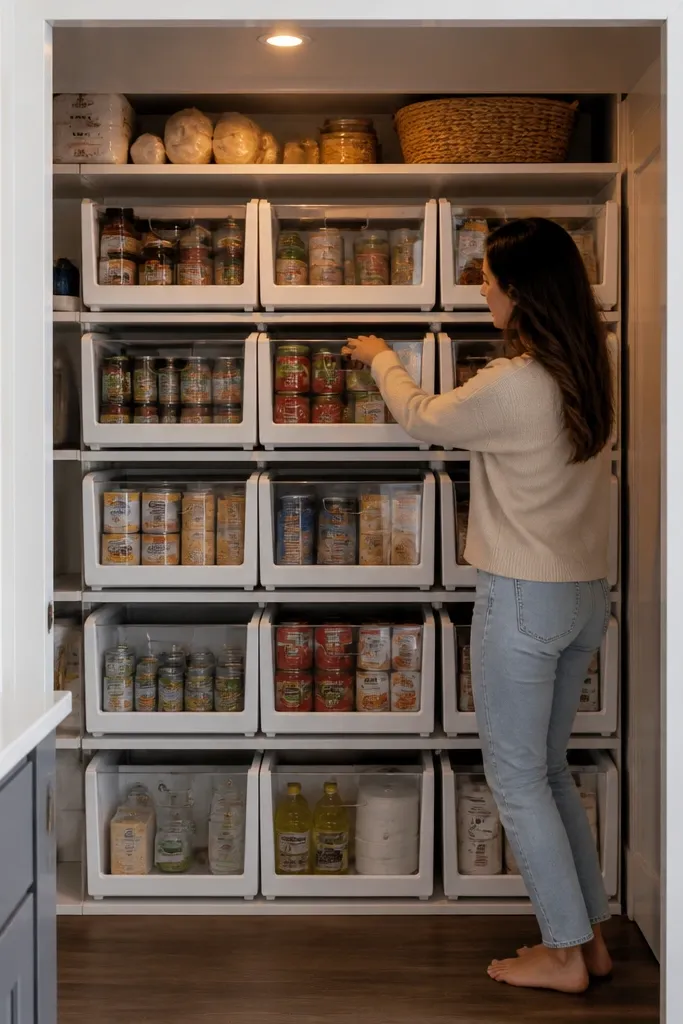
Stackable drawer crates hide messy packaging while keeping everything easy to reach. This is ideal for renters because you can move the whole system when you move out. Use crates for canned goods, boxed mixes, and backup items you don’t need on display. The look stays clean because each drawer has a boundary and the front faces match. You also get a tidy floor footprint, since you can stack drawers rather than piling items on shelves.
Measure your shelf or floor space and choose drawer crates that fit the width and depth with room for the door to close. Add a shelf liner or rubber feet under the bottom crate so it doesn’t slide. Sort items by type and place the heaviest cans at the bottom of each drawer. Label the drawer fronts with category names and a quick count (like “Chili — 6”). Stack drawers in a consistent order so the top layer doesn’t crush lighter boxes.
Buy crates with clear fronts or removable label cards so you can swap labels without peeling tape.
Don’t mix cans and loose bags in the same drawer — you’ll lose the clean, aligned look.
11. Two-Tone Shelf Liner for Instant Color Order
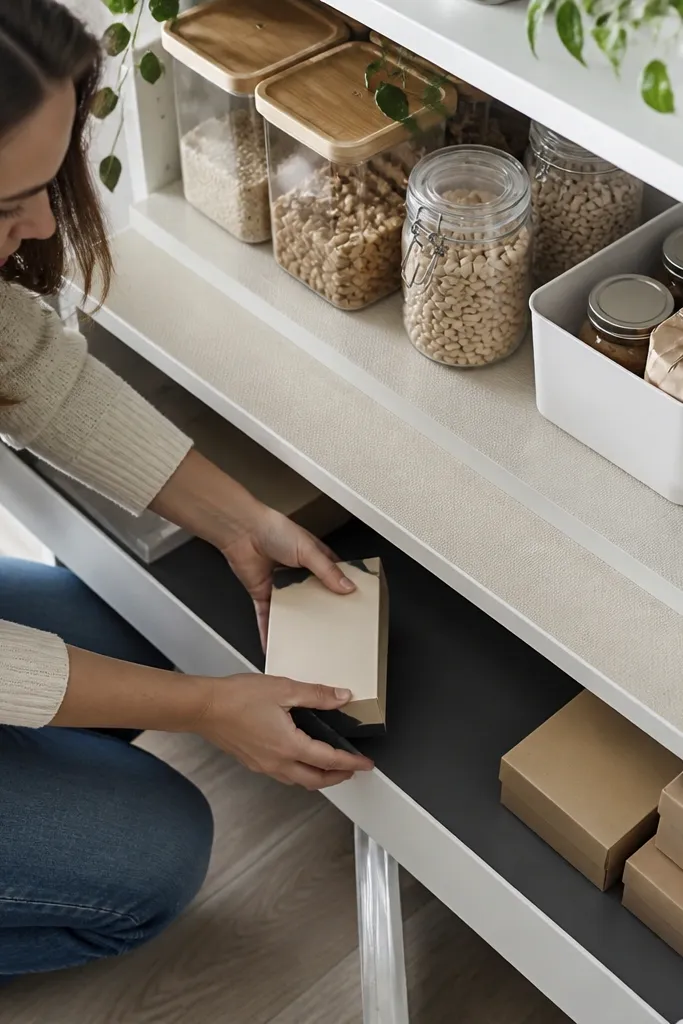
Measure shelf dimensions and cut liner pieces so they fit flat with no curled edges. Choose a neutral top tone (cream or sand) and a deeper tone (charcoal or black) for the overflow area. Place the visible layer liner first, then mark where bins stop so you get straight lines. Add non-slip liner strips under any drawers that slide. Finally, wipe the shelf clean so the liner sticks and doesn’t shift.
Shelf liner is the easiest visual upgrade that still counts as organization. Two-tone liner gives you a “designed” background so bins and jars look intentional instead of floating in a blank shelf. Use one tone for the visible layer and a different tone under overflow drawers. This helps you separate what you want to see from what you want to hide. It’s renter-friendly because liner rolls up and comes with you. The look is especially good in small pantries where the shelf itself is all you notice.
Skip thisDon’t use slippery liner under heavy jars — they’ll slide every time you pull a drawer.
Editor's noteUse a craft knife and a metal ruler for crisp cuts; ragged cuts show up in photos and in real life.
12. Clear Bag Organizer with Vertical Label Tabs
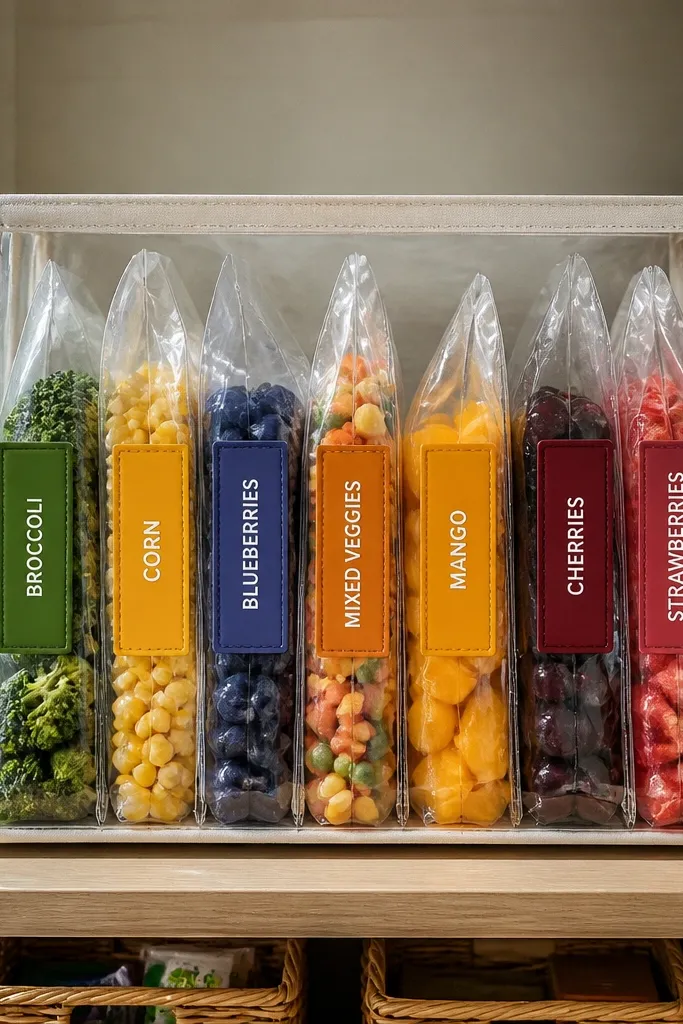
Choose an organizer that fits your shelf depth and has compartments sized for your most common bag width. Lay a shelf liner in the bottom, then insert the organizer so it sits flat and stable. Fold bags the same way each time so they don’t bulge and block neighboring compartments. Add vertical label tabs at the top edge of each compartment so they’re readable from the front. Keep liquids and oily items in sealed containers — clear bags can show residue.
This turns messy bags into a neat, see-through wall of storage. Clear organizers with vertical label tabs make it easy to scan what’s inside without ripping through stacks. Great for produce bags, frozen bag portions, snack mix bags, and bulk items you don’t want in jars. The aesthetic is clean because everything faces the same direction and labels line up. It also reduces the “mystery bag” problem that makes renters buy duplicates.
Skip thisDon’t use this for items that leak — a single sauce spill stains clear plastic permanently.
Editor's noteUse binder clips or zip-seal bags inside the organizer so the contents don’t drift and stain the organizer.
13. Magazine-Style File Holders for Recipe Cards and Mix Packs
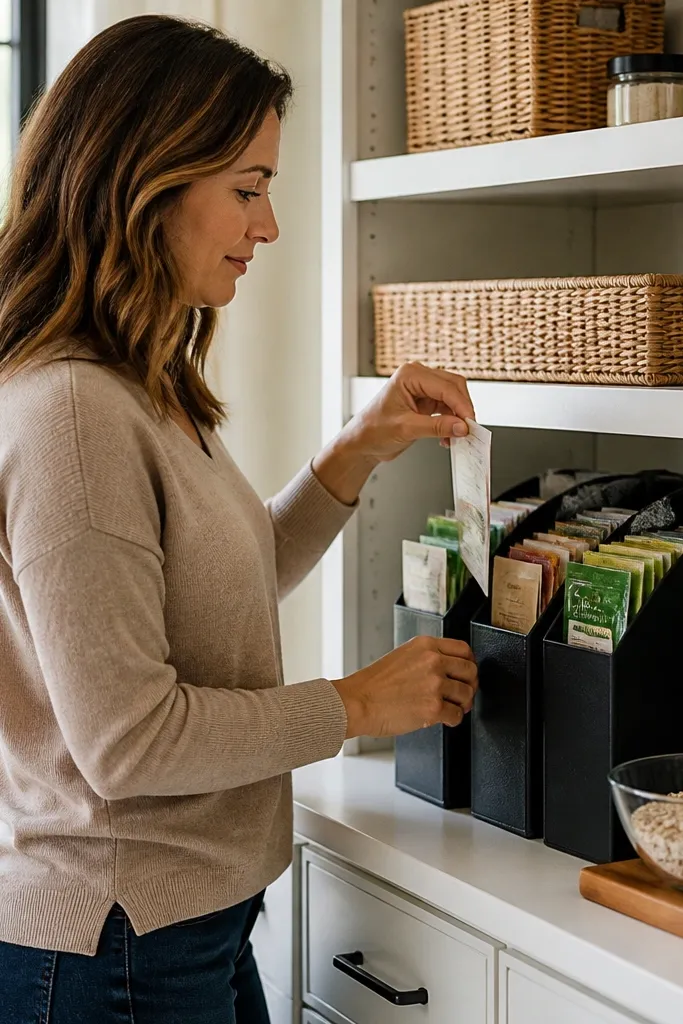
Pick a set of magazine-style file holders that match your shelf depth and fit side-by-side without gaps. Place them on the shelf liner, then sort recipe cards into one holder and mix packs into another. Keep mix packs in a separate section within the holder so they don’t get mixed with paper. Label the fronts with simple category text using a label maker. Store only what you use — if the holder fills, it looks cluttered.
A pantry looks messy when recipe cards, seasoning blends, and mix packs are scattered. File holders create a neat vertical display that keeps small paper items upright and easy to grab. This setup is also photogenic because the paper edges make clean lines. Use it for recipe cards you actually cook, plus seasoning packets and sauce mix envelopes you want visible. It’s renter-friendly since it’s freestanding and shelf-safe. Your pantry becomes a functional cooking station, not a storage dumping ground.
Skip thisDon’t cram — if cards bend and packets overlap, the shelf stops looking styled.
Editor's noteUse clear label tape with black text for a consistent, crisp look across paper items.
14. Tiered Wooden Crate for Produce-Like Dry Goods
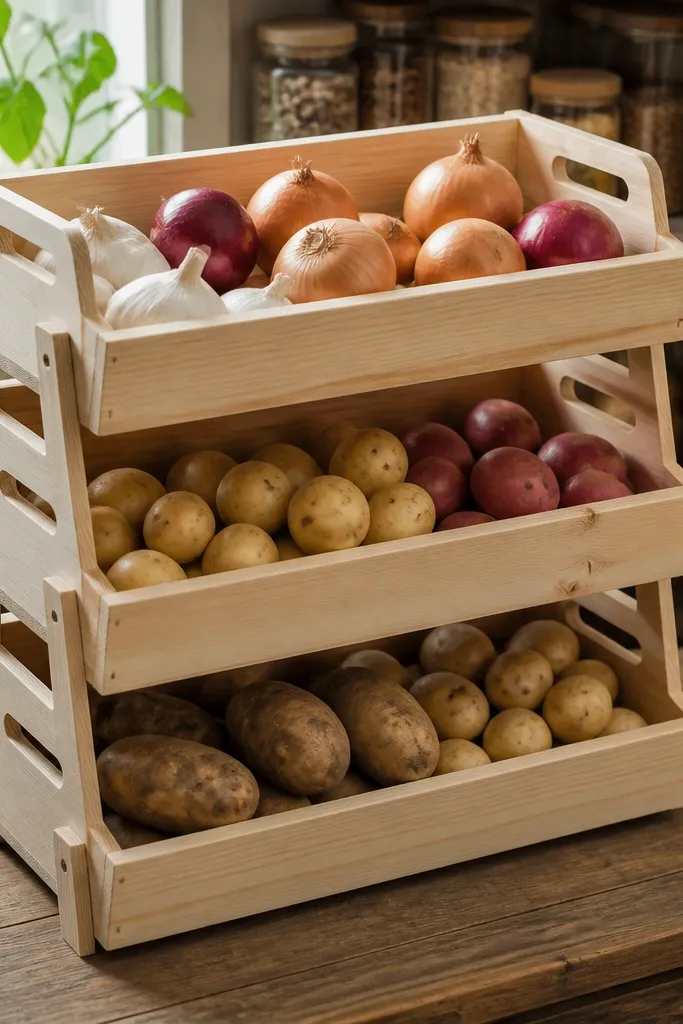
Choose a crate set with airflow gaps and tiers sized to your largest produce item. Place it on a shelf or pantry floor spot where it doesn’t block shelf access. Keep items dry and separated; don’t stack onions directly against potatoes if you can avoid it. Add a tray liner under the bottom tier to catch loose bits and keep the crate clean. Finish by pairing the crate with a separate bin system for dry goods that need sealed storage.
If your pantry includes onions, potatoes, or other produce-style items, a tiered wooden crate makes it look intentional instead of like a storage pile. The wood texture adds warmth and makes the pantry feel more like a styled corner of the kitchen. Use it for items that you want to access quickly and that benefit from airflow. This is renter-friendly because crates are freestanding. It also gives you a clear visual layer separate from jars and bins, so the whole pantry doesn’t blend into one block of containers.
Skip thisDon’t store sealed jars on the same tier as produce — condensation and smells travel.
Editor's noteLine the bottom with a washable tray insert so you don’t ruin the wood when something spills.
15. Reversible Shelf Insert for Baking vs Snacks Zones
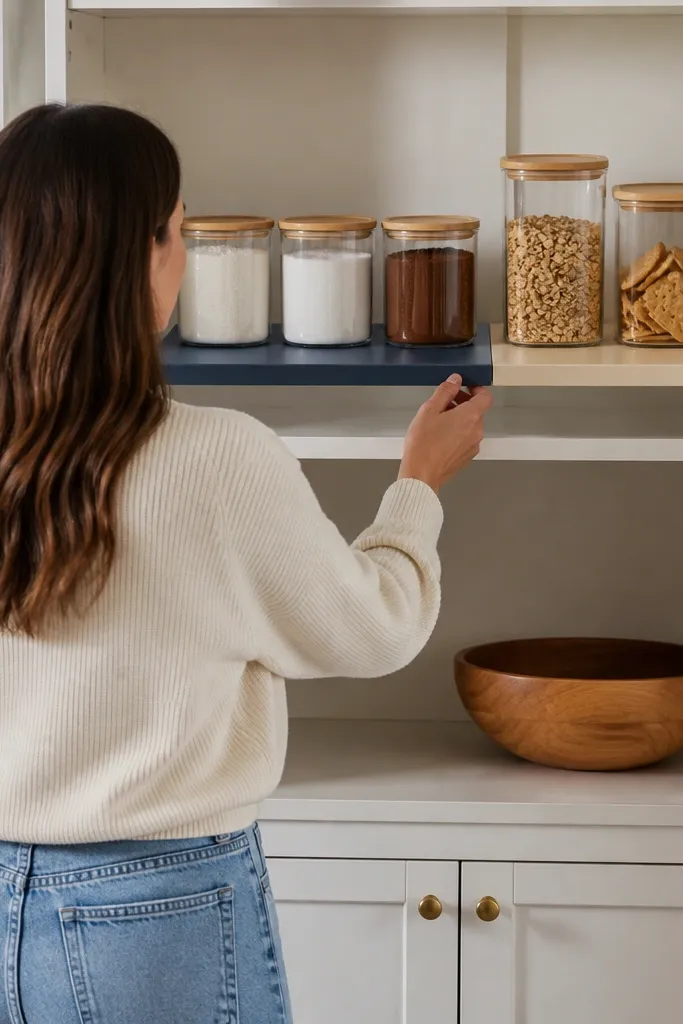
Buy or make an insert panel that fits your shelf opening with a snug fit. Use two surfaces with different colors or textures so the zones are obvious at a glance. Place the insert on the shelf liner, then set your front-zone items first. Keep baking items in one side and snack items in the other, using bins if needed to maintain straight edges. When you want a change, flip the insert and swap what you store in each zone.
Zone storage makes a pantry look curated because the shelves have a purpose, not random items. A reversible shelf insert gives you two distinct zones on one shelf: one side for baking, the other for snacks. It’s a renter-friendly apartment pantry organization idea because it’s just an insert — no drilling, no permanent changes. The look stays clean because you can keep categories separated even when you restock quickly. It also helps you keep your “grab” items near the front without mixing them with backups.
Skip thisDon’t make zones too narrow — if you can’t place items flat, everything starts leaning.
Editor's noteChoose a panel height that keeps bags from tipping forward; a slightly higher edge makes the shelf look neater.
16. Clear Lid Pantry Canister Set with Front-Facing Labels
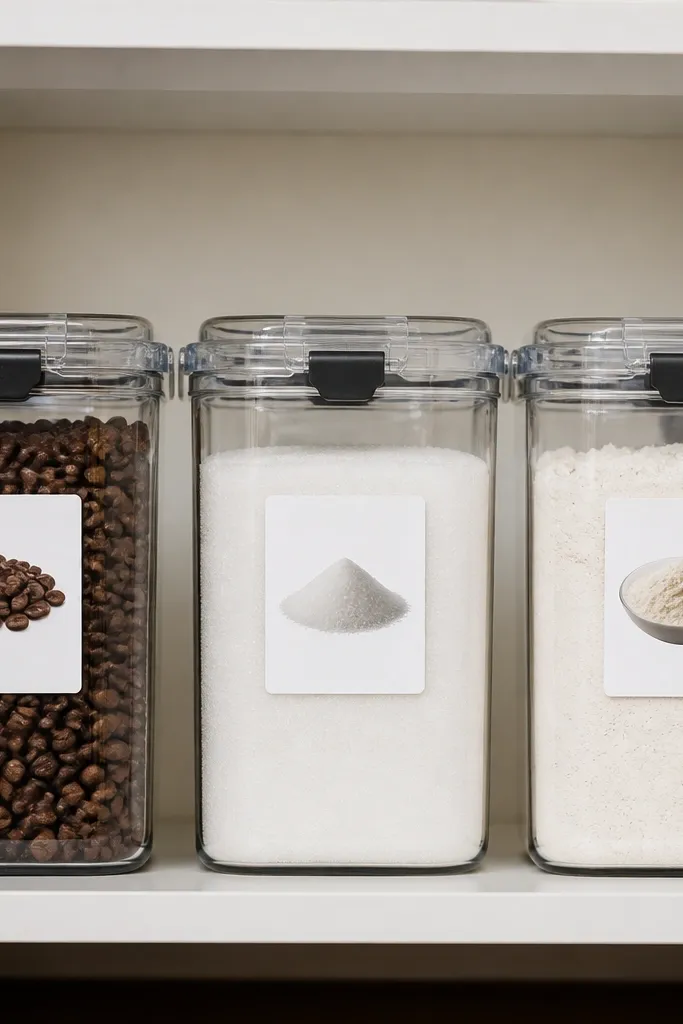
Clear-lid canisters give you the best of both worlds: you see what’s inside, and you still look organized. Matching canisters create a uniform shelf line that hides the chaos of mixed packaging. This setup is especially good for flour substitutes, sugar, coffee beans, and pantry staples you don’t want to keep in bags. The clear lids also make it easy to check levels without opening everything. It’s renter-friendly because most canisters are freestanding and easy to pack away when you move.
Choose canisters with the same footprint and lid style, then group ingredients by how often you use them. Transfer dry goods using a funnel, and wipe the canister rims so lids seal cleanly. Add front-facing labels with the item name and size; keep label placement consistent across every canister. Arrange canisters in a single row at eye level, then put backups in drawers below. Leave at least one empty canister spot so restocking doesn’t force a messy overflow.
Use a label format like “ITEM — OZ” so you can restock without guessing sizes.
Don’t put sticky items like cocoa powder loose — it clings to lids and makes the clear look grimy.
17. Door-Mounted Snack Bag Hooks with Front Label Tags
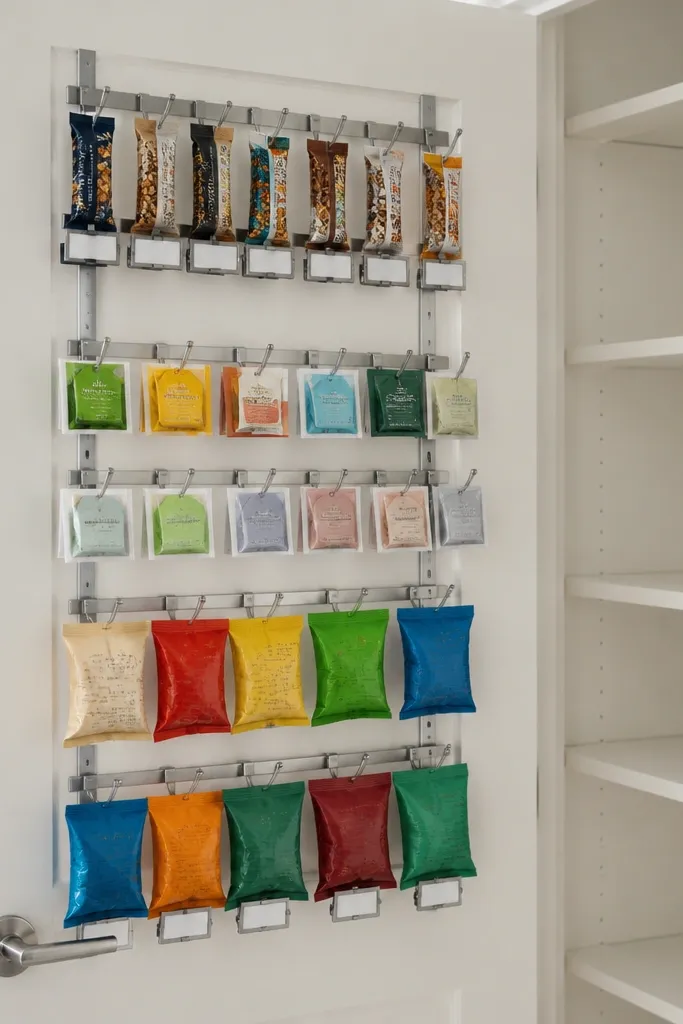
Measure door clearance so hooks don’t interfere with opening. Choose door hooks rated for the weight of your heaviest bag, then attach using the manufacturer’s adhesive method or a strap mount. Add small label tags to each bag using a clip or tie so labels face outward when hanging. Group by category and keep similar sizes on the same hook row. Test the door opening and closing before loading everything.
If your pantry door is unused space, snack bag hooks make it look intentional fast. Hanging snacks keeps them off shelves and creates a clean vertical display line. Use this for items like granola bars, single-serve chips, and tea bags that are already in sealed packages. The front label tags make it easy to find what you want without pulling everything out. This is renter-friendly because most door mounts are adhesive or non-drilling with straps. Plus, it frees up shelf space for jars and bins.
Skip thisDon’t hang wet or oily items — door storage magnifies smell and residue.
Editor's noteUse bag clips to keep openings sealed so you don’t get crumbs on door surfaces.
18. Under-Shelf Dry-Goods Drawer with Shelf-Lip Stop
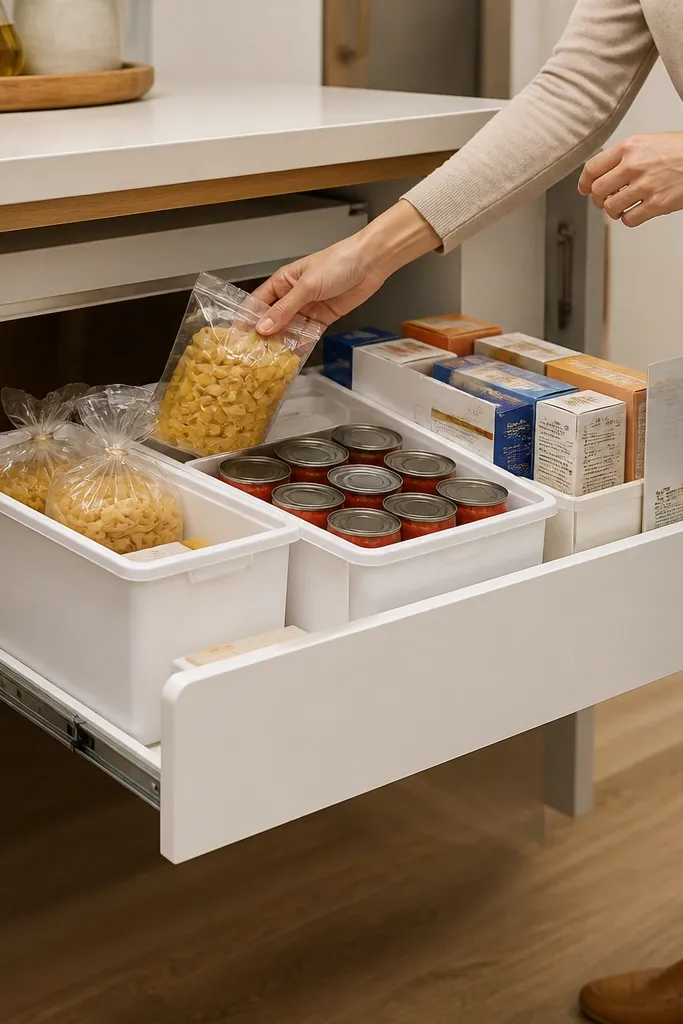
Measure underside clearance and choose a slim drawer system that can sit under the shelf lip. Install using adhesive rails or non-drilling brackets designed for shelving. Add a stop so the drawer doesn’t pull out completely when you grab items. Line the drawer with a non-slip mat, then add bins that match the drawer width. Store heavier items toward the back and lighter boxes toward the front so access stays easy.
An under-shelf drawer gives you hidden storage without giving up visibility. Add bins inside and you get a clean, closed look that still feels accessible. This works well for overflow items like extra pasta, backup canned tomatoes, and cereal boxes you don’t want on display. The shelf-lip stop keeps the drawer from sliding out too far, which is a common renter-friendly failure point. Visually, it makes the pantry front look calmer because you’re not stacking boxes on open shelves.
Skip thisDon’t skip the stop — without it, the drawer becomes a constant re-adjustment job.
Editor's noteUse bins with straight front faces so the drawer looks uniform from across the kitchen.
19. Modular Labelled Can Rack with Pull-Out Shelf
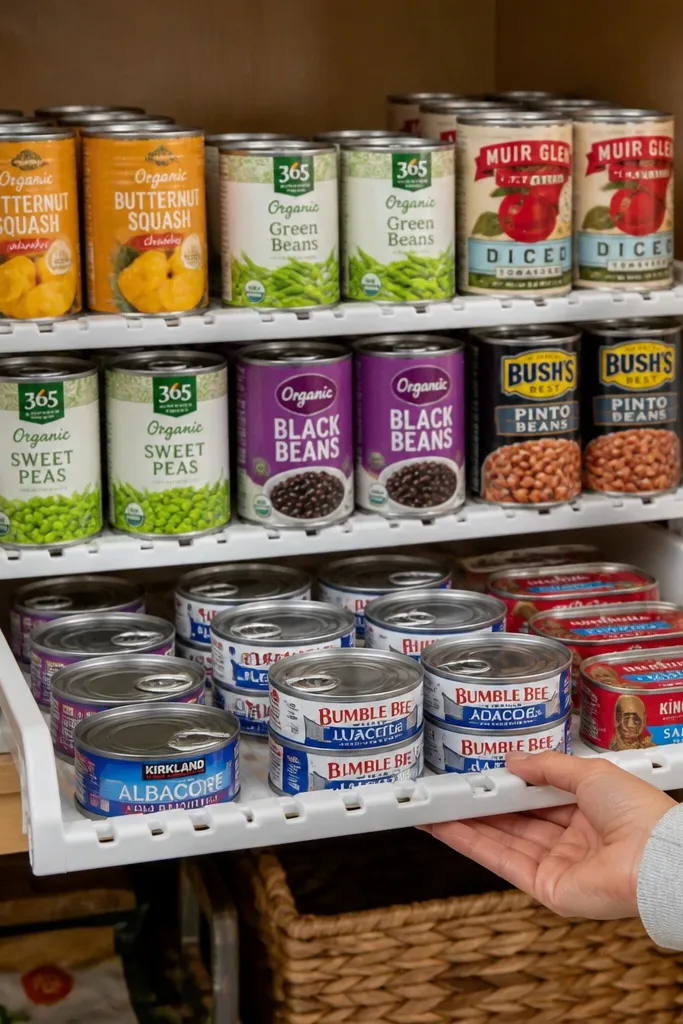
Measure the shelf where the rack will sit and choose a rack that fits without blocking access to other shelves. Place it on a shelf liner, then load cans with labels facing forward. If the rack has adjustable dividers, set them to the can width so there’s no wobble. Add a label strip on the rack front for categories like soup, beans, and sauces. Pull-test the rack with a full load to confirm it doesn’t scrape.
Cans are the pantry’s biggest visual mess because they’re all the same shape but different sizes. A modular can rack with a pull-out shelf makes that problem disappear. The look is uniform because cans stand in consistent rows with label fronts facing you. It also solves the “first can disappears” issue because the rack brings the front row forward. This is renter-friendly because many racks are freestanding and removable. It’s ideal for small apartments where you want the pantry to feel usable, not like a closet.
Skip thisDon’t mix tall and short cans in one row — the rack looks uneven even when it’s organized.
Editor's noteKeep a small container of spare labels inside the pantry so you can rename containers as brands change.
20. Clear Stackable Turntable for Pantry Odds and Ends
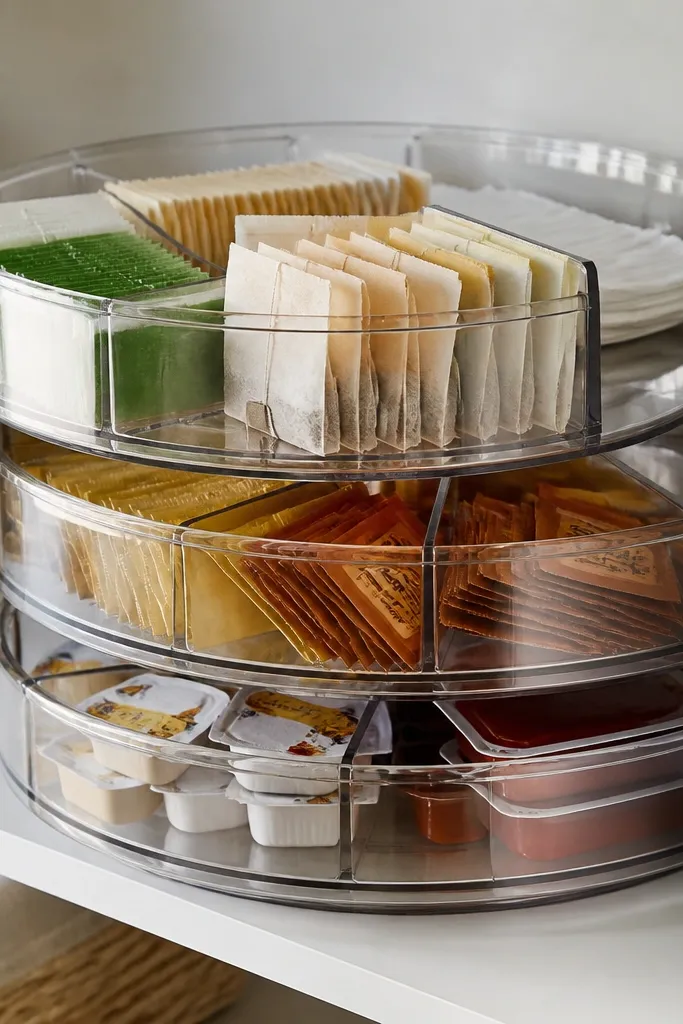
Choose a turntable size that fits your shelf width and doesn’t block other items when you pull it out. Place a non-slip mat under the base, then add the stackable layers if the bottom layer can handle weight. Sort items into categories and place them in the same orientation each time so labels face outward. Keep only items you use regularly on the top layers; backups go in bins. Rotate and check that you can reach items without knocking adjacent containers.
Turntables are the quickest way to make tiny pantry items look curated. A clear stackable turntable gives you multiple rotating layers for odds and ends like packets, tea, bouillon, and condiment sachets. The clear materials keep the look light, and the rotation prevents digging. This setup is renter-friendly because it’s freestanding and easy to pack when you move. Visually, it creates a clean focal point on a shelf instead of random bags shoved together. It also reduces clutter since small items stop “escaping” into drawers.
Skip thisDon’t store heavy jars on top of the turntable — the stack becomes unstable.
Editor's noteUse a label maker with large text size so sachet names stay readable even through clear plastic.



