


1. Two-tier marble-look tray with a "morning only" zone
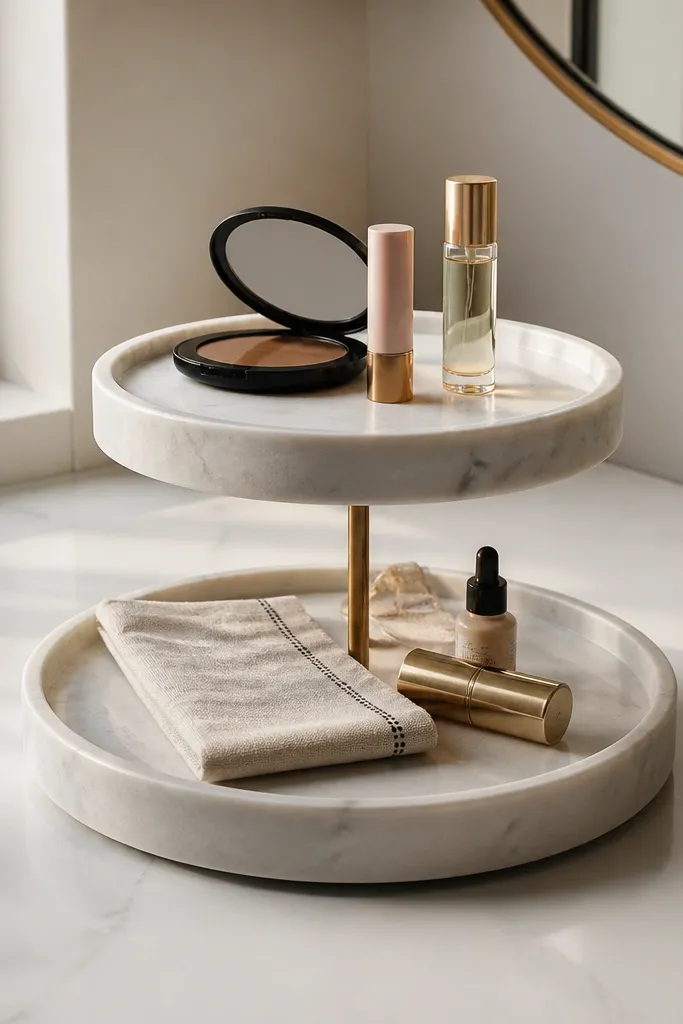
This setup makes your vanity look curated because it separates “daily reach” from “everything else” using height. The top tier is for the handful of items you touch every morning, so the front of your counter stays clean. A marble-look tray also photographs well because it hides minor scuffs and gives you a consistent background for labels. It’s great for shared bathrooms because each person can keep their exact daily items on the top tier. Skill level is easy and the time is about 30 minutes if you’re swapping what’s already out.
Editor's notePut only 5-8 items on the top tier. If it grows past that, it stops looking intentional.
Start by clearing a 12-18 inch strip of counter space and wipe it dry so the tray sits stable. Choose a tray with two tiers and measure your tallest bottle; you want at least 1 inch of clearance above the lid area so nothing crowds. Place daily items on the top tier and put backups under the tray or in a matching bin nearby. Finish by aligning labels facing forward and using a single color pen for any handwritten labels.
Skip thisDon’t leave random full-size bottles on the bottom tier where they create visual clutter.
2. Clear acrylic drawer dividers with a lipstick rail
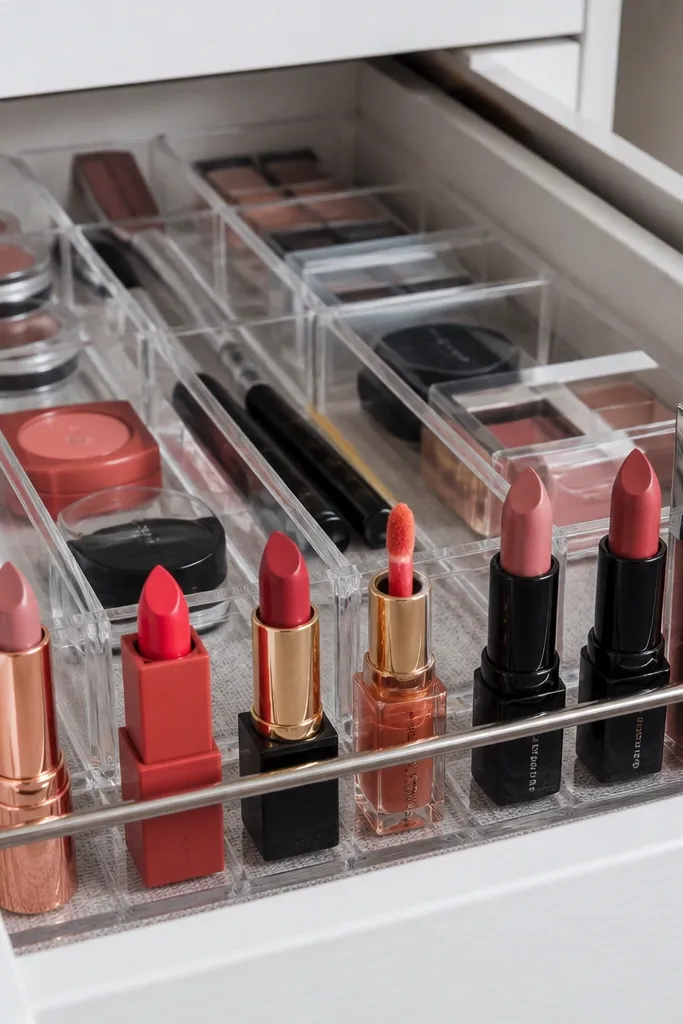
This is the drawer version of “styled but functional.” Clear acrylic keeps the drawer looking neat because you can see what’s where without opening anything. A lipstick rail makes small items stop migrating — you get a straight row with consistent spacing, which looks sharp in photos. It’s perfect for vanities with shallow drawers where makeup and hair accessories mix together. The build is straightforward and you can do it in one afternoon with no heavy tools.
Start by emptying the drawer and sorting items into three piles: daily makeup, occasional makeup, and backups. Measure the drawer width and depth, then cut or choose dividers that create lanes about 1.5 inches wide for tubes and 2 inches wide for full-size bottles. Add a narrow divider lane along the front edge for lipsticks and glosses so they stand upright. Place daily items in the front lanes and backups toward the back where they’re less visible.
Use a removable label on the drawer bottom so you can reassign lanes when your routine changes.
Skip oversized dividers that leave gaps — gaps make bottles tip and the drawer looks sloppy.
3. Inside-door spray bottle rack with a color-coded row
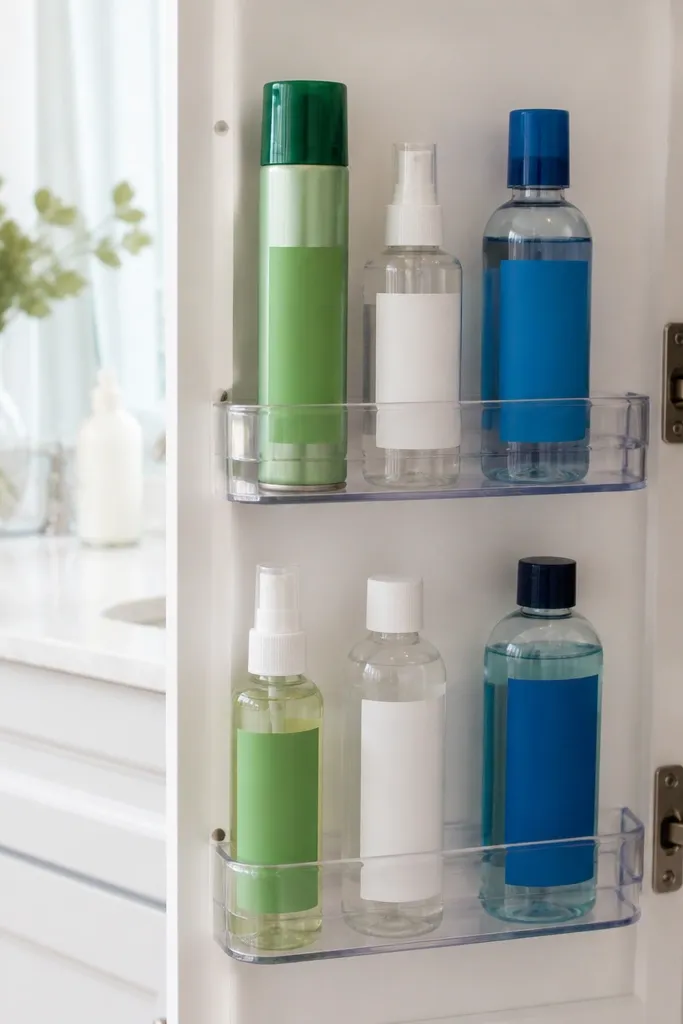
Inside-door storage keeps the counter photo-friendly and gives you a clean vertical line of products. A door rack is especially good for hair styling sprays, body mist, and small cleaners you don’t want on the top. Color-coded labels make it look designed, not chaotic, and they speed up finding the right bottle fast. This works best for vanities with doors that swing open fully so bottles don’t hit the frame. It’s a quick upgrade that usually takes under an hour.
Editor's noteWipe the door with rubbing alcohol before sticking any pads so the rack doesn’t loosen.
Start by removing one shelf or clearing space on the back of the door so the rack mounts flat. Choose a rack with individual hooks or slots that fit your bottles; measure the bottle diameter and height before buying. Mount the rack centered on the door, then hang sprays so no two nozzles collide. Label each bottle with a small color sticker band and write the routine name (like “after shower” or “touch-ups”) on the label.
Skip thisDon’t mount the rack too high — bottles should clear the vanity shelf when the door closes.
4. Woven basket with a labeled "backup bin" insert
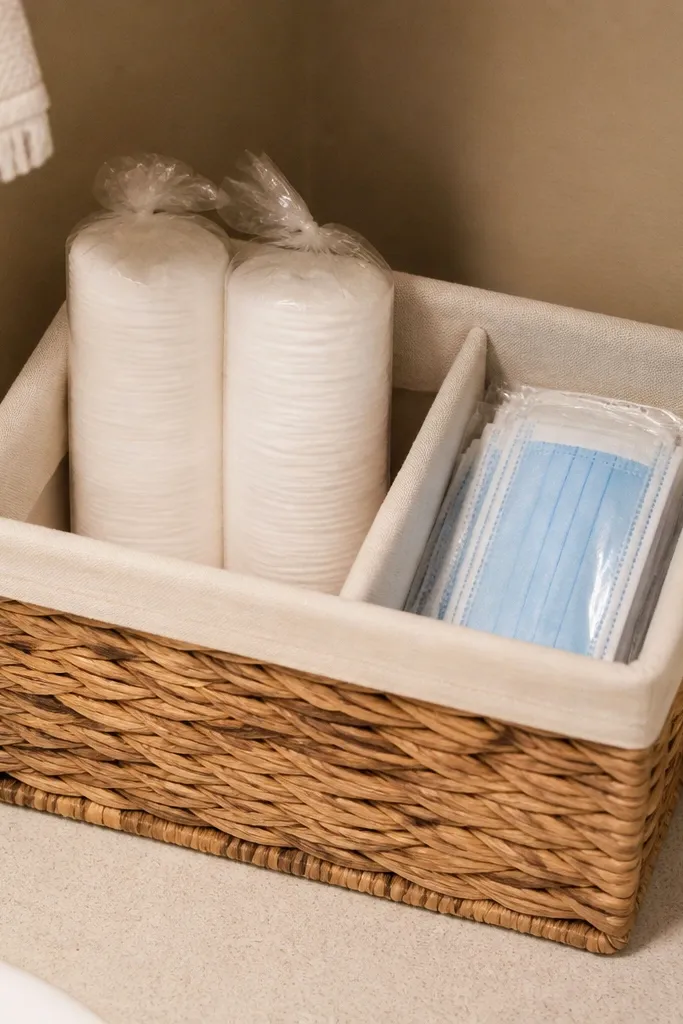
A woven basket looks warm and styled, but it only works aesthetically if you control what’s visible. Use a matching fabric insert or liner so the basket doesn’t show messy packaging, especially for cotton rounds, face masks, or spare refills. The label makes it feel intentional and keeps you from opening the basket every time you need something. This setup is perfect for toiletries that you don’t use daily but still need within arm’s reach. It’s low effort and looks good even with a small number of items.
Editor's noteChoose a neutral liner like cream or charcoal — it makes everything look cleaner than bright colors.
Start by picking a basket that fits your space with a little breathing room on all sides; aim for 10-14 inches wide for most vanities. Line it with a fabric insert that covers the sides so labels and packaging don’t show. Add one label on the front of the insert with a single word like “Backups” or “Pads.” Put the least-used items at the back and the most-used backup in the front so you’re not rummaging.
Skip thisAvoid overfilling. A basket that bulges looks messy in photos.
5. Pegboard vanity wall for "tool" organization

Pegboard is one of the best ways to make vanity organization look sharp because it turns storage into a clean grid. It works for tools like brushes, curling tools holders, tweezers, and small styling accessories that clutter counters. You get repeatable spacing and easy swapping when your routine changes. The look is modern and tidy, especially with a painted pegboard and matching hooks. This is also a practical choice if you have a lot of long-handled items that don’t fit neatly in drawers.
Editor's noteUse a level and mark holes before drilling so the grid stays perfectly straight.
Start by measuring the wall space next to or above the vanity and choose a pegboard size that fits without blocking outlets or mirrors. Paint the pegboard and let it fully cure so it doesn’t scratch when you mount. Install hooks and small baskets in a grid so brushes hang in one direction and tools sit in small trays. Keep daily tools in the center rows and store infrequently used items at the edges.
Skip thisDon’t hang heavy items only from the top hooks — distribute weight across multiple hooks.
6. Counter caddy with matching apothecary jars and labels
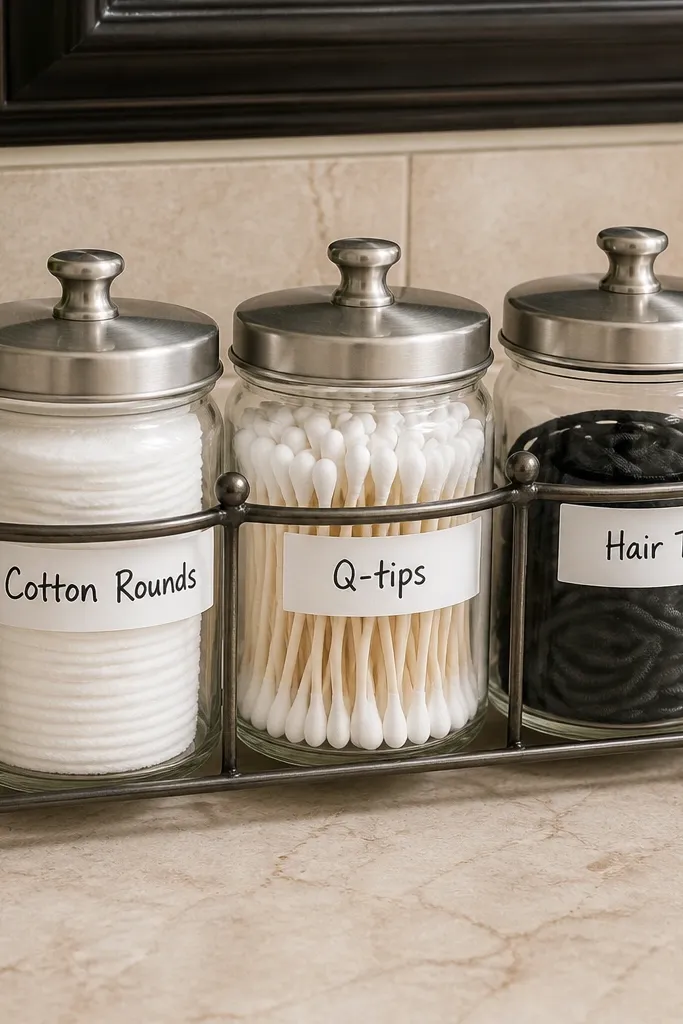
Matching apothecary jars make your vanity look like a boutique setup, but the real win is how they keep small items from spreading. You can store cotton rounds, Q-tips, hair ties, and even travel sizes so nothing rolls around on the counter. Labels keep it readable and stop the “what is this?” problem that leads to clutter returning. This is ideal for people who like a clean counter but have lots of tiny items that never have a home. It takes about an hour to set up cleanly.
Start by selecting jars with the same lid style and a similar height so the caddy looks uniform. Choose a counter caddy tray wide enough to hold all jars in one row without touching. Fill jars with small items and wipe jar lips so they look crisp. Add labels on the jar lids or front faces using waterproof label paper so steam doesn’t ruin them.
Use a small funnel to fill jars neatly so you don’t leave dust on the rim.
Skip mixed jar sizes in the same caddy — it looks accidental.
7. Under-sink pull-out bin with a "daily reach" shelf
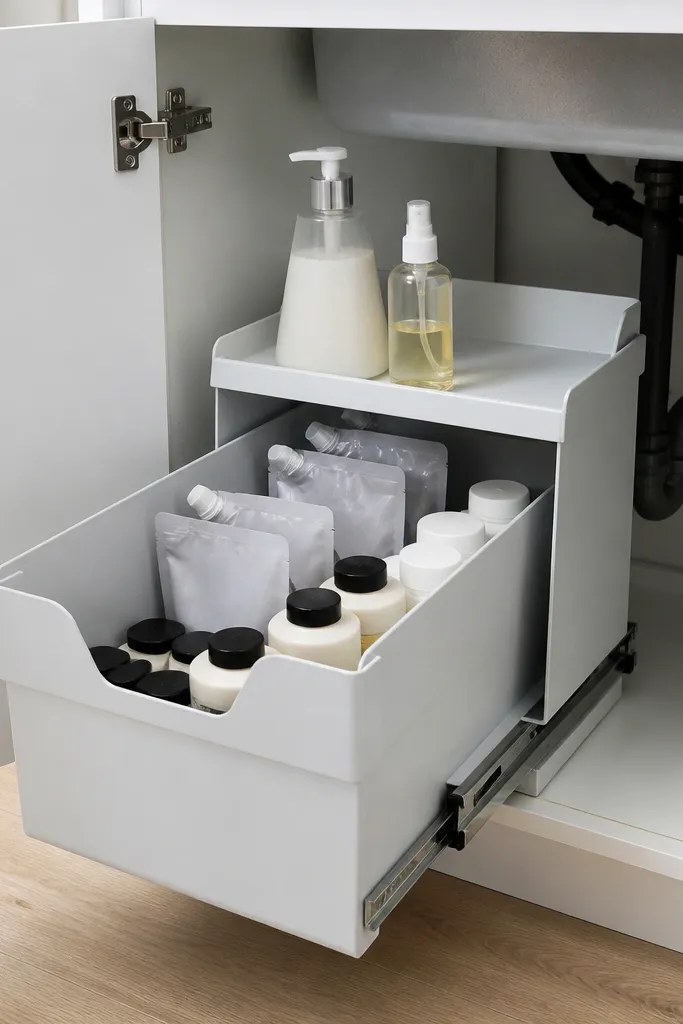
Under-sink storage usually looks chaotic because everything is visible when you open it. A pull-out bin fixes that by letting you slide items out and keep the visual mess contained. Add a small top shelf for daily bottles like hand soap refills or cleaning spray so you don’t have to dig. The look stays neat because bins hide packaging and keep bottles upright. This works best for vanities with deeper cabinets and lots of cleaning or backup toiletries. It’s a one-time upgrade that makes future resets fast.
Editor's noteUse a moisture-resistant bin material and keep a small towel under the pull-out for drips.
Start by measuring the cabinet height and width; choose a pull-out organizer that fits with a small gap for smooth movement. Place the organizer on the cabinet floor and mark where the brackets or rails attach. Add a small shelf insert at the top for daily reach items and keep the rest in bins below. Secure bottles with a simple strap or dividers so they don’t tip when you pull the bin out.
Skip thisDon’t place liquids loose — loose bottles smear and make bins look dirty fast.
8. Rotating makeup organizer with a "face products only" ring
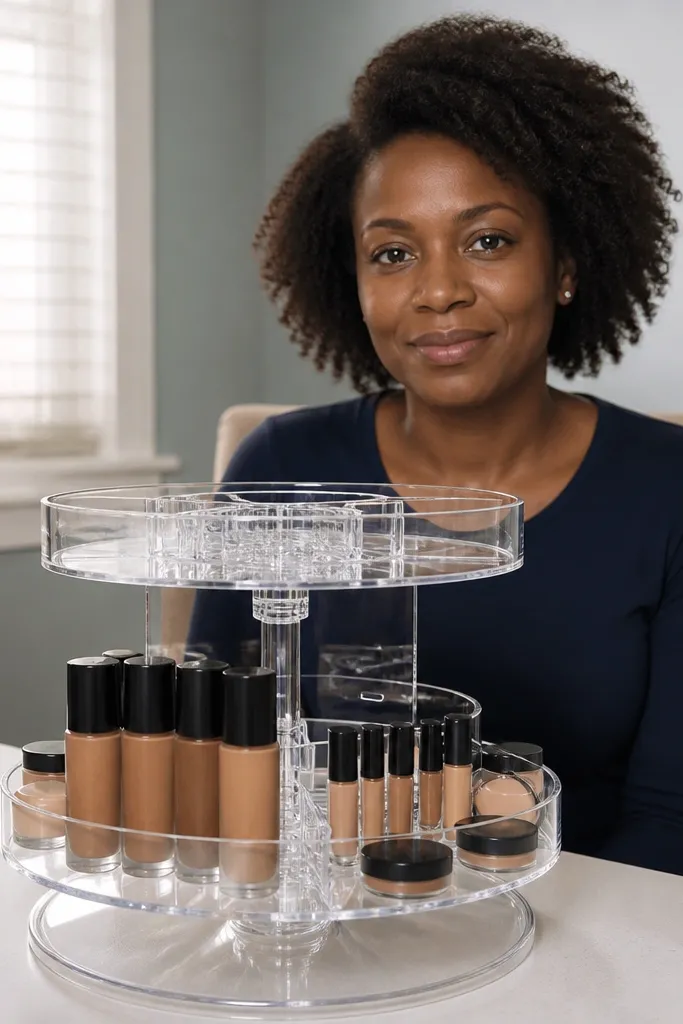
A rotating organizer makes vanity organization look intentional because it creates a clean circle of products instead of a pile. It also solves the “I forget what I own” problem since everything is visible at once. Keep it aesthetic by dedicating one ring to face products and another area to tools like sponges and liners. This is especially good for small makeup collections that still need visual breathing room. It’s quick to fill and easy to maintain because rotation is built-in.
Start by clearing a corner of the vanity and placing the rotating organizer on a non-slip mat. Sort products into face, eyes, and tools, then choose a layout where face products sit in the main ring. Stand items upright and group by finish (matte, dewy) if you have enough items to make it look neat. Add a small tray at the center for brushes and keep sponge storage in a separate cup to avoid mess.
Label the base with a small word like “Face” so you keep the ring from drifting over time.
Skip cramming — a rotating organizer looks best with empty space between items.
9. Magnetic strip on the inside wall for metal tools
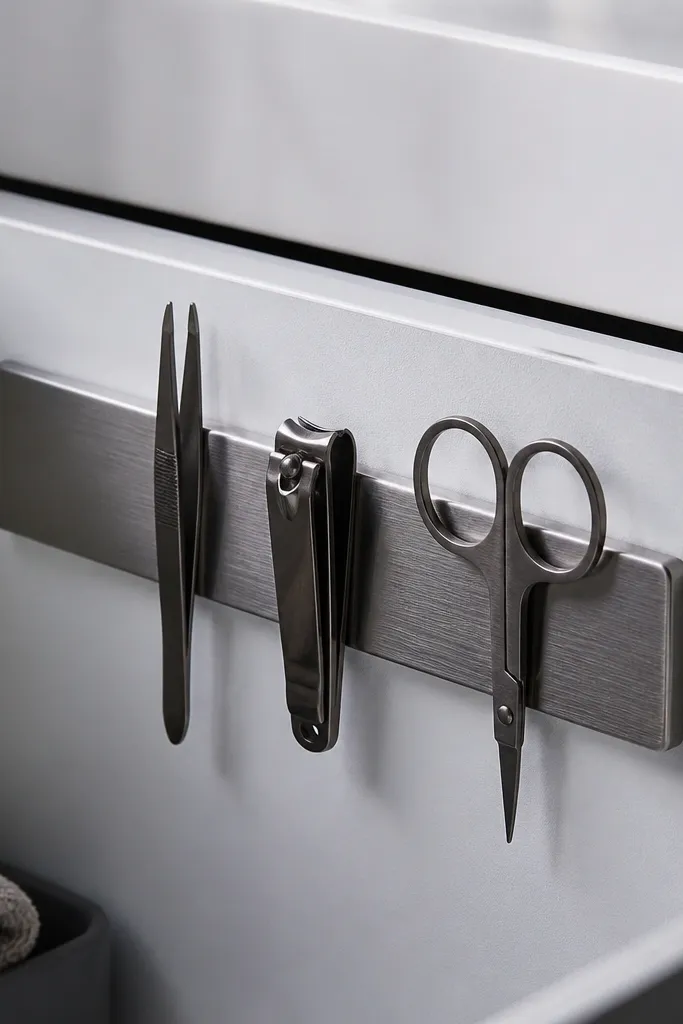
Magnetic storage looks clean because tools line up and don’t take up drawer space. Use it for tweezers, nail clippers, metal scissors, and small razors that have flat metal backs. The look is sleek and minimal, which makes the vanity feel more styled even when you’re storing practical items. It also keeps sharp tools visible and separated. This is a good choice when you want quick access but your drawers are already full of cosmetics.
Editor's noteAdd a small label card near the strip like “Tools” so the cabinet stays tidy for visitors too.
Start by cleaning the inside cabinet wall where the strip will mount. Use a strong adhesive magnetic strip or screw-mount strip based on your cabinet material; measure the tool length so it doesn’t hang awkwardly. Arrange tools by size from left to right and keep sharp edges away from where you open the door. Wipe tools before placing them so the strip doesn’t collect residue.
Skip thisDon’t put heavy tools at the bottom of a weak adhesive mount — it can peel.
10. Linen-look tray for hair ties and barrettes with a clear lid
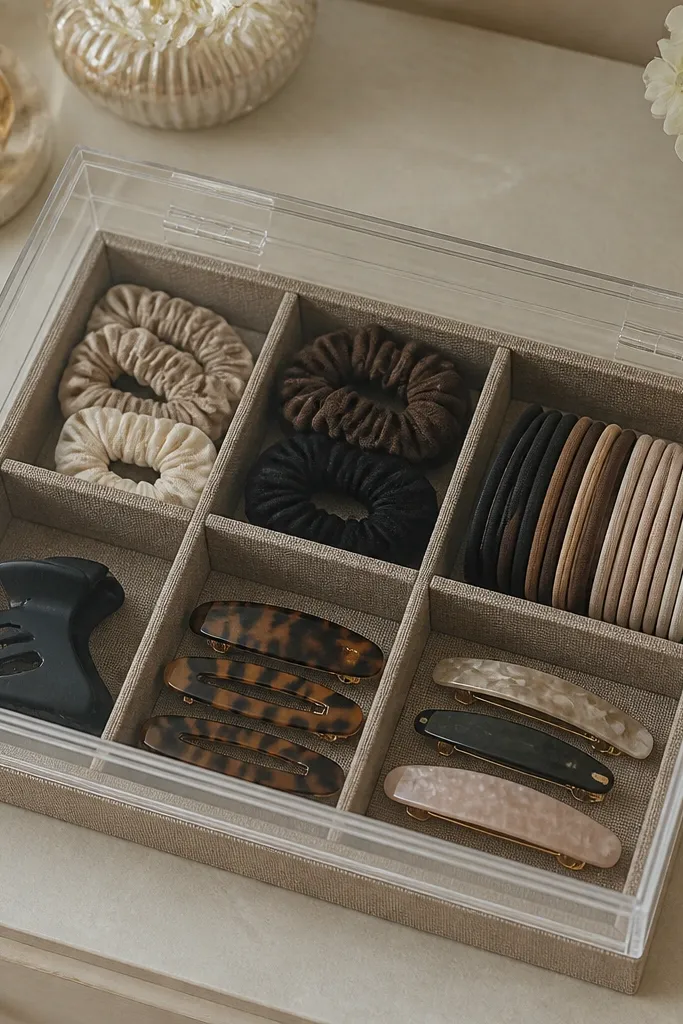
This idea makes hair accessories look organized instead of scattered. A linen-look tray gives you a soft neutral background, while a clear lid keeps tiny items from migrating and protects them from bathroom dust. It’s photogenic because the contents stay visible but controlled. Use it for hair ties, claw clips, and barrettes — anything that usually ends up in a drawer mess. It’s also a great way to keep kids' hair accessories from mixing with your makeup.
Start by choosing a tray with straight sides and matching lid size; measure the tray so the lid sits flush. Line the tray with a linen-look fabric or buy a tray that already has a fabric base. Sort accessories into small groups and place them in compartments created with thin divider inserts. Close the lid and set the tray on the vanity where it’s visible but not blocking your counter space.
Use small elastic bands to bundle hair ties so they don’t spread across the fabric.
Avoid opaque storage for accessories you use daily — you’ll reopen it constantly.
11. Tall bottle caddy that hides messy pump bottles
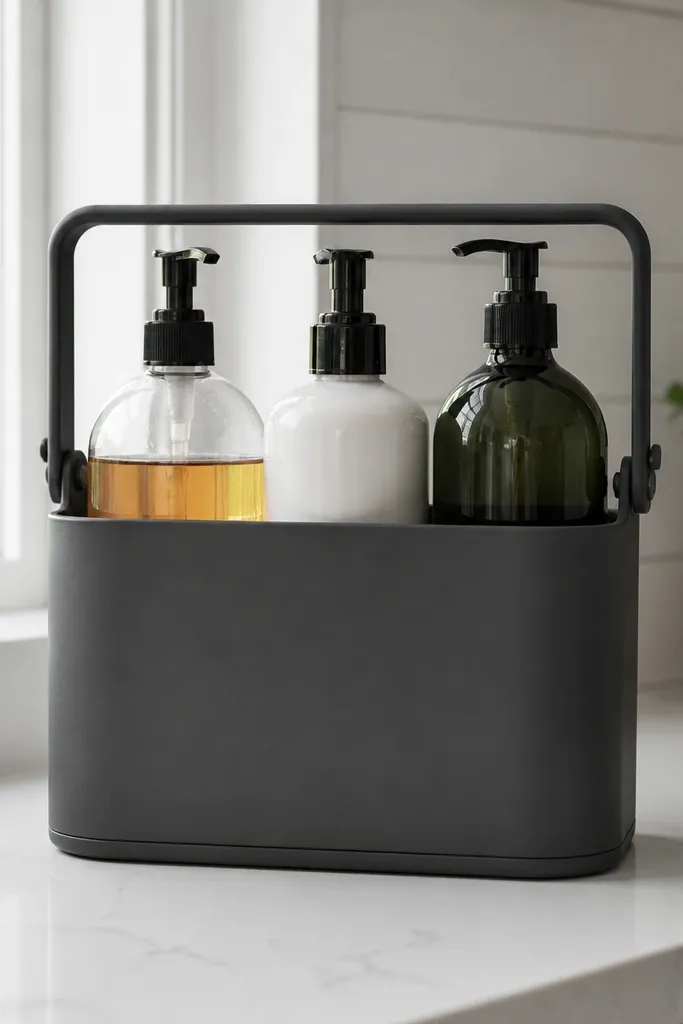
Pump bottles and mismatched packaging can ruin the look of an otherwise tidy vanity. A tall bottle caddy creates one clean vertical block and keeps your bottles upright without visual chaos. It also helps you wipe the counter because spills stay contained inside the caddy. This is a strong choice if you use multiple body washes, hand soaps, or lotion bottles and hate seeing labels. The look is modern and clean, especially when the caddy color matches your hardware.
Editor's noteIf your bottles vary in height, put the tallest ones in the back slot so the front stays level.
Start by measuring bottle widths and heights, then choose a caddy with slots slightly wider than your thickest bottle. Place the caddy on a non-slip mat so it doesn’t slide when you pump soap. Insert bottles so pumps line up and lids don’t collide. Finish by wiping the outside of each bottle and aligning the front-facing labels or label stickers.
Skip thisDon’t set the caddy too close to the sink splash zone — water streaks build up fast.
12. Sink-side tray for skincare that stays dry
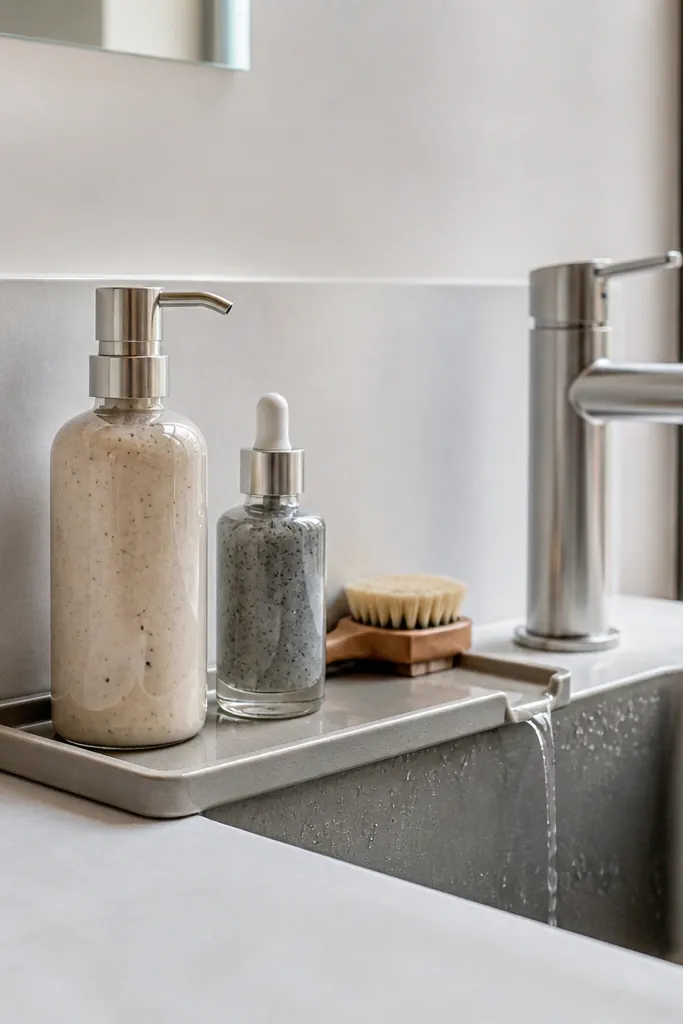
A sink-side tray keeps water and steam from making your skincare area look messy. This is for the products you use while rinsing — cleansers, exfoliants, and shaving items. The drip edge and tray shape keep bottles from pooling water on your counter, which improves the look over time. It also makes it obvious where those “wet routine” items belong so they don’t wander. This is a practical aesthetic upgrade that takes about 20 minutes.
Start by selecting a slim tray that’s wide enough for your daily wet products but narrow enough to avoid taking over the counter. Place the tray on the counter beside the sink where water splashes are lowest. Set your bottles inside so they sit upright and don’t touch the sink edge. Add a small paper towel or absorbent liner underneath the tray if your counter gets damp easily.
Use a tray with a slightly raised lip so droplets slide back into the tray, not onto the counter.
Avoid trays with open bottoms unless you can clean them easily — water and gunk collect.
13. Wall shelf with three identical glass cups for cotton and tools
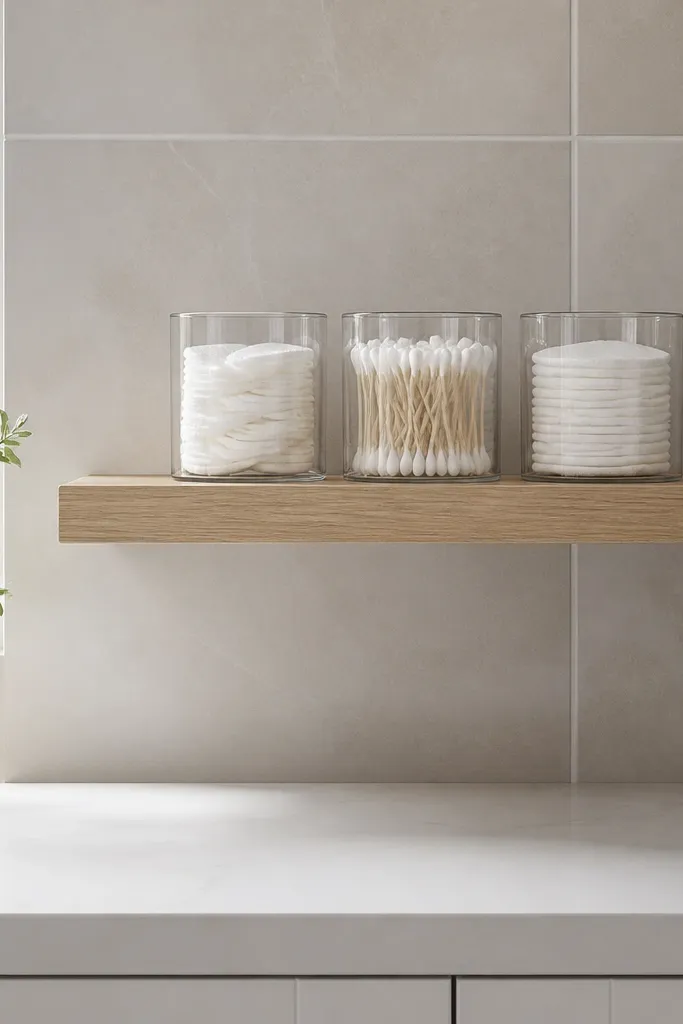
A wall shelf keeps your vanity top clear and gives you a clean vertical storage line. Three identical glass cups create a balanced look and makes it easy to assign each cup a job like cotton rounds, Q-tips, and cotton pads for removal. The transparency keeps you from guessing what’s inside, while the uniform shapes make the shelf look designed. This works especially well in small bathrooms where counter space is tight. It’s a quick install if you mount into studs or use proper anchors.
Start by choosing three identical cups and a shelf that’s at least 2 inches wider than the total cup width. Mark shelf mounting points with a level and install into studs when possible. Fill cups with items and keep levels consistent so the shelf looks tidy. Add a small label on each cup with a simple word and keep the font consistent across all three.
Let glass dry completely before refilling after cleaning so you don’t get cloudy spots.
Don’t use cups with different heights — it looks cluttered even when the contents are neat.
14. Drawer-top tray for tools with a "no lid, no mess" rule
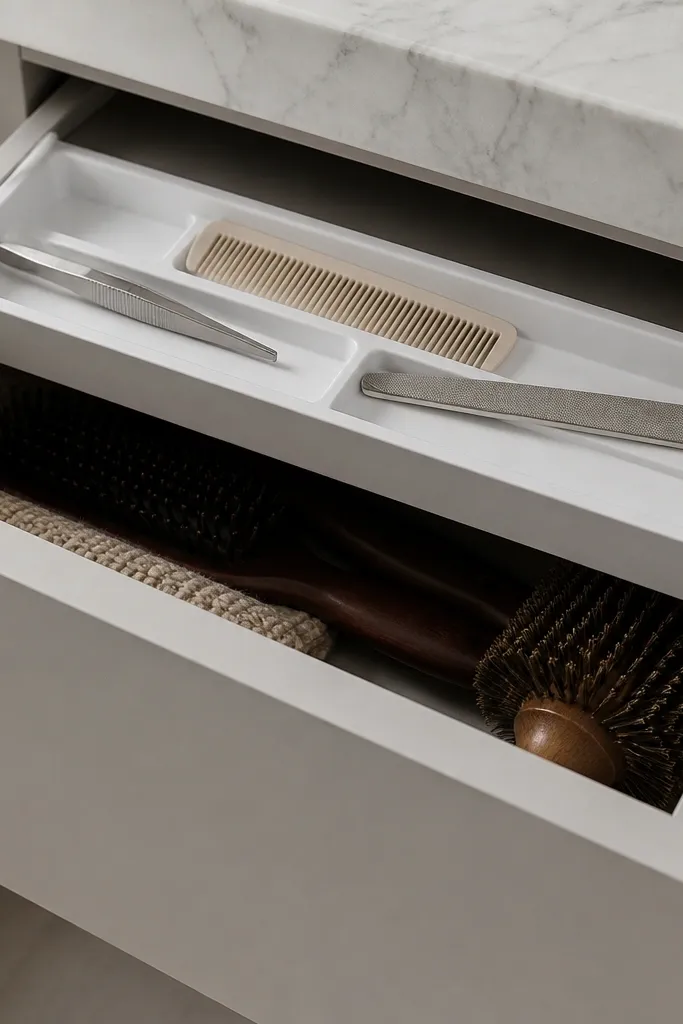
This is a tidy trick for drawers that always end up messy: keep the top layer organized with a shallow tray and leave the deeper drawer for backups. When tools have a dedicated tray, they don’t disappear into the bottom. The look stays clean because you can close the drawer and still see straight rows through a glass-front vanity, or you can keep the tray aligned so it slides in neatly. It’s best for tools like nail files, tweezers, hair clips, and small skincare tools. You can set it up in under an hour with basic measuring.
Editor's noteUse a non-slip liner under the tray so it doesn’t shift and create gaps.
Start by measuring the drawer interior and pick a shallow tray that fits with a small 1/4 inch gap on each side. Sort tools by size and place larger items in the back corners, smaller items in the front lanes. Keep items that shed powder like loose pigments out of the tray unless they have a container. Store backups in the bottom drawer area without lids on top so the tray stays the visible “clean layer.”
Skip thisAvoid mixing loose items like cotton rounds with tools — it looks messy when the drawer opens.
15. Matching label system with white tape and black marker
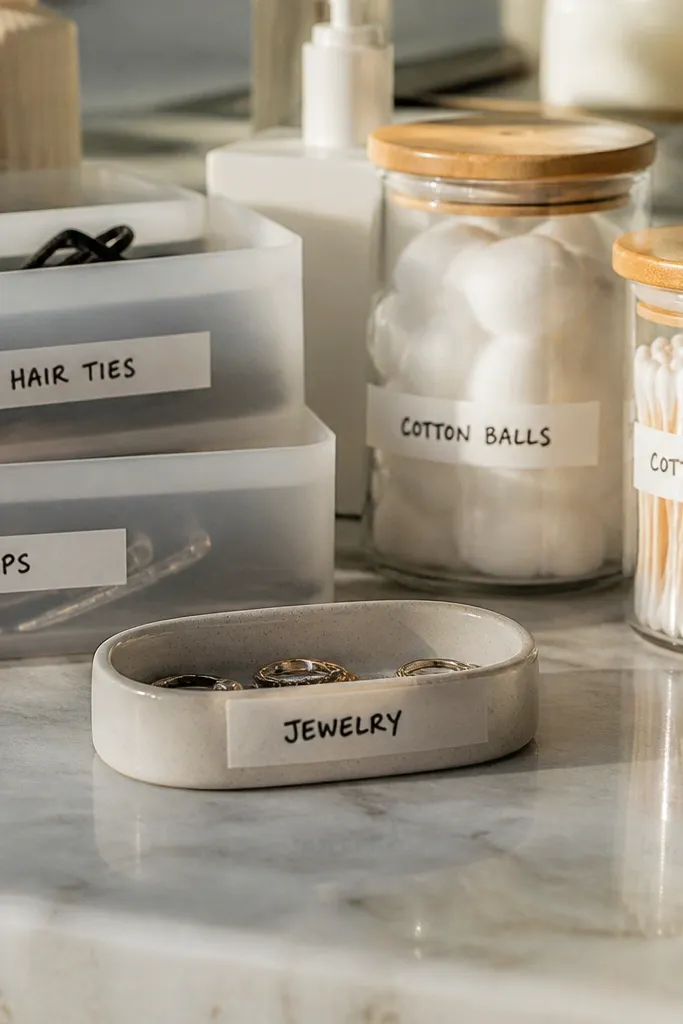
Labels are what make organization look intentional instead of temporary. A matching label system also stops the slow drift where random sticky notes multiply. White tape with black marker looks clean, reads fast, and holds up better than glittery label stickers in steam-heavy bathrooms. It’s ideal for people who switch products seasonally and need a system that’s easy to update. You’ll spend less time fixing the look because the labels keep everything aligned.
Editor's noteCut tape strips with a straight edge and press from the center outward to avoid wrinkles.
Start by picking one label size and one placement rule, like always on the front face of jars or on the top edge of bins. Clean the surface of containers and make sure they’re dry so the tape sticks. Write with a black permanent marker and keep text short: “Cleanser,” “Toner,” “Backups,” “Tools.” Apply labels consistently and add a tiny arrow for items that have a “front” side so placement stays uniform.
Skip thisDon’t use ten different fonts and label styles — it kills the clean look.
16. Lidded counter jar for cotton rounds with a "refill schedule" label
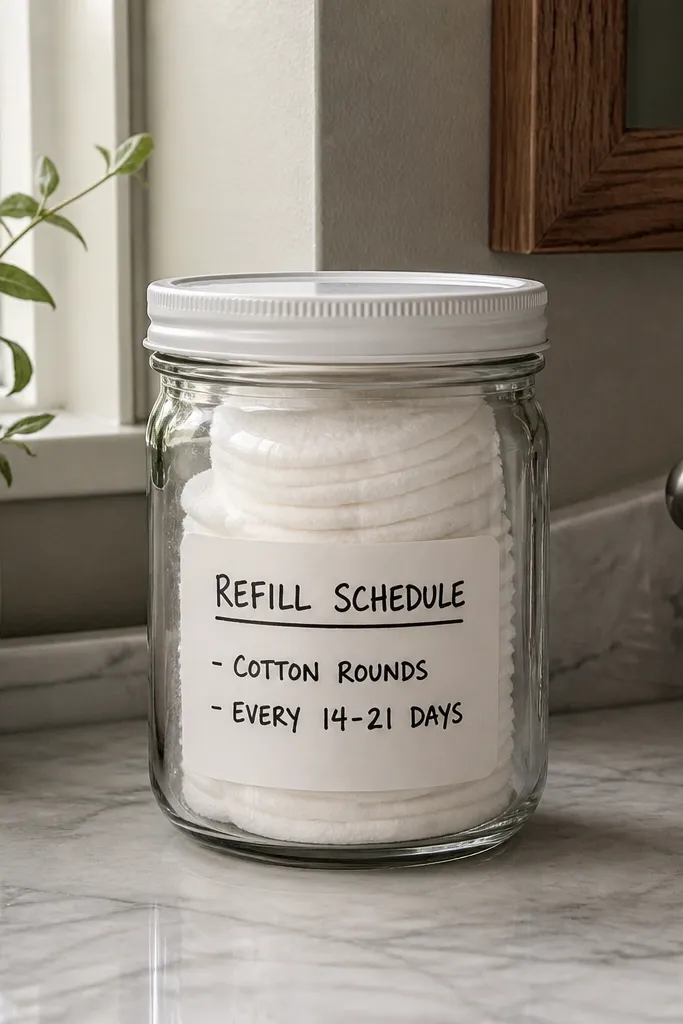
Cotton rounds are the kind of item that looks messy once they’re loose or in an open bag. A lidded counter jar keeps them contained and makes the vanity look tidy even when you don’t have time to reset. The lid also protects from bathroom dust and steam, so the jar stays clean. Add a “refill schedule” label so you know when to top it off before it looks empty. This is a simple project that improves both appearance and daily function.
Editor's noteUse a small scoop to refill so the cotton stays fluffy and the jar looks full.
Start by choosing a jar with a wide opening so you can refill without spilling. Pour cotton rounds in and keep them below the lid line so they don’t compact too hard. Add a label on the jar lid with a short reminder like “Refill weekly” or “When half full.” Place the jar in your morning grab zone near your cleanser or makeup removal items.
Skip thisSkip open jars — dust and steam make them look dirty fast.
17. Under-drawer mesh bin for hair clips with a matching tray insert
Mesh bins are good for ventilation, but they look messy if clips are just tossed in. The fix is a tray insert that creates compartments so clips sit in clean pockets. This keeps the drawer from turning into a jumble and makes it easier to grab one clip without digging. It’s best for hair accessories that are small and shiny, like bobby pins and claw clips. The look is light and organized, not heavy like plastic organizers.
Start by installing a mesh bin under the drawer or using an under-drawer organizer that slides out. Measure the bin width and cut or choose a tray insert that fits snugly inside. Separate clips into compartments with thin dividers or foldable foam board strips wrapped in a wipeable surface. Place the most-used clips in the front pocket and keep backups tucked behind.
Add a small piece of felt under the insert so clips don’t rattle and scratch your drawer.
Don’t skip compartments — loose clips turn mesh bins into visual clutter.
18. Perfume and skincare lineup with a "height ladder" rule

A height ladder makes a vanity look styled even when you have multiple bottles. The idea is to arrange your perfume and daily skincare so heights step up or down in a controlled way, instead of random tall-and-short clumps. It creates a clean visual rhythm that reads as intentional in photos. This works best if you have a few statement bottles and want them out on the counter. It’s a quick layout job that makes a huge difference.
Editor's noteUse two riser heights only. Too many riser sizes make the lineup look chaotic.
Start by laying out your bottles on the counter without moving them yet, just to see the height range. Choose one side as your “tall side,” then place the tallest bottle at one end and step down in consistent increments of about 1-2 inches. Use small coasters or risers under shorter bottles so you don’t have to push them around. Keep labels facing forward and wipe bottle bottoms so they sit cleanly.
Skip thisAvoid grouping bottles by product type if it breaks the height ladder.
19. Corner shelf with a tidy "brush cup wall"
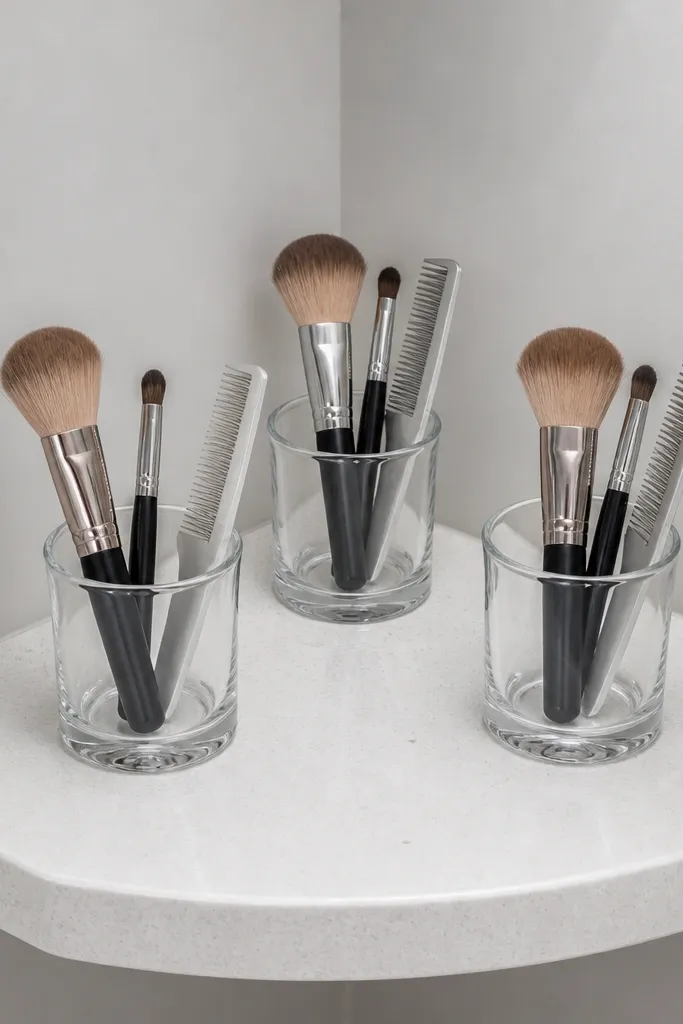
Corner storage is where vanities usually waste space, and a brush cup wall fixes that with a clean, intentional look. Use matching cups or a set of small holders so brushes don’t become a tangled mess. The corner placement keeps the counter free while still keeping your brushes visible and easy to grab. This setup looks good because it turns tools into a neat pattern instead of clutter. It’s also a smart choice if your drawer is already full of makeup.
Editor's noteAdd a small tray under the cups to catch any drips from wet brushes.
Start by measuring the corner area and choosing a small shelf that fits without blocking the mirror. Pick 3-5 matching cups or holders and test spacing so brush handles don’t overlap. Mount the shelf securely and place cups so the tallest brushes are in the center. Put cleaning tools like spatulas or small combs in a separate cup to keep categories clear.
Skip thisDon’t mix cup styles. Mismatched holders make the corner look cluttered.
20. Clear zipper pouches for travel sizes inside a drawer
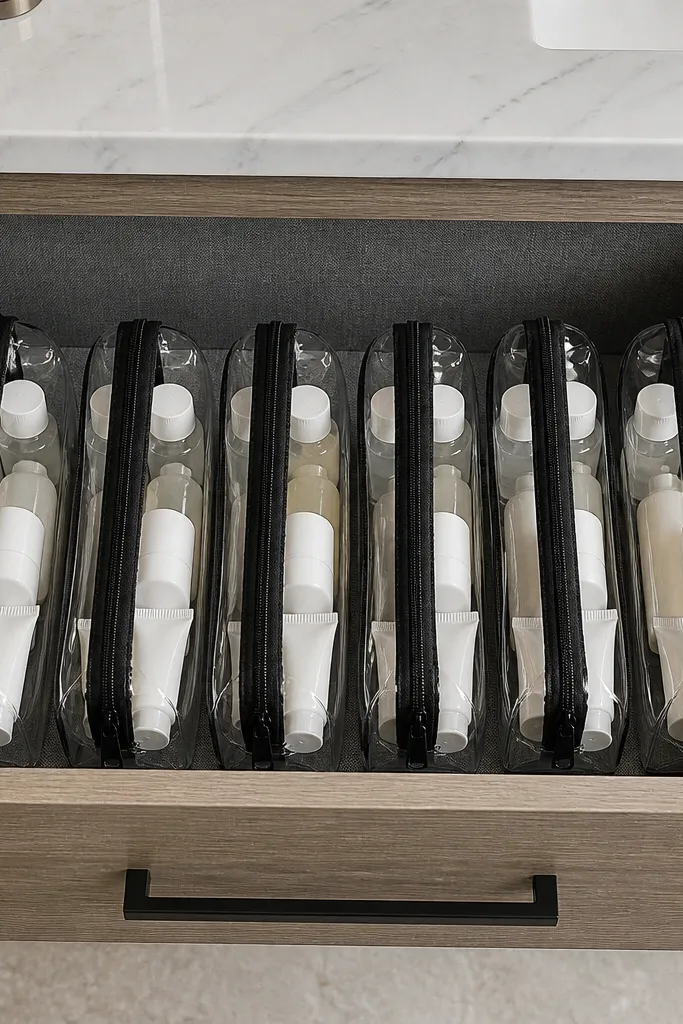
Travel sizes are the sneaky drawer clutter. They look like “small items,” but they multiply and get buried under full-size bottles. Clear zipper pouches solve it by letting you see what’s inside while keeping each set contained. The aesthetic win is that the drawer stays uniform — pouches line up like a set instead of random packets. This is ideal for people who keep backups for trips, guests, or emergency situations. It takes about 45 minutes to sort and place.
Start by gathering travel sizes and sorting into groups like hand soap, shampoo/conditioner, skincare minis, and oral care. Choose clear zipper pouches with similar height so they line up. Label each pouch with a short category and keep pouches flat in one drawer section. Store daily products in front and travel pouches in the back so the drawer stays practical.
Use a binder clip to hold pouch zippers closed if you notice they slide open in a busy drawer.
Avoid mixing travel minis with daily items in the same lane.
21. Slim pegboard shelf for hair sprays and styling creams
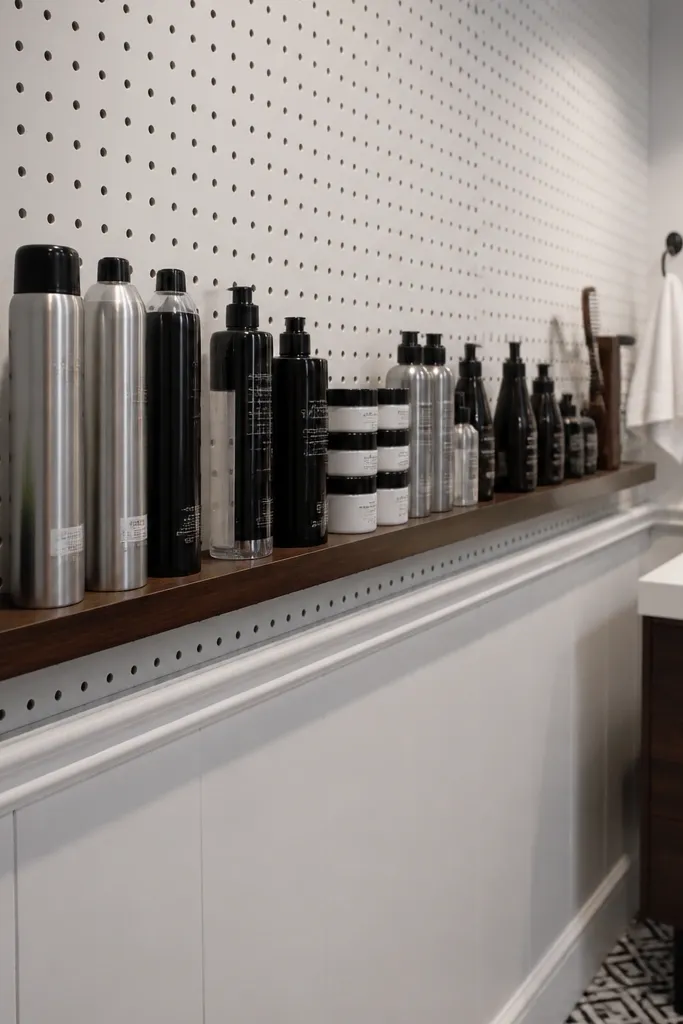
If you want an aesthetic vanity but your products are tall, pegboard with a slim shelf makes them look intentional. Styling creams and hair sprays usually clutter counter corners, but on a pegboard shelf they line up with straight edges. It also keeps bottles off the sink splash zone, which means fewer water spots. This setup is great for people who use a lot of styling products and need them visible. The look is clean and modern because the pegboard grid organizes the chaos.
Editor's noteKeep 6-10 bottles max on the shelf. More than that turns back into clutter.
Start by choosing a slim shelf size that fits your product count and leaves space for your mirror. Mount the pegboard first, then attach the shelf at a height where bottle labels face you when you stand normally. Place bottles in a row, using small felt pads under each one so they don’t slide. Add a small hook for tools like combs or clips on the same pegboard panel.
Skip thisDon’t mount the shelf too high — you’ll stop using it and the counter will fill again.
22. Bathroom vanity roll tray for quick reset day
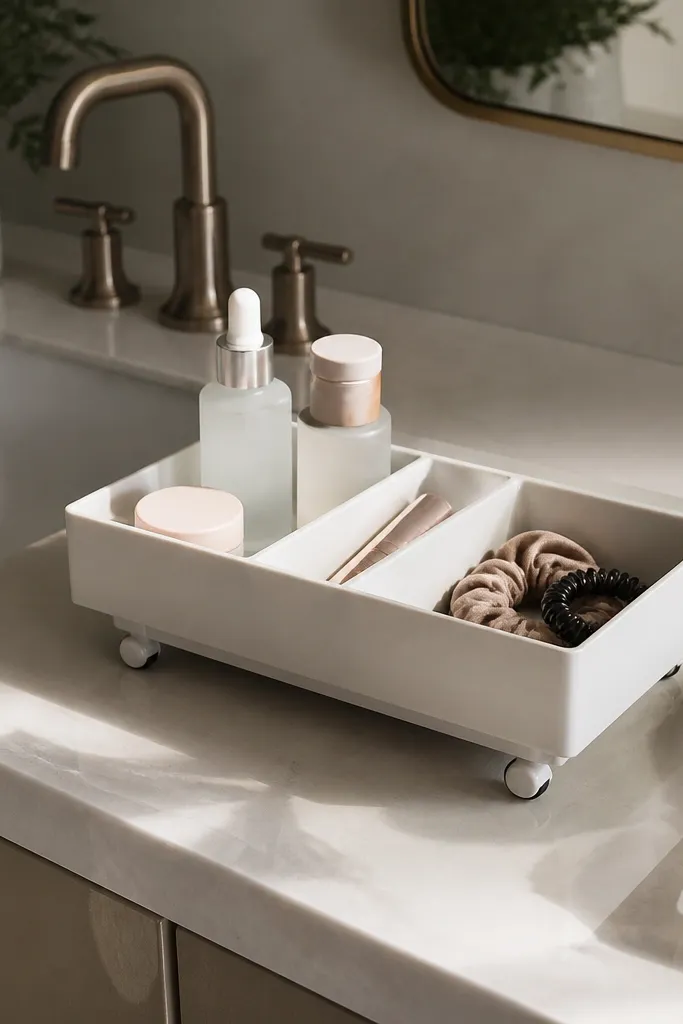
A roll tray is the easiest way to keep your vanity looking good when you need to clean or reset fast. You can slide everything into one organized zone, wipe the counter underneath, and then roll it back out without rebuilding the layout. The compartments keep items from mixing, so the tray always looks the same. This is a great choice for small bathrooms where you don’t have space for a lot of fixed organizers. It’s also helpful when multiple people share the same vanity and need their items separated.
Editor's noteUse a tray mat under the tray so it doesn’t scratch and so it stays stable on smooth countertops.
Start by choosing a roll tray with shallow compartments and wipeable surfaces. Clear your vanity counter and place the roll tray where you can reach it easily. Add a compartment for daily items, one for tools, and one for backups so the tray looks balanced. When you reset, slide the tray out, wipe the counter, then roll it back in and align compartments the same way every time.
Skip thisSkip deep compartments for small items — they hide things and defeat the quick reset goal.
23. Folded-Ribbon Vanity Shelf Divider with Hidden Clips
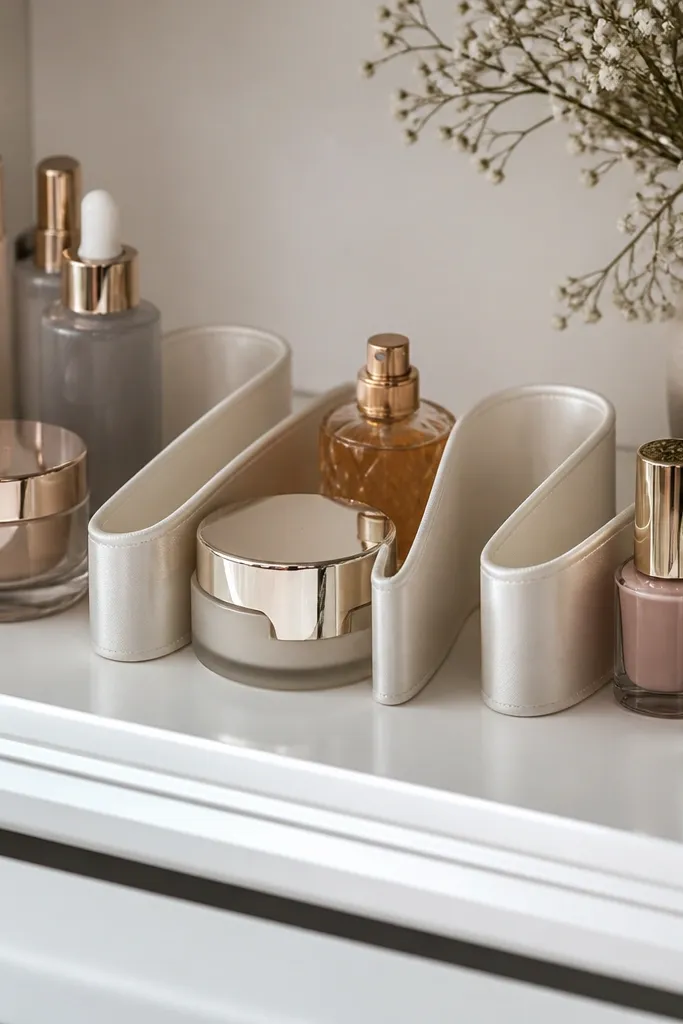
This is the cleanest way to stop your vanity shelf from turning into one tangled pile. You get sharp visual sections like a boutique counter, but the dividers are soft enough that bottles don’t rattle or chip. The folded ribbon edge looks intentional and photogenic in flat lighting, and the hidden clips keep it from looking bulky. It’s quick and forgiving if you’re working with a slightly uneven shelf, because you can trim the folds to fit. Do this for a shallow shelf where you want quick and easy vanity organization that still looks pretty.
Editor's noteUse a narrow iron and press with steam for a crisp fold — it makes the divider look store-bought instead of handmade.
Measure the inside width and depth of the shelf and decide how many zones you want (two for skincare and backup, three for daily items). Cut ribbon or cotton webbing strips to the shelf depth minus 1 cm, then fold each strip in half lengthwise and press the crease with a warm iron. Add small binder-clip style spring clips or picture-hanging clips to the back edge of each folded strip so the front stays flat and neat. Position dividers, mark clip spots with a pencil, then attach with 3M Command strips rated for smooth surfaces or tiny finishing nails if your shelf is wood. Finish by running a lint roller over the ribbon so it photographs clean, then test-fit bottles to confirm you’re not forcing lids against the divider.
Skip thisDon’t glue the ribbon directly to plastic shelves; it peels and leaves residue.
24. Clear-Lid Compartment Caddy for Cotton Swabs and Mini Tools
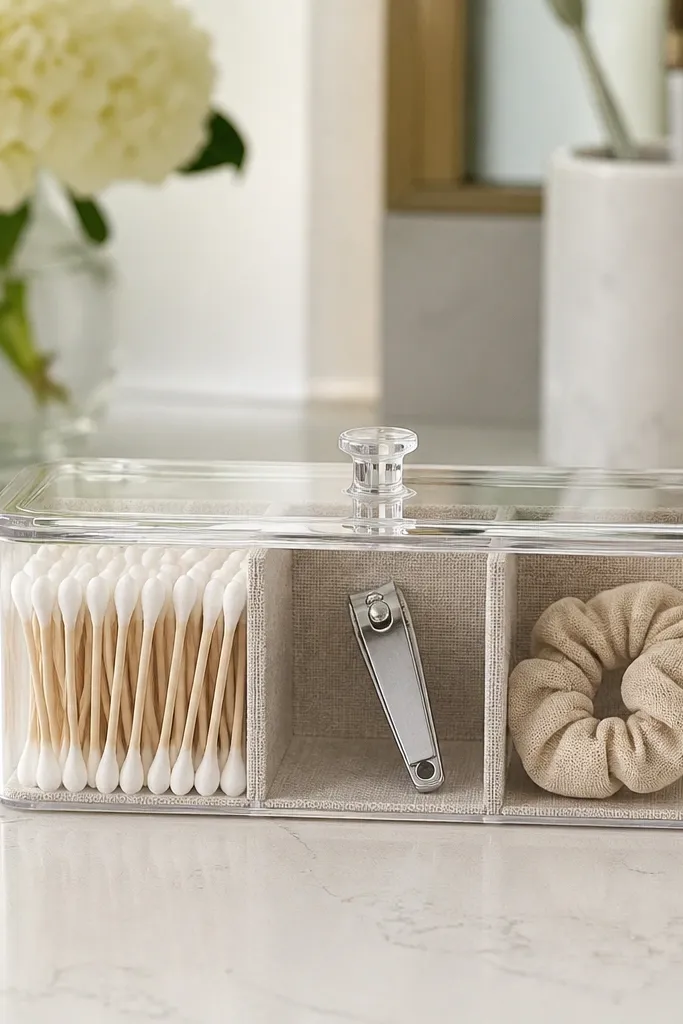
If your cotton swabs, mini nail tools, and spare hair accessories always end up mixed, this caddy fixes it fast. The clear lid keeps dust off and makes the contents easy to spot, so you’re less likely to dig and scatter. It looks tidy because every compartment is the same height and the lid creates one clean silhouette. This is best for a counter or top drawer where you want quick and easy vanity organization without hunting for separate containers. Skill level is beginner — it’s mostly measuring, cutting, and gluing panels.
Editor's noteLightly sand the cut edges and wipe with a damp cloth before assembling; cleaner edges make the clear lid look crisp.
Pick a base size that fits your space — for most vanities, a 20 cm x 10 cm base works well, with about 7-8 cm height so the lid clears. Cut a foam board or thin acrylic sheet into a base and four side panels, then glue with clear acrylic adhesive or hot glue if you’re using foam board. Create compartments by cutting two to three vertical dividers from the same material, sized so they leave 0.5 cm gaps for easy placement. Attach the lid using a small piano hinge along the back edge, then add two magnetic catches (one on the lid, one on the front) so it closes tight. Seal the inside edges with a thin bead of glue and let it cure fully before loading anything.
Skip thisDon’t make compartments too tight for swabs and tweezers; leave at least 1 cm extra width so they slide in without scraping.
25. Magnetic Strip + Color-Coded Label Tabs for Drawer Front Tools
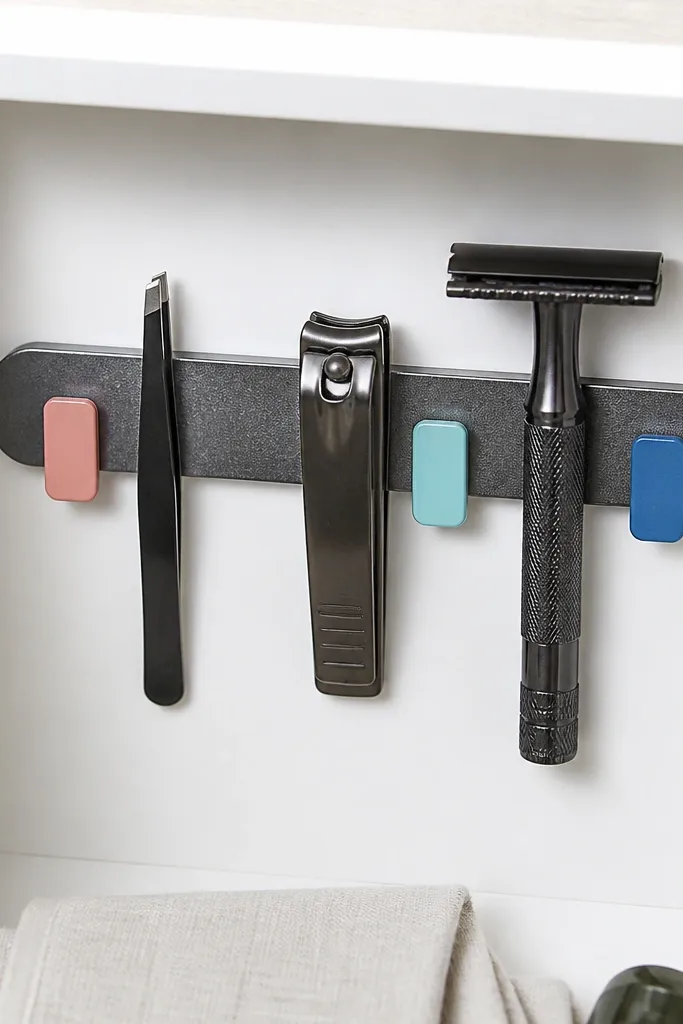
This turns the inside of your drawer into a clean, visible tool lineup instead of a drawer full of loose items. You mount magnetic strips on the drawer back or side panel, then hang slim tools so they stay aligned and don’t tip over. The color-coded label tabs make it quick to grab the right item without reading tiny packaging. It also looks organized in photos because you’re creating a tidy vertical pattern. This works best in a drawer that’s deep enough for a few tools and where you want quick and easy vanity organization you can see at a glance.
Choose slim magnetic strips sized to your drawer back or the left and right side walls, then cut them to fit with metal snips or a rotary tool if needed. Clean the mounting surface with rubbing alcohol so adhesive sticks, then attach strips using strong double-sided adhesive made for magnets or small screws into wood. Make label tabs from 1.5 cm wide cardstock or thin plastic, then print or write with a black fine-tip marker and cover with clear tape so it won’t smear in bathroom humidity. Place each tab under the matching tool position so the label reads when the drawer is open. Add a small foam bumper at the front edge of the drawer so the tools don’t slam into the label tabs when you close.
Use two colors only — one for daily tools and one for backup tools — and keep the rest of the drawer neutral for a calmer look.
Don’t use weak adhesive strips; they shift and the tools start sliding out over time.



