
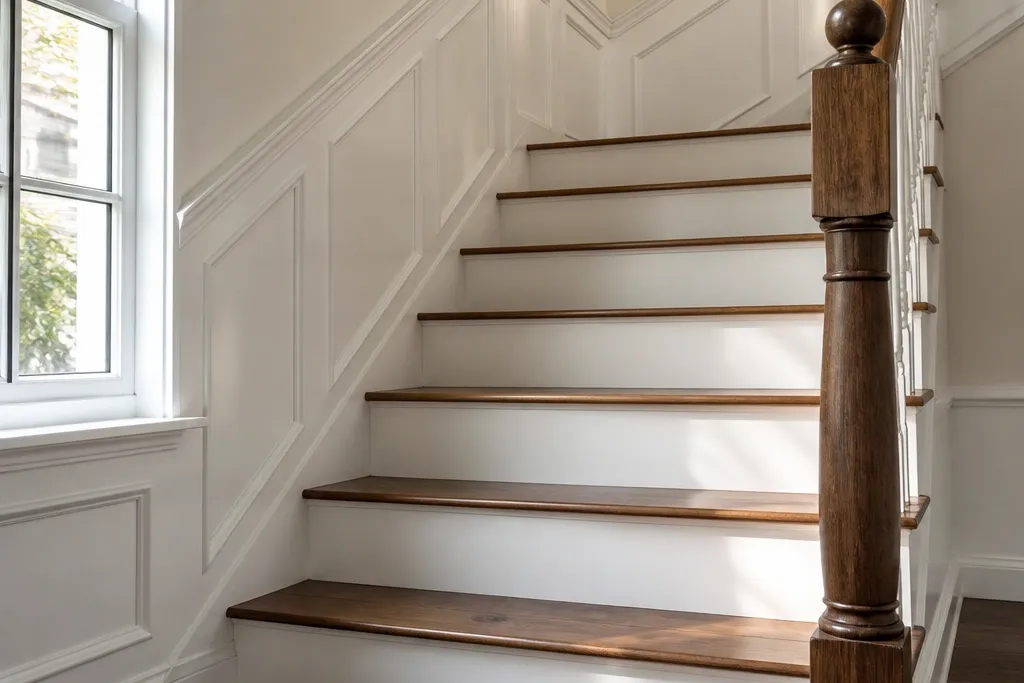
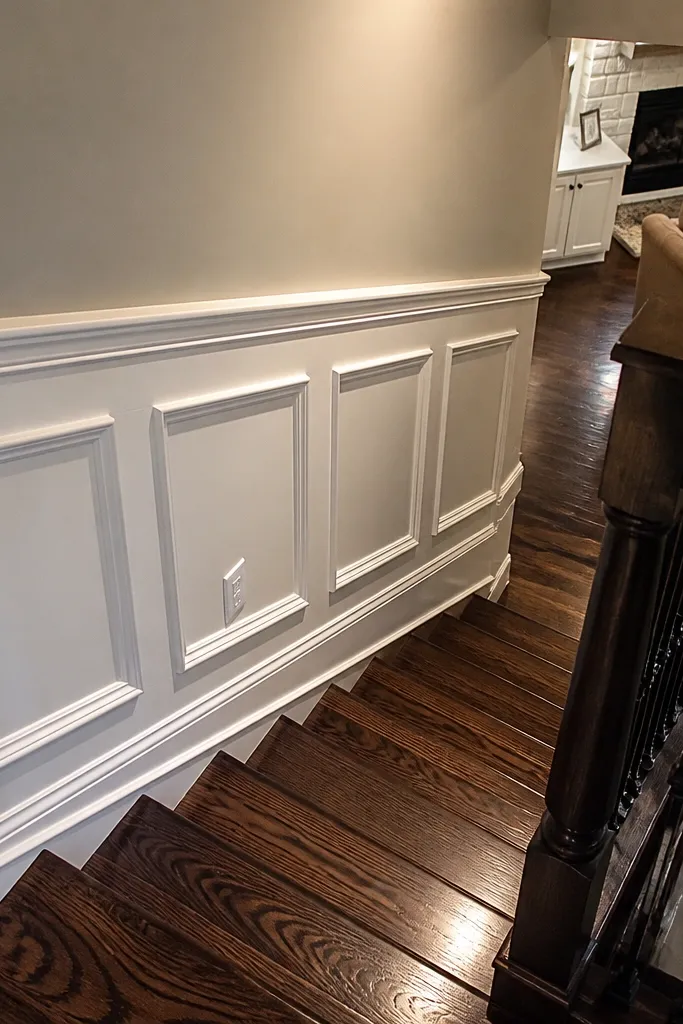
1. Classic Chair-Rail Panels with Center Rectangle
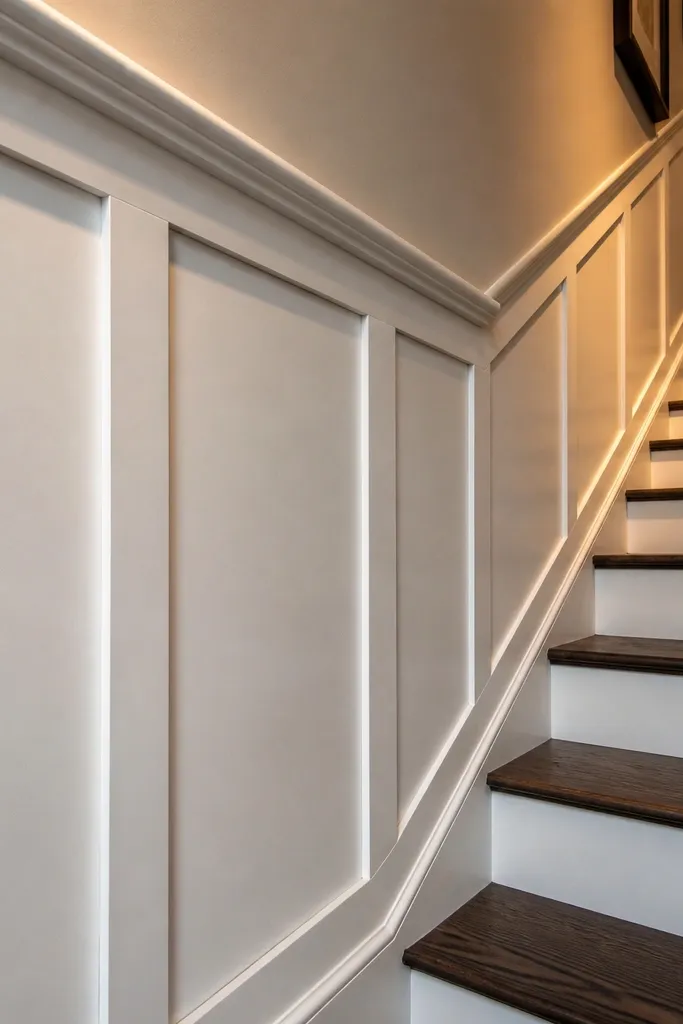
This is the staircase version of “instant done.” You get a familiar chair-rail line that anchors the wall, then each bay has one centered rectangle so guests can read the pattern without squinting. The look stays photogenic because the vertical stiles create clean shadows, and the centered infill keeps the wall from feeling busy. Build it with primed trim and paint it the same color as your baseboards for a crisp, intentional frame. It’s also friendly for DIY because the geometry repeats — you’re basically repeating one panel module along the run.
Start by marking your chair-rail height from the landing floor so the rail stays level across the staircase. Cut and install the horizontal rail first using a stud finder for nail points, then add vertical stiles at your planned spacing. Finally, frame each panel with an inner rectangle using 1/4x1/2 or similar thin trim, then caulk the seams and paint in two coats.
Use a level line and spacers for the first panel only — once that one is perfect, the rest go fast.
Don’t eyeball spacing between stiles. One uneven gap makes the whole staircase look off.
2. Tall Shaker Wainscoting with Two-Board Rails
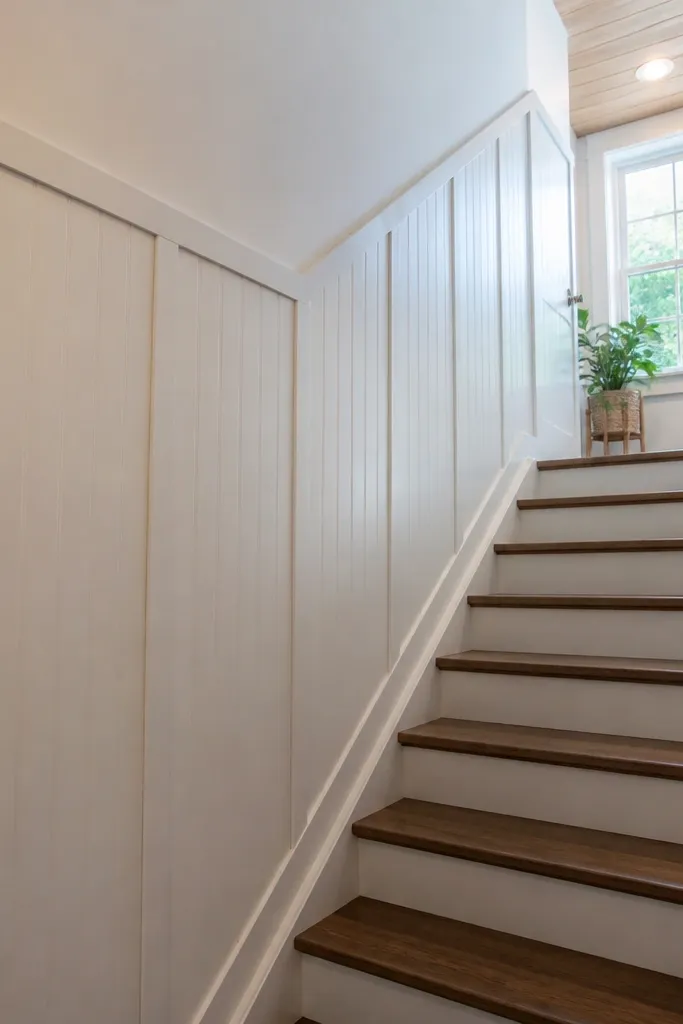
If you want the staircase to feel taller and cleaner, tall shaker panels do it. The vertical lines pull the eye upward, and the simple rails keep the design from looking cluttered near the banister. This style photographs well because the panel borders cast a steady line of shadow even when lighting shifts as you walk. Use a slightly higher top rail than a traditional chair rail so the panels look substantial on the height of the stairs. It’s a strong choice when the wall is long and you want one continuous rhythm.
Choose a panel height that stops just below the handrail height or a consistent trim crown line, then mark that level across the staircase wall. Install the bottom rail and top rail with 1x2 boards, then add vertical stiles between them at equal spacing. Create the inset by adding inner thinner rails and stiles around each panel opening, then fill nail holes, caulk seams, and paint.
Pre-sand the edges of primed trim so your caulk lines disappear after paint.
Avoid making the inner panel too small — tiny shaker rectangles look cramped on stairs.
3. Half-Wall Wainscoting with Arched Panel Corners
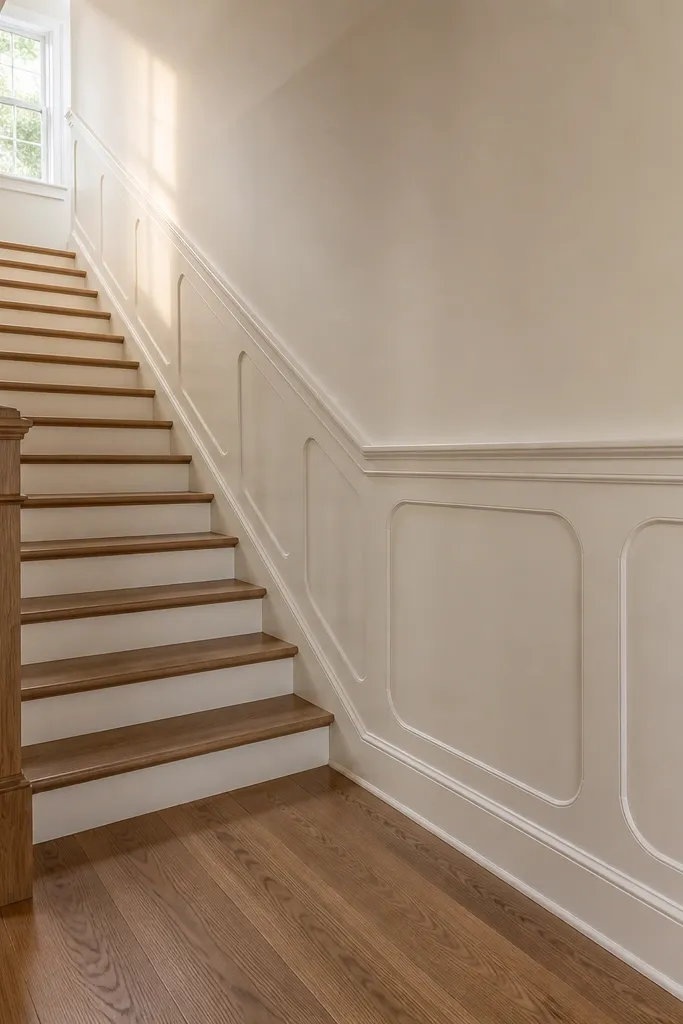
This is a soft, old-meets-modern look that still reads clean on a staircase. You keep the half-wall height so it doesn’t feel heavy, and the arched corners inside the rectangles add a gentle curve that’s very photogenic. The curve catches light differently than straight trim, which is why this design looks more interesting than plain rectangle panels. It also helps visually break up awkward wall sections where you don’t want a full custom shape everywhere. Paint it in a warm white trim color for the best contrast against a deeper wall color.
Mark your half-wall height and install horizontal rails (1x3 works well) at that line and along the floor baseboard line. Build the outer rectangle frames with 1x2 trim, then cut inner corner pieces that create a shallow arch — a simple way is using a small radius template or flexible strip for layout marks. Add the inner border trim to complete each panel, then caulk and paint two coats.
Cut the inner arch pieces from the same board orientation so the grain direction (if any) matches across panels.
Don’t make the arch too deep. Deep curves look busy and harder to keep consistent.
4. Stacked Rectangle Panels with Narrow Infill Frames
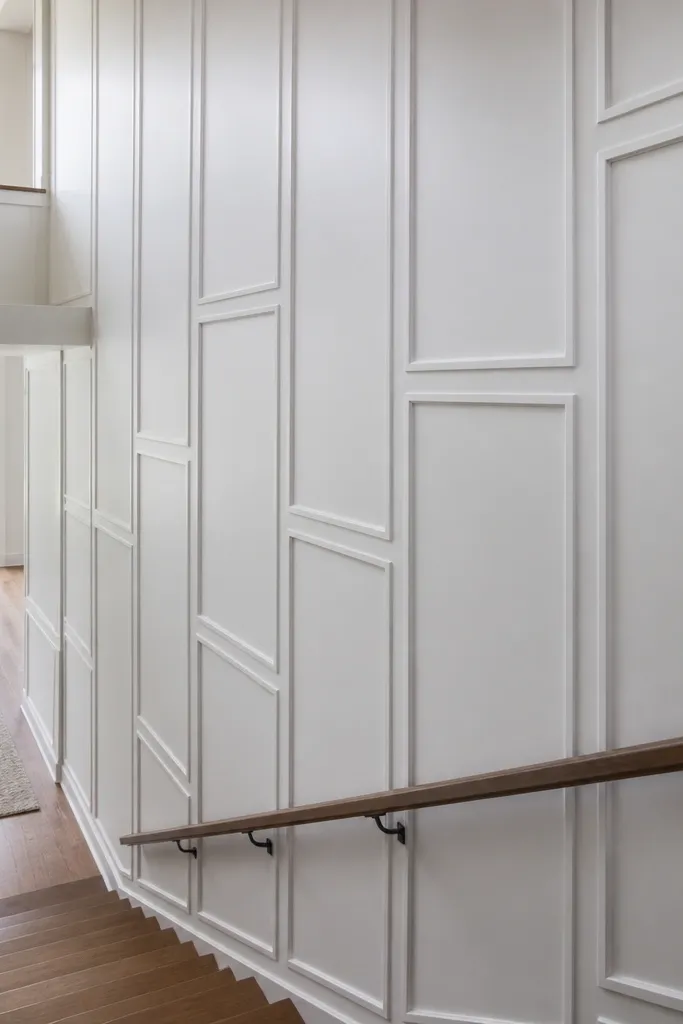
This layout gives you that gallery-wall feel without actually needing art. Narrow inset frames make the panels look crisp and layered, and the stacked rectangles read clearly from the top landing. It’s a great choice when the wall has a lot of vertical movement from the stairs, because the pattern moves with it instead of fighting it. The thin infill also makes the project faster since you’re mostly repeating a simple frame. This is one of the cleanest “quick and easy wainscoting ideas” if you want a modern look.
Use a consistent panel width based on your wall measurements and target spacing around doorways or corners. Install the outer vertical and horizontal trim frames first, then add a thinner inner border around each rectangle using 1/4x1/2 or 1/2x1/2. Keep your inner border width consistent across the whole run, then caulk all seams and paint.
Use painter’s tape to mask panel lines before caulking. It makes cleanup faster and keeps edges sharp.
Avoid mixing trim widths mid-project. Even small changes show up in photos.
5. Diagonal Panel Accent Starting at the Landing
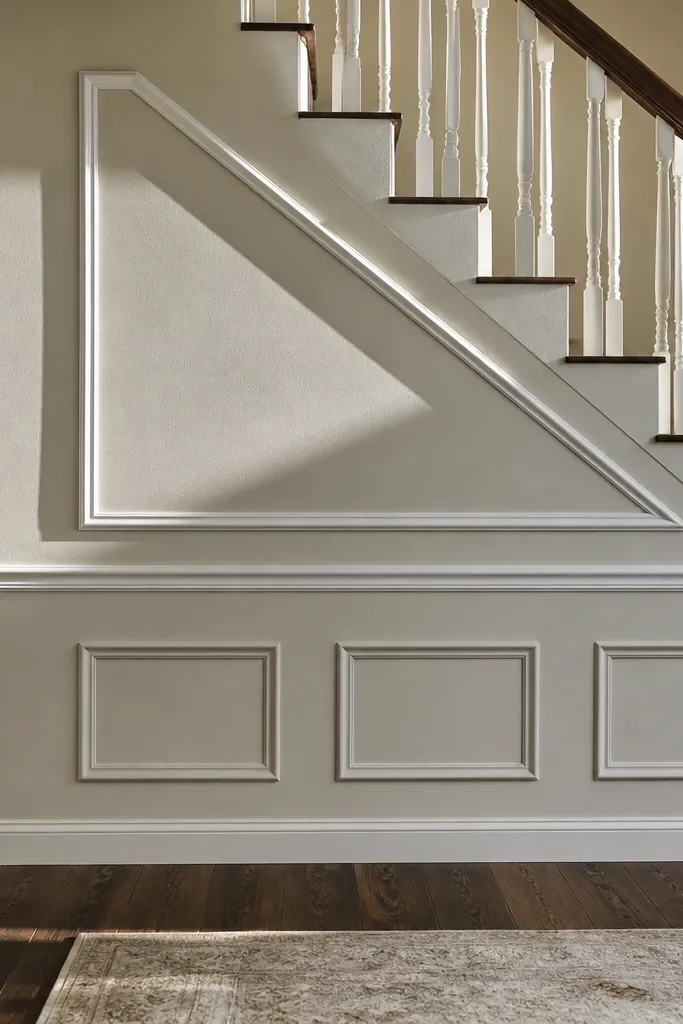
This one stops guests because it breaks the boring grid. You still do wainscoting, but you place a single diagonal framed panel that points toward the landing, like a visual arrow. The rest of the wall can stay simpler, like a chair rail with smaller rectangles, so you don’t overwhelm the space. Diagonal lines look sharp under stair lighting and photograph well because they create movement across the wall. It’s a smart option for stairways that have a strong focal spot at the landing.
Start by choosing the landing wall bay you want to emphasize, then draw the diagonal line on painter’s tape so you can see it from the stairs. Build the diagonal outer frame using mitered trim pieces cut to match the angle, then install the regular chair rail and stiles around it for balance. Finish by adding a thin inner border so the diagonal panel has depth, then caulk and paint.
Cut diagonal pieces in batches and label them by position. You’ll save time and avoid mirrored mistakes.
Don’t center the diagonal on a frame that later gets cut off by a corner. Plan the diagonal around real trim boundaries.
6. Board-and-Batten Wainscoting with Wider Battens
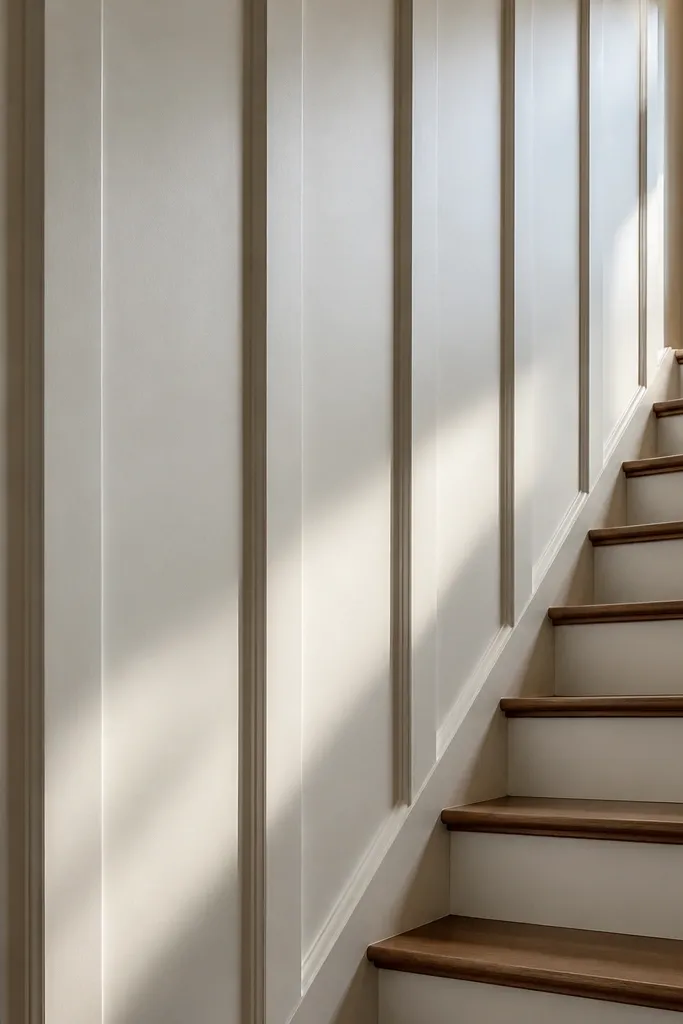
Board-and-batten is the fastest way to get texture and structure on a staircase wall. Wider battens create stronger shadows, which makes the wall look expensive in photos even with simple paint. Keep the base boards clean and run the vertical battens straight — the whole thing reads intentional instead of rustic clutter. This works best when your staircase wall is fairly smooth and you want the trim to add the interest. It’s also easy to adjust around outlets or odd wall sections by shifting battens.
Editor's noteUse a consistent batten width and spacing — the simplest board-and-batten looks best when the rhythm is strict.
Install horizontal base boards first (1x4 or 1x3 depending on your wall scale), then mark vertical batten locations at equal intervals. Attach battens using construction adhesive plus finish nails, then fill seams and nail holes with paintable filler. Add a top rail if you want the look to feel framed, then sand lightly and paint two coats.
Skip thisAvoid thin battens on stair walls. They look delicate and get lost under moving light.
7. Crown-Molded Wainscoting Panels with Top Framing
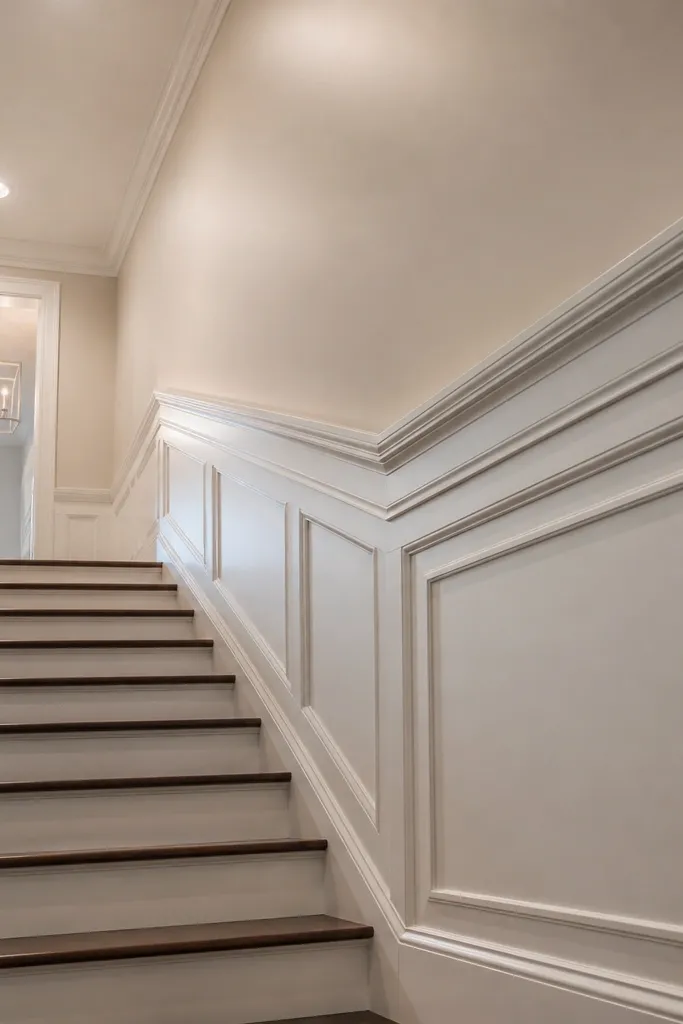
If your staircase has a higher ceiling or a dramatic landing, adding a top crown border makes the wainscoting look built-in. The crown detail photographs beautifully because it creates a layered highlight line that catches overhead light. Keep it modest — a small crown on top of the top rail — so the wall doesn’t feel top-heavy. This is a great “stop guests” move when you want the wall to feel finished all the way up, not just at chair-rail height. Paint the crown and panels in the same trim color for a cohesive, architectural look.
Install your main top rail and panel frames first so the crown has something straight to sit on. Cut crown molding pieces to fit the wall run, coping inside corners if needed, then attach with finish nails and wood glue at joints. Caulk every seam, then paint after filler dries and sanded smooth.
Dry-fit crown pieces on the floor with the same angle settings you’ll use on the wall.
Don’t skip sanding caulk ridges under crown molding. They show up immediately in photos.
8. Floating Panel Frames with No Center Infill
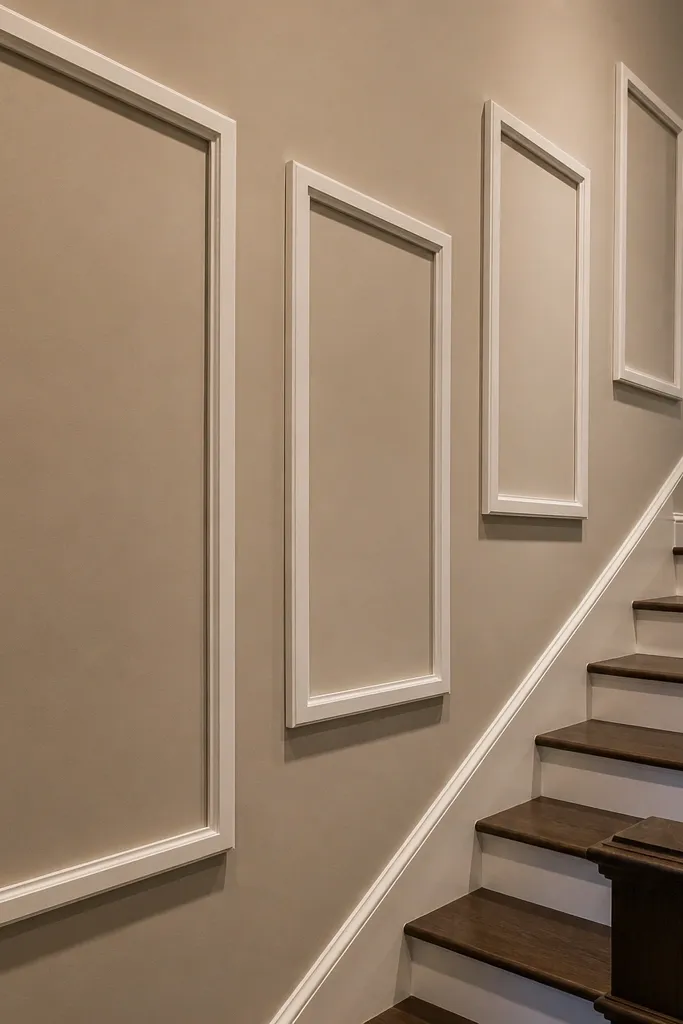
This design gives you the “frame” look without adding extra layers that slow you down. You mount outer trim rectangles so the wall paint becomes the panel surface, which keeps thickness low and makes the installation forgiving. It’s photogenic because the edges still cast crisp shadows, and the open center avoids a bulky feel on narrow stair walls. This is a good choice when you need quick and easy wainscoting ideas that don’t require building inset boxes for every panel. It also works well if your wall already has decent paint coverage.
Mark your panel grid and install the outer frame trim pieces directly to the wall using adhesive plus finish nails. Leave the center area untouched so it stays flush with the existing wall surface. After all frames are installed, caulk along the trim edges, fill nail holes, then paint the full area in two coats so frames and wall match cleanly.
Use a thin caulk line and wipe it once — don’t overwork it or it’ll smear into the panel center.
Avoid leaving gaps between frame and wall. Even small shadow gaps look messy on stairs.
9. Beveled Inset Panels with 1x2 Borders
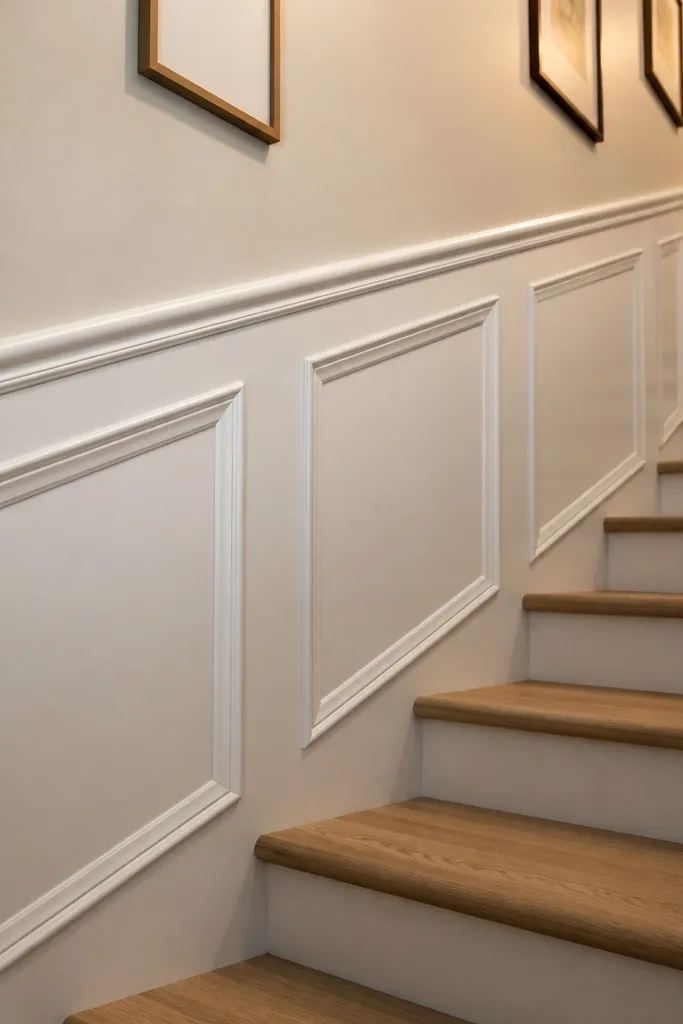
Bevels add depth without needing thick trim. The beveled edge makes the panel surface look recessed, so the wall feels more dimensional in photos and from the side as you climb. This style works great on staircases because the angle shifts, and the bevel catches that change. Use 1x2 trim for the outer border so the profile looks substantial against a wall. This is a strong “guest stopper” if you want something more upscale than flat rectangle frames.
Install the outer border frames first at your marked panel grid. For the inset, use pre-primed beveled panel boards or cut beveled strips to fit — keep the bevel orientation consistent across panels. Attach inset pieces, then run caulk along the perimeter and fill nail holes before painting.
Paint the inset panel pieces before installing them if you can. It reduces hard-to-reach coverage spots.
Don’t mix bevel widths across panels. Consistency is what makes the look intentional.
10. Vertical Panel Columns Over a Chair Rail
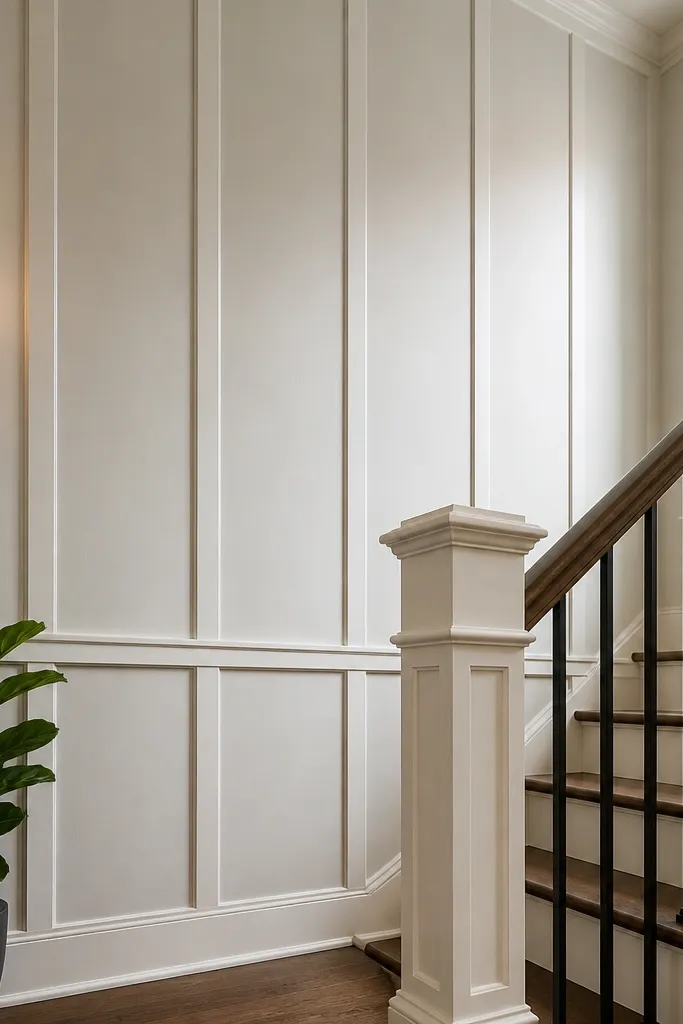
This is a smart way to make the staircase wall feel taller without raising the whole wainscoting height. You keep a chair rail line for structure, then add vertical column panels above it so the design climbs with the stairs. Guests read the vertical columns instantly, and camera angles from the landing make the columns line up in a satisfying way. It also hides wall imperfections because the columns break up large flat areas. Paint the columns and rail in crisp trim white and keep the wall color deeper for contrast.
Editor's noteStart columns at consistent points near corners so the pattern doesn’t “drift” across the staircase run.
Mark your chair rail height first, then install the rail level across the run. Add vertical column frames above the rail using 1x2 stiles and 1x2 top pieces, with inner rectangles or simple flat infill. Finish by installing a thin inner border if you want extra definition, then caulk and paint.
Skip thisAvoid irregular column widths. Use one width and repeat it so the staircase looks designed.
11. Half-Wall Wainscoting with Raised Center Squares
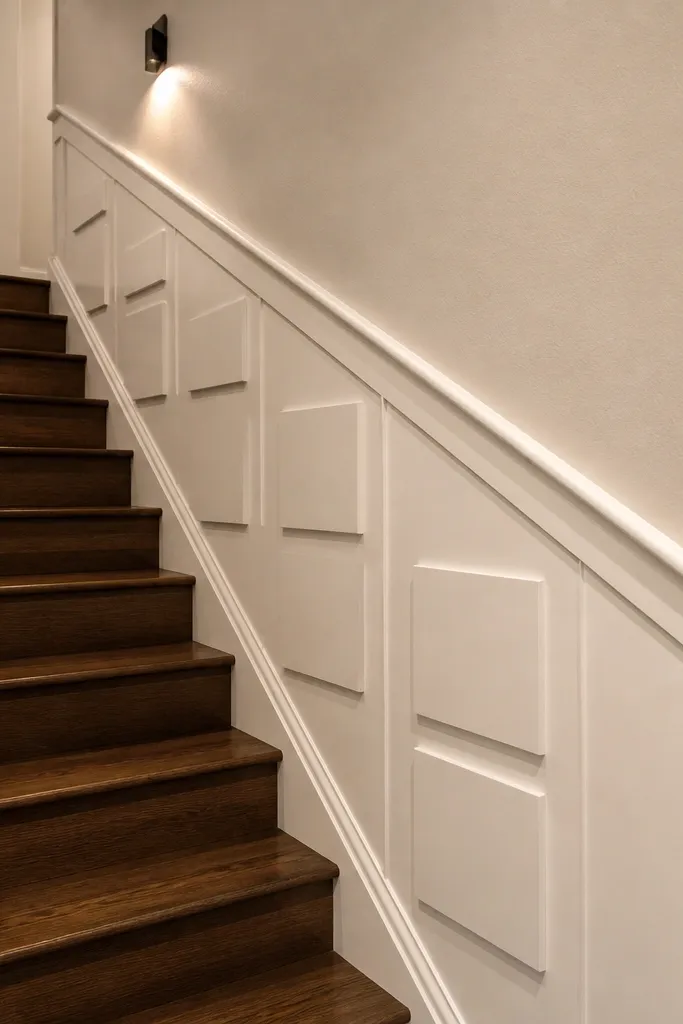
Square accents look bold and graphic, which is exactly what you want in a narrow stair corridor. This design uses half-wall wainscoting so the wall doesn’t feel overbuilt, then adds centered raised squares that pop under overhead lighting. The squares also help you align the pattern around outlets or baseboard transitions. It’s visually strong without being fussy, and it reads well in photos because the geometry is simple. Use a satin finish on the trim so the raised edges stay crisp.
Install your half-wall rails and outer frames using 1x3 for the horizontal and 1x2 for the vertical. Cut inset squares from thinner trim stock or panel board and attach them centered inside each outer frame. Caulk around the square edges, fill nail holes, and paint the entire section in two coats for even sheen.
Measure the square size off the finished outer opening, not off raw board sizes.
Skip skipping: don’t place squares too close to rail edges or they look cramped.
12. French-Edge Panels with Thin Beadboard Infill
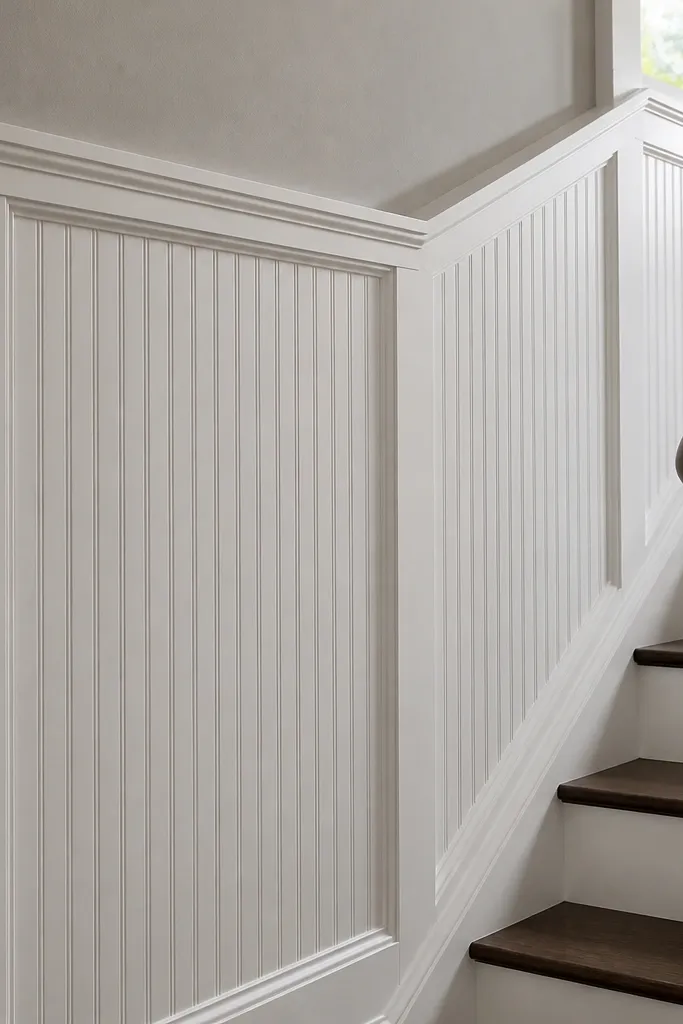
Beadboard infill gives you texture that still looks clean and tailored. The key is keeping the beadboard thin so it doesn’t turn into a bulky farmhouse wall. Frame it with thin borders for a “French edge” look, where the texture sits inside a crisp rectangle. This is photogenic because the bead lines create fine shadow texture, especially in lower light near stairs. It also helps if your wall has minor surface imperfections — the beadboard hides them better than smooth paint alone.
Editor's noteSand beadboard edges lightly before painting so the caulk line stays thin.
Install outer trim frames at your panel grid using primed 1x2 boards. Cut beadboard panels to fit the inside openings and nail or glue them to the frame edges. Caulk the seams where beadboard meets trim, then fill nail holes and paint. Use the same paint sheen on beadboard and trim for a unified look.
Skip thisAvoid thick beadboard. It makes staircase walls look heavy and harder to align.
13. Corner-Block Framed Panels for Tricky Angles
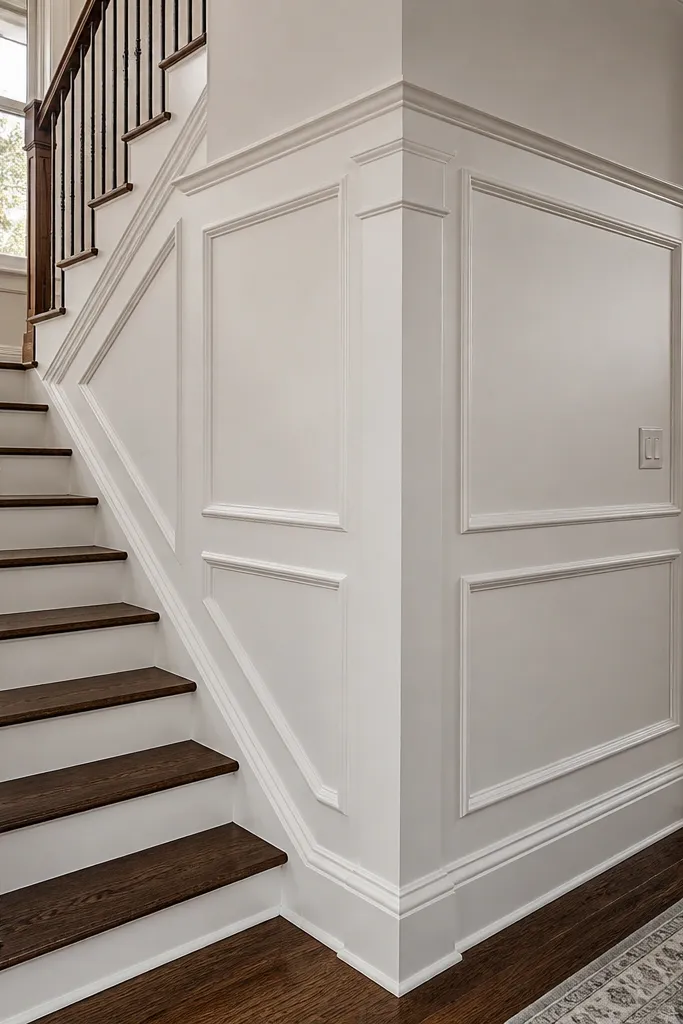
Corner blocks are the secret weapon when your staircase wall has odd angles, returns, or slightly out-of-square corners. Instead of fighting perfect miter joins, you use corner blocks to visually “finish” the design. The panels still look crisp, and the corner block adds a decorative pause guests notice. This is one of the most reliable quick and easy wainscoting ideas for DIY because it hides small measuring errors. It also makes the wall look custom even if the house isn’t perfectly straight.
Plan your panel grid so the corner block sits at the intersection of two frames. Install straight runs first — rails and stiles — then stop panels short of the corner. Glue and nail corner blocks in place, then frame into them with short trim pieces so the corner reads intentional. Caulk all junctions and paint after filler cures.
Buy corner blocks slightly larger than you think you need. You can trim them down for a clean fit.
Don’t rely on caulk to fix a big corner gap. Use blocks to correct the shape.
14. Staircase Landing Accent Box Frames
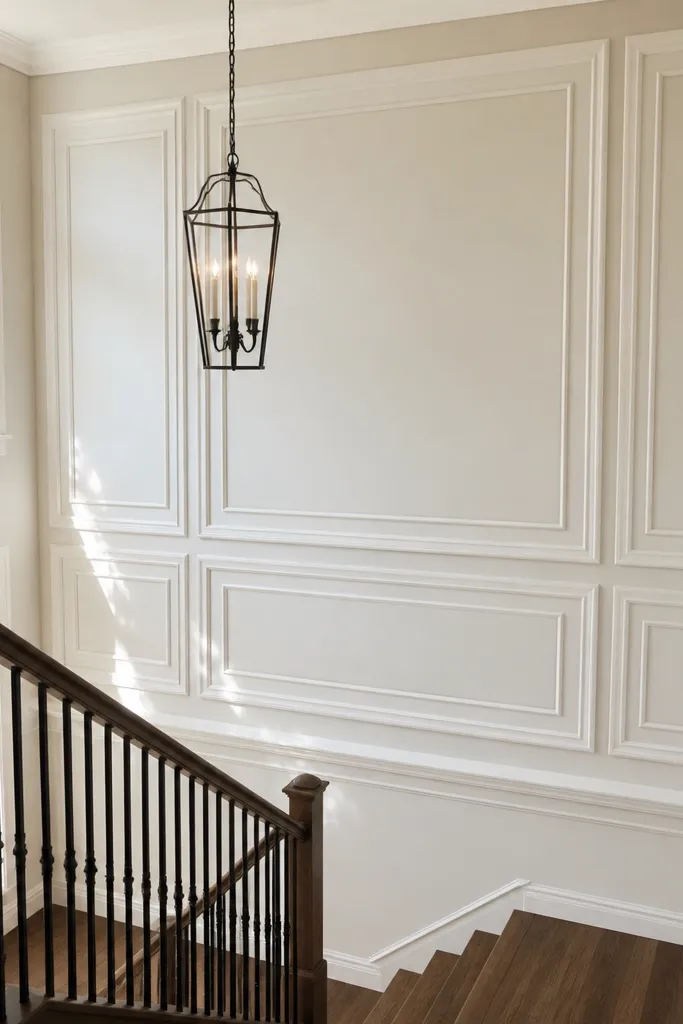
When guests stop at the landing, this is the moment to make the wall look intentional. Stacked box frames around the landing area create a strong focal panel that still feels like wainscoting. You get depth from layered trim lines, and the stacking makes the design feel architectural rather than decorative clutter. It’s also easy to keep neat because you’re working in one defined zone instead of the entire staircase run. Paint it in high contrast so the stacked frames pop in photos.
Editor's noteUse a laser level or long level to keep each nested frame perfectly parallel.
Choose the landing wall rectangle you want to frame and mark its outer boundary level. Install one outer rectangle frame, then add a second inner rectangle with thinner trim, keeping equal spacing on all sides. For extra punch, add a third layer with even thinner trim, then caulk and paint. Keep all layers aligned to the same centerline so the stack looks symmetrical.
Skip thisAvoid stacking too many layers. Three frames look crisp; four starts to look busy.
15. Gothic-Inspired Panel Tops with Small Arches
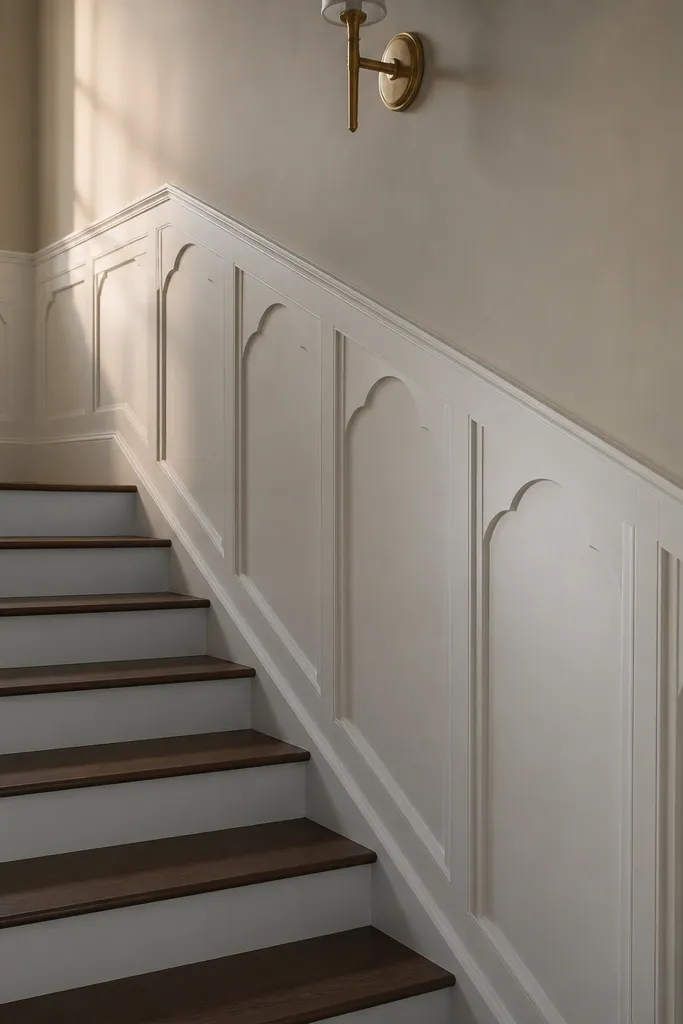
This is a decorative twist that still works in modern homes because the arches are small and controlled. The top of each panel has a gentle arch, while the bottom stays rectangular, which makes the pattern feel grounded and not costume-y. Guests stop because the arches create a silhouette that reads instantly from the stairs. The design also hides minor wall transitions since the arch shape gives you a natural visual center. Use a satin paint finish on the trim so the arch edges catch light cleanly.
Editor's noteCut one perfect arch template and trace it for the rest. Consistency beats speed.
Lay out your panel grid with consistent width and height, then mark where the arch begins on each panel. Build the outer frame with straight trim, then add arch templates for the top inner border using flexible molding strips or pre-cut arch trim pieces. Install inner borders, caulk all joints, and paint two coats. Keep arch radius consistent across every panel for a uniform look.
Skip thisDon’t freehand arches. If the radius changes between panels, the whole wall looks amateur.
16. Chevron Panel Border at the Top Rail
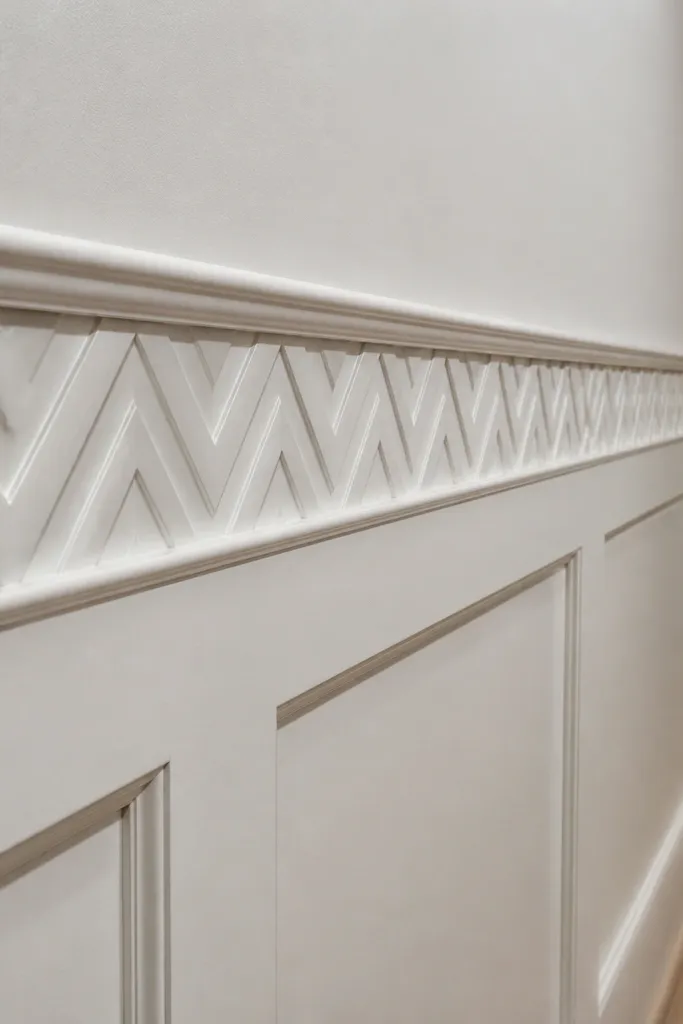
If you want guests to stop because it looks designed, add a chevron border where the eye already travels. The chevron sits along the top rail, so you only build one repeating strip instead of changing every panel. It reads like trim art, but it still functions as wainscoting because it frames the wall in a structured way. This looks especially good on staircases with a darker wall color and bright white trim. Keep the chevron small so it stays elegant and not childish.
Install your base wainscoting rails and panel frames first in simple rectangles. Then cut chevron pieces from thin trim stock, making a repeating V pattern that fits the top rail length. Dry-fit the chevron strip, then attach it along the rail edge with adhesive and finish nails. Caulk the seam lines, fill nail holes, and paint.
Cut chevron pieces with a stop block on your miter saw so every angle matches.
Don’t make the chevron too wide. Wide chevrons overpower the staircase wall.
17. Mixed Panel Sizes with One Large Center Bay
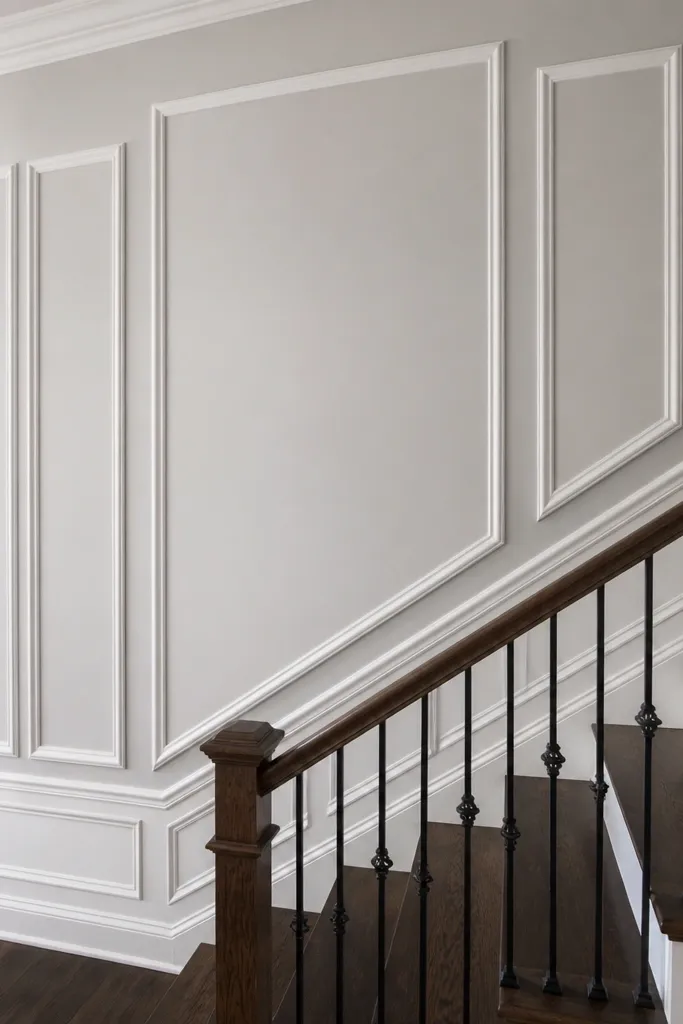
This is how you make a long staircase wall feel planned instead of repetitive. You choose one large center bay that sits at the landing line or directly behind the banister, then surround it with smaller matching panels. The contrast in scale is what stops guests — it feels like a focal piece without needing art. It also helps with tricky sightlines because the biggest panel takes the visual weight. Choose one trim color and one wall color so the sizing change is the only “pattern.”
Start by finding your center reference point on the wall — usually the landing centerline. Build the large center bay first, then plan smaller bays on both sides so the outer edges line up with your existing trim or corner blocks. Install frames in order from center outward, then add inner borders to match the style. Caulk joints and paint two coats for consistent sheen.
Use painter’s tape to map panel sizes before cutting any trim. You’ll spot awkward gaps immediately.
Avoid making the center bay off-level. Use a level line at the rail height before you attach anything.
18. Slim Vertical Slat Wainscoting with Flat Panel Frames
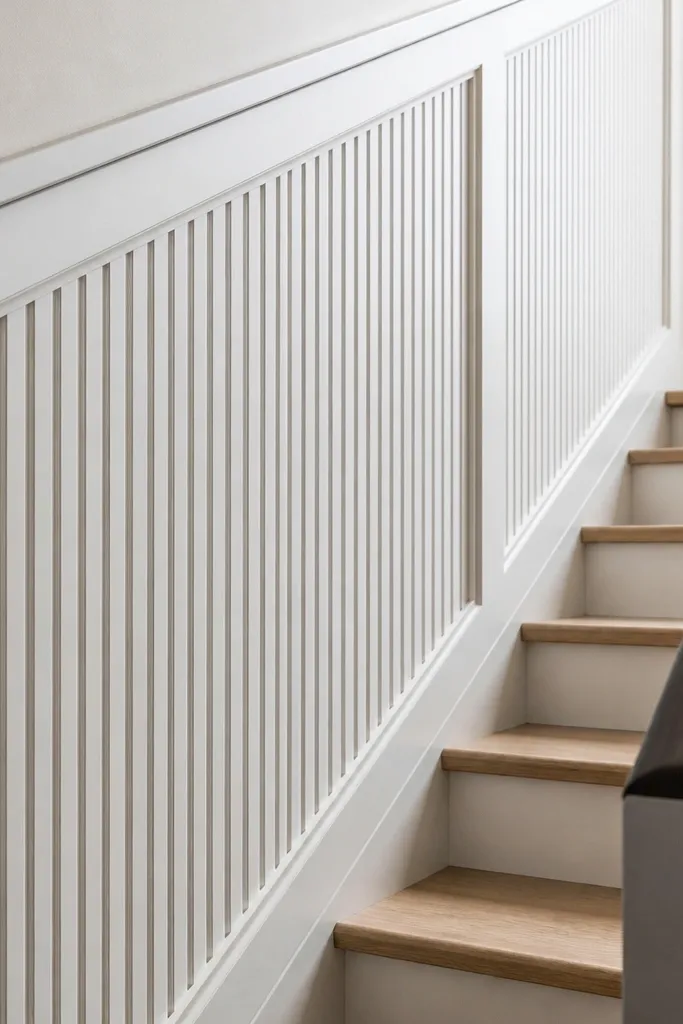
This one leans modern and looks sharp in photos because the slats create a clean texture stripe across the staircase wall. You keep rectangles as frames, but the infill is vertical slats instead of flat boards. That gives you movement as you walk, because the slats catch light at different angles. It also helps if your staircase wall shows minor unevenness — the slats visually break up the surface. Use a smooth paint finish on the slats so the texture stays crisp rather than fuzzy.
Install outer frame trim for each bay using 1x2 boards, then mark slat spacing inside each frame. Cut slats from thin primed stock like 1/4x1/2 or similar, then glue and nail them in place with even gaps. Once all slats are installed, caulk around the slat edges and fill nail holes, then paint. Work in sections so you don’t smear caulk before it sets.
Make a slat spacing spacer from scrap trim so every gap stays identical.
Avoid using slat gaps that vary. Uneven spacing reads as sloppy even if the frames are straight.
19. Raised Panel Squares in a Grid with Thick Borders
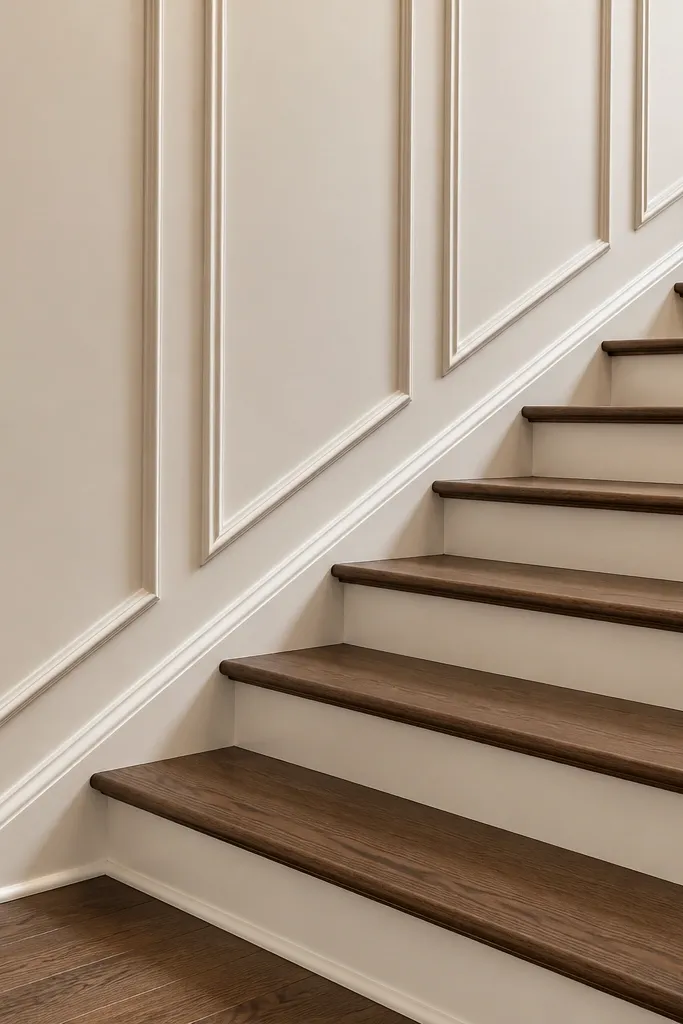
Thick borders make wainscoting feel substantial, which matters on staircases where guests view the wall from changing heights. This design uses a grid of raised square panels, each with a thicker outer border so the shadows are bold. It’s a great look for modern homes because it feels graphic and architectural. Paint the borders in satin or semigloss trim white and keep the wall color darker for contrast. The grid also helps you hide small wall imperfections because the repeated squares break up the surface.
Editor's noteUse a consistent square size and keep the grid centered. Symmetry is what makes it look expensive.
Decide your square size based on wall width and the number of bays you want, then mark a grid on the wall. Install thick outer borders first using 1x3 or wider primed trim, then add inner raised squares using thinner boards cut to fit. Attach and caulk every seam, then sand any raised edges lightly before painting two coats.
Skip thisDon’t paint over rough filler ridges. Raised panel edges show every bump.
20. Shallow Wainscoting with Picture-Frame Insets
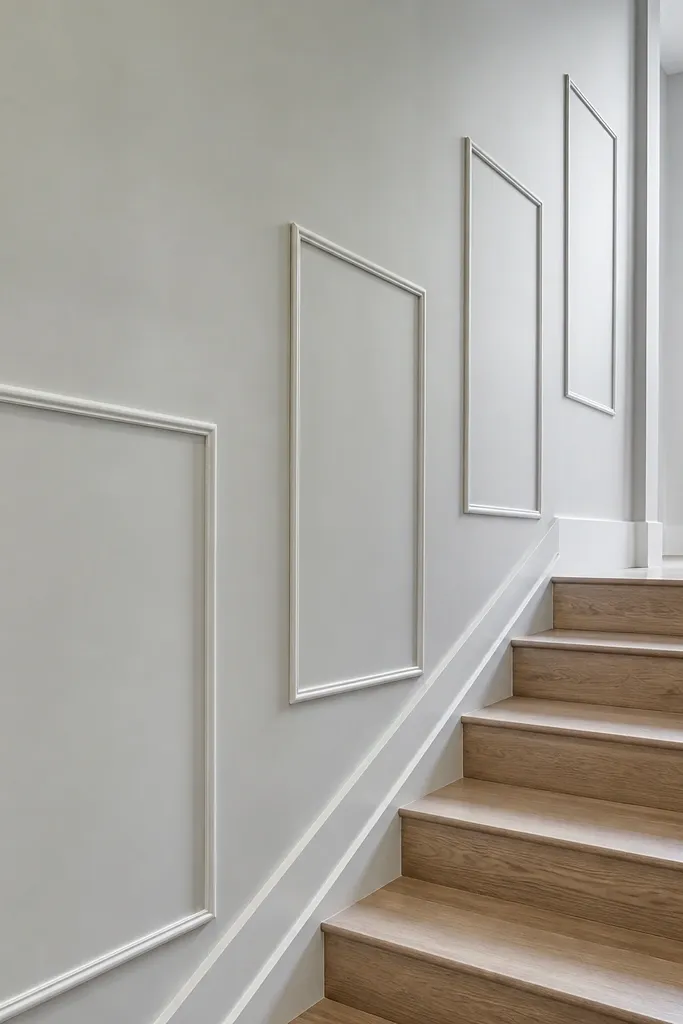
If you want quick and easy wainscoting ideas that still look custom, shallow picture-frame insets are the move. The wall stays mostly flat, but the inset rectangles create that framed, built-in look that photographs beautifully. This is ideal for narrow stair walls where bulky trim would crowd the space. Use thin trim for the insets so the total depth stays low and the design feels refined. The result is crisp shadow lines without the heavy “cabin” vibe.
Install a single horizontal rail or even just corner-to-corner outer frames, then build inner picture-frame rectangles using thin trim. Keep each inset centered and consistent in width so the wall reads as one system. Caulk seams and fill nail holes, then paint the entire area with the same trim color in two coats for even coverage.
Cut thin inset trim with a sharp blade and test-fit one frame before you commit to all of them.
Don’t make the insets too close together. Leave enough wall space between frames so the shadows separate.



