
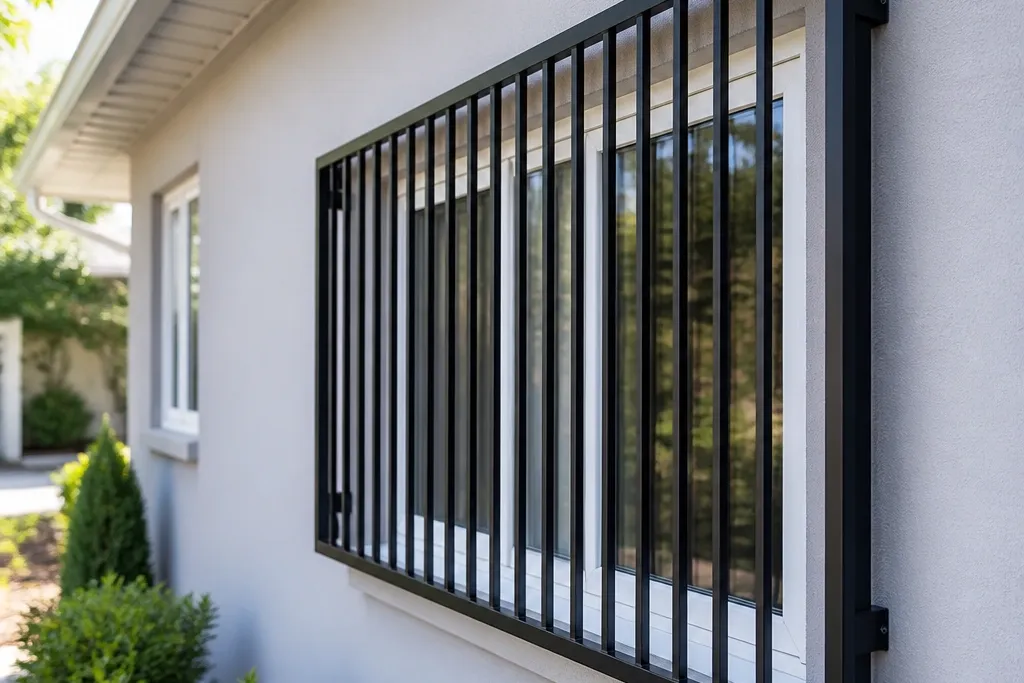
1. Straight vertical bars on a flat frame
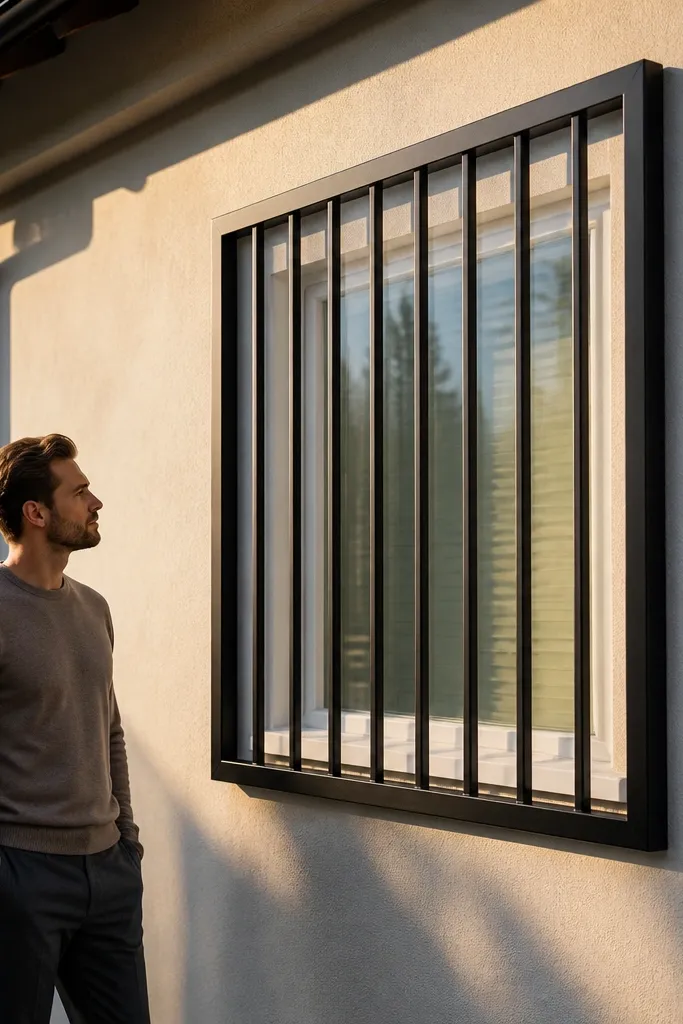
This is the quick and easy modern window grill that stays modern even from across the street. The look is clean because you keep one direction (vertical) and remove extra decoration. Use it when you want privacy without turning the room into a dark box. The flat frame gives you a crisp edge against the window trim, so the grill reads intentional instead of “some bars added.” It’s also forgiving for DIY because you can get away with simple spacing jigs and straight cuts.
Measure the window opening width and height at three points, then subtract 5-8 mm so the grill clears the trim. Cut a rectangular frame from square or flat bar (commonly 25x25 mm square or 20x30 mm flat stock) and dry-fit it on the floor to check squareness with a tape measure for corner-to-corner equality. Mark vertical bar locations using a spacing block (for example 90 mm spacing for a balanced look), then clamp each bar and tack-weld before full welding. Grind welds lightly, prime all metal surfaces and cut edges, then paint with a metal-rated exterior topcoat.
Make a cardboard or scrap-wood spacing jig and use it for every bar — it’s the fastest way to keep gaps identical.
Avoid guessing bar spacing; inconsistent gaps are what make the “modern” look collapse.
2. Vertical bars with a top cap channel
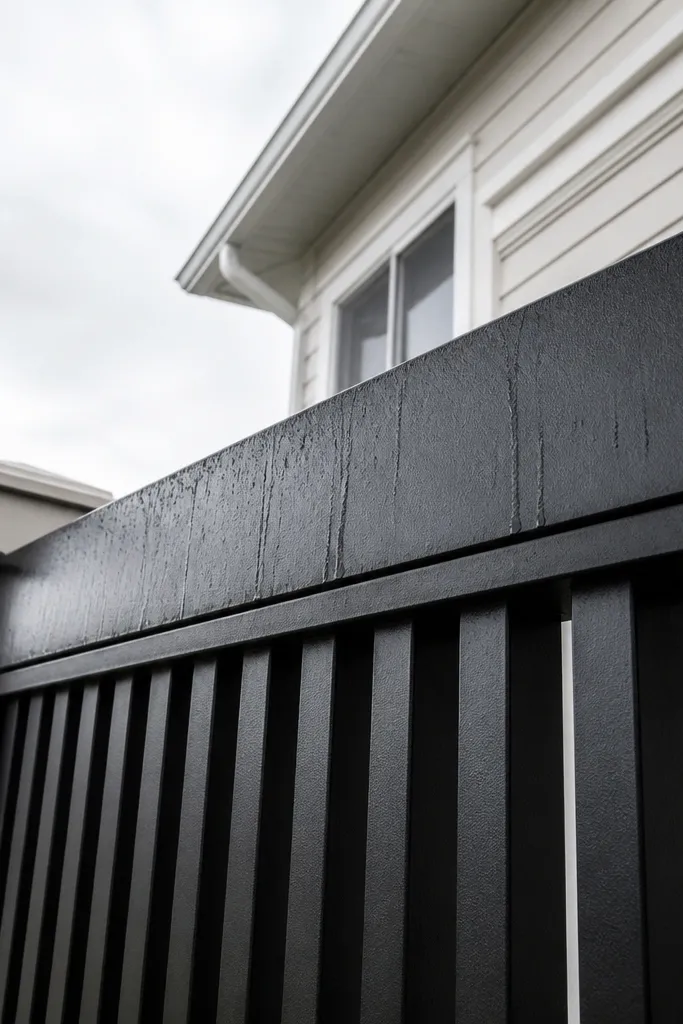
Build the same rectangular frame as a standard vertical-bar grill, then add a top cap from a thicker flat bar or a small U-channel so it sits over the top edge. Cut your vertical bars to the exact clear height between the frame rails, then tack them in place on the top cap and bottom rail. Check that each bar is perpendicular using a square or a straightedge against the bar — fix it before welding solid. After grinding, prime and paint the cap and bars in thin coats, and seal around the mounting points to reduce water creep.
Adding a top cap channel makes the grill look designed, not assembled. The thicker top piece visually anchors the bars and hides minor alignment issues at the top edge. This style works well for street-facing windows where rain splatter hits the top area — the cap gives a stronger visual and a little extra protection if you seal the mounting area well. It also gives you a place to reinforce the frame without adding ornament. If you want modern but slightly sturdier, this is a smart upgrade.
Skip thisDon’t mount the grill directly with small screws only — use proper anchors into masonry or frame into solid surround.
Editor's noteIf your window trim is uneven, the top cap visually “covers” the edge better than a thin frame.
3. Horizontal slat modern grill (narrow spacing)
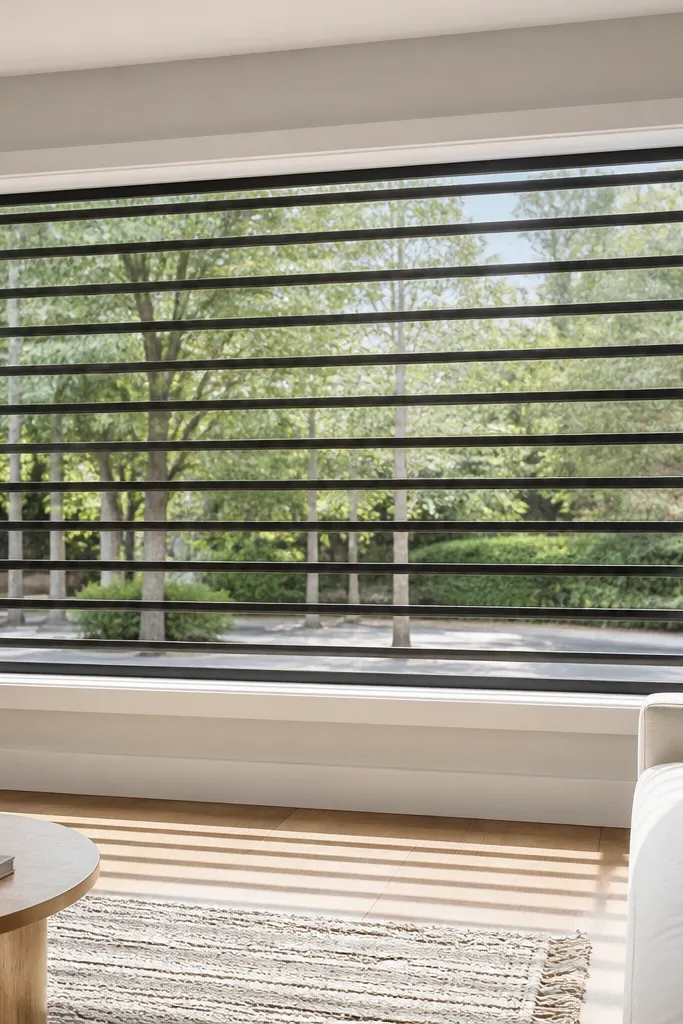
Choose slat material that doesn’t look too chunky, like 10-12 mm round bar or 12-16 mm flat bar. Cut the outer frame first and dry-fit it square. Then mark slat spacing with a ruler and spacing block so every slat lands at the same distance; tack-weld each slat starting from the center outward to keep symmetry. Weld fully, grind burrs, prime, and paint. For mounting, keep a small uniform gap from the window surface to reduce moisture trapping.
Horizontal slats look modern because they create a banded, streamlined silhouette. This style is great for rooms that need daylight and airflow — the lines guide your eye and keep the grid from feeling heavy. It also matches contemporary window shapes like wide panes. Use it when you can commit to consistent slat spacing; if the gaps vary, horizontal designs show it immediately. The grill is also straightforward to build because you’re repeating straight cuts.
Skip thisAvoid wide uneven slats; horizontal grids reveal spacing mistakes faster than vertical ones.
Editor's noteStart tack-welding from the center slat and work outward — it keeps the pattern visually centered even if the opening is slightly off.
4. Diamond pattern with flat bars (modern geometry)
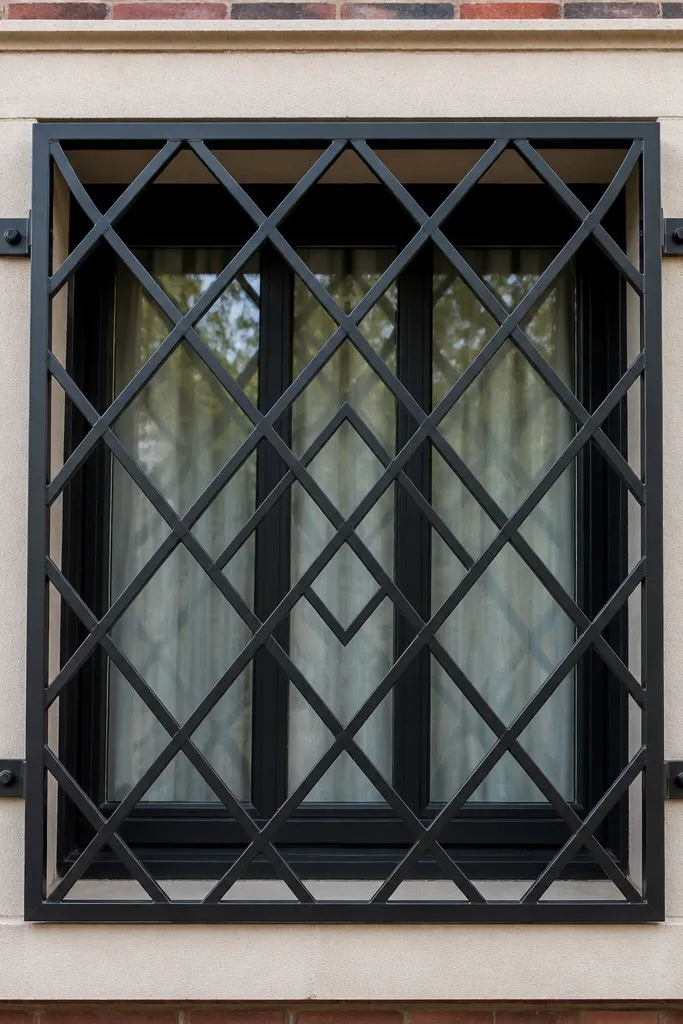
Pick a layout where the diamond centers land at consistent offsets — draw the pattern on paper using your target spacing, then transfer measurements to the frame. Cut two sets of flat bars at consistent lengths: one set for one diagonal direction and the other set for the opposite diagonal. Tack-weld the first diagonal run, then tack the opposite direction so the intersections form the diamonds; use a straightedge and measure from frame corners to keep the pattern symmetrical. After full welding, grind intersection welds smooth, prime all edges, and paint in thin coats to avoid thick blobs at each crossing.
A diamond pattern reads modern because it breaks the boring straight-grid look without turning into heavy scrollwork. It also gives you a stronger sense of structure — the crossed geometry stiffens the panel visually and can feel more secure. This is a good pick for front windows where you want the grill to look like part of the architecture. The trade-off is alignment: diamonds demand accurate angles and repeat spacing, so you should be comfortable with careful marking. If you want “modern” without going plain, this is the sweet spot.
Skip thisDon’t weld everything at once; tack, check, then weld. Diamonds drift fast if you lock in early.
Editor's noteMake one perfect test intersection on scrap first — if the angle and spacing look right, copy it for the whole panel.
5. Modern grid with a thin perimeter border (lightweight look)
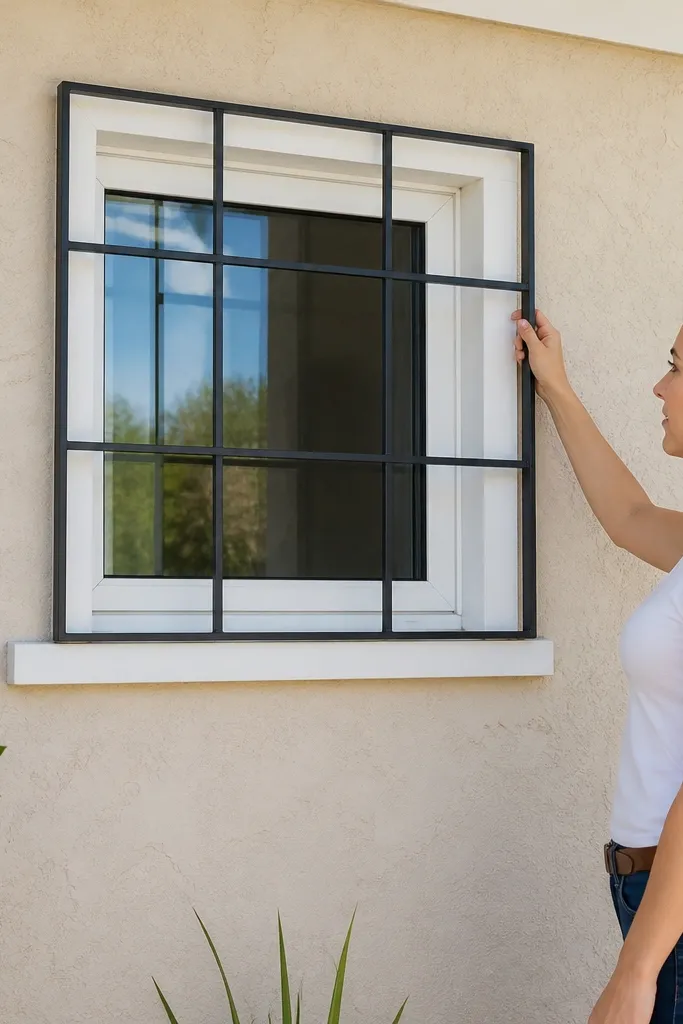
This is modern because it looks “lighter” than classic thick borders. A thin perimeter frame plus straight crossbars creates a tidy grid that doesn’t overpower the window. It’s ideal for apartments or smaller windows where a heavy classic grill makes the opening feel cramped. The build is practical: you’re cutting straight pieces and welding a rectangular frame, then adding the internal grid. If you want quick and easy modern window grill results without a lot of metal or complex cuts, this is a strong choice.
Use a relatively thin square tube or flat bar for the perimeter, then cut internal grid bars to run evenly across the frame. Dry-fit the frame and confirm squareness by measuring diagonals — they should match. Mark grid intersections with a spacing block so vertical and horizontal bars cross at consistent positions. Tack-weld the grid in sections (for example 4-6 intersections at a time), then weld fully once the whole panel looks aligned. Finish by grinding burrs, priming, and applying a metal-rated topcoat in two coats.
If your window trim is slightly bowed, clamp the grill to the frame square first, then mount — don’t try to “bend” the grill into place.
Avoid using the same bar thickness everywhere if it looks too heavy — keep the border thinner for the modern look.
6. Modern panel with vertical bars and a diagonal brace

Build a standard rectangular frame and install vertical bars with consistent spacing. Then cut a diagonal brace from flat bar or square bar sized to fit from one lower corner to the opposite upper corner inside the frame. Tack the brace after you confirm the frame is square — use a tape measure to check diagonal distances. Weld the brace and vertical bars, grind, prime, and paint. Mount with anchors so the brace isn’t doing the job of a weak installation.
A diagonal brace gives modern structure without turning the whole thing into a complicated pattern. The vertical bars handle the privacy part, and the diagonal line adds visual movement and stiffness. This works well for taller windows where a plain vertical grid can feel flimsy. You also get a “design detail” that doesn’t require scrolls or fancy bends. It’s a good DIY option because you only add one extra piece beyond the basic vertical-bar frame.
Skip thisDon’t add a brace without solid anchoring — it can’t fix a loose mount.
Editor's noteUse the diagonal brace to hide a slightly uneven corner — the line draws the eye away from tiny mounting gaps.
7. Classic grid with thick border (the safe, familiar look)
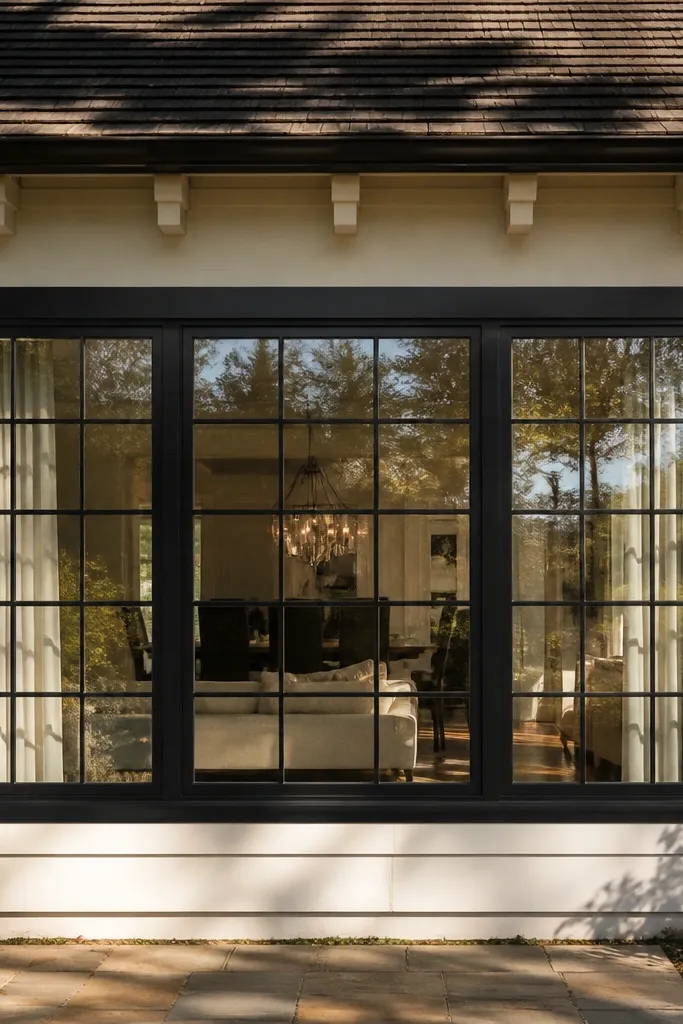
Cut the thick outer border frame first and dry-fit to check squareness. Then add internal bars in a regular grid — keep the spacing consistent so the squares look even. Tack internal bars in sections, measure diagonals again, then weld fully. Grind welds, prime all metal and cut edges, and apply a topcoat with good coverage on the thick border corners. When mounting, use multiple anchors across the border so the grill can’t flex.
Classic grids with a thick border look right on older homes because the proportions feel familiar. The thick perimeter also hides small gaps where the grill meets the trim. This is a practical choice if you want durability and a straightforward build, especially for larger windows. It does take more metal than thin modern borders, but it’s still DIY-friendly because it’s just rectangles and straight bars. If your priority is “looks finished and secure,” this style delivers.
Skip thisAvoid mounting with only two anchors; classic thick borders still twist if you don’t anchor evenly.
Editor's noteThick borders look best when the inner grid spacing is smaller than the border thickness, so the border feels purposeful.
8. Classic spear-point grill (simple points, strong silhouette)
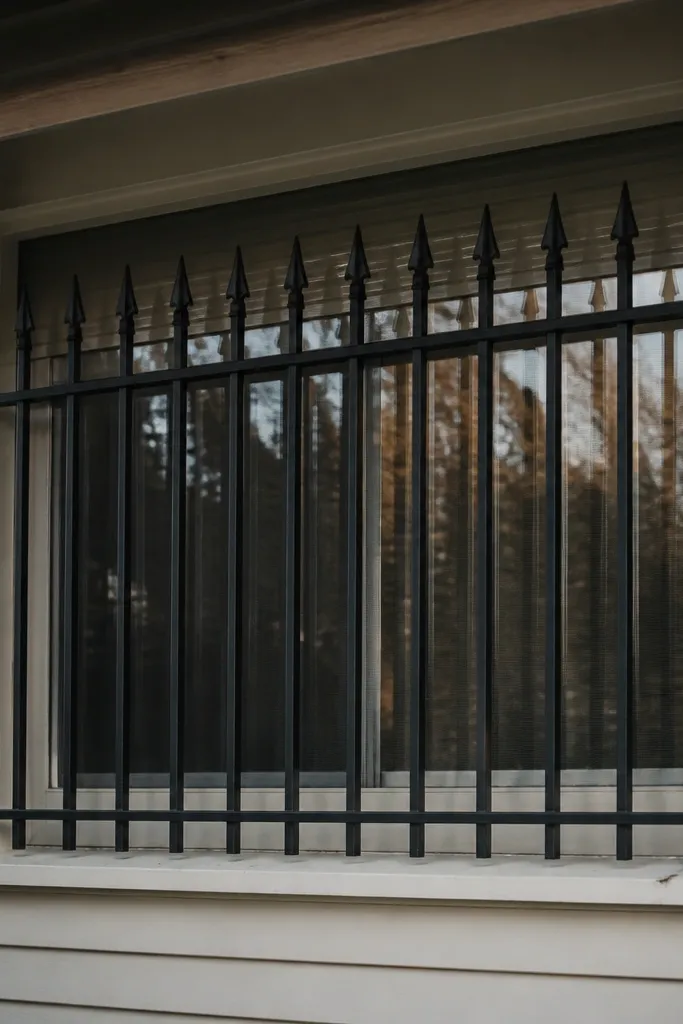
Spear-point grills are classic without going full scrollwork. The points add security presence and a familiar look, especially on single-story homes. You get a bit of decorative character while keeping the main structure straightforward: straight bars and repeatable pointed ends. This style suits front windows where you want more visual strength than a flat modern grid. It’s not the fastest if you’re fabricating points from scratch, but it’s manageable if you use pre-made spear sections or cut templates.
Decide your bar count and spacing first, then build a rectangular frame. Use straight bars for the main runs and add spear tips at the top and bottom ends, or use pre-made spear sections if you can source them. Mark positions carefully so the spear points align across the panel. Tack, check alignment across the whole width with a straightedge, then weld and grind. Prime and paint thoroughly, paying extra attention to the spear tip edges where rust starts.
If you’re cutting points yourself, make a cardboard template for the angle and trace it on every bar — repeat accuracy matters.
Don’t leave sharp burrs at spear tips; they catch paint and look messy fast.
9. Classic scroll-work center panel in a modern frame
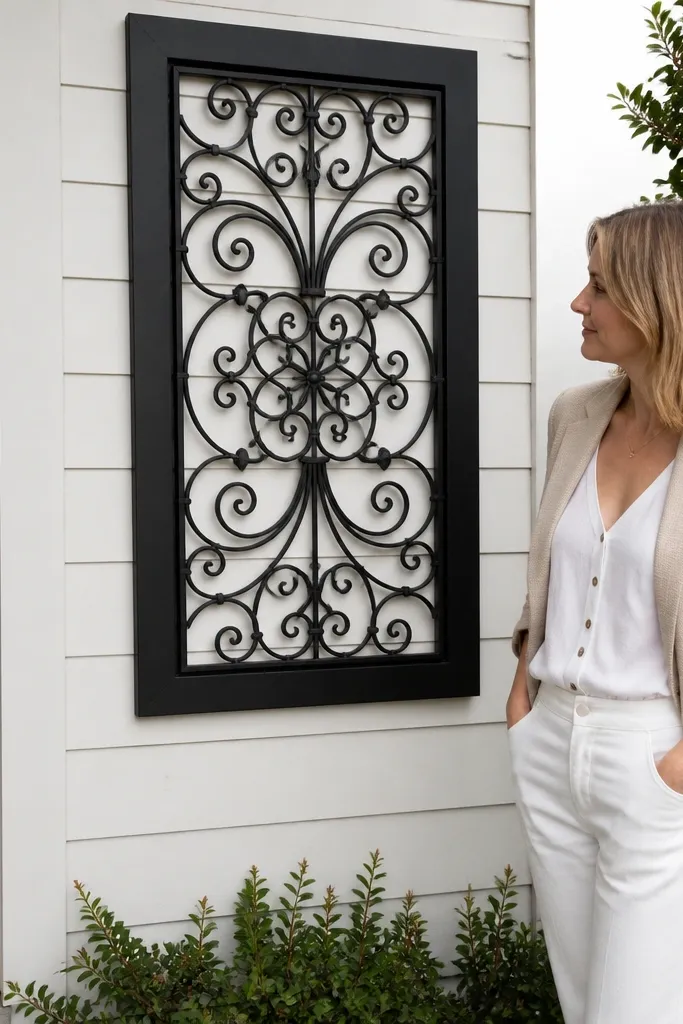
Build a modern rectangular frame with straight bars and flat edges. Then design the scroll-work as a smaller insert panel that fits inside the frame — measure the inner opening and build the scroll panel to match. Tack the insert into the frame from the back side so the front stays clean. Grind, prime, and paint the entire assembly, then seal around mounting points. Mount using a consistent gap from the window surface and secure anchors along the frame perimeter.
This is a hybrid that looks intentional instead of “random classic bits stuck on.” You keep a modern outer frame so the grill reads clean, then place scrollwork only in the center area where it’s visually contained. The result feels decorative but not cluttered. It’s a good option if you like classic detailing but you’re chasing the quick and easy modern window grill vibe for the overall structure. The scrollwork itself adds time, but the modern frame makes the installation cleaner and more square.
Skip thisAvoid welding scrolls directly to a misaligned frame; fixing it after paint is a pain.
Editor's noteKeep scrollwork confined to the center so you don’t fight alignment at the edges where the grill meets the trim.
10. Modern 'ladder' grill with evenly spaced rungs
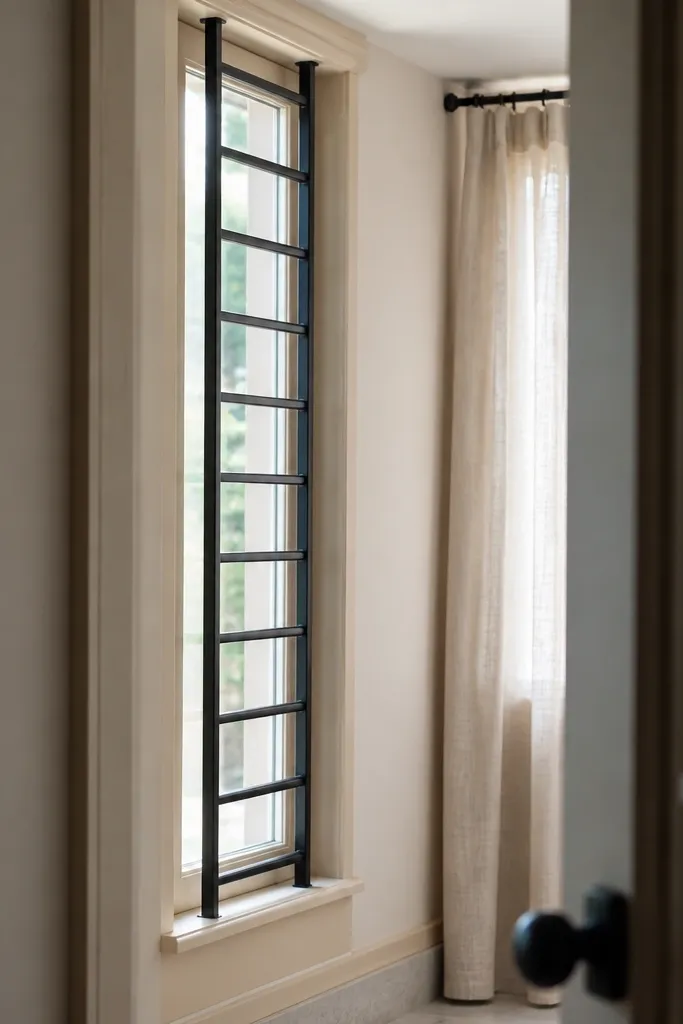
Cut two vertical rails to the window height and build a rectangular top and bottom crossbar or end caps to keep the rails straight. Mark rung positions using a spacing block, then cut rungs to sit between the rails. Tack rungs starting from the middle, then alternate left/right so the pattern stays even. Weld, grind, prime, and paint. Mount with anchors along the top and bottom rails so the grill can’t twist.
A ladder-style modern grill is clean because it repeats one simple shape: two rails and rungs. It’s a good fit for narrow windows where a full grid can feel too busy. The ladder pattern also keeps the metal volume reasonable, so the grill doesn’t look heavy. You get a modern look with less cutting and fewer intersections than a classic square grid. It’s also easy to maintain because dust and debris don’t get trapped in tight checker patterns.
Skip thisAvoid random rung spacing; ladder designs exaggerate unevenness because the eye tracks the rails.
Editor's noteUse the same rung length every time and clamp them as a group before welding — it speeds up the build.
11. Modern flat-bar frame with infill bars staggered

Start with a flat-bar rectangular frame. Lay out your first row of infill bars across the inner width, then mark the second row offset by your chosen amount (for example half the bar spacing). Tack bars in two rows at a time so you can check alignment and offset visually with a straightedge. Weld fully, grind, prime, and paint. Mount with a level line at the top so the stagger doesn’t drift across the height.
Staggered infill bars look modern because they break the rigid straight-grid feel without adding complicated shapes. The stagger gives a subtle rhythm, and it can still provide privacy while letting more light through than a dense lattice. This is a smart pick when you want a modern look but you don’t want the “diamond” pattern work. The trade-off is spacing accuracy: staggered layouts demand careful measurement so the pattern doesn’t turn into chaos.
Skip thisAvoid eyeballing the offset; staggered grills look messy if the offset shifts by a few millimeters.
Editor's noteMark offsets with a ruler and pencil on masking tape — it’s cleaner than marking directly on metal before cutting.
12. Classic lattice grill with multiple crosspieces
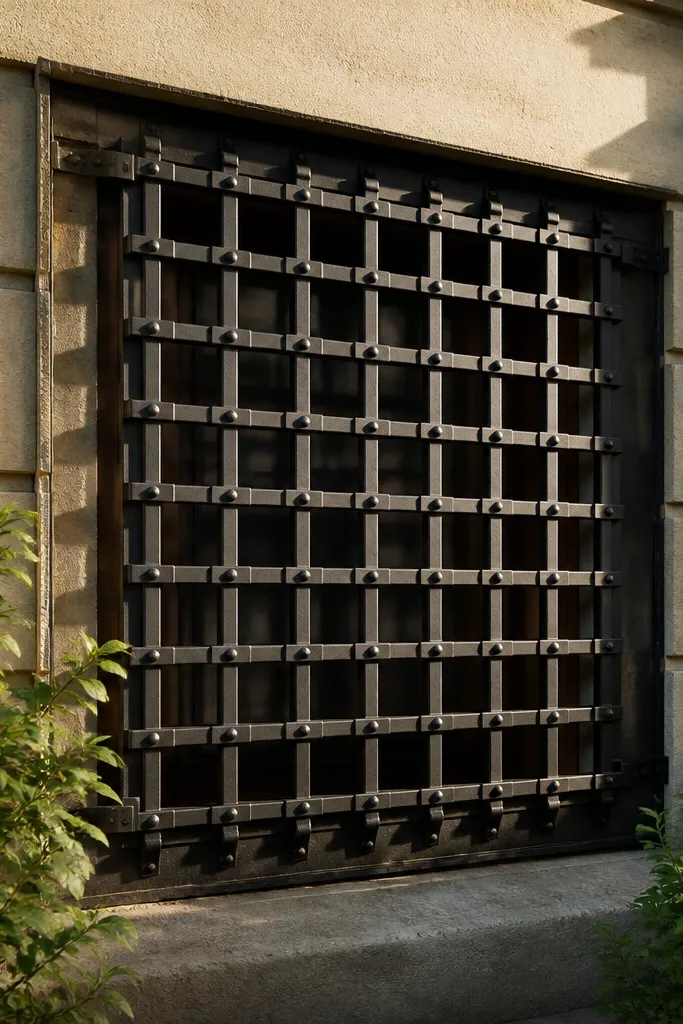
A classic lattice with many crosspieces looks secure and traditional, and it handles privacy well. It’s also forgiving if your window opening isn’t perfectly square because the dense pattern hides small imperfections. The look is busier than modern designs, but it fits classic facades and older trim styles. This is a good option if you want more coverage and you’re okay with extra bars and extra welding. The build time goes up, but the result looks “complete” even when you’re working on a budget.
Build a strong outer frame first, then decide on your square size — smaller squares mean more metal and more welding. Cut vertical and horizontal bars to create the lattice, marking intersections with a spacing block. Tack a few bars at a time, starting from the center to keep the grid balanced. Weld, grind, prime, and paint, then inspect cut edges carefully. Mount with multiple anchors across the frame so the dense lattice doesn’t flex.
Choose a consistent square size you can measure easily with a ruler — it reduces marking errors.
Avoid mixing bar thicknesses; lattice grills look cheap when the grid rhythm changes.
13. Modern minimal frame with just two internal rails
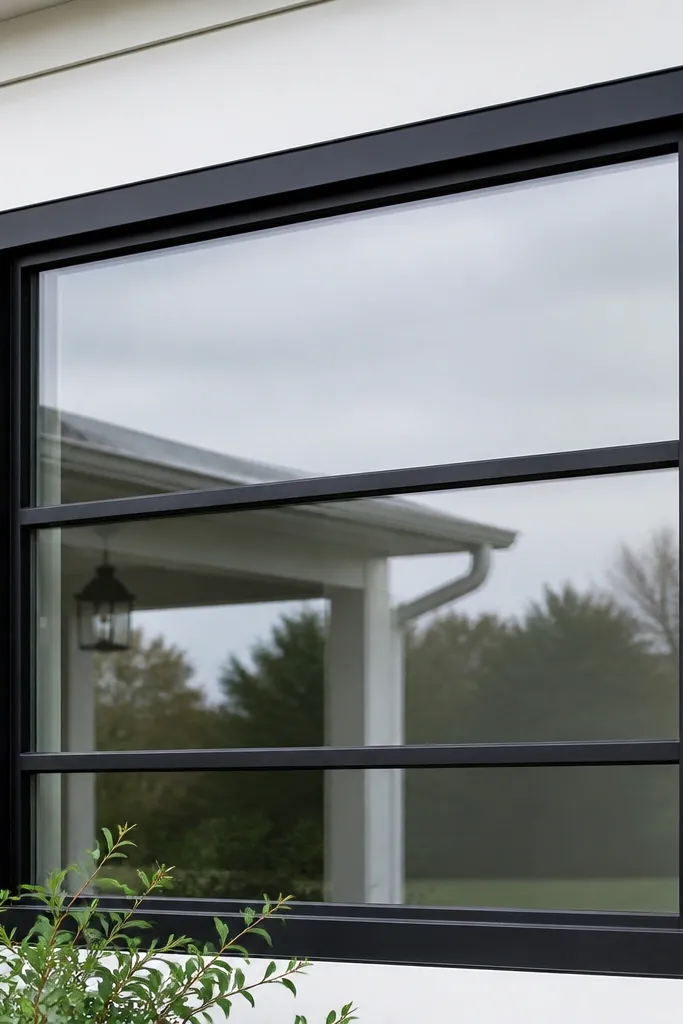
Minimal modern grills look clean because they use negative space. This style is best for windows where you want a barrier but you also want the room to feel open. It’s not the same as a “cheap fence” look — the trick is proportions: the frame must be straight, and the internal rails must be perfectly level. If you use this style, don’t overload it with small bars; keep it simple so the modern lines stay crisp. It’s also one of the quickest builds if you keep your design to a few straight pieces.
Cut a rectangular outer frame and add two internal rails — one near the top third and one near the bottom third. Mark rail positions using a measuring tape and a level so both rails match horizontally. Tack rails to the frame, check alignment across the panel, then weld. Grind, prime, and paint. Mount with a tight, even gap and secure anchors at the corners and midpoints so minimal grills don’t wobble.
Use a level to set the first rail, then measure from it for the second rail — it keeps the spacing visually balanced.
Avoid thin, flimsy frame stock; minimal grills show flex more than grid grills.
14. Classic arched-top grill using straight bars and an arched header
Build a base rectangular frame for the window width, then create an arched header from flat or square bar shaped using a template. Cut vertical bars to match the inner height under the arch, then tack them to the base frame and header. Use a template or marked template points so each vertical bar lands at the same distance from the center. Weld, grind, prime, and paint, then mount with anchors along both the base and header. Seal the mounting area so water doesn’t sit at the arch edges.
An arched-top header is classic instantly, and you can still keep it fairly clean. The arch gives a traditional silhouette without requiring scrollwork. This style works on windows with arched trim or on doors and transoms where the top shape matters. It’s a good middle ground if you want “classic” but still prefer straight bar simplicity. The key is getting the arch header shape consistent and aligning the vertical bars to it.
Skip thisAvoid welding the arch last if the frame is already out of square; it locks in the error.
Editor's noteMake a full-size paper or plywood template for the arch radius before you cut metal — it saves rework.
15. Modern window grill with hidden mounting plate (clean front face)
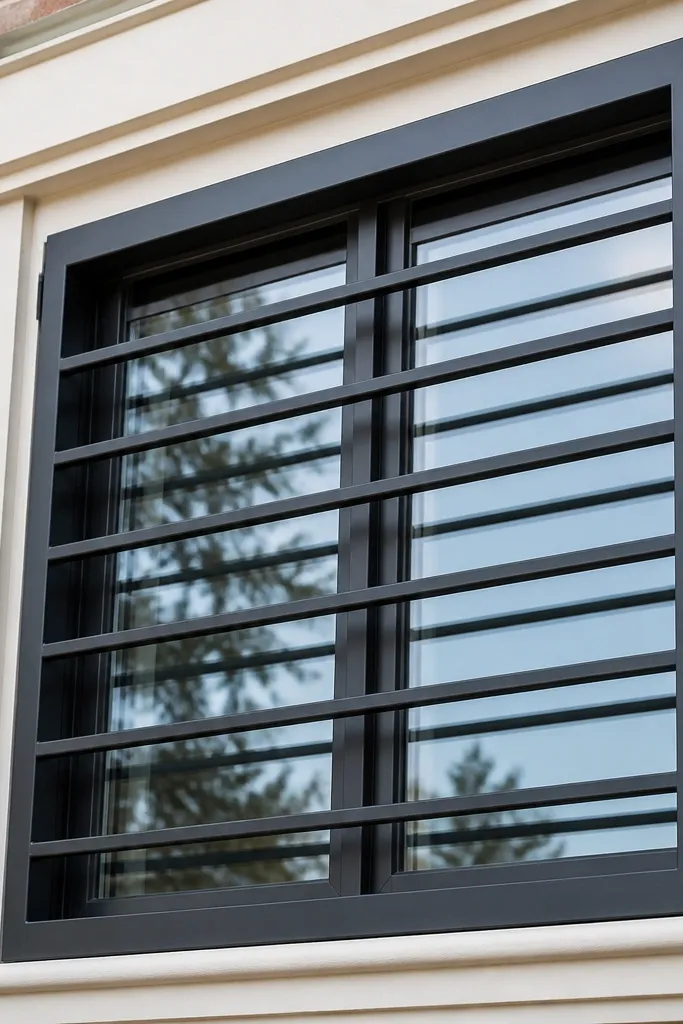
If you care about the front look, hidden mounting plates make a big difference. The grill face stays clean — no bolts or messy brackets showing — which is where modern designs win. This style also helps if you’re working around decorative trim where you don’t want hardware to clash. The trade-off is a little extra fabrication: you need an attachment plate and a way to anchor it from behind. The payoff is a more polished result that still locks solidly to the wall.
Build your grill panel with a standard modern frame, then add a mounting plate on the back side — a flat bar strip or steel plate that sits behind the frame. Mark anchor hole locations on the plate based on your wall studs or masonry pattern. Drill holes in the plate, then mount the plate first using anchors, and finally attach the grill panel to the plate using bolts or welded tabs. Grind and paint all visible surfaces, then paint or seal the hidden areas too. Check the panel is level before tightening the final fasteners.
Dry-fit the grill to the mounted plate before final paint so you can correct any alignment issues without sanding fresh coating.
Avoid skipping corrosion protection on the back side; hidden spots rust quietly and stain the front later.



