
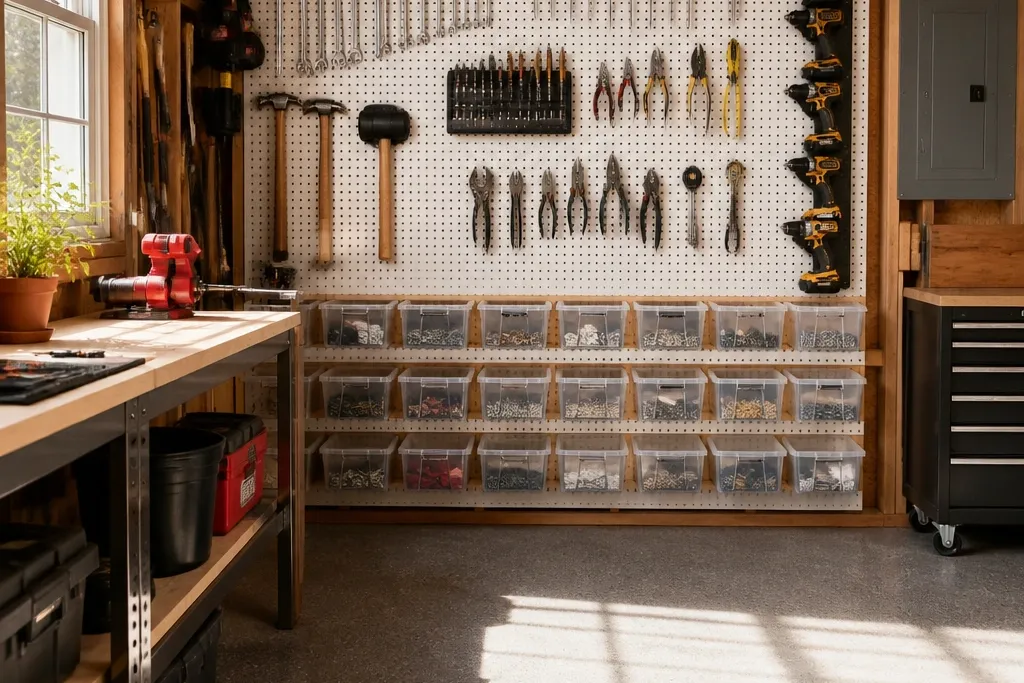

1. Stud-mounted pegboard with weight-rated hooks
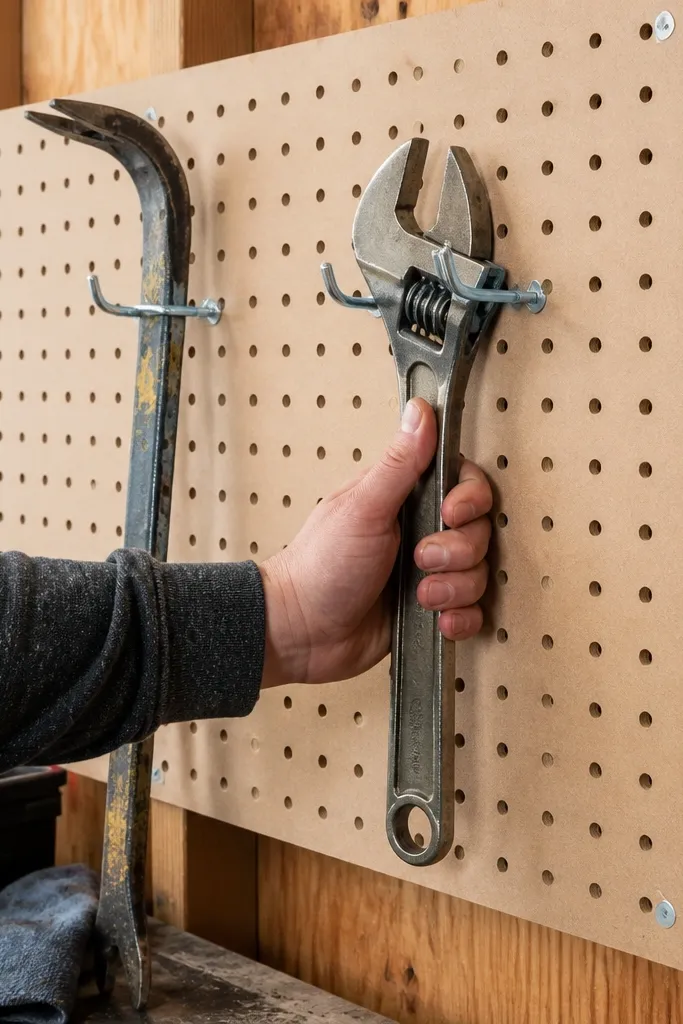
This is the pegboard setup that doesn’t sag after a few months. The trick is mounting the pegboard to studs (or to a solid plywood backer screwed to studs), then using hooks that grip the tool at the right points instead of just catching the handle. For most garages, 1/4-inch thick pegboard is fine, but you need the structure behind it. The look is clean and the function is fast: tools hang where you expect them, and you can swap hooks as your collection changes.
First, locate studs with a stud finder and mark a grid line every 16 inches. Screw a 3/4-inch plywood backer to the studs, then screw your pegboard to that backer using 1-1/4 inch wood screws at 6-inch spacing along the studs. Next, install a mix of hooks: J-hooks for screwdrivers, straight hooks for pliers, and thicker-duty hooks for hammers and pry bars. Finally, hang tools with the heavy ones closest to the stud lines and keep the pegboard “load” centered, not hanging off to the side.
Editor's noteUse a hook variety pack and test-fit one heavy tool before you commit to the whole layout.
Skip thisAvoid mounting pegboard only to drywall — it will bow and your tools will slowly drift.
2. Vertical drill holster rack with battery-ready spacing
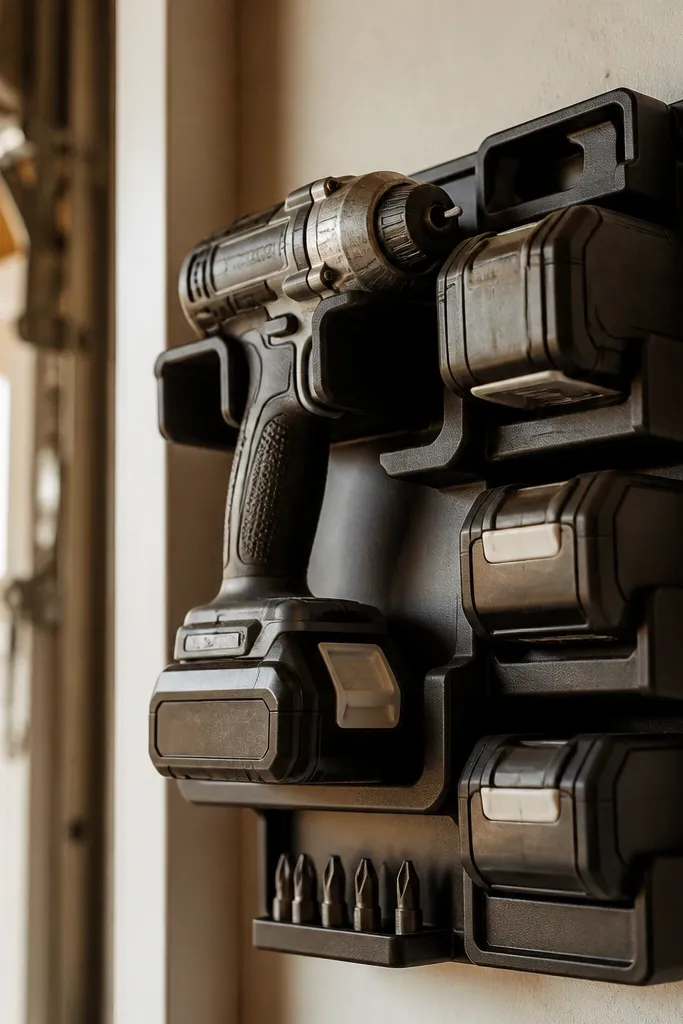
Cordless tools are the worst for generic storage because batteries make them bulky and heavy. A vertical holster rack keeps the drill’s weight supported along the body instead of hanging from the trigger area. I like this style because it also solves the “where do the batteries go” problem: you can dedicate slots for batteries so chargers stay organized. The result is a garage wall that looks intentional, and more importantly, it cuts down the time you spend hunting for the right tool.
Start by measuring the widest point of your drill bodies and the length of your battery packs. Build a rack from 3/4-inch plywood with vertical dividers spaced so each drill sits snug but not jammed, leaving 1/4-inch clearance for easy removal. Then add a separate battery slot section using 1/2-inch spacers that stop the battery from sliding but don’t crush the terminals. Finally, mount the rack to studs using a French cleat or directly through the back with at least two screws per stud location.
Editor's noteLabel the rack with tool voltage and bit-sets using clear tape over printed labels so grime doesn’t kill readability.
Skip thisAvoid tight slots that scrape paint — you’ll hate using it and you’ll stop putting tools back.
3. Magnetic bit bar under a shelf edge
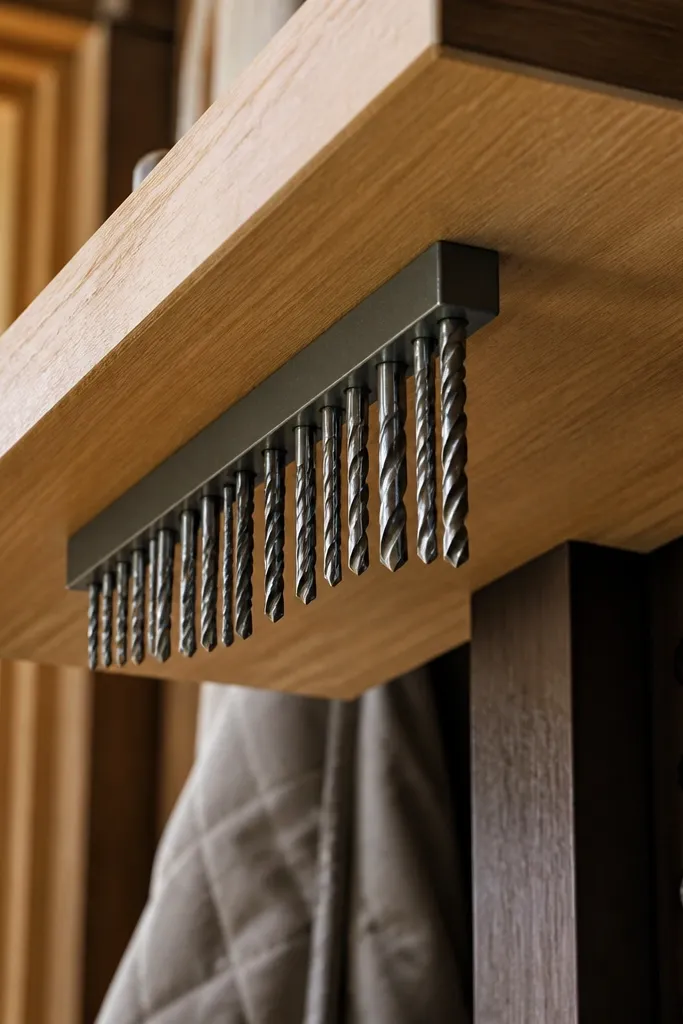
This is one of my favorite Quick and easy Garage Organization Ideas because it uses vertical real estate you already have. A magnetic bar under a shelf keeps bits visible and reachable without opening a drawer. It also prevents the “bit graveyard” effect where loose bits roll into corners. The shelf-edge placement matters: bits stay flat and don’t fall as easily as they do on a top surface.
First, choose a steel or magnetized bit bar sized to the shelf depth. Clean the underside of the shelf edge with alcohol wipe, then mount the bar using the included screws or a strong adhesive rated for metal-to-wood, depending on your bar type. Next, organize bits by size on the bar — keep the most-used sizes near the front. Finally, add a small lip or a strip of wood at the far end if your shelf is shallow so bits can’t slide off when you bump the shelf.
Editor's notePut a tiny strip of painter’s tape on the bar as a “stop” when you’re arranging sizes — remove it after you’re happy.
Skip thisAvoid sticking magnets to painted particle board without cleaning — the bond fails and the bar drops.
4. Clear-lid tool drawer bins for fasteners
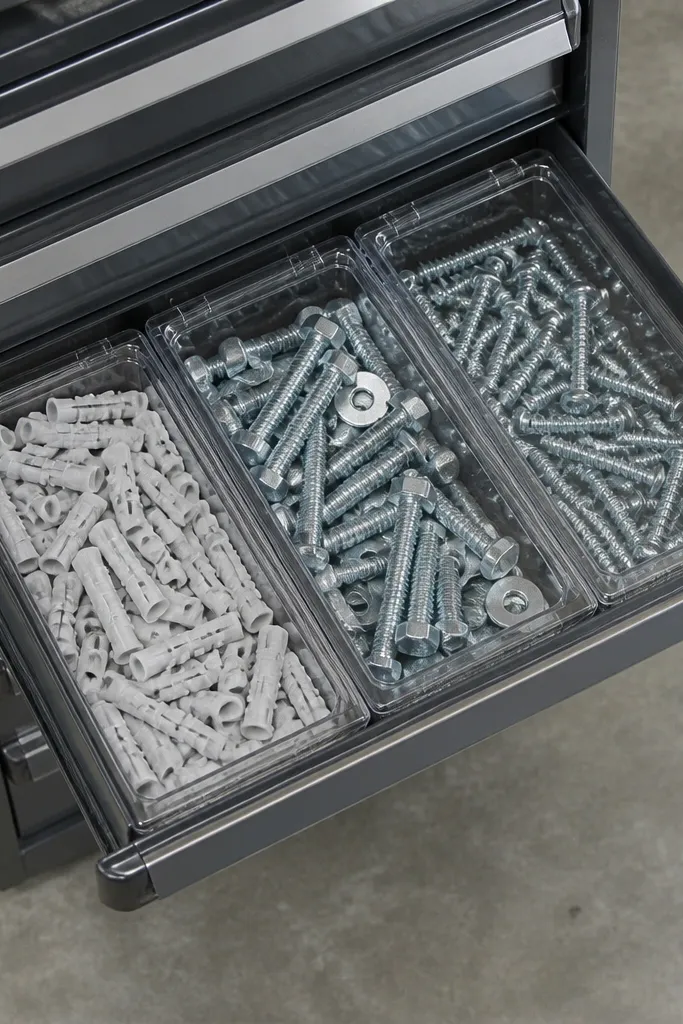
The moment you store fasteners in mixed bags, the garage becomes a search-and-swear zone. Clear-lid bins fix that by making the contents visible and keeping each size separated. You can tune the system for how you work: store drywall anchors with their matching drill bits, keep lag screws with washers, and keep specialty items in their own bins. It’s not fancy, but it prevents the slow creep of clutter because each item has a home.
Start by buying bins that fit your drawer width with minimal gaps so they don’t tip when you open the drawer. Label each bin with a durable method: laser-printed label plus clear packing tape over it, then stick the label on the bin lid. Next, create a simple grouping — one row for anchors and screws, one for washers and nuts, one for specialty fasteners like toggle bolts. Finally, add a “reset rule”: when you put something away, it must go into the matching bin, not into the drawer bottom.
Use a label format that includes both screw size and length, like 1/4-20 x 1-1/2, so you don’t guess later.
Avoid storing mixed-size bolts in one bin — you’ll end up shaking and spilling every time.
5. Corner pegboard tool wall with a right-angle layout
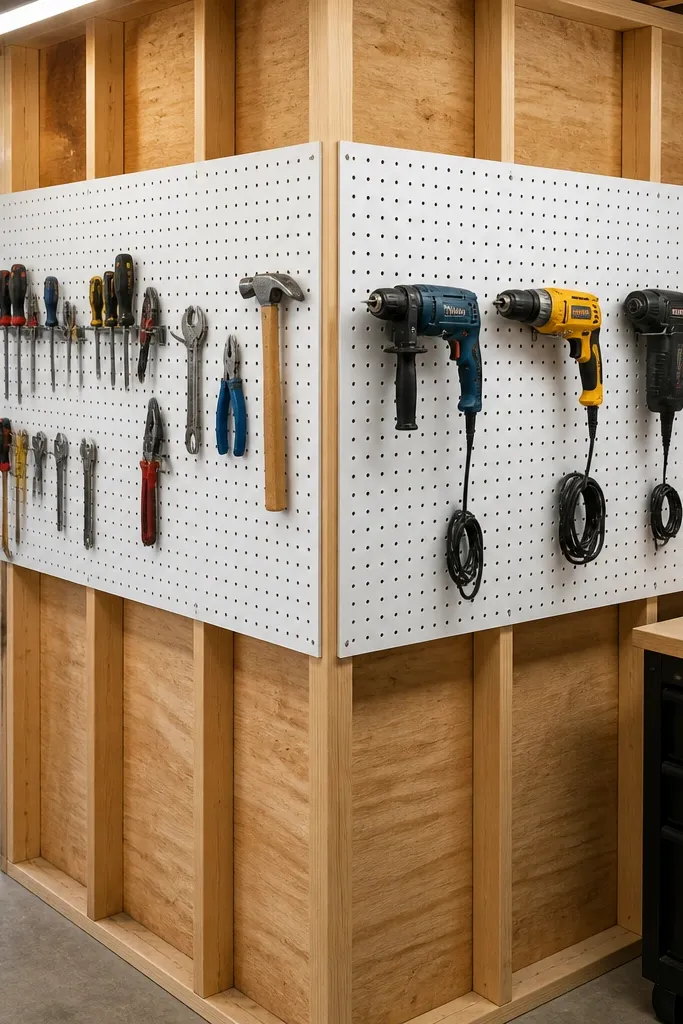
Corners are dead space until you turn them into a tool wall. A right-angle pegboard layout gives you two working sides, so you can separate hand tools from power tools without crowding. This works well for garages where the main wall already has shelves and you need more hanging room. The best part is the visibility: tools are in your face when you walk in, and you don’t have to open bins to find the right one.
First, decide which corner wall gets the heavy tools and which gets lighter tools. Install a plywood backer on both walls where you’ll mount hooks, then screw pegboard sheets into the backers. Next, lay out a category plan: one side gets measuring and cutting tools, the other gets pliers, hammers, and screwdrivers. Finally, keep hooks in straight horizontal lines so you can scan quickly, and leave 2 inches of clearance between pegboard edges and tools so you can hang gloves on the side without snagging.
Editor's noteUse longer hooks in the corner to prevent tools from knocking into each other when you pull them out.
Skip thisAvoid hanging long-handled tools across the corner edge — they’ll collide and you’ll stop using the system.
6. DIY shadow-board for frequently used hand tools
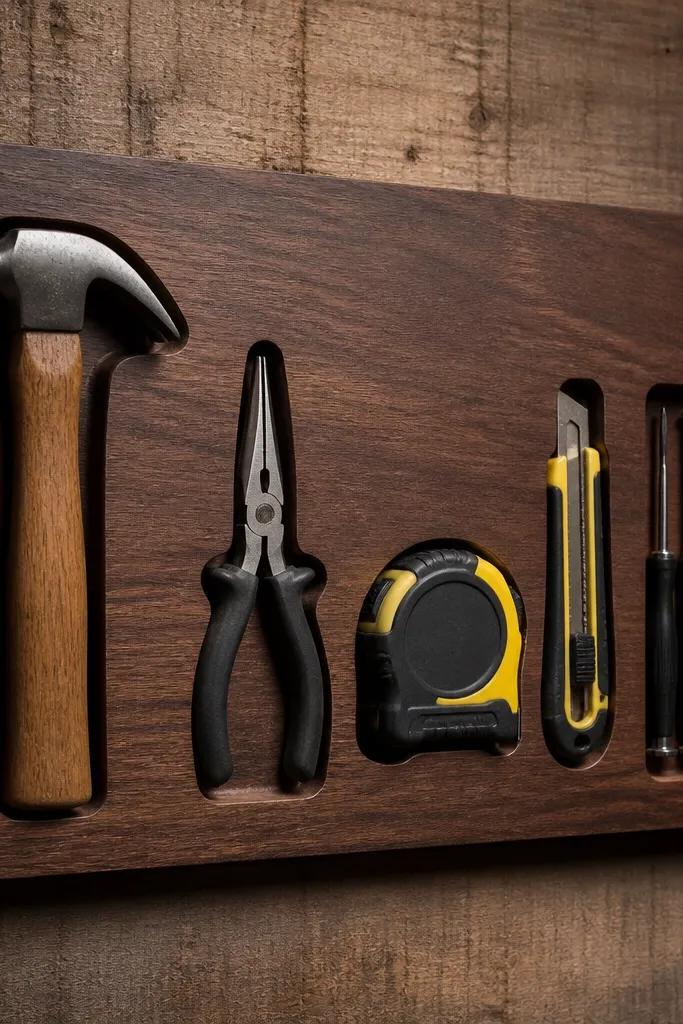
Shadow-boards are one of the cleanest ways to stop tool drift. When each tool has a cut outline or a peg position that matches the tool shape, you can put it back without thinking. This is great for the tools you grab every week: hammer, needle-nose pliers, tape measure, utility knife, and a small set of screwdrivers. The board looks tidy, but the real win is that you instantly spot what’s missing because the outline is empty.
Start by choosing a piece of 3/4-inch plywood and marking your tool outline positions on the surface. Use a jigsaw or router to create shallow recesses for tool handles or drill holes for peg placement, depending on your tool shapes. Then mount the board to studs with at least two attachment points per stud bay. Finally, finish the surface with polyurethane and add a clear coat over any printed labels so dust doesn’t dull the markings.
Put the tools you grab first at eye level and keep the heaviest ones centered on stud spacing.
Avoid trying to shadow every tool you own — focus on the weekly rotation or the board becomes clutter.
7. Floor-to-shelf pull-out bin for paint rollers and brushes
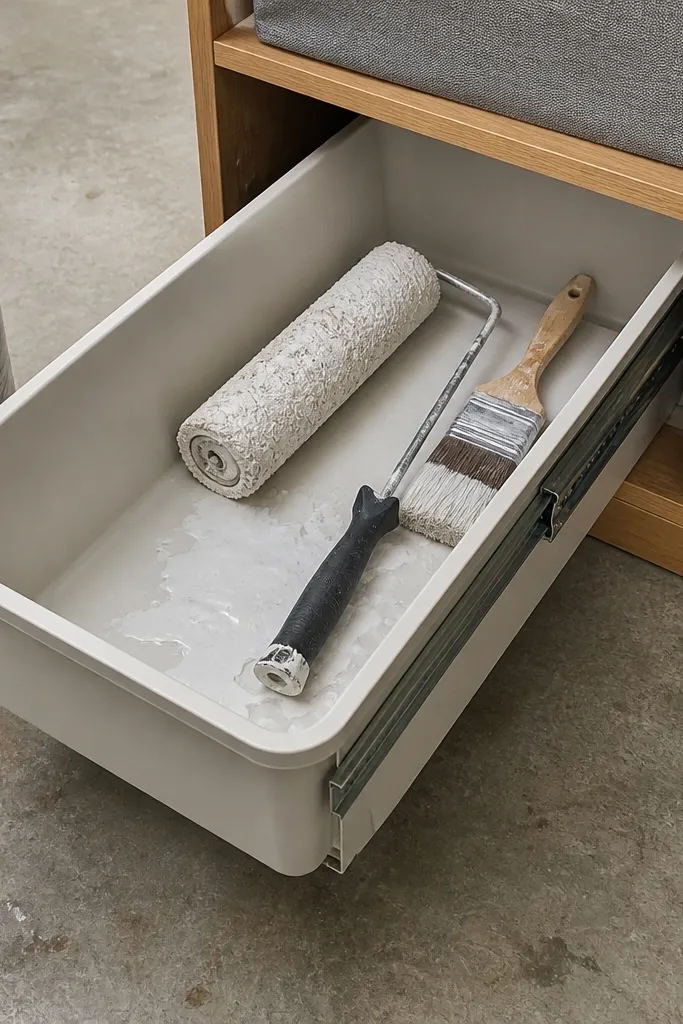
Brushes and rollers are awkward because they’re long, dirty, and easy to toss anywhere. A pull-out bin solves the mess by keeping them contained and easy to grab without digging through a shelf. It also protects other items from paint drips and keeps the garage floor cleaner. This project is a good Quick and easy Garage Organization Idea because you’re building around a problem shape, not forcing items into standard boxes.
First, measure the roller frame length and brush handle length so you choose a bin depth that allows full storage without bending bristles. Build a simple frame from 2x2 lumber or 1x2 cleats and mount it under a shelf so it slides forward. Then attach drawer slides to the frame and bin — use full extension slides if the shelf is deep. Finally, add a front stop so the bin doesn’t pull out too far, and line the bin interior with plastic sheeting or a washable mat.
Label the bin by paint type or room use, like “trim” and “walls,” so you don’t cross-contaminate.
Avoid stuffing brushes into tight lids — dried bristles break and you’ll waste money replacing them.
8. Wall-mounted lawn mower cord wrap with tool hooks
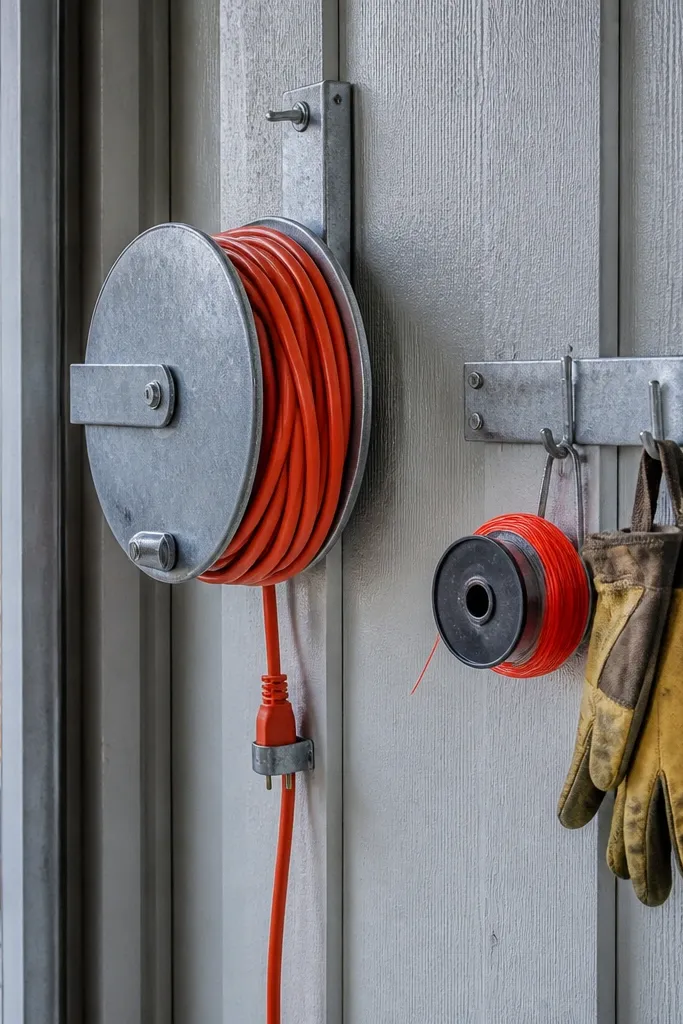
Cords and string trimmer gear clutter up garages because they’re easy to toss and hard to store neatly. A dedicated cord wrap system keeps extension cords from becoming a tangled knot pile. Pair it with a small hook strip for the trimmer line spool, extra blades, and a compact pair of gloves. This setup is quick because it’s mostly hardware mounting, and it has a real payoff: you stop wasting time untangling and you reduce the chance of cord damage from kinks.
First, mount a cord reel or wall spool to studs using the mounting holes provided, or use a backing board if the reel requires multiple screws. Then add a vertical hook strip to store trimmer accessories at a height you can reach without stepping. Next, wrap cords with a consistent method: 8-shaped loops or a simple figure-eight, then secure with a Velcro strap. Finally, store the strap and accessories in the same zone so you don’t create a new mess elsewhere.
Editor's noteKeep the reel near the door you use most so cords aren’t stretched across the garage floor.
Skip thisAvoid wrapping cords too tight around small diameters — it weakens the cable over time.
9. Overhead bike-style tool rail for long-handled tools
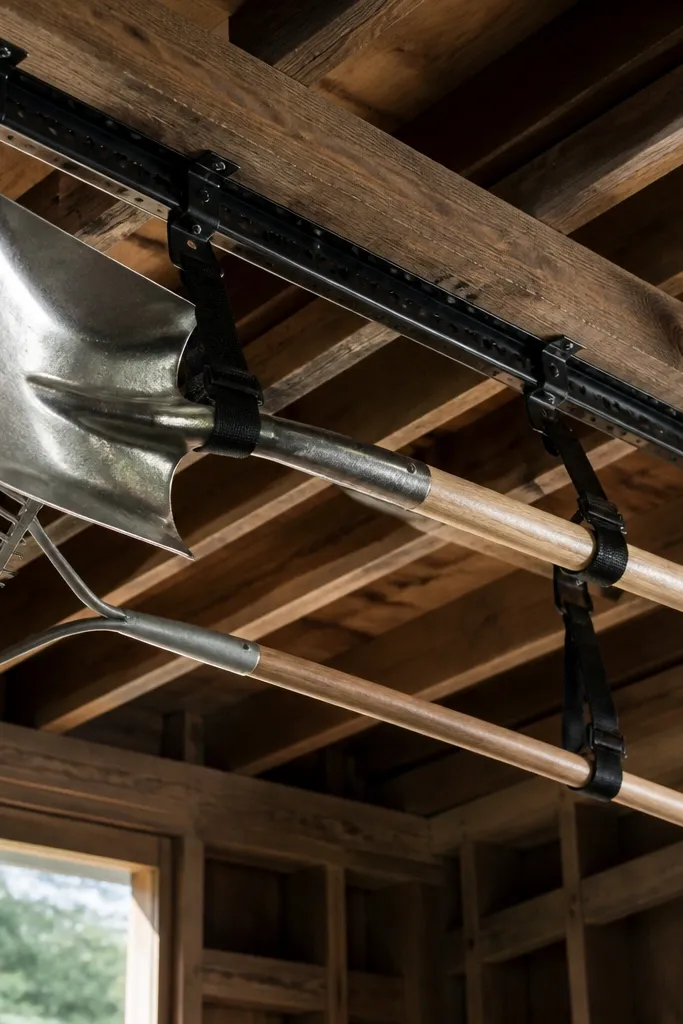
Long-handled tools take up floor space and become trip hazards. An overhead rail with straps or hooks keeps them out of the way and makes the garage safer. This is one of the best Quick and easy Garage Organization Ideas when you have low shelves and need vertical storage. The key is using straps or hangers that distribute weight so the handles don’t twist or slip. You also get a cleaner floor, which makes everything else easier to organize.
First, measure the longest tool length and decide the hanging height so you clear the door and you can still grab the handle comfortably. Install a metal rail or two parallel steel angle brackets into studs or into a properly backed mounting point. Then attach straps with rubber lining or heavy-duty S-hooks so the tool hangs from the handle without crushing it. Finally, set the strap tension so the tool rests snugly and doesn’t swing when you walk by.
Add a small rubber bumper on the rail where straps meet metal to prevent squeaks and handle scuffs.
Avoid hanging heavy tools from a single drywall anchor — the rail will loosen and the tool will drop.
10. Magnetic socket strip for sockets and extensions
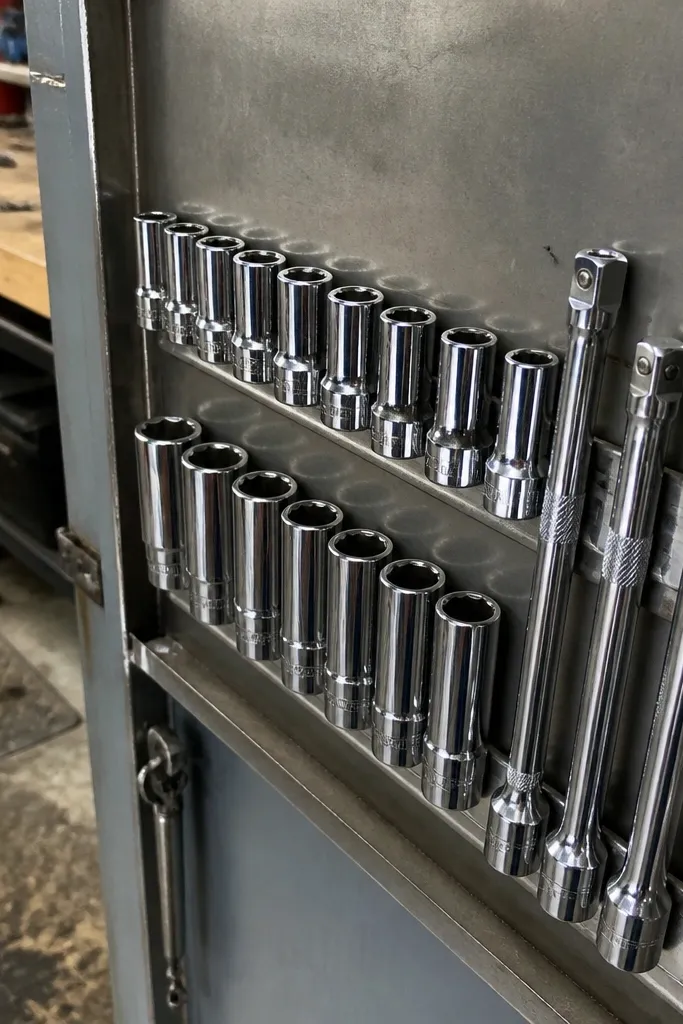
Sockets and extensions are the poster children for “I swear I had it.” A magnetic strip makes them easy to see and quick to grab, and it keeps them from disappearing into bins. This works especially well if you already have a metal toolbox or you don’t want to build a whole drawer system. The magnet holds steel socket bodies well, and the strip format keeps sizes visible so you don’t rummage. It’s fast to install and looks tidy once you line up sizes.
Start by choosing a magnetic strip with enough length for your most-used set, and mount it to studs or a solid backing board. Clean the mounting surface, then screw the strip in place using the provided holes. Next, arrange sockets by size — keep common sizes in a row at eye level, and extensions below or to the side. Finally, add a small label at each end of the strip, like “1/4 drive” and “3/8 drive,” so you separate systems at a glance.
Use painter’s tape to map your size order before you mount — magnets are permanent once they’re aligned.
Avoid sticking the strip to plastic or thin trim — it will peel and you’ll lose the whole set.
11. Pegboard wrench rack with angled support arms
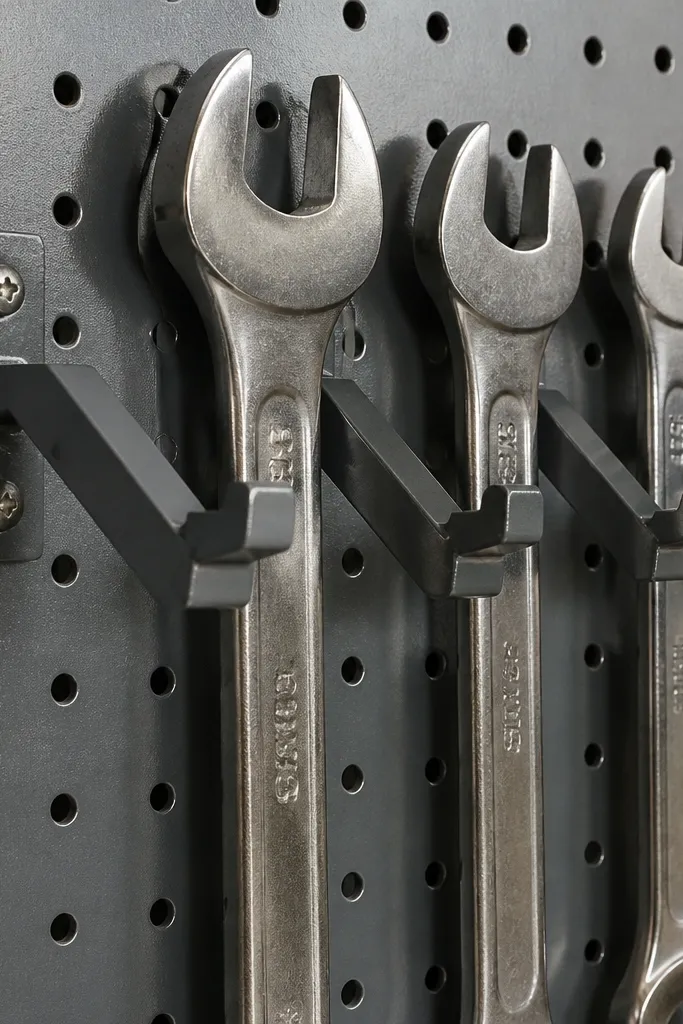
Wrenches don’t hang well on simple hooks because they’re heavy and the jaws want to rotate. An angled support rack solves that by holding the wrench at two contact points so it stays put. This is a great Quick and easy Garage Organization Idea when you want wrenches visible and sorted by size. It also keeps the jaws from scraping each other, which matters if your wrenches are chrome and you care about finish. The layout looks sharp and the retrieval is quick because sizes line up.
First, pick metal wrench hangers or build your own from scrap angle aluminum and pegboard-compatible mounting plates. Mount the rack to studs or to a plywood backer behind the pegboard so the weight is supported. Then place the angled arms so the wrench rests with the jaw opening facing outward and the handle end supported. Finally, sort by size and leave a small gap between wrenches so you can pull one without catching the next.
If you store both metric and SAE wrenches, split them into two zones so you don’t grab the wrong one under time pressure.
Avoid hanging wrenches by the jaw tip only — they slip and you end up re-hanging them every time.
12. Toolbox drawer foam for layout that stays clean
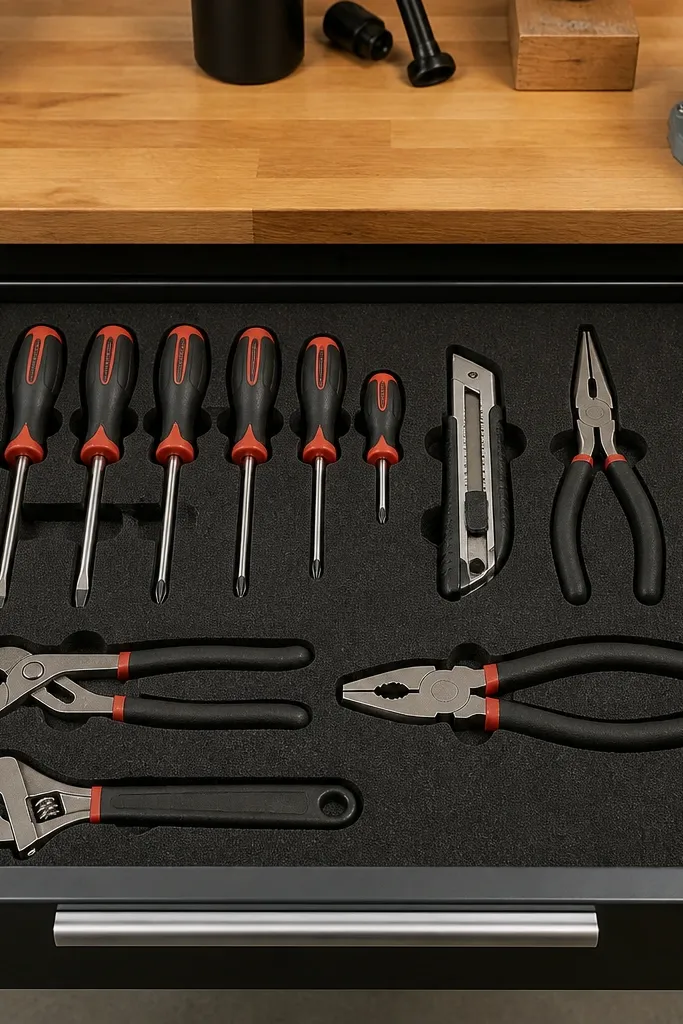
Foam inserts are underrated for garage tool storage because they stop the “pile” problem. When each tool has a shaped spot, the drawer stays tidy even when you’re working fast. This is especially useful for small hand tools that get tossed into a drawer because they don’t have a good home on the wall. Foam also protects tool finishes and reduces rattling. The goal here is simple: you open the drawer and every tool has a place.
Start by measuring the inside width and depth of your toolbox drawer. Buy closed-cell foam sheets and cut a base layer, then carve shallow pockets for each tool using a utility knife and a template made from cardboard. Next, press tools into the foam to mark where they sit, then cut to match tool outline depth. Finally, add a thin clear plastic liner on top of the foam if your garage gets wet — it keeps foam from absorbing grime.
Editor's noteUse a slightly loose fit for pliers handles so you can remove them with gloves without tearing foam.
Skip thisAvoid cutting foam too deep — you’ll jam tools in and the drawer will get messy again.
13. PVC organizer rails for extension cords and air hoses
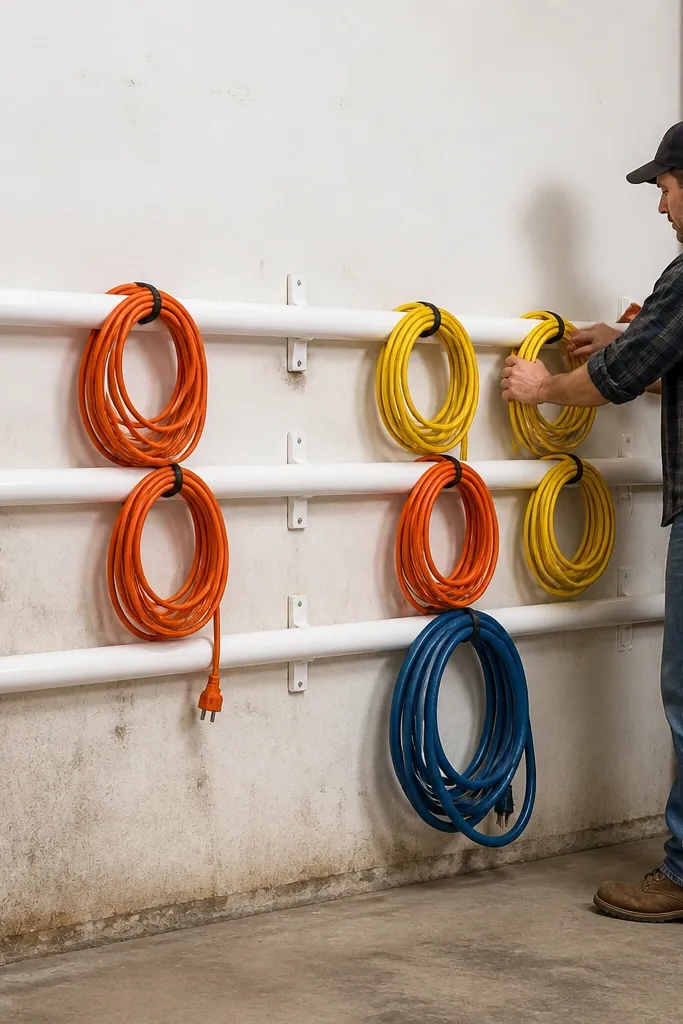
PVC rails are a cheap way to tame long flexible gear that otherwise lives on the floor. The idea is to guide coiled cords and air hoses into consistent lanes so they don’t tangle. This works well in garages where you want a clean wall but don’t want to buy expensive reels. PVC also handles dust and minor splashes, and it’s easy to modify later when your cord set changes. The best part is you get a repeatable coil position — grab, pull, use, return without reworking the whole coil.
First, cut PVC pipe segments into short standoff rails or use flat PVC strip sections, then drill holes where you’ll mount the rails to studs. Use 1/2-inch or 3/4-inch PVC depending on how thick your hose/cable is, and sand the cut edges so they don’t snag. Next, mount the rails in a vertical grid so each coil has a separate lane and doesn’t overlap. Finally, wrap cords using a consistent coil method and secure with Velcro straps so they return to the same shape.
Editor's noteDrill a small drain hole in the lowest rail if your garage gets wet so water doesn’t sit in the PVC.
Skip thisAvoid mounting PVC to drywall without studs — the rails will pull out after you hang a heavy hose.
14. Under-shelf wall cabinet for small tools with magnetic latches
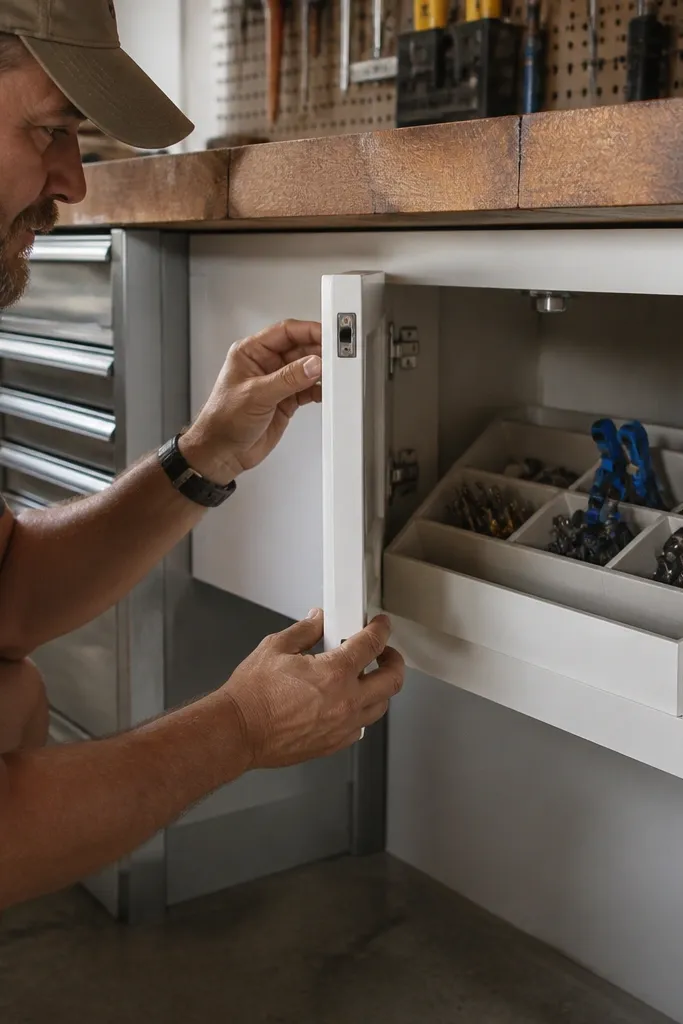
Small tools get messy because they’re too annoying to bin but too important to lose. An under-shelf cabinet keeps them out of sight, dust off, and still reachable. Magnetic latches are key because they open quickly and close tight without fumbling with tiny knobs. This is Quick and easy when you already have a shelf line and want to add storage without reorganizing the whole garage. You’ll also stop the habit of leaving loose tools on the workbench because they now have a lid and a clear home.
First, build a small cabinet box from 1/2-inch plywood and add internal dividers based on your most common tools. Install magnetic catches on the face and a metal strike plate inside so the door closes flush. Next, mount the cabinet to studs under an existing shelf or directly to the wall at a comfortable reach height. Finally, line the inside with a thin plastic sheet so you can wipe it clean and add a simple label strip on the inside of the door.
Use two magnets on the latch side so the door stays aligned and doesn’t sag over time.
Avoid cheap self-adhesive magnets — they peel off with garage heat and dust.
15. Wall-mounted level and measuring tool rack with spring clips
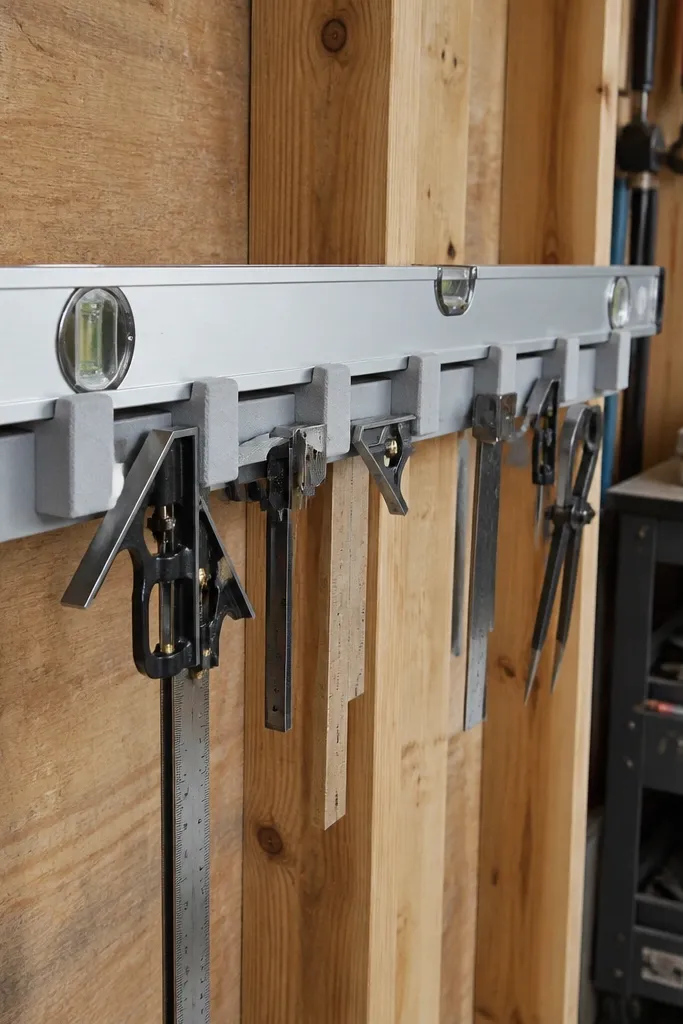
Levels, straightedges, and measuring tapes are long, awkward, and easy to lean against shelves until they fall. A measuring tool rack with spring clips keeps them controlled and prevents edge damage. The foam stops matter: they stop metal from chewing into wood and they reduce rattling. This project fits Quick and easy Garage Organization Ideas because it’s mostly mounting and clip placement, not full woodworking. You get a garage where measuring tools are always ready and your work surface stays clear.
First, choose a rack board from 3/4-inch plywood and mount it to studs at a height you can reach without stepping. Install spring clips or adjustable tool holders sized for your straightedges and levels, then add foam strips at contact points. Next, hang measuring tapes on small hooks or a dedicated clip holder so the tape doesn’t stay extended and get bent. Finally, protect the rack face with a wipeable finish like polyurethane or a clear coat made for workshop use.
Store levels with the vial facing outward so you can read the bubble direction at a glance.
Avoid storing levels flat on a shelf with weight on top — the straightedge edges get warped.



