

1. Corridor Rail for Hangers (Same Height Line)
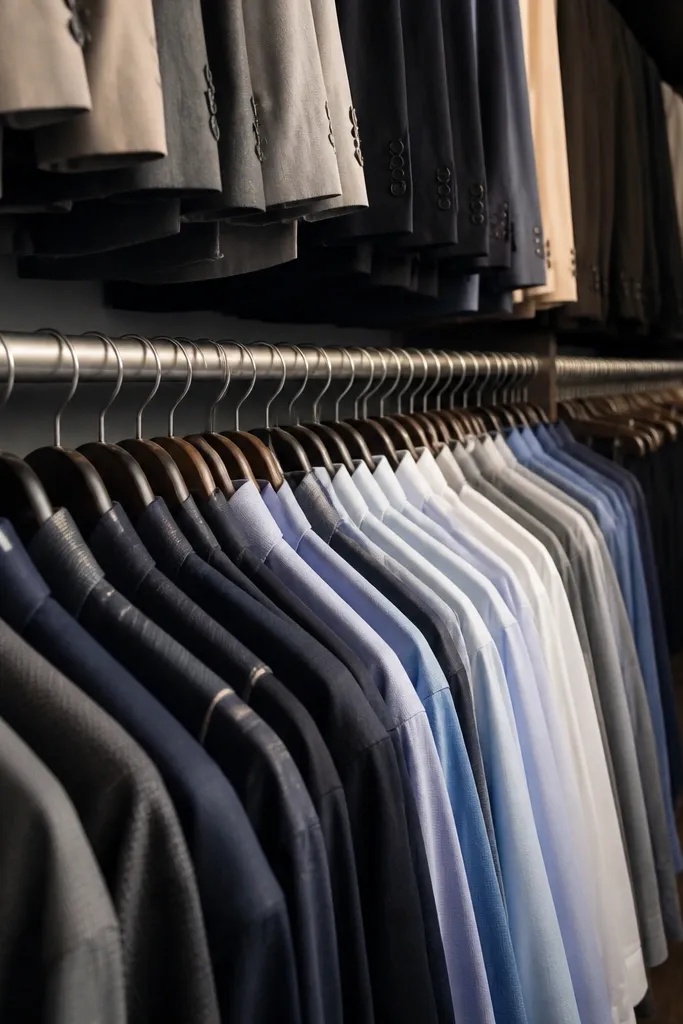
This is the fastest way to make a closet look sorted because it creates one clean hanger plane. When tops and bottoms hang at different heights, your eye reads it as clutter even if the closet is tidy. Add a second rail or a narrow “corral” rail so every hanger’s hook sits in the same vertical spot. The look is crisp, and you also stop the slow drift where heavy items slide forward and block lighter ones.
Measure your current rod height and decide the hanger line you want, usually 60-62 inches from the floor for everyday tops. Install a second rod at that line using a drill, a level, and two wall brackets or a stud-mounted kit. Test with 5-6 hangers from different garment weights, then adjust until sleeves hang without pulling. Finally, add a small stop strip or rail lip so hangers can’t slide toward the door.
Use a level on the brackets, not the floor. Closet floors lie.
Don’t mount the rail to drywall alone — it will loosen and the whole line breaks.
2. Fabric Bin Wall with Matching Label Tabs
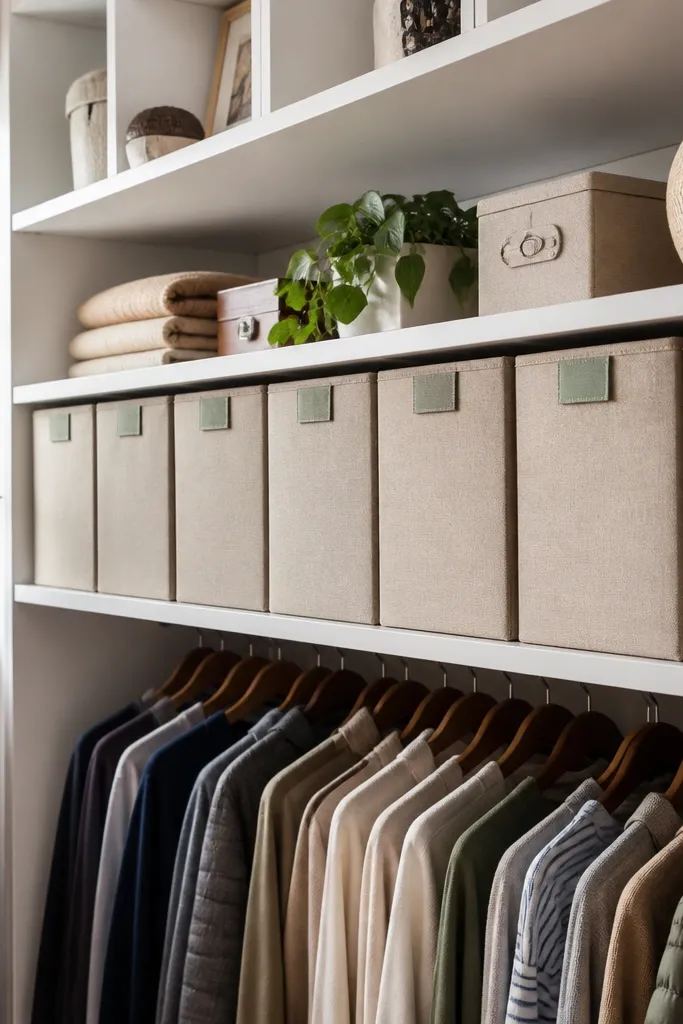
If your closet has “stuff leaks” from shelves, bin walls stop it immediately. The bins give you a soft, neat look, but the labels keep you from turning it into storage you forget. Use bins that are the same height and sit flush to the shelf edge so the front line stays straight. This setup hides small messes like scarves, extra hangers, and seasonal accessories while still letting you spot what’s inside.
Pick shelf openings you can divide into equal widths, then measure each opening and subtract 1/4 inch for a snug fit. Choose fabric bins with a flat front, not floppy ones, and slide them in so the top rim aligns. Make label tabs from label tape or cardstock in the same font and color scheme, then attach them with clear tape to the bin front. Step back and adjust bin placement until every label lines up in one row.
Editor's noteLabel the bin by use, not by material. “Shoe care” reads faster than “Leather stuff.”
Skip thisAvoid opaque bins with no labels — they hide chaos because you can’t see what’s missing.
3. Clear-Front Shoe Cubby with 2-Inch Spacing
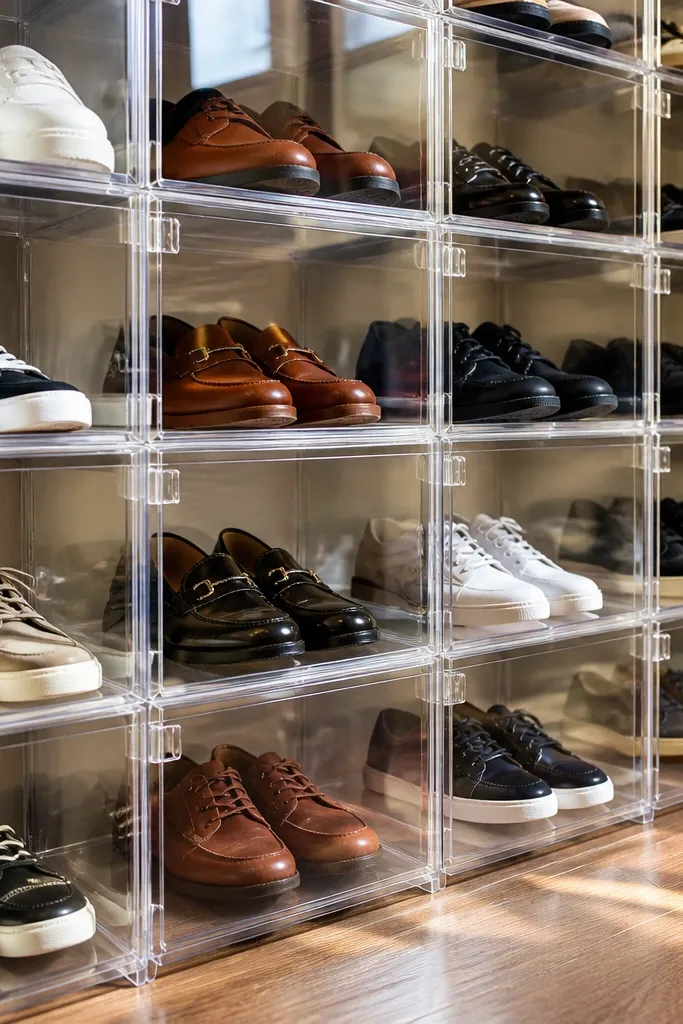
Shoes are the number-one closet visual mess because pairs don’t stack neatly. A clear-front cubby system keeps them visible and contained, so the closet looks tidy even when you own a lot. Use a grid that spaces pairs evenly, usually leaving about 2 inches between shoe toes for airflow and clean visual rhythm. The result is photogenic because your closet reads like a display, not a pile.
Measure the shelf width and decide how many pairs you want per row. Build a simple grid using thin wood strips or purchase stackable cubby dividers that match the shelf depth. Add clear fronts or use clear plastic shoe boxes with removable lids so you can still grab quickly. Place each pair with toes aligned to the same direction, then add small label stickers on the front for boots, sneakers, flats.
Store shoes with a slight tilt inward so the toe line stays consistent.
Don’t cram pairs too tight. Tight storage makes everything look messy even when it’s “organized.”
4. Door-Back Command Strip Rail for Bags
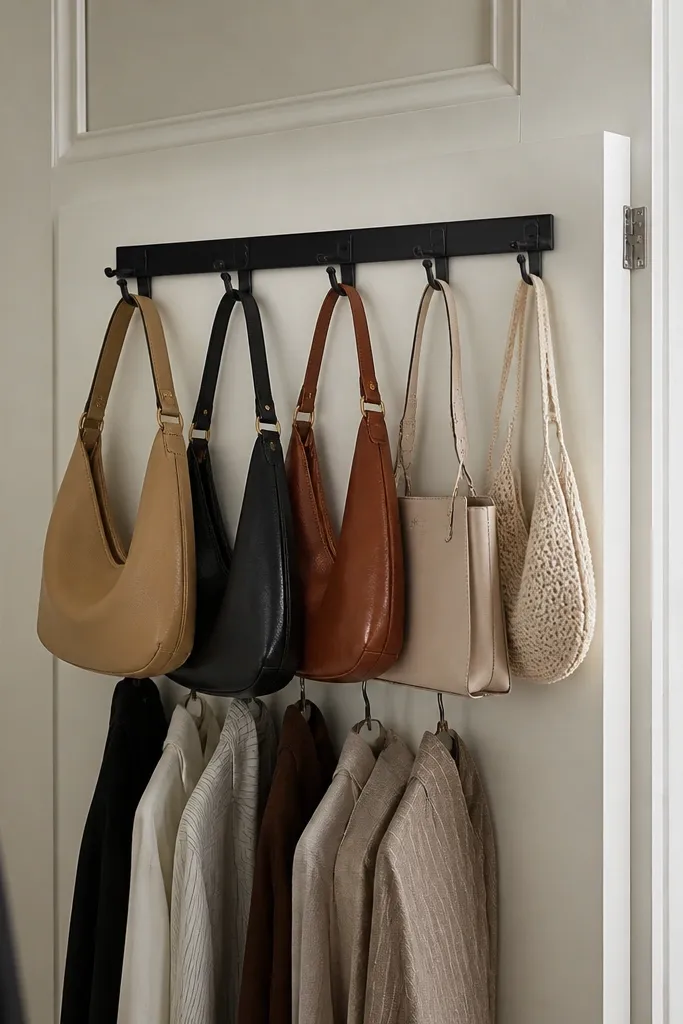
Door storage is where your closet stops looking cluttered fast because it moves bulky bags off shelves and away from hanging clothes. A slim rail keeps bag handles from tangling and keeps the door area looking intentional. Use a rail with multiple hooks so each bag has its own spot, and keep the rail line straight. This also protects your bags from getting crushed under folded stacks.
Measure the door width and choose a rail length that leaves at least 1 inch of clearance from the door edges. Use strong adhesive anchors or, if possible, screw the rail into a solid backing board behind the door. Install with a level so the hook line stays even. Hang bags by handle, and add a small fabric dust cover band if you store delicate materials.
Editor's noteGroup by style, not color. “Work bags” together makes grabs faster than a rainbow wall.
Skip thisAvoid mounting on paint-only surfaces if you can’t get a solid anchor. Bags add weight.
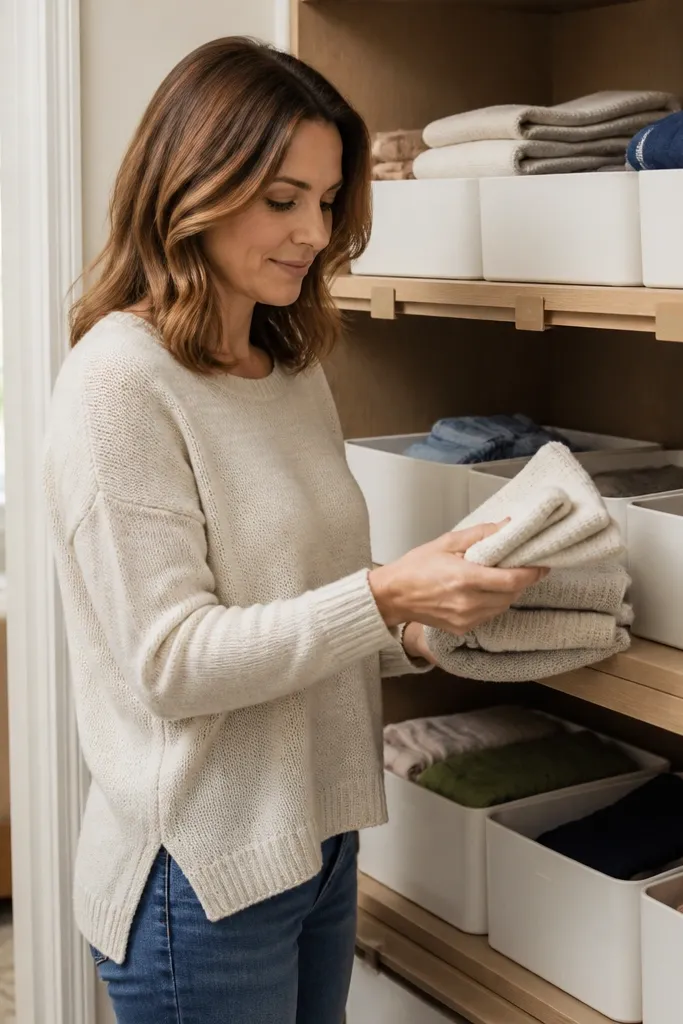
5. Folded Sweater Stack with Shelf Stops (No Sliding)
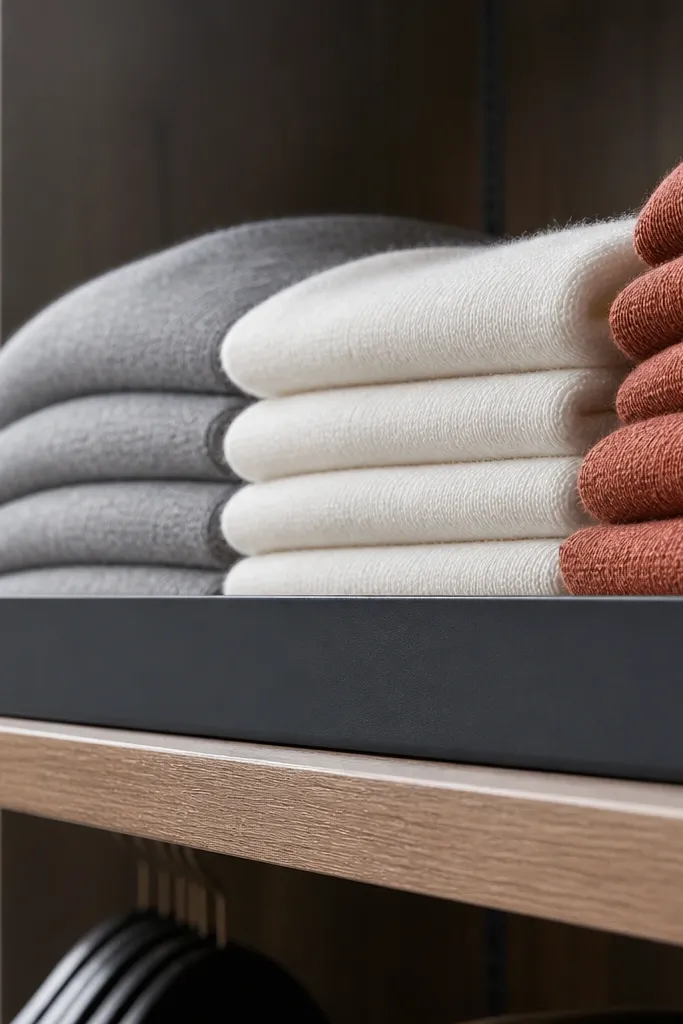
Sweaters look chaotic when stacks slide forward and mix with other folds. Shelf stops fix that by creating a hard boundary at the front edge, so every stack stays aligned and the shelf reads clean. This is a visual trick and a functional one — it prevents the “one-off” fold that breaks the whole look. You’ll also stop the annoying habit of repiling because everything stays where you placed it.
Measure your shelf depth and decide how far forward you want folds to sit, usually leaving 1-2 inches behind for air. Add small front stops using thin wood strips or adhesive shelf bumpers cut to the shelf length. Fold sweaters into the same width (use a cardboard template if needed) and place them with labels facing out on the top fold. Push each stack back to the stop so all fronts align.
Editor's noteUse a single fold width for the whole shelf. Mixed fold widths look messy even when the quantity is small.
Skip thisDon’t skip air space. Tight stacks look flat and can trap odor.
6. Adjustable Tie and Belt Ladder with Color Cues
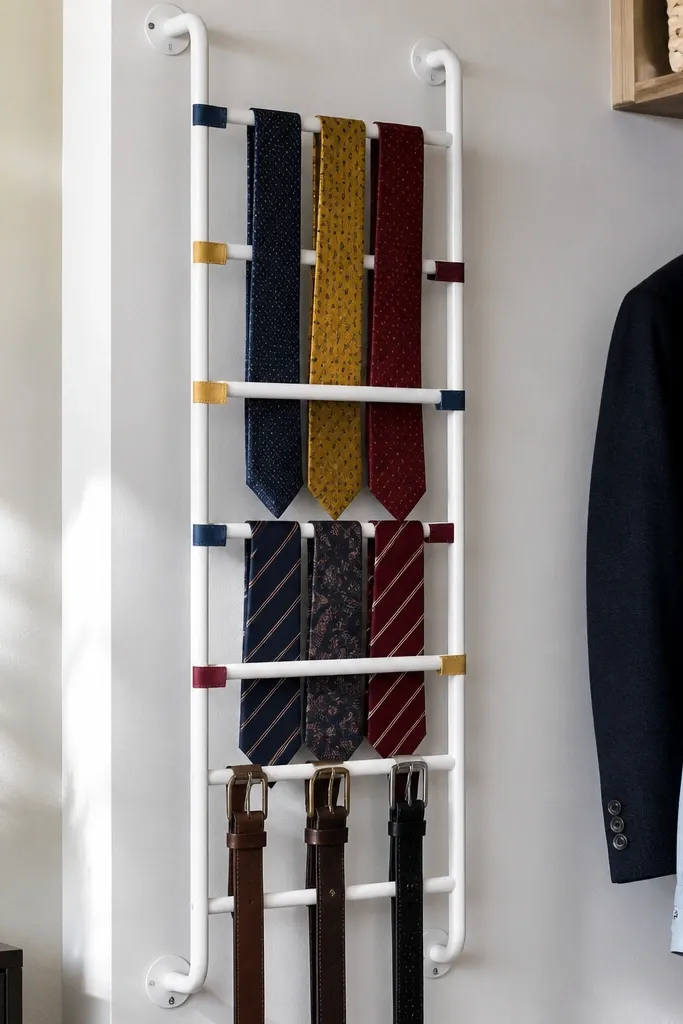
Ties and belts create instant clutter because they tangle and hang at random lengths. A ladder-style organizer with adjustable spacing gives each item its own vertical slot, so the closet looks neat even at a glance. Add color cues so you can grab quickly without reading labels every time. This setup is also easy to keep looking clean because you’re not fighting knots.
Choose a ladder organizer with multiple rungs or install your own using 1x2 wood and evenly spaced hooks. Measure the side-wall area and leave 2-3 inches clearance from the door or hanging rod. Set hook spacing so ties hang flat and belts don’t overlap — start with 3-4 inches between hooks. Add small colored tags on the hook neck: one color for work, one for formal, one for casual.
Editor's noteHang belts by the buckle end so the bulk stays at the same point.
Skip thisAvoid single hooks for everything. One hook turns into a knot magnet.
7. Wire Shelf Turntable for Small Accessories
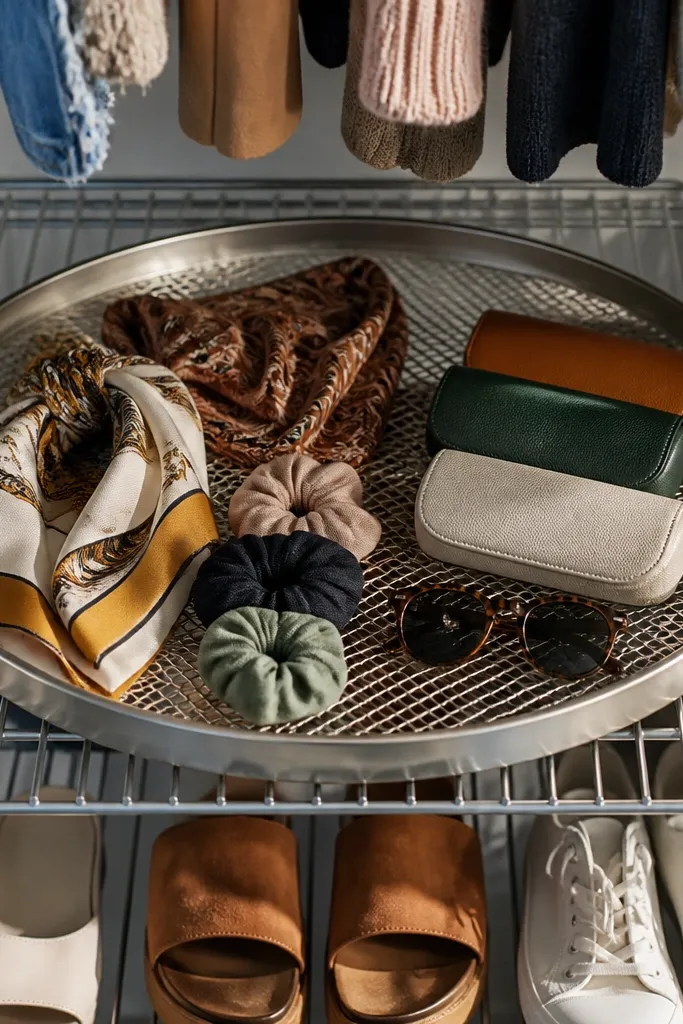
A turntable is a sneaky-looking fix for clutter that doesn’t belong on a hanger. It keeps small accessories visible and stops the “bin pile” effect where you shove things in and forget. On a wire shelf, it also looks light and tidy because items fan out rather than stacking into a mound. Choose a turntable with shallow compartments so each category has a spot.
Pick a turntable that fits your shelf depth and has removable trays or bins for easy sorting. Clear the shelf and wipe it clean, then place the turntable centered so it doesn’t bump the door. Sort accessories into 3-5 categories: hats, gloves, hair tools, belts, and jewelry. Place each category into one compartment and label the tray fronts with small adhesive labels.
Editor's notePut your most-used category in the top-right position. Your hand goes there without thinking.
Skip thisDon’t overload compartments. Crowded trays look messy even when they’re “organized.”
8. Hanging Shelf Skirt for Laundry-Free "Lounge" Zone
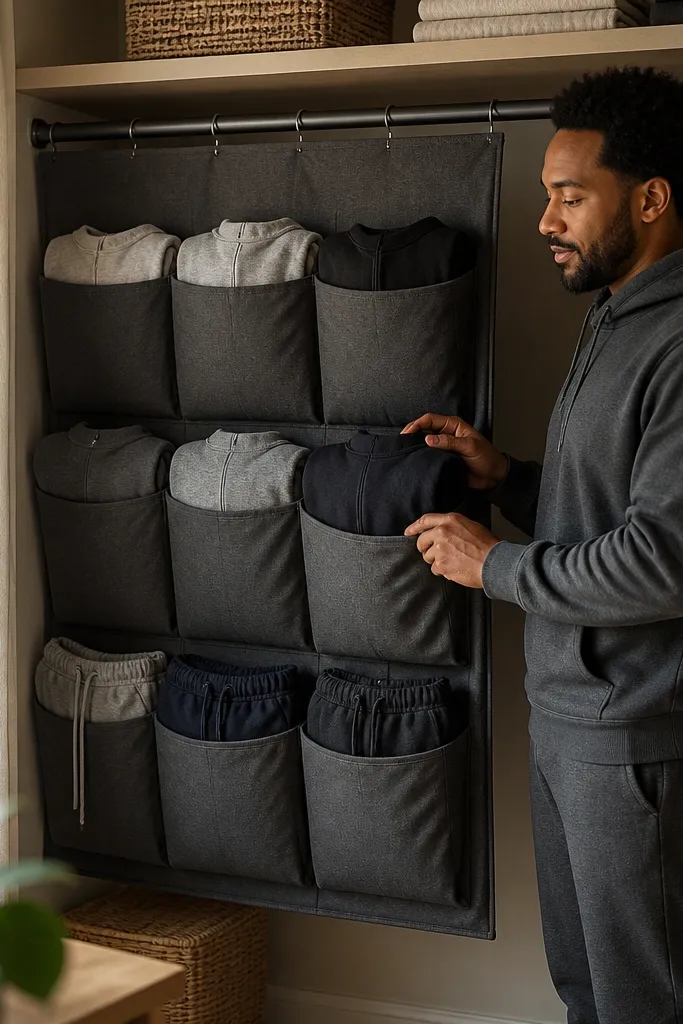
If your closet has a “lounge pile” of hoodies and lounge pants, hanging shelf organizers make it look intentional. Instead of tossing items on the floor or mixing them into the main wardrobe, you create one vertical zone with pockets that visually separate categories. The look is clean because pockets create repeating rectangles. It also keeps the closet from looking cluttered even when you’re actively using that zone.
Choose a hanging organizer that fits your closet depth and has rigid top binding so it doesn’t sag. Install it on the inside of the rod or on a side rail using the organizer’s hardware. Assign pockets by category: hoodies, joggers, socks, and workout accessories. Keep pocket contents to one item type per pocket and fold hoodies so they sit flat.
Editor's noteUse fabric bins in the bottom pockets only if you can label them. Otherwise, pockets alone look better.
Skip thisAvoid overstuffing. A sagging organizer reads messy from across the room.
9. Pegboard Panel with Clear Acrylic Front for Cleaning Kit
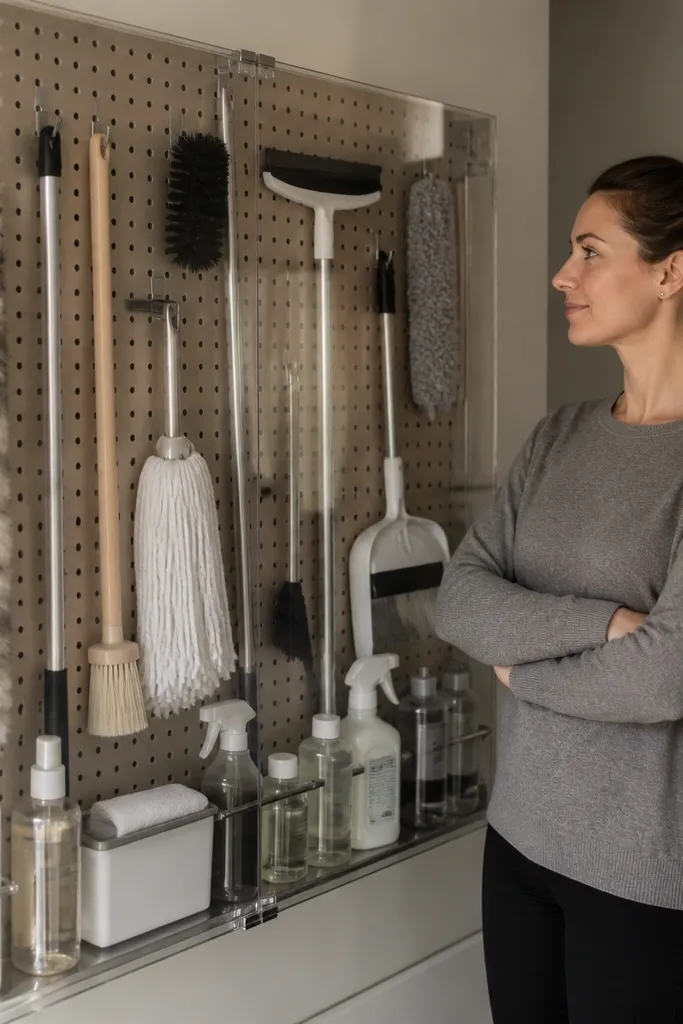
Utility closets get messy because cleaning tools multiply. A pegboard panel with hooks keeps tools vertical and visible, and an acrylic front keeps dust and grime from turning the wall into a visual mess. The result looks like a small workshop, not a storage closet. It also makes it easy to return items to the exact spot, so the chaos doesn’t creep back in.
Cut or buy a pegboard panel sized to your closet wall, then mark stud locations. Mount the pegboard level using screws into studs where possible. Hang your tools on hooks: broom handle, dustpan, lint roller, and spray bottles on bottle hooks. Add a clear acrylic cover over the pegboard grid if you want a cleaner look; drill or fasten it so it doesn’t rattle.
Editor's noteLabel hooks with tiny vinyl tags. It’s faster than rethinking where things go.
Skip thisAvoid hanging heavy tools by thin wire hooks. Use sturdier pegs and check fasteners.
10. Drawer-Style Shelf Inserts for Socks and Underwear
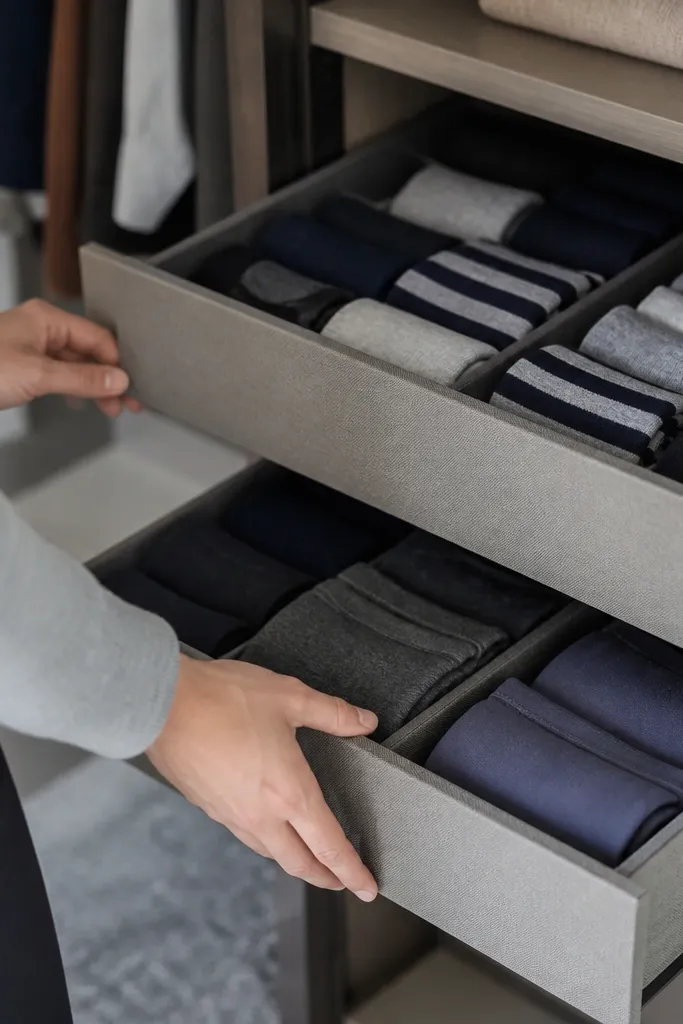
Socks and underwear look messy because they spread. Drawer-style shelf inserts give you the drawer experience without building actual drawers, and the front edge makes the closet look finished. Use inserts that slide out or lift easily so you can grab without wrecking the stack. This setup hides the messy middle because each category sits in a separate “drawer” with a clean front line.
Measure your shelf and choose inserts with a front lip that covers the shelf edge so you don’t see gaps. Set inserts so each compartment is wide enough for a folded set — a common target is 6-8 inches wide per fold. Label each insert on the front with category labels like “ankle,” “sports,” “lounge,” “underwear.” Fold using the same width and place folds standing or flat depending on insert depth.
Editor's noteUse drawer liners in a matching neutral color. It makes every bin look intentional.
Skip thisAvoid mixing fold directions in the same compartment. Mixed stacks look sloppy.
11. Bottom Shelf Boot Rack with Vertical Slots
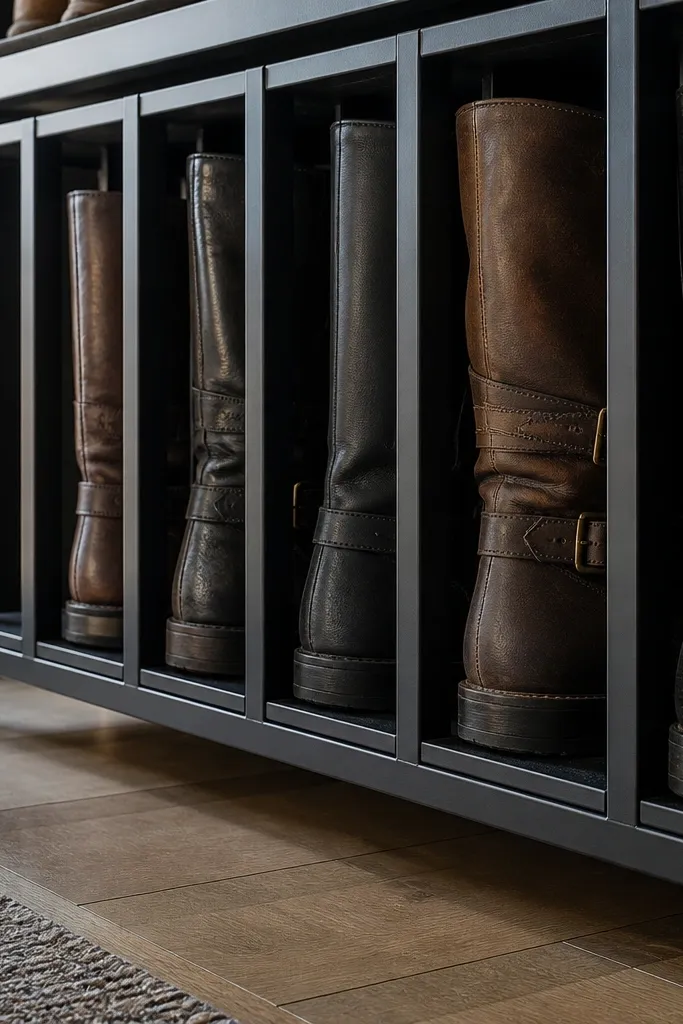
Boots ruin closet aesthetics when they lean, collapse, or take over the whole floor. A vertical-slot rack holds them upright and spaced so the shelf stays clean and your boots don’t mash each other. This also protects boot shafts from creasing because you aren’t forcing them to stack flat. The look is striking because you get a neat row of shapes instead of a pile.
Measure the boot shaft width and choose slot spacing that leaves 1-2 inches of breathing room. Build a rack using wood dividers cut to shelf depth, then screw dividers into a base board or directly into the shelf. Add a back brace so tall boots don’t tip forward. Finish by placing boots with toes aligned and shafts resting fully in their slots.
Editor's noteAdd felt pads on divider edges. It prevents scuffs and keeps boots from sliding.
Skip thisAvoid stacking boots on their sides. It saves space short-term and looks messy immediately.
12. Hanging Clear Pocket Organizer for Travel Minis
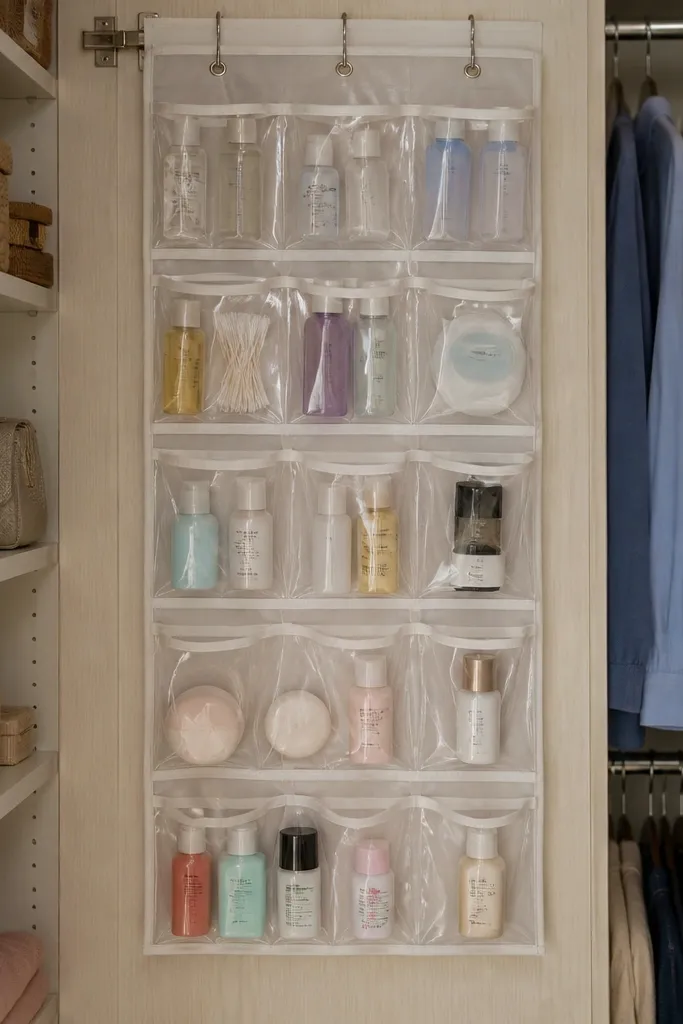
Small travel items create chaos because they live in random drawers or bags. A clear pocket organizer hanging inside the closet keeps everything visible and contained, which makes the closet look clean even when you’re mid-trip planning. The clear pockets also look tidy because each pocket is a neat rectangle. It’s a good fit for humid closets too because you can see what needs restocking.
Pick an organizer with pockets sized for bottles and small pouches. Hang it inside the closet door or on a side rod using the included hooks. Assign pockets to categories: toiletries, chargers, meds, and hair tools. Use small resealable bags or slim pouches inside each pocket so items don’t jostle and create a messy bulge.
Editor's notePut a small label sticker on each pocket’s top edge for faster restocks.
Skip thisAvoid cloth-only organizers with deep pockets. They hide mess and get hard to clean.
13. Labeled Bulk Bin Zone for Seasonal Swaps
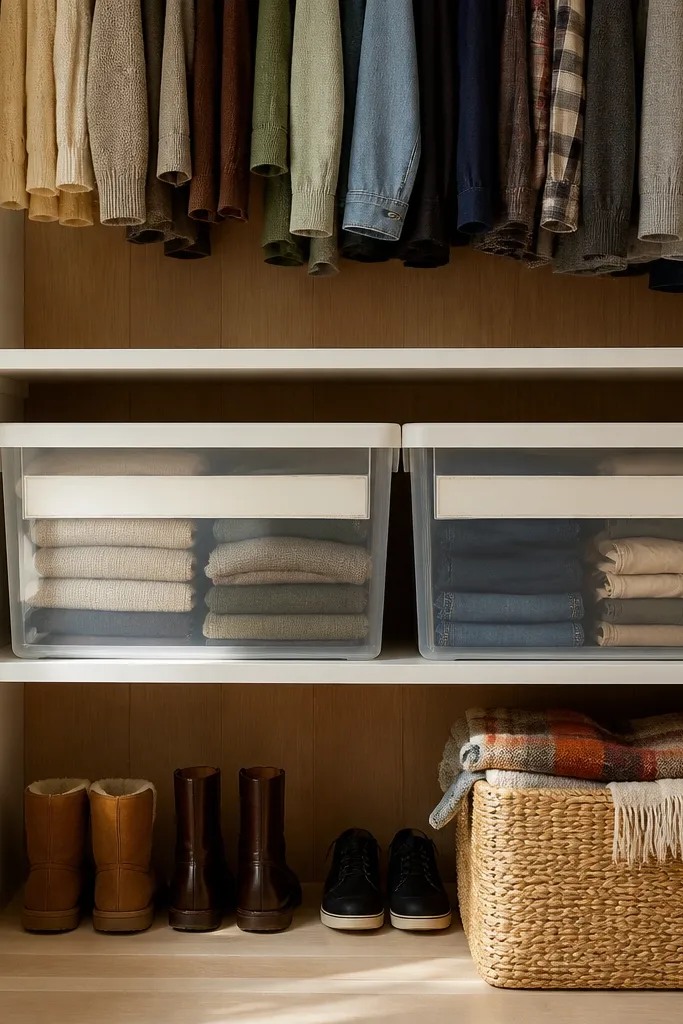
Seasonal clothing is where closets look chaotic because people cram it in and forget it. A dedicated bulk bin zone makes swapping feel simple and keeps the rest of the closet looking sleek. Use two large bins: one for “off-season tops” and one for “off-season bottoms,” then label clearly. Choose bins that look uniform and sit flush so the shelf line stays straight and photo-ready.
Choose two bins with the same height and a front label area. Measure shelf width and place bins so you have even gaps between them or so they touch for a seamless look. Label the lids or front panels with month ranges if you like, like “Nov-Dec” and “Jan-Feb,” or use simple categories. Store only items that you truly rotate — if it’s not seasonal, it doesn’t belong in the bulk bins.
Editor's noteUse a thin cardstock divider inside each bin to separate tops from bottoms if the bin is too deep.
Skip thisAvoid mixing random “maybe” items in seasonal bins. That’s how chaos comes back.
14. Closet Corner Shelf with Vertical Dividers for Hats
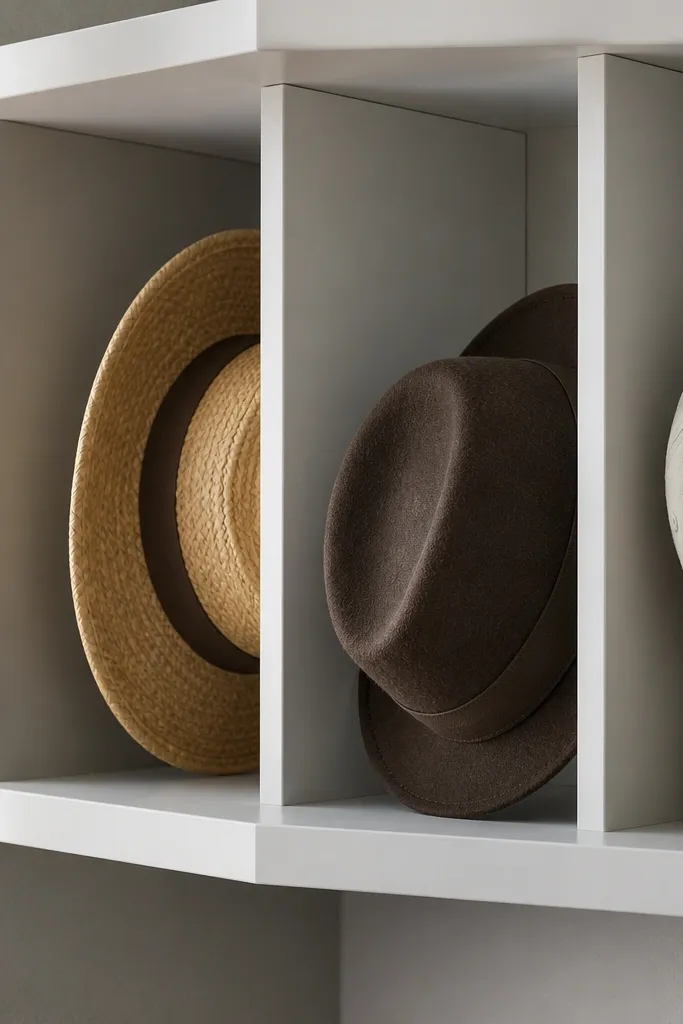
Corners are where closets look the worst because hats and accessories spill sideways. A corner shelf with vertical dividers makes hats stand upright and keeps them from collapsing into each other. The visual payoff is huge because hats become clean shapes instead of a jumble. This also helps you find the right hat quickly because each one has a dedicated slot.
Measure the corner shelf footprint and build a simple divider grid using thin wood strips or pre-made shelf dividers. Install the shelf first, then mount dividers so they run front-to-back. Choose slot width based on the widest hat — leave 1 inch extra so hats don’t scrape. Place hats in rows with brims facing the same direction and add a small label on each divider front if you have more than 8 hats.
Editor's noteUse felt pads on divider edges to stop snagging on hat bands.
Skip thisAvoid storing hats flat. Upright slots look cleaner and protect shape.
15. Matching Hanger Set with Clip-Only Zone
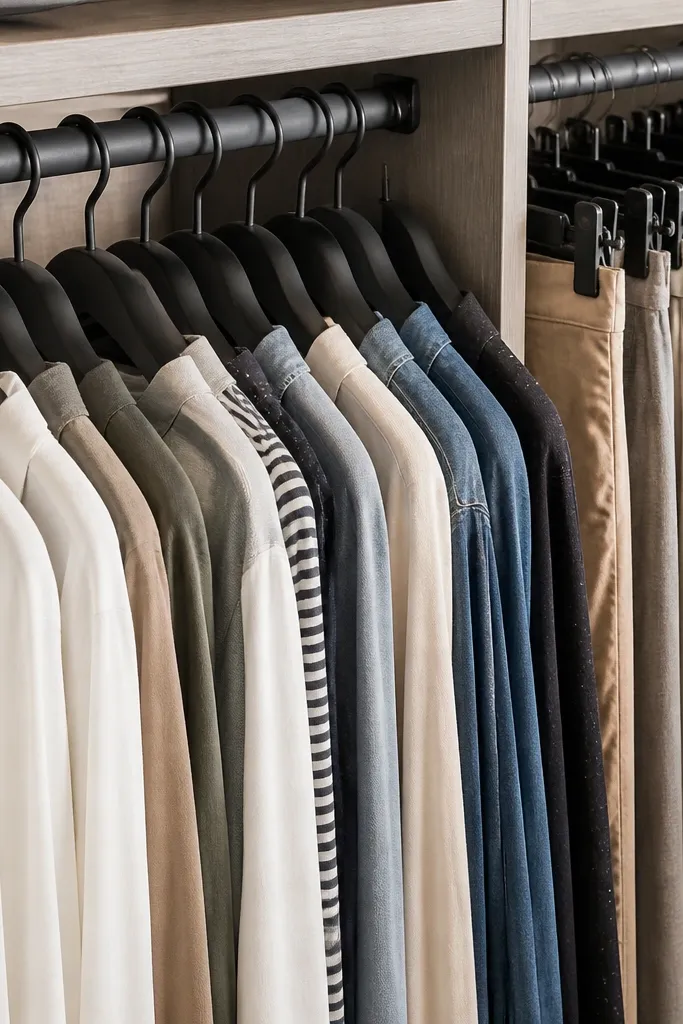
Random hangers create visual noise even when clothes are folded neatly. A matching hanger set makes the closet read organized because the silhouettes align. Add a separate clip-only zone for pants or skirts so they hang without bumping shirts. The look is smoother and calmer, and the closet stays tidy because you’re not mixing different hanging styles in the same rail.
Remove everything from the closet rod and group items by type. Choose one hanger style for tops and use a different setup for pants: a clip rail or pant hangers. Install a clip-only rail at the same height across the closet so pant silhouettes align. Put skirts and pants in a separate section so you don’t end up with mixed lengths.
Editor's noteKeep hanger color consistent. Even neutral mismatches show up in photos.
Skip thisAvoid mixing wooden and plastic hangers on the same rod. The angle differences look messy.
16. Sliding Shelf Pull-Out for Small Bags and Clutches
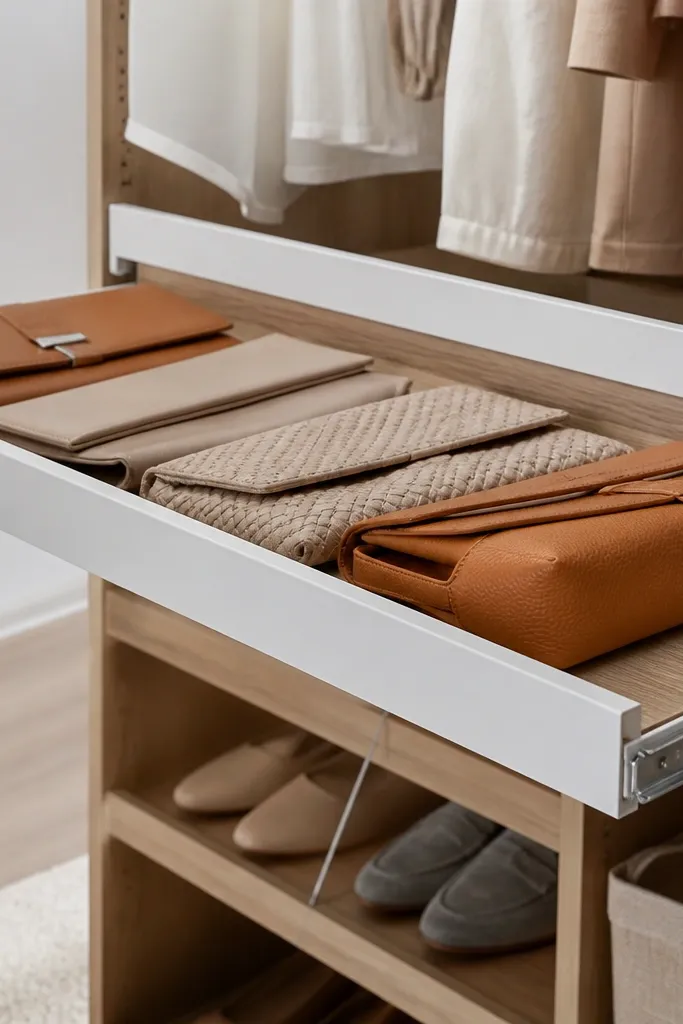
Pull-out shelves make a closet look high-end because you don’t see the mess behind the front row. For small bags and clutches, a sliding shelf lets you store them flat, aligned, and still access everything without digging. It also prevents the “stack and forget” problem that turns a closet into a bag graveyard. The photogenic part is the clean front line of bags with consistent spacing.
Measure the depth of your closet and build or buy a shallow pull-out shelf that fits inside the opening with clearance. Install two side rails or slides to support the shelf, keeping it level so it glides smoothly. Line the pull-out shelf with a non-slip mat and place bags upright or flat depending on shape. Add labels on the front edge for quick grabs.
Use low-profile slides so the shelf front stays flush and doesn’t look bulky.
Avoid a pull-out that binds. If it sticks, you’ll stop using it and clutter returns.
17. Trimmed Shelf Backer for Instant Clean Color Block
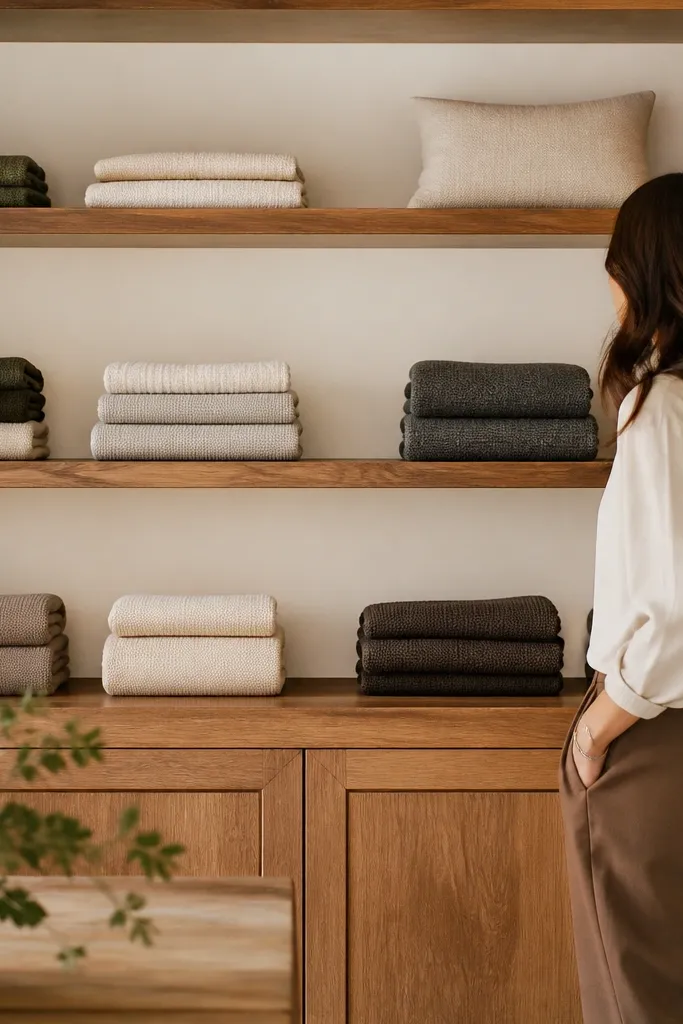
A plain, unfinished shelf back makes your closet look messy because it shows shadows and random reflections. A trimmed backer panel creates a clean color block behind folded items, so the whole shelf looks intentional. This is one of those “small change, big look” upgrades that makes labels and bins pop. It also helps hide the visual clutter behind the front row.
Cut a backing panel (painted plywood, MDF, or thick fabric-backed board) to the exact shelf width and depth. Paint or cover it in a matte neutral that matches your closet palette. Attach it with construction adhesive and small finishing nails or screws so it sits flush and doesn’t warp. Place bins and folded clothing against the backer so the front line stays crisp.
Editor's noteChoose matte finishes. Gloss shows every bump and shadow in photos.
Skip thisAvoid thin backing that flexes. Warping makes gaps that look unfinished.
18. Clear Lid Storage with Front Label Strips
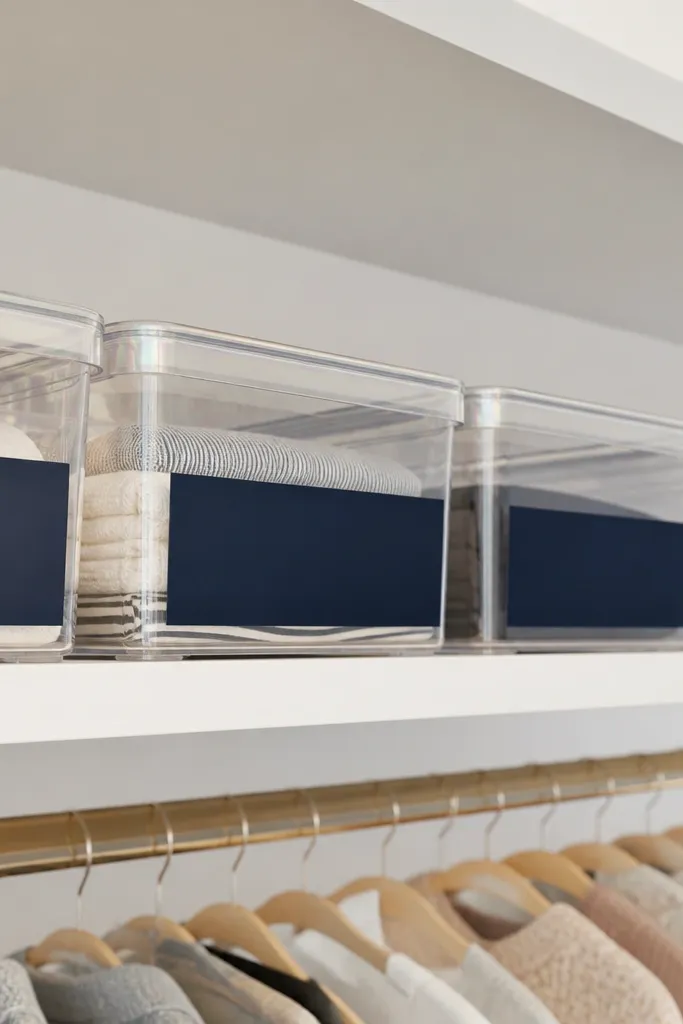
Clear-lid bins hide visual clutter because the lid keeps items from spilling out, but you still see what’s inside. Front label strips make the closet feel organized because you can scan without opening anything. This is especially good for bulk items like seasonal accessories, extra shoe inserts, and spare socks packs. The look is clean because the bin fronts align and the lids create a uniform “top line.”
Choose bins with clear lids and matching sizes so the shelf top line stays even. Add label strips on the front using label tape or a label maker, and keep labels to one short line. Stack bins carefully with the labels facing outward and align the corners to the shelf edge. Wipe bins before placing them in the closet so fingerprints and dust don’t show through.
Editor's noteUse two label levels: category on the bin front, and a small checklist on the lid for restocking.
Skip thisAvoid mixed-size bins on the same shelf. Uneven tops create clutter from a distance.
19. Hanging Corner Shelf for Jewelry Trays
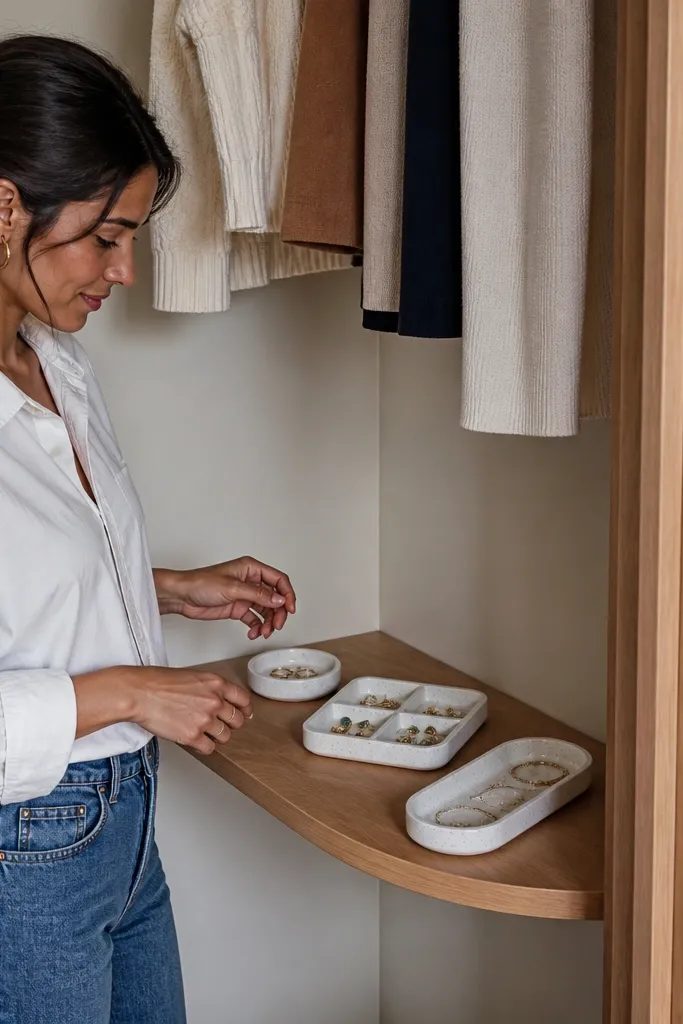
Jewelry is small, but it makes closets look messy because it spreads across surfaces. A hanging corner shelf keeps jewelry trays contained and keeps them off the floor or main shelves. The corner placement also keeps the look clean — you’re not cluttering the main hanging area. Use shallow trays with consistent heights so the shelf looks like a mini display rather than a jumble.
Pick a corner shelf that mounts securely to the side wall or uses a bracket kit. Install brackets with a level and screw into studs if possible. Place three to five shallow trays on the shelf and keep each tray dedicated: rings, earrings, necklaces, and hair accessories. Add small labels under clear tape so they’re readable but still neat.
Editor's noteUse one tray material across the shelf, like white ceramic or matte plastic, for a consistent look.
Skip thisAvoid stacking trays too high. High stacks look like clutter and are harder to access.
20. Magnetic Spice-Label Canisters for Closet Floor Extras
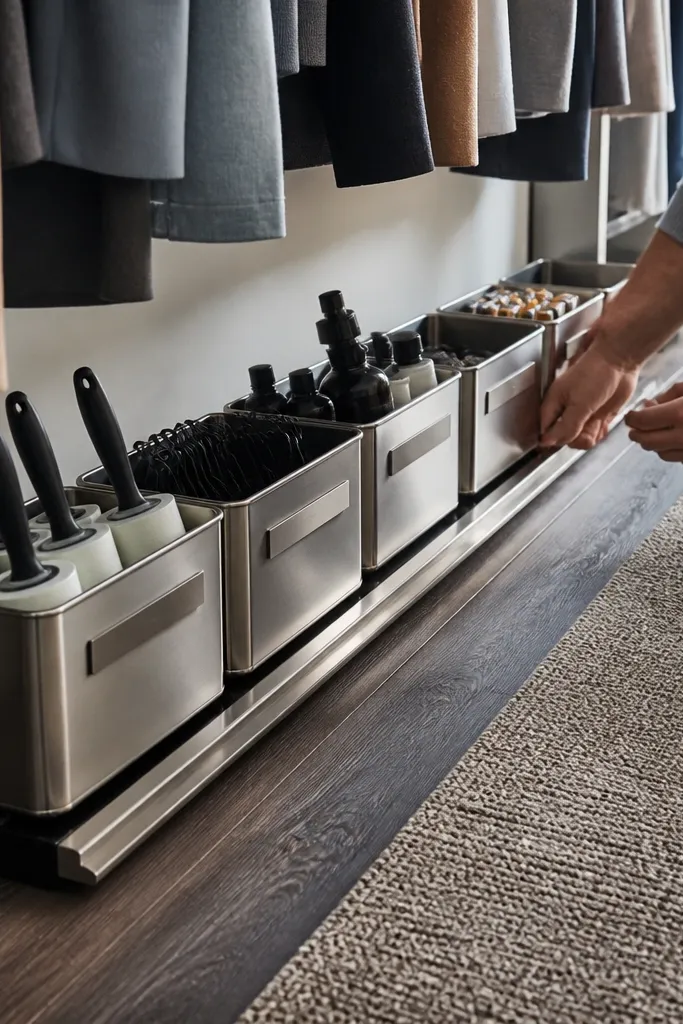
Closet floors collect the weird stuff — lint rollers, extra hangers, shoe polish, batteries, and travel-size cleaners — and it all looks messy because it has no “home.” This setup hides that chaos in matching metal canisters with clean label strips you can read from across the room. The canisters sit on a simple rail so they don’t slide around when you open the closet or sweep near the door. It looks tidy because everything matches in color and shape, and the labels give the floor a uniform grid. This is quick and easy Closet Organization ideas that still look intentionally designed, not like bins thrown in place. It fits best in utility closets, mudroom closets, and any closet with a flat floor area you want to keep visually calm.
Buy 8-12 small metal canisters with flat sides (the kind sold for spices or tea) and add a magnetic strip to each one. Use a 1x2 wood ledger or a 1x1 aluminum angle rail mounted 2 inches above the floor so the canisters sit slightly “on display” instead of touching dust. Cut a scrap of 1/8-inch birch plywood into label backers, then add a 1-inch-wide strip of white vinyl label material to each backer and print the labels in a consistent font. Mount the rail with 2.5-inch screws into studs or use toggle bolts if you’re in drywall only. Stick the magnetic strips onto the canister backs, then press them onto the rail and adjust spacing so you get even gaps. Finish the wood rail with matte clear coat so it wipes clean with a damp rag.
Editor's noteUse a steel ruler to mark canister spacing before you mount anything — a tiny gap mismatch reads as “messy” instantly.
Skip thisDon’t mount the rail flush to the floor or the canisters will collect dust and scuff up the labels.



