
1. Front-Lip Pantry Tray Rows for Zero-Slip Front Stacking
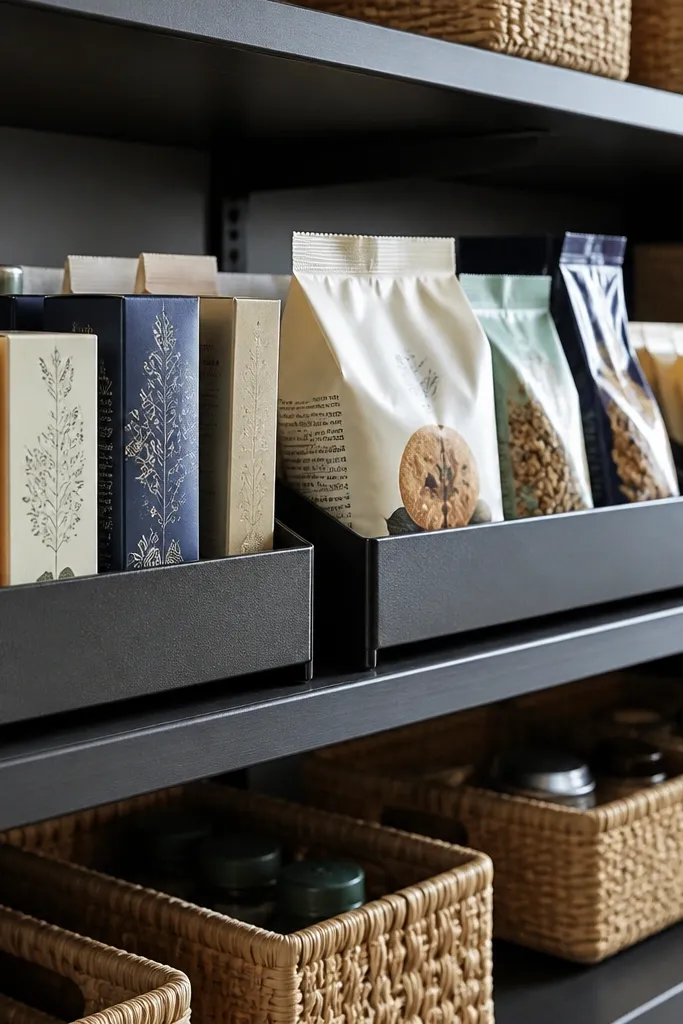
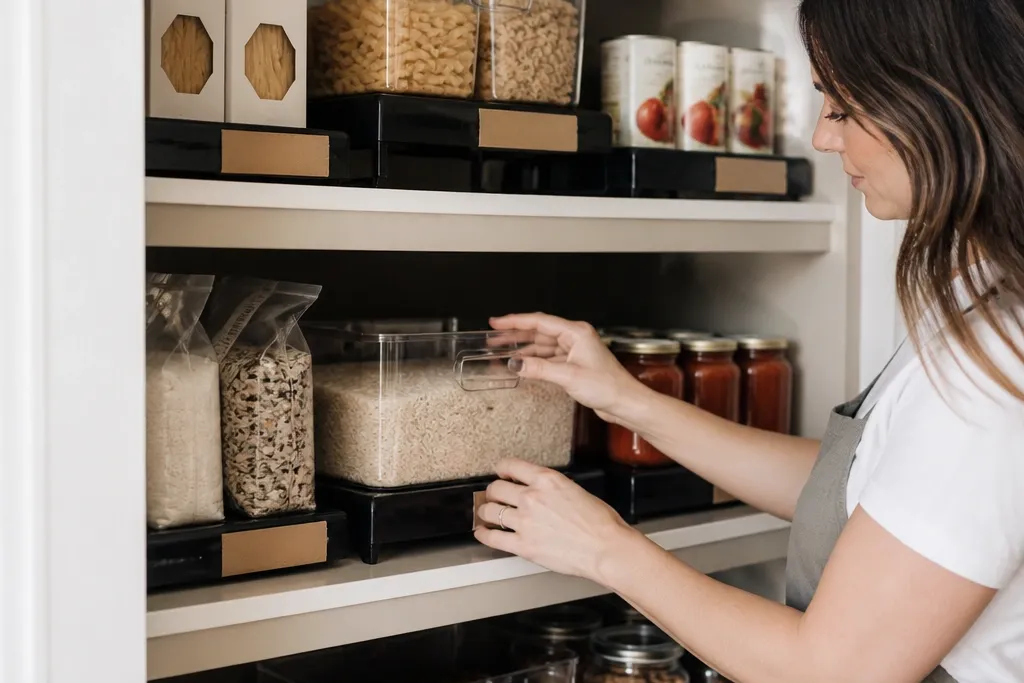
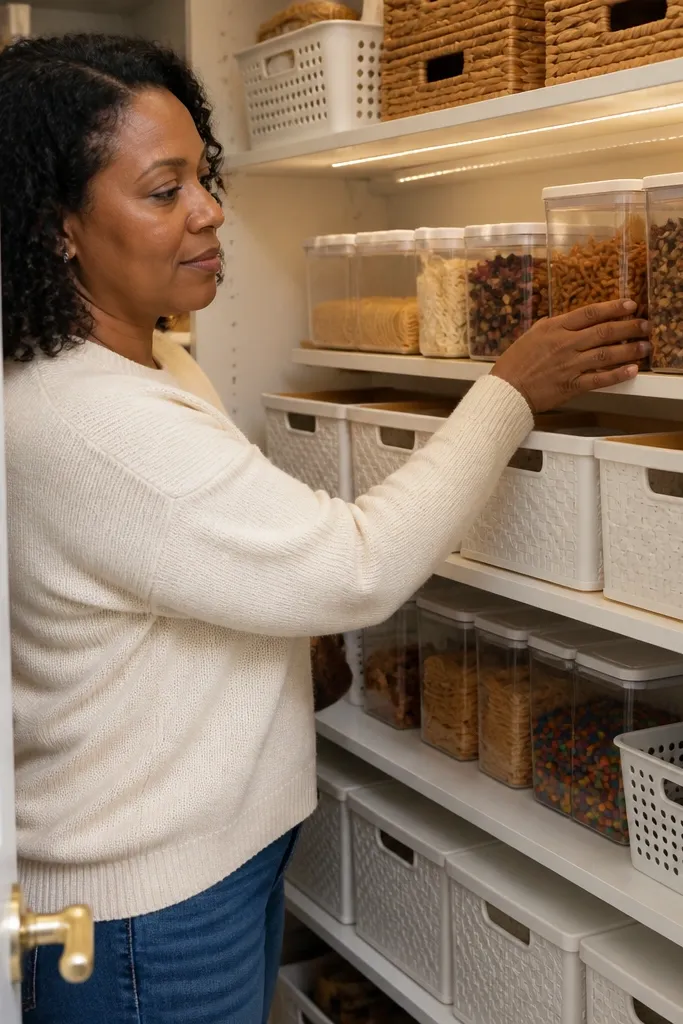
This layout solves the small-space problem where items creep forward and spill when you open the door. The raised front lip creates a visual and physical boundary, so bags, boxes, and small containers line up like they belong in a store shelf. Use matching tray colors to make the pantry look intentional — black for contrast, light wood for warmth, or white for a crisp kitchen. It’s also easy on tight shelves because trays don’t eat depth like bulky organizers can. Expect a clean, photogenic grid where everything sits at the same height and you can read labels from one angle.
Start by measuring your shelf depth and subtract 1/2 inch so trays fit without forcing. Pick trays with a front lip height of about 3/4 to 1 inch so small items can’t slide over the edge. Install adhesive bumpers or a thin strip of shelf liner at the tray base, then place trays in rows and leave a 1/4-inch gap between them for airflow. Finally, add label tags to the front lip with a consistent font size so the whole shelf looks uniform.
Editor's noteUse a magnetic label strip on the tray front so you can swap labels when you change brands or reorder.
Skip thisDon’t use flat trays with no lip — they look neat at first and then everything drifts.
2. DIY Adjustable Shelf Risers with Hidden Wedges
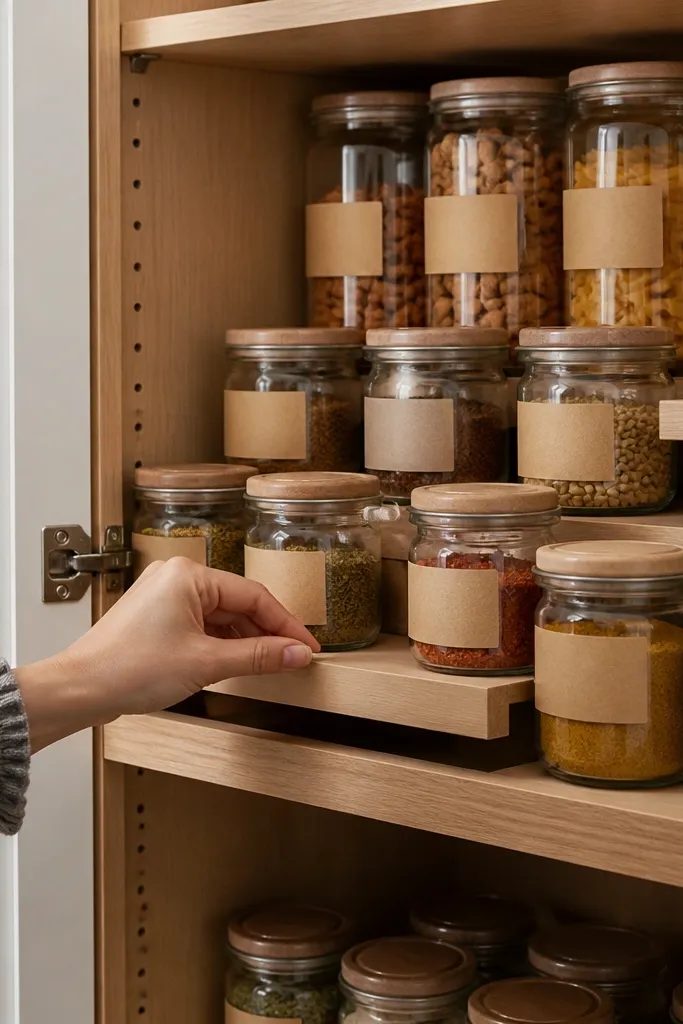
Risers are the fastest way to make a small pantry look organized because they instantly create layers. With adjustable wedges, you control height so tall jars don’t block shorter items. The beauty is in the step pattern — it reads clean and intentional in photos, and it keeps labels visible. This also helps you separate categories without needing extra shelves. A small pantry usually has uneven item heights, so adjustable risers let you fit what you actually own instead of forcing everything into one container size.
Cut wood blocks or plywood wedges in widths that match your shelf surface, aiming for 2 to 3 inches tall in the tallest position. Drill a grid of shallow holes or use a slotted base so you can slide the wedge angle and lock it in place with a pin or screw. Place risers under the back half of jars so the front row stays flat and readable. Add a thin felt or rubber strip on the bottom to prevent sliding, then test with your heaviest jar before you commit to final placement.
Editor's notePaint or seal only the top faces in a matte finish so labels don’t peel and the risers look clean.
Skip thisSkip tall risers that push everything too high — you want labels at eye level, not jars stacked over your sightline.
3. Slim Vertical File Divider for Spice Packets and Tea Bags
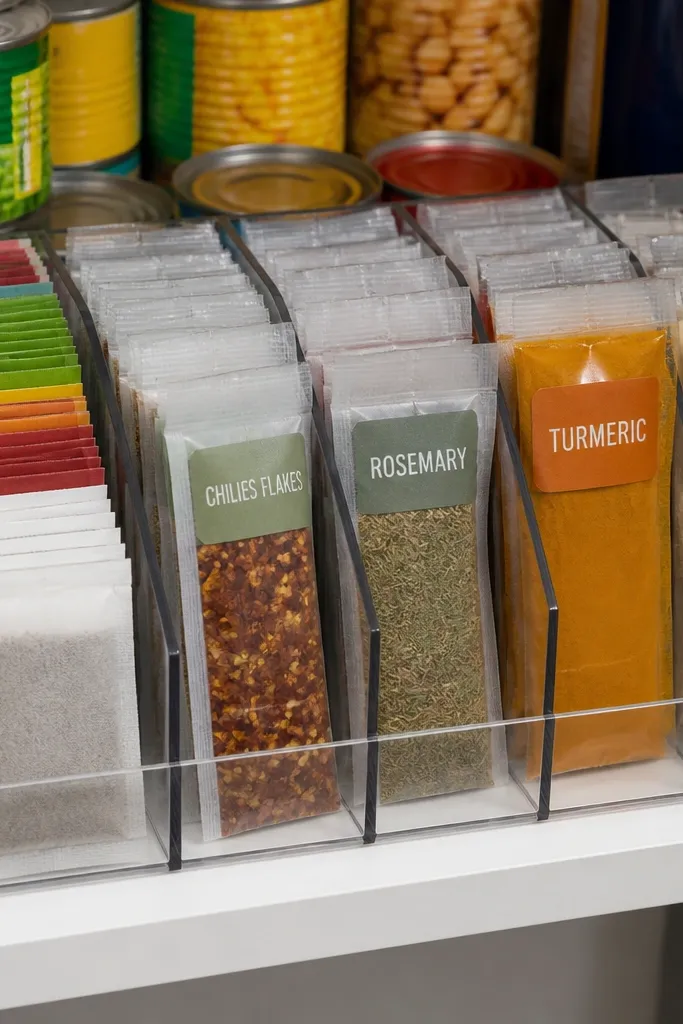
Packet clutter is the ugliest kind of pantry mess because it creates a lumpy wall that hides what you have. A vertical file divider makes every packet stand upright, keeps them from tipping, and turns the shelf into readable columns. This is one of the best pantry shelf organization ideas small-space projects because it uses height instead of depth. It also looks great — crisp dividers create strong lines and spacing. Best for spice packets, tea bags, instant mixes, and any item that’s roughly the same thickness.
Measure the thickness of your most common packets and add 1/8 inch clearance per slot so they slide in without tearing. Cut a backing panel from 1/4-inch plywood or acrylic and add a set of vertical strips spaced 1/2 to 3/4 inch wider than the packet thickness. Build shallow “pocket” dividers by adding a front stop strip so packets can’t fall forward when you reach. Sand edges smooth, then mount the divider to the shelf with screws through the back or heavy-duty removable adhesive pads.
Editor's noteLabel each column with a small strip label at the top edge so you can scan without pulling packets out.
Skip thisDon’t make slots tight — tearing packaging ruins the clean look fast.
4. Wire Basket + Clear Front Cover for Paper-Thin Dry Goods
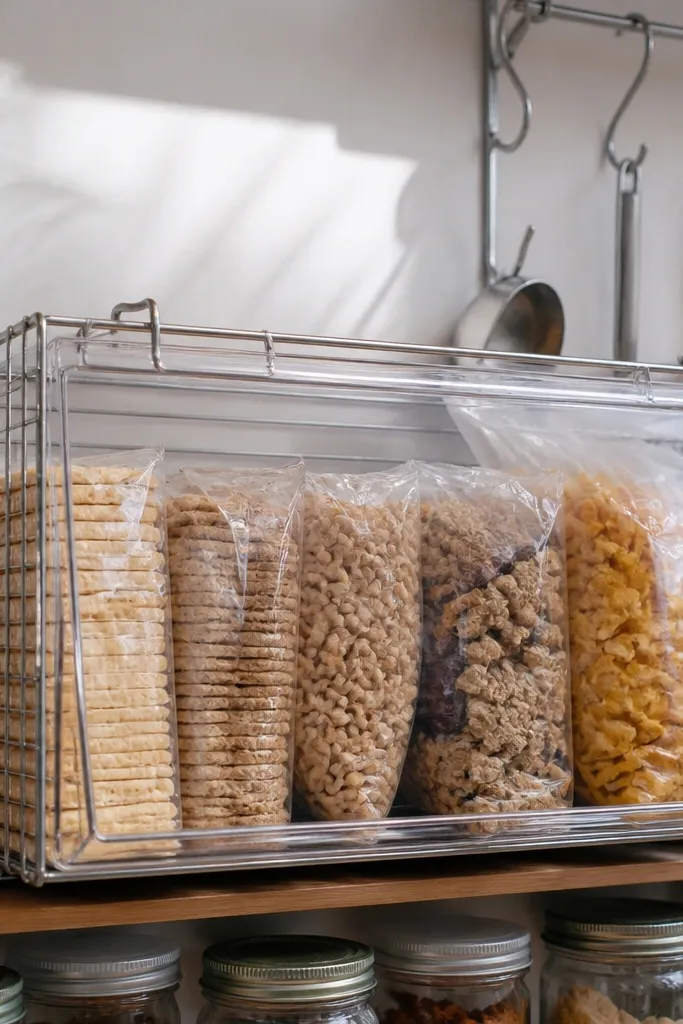
For small pantries, the eye needs a frame. A wire basket with a clear front cover hides the mess behind it while still letting you see what’s inside, so the shelf stays tidy even when you’re in a hurry. The wire structure also keeps items from becoming a squished block, which means you can grab without collapsing everything. This setup looks airy and modern, especially with consistent basket placement and matching covers. It’s ideal for flour, sugar, rice, granola, and anything that comes in bags you don’t want rolling around.
Pick wire baskets that match your shelf width and allow 1/2 inch clearance on both sides. Cut or buy clear acrylic or polycarbonate panels sized to cover the front opening, then attach with small screws and corner brackets. Add a non-slip mat at the basket base so the basket doesn’t shift. Fill with bags in a consistent orientation, then apply label stickers to the front cover at the same height for a uniform look.
Editor's noteUse a label maker with white text on black tape for strong readability against clear plastic.
Skip thisSkip opaque covers if you want the styled look — you’ll end up opening doors to check contents.
5. Lazy Susan Shelf Insert with Stop Ring
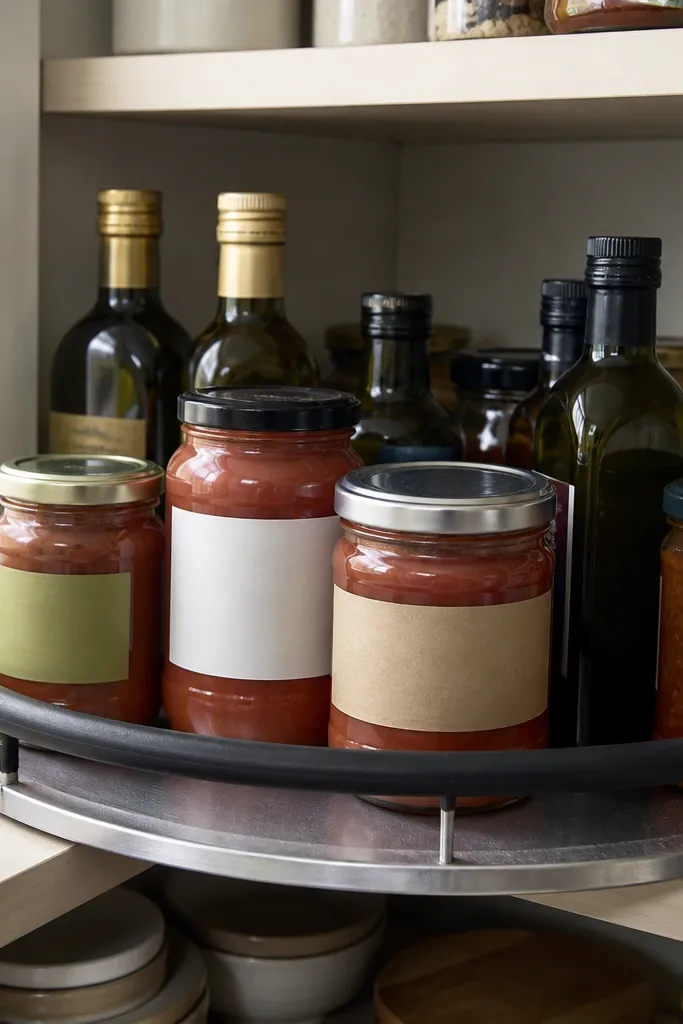
If you’re tired of reaching into the back for sauces and jars, a small lazy Susan insert fixes the visibility problem instantly. The stop ring keeps jars from rolling into each other, which keeps labels clean and prevents the “jumbled carousel” look. This is a strong option for corner shelves or any small-space shelf where you can’t fit multiple rows. The look is satisfying: items rotate into view, and you get clean front-facing labels. It works best for canned goods, pasta sauces, pickles, and spice jars that share a similar diameter.
Choose a turntable insert sized 1 to 2 inches smaller than the shelf opening so it doesn’t scrape. Add a stop ring by screwing a thin circular strip or using furniture-grade rubber bumpers around the edge. Place heavier items at the outer ring and lighter items toward the center so it spins smoothly. Add a non-slip liner between the shelf and the base, then test rotation with full jars before labeling.
Editor's noteUse flat-bottom jars or cans; irregular bases make the turntable jerky and messier visually.
Skip thisDon’t skip the stop ring — without it, jars drift and labels stop lining up.
6. Bamboo Slat Divider Grid for Cans and Boxes
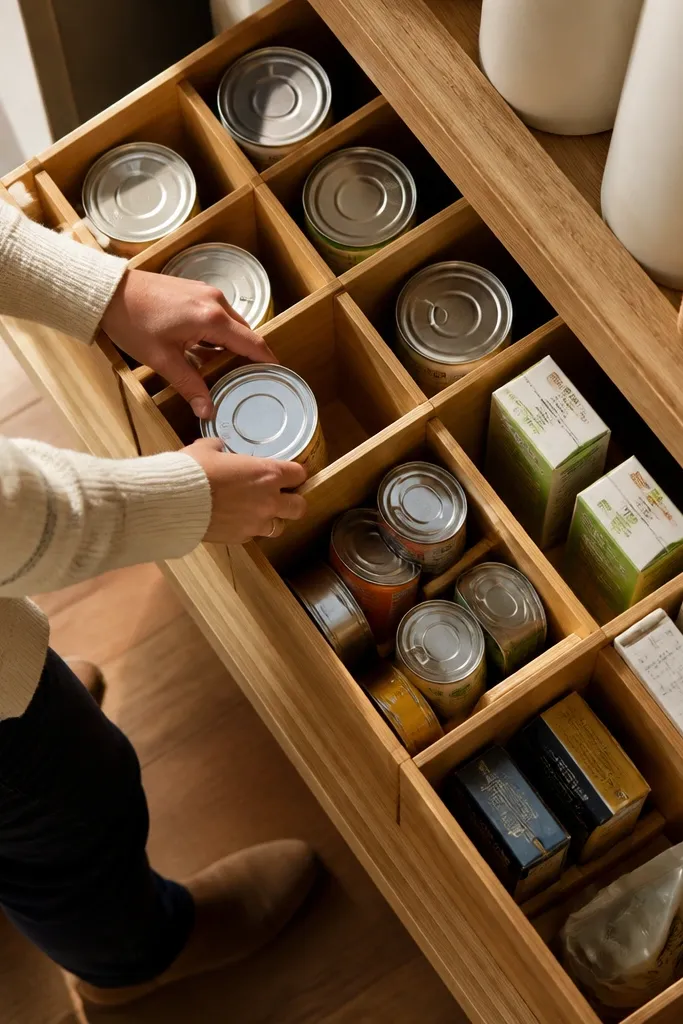
A slat grid gives you structure without looking bulky. It creates consistent compartments that keep cans from tipping and boxes from collapsing sideways, and it looks warm and natural in a pantry. The grid also makes it easier to keep a “one category per column” rule, which is what keeps small spaces tidy. Use it for canned tomatoes, beans, chickpeas, and boxed broths. The best part is the clean aesthetic: straight lines and even spacing make the shelf look styled even when you change brands.
Cut bamboo slats into uniform lengths slightly shorter than the shelf depth. Space slats with 3/4-inch to 1-inch gaps depending on your can width, then glue and clamp them to a backer strip or thin plywood base. Sand edges so nothing catches packaging corners. Mount the grid to the shelf with corner screws or removable adhesive pads, then load cans standing upright with the same orientation for a consistent look.
Editor's noteKeep slat spacing consistent across the whole shelf so your columns look intentional instead of random.
Skip thisAvoid mixing tall and short compartments on the same shelf if you want easy visual order.
7. Clear Cup Lid Organizer for Small Bottles
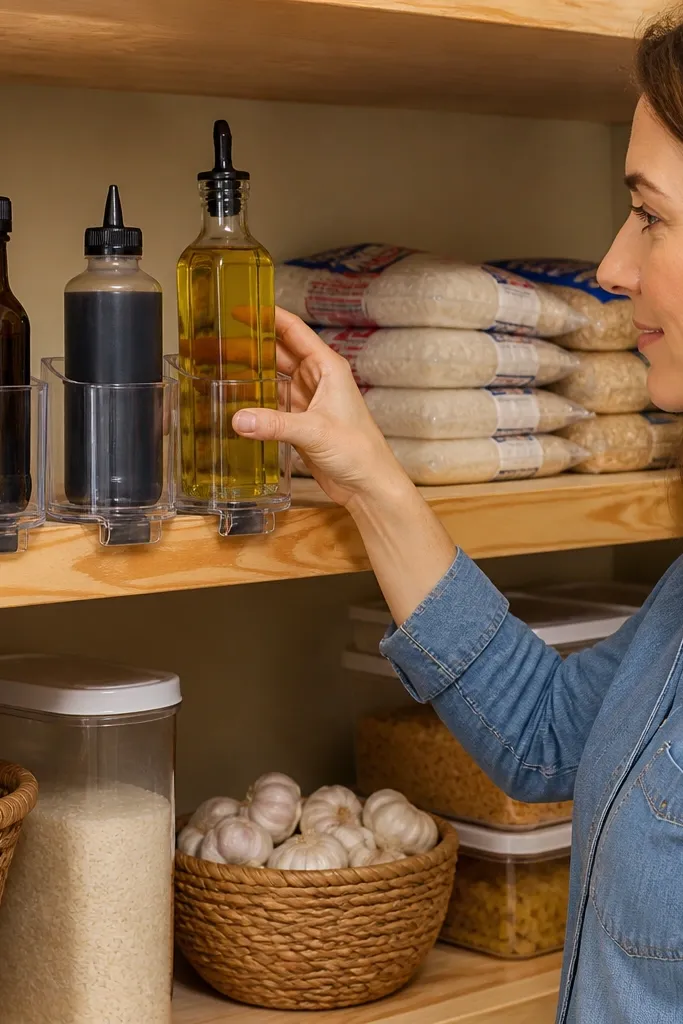
Small bottles — vanilla, oils, extracts, soy sauce squeeze bottles — create chaos because they roll and tip. Cup-style holders lock each bottle in place so labels face outward and the shelf stays tidy. The clear cups are photogenic because you can see the bottle color and label at a glance. This is a great small-space option because it uses minimal footprint and gives you a neat row. Use it on a shelf where you want a clean, front-facing lineup instead of a pile.
Buy or cut clear acrylic cups with a diameter 1/4 inch wider than your bottle base. Arrange cups in a grid on a plywood or plastic board sized to your shelf, keeping 1/2 inch between cups for airflow. Glue cups down with aquarium-safe adhesive or acrylic-safe glue, then add a non-slip liner under the board. Place bottles in cups, check for wobble, then label the front of the board with category tags.
Use a consistent bottle orientation — caps all facing the same direction — for a calmer look.
Don’t use cups that are too tight; removing bottles should be easy, or you’ll stop using the system.
8. Stackable Drawer-Style Bin Inserts for Baking Mixes
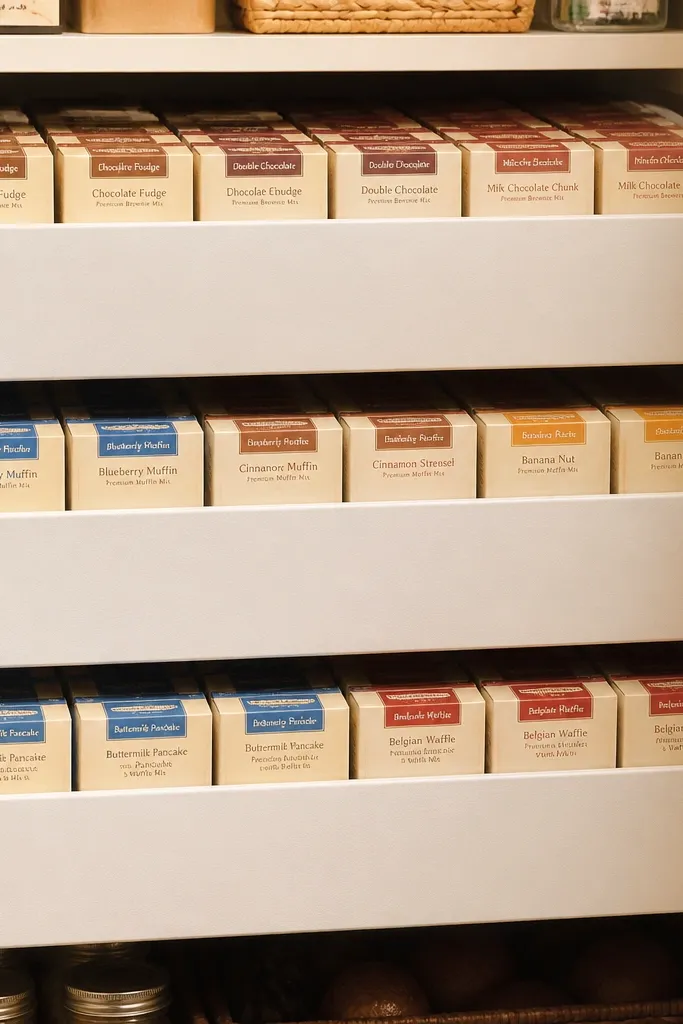
If your pantry has baking mixes stacked in awkward piles, drawer-style bins fix both function and appearance. They slide out cleanly, keep boxes from leaning, and let you stack without crushing labels. The look is crisp because the bins create a uniform front face across the shelf. This is one of the better pantry shelf organization ideas small-space because it turns one shelf into multiple usable zones without adding shelves. It’s best for cake mixes, muffin mixes, gelatin, cookie kits, and anything box-shaped.
Build two-bin units using 1/2-inch plywood for the frame and 1/4-inch hardware cloth or thin plywood for the bottom. Cut rails from 1x2 strips on the shelf sides so each bin slides in smoothly. Add a front lip or magnet stop so the bin doesn’t pull all the way out. For stacking, build a second frame that sits on top with corner spacers so bins align and don’t shift, then sand and seal surfaces with matte clear coat.
Add a small felt strip on the rail contact points to stop rattling and scuffing.
Skip open-wire bottoms if your boxes are small; they can snag and fall.
9. Lettered Label Tape Strip System Across the Shelf Front
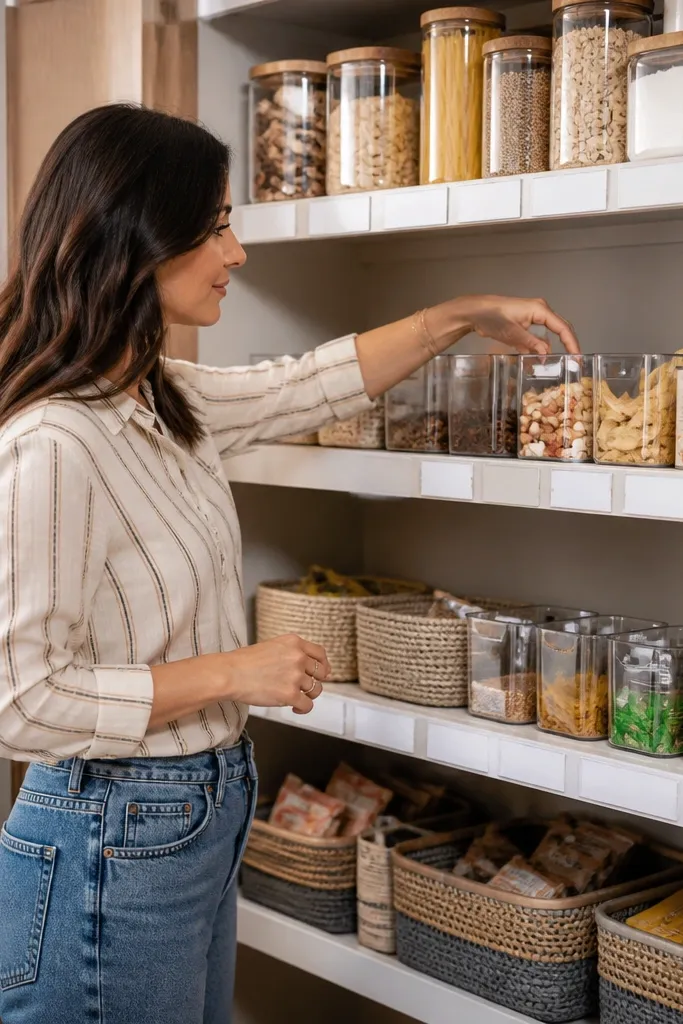
Labels aren’t the glamorous part, but they’re the part that keeps a tidy pantry from turning messy again. A continuous label strip on the shelf front creates a clean visual line, and it also trains you to return items to the right spot. This approach looks intentional in photos because the labels are the same size, same height, and same alignment. It’s not a container project, but it upgrades every other idea on this list by making the system easy to follow. Use it for categories like snacks, baking, breakfast, and “cooking staples.”
Measure the shelf front length and cut a strip of thin wood or plastic to fit, leaving 1/4 inch gaps at each end. Add small label holders or tape sections every 3 to 4 inches for different zones. Print labels with a consistent style and apply them to the strip so they line up vertically. Place containers so each category sits behind its label zone, then add a small arrow sticker for items that need a specific direction like flour bags.
Use two label sizes only — category and item — so the shelf looks organized instead of busy.
Don’t mix handwriting labels with printed ones; the visual mismatch makes clutter look worse.
10. Magazine-Style Can Holders with Angled Back Stops
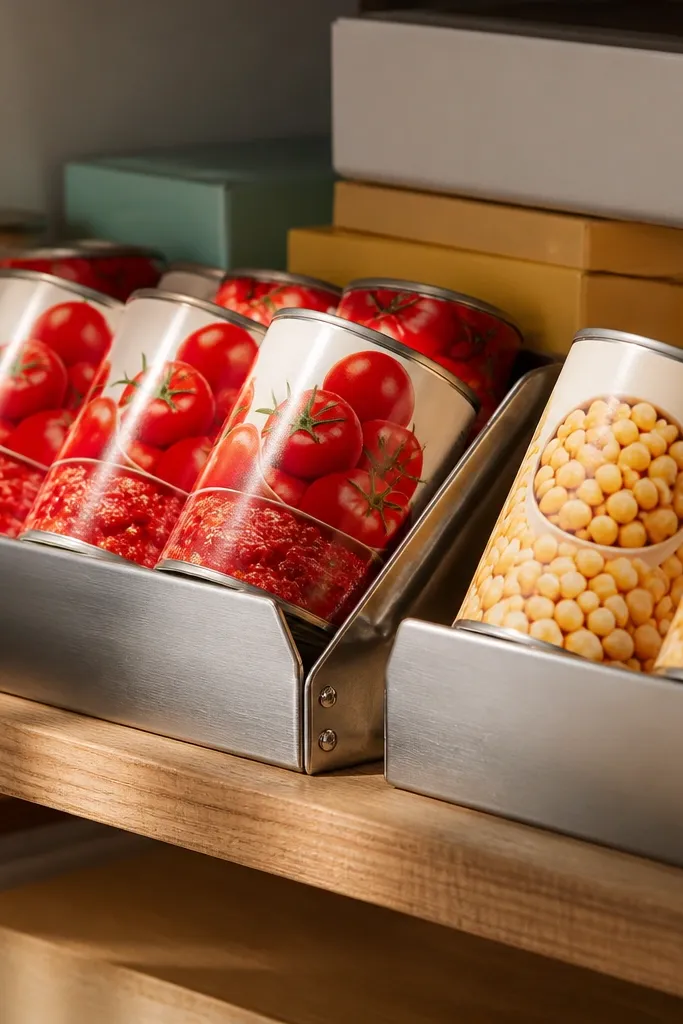
Cans look neat until you put too many in one spot and they slump. Angled back stops create a controlled lean so cans sit upright with labels facing out, which is exactly what looks good on camera. This design is perfect for small spaces because it uses shallow angles instead of deep dividers. It also makes grabbing faster since the front can is always accessible. Use it for canned vegetables, soup, and beans where you want a tidy row with minimal visual clutter.
Cut a base panel to shelf width and mark two or three angled channels based on can height. Build back stops by attaching thin strips at an angle of about 10 to 15 degrees, then add side rails so cans can’t roll sideways. Sand all contact edges, then mount the holder to the shelf with screws through the back. Place cans in channels and adjust stop angles until the can fronts sit in a straight line.
Editor's noteKeep the stop angle consistent across the shelf; mixed angles make labels look crooked.
Skip thisAvoid tall stops that block your hand — you’ll end up pulling from the back and ruining the alignment.
11. Pegboard Lid Rack Mounted Under a Shelf for Small Jars
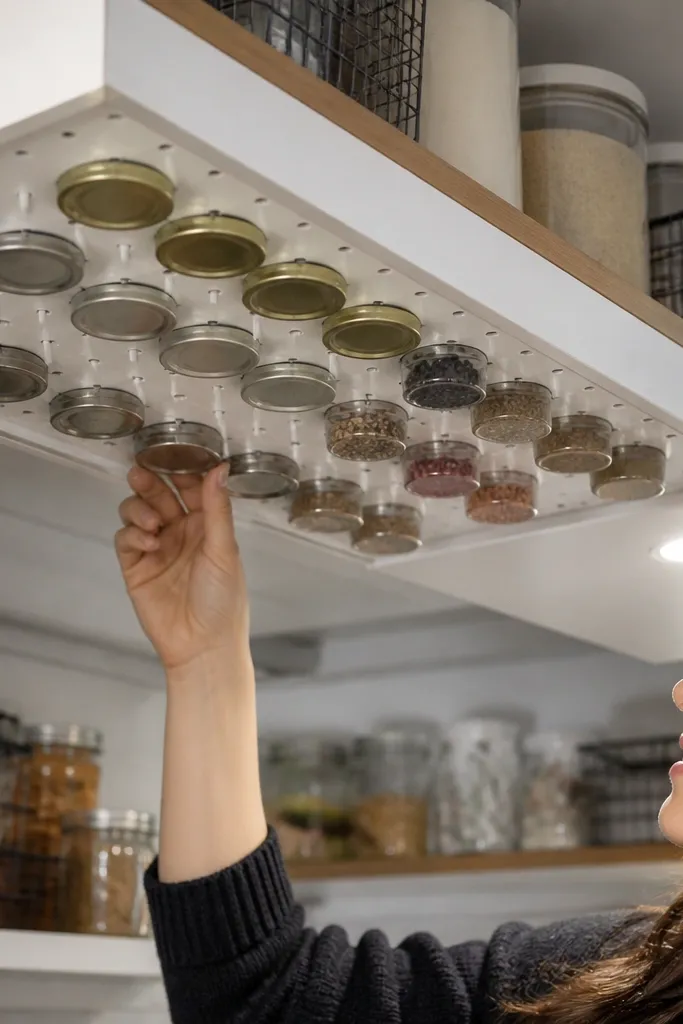
Under-shelf storage is the small pantry cheat code. Mount a pegboard lid rack under a shelf to store jar lids, small jars, and open packets without taking up the main shelf footprint. The look is tidy because pegboard holes create a grid pattern, and everything sits at a consistent height. This helps you keep the top shelf clean and front-facing while using vertical space that usually goes unused. It’s ideal for lid storage, small condiment jars, and spare spice jars you don’t want buried.
Cut a pegboard panel to the underside dimensions of your shelf run and mark hole spacing for your jar sizes. Mount the pegboard with screws into the shelf frame so it’s stable, then add small hooks or pegs for each jar size. Use a shallow tray lip along the bottom edge so small items don’t slip out. Finally, hang jars by the handles or place them on hooks, then apply small label stickers to the hooks for quick identification.
Editor's noteUse a matte clear spray on the pegboard so labels stick better and it wipes clean.
Skip thisDon’t mount pegboard too close to the shelf above; you need clearance for lids without scraping.
12. Tiered Wire Basket Stack for Snacks with Color-Coded Fronts
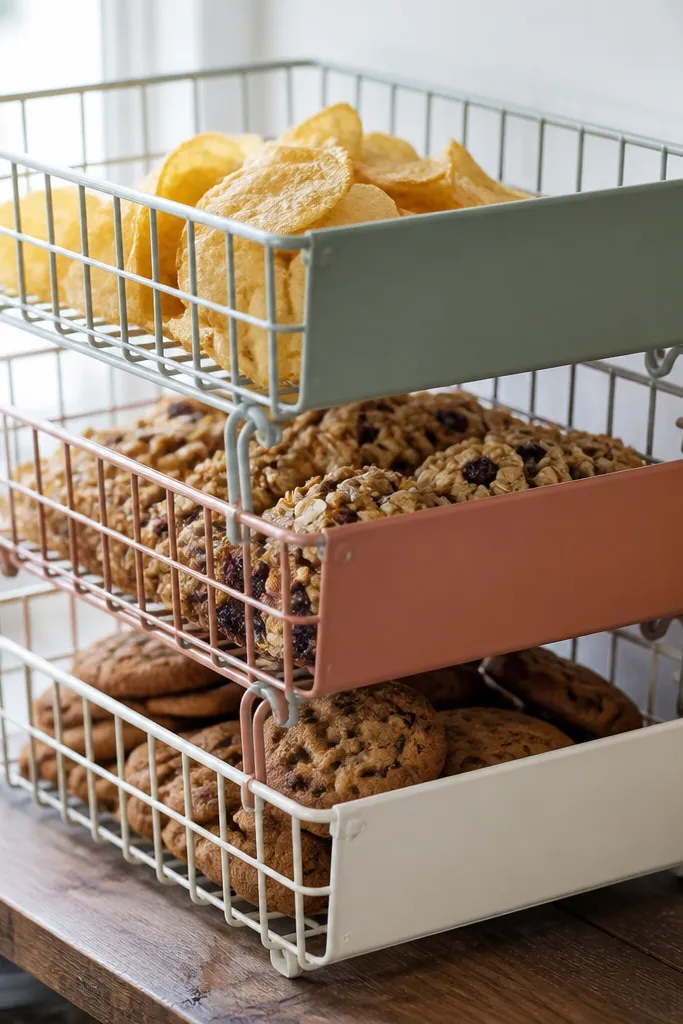
Snacks are where small pantries look messy fast because there are too many shapes. A tiered wire basket stack gives you height separation, so chips don’t block granola and cookies don’t hide bars. The wire structure looks light and modern, and it lets you see inside without pulling everything out. Color-coded fronts make it photogenic — even if you change brands, the category color stays the same. Best for snack bars, chips, crackers, cereal pouches, and single-serve packs.
Choose two wire baskets that fit your shelf width, leaving at least 1/2 inch clearance between baskets. Add a divider rail or spacer block to prevent the top basket from sliding, then attach baskets using brackets or screws through the basket frame into a base board. Add non-slip pads under each basket. Label the front with category stickers and keep basket contents consistent by category, not by brand.
Editor's noteUse one color for sweet snacks and another for savory so the shelf reads instantly.
Skip thisSkip overstuffing — if items reach past the basket rim, the tidy look disappears.
13. Reversible Bin Inserts for Rotating First-In Items
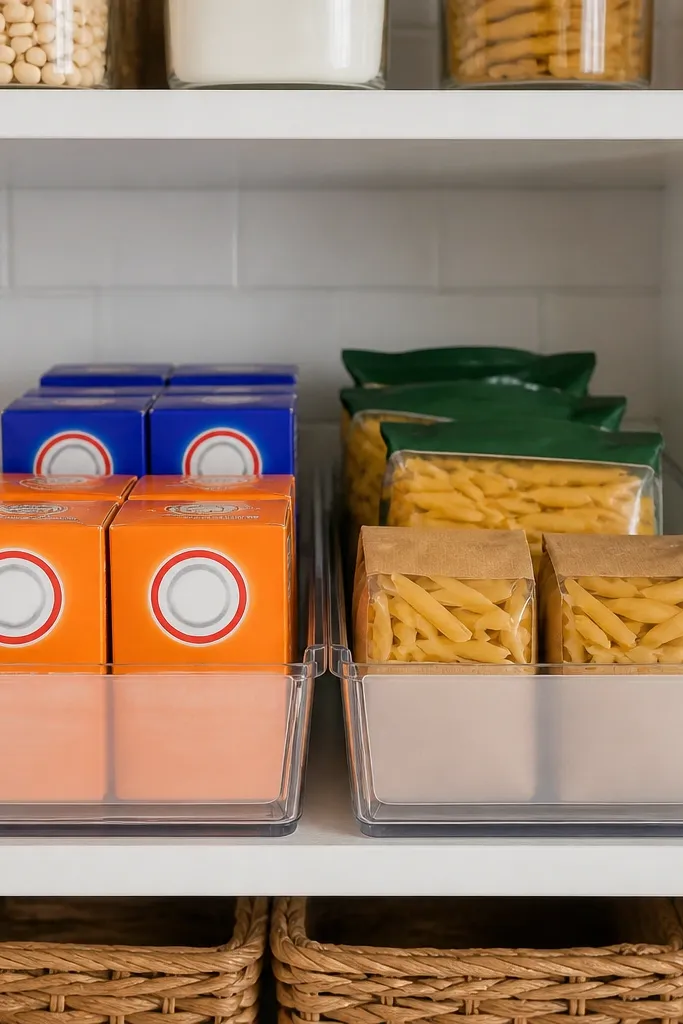
A small pantry gets messy when you can’t tell what you bought first. Reversible bin inserts keep packages aligned and make rotation simple, so older items stay in front. The look is clean because packages sit in a controlled lane, and the bin front stays consistent. This is one of the most practical pantry shelf organization ideas small-space because it reduces waste and keeps you from shoving items to the back. It’s ideal for open bags like rice, pasta, and granola, plus boxed mixes you want to rotate.
Build a shallow bin insert with two compartments separated by a divider that’s thick enough to stop sliding. Make the insert reversible by mounting it with two sets of stops so you can flip it end-for-end as you rotate stock. Add a front lip stop about 1 inch tall so packages don’t fall forward. Place the insert inside a larger bin or directly on shelf liner, then use a simple “front = newest” or “front = oldest” rule based on what you track best.
Editor's noteMark the insert underside with arrows so you don’t forget which side is the active lane.
Skip thisAvoid using tall bins that trap air and make bags balloon — it looks messy even when organized.
14. Fabric Divider Roll-Up for Deep Shelves and Back-of-Shelf Items
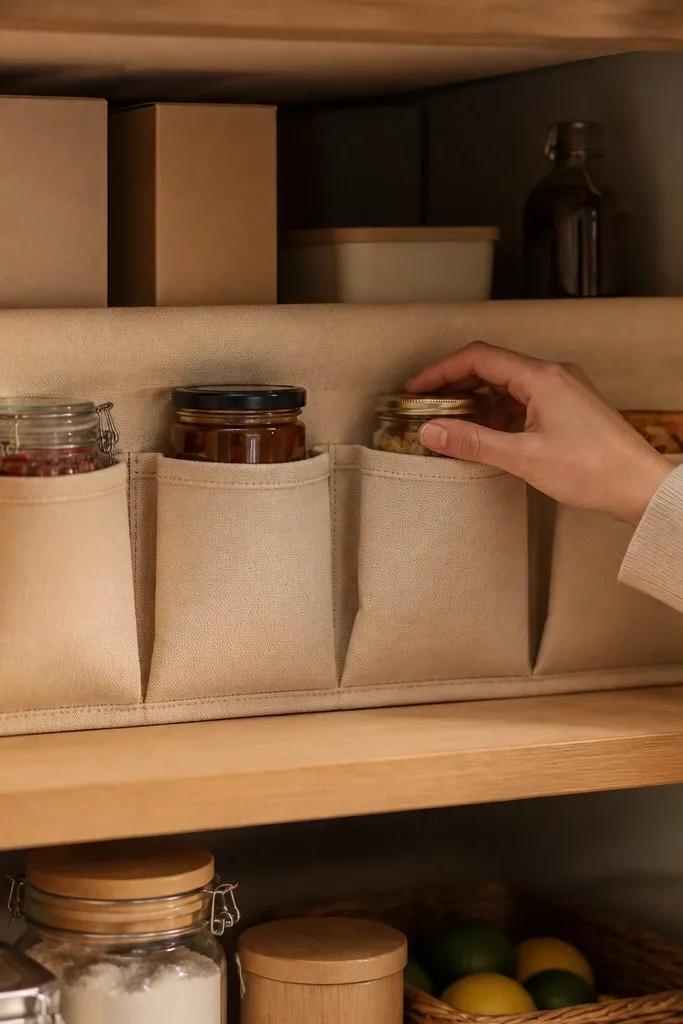
Deep shelves create a visual void — the back disappears and becomes a junk zone. A fabric divider roll-up turns that back space into a controlled pocket system while still looking soft and homey. It’s photogenic because the fabric edges are clean and the pocket openings keep items from spilling forward. This works well for backups and bulk items you don’t use daily, like extra flour, paper towels, or backup oils. The roll-up approach is also easy in small spaces because you can store it flat when not needed.
Cut fabric into panels sized to your shelf depth, then add reinforced pockets using double-stitched seams. Fold the panel into a roll form and attach a hook-and-loop strap to hold it closed. Mount the roll-up using a small dowel or hooks at the front so it stays anchored. Place items into pockets with consistent orientation, then roll and secure when you need the shelf to look clear.
Use canvas or a tightly woven cotton so the pockets keep their shape instead of sagging.
Don’t use thin jersey fabric — it collapses and makes the shelf look messy again.
15. Acrylic Packet Sleeve Wall on the Shelf Side
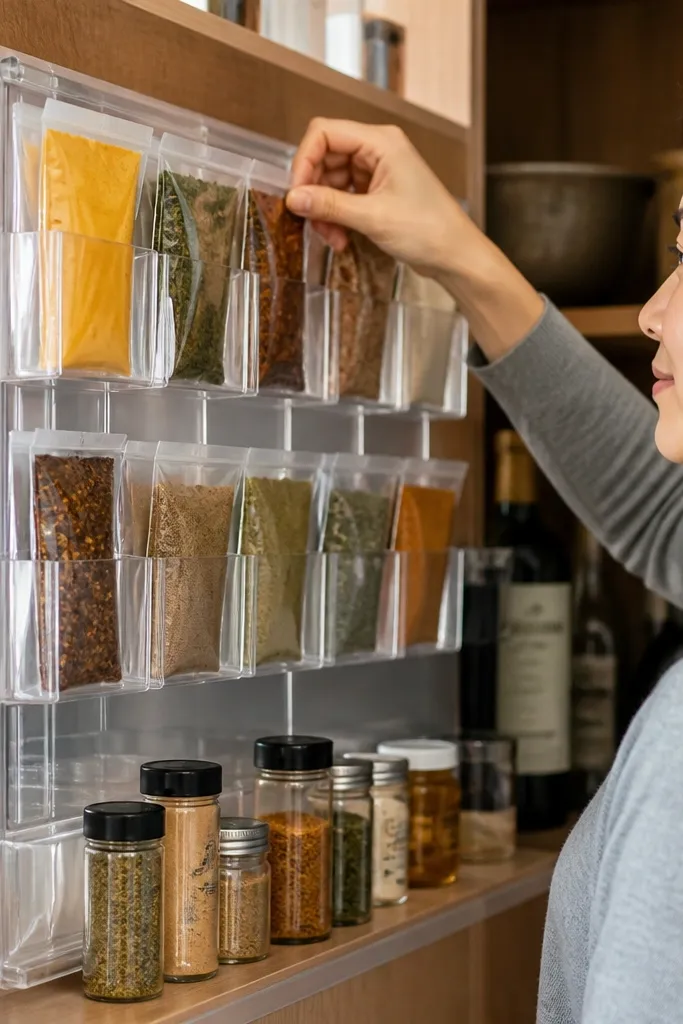
If your shelf has side space, use it. Acrylic packet sleeves mounted on the shelf side keep small items visible without taking up front depth. The look is sharp because sleeves align vertically in a clean panel, and the clear acrylic makes labels easy to read. This is one of the best pantry shelf organization ideas small-space because it turns unused side real estate into a display. It’s great for seasoning packets, drink mixes, and single-serve packets you want to grab quickly.
Measure the packet width and cut acrylic strips or buy ready-made acrylic sleeves that match that width. Mount the sleeves to a thin back board using screws and spacers so each sleeve stays straight. Attach the back board to the shelf side with brackets so it doesn’t wobble. Insert packets with labels facing out, then add a small category label at the top of each sleeve column.
Editor's noteLeave 1/8 inch gaps between sleeves so packets slide in without scraping labels.
Skip thisAvoid mounting sleeves flat against the shelf if the shelf surface is uneven; it creates crooked alignment.
16. Corner Shelf U-Track for Standing Bags and Tall Boxes
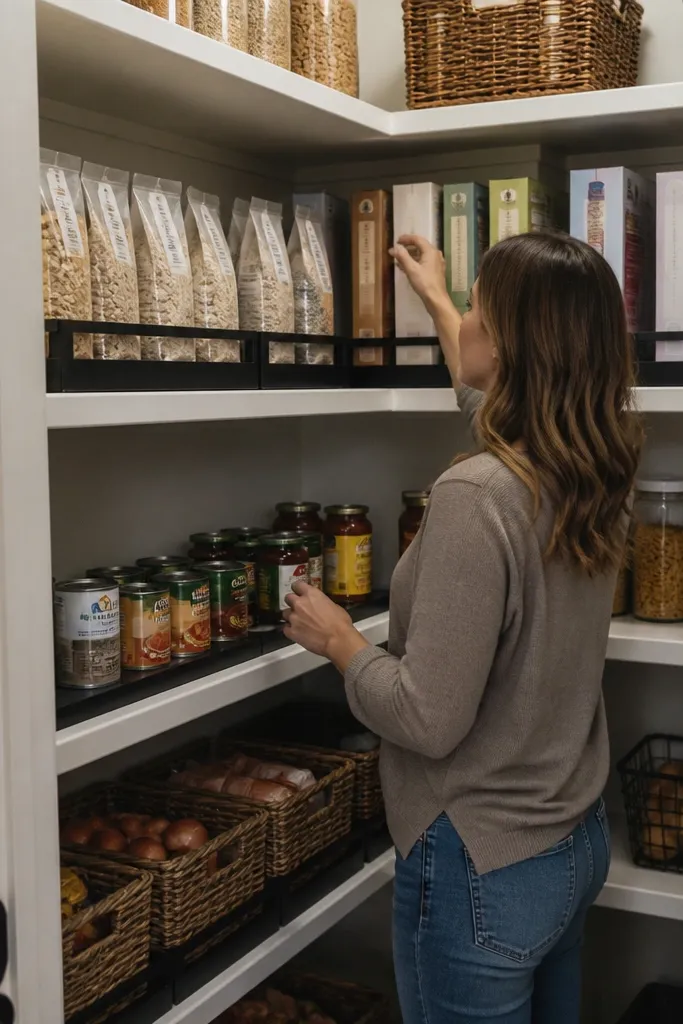
Corner shelves are where small pantries go to die visually. A U-track setup fixes that by trapping tall items upright, so they don’t lean into the aisle. The look is strong because the U-shape creates a clean boundary line, and items sit in a straight row. This project is worth it if you store tall boxes, bags of oats, or large seasoning bottles in the corner. It also keeps the rest of the shelf clean because you stop cramming everything into one front pile.
Measure the corner shelf depth and cut a base board that fits snugly along the corner line. Attach U-shaped metal channel or flexible plastic channel along the inside edges so items can stand with minimal wobble. Add a front stop strip to prevent sliding forward when you pull. Seal the board edges, mount it securely to the shelf, then test with the heaviest bag to confirm the track holds under real use.
Editor's noteUse rubber shelf pads under the base to stop the whole track from shifting when you grab a bag.
Skip thisDon’t rely on friction alone; leaning bags look sloppy even if they don’t fall.
17. Matte Black Wire Shelf Dividers for a Bold, Clean Look
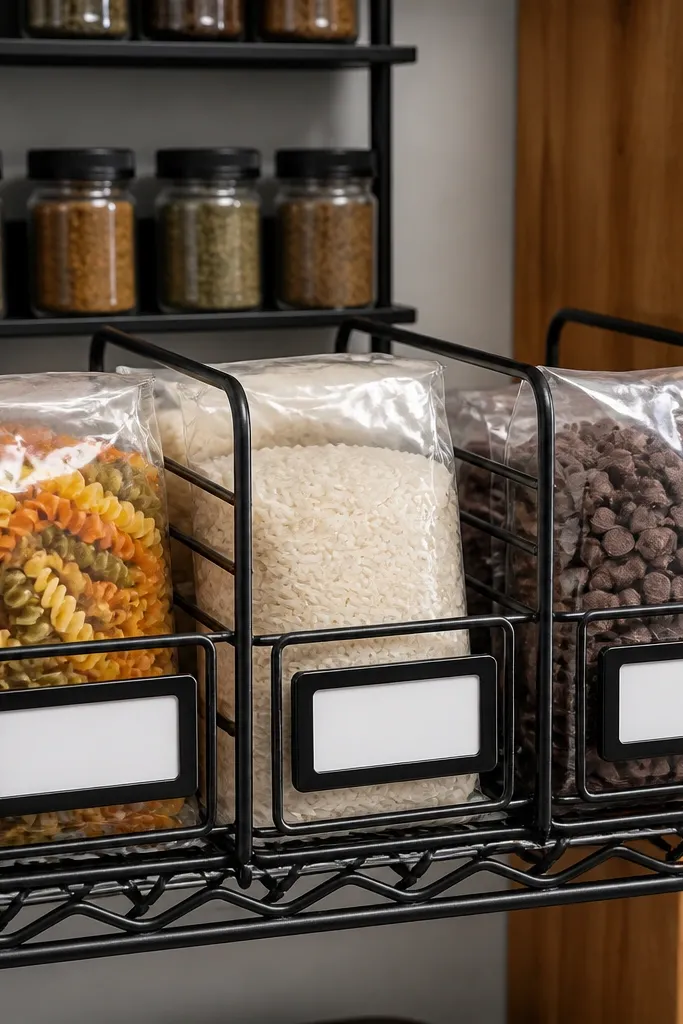
For small pantries, a bold divider color makes the whole setup look designed. Matte black wire dividers create crisp compartments that keep items upright and separate without blocking visibility. It’s also practical because wire lets you see labels and adjust spacing as your pantry changes. The aesthetic payoff is strong: straight black lines against light shelves look intentional and tidy in photos. Use it for cereal boxes, snack bags, and jars that need separation.
Buy adjustable wire dividers or make your own from wire shelving material with uniform height. Position dividers on shelf liner and mark exact points so they’re square, then secure with screws or shelf clips. Keep divider heights just above the tallest item so taller items don’t escape. Add matching label tags to each compartment front, then load items in a consistent order left to right.
If your shelf is light wood, pair matte black dividers with white labels for maximum contrast.
Don’t mix divider heights randomly — uneven sections make the shelf look cluttered even when it’s organized.
18. Clear Stack Cubes for Counting Snacks by Height
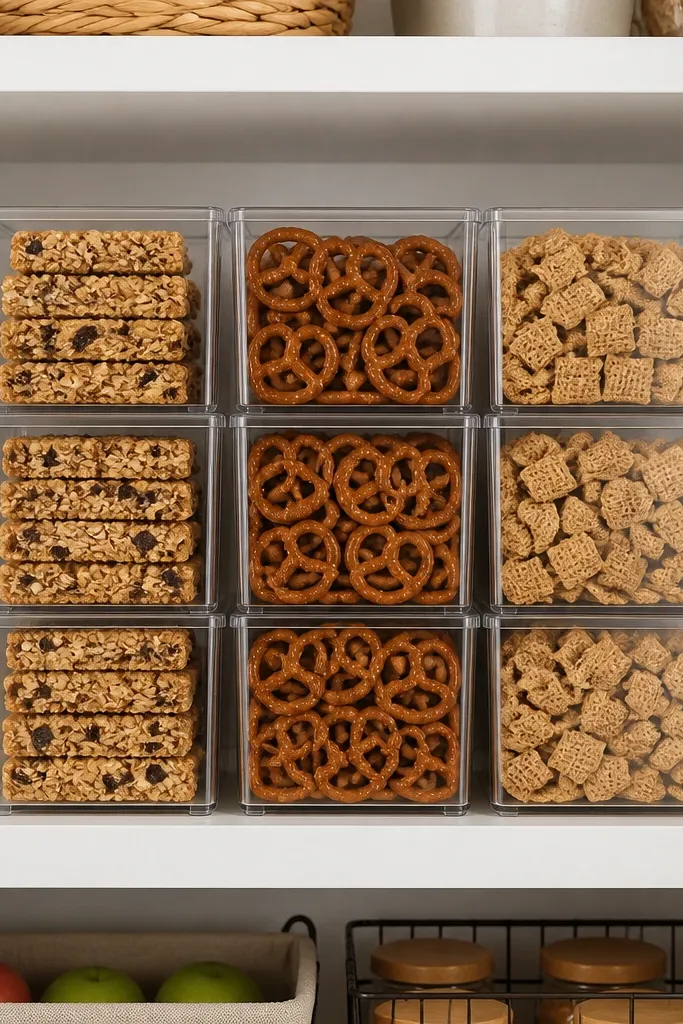
Stack cubes turn snack storage into a clean block of color and label. The clear sides make it easy to scan, and the cube shape creates uniform height so the shelf looks tidy instead of lumpy. This is a strong option for small-space pantry shelf organization ideas small-space because it fits narrow widths and keeps items from spreading. Use it for single-serve packs, granola bars, and small boxes. The visual effect is the point: everything lines up in geometric stacks.
Measure the width of your shelf and choose cube organizers that leave 1/4 inch clearance on each side. If you build your own, use clear acrylic panels cut into cube faces with a bottom tray, keeping side panel thickness consistent for stability. Add a small label strip on the front face at eye level. Fill cubes in layers, then stop when items reach the cube top line — overfilling makes the stacks look messy.
Use one cube per category and keep the same fill height each time so the shelf looks even.
Skip frosted cubes if you rely on labels — you’ll end up opening and digging.
19. Magnetic Spice Strip Rail with Swing-Out Labels
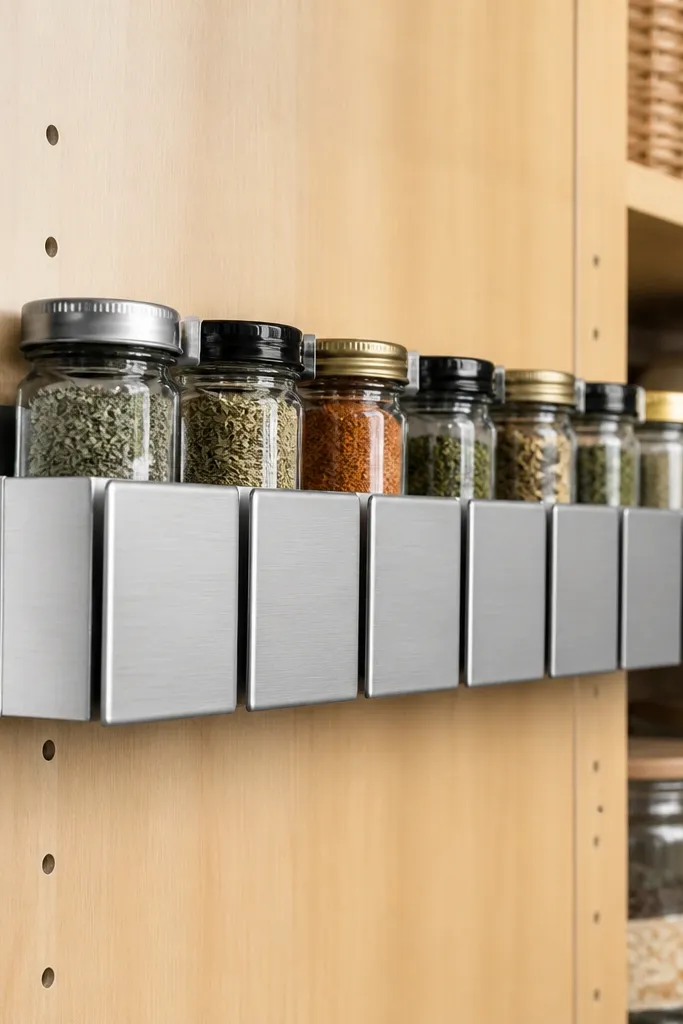
This is for the pantry shelf that stays messy because labels face sideways and bottles get nudged out of place. A magnetic rail holds flat label cards in a fixed row, and the jars sit behind them so everything lines up the same way every time. The swing-out card design means you can read labels without pulling jars forward and dumping the front row. It looks clean — one repeating line of labels — and it stays tidy because the label card acts like a visual and physical stop. This fits small-space pantries where you want the shelf front to look intentional, not like a storage bin.
Cut a strip of thin sheet metal (or buy a magnetic sheet) to the shelf length minus 1/8 in on each end so it doesn’t scrape cabinet walls. Adhere it to the shelf front underside with a thin bead of construction adhesive meant for metal and wood, then clamp while it cures. Make label cards from 110 lb cardstock or thin acrylic sheets sized to 1/2 in shorter than the shelf depth so they can swing without rubbing; attach each card to a tiny binder-ring or two small screw eyes so the card pivots outward. Place jars in a single row with the jar front edges touching the rail line, then fine-tune card spacing so each card lines up with one jar label. Finish by sealing the shelf surface with a clear matte topcoat where adhesive squeezed out, and wipe fingerprints off the metal before it’s covered with labels.
Editor's noteUse a strip of painter’s tape along the shelf front to mark the exact jar line before you mount the rail — it makes the whole row look straight.
Skip thisSkip strong magnets that are too thick — they create a bulky lip that jars catch on every time.
20. Fold-Open Shelf Drawer Liners for Sticky, Powdery Items
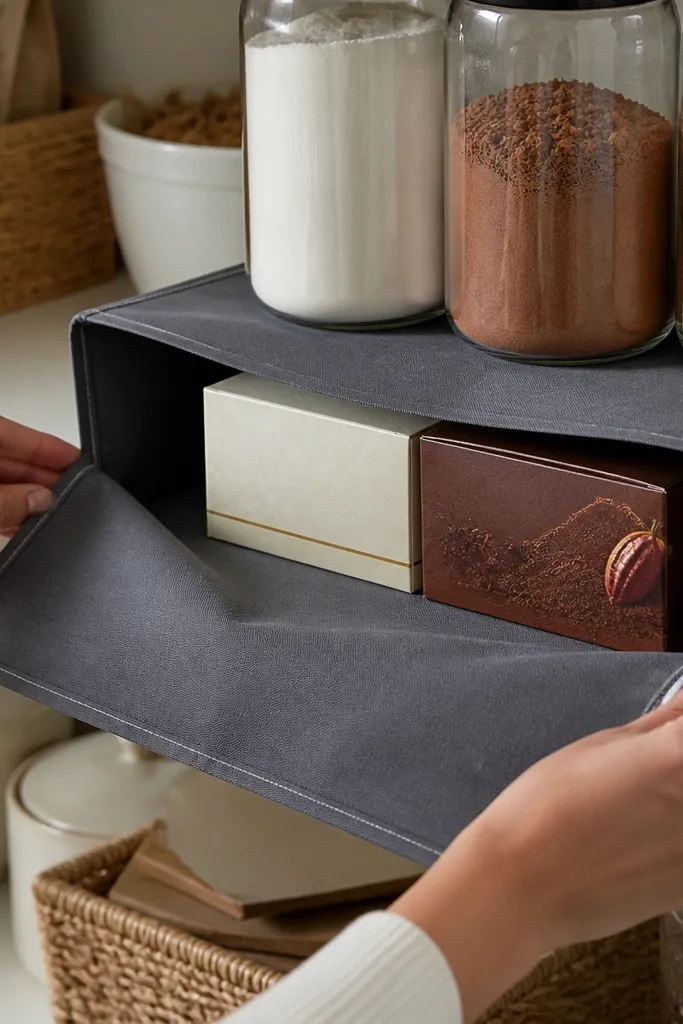
This tackles the kind of clutter that doesn’t look like clutter until flour, sugar, or cocoa dust spreads and makes everything look grimy. A fold-open liner creates a shallow “drawer” inside the shelf so messy items stay contained, even when you’re grabbing one box at a time. The liner also gives you a clean front edge, so the shelf looks tidy from across the kitchen. Use it for powdered baking goods, drink mixes, and anything that leaves residue on shelf surfaces. It’s beginner-friendly and fast — you’re making liners, not building furniture — and it works especially well in small pantries where shelves take the most abuse.
Measure the shelf inner width and depth, then cut a fabric liner panel from oilcloth or wipeable canvas with a 1 in overlap on the front and 1/2 in extra on both sides. Cut a second panel from rigid plastic sheet (corrugated polypropylene works) to the same size but 1/4 in narrower so it slides under the overlap without catching. Sew or glue a simple fold line by reinforcing the top edge with iron-on hem tape, then create two side “wings” by folding the overlap inward and stitching a straight seam 1/2 in from the edge. Place the rigid sheet into the liner so it holds the drawer shape, then install two small adhesive-backed hook-and-loop strips on the shelf front underside to keep the liner flat. Finish with a clear matte shelf-safe seal on any wood contact points so residue wipes off instead of soaking in.
Editor's noteBefore cutting, do a dry fit and mark the exact fold line with a pencil — if the fold is off by even 1/4 in, the front edge looks crooked.
Skip thisDon’t use thin cotton or uncoated canvas — it soaks up powder spills and the liner stops looking clean.



