
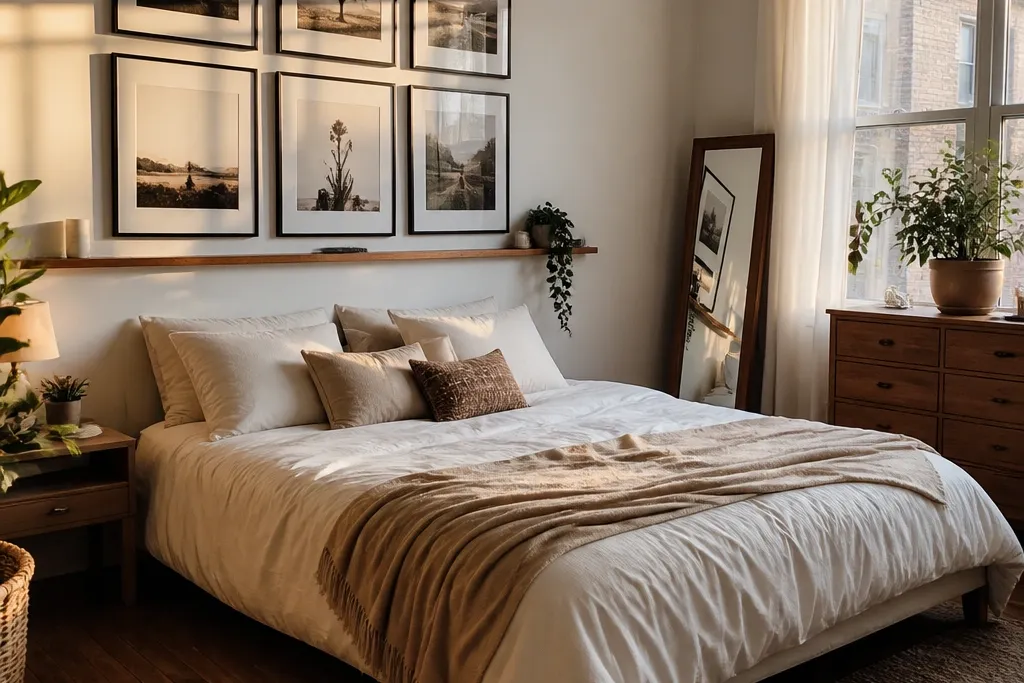
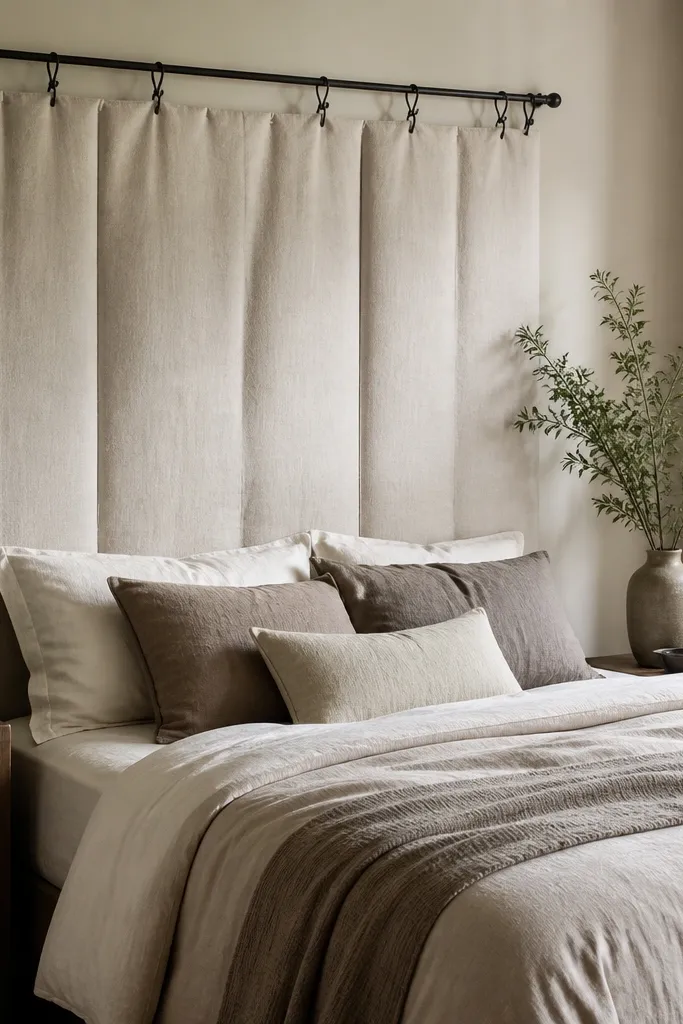
1. Linen drape ceiling-to-bed wall curtain

This look gives you the same “headboard height” effect without adding furniture. Heavy linen (not thin sheers) pools in flattering folds and visually fills the blank wall behind your pillows. The top rail sits high enough that the room feels taller, and the drape frames the bed edges so it doesn’t look like bedding is just floating in the middle of a wall. Choose a warm neutral like cream, oatmeal, or stone to keep it cozy, then add a slim curtain rod or a track so the fabric hangs straight.
Start by measuring from the mattress top to about the pillow peak, then add 2 inches — that’s your target drape coverage height. Install a curtain rod or ceiling track 6-10 inches above the window or highest point you can reach on that wall, so the folds start high. Use two panels that together cover the bed width plus 8-12 inches total (4-6 inches overlap per side). Hem or buy panels long enough to reach 1-2 inches above the floor; press the fabric and clip it to a rod with wide rings for clean fold spacing.
If your wall is slightly uneven, tension the fabric with a few hidden clips on the rod so the folds stay symmetrical.
Don’t use thin, shiny sheers — they won’t cover the wall gaps and they look unfinished behind pillows.
2. Peel-and-stick wood slat panel wall behind the bed

Wood slats are the fastest way to make a bed feel architectural. Peel-and-stick panels let you get that vertical texture and shadow play without building anything. The slats also hide minor wall imperfections because the grooves break up flat lighting. Keep the color in the same temperature family as your floor or nightstand (light oak tones for light rooms, walnut tones for deeper palettes). This is a strong fit for renters and anyone who wants a crisp look with minimal tools.
Clean the wall with rubbing alcohol and let it fully dry so the adhesive bonds. Mark the bed centerline and measure the exact width you want to cover — a clean target is bed width plus 6-10 inches each side. Apply panels in a grid or staggered pattern with a level line as your first row; press firmly along edges and corners. Seal seams only if the product recommends it, then style with two matching pillowcases or one throw in the same wood-tone family to tie it together.
Editor's noteUse a laser level (or a careful level line) for the first row — all the rest depends on that straight start.
Skip thisDon’t cover the entire room wall if the bed is small; a tight “bed zone” looks intentional and avoids a busy look.
3. Floating picture ledge + gallery grid above the bed
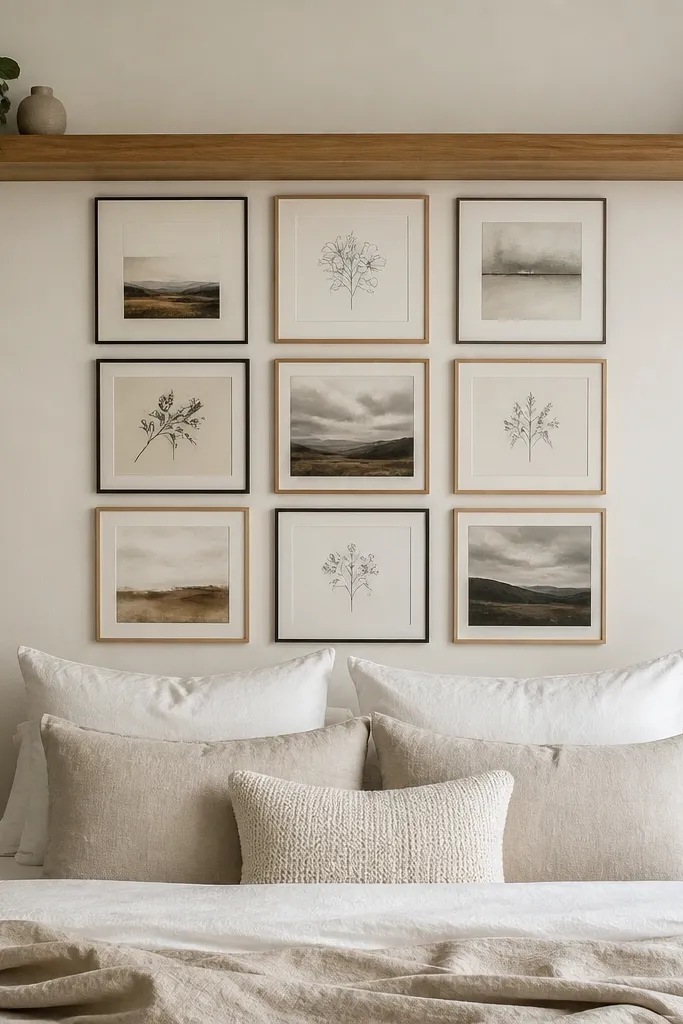
A gallery wall can work as no headboard bedroom ideas when you build it like a structured grid. The key is a floating ledge or shelf that creates a horizontal line at headboard height, then frames arranged with matching spacing. This setup gives visual weight behind pillows and lets you rotate decor without redoing the whole wall. Stick to one frame color (matte black, warm wood, or white) and one paper tone (cream or off-white) for a clean, modern finish.
Pick a ledge width around the bed width (bed width plus 2-6 inches total) and mount it 4-8 inches above the mattress top. Install at least two anchor points so it doesn’t sag; use a stud finder and a proper bracket kit. Arrange 6-9 frames in a grid pattern under the ledge or around it, keeping consistent gaps of about 2-3 inches between frames. Use museum glass or glare-free acrylic if you get strong overhead light, then hang the bottom of the lowest frame so it lines up with the pillow peak.
Measure frame centers, not frame edges — it keeps the spacing consistent even if frames have different widths.
Don’t mix frame finishes and paper tones — the wall reads chaotic and the bed looks less “finished.”
4. Built-in style wall panel molding (no furniture added)

Panel molding turns a blank wall into a built-in look, which is exactly what a headboard would do visually. It creates crisp rectangles behind the pillows and adds shadows that look good at night. This works best in rooms with white walls and simple bedding because the molding becomes the star. Use a paint-matched finish so it looks like architecture, not trim you bolted on yesterday.
Plan one centered rectangle behind the bed: its width should be bed width plus 8-12 inches total, and its height should reach from about 6 inches above the mattress to just above the pillow peak. Install 1x3 or 1x2 MDF primed trim for the outer frame, then add inner box trim pieces for depth. Use construction adhesive plus brad nails for tight seams, then fill nail holes with spackle. Prime and paint in the same wall color with a satin finish so it’s wipeable and stands up to dust.
Editor's noteDry-fit your layout on painter’s tape first; correcting the rectangle now is easier than patching later.
Skip thisDon’t use glossy paint — it highlights every tiny gap where trim meets wall.
5. Tall headboard illusion with vertical curtains on a track
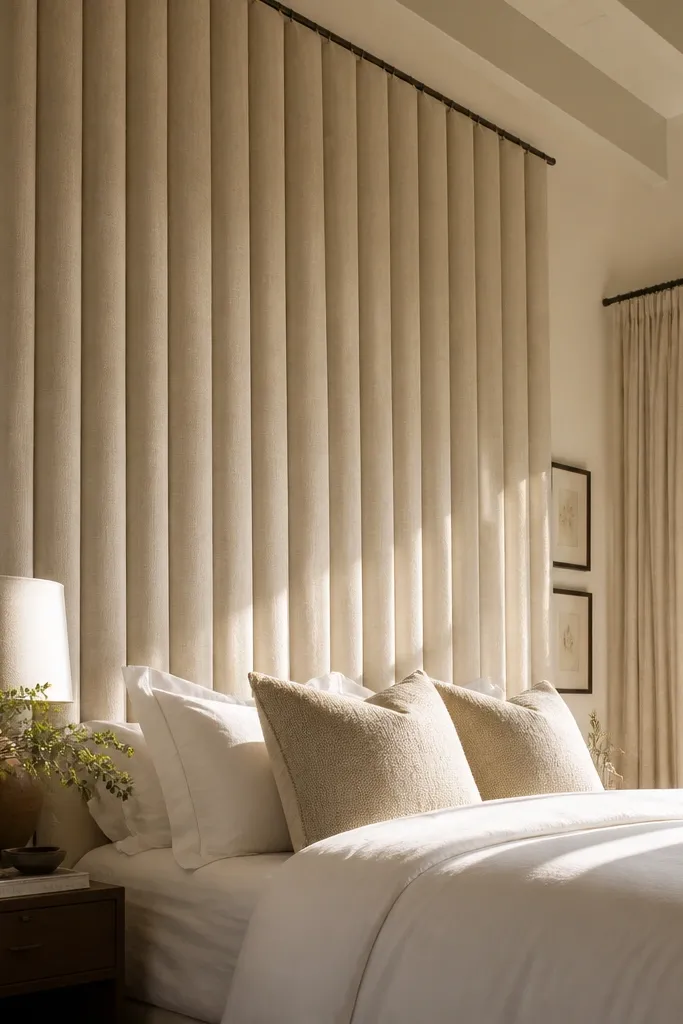
If you want a headboard feel but hate heavy furniture, vertical curtains are a clean fix. A track system lets you hang multiple panels so they meet behind the pillows and create a tall, uniform block. Vertical lines also make the wall look higher, which helps beds feel more grounded. Choose a striped or textured fabric so the wall doesn’t look flat, and keep the color palette tight to avoid the “random curtain” vibe.
Install a ceiling-mounted track across the bed zone, starting about 6-10 inches above the mattress top and ending at least above pillow height. Use panel widths that overlap slightly in the middle, so there are no gaps when the panels fall naturally. Hang 3-5 panels depending on bed width: for a queen, three wide panels plus one center panel looks balanced. Steam the fabric and adjust panel spacing so folds land symmetrically around the bed centerline.
Add a small weighted hem (or use curtains with weight bars) so the fabric hangs straight instead of twisting.
Don’t hang panels too narrow — gaps between curtains look like missing headboard sections.
6. Removable fabric wall panels on command hooks
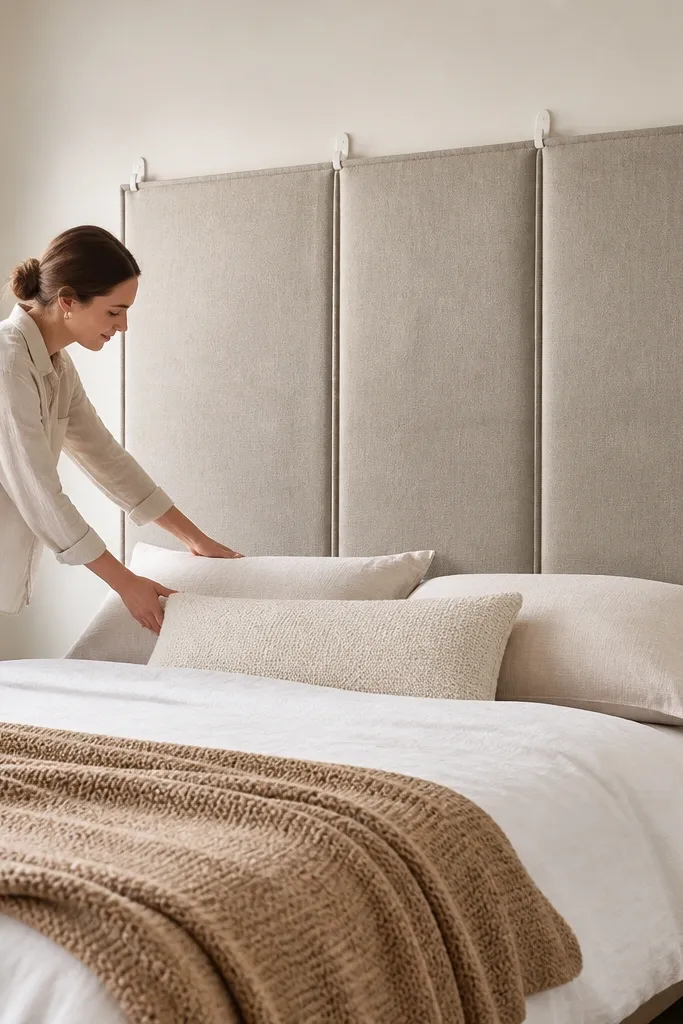
This is the rental-friendly answer when you want no headboard bedroom ideas but still need a soft, styled backdrop. Fabric panels add warmth, hide patchy walls, and make the bed look cushioned even without furniture. Use thicker upholstery-weight cotton or linen-blend, not curtain sheers, so the panels hold shape. The look is best when you cover the bed zone in two or three panels for a clean block behind pillows.
Pick two or three fabric panels sized to cover the bed zone: measure bed width, then add 6-10 inches total for side coverage. Use adhesive strips or command hook clips rated for the fabric weight; place hooks along the top edge in a straight line. Stretch each panel taut and secure the top edge first, then smooth the fabric so it doesn’t wrinkle. Press the fabric and trim any excess so the bottom edge lines up around pillow height.
Choose a fabric with a subtle texture — it hides wrinkles better than smooth cotton.
Don’t use lightweight sheets — they sag and show the wall through, which defeats the “full” effect.
7. Oversized mirror as the headboard anchor
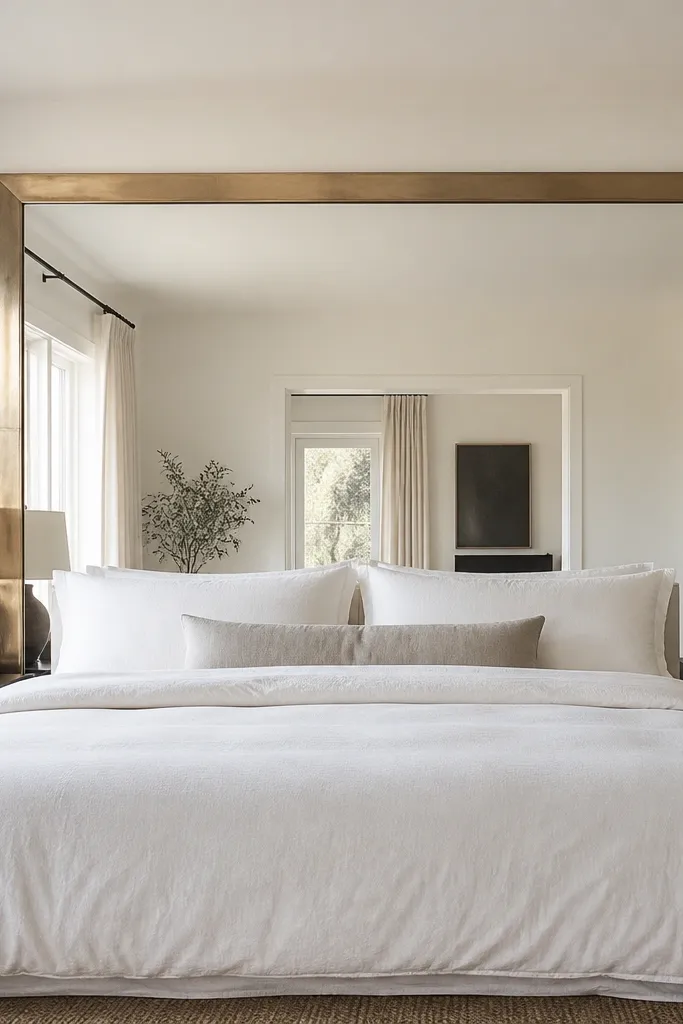
A mirror behind the bed works because it gives the wall a strong shape and reflects light onto bedding. It also visually widens the room, which helps beds look less cramped. Go bigger than you think: the mirror should cover most of the bed zone behind pillows so the bed doesn’t feel like it’s in front of a random object. Choose a frame that matches your hardware — black for modern, warm wood for farmhouse, brushed brass for glam-lite.
Choose a mirror height that reaches from about 6 inches above the mattress to at least pillow peak — arched mirrors often fit this perfectly. Mount with proper wall anchors into studs if possible; use a bracket rated for the mirror weight. Center it on the bed so it aligns with the pillow midpoint. Keep a 2-4 inch gap between the mirror bottom and the pillow top so it doesn’t feel like a ceiling decoration.
Editor's noteIf you get glare at night, angle the mirror slightly or place it on the side wall rather than directly opposite a bright window.
Skip thisDon’t pick a mirror that’s too small — a tiny mirror looks like decor, not a headboard replacement.
8. Wood ladder shelf behind the bed

This is no headboard bedroom ideas in the most literal way: a ladder shelf rises behind the bed and fills the vertical space. The shelves add texture and allow you to style books, framed photos, and small plants, which turns the blank wall into something layered. Look for a ladder with wide rungs so it doesn’t feel too airy. Keep the styling tight: two bookshelves' worth of items max across the width so it reads intentional.
Select a ladder shelf that’s taller than pillow height by at least 6-10 inches. Place it centered behind the bed and keep the distance from the bed consistent on both sides; aim for about 2-4 inches clearance so bedding doesn’t bump. If it’s freestanding, anchor the top with a wall strap for safety. Style in height order: tallest items at the top rung, then medium frames, then small objects on the lower shelves.
Editor's noteUse book spines in one color family so the ladder doesn’t turn into visual clutter.
Skip thisDon’t stack too many small decor pieces — the wall looks busy instead of full.
9. Two-tone upholstered wall panels with simple batting

If you want the look of a headboard that you can’t stop touching, upholstered wall panels do it. The padding makes the bed feel cozy and the seams create a tailored, furniture-like outline. Use two tones if you want depth: one fabric for the main field and a contrasting fabric for a thin border strip. This works best with neutral bedding because the texture is already doing the heavy lifting.
Build two or three panels using foam batting and a plywood backer (or thick MDF) sized to the bed zone. Stretch fabric tightly over the foam and secure with a staple gun at the back; keep corners crisp so they don’t bunch. Mount panels using French cleats or heavy-duty wall anchors depending on your wall material. Paint or finish the edges so the panel looks like a piece of furniture, not a craft project.
Editor's notePre-wash your fabric and iron it before stretching so the surface doesn’t shrink later.
Skip thisDon’t skip the backer — foam alone dents and the panel looks uneven after a few weeks.
10. Floating slat shelf + framed fabric art strip
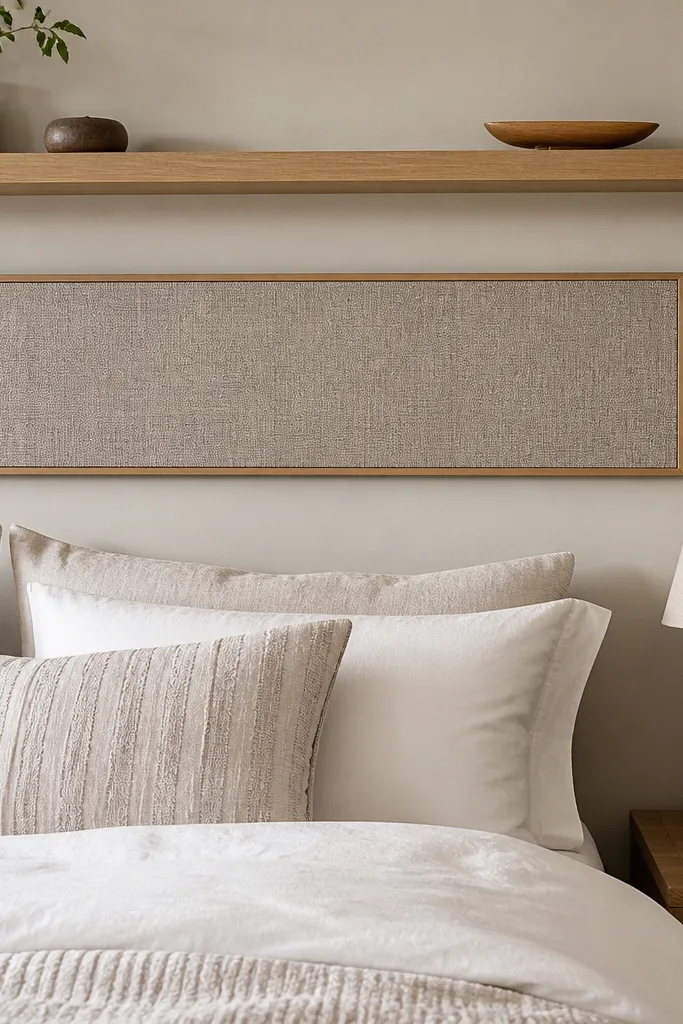
This combines a hard horizontal line and a soft vertical texture, which is exactly how a headboard reads. The floating slat shelf gives you that “top edge” feeling, and the framed fabric strip below it fills the wall space behind pillows. It’s a great option for modern bedrooms that need warmth without heavy upholstery. Choose fabrics with a pattern scale that matches your room — small woven textures look calm, larger prints look bolder.
Mount a floating shelf at headboard height: about 4-8 inches above the mattress top. Use a shelf depth around 3-5 inches so it looks substantial but not bulky. Frame a fabric piece (or stitched textile panel) in a simple frame sized to the bed zone width minus 2-4 inches total. Hang the fabric under the shelf, centered to the bed, then add a few objects on the shelf in one finish (all wood or all black).
Use a matte frame finish; shiny frames catch light and can look harsh behind bedding.
Don’t center the fabric too low — if it sits behind the mattress, the wall still looks empty.
11. Tiled wall panel behind the bed with a simple grout grid
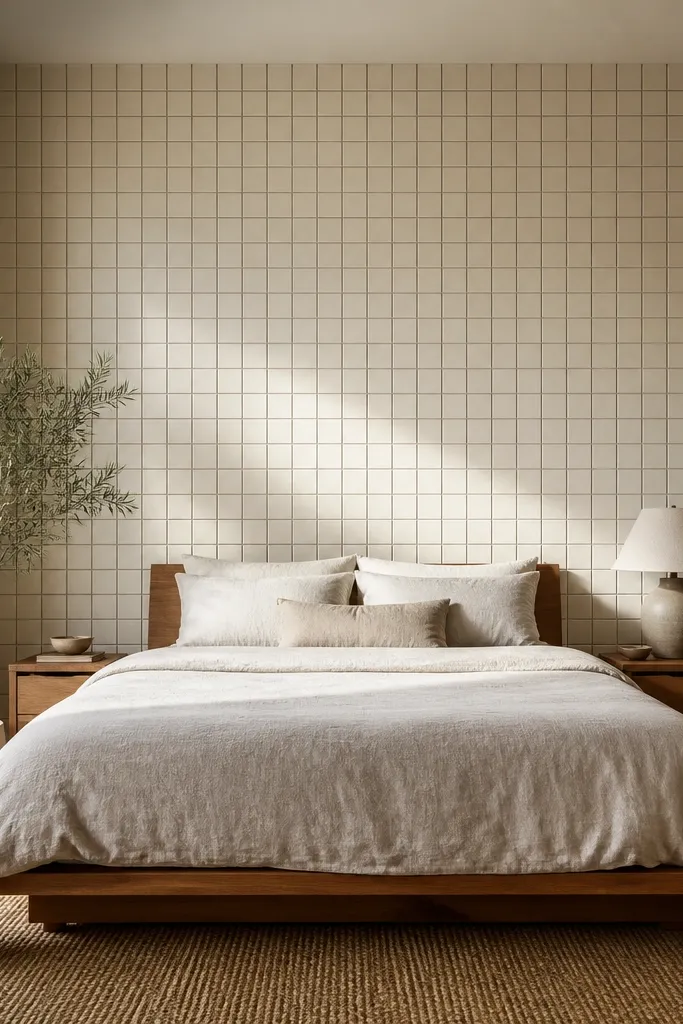
Tile is the “no headboard bedroom ideas” option that looks expensive and holds up. A tile panel behind the bed gives you a clean, geometric backdrop that reads like a built-in wall feature. Choose small-format tiles (like 2x2 or 3x3) for a denser look, and use grout color intentionally: warm white grout makes the wall softer, charcoal grout makes it modern. This is ideal if you get sun and want something that won’t fade like fabric.
Mark the bed zone on the wall and plan a centered rectangle that covers pillow height plus a few inches. Use a tile backer board or tile directly if your wall is suitable; prime and waterproof as needed. Dry-lay tiles first to confirm the grid lines look centered, then spread thinset and set tiles in rows. Use spacers for consistent grout lines, let cure fully, then grout and seal according to the grout product instructions.
Editor's noteChoose a grout color before you buy tiles — it changes the whole vibe more than the tile color does.
Skip thisDon’t skip backer board if your wall is drywall — tile can crack without proper support.
12. Washi tape stripes for a crisp temporary headboard look
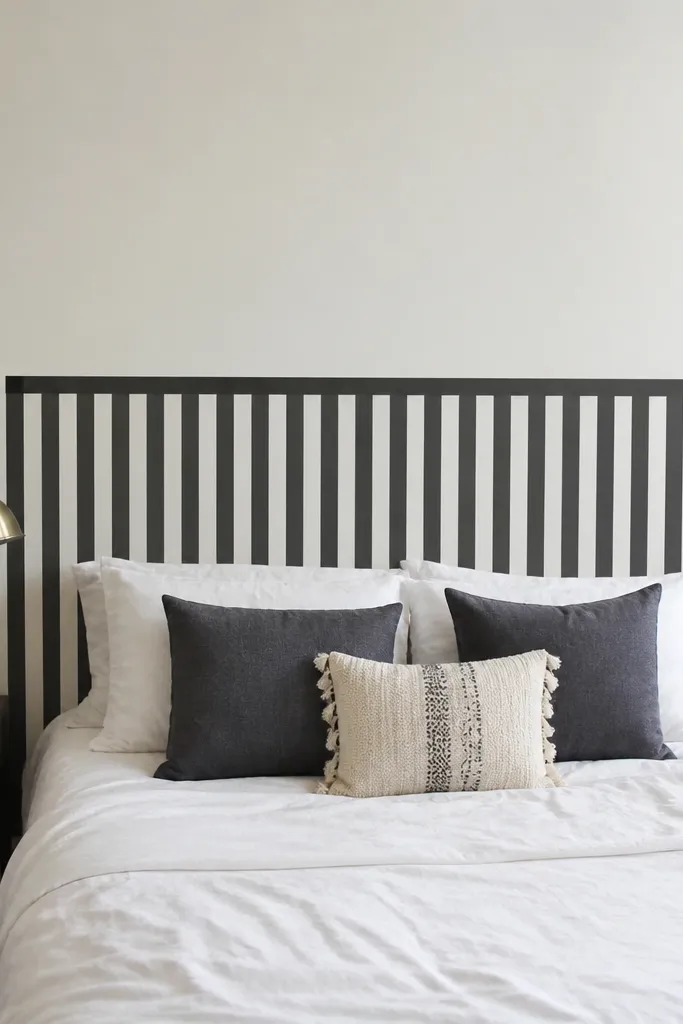
This is the fastest, lowest-cost way to get a headboard-style backdrop and it photographs well. Bold, straight stripes create a clear pattern block behind pillows without drilling or permanent changes. Washi tape also lets you adjust spacing until it looks right, which matters because beds sit at a specific height and the wall needs alignment. Keep it graphic: two to four vertical or horizontal stripes in one high-contrast color.
Clean the wall so tape sticks evenly. Mark a centerline and measure the bed width; then plan stripe spacing so the stripes sit behind pillow zones, not out in the open wall. Apply tape with crisp edges using a level and press down along the tape seams. Add a second layer of tape if you need more opacity, then remove slowly after you’re done styling (or leave it if it’s a longer project).
Editor's noteUse a plastic smoothing tool to press edges — it prevents lifting corners that show up in photos.
Skip thisDon’t use too many colors — the wall becomes noisy and the bed looks less “full.”
13. Pegboard wall organizer styled like a gallery
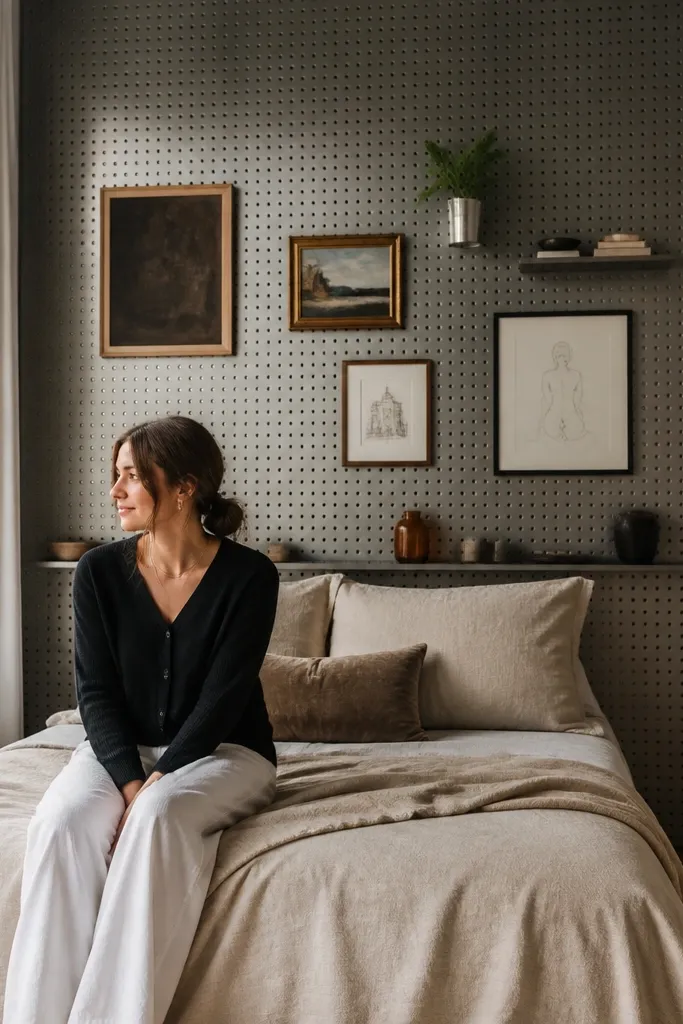
Pegboard gives you built-in structure without a headboard and it’s easy to style so it looks intentional. The holes add texture and the add-on hooks and shelves let you place small frames, planters, and even a narrow ledge at pillow height. For a full look, cover the bed zone with one big pegboard sheet or multiple pieces that align in a grid. Choose a pegboard color that matches your room — white for bright, wood-tone for warm, or black for modern drama.
Buy pegboard sized to cover the bed zone width and pillow height. Mark stud locations and mount the pegboard with proper anchors and screws so it stays flat. Add a simple layout: one narrow shelf at about pillow top height, then 2-3 framed prints or small baskets below. Use consistent frame sizes and keep the items mostly in one color palette so the wall reads styled, not random.
Editor's notePre-plan your layout on paper — pegboard holes make it easy to move stuff, but it’s faster to commit early.
Skip thisDon’t hang heavy items only on the top edge — distribute weight across multiple hooks and shelves.
14. Painted faux panel headboard using a roller and brush lines
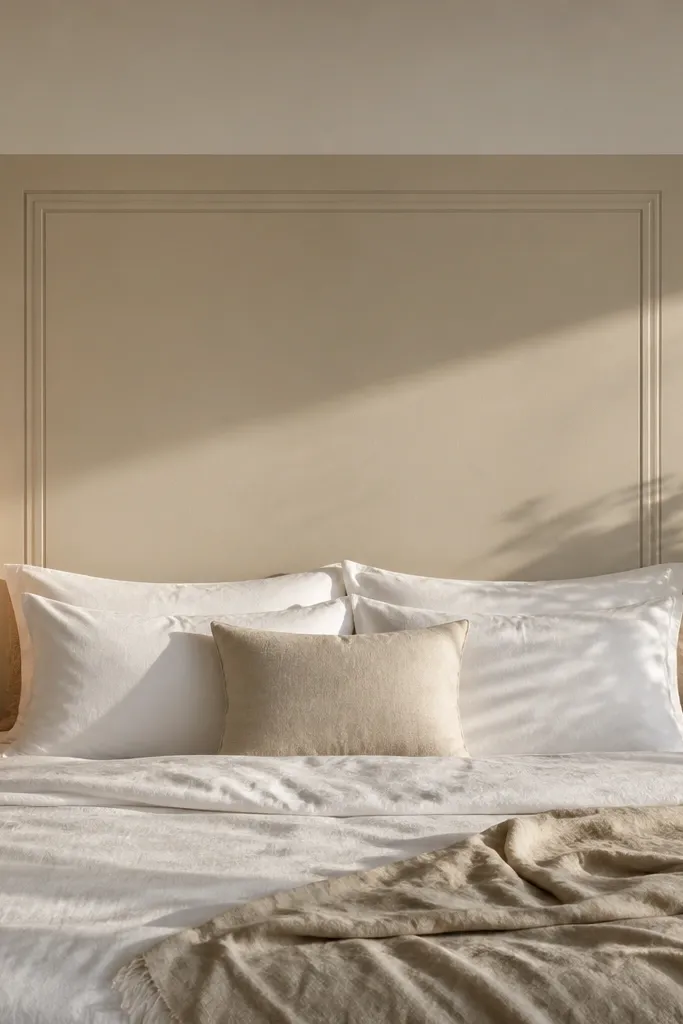
A painted faux headboard gives you the look of trim without installing anything. You create a rectangular “panel” behind the bed with a slightly different sheen or a second color, then add subtle shadow lines. It’s clean, modern, and it works in rooms where drilling is a no-go. Use a satin or eggshell finish for the base and a slightly different sheen for the panel so the edges read from across the room.
Tape off a centered rectangle behind the bed: width bed width plus 8-10 inches total, height from about 6 inches above the mattress to pillow peak. Paint the rectangle a shade darker or in the same color family for depth; let dry. Use a smaller brush to outline crisp edges or add 1/2 inch “shadow” lines along the inner border. Remove tape while paint is slightly tacky so edges stay sharp.
Editor's noteUse a small foam roller for the main field so you don’t leave brush marks inside the panel.
Skip thisDon’t paint fuzzy edges — if the tape line bleeds, the whole headboard illusion looks sloppy.
15. Large woven wall hanging with a dowel rod top
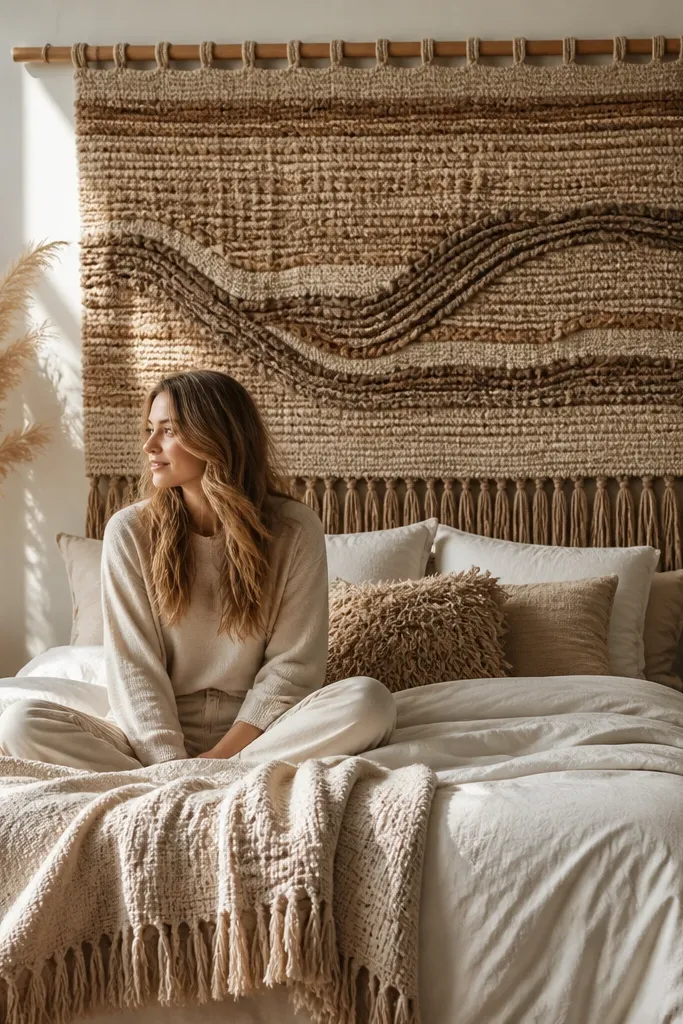
A woven wall hanging is one of the best no headboard bedroom ideas because it adds texture, warmth, and movement without bulk. A dowel rod at the top makes the hanging hang straight and keeps the bottom edge from curling. Size matters — the hanging should cover the bed zone behind pillows, not just decorate a corner. Choose materials like jute, cotton macrame-style weave, or thick woven cotton to keep it looking intentional and not flimsy.
Measure the bed zone and buy or cut a hanging wide enough to cover bed width plus 6-10 inches total. Attach the top dowel using the hanging’s channel or sew a simple pocket and slide the rod through. Mount two hooks into studs and hang with a taut rope or wire so the fabric lays flat. Smooth the hanging and let it settle; if it has fringe, trim only if needed for an even bottom line.
Editor's noteSteam the hanging lightly before mounting so the weave looks even and flat.
Skip thisDon’t hang it too high — if it starts above pillow height, the wall behind your head stays blank.
16. Corner-to-corner board and batten panel behind pillows
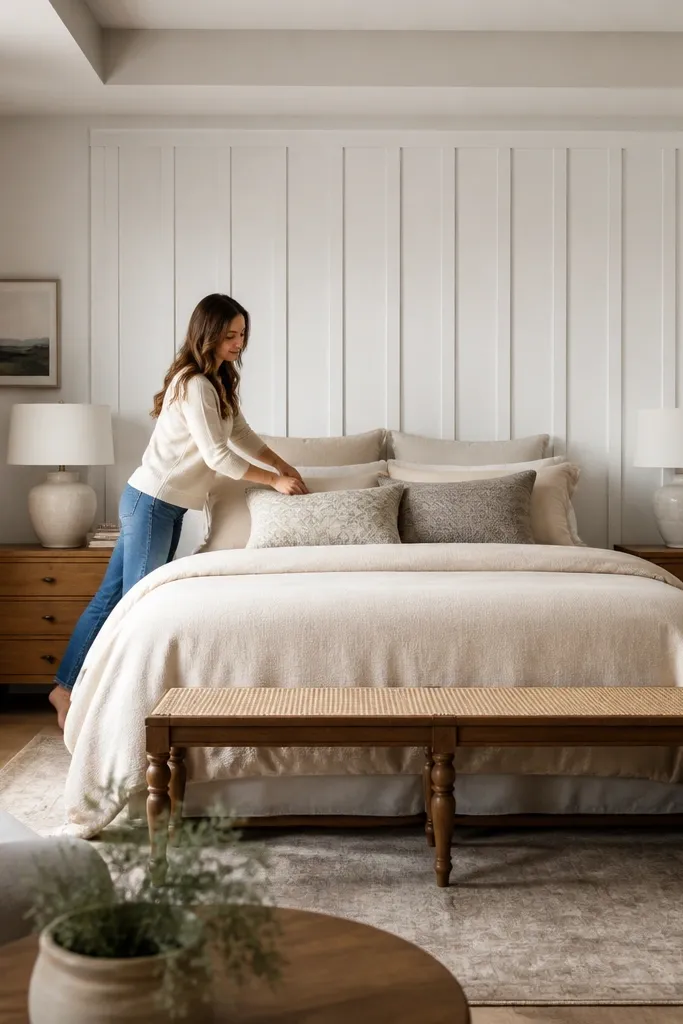
Board and batten looks like built-in furniture because it creates vertical rhythm and a framed center. The trick for a no headboard bedroom idea is to keep the panel confined to the bed zone so it looks like design, not a full-wall remodel. It also works with either traditional or modern styles depending on spacing and trim width. Use white or a soft greige so it doesn’t fight your bedding colors.
Mark a centered rectangle behind the bed and decide your batten spacing — 12 inches on center gives a calm look, 8-10 inches gives more drama. Install the vertical boards on the rectangle first using a level and brad nails into studs when possible. Add horizontal rails at the top and bottom of the rectangle so everything looks framed. Fill nail holes, caulk seams, then paint in satin for easy cleaning.
Editor's noteCaulk the trim seams — it’s what makes it look like architectural trim instead of DIY boards.
Skip thisDon’t make the panel too short — if it ends below pillow height, you lose the headboard effect.
17. Narrow bookcase wall built in two shelves wide

A simple two-shelf bookcase behind the bed reads like a headboard because it creates a top and middle horizontal structure. It’s especially good if you like minimalist decor but still want something substantial behind pillows. Keep the shelves shallow so the bed wall doesn’t feel crowded, and use a mix of vertical books and slim frames to create a balanced, photo-friendly arrangement. This works in small bedrooms where a full bookcase would block circulation.
Choose shelf depth around 5-7 inches and mount one shelf at pillow top height and a second shelf about 10-14 inches above that. Cover the bed zone width with shelves that extend a few inches beyond each side of the bed. Use stud anchors and a level for the first shelf — the second shelf placement is easy after the first is straight. Style with 60-70% negative space so the wall doesn’t turn into clutter, then add one larger frame centered between the shelves.
Editor's noteUse bookends in one metal finish so the top shelf looks intentional even when books shift.
Skip thisDon’t overload — a packed shelf looks like storage, not a designed headboard.
18. Oversized corkboard framed as a functional headboard
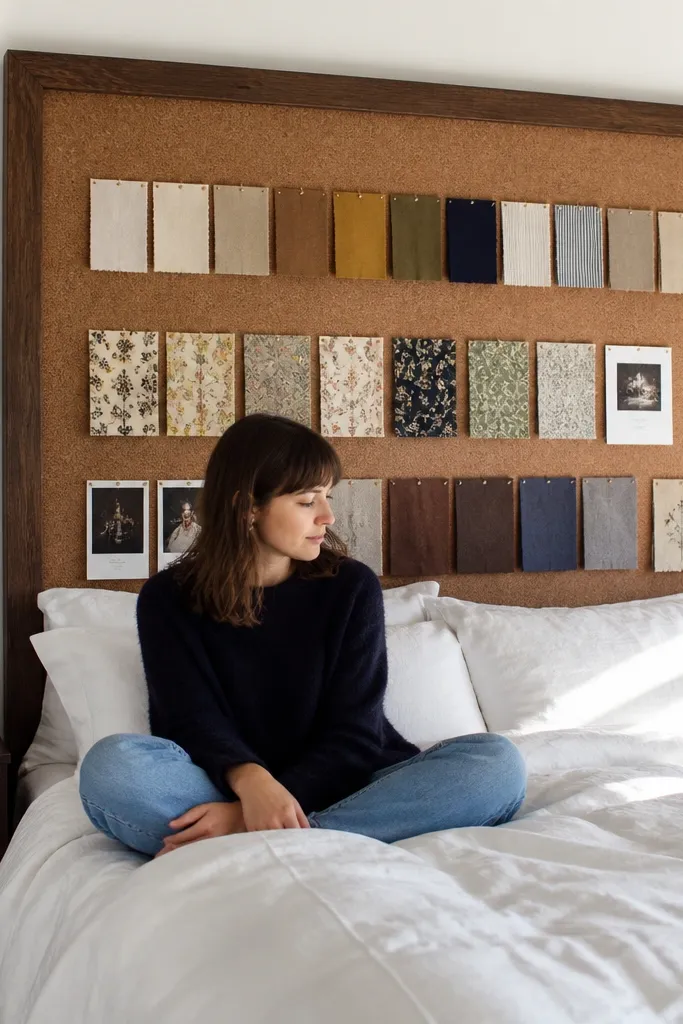
Corkboard is underrated for no headboard bedroom ideas because it’s textured, practical, and easy to keep looking neat. When framed, it reads like a design piece rather than a schoolroom bulletin board. Pin a few prints or fabric swatches in straight rows so the wall looks curated, not random. This is a smart pick for bedrooms where you want a functional wall — you can swap photos without rehanging art.
Buy or make a corkboard frame sized to the bed zone and mount it centered behind the pillows. Use a frame with a clean inner lip so the cork edge looks finished. Mount with screws into studs if possible; cork itself isn’t structural. Style with pin placement: keep prints aligned in a grid or two tidy rows, then use matching push pins so the details look consistent.
Editor's noteUse fabric-backed prints or heavier paper so pins don’t sag over time.
Skip thisDon’t pin too many items — a sparse grid makes it look designed.
19. Large canvas wall panels stacked like a headboard
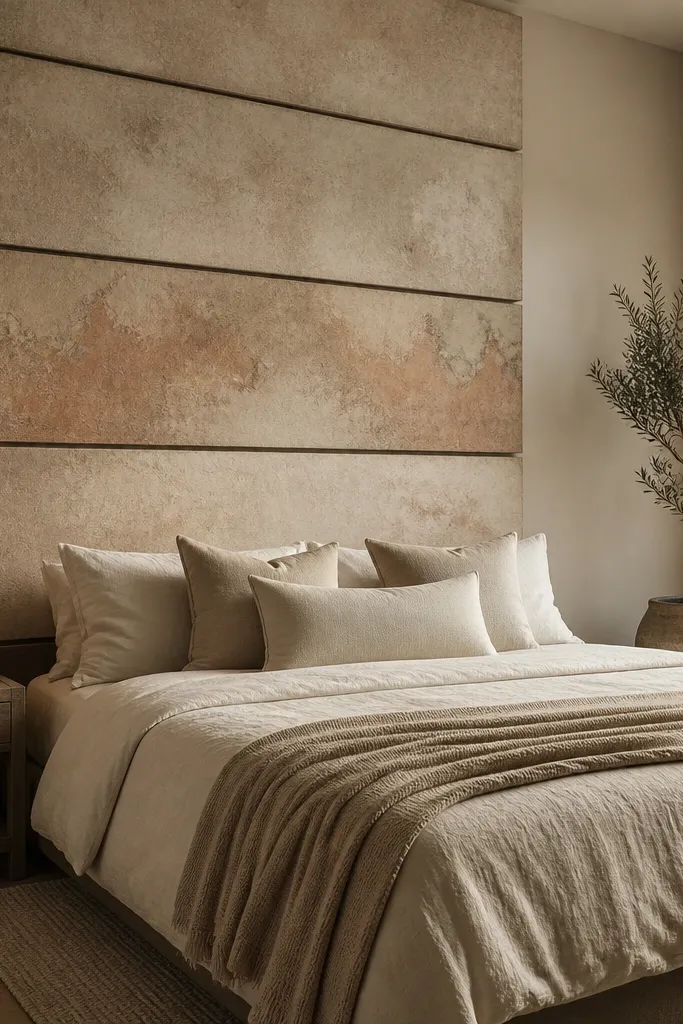
Canvas wall panels can replace a headboard when you scale them correctly. The best version is two or three large panels that align vertically so your wall behind the bed looks like one continuous block. Textured canvas adds depth that reads well from across the room, especially under warm lighting. Choose art that supports your bedding palette: a limited color palette looks more expensive than a busy print.
Pick panel sizes that cover the bed zone: for a queen, two panels each about half the bed width with a small gap in the center works well. Mount with a level — align the panels so their top edges land around pillow peak height. Use a hanging system rated for the canvas weight, and keep the gap consistent (about 1-2 inches). Add one coordinating throw pillow color pulled from the canvas so the bedding doesn’t clash with the wall.
Editor's noteIf the art is glossy, matte it with a light anti-glare spray made for canvases to reduce glare.
Skip thisDon’t use tiny art — small pieces make the bed wall look emptier, not fuller.
20. Woven rope wall grid with a slim rail top

A rope grid adds structure and texture while keeping the look airy. When you mount a slim rail at headboard height and weave rope lines downward, you get a graphic backdrop that reads modern and cozy at the same time. It’s also forgiving: rope texture hides small wall dents and uneven paint. This is a strong choice for bedrooms with light wood furniture and neutral bedding.
Install a slim wood or metal rail across the bed zone at pillow peak height. Mark anchor points below it using a grid: spacing around 6-8 inches looks balanced for most beds. Wrap rope around anchors and weave in straight lines, tying off at the bottom anchor points. Trim rope ends cleanly and seal knots with a small dab of clear glue so they don’t fray.
Use two rope thicknesses — thicker rope for the main lines and thinner for the secondary lines — to avoid a flat look.
Don’t make the grid too tight — dense rope looks heavy and can crowd a small room.



