
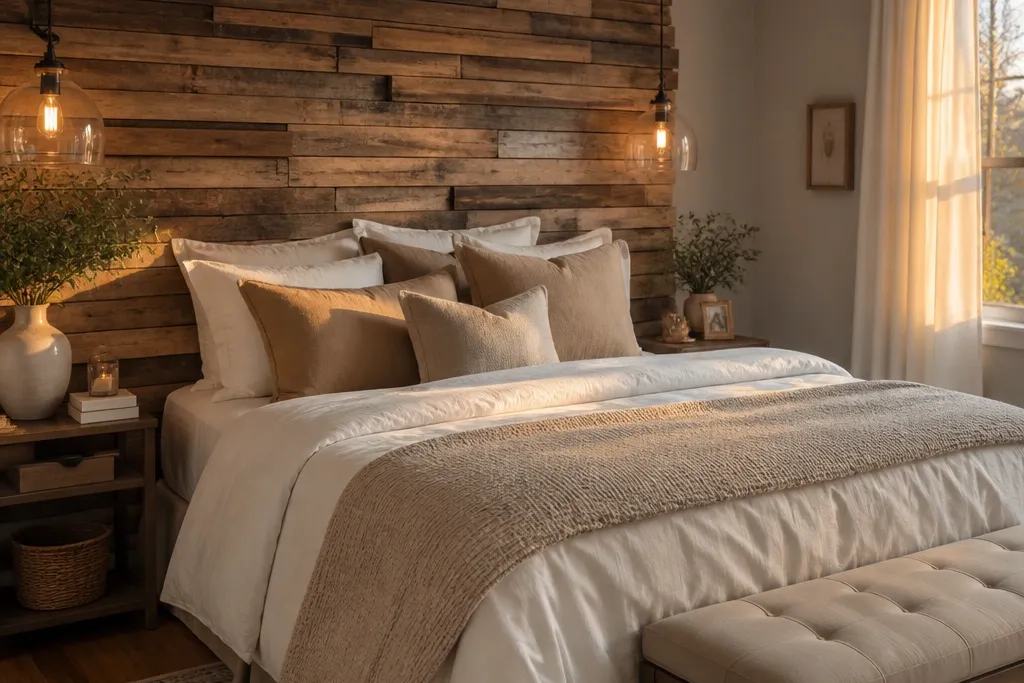
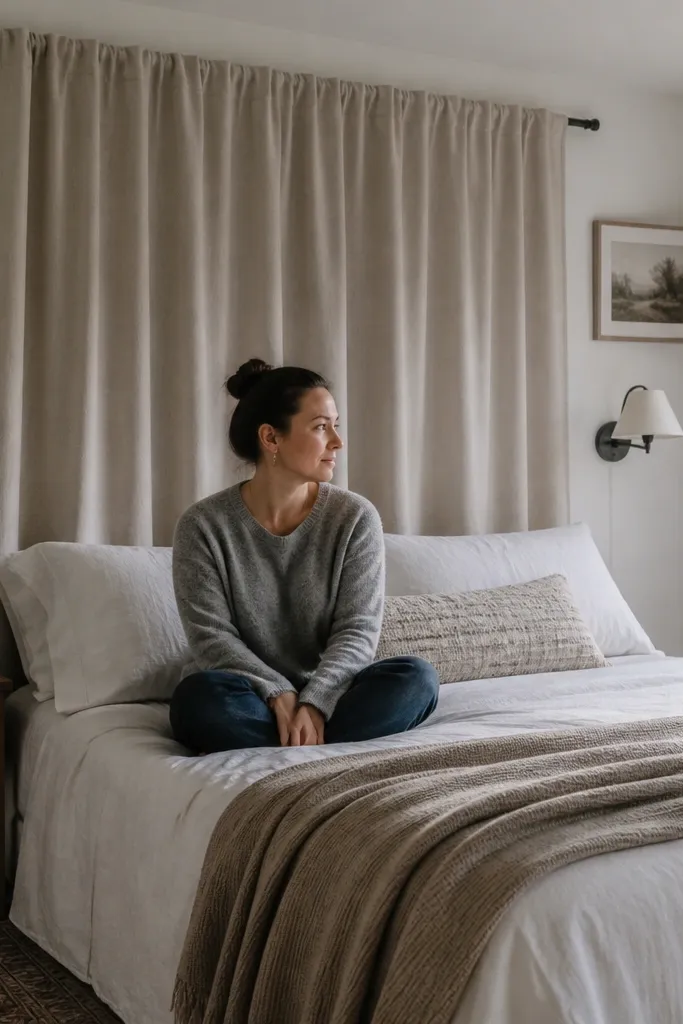
1. Linen curtain panel pulled like a headboard

This works because curtains create a tall, soft rectangle that visually replaces a headboard without the rigid bulk. Use two full panels so the folds fall from above the pillow line, not from the mattress. The fabric matters: a medium-weight linen blend looks structured and hides wall imperfections, while thin sheers look flat. For an aesthetic “built-in” feel, hang the curtain rod slightly above where a headboard would start and pull the panels wider than the bed so the corner looks intentional in photos.
Start by measuring bed width and adding 20-30 inches total for overlap and fullness. Install a curtain rod 6-10 inches above the mattress top, centered on the bed, then mount two curtain rings or clip hooks per panel so the drape hangs evenly. Finally, use tiebacks or a simple knot at the sides to keep the folds vertical and prevent the fabric from collapsing around the pillows.
Steam the linen and hang it wet for cleaner folds that hold their shape.
Don’t hang the curtain low — if it starts around the pillow area, it reads like a window treatment, not a bed anchor.
2. Oversized framed fabric panel with a stretched backing
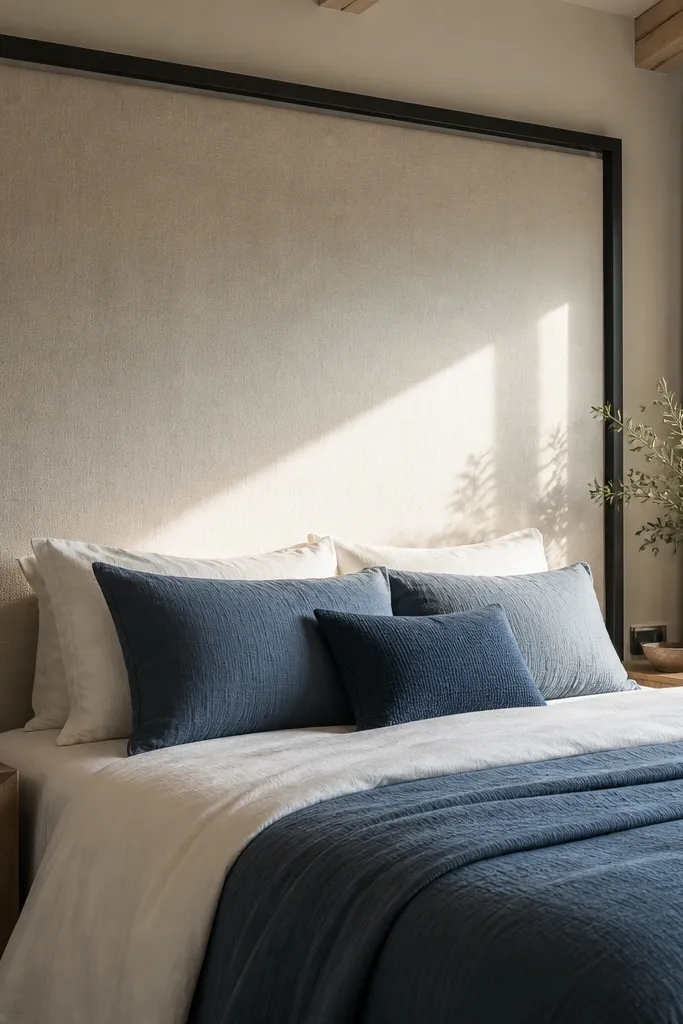
A big framed fabric panel looks like a headboard because it creates a crisp boundary and a soft surface. It’s also easier than building a padded headboard: you get the look without the foam mess. Pick a thick upholstery-weight fabric or a tightly woven canvas so it doesn’t sag. This is especially good for renters because you can mount it using picture hooks into studs, and the piece can come down later without redoing the wall.
Build a simple rectangular frame from 1x3 boards, using 45-degree corners or pocket-screws for clean edges. Stretch fabric over a backing board (plywood or MDF cut to fit), then staple from the back with the tension pulled tight like a drum. Mount the finished panel centered behind the bed using two heavy-duty picture hooks or a French cleat if your wall can handle it.
Use a fabric that matches at least one pillow or duvet tone so the panel looks like part of the bedding, not a separate decoration.
Avoid quilting-thin cotton — it wrinkles and shows every ripple once the panel is mounted.
3. Vertical wood slat wall feature behind the bed
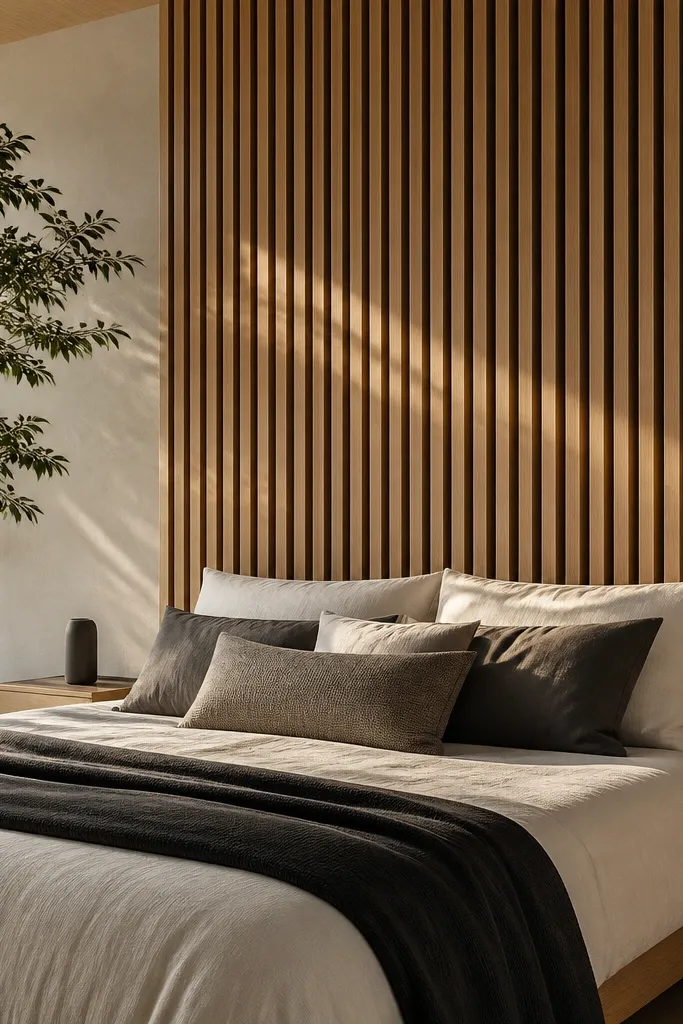
Vertical slats add headboard energy because they create height, rhythm, and shadow lines. The shadows are what make it look high-end — a flat wall can look dead in daylight, but slats show depth. Use real wood or wood-look panels with narrow gaps so the lines stay crisp. Keep the finish warm (oak, walnut stain, or whitewash) to avoid the look turning cold or overly modern for a bedroom.
Measure the bed width and decide your panel width; cut slats with a consistent spacing plan (for example, 1-inch slat with 1/2-inch gaps). Use a level to mark two horizontal support lines on the wall, then screw slats to the supports or to a thin backing rail if you want a straighter install. Finish by sanding edges lightly and applying a stain or matte clear coat so the slats don’t look shiny in photos.
Editor's notePre-finish the slats before mounting so you don’t miss the sides and edges later.
Skip thisSkip random spacing — uneven gaps read messy and kill the “designed” look.
4. Rattan or cane headboard look using a freestanding screen
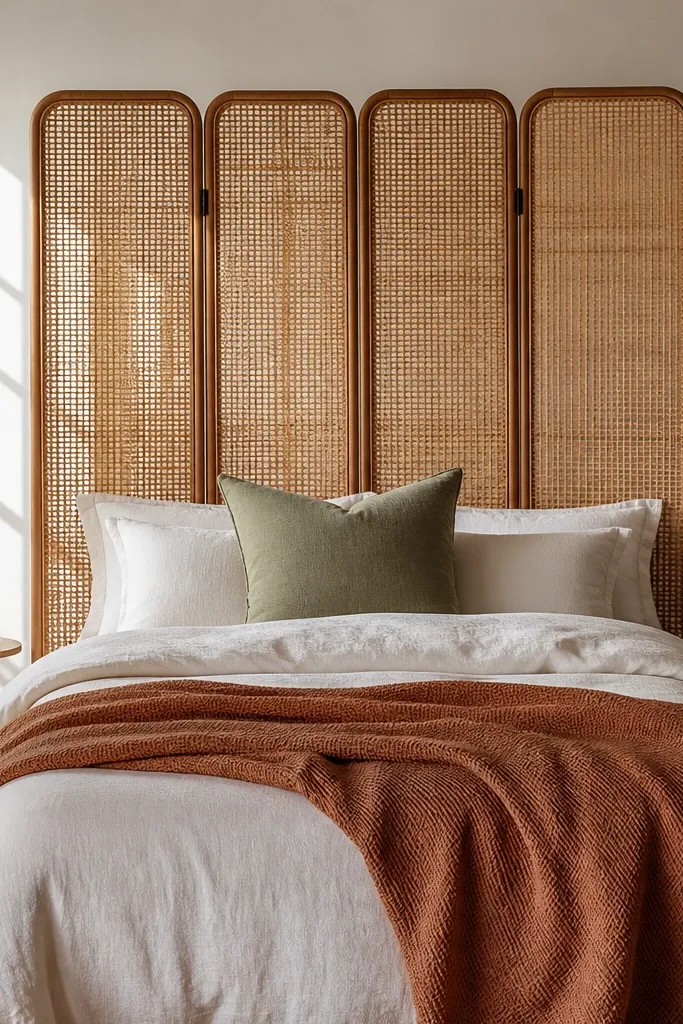
A freestanding screen creates the headboard silhouette without attaching anything to the wall. It’s also great for renters or anyone who wants to change the look seasonally. Rattan and cane textures catch window light and make the bed area feel warmer and more layered. Choose a screen with a width close to the bed and place it so it covers the wall behind your pillows, not the whole wall.
Pick a screen size that spans at least the bed width minus 2-6 inches on each side. Place it on the floor with the bottom edge 1-2 inches behind the bed frame so it doesn’t look like it’s floating too far forward. If the screen has adjustable feet, level it so the top edge is straight, then style pillows and a throw to match the warm natural tone.
Add a thin rug or runner under the bed area to anchor the screen visually.
Don’t choose a flimsy, see-through screen — you need enough opacity to replace the wall space behind the bed.
5. Two-tier floating shelf stack with a framed mirror centerpiece
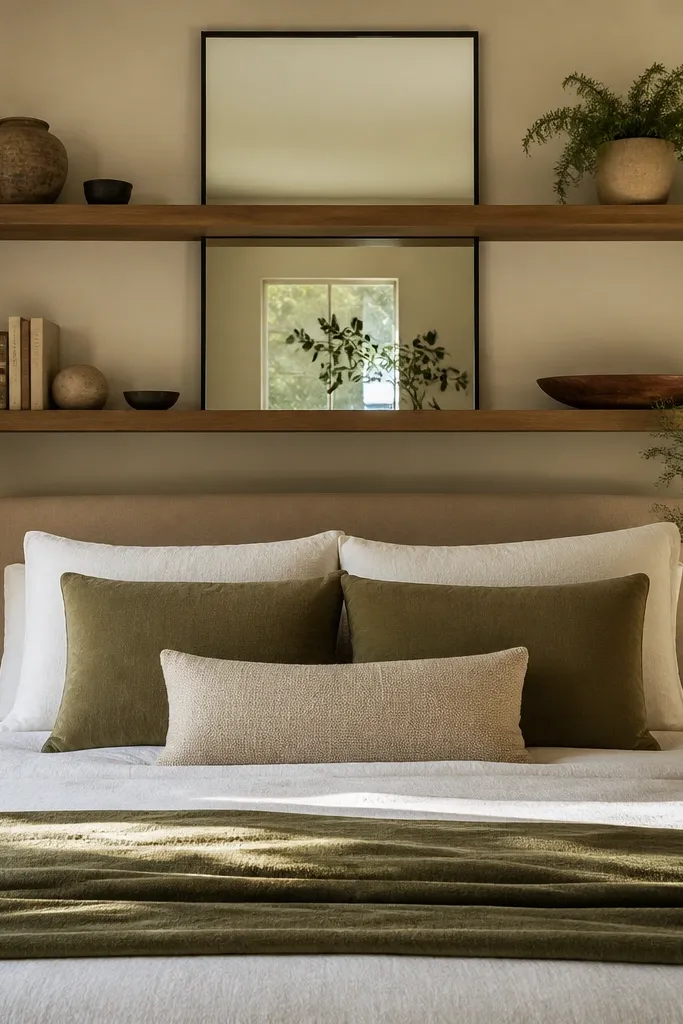
If you want a headboard look with zero upholstery, go vertical storage. Two floating shelves create height and a boundary line, and a mirror in the middle adds light and makes the wall feel styled. This is best for rooms where you already have nightstands but want something behind the bed that ties everything together. Keep the shelf depth slim so the wall doesn’t feel crowded, and style with a small lamp and one sculptural object per side.
Install a level center line behind the bed. Mount two shelves at different heights so the top shelf lands about pillow-top level and the bottom shelf sits around the upper mattress area. Add a narrow framed mirror between or above the shelves, then style the shelves with one tall item each side and a low tray or book stack on top.
Editor's noteUse the same finish on shelves and mirror frame so it reads intentional, not like three separate items.
Skip thisDon’t overload — if both shelves are packed, it looks cluttered instead of headboard-like.
6. No-drill fabric wall panels on command strips grid
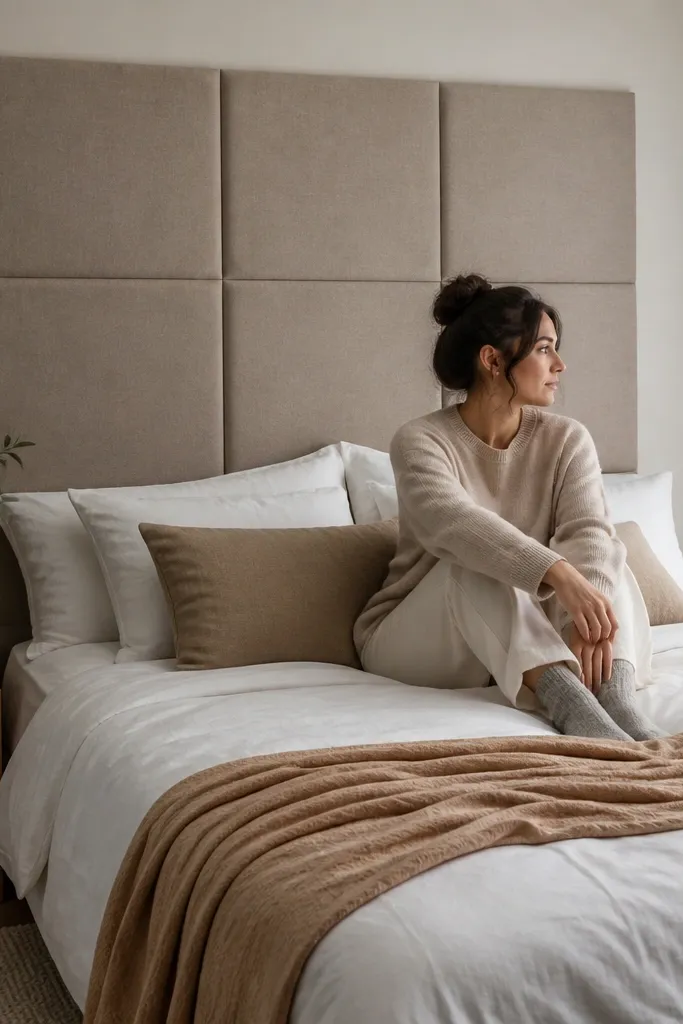
This is the cleanest “no headboard” fix for renters because it builds a headboard-sized rectangle out of fabric panels. The grid structure gives you the same visual order as slats or tufting, and fabric softens the entire corner. Choose a medium-weight woven fabric that holds shape. For the best look, keep the panels in one color family and vary only the texture, like linen + boucle or cotton canvas + subtle texture.
Measure the wall area behind the bed and plan a grid, such as 2x2 or 3x2 panels. Cut foam or stiff backing boards to panel size, wrap fabric tight, and staple the edges on the back. Attach the panels using heavy-duty removable wall hooks or strips rated for the panel weight, then align edges using painter’s tape lines before you press anything permanently.
Label your panel backs (top-left, top-right) so you don’t mix up orientation once everything is on the wall.
Avoid stretchy fabric — it sags and makes the panels look uneven after a week.
7. Pegboard with framed art above the bed
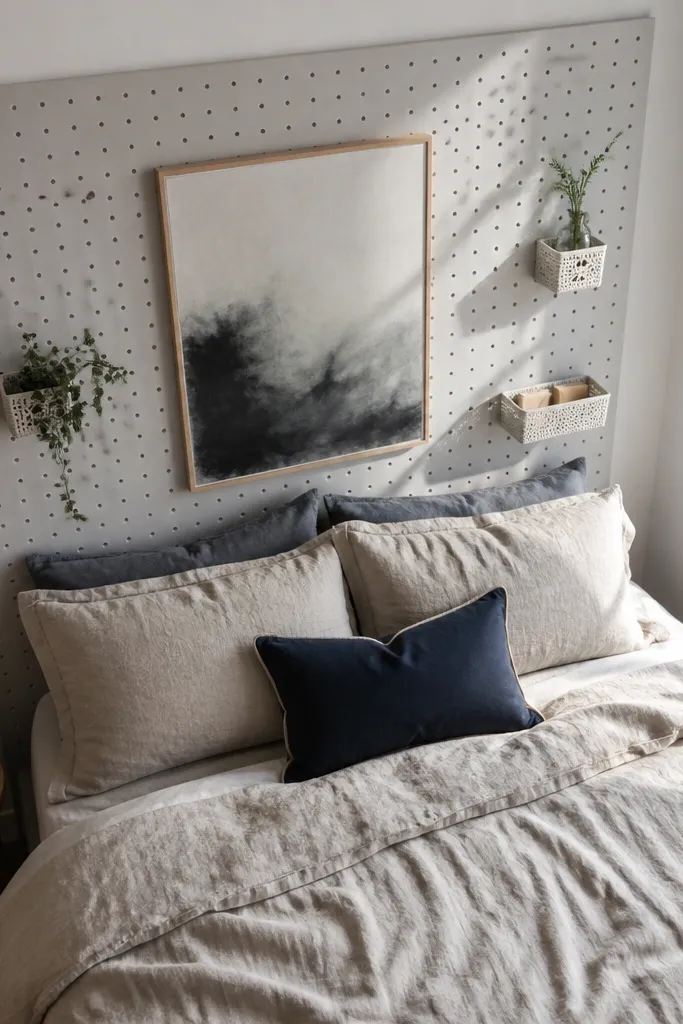
Pegboard gives you an instant headboard vibe because it creates a structured backdrop with built-in lines. You also get practical storage for wall decor like baskets, small shelves, or hanging fabric organizers. This works best in modern spaces or rooms where you like functional styling. Paint the pegboard matte white or warm off-white so it doesn’t look industrial, then add framed art in the center to keep it cozy and bedroom-appropriate.
Cut pegboard to the bed-width area and mark mounting points on wall studs if you can. Paint both sides and edges before installation for a cleaner finish, then mount level. Place a cluster of hooks or a small ledge where your eye lands, and mount a single large framed print centered above the pegboard so the whole wall reads as one unit.
Use 1-2 hanging items maximum on each side so the pegboard stays calm and photogenic.
Skip glossy paint — pegboard glare makes the wall look unfinished in daylight.
8. Wood picture-rail ledge with draped string lights

This gives you the headboard effect through light and a soft upper boundary. A picture-rail ledge lets you hang something behind the bed without a bulky installation, and string lights create a glowing rectangle that photographs beautifully at night. It’s also a great option for people who hate the look of large décor — the lights feel subtle but intentional. Use warm white LED strands and keep them low density so you don’t get harsh dots.
Install a picture rail or a shallow 1x2 ledge level above the mattress top, centered on the bed. Hang two vertical fabric strips or thin wire lines for the lights to follow, then drape the LED strands in gentle arcs so they form a rectangle behind the pillows. Secure the cord with small clips on the rail and test the spacing before you fully tighten everything.
Choose warm white LEDs (around 2700K) so the glow matches typical bedside lighting.
Don’t wrap lights too tightly — dense strands look like a craft project instead of a designed backdrop.
9. Reclaimed wood pallet slat backdrop with a matte finish

Pallet wood slats create a headboard look with real character, and the gaps between boards add shadow depth. The key is sanding and sealing so it looks intentional, not like scrap. This is best for rustic, farmhouse, and modern-rustic bedrooms that need warmth. A matte clear coat keeps it from looking overly glossy and makes the texture read clearly in photos.
Disassemble the pallet if needed, then cut boards to a consistent height that lands 20-30 inches above the mattress top. Sand each board until the surface feels smooth to the touch, then pre-stain or apply a single stain color for uniformity. Mount the boards to a backing frame or directly to wall rails, then seal with a matte clear coat and caulk any rough edges for a finished look.
Editor's noteMix board widths intentionally, but keep the thickness consistent so the wall reads clean from across the room.
Skip thisDon’t skip sanding — rough pallet grain looks scratchy and cheap under warm lighting.
10. Oversized wall mirror framed in reclaimed trim
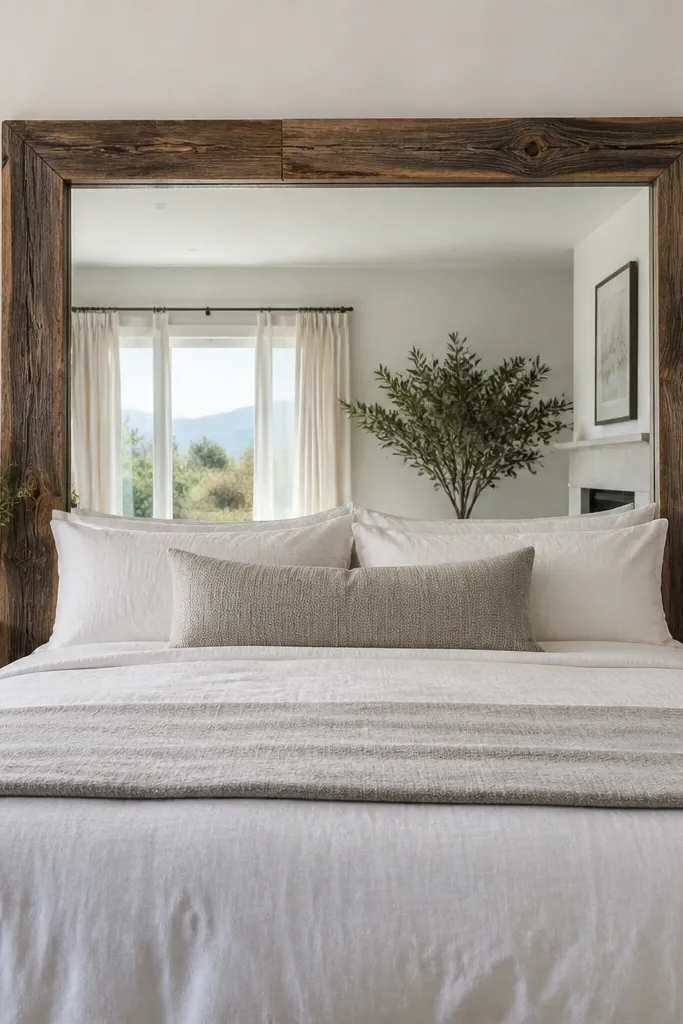
A big mirror behind the bed acts like a headboard because it fills the blank wall space and adds height instantly. It also bounces light, which makes small rooms feel less cramped. The frame is where you make it look like a deliberate bed feature. Go for a wide, simple frame in stained wood or blackened metal, and position it so it sits behind the pillows, not centered too high like a hallway mirror.
Measure the wall area behind the bed and choose a mirror width that covers at least 80% of the bed width. Build or buy a wide frame, then secure the mirror to backing plywood if needed. Mount with two or more wall anchors into studs, level it carefully, and style the bottom edge so it clears pillows by a few inches.
Editor's noteKeep the mirror frame finish consistent with your nightstand or bed hardware so the look feels built-in.
Skip thisAvoid tiny mirrors — they don’t create the headboard-sized anchor.
11. Tall fabric-covered foam panels in a simple channel frame

If you want the headboard look without a bulky upholstered bed, this channel frame does it. The secret is structure: slim channel trim holds foam panels flat so you get clean edges like a real headboard. Use a thicker foam (like 1.5-2 inches) and upholstery fabric with a tight weave so it doesn’t look saggy. This is a weekend build that looks custom and feels soft when you lean back against it.
Cut foam panels to your target height and width, then wrap upholstery fabric with a tight seam placement on the back. Build a simple rectangular frame from 1x2 or 1x3 lumber and add internal supports so each panel sits flat. Stretch and staple fabric-wrapped foam onto the frame backing, then attach the frame to the wall using a French cleat or heavy-duty wall anchors into studs.
Use a fabric with a slight texture, like linen-look twill, because smooth satin shows wrinkles under side lighting.
Don’t use thin foam — it collapses and makes the panels look cheap compared to a real headboard.
12. Oversized cane webbing panel stretched in a wooden rectangle
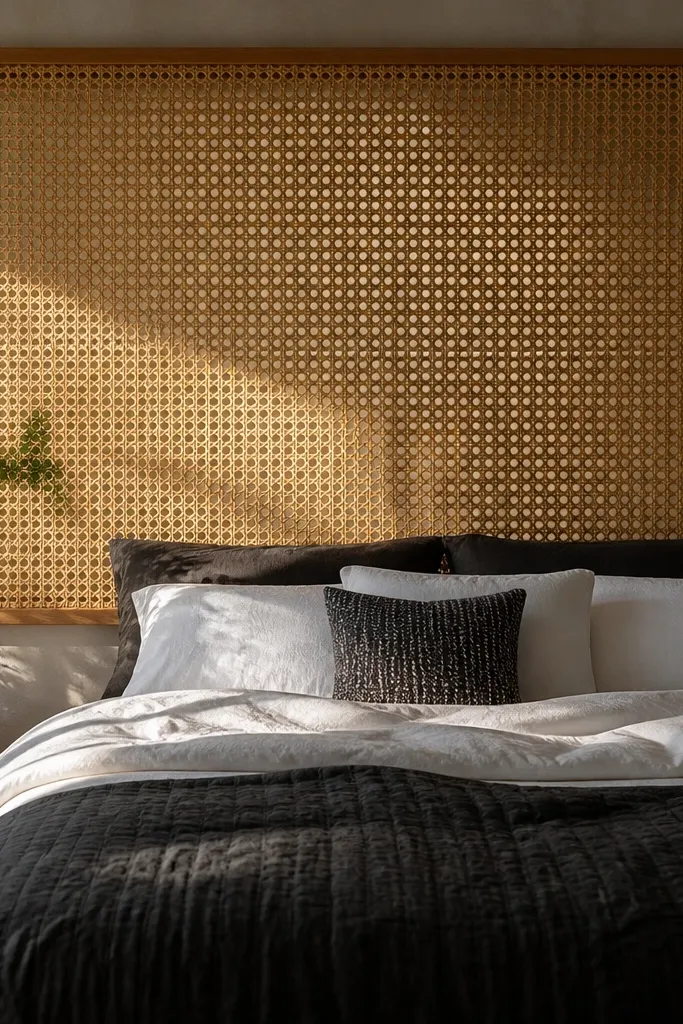
Cane webbing has the same airy texture as a rattan headboard but in a flat, wall-friendly format. It creates a high-contrast backdrop that makes your bedding look sharper. The woven pattern also hides minor wall marks, which is a huge win if your wall isn’t perfectly smooth. This works in bedrooms that lean modern or coastal, especially with white bedding and warm wood floors.
Build a rectangle frame using straight stock wood, and cut it to cover the bed width area you want. Stretch cane webbing over the frame and tack it evenly on all sides, keeping tension consistent by pulling opposite corners. Attach a backing board or cross braces behind for stability, then hang using two wall anchors or a cleat so it stays perfectly level.
Use a matte clear coat on the frame so the cane pattern stays the star.
Avoid loose webbing — saggy cane reads unfinished and warps the whole look.
13. Stone-look peel-and-stick wall tile strip as a headboard band
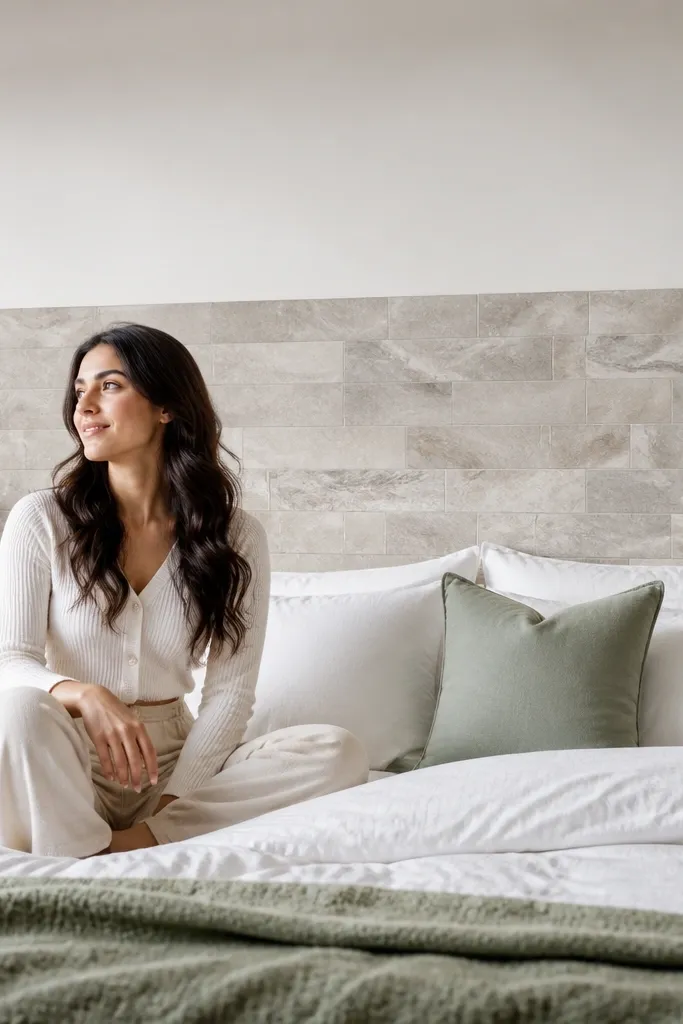
A horizontal stone-look tile band gives you the headboard effect through contrast. It’s not a full wall — it’s a focused strip that creates a “base” behind pillows and makes the bed look styled. Peel-and-stick tiles are fast and clean, and a matte stone pattern hides fingerprints and scuffs better than shiny paint. Choose warm neutrals like greige, sand, or soft taupe so it doesn’t feel cold in the bedroom.
Measure a band height that covers roughly the pillow area, about 18-28 inches tall, centered on the bed. Clean the wall thoroughly, then mark a level baseline using painter’s tape. Apply tiles in staggered rows, press firmly, and cut edges with a straightedge and utility knife. Seal any recommended grout lines if your tile type calls for it, then touch up trim edges with a thin bead of caulk.
Editor's noteDo a dry layout first on the floor so you don’t end up with tiny slivers at the sides.
Skip thisDon’t install over textured dust — tile edges lift and the band looks patchy.
14. Macramé or rope wall hanging anchored to a slim rod
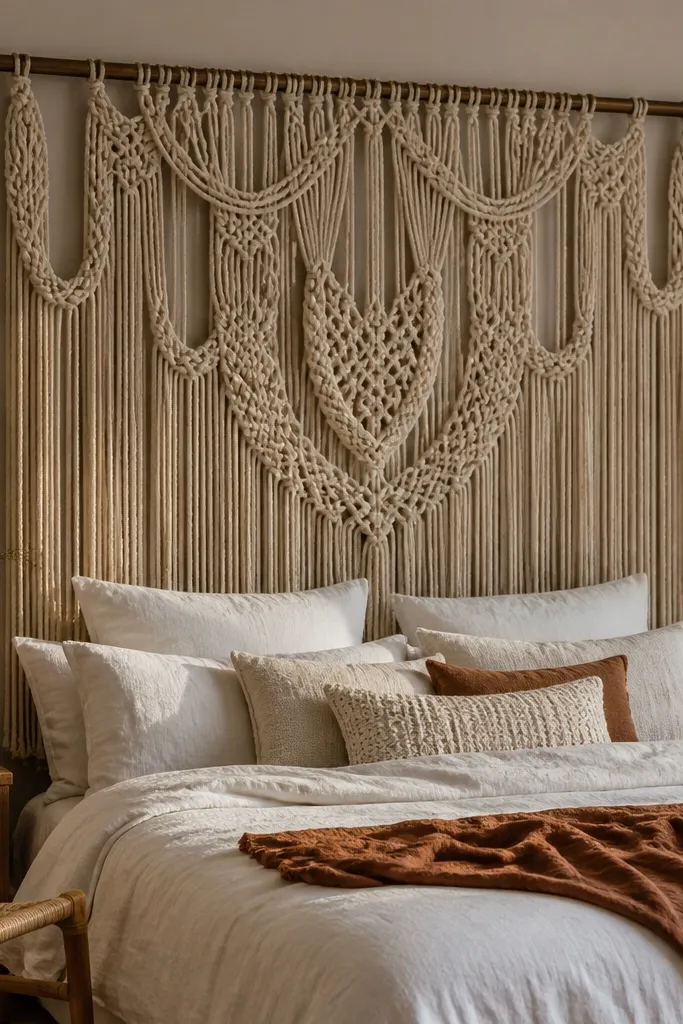
A rope or macramé wall hanging creates headboard height with soft movement and an artisan look. It’s photogenic because the knots cast subtle shadows, especially in late-day light. Keep it structured: use a slim rod so the top line looks straight, and choose a large piece that covers the wall behind pillows. This works best in bedrooms with neutral bedding and natural fibers so the hanging looks intentional, not random.
Pick a hanging width that spans at least 80% of the bed width. Install a slim rod or tension rod at the top anchor point, then attach the hanging to the rod using rings or cord ties so it hangs evenly. Spread the strands so they cover the pillow zone and keep the bottom edge roughly aligned across the bed.
Editor's noteUse a steamer on the hanging before mounting so it doesn’t look wrinkled from storage.
Skip thisDon’t choose a tiny hanging — it reads like a wall decoration, not a bed anchor.
15. Curtain + slat hybrid using a slim wood batten frame
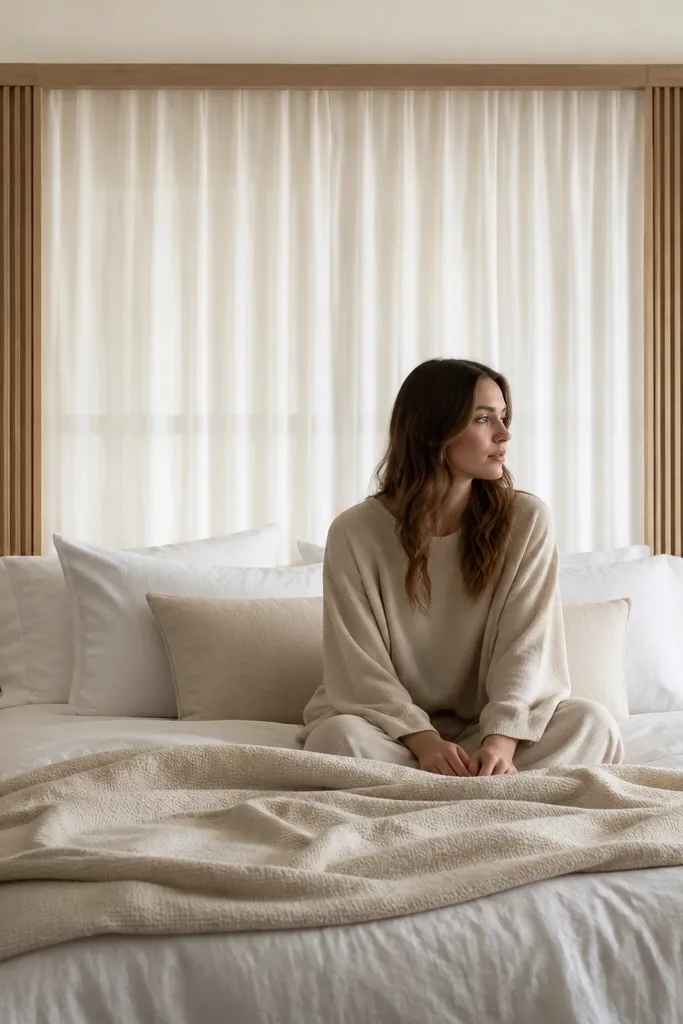
This is the best “no headboard bed ideas” option if you want both softness and crisp structure. The batten frame gives you clean edges like a headboard, while the curtain inside brings softness and depth. It also makes the whole setup look built-in because the rectangle reads as intentional architecture. Use sheer or semi-sheer linen so light moves through it, then layer it over a neutral blackout liner if you need privacy.
Build a rectangle frame from 1x2 battens sized to cover the bed width area, and make the frame depth shallow so it can mount cleanly. Mount the frame to the wall centered behind the bed, then hang curtain panels inside using small clip rings or curtain hooks. Adjust panel width so it reaches near the bed edges and pin or tie at the sides so the drape looks structured.
Match the batten finish to your bed frame or nightstands so the rectangle looks like part of the furniture.
Don’t use heavy blackout curtains without structure — they sag and turn the rectangle into a droopy blob.



