
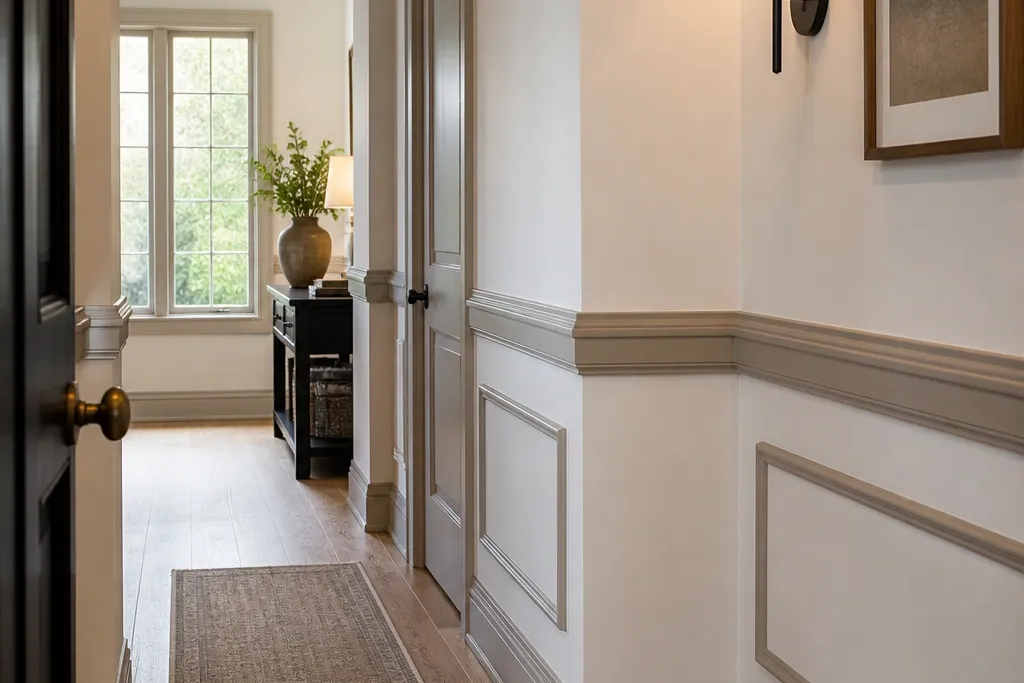
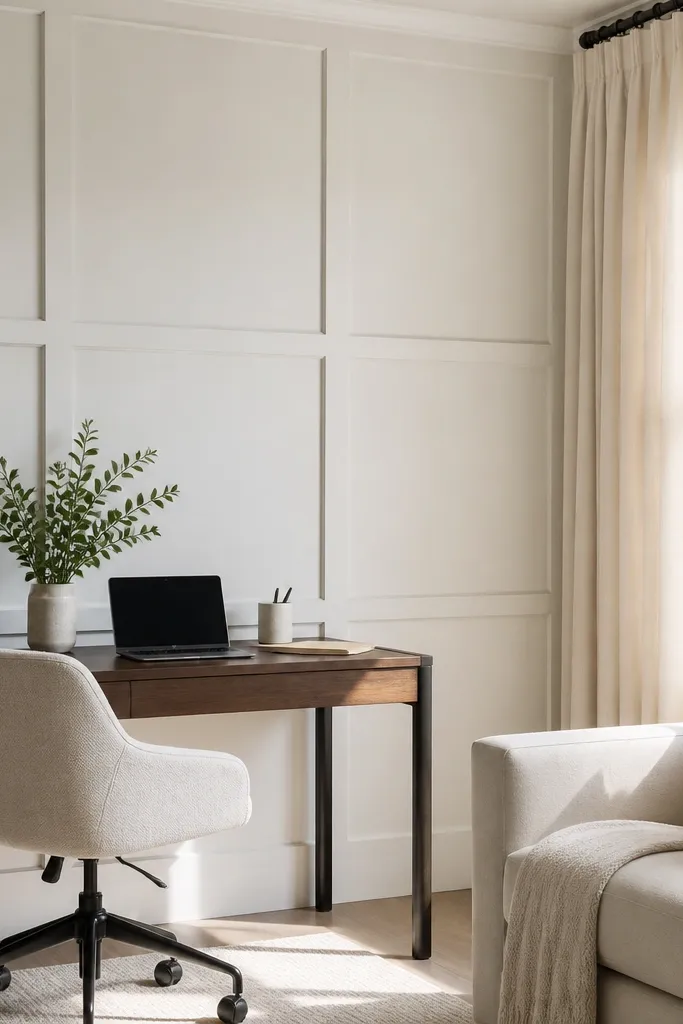
1. Classic Chair Rail with Double Top Rail
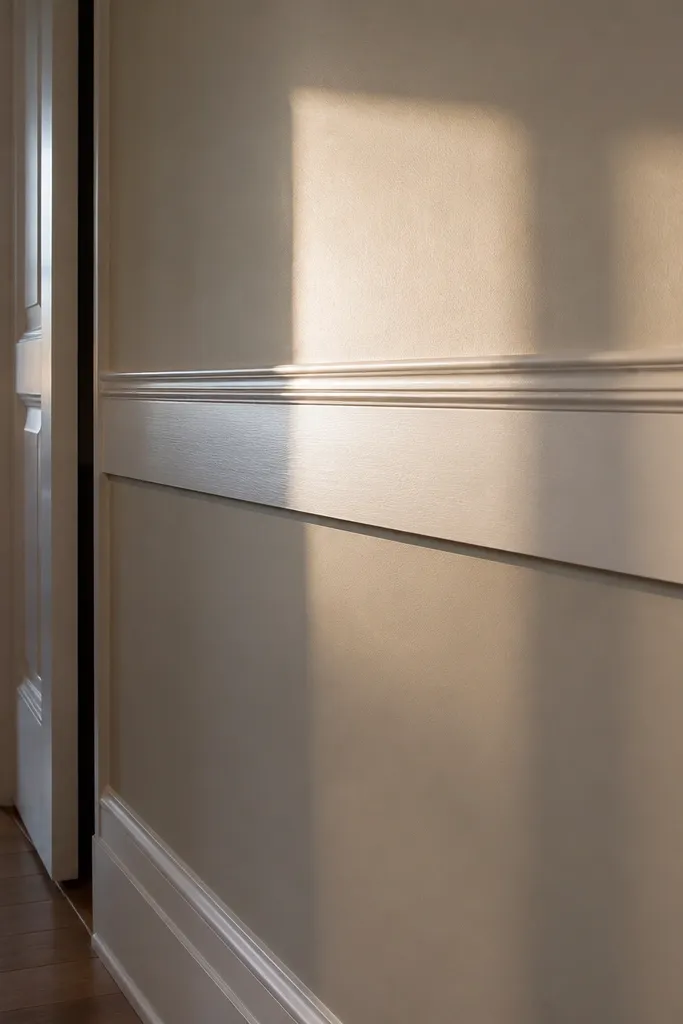
This is the cleanest French-inspired look because it frames the wall without turning it into a maze. The double top rail gives you a refined highlight line that reads well under daylight and doesn’t disappear in darker rooms. Keep the overall width between 3-5 in for the main rail area, then add a slimmer companion rail (about 1-1.5 in) above it. It’s modern wall moulding ideas done the easy way: straight, symmetrical, and forgiving if your wall has minor waviness.
Start by snapping a level line for the main rail height, then mark the second rail line above it using a tape measure from the first. Cut your moulding with 45-degree miters at corners and dry-fit each run so the profile lines up cleanly. Install with construction adhesive plus 15-gauge brad nails, then fill seams with paintable caulk. Prime and paint in two coats, pulling the paint into the shadow gap without overloading it.
Editor's noteUse painter’s tape as a temporary “straightedge” guide for the second rail so it stays parallel while you nail.
Skip thisDo not set the rail too low; a chair rail under 26 in makes the whole wall feel cramped.
2. Symmetric Half-Panel French Grid
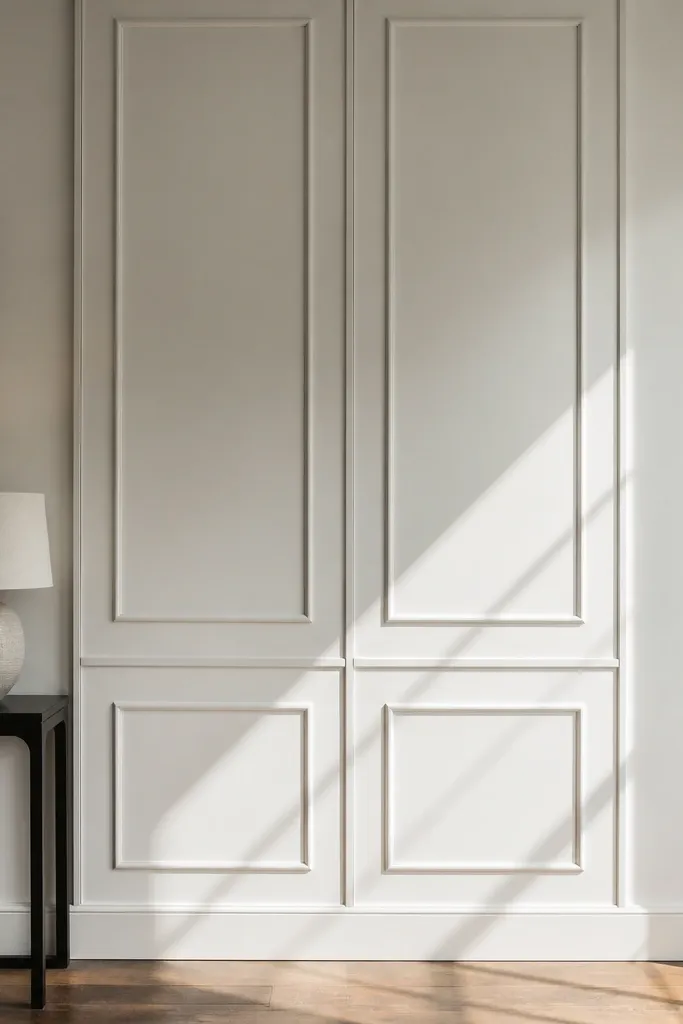
This look turns a plain wall into a French-style composition using only rectangles. The trick is symmetry: equal panel widths on both sides of a center point, so the design reads “designed,” not “added.” Use panels around 12-16 in wide so the pattern stays crisp at typical viewing distance. It’s photogenic because the shadow lines create a soft 3D grid that shows up in photos even with low lighting.
Find your centerline using a tape and laser level, then decide your panel size (aim 12-16 in). Install a horizontal rail first at your chosen mid height, then frame the first vertical rectangle using two vertical members and one horizontal member. Repeat outward using spacers (thin cardboard strips work) so every panel width matches. Caulk all seams, then paint the whole wall and moulding together so the junctions disappear.
Editor's noteMake a cardboard template for the rectangle opening size; it speeds up layout and keeps panel widths consistent.
Skip thisAvoid mixing panel sizes in one section; random widths make the design look like a renovation leftover.
3. Modern Frieze Band with Under-Panel Arches
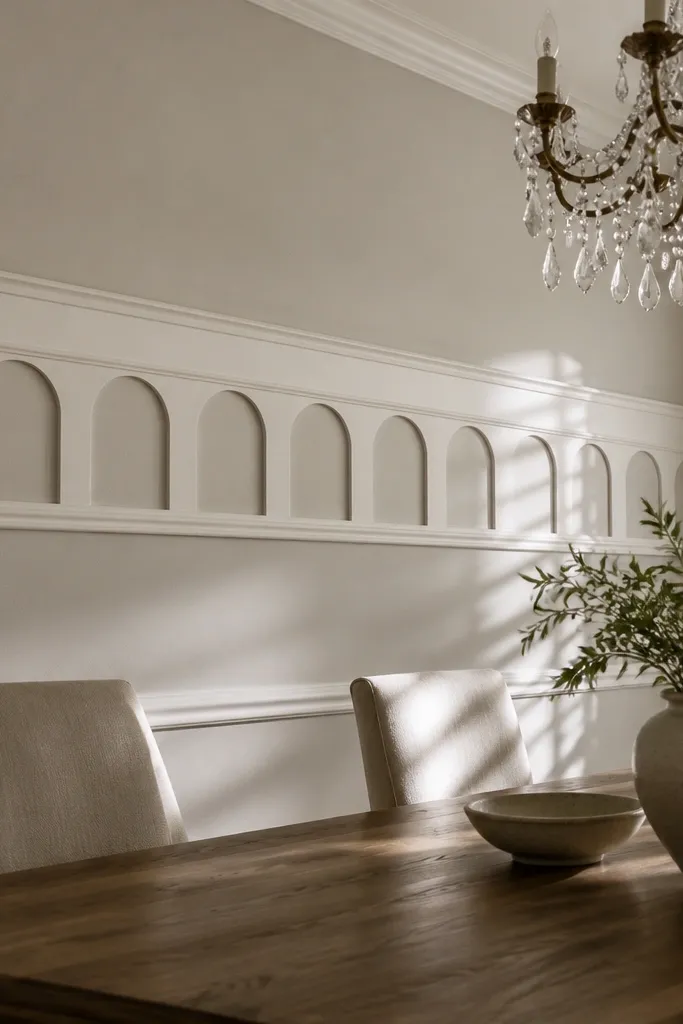
This is French wall moulding ideas with a softer, more romantic twist. A frieze band across the room adds an elegant horizontal “belt,” while the under-panel arches create a gentle curve that looks expensive. Keep the frieze band height around 4-6 in and use arch cutouts that are about 10-14 in wide per opening. The arch shadow lines catch light differently than straight panels, so it photographs beautifully.
Mark the band height first and install a straight moulding strip for the frieze. For the arches, cut two side supports and a top arch piece from MDF, then assemble each opening on the wall using the frieze as the top anchor. Use a consistent arch radius by drawing one template on scrap and tracing it for every piece. Prime, caulk seams, then paint with a satin finish so the curves show depth.
Sand the arch edges lightly before priming so the paint doesn’t highlight tool marks along the curve.
Don’t make arches too small; under 8 in wide they look like decoration, not architecture.
4. Layered Rectangle Panels with Shadow Gap (No Medallions)
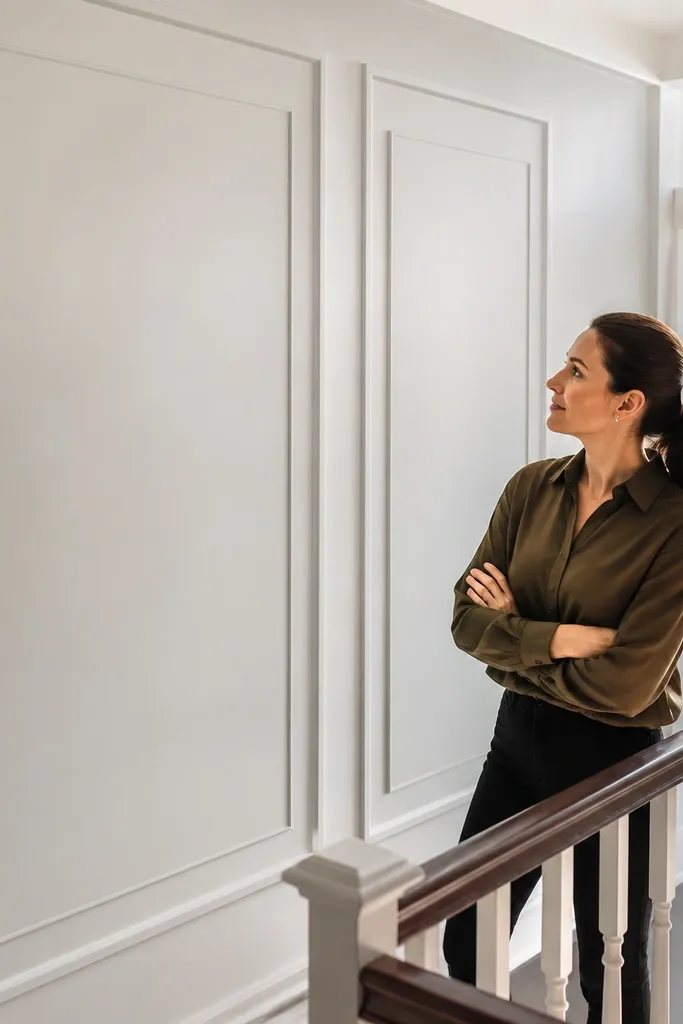
If you want modern wall moulding ideas that look designer without extra carving, layered rectangles are the answer. The layered effect adds depth by using two moulding layers: one forms the outer frame, the second sits slightly inset to create a clean shadow gap. This reads as French panel moulding but stays modern because the lines are simple and repeatable. It’s a great choice for living rooms, entry walls, and stair landings where you want texture that still feels sleek.
Choose a moulding profile with a flat face and a clear back bevel or a built-in lip for shadow. Install the outer rectangle frames first using 45-degree corners for a boxed look. Then set the inner rectangles by measuring the inset spacing — 1/2 to 3/4 in inset looks balanced on most walls. Fill nail holes, caulk both layers carefully, and paint two coats with a foam roller to keep the surface smooth.
Editor's noteUse the same moulding thickness for both layers; mixed thicknesses make the inset look accidental.
Skip thisDon’t rely on caulk to create the shadow gap; the gap needs to exist before paint.
5. French Doorway Frame Style Around an Entry
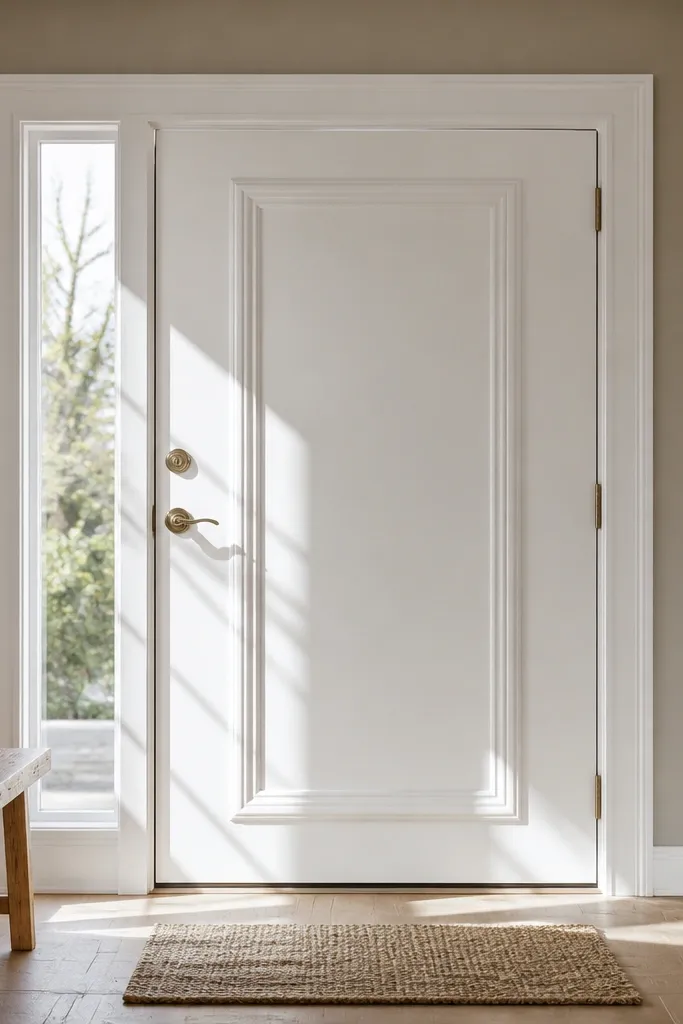
Turn a plain entry wall into a French-style portal. This idea frames the doorway area with outer trim, then adds an inner rectangle panel that makes the opening feel intentional and architectural. It’s especially photogenic because cameras love strong frames — the doorway becomes the composition center. Keep the outer frame width around 6-9 in total so it looks substantial, not like a small border.
Measure the doorway surround and pick an outer frame size that leaves 2-3 in clearance from the existing trim. Install outer verticals and a top piece with mitered corners, then add an inner rectangle panel using a smaller moulding profile. Use a level line to keep the inner panel parallel to the outer frame. Fill seams and sand any proud edges, then prime and paint in a bright white or warm off-white to make it pop.
Editor's notePre-sand the existing wall edges where moulding meets so caulk lines stay thin and invisible.
Skip thisDon’t mount moulding directly over uneven trim edges; shim behind the moulding so the frame stays flat.
6. Raised Starburst Cartouche Centerpiece
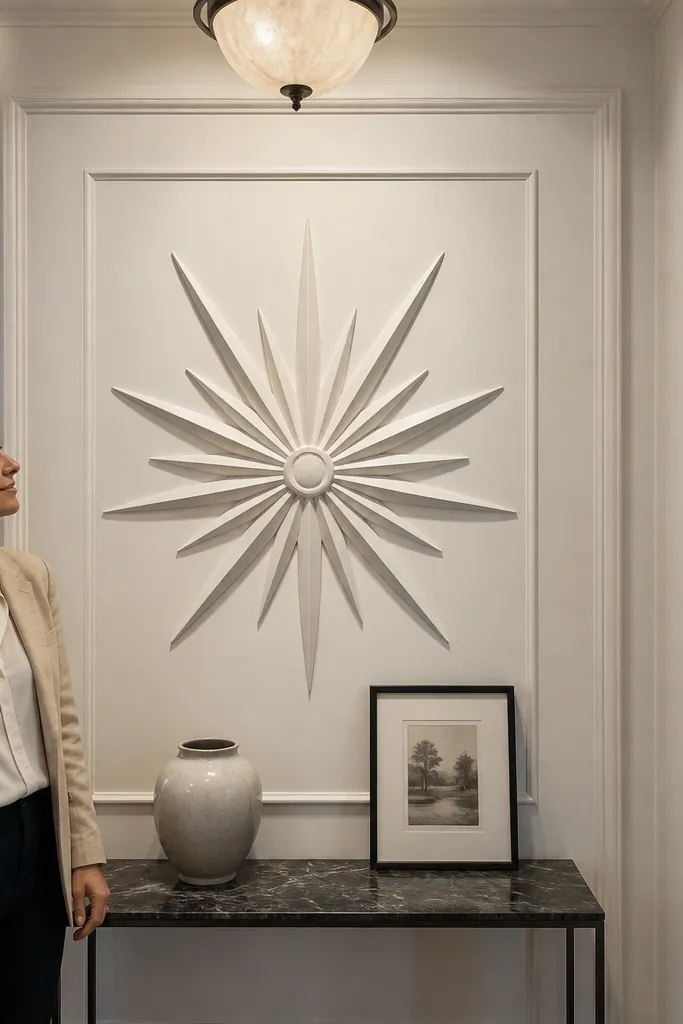
A cartouche is the fastest way to make moulding look French, but you need a modern version. Go for a starburst centerpiece inside a simple rectangular border so it reads crisp, not busy. The raised lines create a “burst” of shadow that looks great in close photos and adds personality in a hallway or above a console. Keep the cartouche diameter about 14-20 in so it feels proportional to typical wall spaces.
Build a rectangular outer frame first, then mark the cartouche center. Create the starburst by cutting multiple narrow MDF strips and arranging them like rays around a center point, then tack them onto the backing with wood glue and brad nails. Add a small inner circle using a ring of moulding strips or a router-cut MDF circle if you have one. Prime, fill gaps with lightweight spackle, sand smooth, then paint.
Editor's noteDry-fit the rays on the floor first; label each piece with tape so the angles stay consistent during installation.
Skip thisSkip oversized cartouches; bigger than 24 in can start looking like wall art instead of moulding.
7. Octagon Medallion Corner Detail
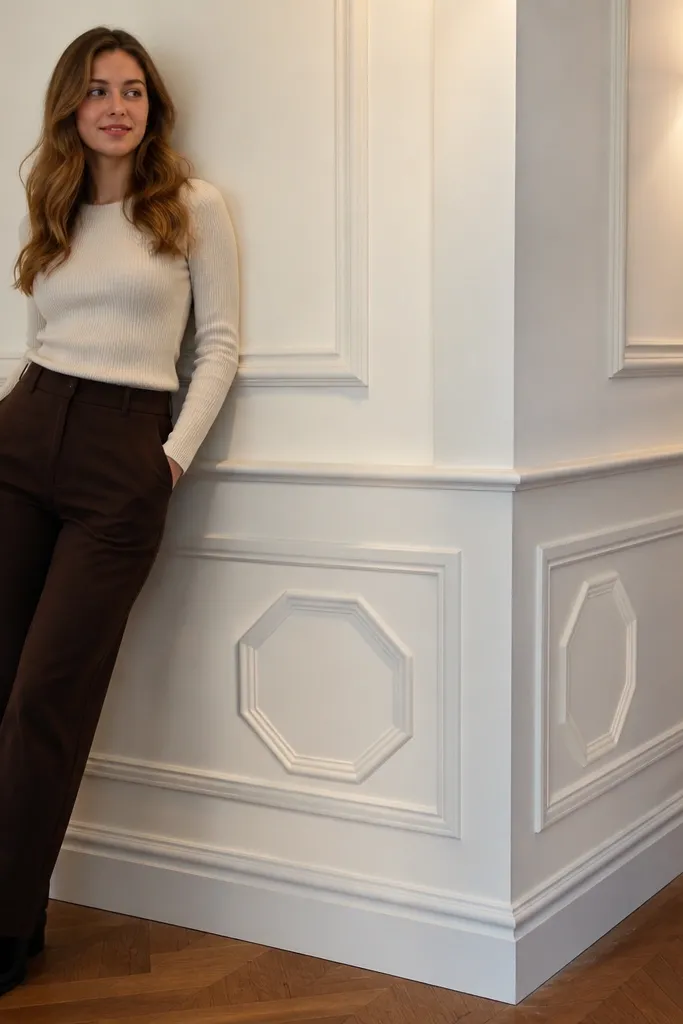
This detail makes your wall moulding ideas feel tailored. Place an octagon medallion near a corner, slightly above eye level, and surround it with a simple rectangular panel so it doesn’t look random. The octagon shape gives you French flair with fewer pieces than a complex rosette. It also photographs well because it creates a focal point without filling the entire wall.
Install your base rectangles first, then decide where the medallion sits — aim around 60-68 in from the floor. Cut an octagon frame from MDF using a template or a simple paper pattern and trace it onto the board. Glue and nail the octagon frame to the wall, then add a second inner octagon using thinner moulding. Caulk edges, then prime and paint so the medallion blends into the wall finish.
Use a thin brush for paint edges on the medallion so you don’t flood the shadow lines.
Don’t place medallions too low; under 48 in the detail becomes an afterthought.
8. French Panel Wall with Vertical Pilaster Strips
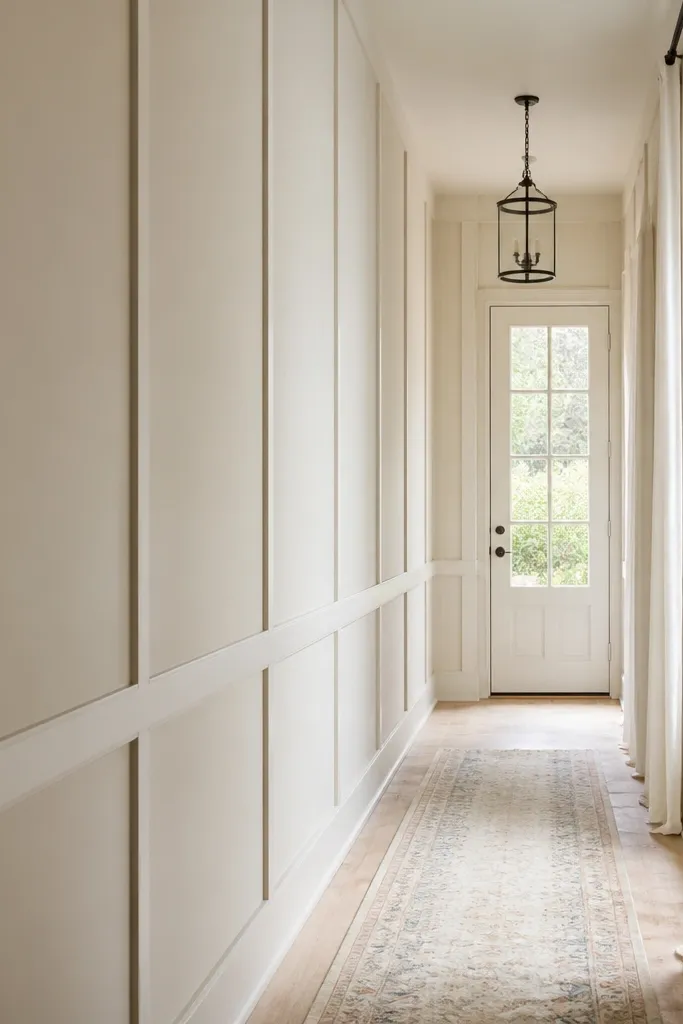
Pilaster strips make moulding look more architectural and less like surface decoration. The vertical members create a stronger sense of height, which is great for rooms with low ceilings or narrow hallways. Pair them with rectangular panels so the wall stays modern and clean. This is a strong option for modern wall moulding ideas because the vertical rhythm feels contemporary even when the style is French-inspired.
Start by marking vertical lines on your wall at equal spacing, keeping each panel width around 16-24 in. Install pilaster strips first using a level and brad nails, then add horizontal rails to cap the panels. Frame the inside rectangles with moulding, keeping all panel boundaries aligned to your pilaster edges. Caulk and sand, then paint in satin so the vertical shadows read sharply.
Use a laser level for verticals; small angle drift shows up instantly in tall panels.
Avoid uneven vertical spacing; it makes the wall look crooked even if the corners are square.
9. Double-Height Paneling for Stair Landings
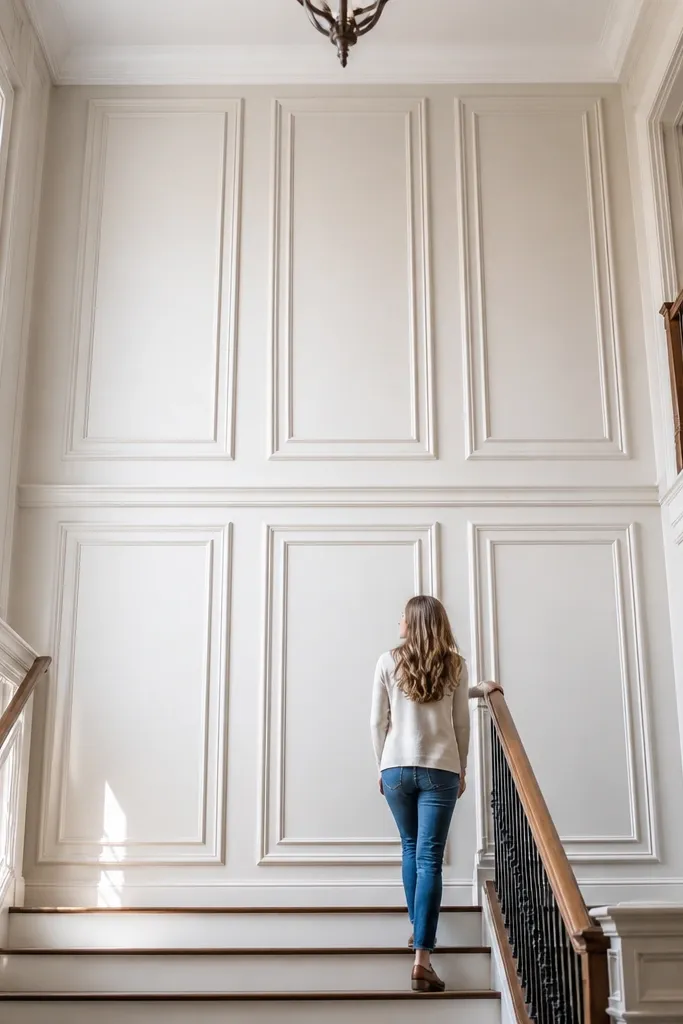
Stair landings are where French wall moulding ideas look most dramatic because you get height and a natural focal point. Double-height paneling gives you that grand, symmetrical feel without needing ornate cornices. Use one strong horizontal dividing rail and then frame tall rectangles above and below so it reads as one coherent design. The shadow depth is visible from the bottom of the stairs, which is what makes it impress.
Measure the landing height and place a main horizontal rail at the midpoint so the panels feel balanced. Install vertical frames from the rail to the upper boundary, then mirror the lower section with matching panel widths. Keep the moulding thickness consistent across the whole wall so the depth looks uniform. Fill, sand, prime, then paint with two coats, letting the first coat dry fully before the second.
Pre-cut extra length for vertical members and trim in place after you check plumb; it saves you from a gap at the top.
Don’t try to match existing stair wall trim if it’s out of level; start fresh from your rail line.
10. French Cornice-Style Top Border with Simple Panels
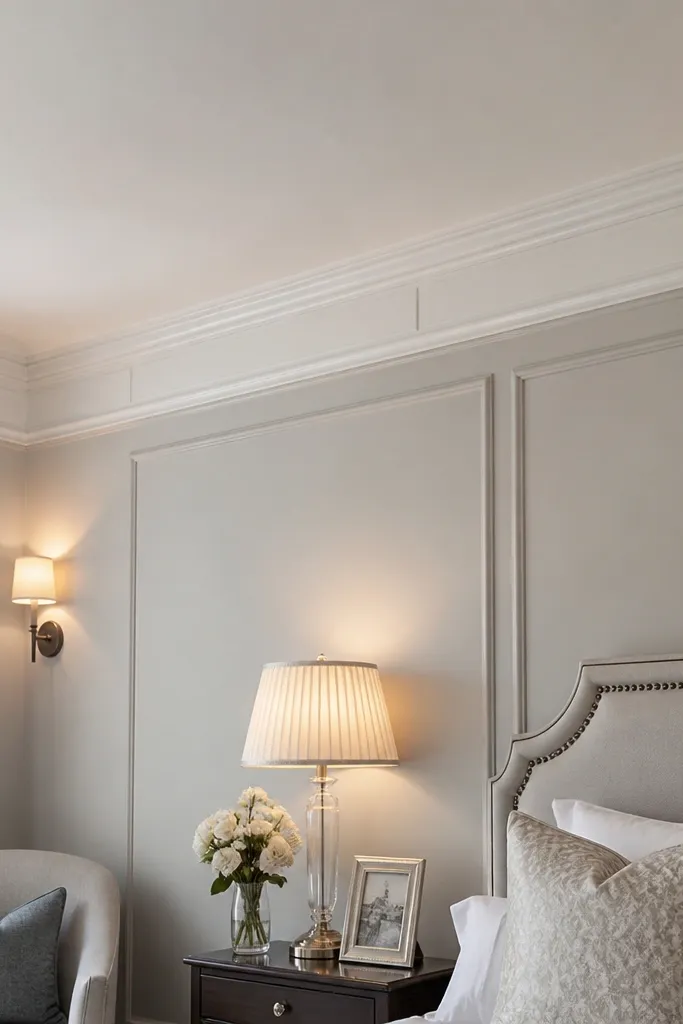
A top border gives you instant French mood. This design uses a cornice-style moulding strip at the ceiling line and pairs it with smaller rectangular panels below, so the wall looks finished from every angle. Keep the top border height around 3-4 in so it looks crisp, not bulky. It’s modern wall moulding ideas that feel upscale because the top line anchors the whole composition.
Install the ceiling-level border first, using a laser to keep it straight along the room. Then mark panel rectangles beneath it with consistent spacing and install the verticals and horizontals. Use mitered corners where possible; if walls are slightly off-square, cope joints at corners for a tighter fit. Fill nail holes and caulk seams, then paint the border and panels together for a uniform sheen.
Use a small foam roller on the moulding faces so paint stays even and the shadow recesses stay darker.
Skip heavy texture fillers; they shrink and create hairline cracks in the corners.
11. Herringbone Moulding Border (French-Inspired Modern)
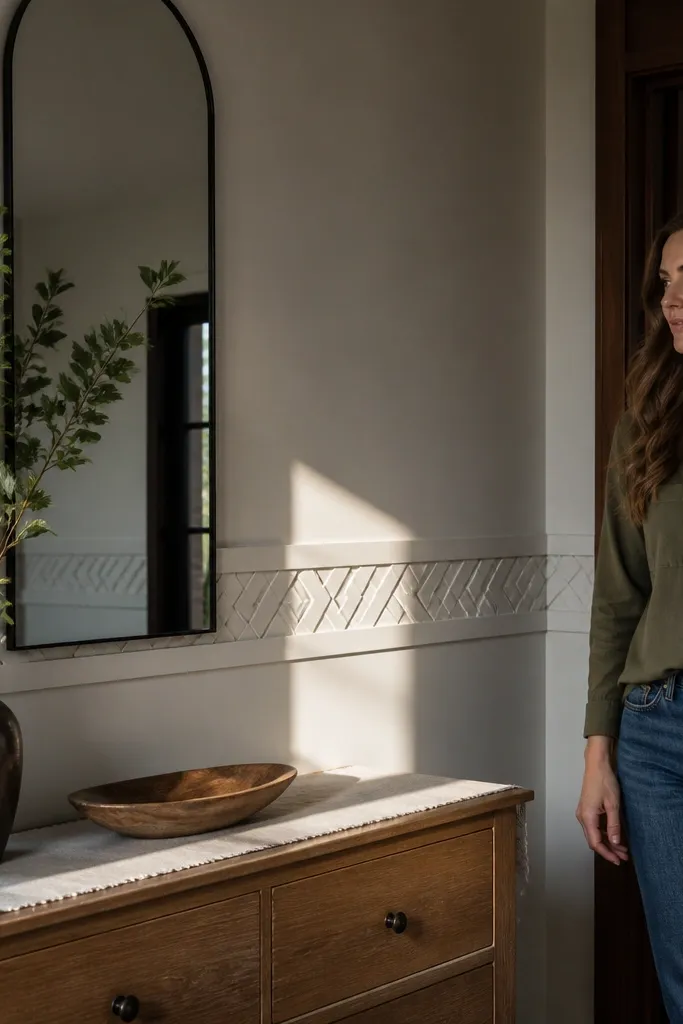
This is the one that looks trendy without losing the French feel. A herringbone border creates a tailored pattern, and because it’s only in a band, it stays modern instead of ornate. Place it around a door or above a console where the pattern gets seen. The angled shadow lines make it pop in photos even if your room lighting is flat.
Choose a narrow moulding strip (about 1/2-3/4 in wide) for the herringbone. Mark a rectangle area on the wall, then start with two angled strips meeting at the center and build outward at a 45-degree rhythm. Use a jig made from scrap wood to keep the angle consistent across every piece. Once the border is complete, frame it with a simple outer rectangle and then caulk and paint.
Editor's noteLabel the back of each strip as you cut so you don’t flip angles mid-install.
Skip thisDon’t use wide moulding for herringbone; it looks chunky and eats the pattern.
12. French Doorway Keystone Motif Above a Mirror
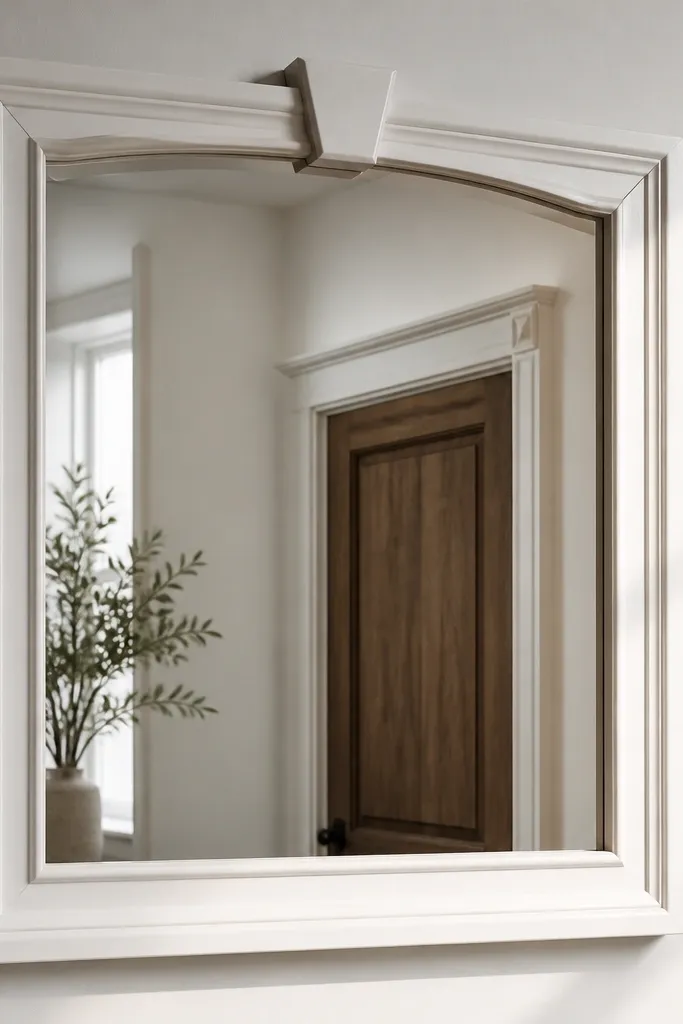
A keystone motif gives you a French architectural nod with minimal work. It’s perfect above a mirror or centered art, where you want the eye to land. Pair a simple rectangular frame around the mirror with a small keystone element at the top center to create that “arched entry” feel. Keep the keystone height around 6-10 in so it reads as moulding detail, not a separate sculpture.
Install the rectangular mirror frame first with mitered corners and consistent spacing from the mirror edges. Then cut the keystone from MDF — use a template so the top point and width match exactly. Glue and nail the keystone to the top center of the frame, aligning it with the centerline. Caulk the edges, prime, and paint, then do a careful second coat so it stays crisp.
Use a compass or printed template to get a symmetrical keystone; hand eyeballing makes it look off in photos.
Avoid placing the keystone too high; it should sit comfortably above the mirror, not near the ceiling line.
13. Raised Wainscot Panels with Bottom Baseboard Cap
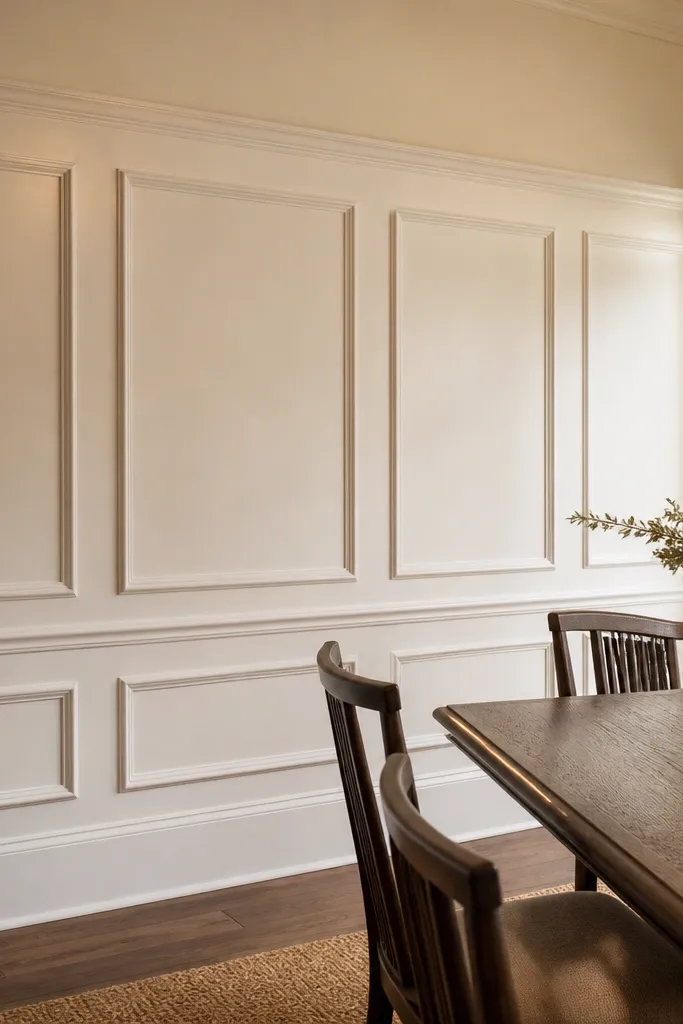
This look is French-inspired wainscoting without the heavy, traditional bulk. The bottom cap rail adds a grounded base, while raised panels create the classic carriage-house vibe. It’s great for dining rooms and hallways because the panel area makes walls feel more structured. Keep the bottom cap rail width around 3-4 in and the panels between 10-18 in wide for a clean, modern read.
Mark the wainscot height and install a bottom cap rail first, then add vertical panel frames above it. Use a matching top rail to close the panel area so the design doesn’t look unfinished. Install panels using layered rectangles or single-frame rectangles depending on your skill level. Fill seams, sand lightly, prime, then paint with satin so the raised edges show depth.
Editor's notePre-check your floor line; if it’s uneven, shim under the bottom rail so the cap stays level.
Skip thisDon’t skip sanding the moulding edges; paint will highlight any ridge at panel boundaries.
14. Modern French Wall Panels with Diagonal Corner Bracing
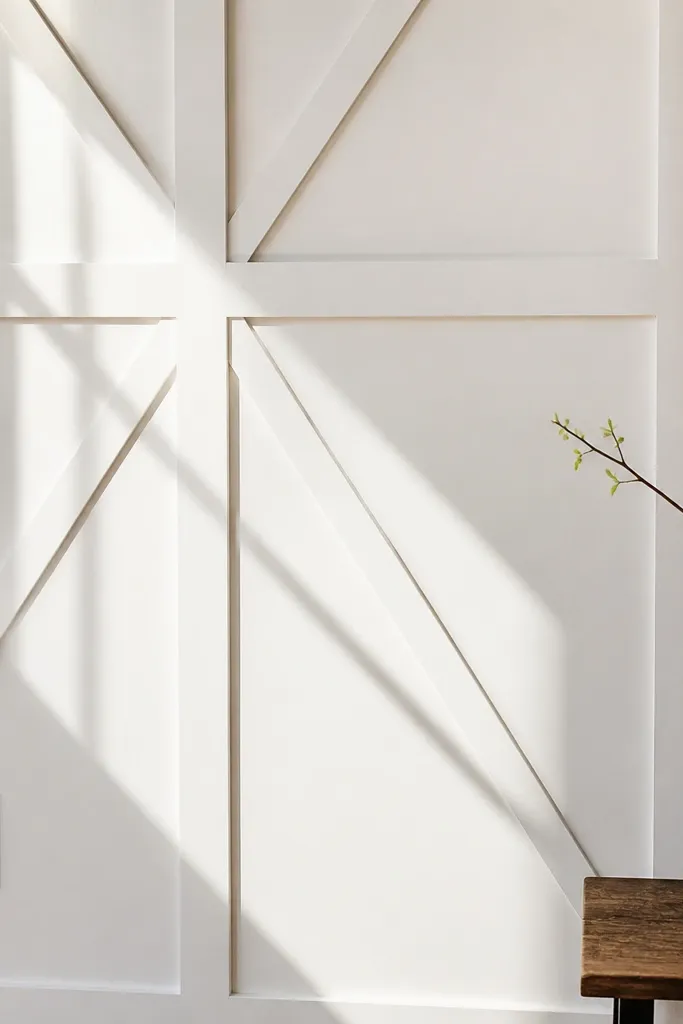
Diagonal braces make moulding ideas look modern and intentional, not like a copy-paste traditional panel. Add diagonal members inside a rectangular panel so you get a subtle X that reads architectural. This works especially well on walls that need visual structure but you don’t want a busy pattern across the whole space. The diagonal shadow lines show up strongly in photos because they catch light at different angles than straight moulding.
Build the outer rectangle frame first, then mark the diagonal lines using a tape measure from corner to corner. Cut diagonal braces from MDF strips and test-fit them so the ends land tight inside the frame. Glue and nail the braces in place, then caulk around the junctions. Finish with primer and two coats of paint, sanding any raised caulk bumps after the first coat.
Editor's noteCut diagonals slightly long, then trim to fit after dry-fitting; it’s faster than chasing gaps with caulk.
Skip thisAvoid using too-thick strips for diagonals; thick diagonals can overwhelm the panel.
15. French Corner Picture Frame Panels (Two Opposite Walls)
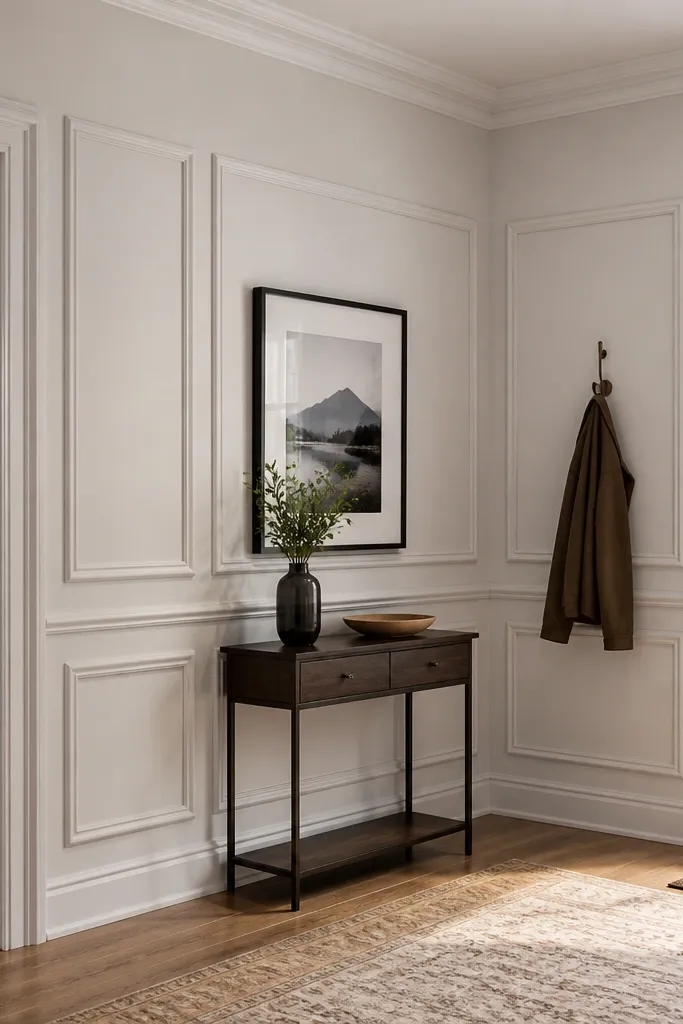
When you carry moulding across two walls, it looks custom because the design reads as one continuous system. Use picture-frame panels that wrap the corner with matching widths so the lines don’t reset at the corner. This is one of the best modern wall moulding ideas for entryways because it makes the space feel intentional the moment you walk in. Keep the panel width consistent across both walls and use the same rail height so photos look clean.
Plan your panel grid on paper first, then transfer the corner measurements to both walls. Install the first wall’s frames, then use those finished moulding edges as the reference for the second wall. For corners, use 45-degree miters if your walls are square; if not, use coping cuts so the profile matches without gaps. Caulk the corner joints and paint with a smooth finish for a continuous look.
Use a scrap “corner gauge” piece to check panel widths across the corner before you nail the final section.
Don’t let the corner panel width change; even a 1/4 in difference shows in photos.
16. Slim Vertical Panel Columns with a Horizontal Band
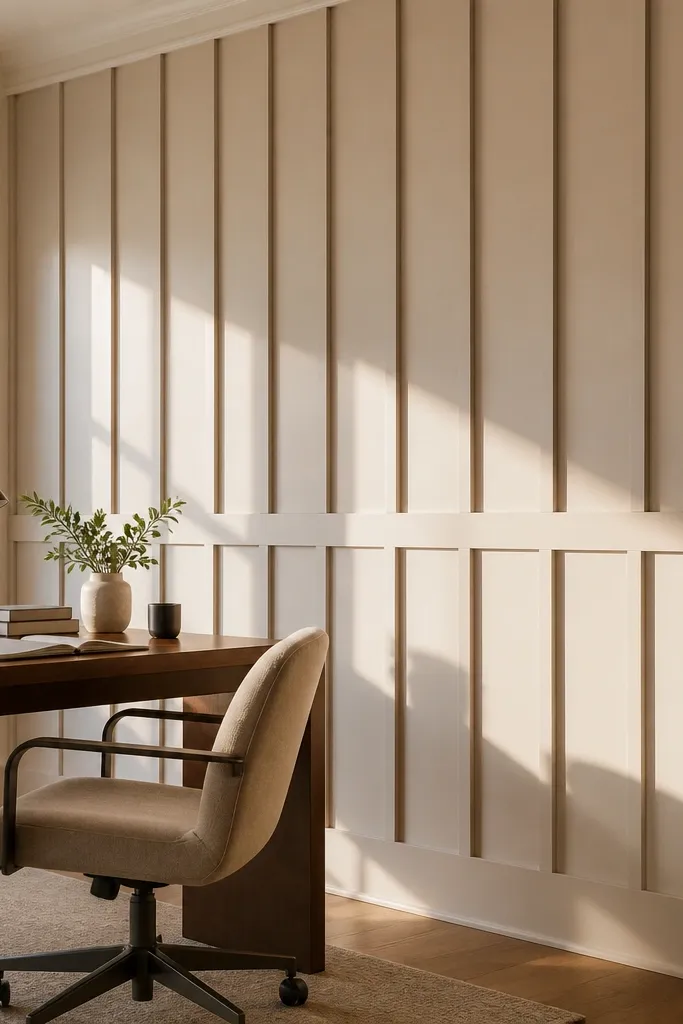
This design is modern, French-adjacent, and super clean. Slim vertical columns divide the wall into narrow lanes, while a horizontal band ties everything together so it doesn’t look like random trim. It’s photogenic because it creates strong vertical rhythm that makes walls look taller. Use it in living rooms, offices, and bedrooms where you want texture without large panels taking over the whole wall.
Mark a horizontal band line first and choose column spacing so each column width is 3-5 in with 1/2-1 in gaps. Install the horizontal band moulding, then attach vertical columns from band to a chosen top boundary. Add small caps at the top of columns so the ends look intentional rather than chopped. Fill nail holes, sand, prime, and paint, keeping caulk lines thin for sharp separation.
Editor's noteIf your wall has outlets, build the columns to stop at the outlet edges and resume above — don’t squeeze columns around outlets.
Skip thisAvoid columns wider than 6 in; they start reading like bulky trim rather than moulding.
17. French Wall Moulding with Circular Medallions in Panels
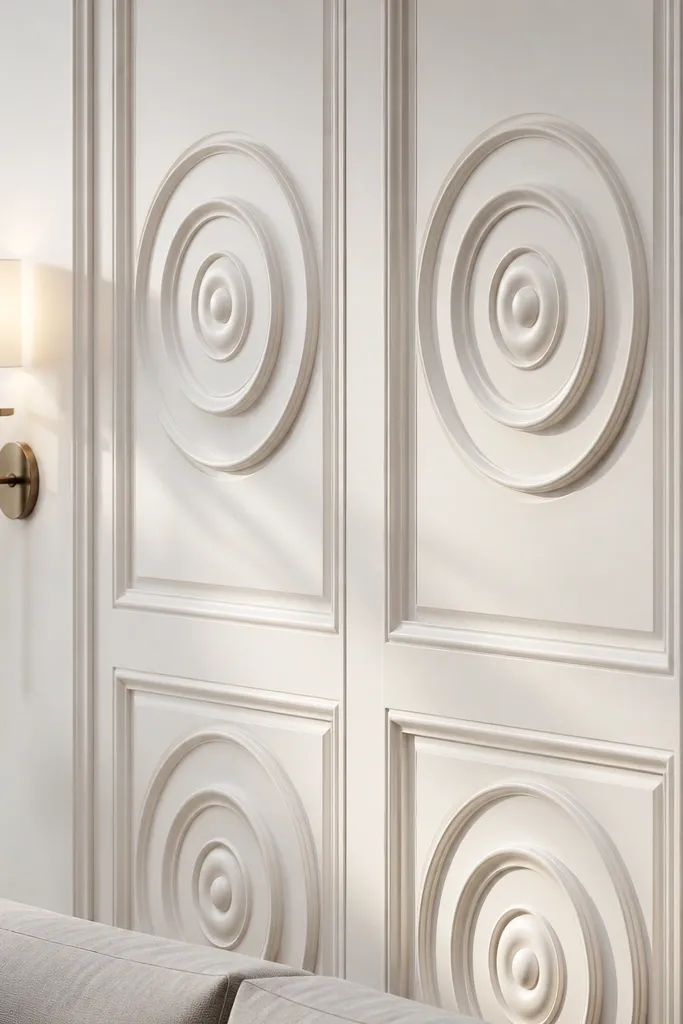
This is the “French furniture” vibe translated to walls. Place a circular medallion in the center of each panel so the design has a repeated focal point. The circles soften the geometry of rectangles and create a more ornate look without using complicated rosettes. It photographs well because circles reflect light differently than straight edges, and each panel reads as a mini frame.
Frame your rectangular panels first so the grid is straight. Then cut circles from MDF or use pre-made round moulding pieces for the medallion outer ring. Glue and nail the medallion ring to the panel center, then add an inner circle using a thinner strip for contrast. Caulk edges, prime, and paint; use satin on the moulding for the cleanest shadow contrast.
Use the same medallion diameter across all panels so the pattern looks deliberate, not decorative chaos.
Don’t make medallions too close to panel borders; leave at least 2 in of breathing room.
18. French Mirror Frame with Inner Beaded Strip
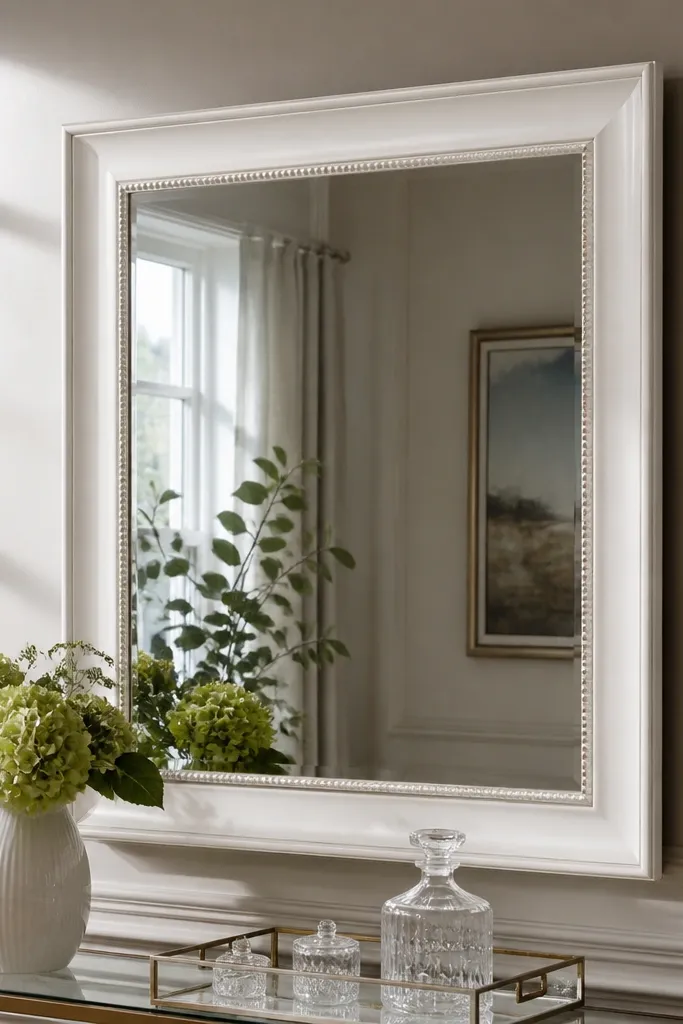
A mirror is where French wall moulding ideas pay off immediately. This design builds a bold outer frame, then adds a thin inner beaded strip to create an extra layer of light-catching detail. The beaded line makes the mirror area look finished and helps the frame look more expensive than it is. It’s a great look for entryways and bedrooms because it combines practicality with architectural styling.
Install the outer rectangle frame around the mirror opening with mitered corners and consistent offsets from the mirror edges. Add a second inner strip about 1/2 in inset from the outer frame and center it so the border looks even. If you’re using beaded moulding, test a short piece to confirm the bead direction reads cleanly from your main viewing angle. Caulk all seams, prime, then paint with a smooth roller and a brush for corners.
Editor's notePaint the moulding before installation if you can — it seals MDF edges and reduces brush marks around corners.
Skip thisAvoid thick caulk on the inner bead; it fills the bead ridges and kills the detail.
19. French Corner Panels with a Small Crown Return
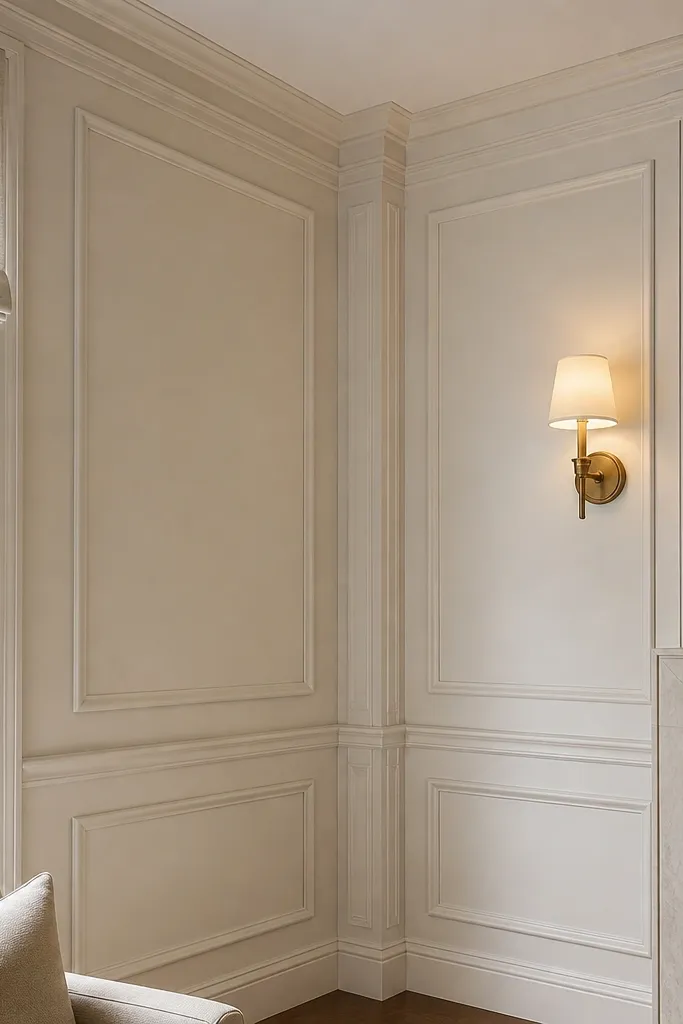
This is the kind of French wall moulding idea that looks “architectural” because it respects the ceiling line. Instead of a full ceiling crown, you add a small crown return at the corner above panel sections. It frames the wall and gives the moulding system a finished top edge, which is what most DIY attempts miss. Keep it tight and minimal so it still feels modern.
Install your main panel frames first, then mark a small crown return area where the panels meet the ceiling line. Cut the crown return pieces and dry-fit at the corner so the profile matches without gaps. Nail the crown return on top of the panel line, then caulk the joint and fill nail holes. Prime and paint, using painter’s tape to protect sharp edges along the panel tops.
Use a coping saw for the corner crown return if your ceiling line is slightly irregular; it hides small inconsistencies.
Don’t use a huge crown return; oversized crowns make the panels look like they’re floating.
20. French-Style Faux Chimney Breast Paneling for a Wall Feature
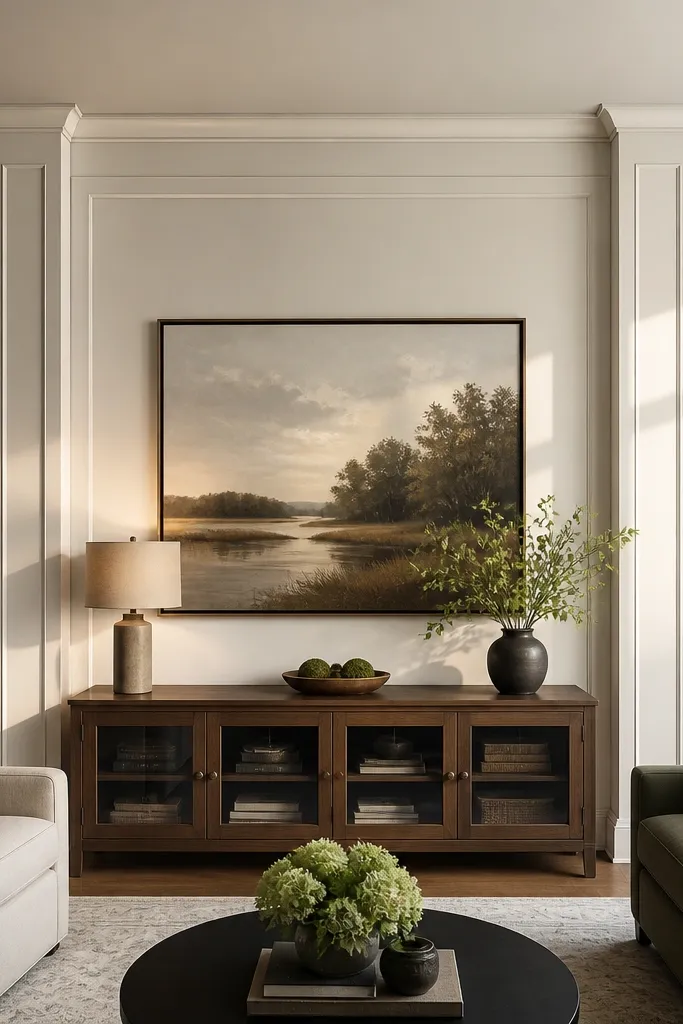
This is the French wall moulding idea that makes a boring wall look like it has architecture. You build a tall, centered “chimney breast” frame with layered rails and two side pilasters, then cap it with a simple cornice. It reads instantly as French because the proportions mimic classic mantle wall rhythm, not because of ornate carving. Use it in a living room or dining room where you want one focal wall without installing a fireplace. The materials are standard MDF or finger-jointed primed boards, so the build is doable with basic cutting and a steady hand. Plan on about a weekend for one feature wall, plus a little extra time for caulk and paint to make the seams disappear.
1) Mark a centered layout: choose the feature width as 60-70% of the wall width, then keep the top of the cornice about 6-10 in below the ceiling. Draw a rectangle for the main frame and add two vertical pilaster strips on each side with widths around 4-5 in (adjust to your design) and a 1/8 in shadow gap between moulding pieces. 2) Cut the frame rails and pilaster bases from 1x primed MDF trim, then assemble using wood glue plus 18-gauge brads. Add a lower “mantle shelf” rail about 10-14 in above the bottom panel line, with a second rail beneath it to create depth. 3) Install 3-piece panel inserts inside the frame using flat panels (MDF panel or pre-primed raised panel boards) and keep every seam tight with consistent 1/8 in gaps. Fill brad holes, caulk the shadow gaps lightly, sand with 180-grit, then prime and paint in a satin finish for walls (semi-gloss on trim if you want sharper contrast).
Use a laser level or a long spirit level for the centerline and keep all verticals referenced to that, not to the wall edges. Paint the mouldings before install if you can — it hides scuffs and makes the final finish look crisp.
Don’t make the center feature too narrow — below about 50% of the wall width it looks like a picture frame, not a French architectural wall.



