
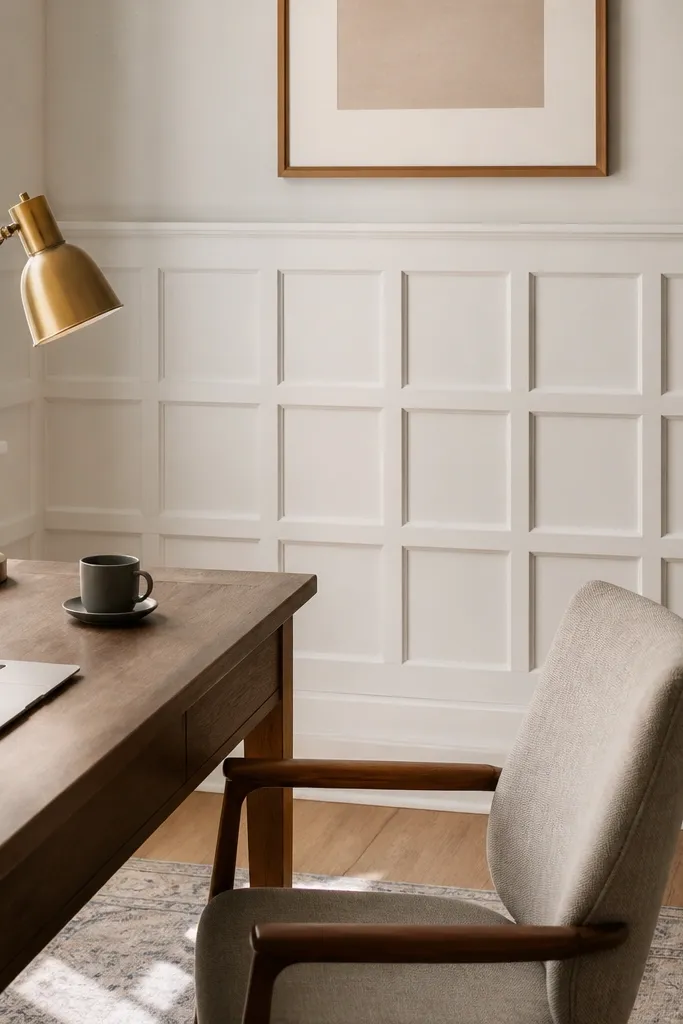
1. Narrow-Frame Square Panels with a Single Chair Rail
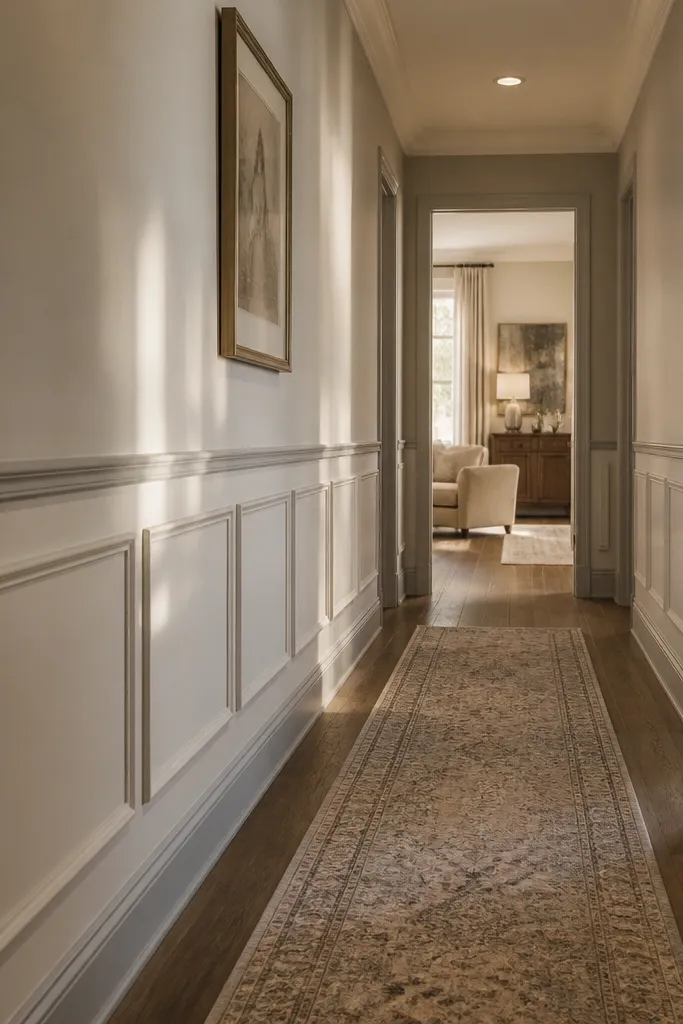
This look is modern because the panels are small, evenly spaced, and framed with thin trim instead of chunky molding. The single chair rail keeps the eye level and prevents the wall from feeling busy. Use it in hallways, dining rooms, or a home office where you want structure without a heavy traditional vibe. Painted MDF makes the frames look crisp and photo-ready, especially when the edges are sanded flat and sealed.
Start by marking a level line for the chair rail at your target height (commonly 40 inches). Cut MDF trim for the outer frames and build the inside grid with consistent panel openings (for example, 10x10 inches). Dry-fit each section around outlets, then glue with construction adhesive and nail the trim to studs or solid backing. Caulk all seams, sand flush, prime, and finish with cabinet-grade enamel in a satin or semi-gloss sheen.
Pre-measure outlet positions and “map” the panel grid on paper so you can shift one panel instead of forcing a skinny cut piece.
Don’t mix panel sizes across the same run — it makes the whole wall read sloppy.
2. Vertical Slat Wainscoting with a Thin Top and Bottom Rail
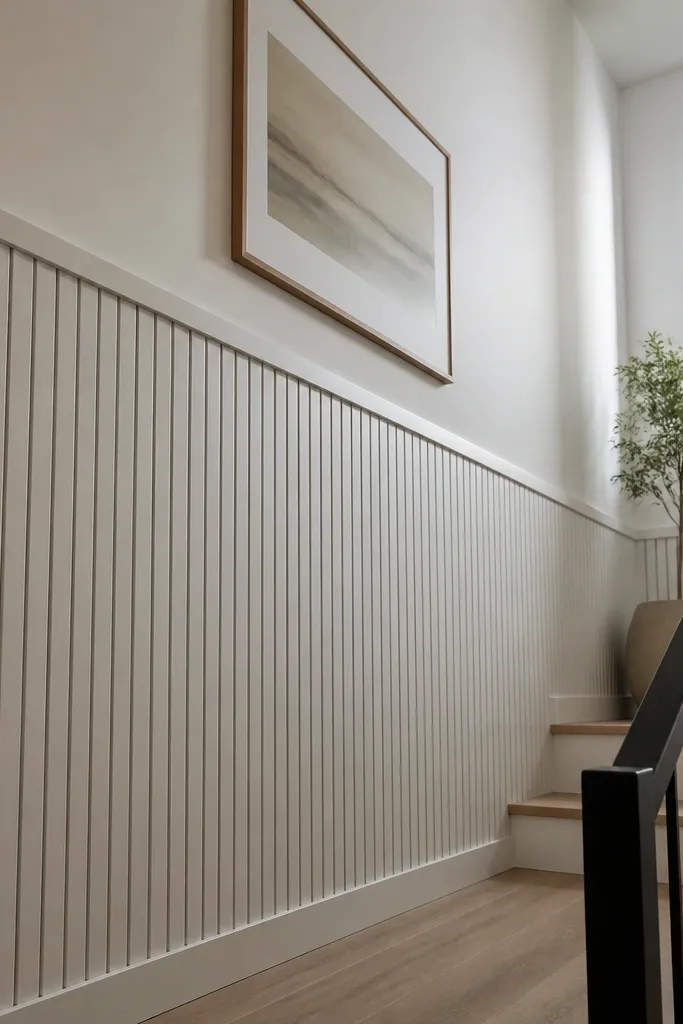
Vertical slats give you modern lines that feel taller and cleaner than box panels. The thin top and bottom rails act like a frame, so the slats look intentional instead of like a DIY fence. This style is great for entryways and stair landings where you want height and a sleek backdrop for art or mirrors. It also photographs well because the shadows between slats create texture without extra color.
Mark the overall wainscoting height and install a level top rail first. Use a consistent slat width and spacing, like 1x2 inch slats with 3/8 inch gaps, and cut all slats to the same length minus a small clearance for uneven floors. Attach slats to studs using construction adhesive plus brad nails, then add the bottom rail to hide any bottom unevenness. Fill nail holes, caulk the edges, prime, and paint.
Use a spacer strip (a scrap 3/8 inch block) while installing slats so every gap stays identical.
Skip wide gaps — they make the wall look unfinished and break the modern effect.
3. Herringbone Panel Band with a Clean Perimeter Frame
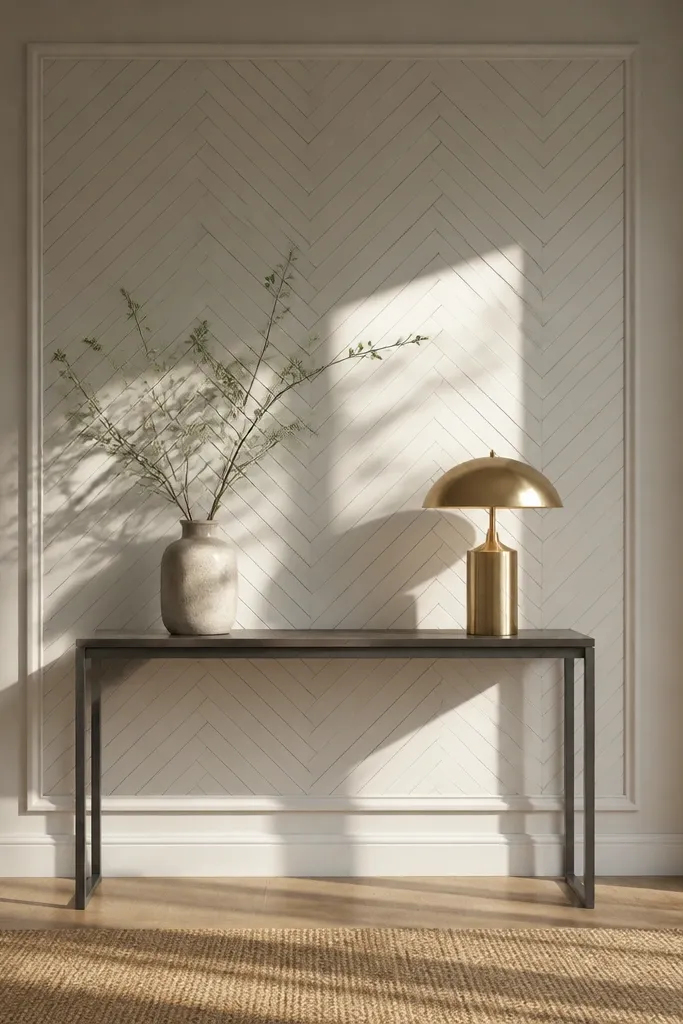
A herringbone band is modern when it’s contained inside a crisp perimeter frame. Keep the pattern area limited to one main rectangle so it reads like design, not wallpaper. This works especially well behind a console table or on the wall you see first when you enter a room. Use paint to keep it current; the pattern texture does the visual work.
Build a perimeter frame with MDF trim to your chosen band height, like 36-42 inches tall. Inside the frame, set out a herringbone using small strips, such as 1x3/4 inch pieces, cut at 45 degrees. Dry-fit one “V” row, then work outward, keeping the points aligned using painter’s tape lines. Once the pattern is glued and nailed, fill gaps lightly, caulk around the perimeter, prime, and paint.
Editor's noteMake a single paper template for the strip layout and tape it to the wall before you cut — it saves you from cumulative alignment drift.
Skip thisDon’t use thick trim strips — they make herringbone look heavy and traditional.
4. Beveled Rectangle Panels with a Flat Rail System
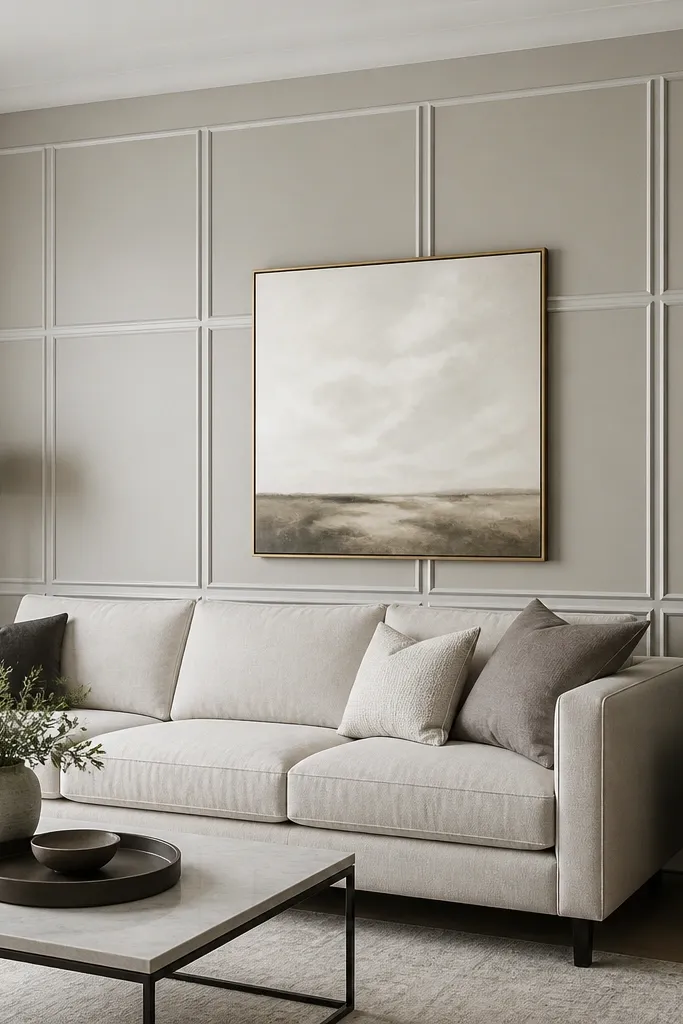
Beveled rectangle panels feel modern because the bevel catches light subtly and creates depth without ornate detailing. The flat rail system keeps everything straight and architectural, so the wall doesn’t look like classic wainscoting. This is a strong pick for living rooms and bedrooms where you want a calmer, tailored backdrop. Paint it in a crisp white or soft warm white so the bevel shadows show up on camera.
Install top and bottom rails first using a level line and screws into studs where possible. Use MDF panels with a shallow bevel edge, then size each rectangle to keep consistent spacing (for example, 12-inch wide by 18-inch tall panels with 1/4 inch gaps). Glue and nail the panel frames, then add side rails to complete each bay. Sand edges, caulk seams, prime, and finish with a smooth enamel topcoat.
Editor's noteSlightly break the edges with 220-grit sanding before painting so the bevel looks sharp, not fuzzy.
Skip thisDon’t leave gaps unfilled along the rail lines — they show through paint and ruin the clean look.
5. Two-Tone Wainscoting with a Shadow Gap at the Top
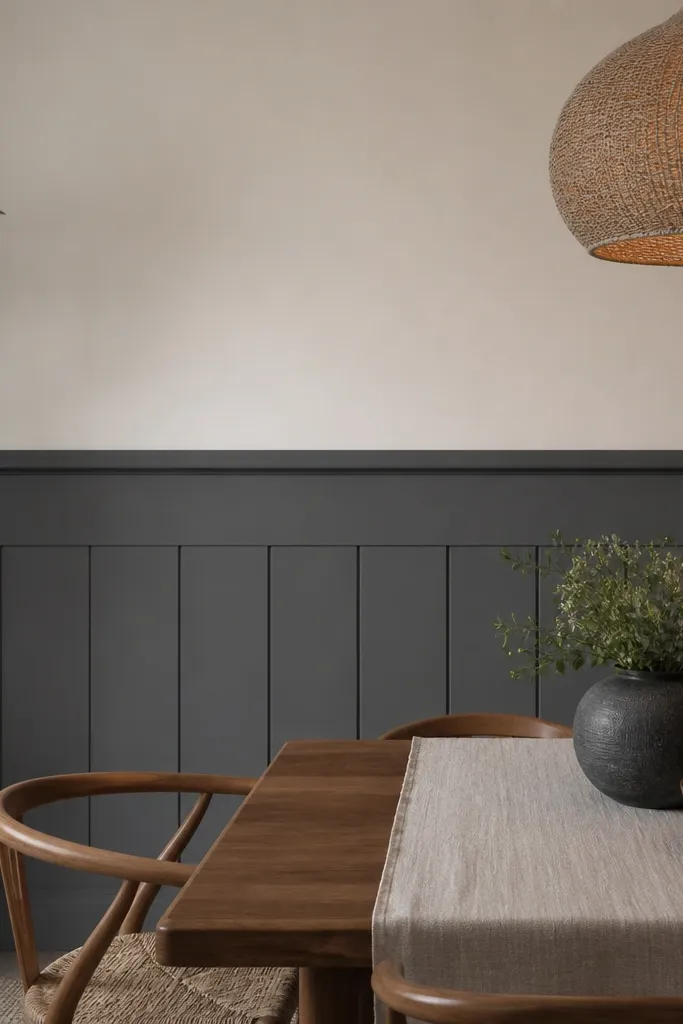
Two-tone wainscoting reads modern when the color change is crisp and there’s a visible separation line. The shadow gap at the top rail creates that clean “cut” between the panel area and the wall above, like built-in millwork. This works great in rooms with strong paint colors, because the lower section can take the darker tone while the upper stays light. Use a satin or semi-gloss sheen on the lower panels so the line catches light.
Plan your color split height first, then install a thin wall-mounted backer strip to create a small shadow gap, like 1/8 inch. Add the top rail over the backer so you get a consistent separation line. Build panel frames below, then prime everything with a bonding primer. Paint the panel area in your darker tone and the upper wall in your lighter tone, keeping tape lines straight and removing tape while paint is still slightly tacky.
Use painter’s tape on the lower edge of the darker paint only, then apply the upper paint first for cleaner tape removal.
Don’t rely on caulk alone for the color boundary — you need a physical gap or you’ll get messy bleed.
6. Mixed Panel Sizes in a Locked Grid (No Randomness)
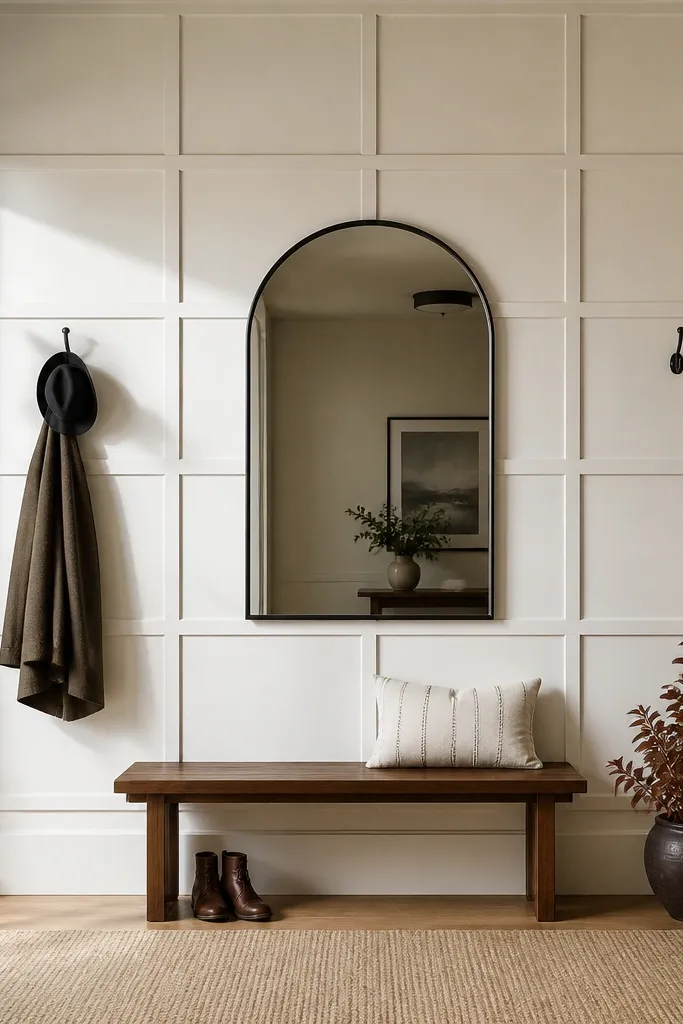
Modern wainscoting can handle mixed panel sizes as long as the grid is strict. Instead of random rectangles, use a repeating pattern like alternating 12x16 and 12x12 shapes so the layout feels designed. This is ideal for walls with awkward proportions because you can balance the pattern around a focal point like a window or doorway. Keep it painted so the geometry stays the star.
Draw your wall elevation and decide the repeating unit. For example, a two-panel column could repeat a 12x16 rectangle beside a 12x12 rectangle, with consistent spacing like 1/4 inch. Build frames for each unique panel size, dry-fit all bays, then install starting from the most visible side. Nail into studs, glue trim edges, fill seams, prime, and paint.
Editor's noteStart your layout from a center reference point and work outward so the pattern edges land symmetrically.
Skip thisDon’t “fill” the last bay with a weird skinny panel — adjust the whole grid instead.
7. Overscaled Panels with a Minimal Perimeter Border
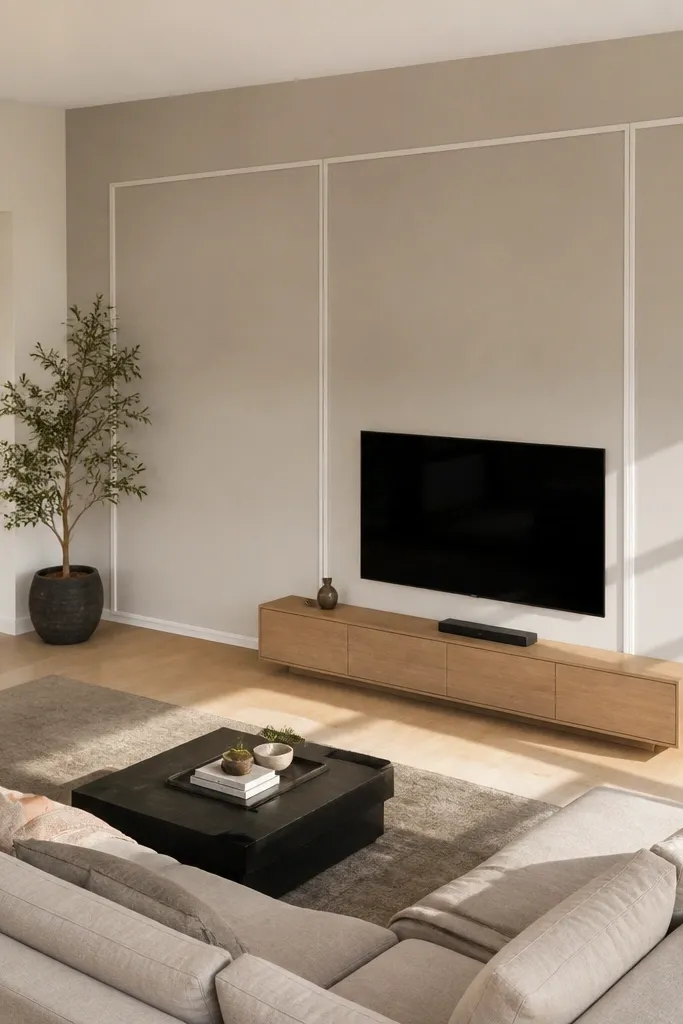
Overscaled panels look modern because they reduce visual noise. Instead of many small boxes, you get fewer, larger rectangles with a thin perimeter border, which makes the wall feel calm and architectural. This style works in open-plan living rooms where you want wainscoting that doesn’t compete with furniture. Paint with a smooth finish so the panel surfaces look flat and clean in photos.
Pick a band height around 40-44 inches and decide on a small number of bays, like 3 or 4 across. Use MDF trim for a thin perimeter border, and keep the inside panel surface either smooth MDF or a flat panel board. Install the top rail, then mark and level the vertical dividers before attaching the perimeter frames. Fill, sand, prime, and paint with a cabinet-grade enamel for a durable, smooth surface.
Editor's noteUse a long straightedge to check the wall for dips before you lock in the first bay — your big panels will show every wobble.
Skip thisDon’t use thick, ornate corner blocks — they ruin the minimal look.
8. Shiplap-Style Horizontal Panels with a Clean Frame
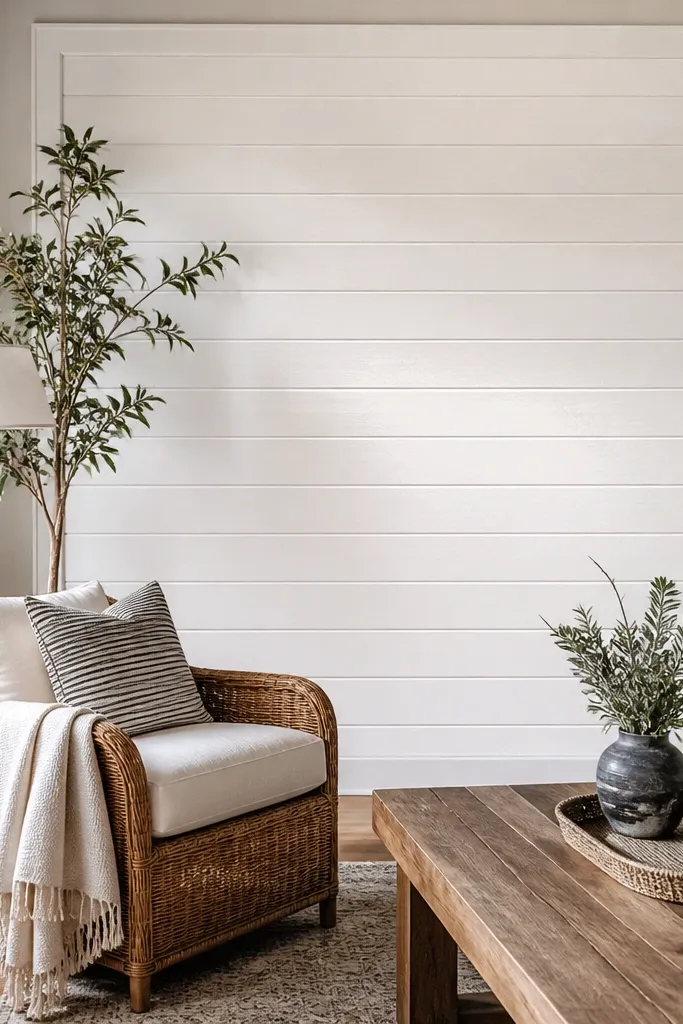
Horizontal plank styling can look modern when the planks are installed with tight, consistent reveals and the whole section has a neat frame. This gives you a soft texture without the “farmhouse” look, especially if you paint everything the same bright color. Great for family rooms and kitchens where you want something more interesting than flat drywall. The key is the frame and the reveal size — that’s what makes it feel intentional.
Install a top and bottom rail to lock in height, then add side trim to frame the band. Cut planks to length and keep a consistent reveal, like 1/8 to 3/16 inch, using spacers while installing. Nail each plank into studs or solid backing, then fill nail holes and sand the joints smooth. Prime and paint with a roller-smooth approach, so the seams look crisp rather than rough.
Editor's noteSand the plank edges lightly before paint so the reveal stays sharp instead of ragged.
Skip thisDon’t skip the frame — loose plank ends make the whole section look like a patch job.
9. Inset Panel Squares with a Recessed Surface

Inset squares look high-end because the panel surface sits slightly back from the trim, creating a real shadow line. It’s modern because it’s subtle and architectural, not decorative. This is a great pick for powder rooms and dining rooms where you want a refined look without heavy patterning. Use MDF for the inset surfaces so you can cut clean recesses and keep everything level.
Build a perimeter frame and internal trim grid, then set the inset panel surfaces to sit back by about 1/4 inch. Use a router or pre-made recessed panel boards so the edges are even. Dry-fit the inset panels, then glue and nail the perimeter trim while keeping the inset surface flush. Fill and sand, caulk the trim-to-inset seams, prime, and paint.
Editor's noteDo a test panel on scrap first — the inset depth is what creates the shadow line, so dial it before you build the whole wall.
Skip thisDon’t make the inset too deep — it can look like a dent instead of a design.
10. Grid-Only Wainscoting with No Panel Inserts
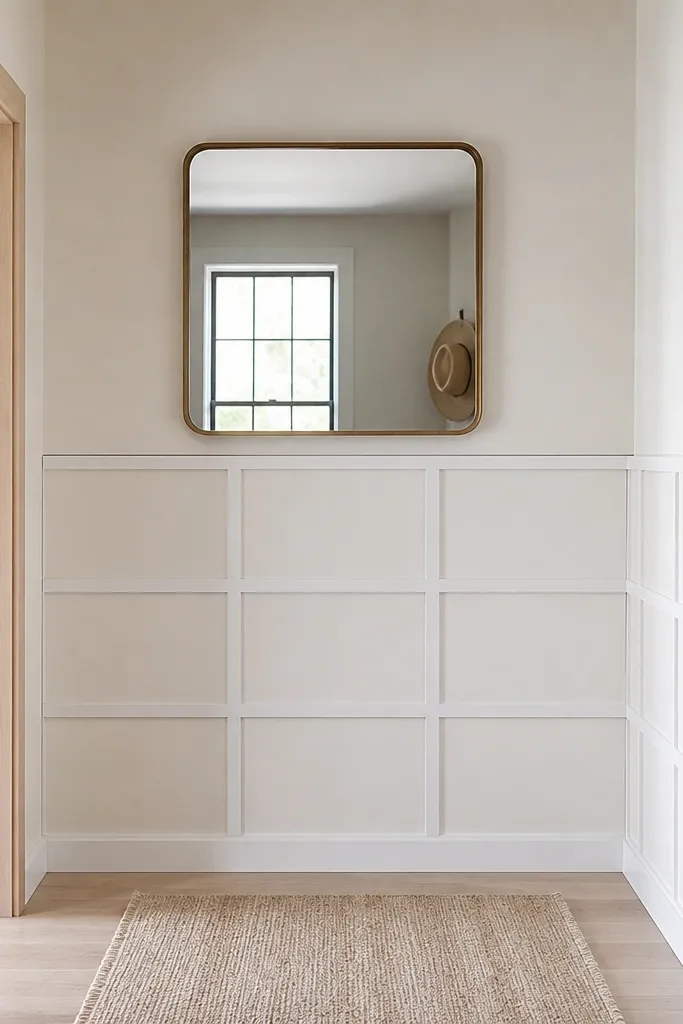
This is the easiest modern option that still looks designed. Instead of adding full panel inserts, you install a trim grid that outlines squares or rectangles, leaving the wall surface smooth behind. The look is clean, minimal, and forgiving if your wall isn’t perfectly flat because the grid hides small imperfections. It’s also faster than full panel builds, which helps if you’re doing a single feature wall.
Decide on your spacing and mark grid lines lightly with a pencil and level. Install the vertical grid trim and horizontal grid trim using construction adhesive and brad nails into studs. Keep the grid lines consistent by using a spacer block for panel spacing. Sand nail pops, caulk the trim edges, prime, then paint the whole section so the wall and trim finish match.
Use a foam roller after priming to keep the wall texture consistent under the trim lines.
Don’t paint trim before caulking — hairline gaps show once the sheen changes.
11. Butt-Joint Flat Panels with a Floating Look
Floating panels look modern when the joins are tight and the panel faces are flat. This style uses flat MDF sheets or panel boards set into a perimeter frame, so you get broad, clean surfaces with narrow shadow lines at the edges. It’s a strong choice for contemporary living rooms because it reads like built-in furniture. Keep the finish smooth and the edges crisp so the wall looks “designed,” not patched.
Frame the wainscoting band with MDF trim, then cut flat panel boards to fit inside with a small reveal, like 1/8 inch. Dry-fit and adjust so panel faces sit even across bays. Glue the panel into place and use brad nails at the edges into studs or backing, then remove any squeeze-out. Caulk the reveals, sand flush, prime, and paint with a smooth enamel finish.
Editor's noteUse a laminate trimmer bit or sharp saw blade for clean edges so the reveal line stays crisp after paint.
Skip thisDon’t go for a zero-reveal fit — wood movement and uneven walls will show it.
12. Corner-to-Corner Diagonal Panel Band
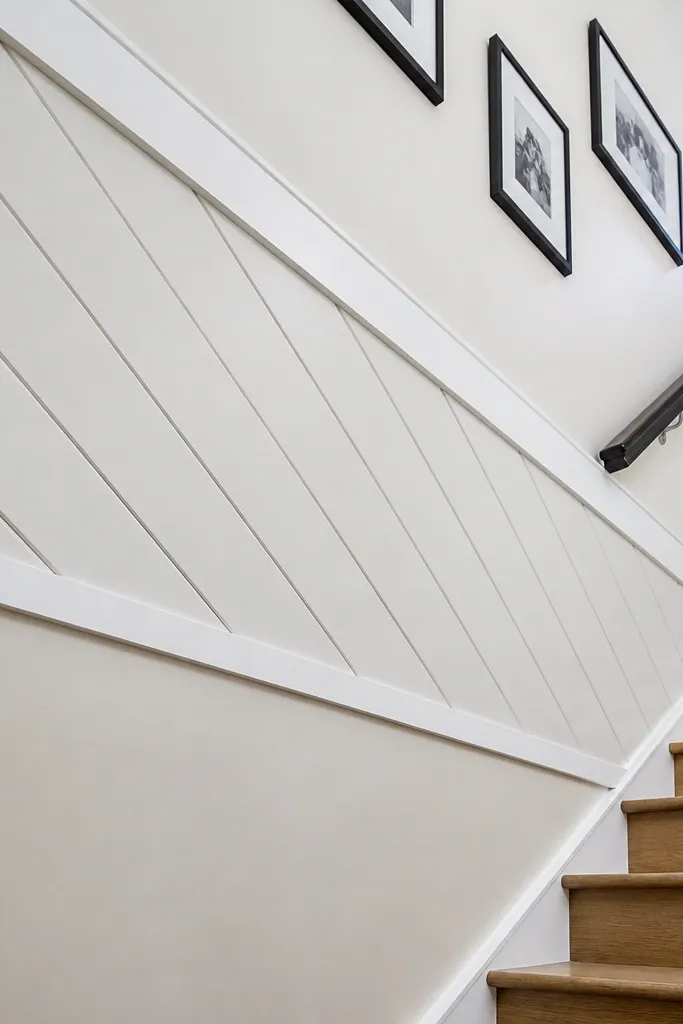
Diagonal paneling looks modern because it breaks the horizontal and vertical monotony without adding clutter. Keep it contained to one band and frame it with straight rails so it stays sharp and architectural. This works well on stair walls, entry walls, and any space with a clear focal area. Paint helps the diagonal lines stay crisp and readable from a distance.
Mark the band rectangle and install the perimeter rails first. Cut two sets of panel pieces at matching angles, such as 45 degrees, so the diagonal pattern meets in the center. Dry-fit the diagonal pieces to confirm the meet line is straight, then glue and nail into studs or backing. Fill seams, caulk around the perimeter, prime, and paint.
Editor's noteUse a stop block on your miter saw so every diagonal piece hits the exact angle and length.
Skip thisDon’t eyeball the center meet line — measure from both corners to keep it straight.
13. Tall Half-Wall Wainscoting with Vertical Center Posts
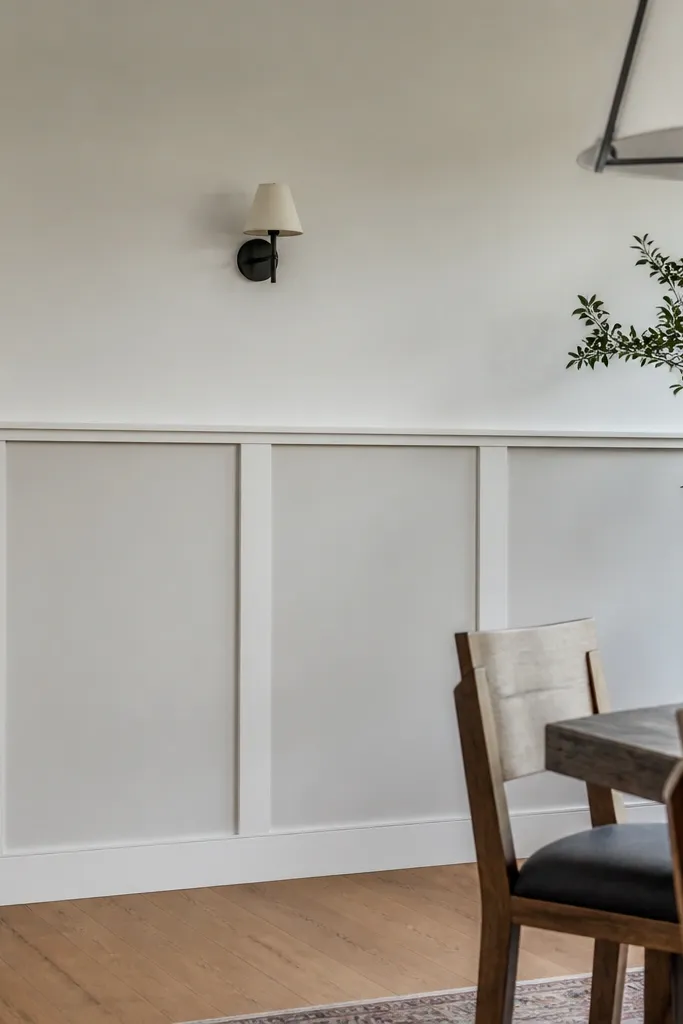
A tall half-wall with vertical posts reads modern because it adds structure while keeping the panel count low. The center post idea gives you a clear rhythm — one main vertical line per bay — which looks clean and intentional in photos. This is great for open living spaces where you want definition between the lower wall and furniture. Use paint for the smooth surfaces and add slim trim details so the posts don’t feel bulky.
Set the top rail height higher than the classic chair rail, like 48-54 inches from the floor. Install the top and bottom rails, then add vertical posts within the bays using consistent spacing, like 16-24 inches apart. Use panel insets or simple flat panel surfaces between posts to keep the design clean. Nail into studs, glue trim edges, caulk seams, prime, and paint in a satin enamel.
If your floor is uneven, start with the bottom rail set to the highest point, then adjust panel lengths to match.
Don’t use thick posts — the modern look comes from slender lines.
14. Picture-Frame Wainscoting with a Narrow Inner Bevel

Picture-frame wainscoting looks modern when the bevel is narrow and the frames are proportionate. You get the classic “frame” look but without the heavy, antique feel because the inner edge is subtle. This is ideal for hallways and dining rooms where you want a structured pattern that still feels airy. Keep everything painted so the bevel shadows stay the main visual detail.
Choose a chair rail height around 40 inches and build outer frames using MDF trim strips. Create the inner bevel using a pre-beveled trim profile or by routing a narrow bevel edge on MDF strips. Assemble frames on a flat surface first, then install on the wall with adhesive and brads. Fill and sand, caulk the perimeter and inner seams, prime, and paint.
Use the same trim width for every frame so the bevel shadows line up across the wall.
Don’t vary frame widths between bays — it makes the pattern feel accidental.
15. Crisp Raised Rails with Flat Panel Walls
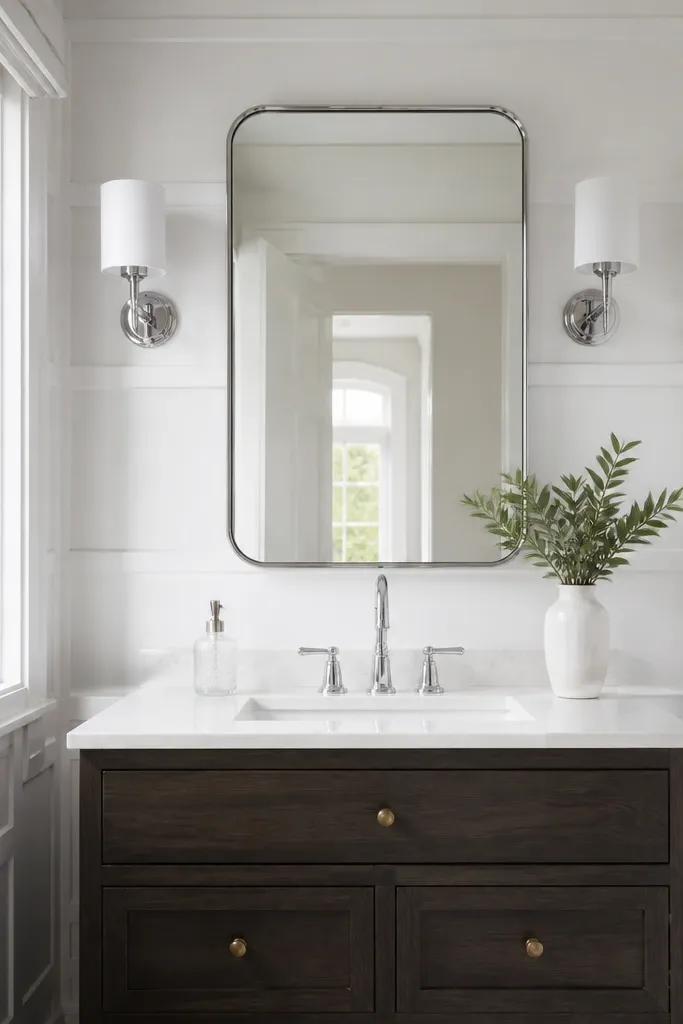
If you want modern wainscoting ideas with the least carpentry, raised rails are the move. You keep the wall surface mostly flat, then add a few crisp horizontal rails that create a built-in feel. This looks especially clean in bathrooms and small rooms where too many seams can clutter the space. Paint it in a consistent finish and let the rail edges do the visual work.
Mark a single wainscoting band height and install the top rail first, then add a bottom rail at the base. Add one middle rail for spacing, keeping it level across the room. Use MDF for the rails, then glue and nail into studs. Caulk the rail edges, sand smooth, prime, and finish with enamel paint.
Editor's noteUse a straightedge to verify the rails are perfectly level — tiny dips show up hard under paint.
Skip thisDon’t add too many rails — three lines is enough for a modern look.
16. Frame-and-Slab Panels with a Center Vertical Slab
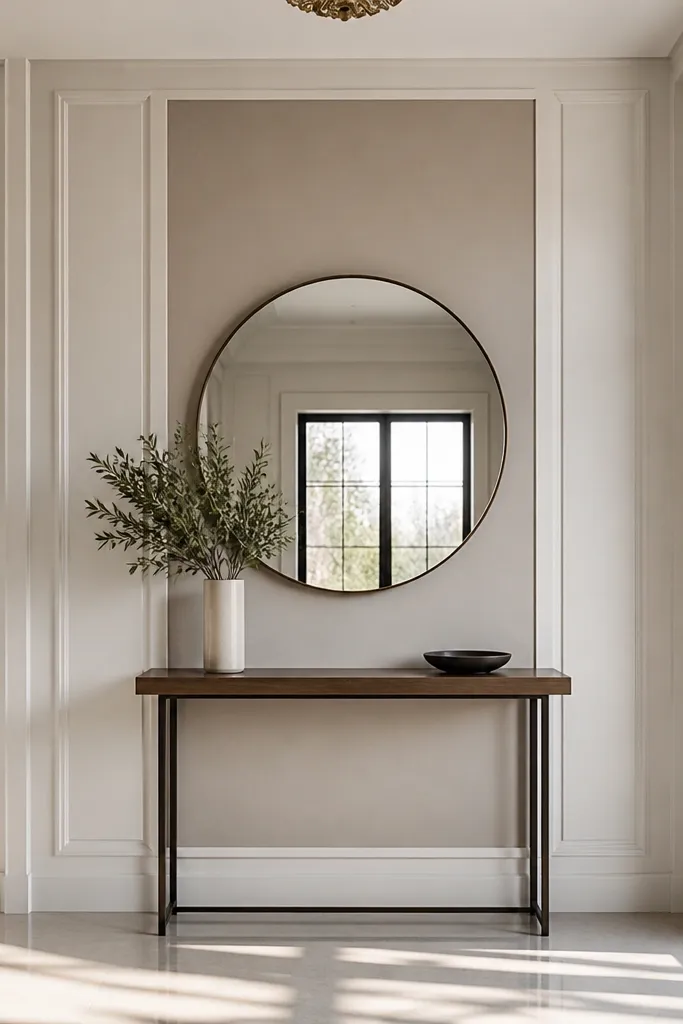
This design uses a framed bay with one larger vertical slab insert, so the wall has bold shape without a busy grid. It reads modern because the slab creates a strong vertical line and the frame keeps edges sharp. Great for entry walls and living rooms where you want a focal pattern that still stays clean. Paint gives the slab crisp edges and makes the center line pop.
Plan bays across the wall, like 24-32 inches wide each. Build the outer frame for each bay with MDF trim, then cut a vertical slab insert to fit centered inside. Glue and nail the frame, install the slab, and keep a consistent 1/8 inch reveal around the slab for shadow. Fill nail holes, caulk reveals, prime, and paint.
Editor's noteCut the slab insert to the same depth as the frame inner edge so it looks truly inset, not stuck-on.
Skip thisDon’t center the slab by eye — measure from both sides so the vertical line stays symmetrical.
17. Asymmetrical Rectangles with One Shared Horizontal Line
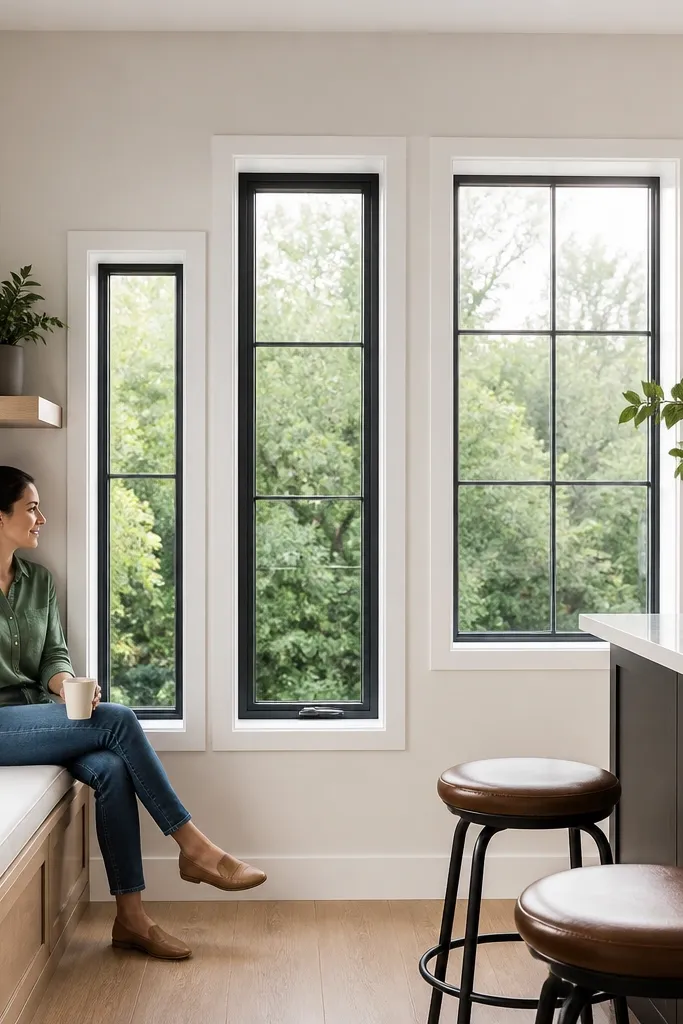
Asymmetry can still look modern when everything shares one reference line. This design uses rectangles that vary slightly in width or height, but they all sit on the same top rail and share consistent spacing. It’s a great choice for contemporary spaces that need a little personality without going full geometric chaos. Use paint and slim trim so the wall stays crisp and readable.
Pick one horizontal rail line height and build the top rail first. Install vertical trim posts to create bays, then place rectangle panels with different widths inside each bay while keeping the top edges aligned to the rail. Keep consistent gaps, like 1/4 inch, between rectangles and frame edges. Nail into studs, caulk all seams, prime, then paint.
Editor's noteUse painter’s tape to outline each rectangle before cutting any trim — you’ll catch spacing problems immediately.
Skip thisDon’t let the bottom edges wander — modern asymmetry still needs a controlled boundary.
18. Matte-Look Wainscoting with Semi-Gloss Trim Edges
Finish contrast is a cheat code for modern wainscoting. If your panels look flat in photos, switch the panel field to a matte or low-sheen paint and paint the trim edges in semi-gloss. The edge sheen catches light and makes the lines look sharper, even when the color is the same. This works in living rooms and bedrooms where you want a soft, not shiny, overall wall. Keep the trim lines thin so the sheen doesn’t look heavy.
Paint and prime the wainscoting base first with a bonding primer. Tape along the trim edges you want glossy, then roll the panel field with matte paint and let it dry fully. Remove tape, then cut and paint the trim edges with semi-gloss enamel. After cure, touch up nail holes and re-check the sheen boundary with side lighting.
Use two different rollers if you can — matte paint sheds and grabs differently than enamel.
Don’t mix sheens without clean tape lines — the boundary will look messy and cheap.
19. Staggered Vertical Panels with Varying Widths
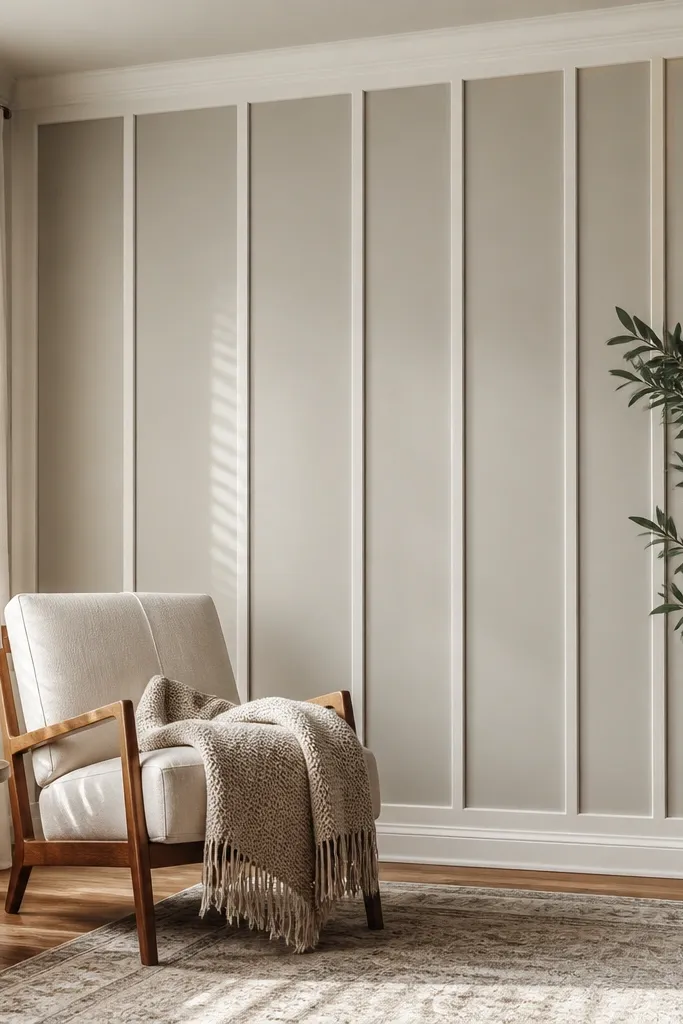
This is modern because it uses controlled variation. Instead of repeating identical slats, you alternate panel widths in a staggered pattern while keeping the overall band height and frame consistent. The result is a wall that looks custom without needing complicated joinery. It’s a great fit for feature walls behind a couch, because the texture reads from across the room. Paint it a single color so the pattern comes from shadow, not multiple tones.
Frame the wainscoting band with top and bottom rails so the edges are straight. Cut vertical panel strips in two widths, like 2 inches and 1 inch, and alternate them with consistent spacing, like 3/8 inch gaps. Stagger the seams so the narrow panels don’t line up across adjacent bays. Glue and nail into studs, then fill nail holes, caulk gaps, prime, and paint.
Editor's noteMark each strip with pencil on the back so you don’t rotate a piece and break the stagger pattern.
Skip thisDon’t let the staggering drift — measure from a reference line every few panels.
20. Slim Wainscot with a Single Centered Panel Column

When you want modern wainscoting ideas for smaller spaces, go slim and focused. This design uses a low band with one centered panel column, so the wall looks intentional even if you only have a narrow wall run. It’s great for bathrooms, laundry rooms, and small entry nooks where full panel coverage would feel heavy. The centered column gives symmetry and makes the band look like built-in furniture.
Set your band height lower, around 24-30 inches from the floor to the top rail. Install a top and bottom rail, then add a centered vertical panel column using thin MDF trim frames. Fill the column with a recessed or flat panel surface and keep side spacing consistent. Nail into studs, caulk seams, prime, and paint with durable enamel.
Editor's noteIf the wall has a door nearby, use the same centered column alignment relative to the door trim so the composition feels planned.
Skip thisDon’t go too tall on small walls — a slim band stays modern, tall bands can feel bulky.



