
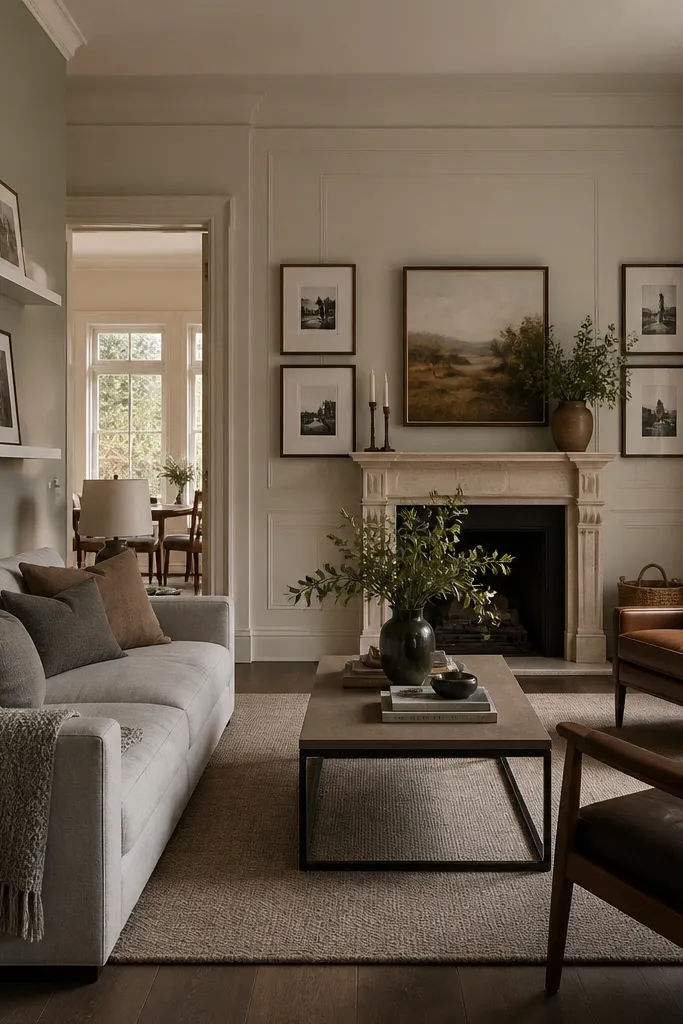
1. Chair-rail classic with warm eggshell walls
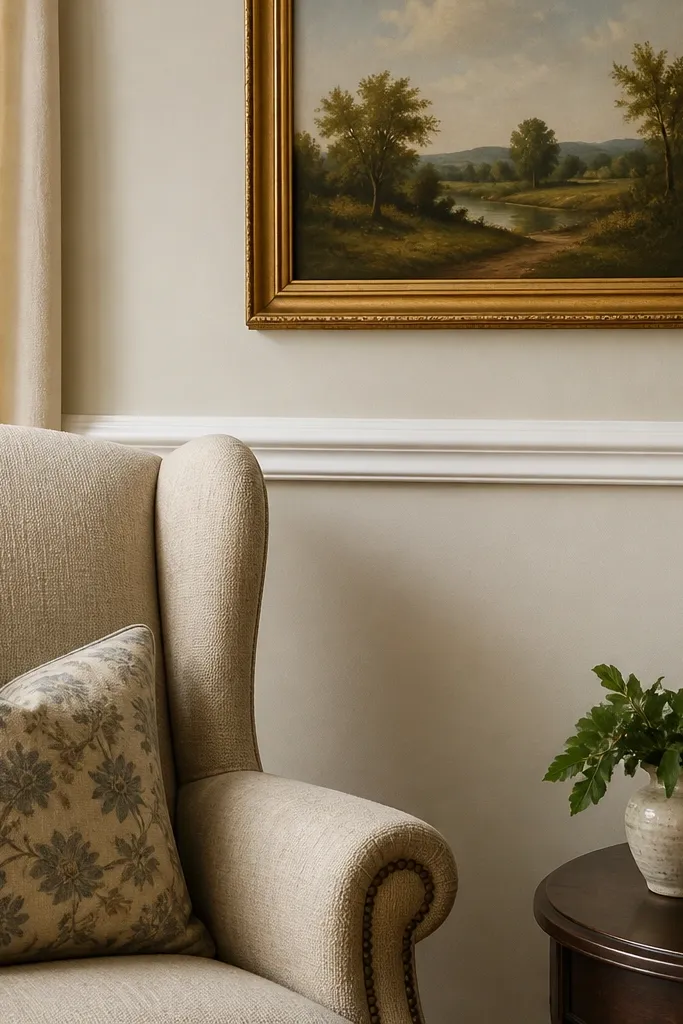
Measure your chair rail height first: aim for about 36-42 inches from the floor to the top edge, then check sightlines with your sofa back. Install 1x trim boards (usually 3-4 inches tall depending on your wall scale) using a level and a stud finder for solid fastening. Fill nail holes, sand smooth, then paint wall and trim in separate days so the trim doesn’t get scuffed. Finish with two coats of trim paint and one or two coats of wall paint, letting each coat cure before you touch it.
This is the fastest way to push a drawing room into classic territory without redoing floors or buying new furniture. The chair rail creates a visual stop line so your wall doesn’t feel like a blank hallway. Pair it with warm eggshell paint so the wall catches light softly and doesn’t look flat or chalky. Keep trim paint in a slightly glossier finish than the wall so the edges read crisp in daylight and at night.
Skip thisDon’t put the chair rail too high — if it sits above eye level, the room feels like it’s shrinking.
Editor's noteUse painter’s caulk in the trim seam instead of trying to “perfect” the gap with paint alone.
2. Modern matte walls with one-tone trim
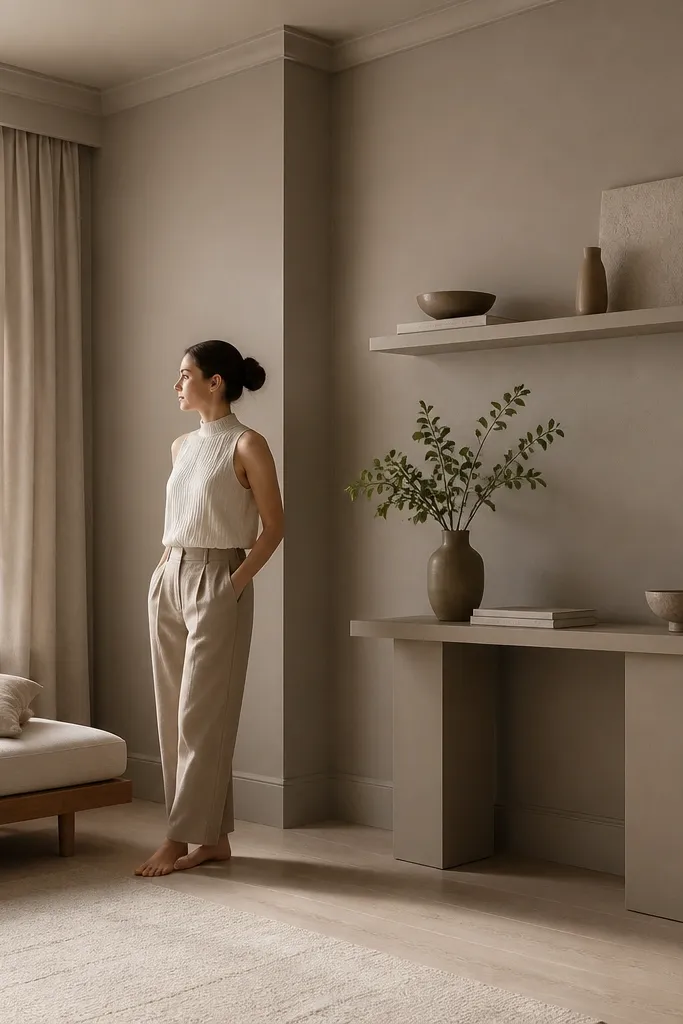
Modern vs classic drawing rooms often comes down to wall finish. Matte walls reduce glare and make the room feel calm, especially if you have large windows. Keep trim in the same color family and don’t chase high-contrast whites everywhere; it keeps the room from looking “decorated” instead of designed. This direction works well when you already have decent furniture and you want the room to look intentional with less visual noise.
Choose a matte interior paint labeled for walls and ceilings, not a flat paint meant for touch-ups. Mask carefully, then paint walls first and trim second; trim paint should be satin or semi-gloss so it cleans easily. Apply two coats with a roller and cut-in brush, then inspect under a lamp at night to catch streaks. If your walls have patchwork, skim and sand before painting so the matte finish doesn’t show every ridge.
Roll in consistent W patterns and keep a wet edge so you don’t get flashing between roller passes.
Skip thick texture rollers — modern matte looks clean only when the wall surface is smooth.
3. Classic fireplace framing with a simple surround
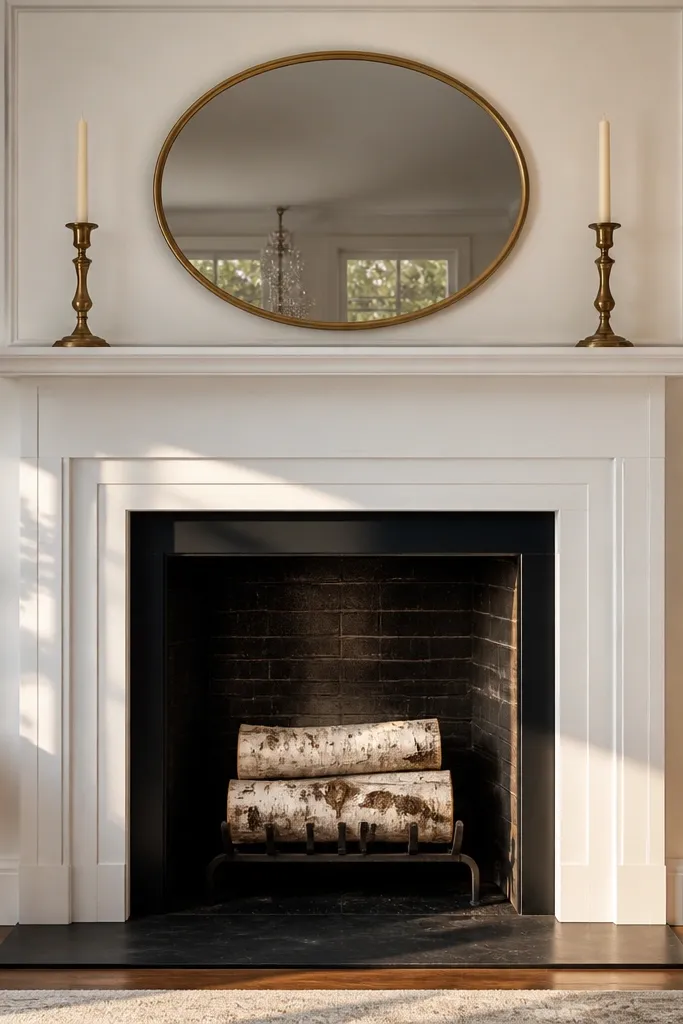
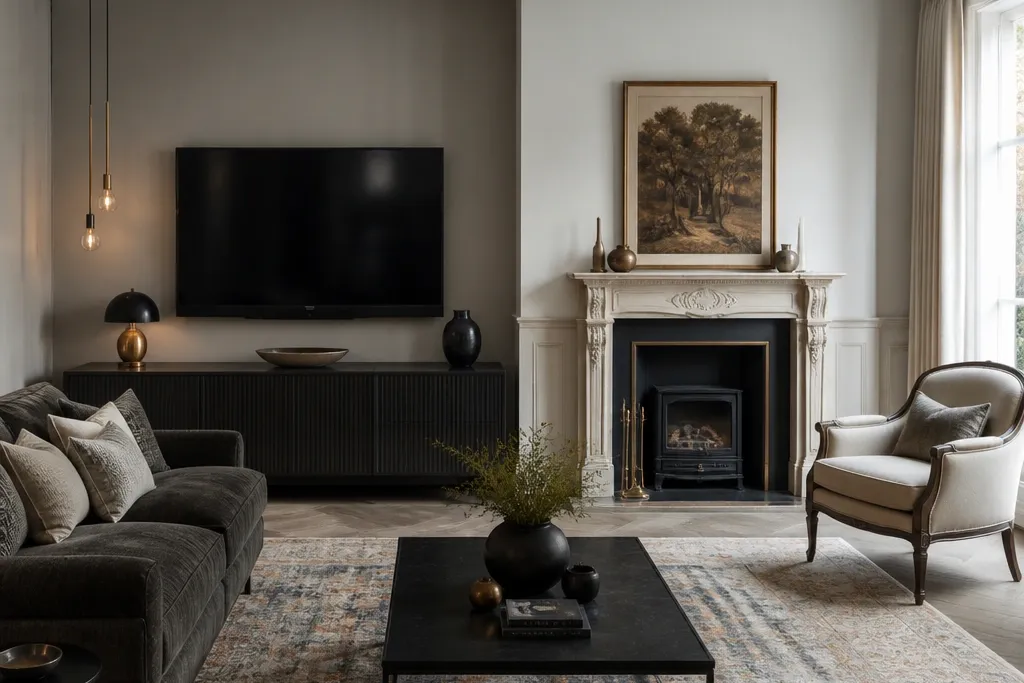
If your room has a fireplace, it’s the perfect classic anchor. A surround with clean lines gives you a focal point that feels architectural, not random. Classic drawing rooms also benefit from the “frame within a frame” effect: mantel shelf, symmetrical accessories, and a centered mirror or art. Go for paint-grade finishes (or refinishing) rather than chasing stone looks, because crisp paint edges read more classic at home scale.
Start by measuring the fireplace opening and the width of the wall around it so the surround doesn’t overpower the room. Use MDF or primed trim boards for a mantel and surround build, then prime everything thoroughly before paint. Build in layers: first the mantel shelf, then side returns, then the inner trim line around the firebox opening. Caulk seams, fill nail holes, and paint in two stages with drying time between coats.
Use a laser level or long straightedge to keep the mantel perfectly level — a slight tilt looks obvious once it’s painted.
Don’t match the surround to your baseboards exactly if your room’s baseboards are already busy.
4. Modern media wall with shadow gaps
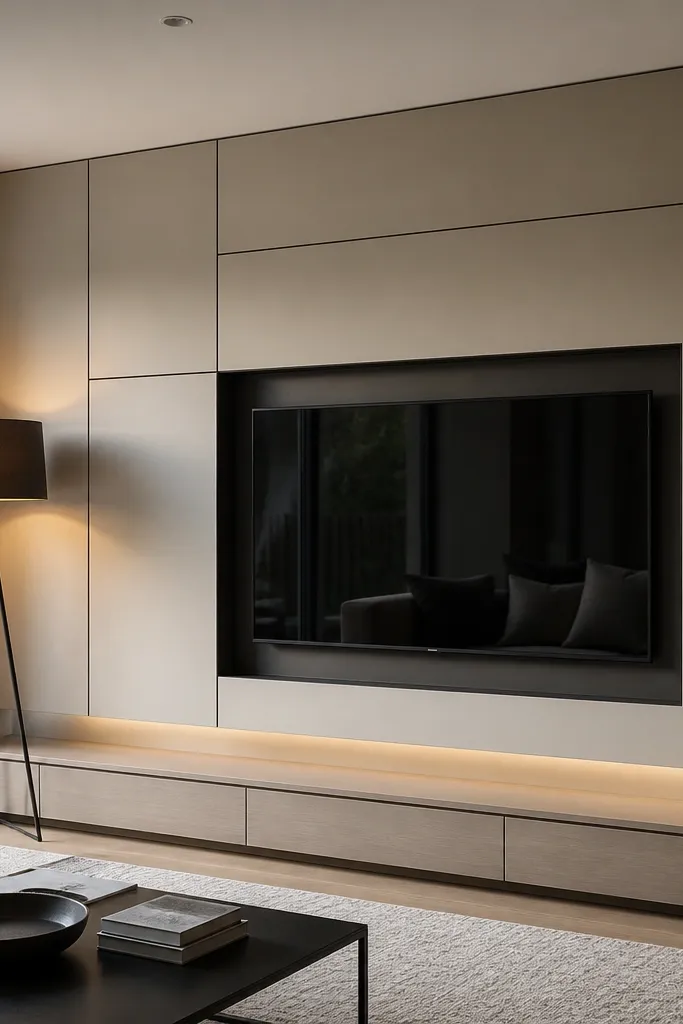
Plan your layout around the TV size: center it at about eye level when seated, then leave at least 2-3 inches of clearance around it for trim. Build a backer frame from 2x2s or plywood to mount panels and hide wiring, then attach flat paneling or MDF sheets to create the face. Add spacers or trim strips to form a consistent shadow gap (often 1/2 inch) along the panel edges. Prime, paint, and finish with cable management before you mount the TV.
This is modern drawing rooms' favorite trick: make the wall look engineered. A media wall with shadow gaps reduces visual clutter because you hide cables and keep edges sharp. The shadow gap also separates the panel from the wall, so the room reads high-end even with basic furnishings. It’s a strong option if you use the drawing room as a daily hangout and want storage without a haphazard bookcase feel.
Skip thisDon’t use flimsy drywall-only mounting for anything heavy — anchor mounting points into studs or solid backing.
Editor's noteRun power and low-voltage cables before paneling — access after the face is on is miserable.
5. Gallery wall in a strict grid (modern)
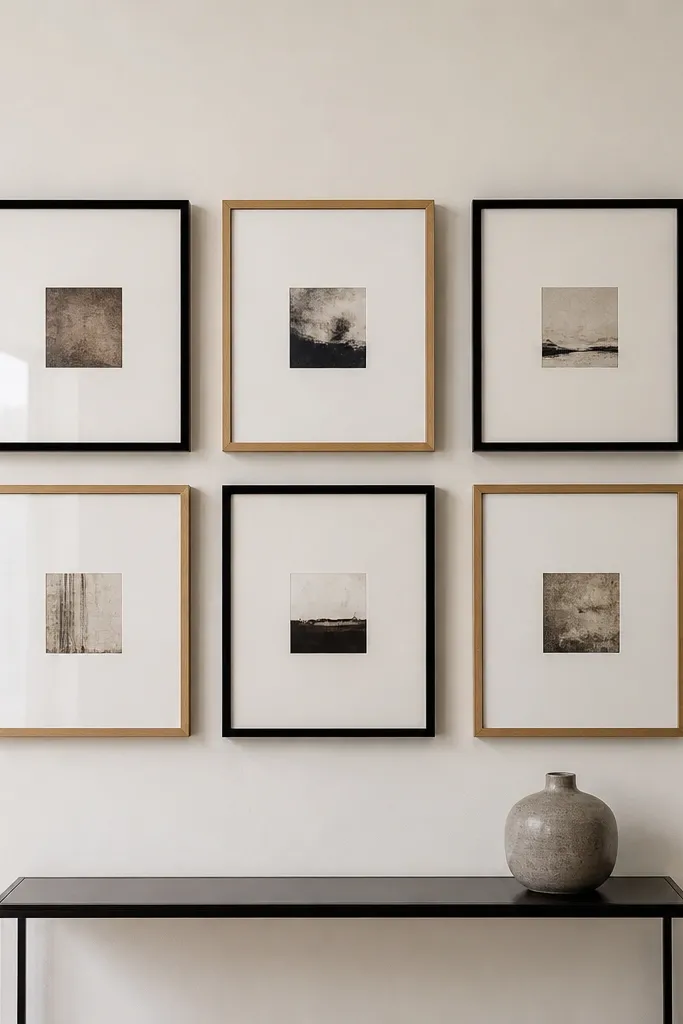
Modern vs classic drawing rooms can look different even when you use the same art. A strict grid makes the wall feel designed, while classic layouts usually lean looser or centered with symmetry around a single large piece. Use a grid when you want calm visual rhythm and you don’t want your wall to feel like a collage. This works with mixed frame styles too, as long as the spacing and alignment stay consistent.
Pick one grid rule: either align all top edges or align all centers, then measure the wall width to decide how many frames fit. Use painter’s tape to map the grid on the wall, including consistent spacing (commonly 2-3 inches between frames). Hang the first frame using a level, then measure from that frame to keep spacing exact for the rest. After layout is right, install with picture hooks rated for the frame weight and keep hanging hardware aligned with studs when possible.
Use the same mat color across frames even if the frames differ — it unifies the look fast.
Don’t mix random frame heights — that’s how a modern grid turns into a classic “collected over time” mess.
6. Modern 1-wall paneling for texture without pattern
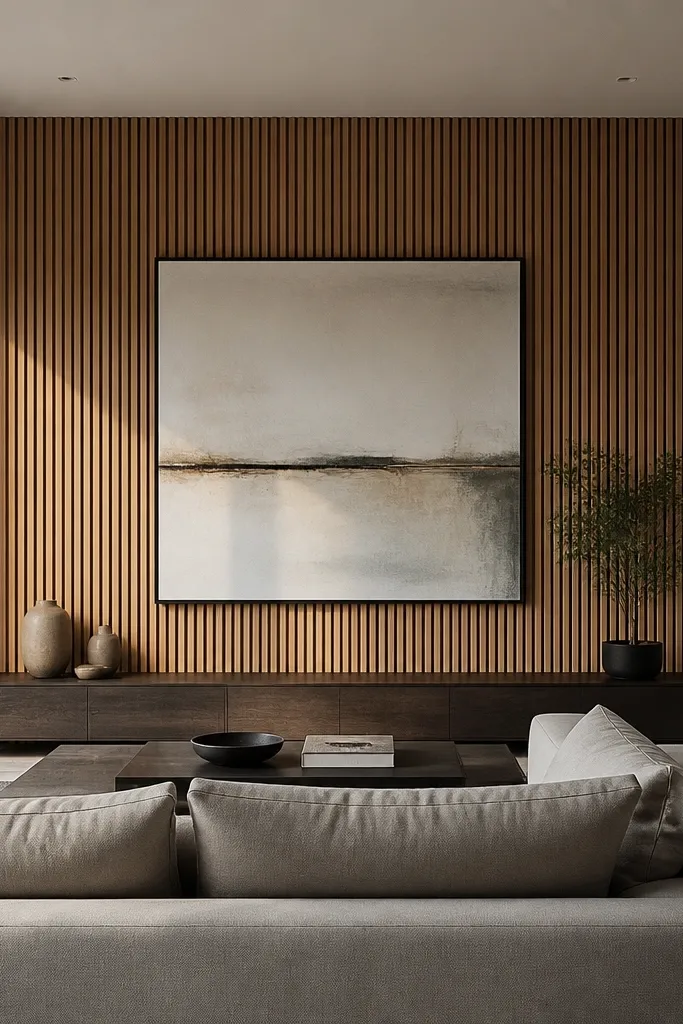
Choose your panel layout: vertical slats are forgiving, and they visually raise ceilings in many rooms. Mark a level baseline across the wall, then space slats evenly (for example, 2-3 inches between slat edges depending on your slat width). Use thin shims to keep the spacing consistent while you screw panels into studs or solid backing. Prime and paint the panels if you want a modern monochrome look, then seal edges with caulk for clean lines.
One textured wall is an easy way to make a modern drawing room feel styled without adding bold color or busy wallpaper. Vertical or horizontal paneling adds shadow lines that look good day and night. Keep it to one wall so the room doesn’t feel like a hallway of panels. This is also a good solution if you want the “classic depth” effect but in a more modern way.
Skip thisDon’t skip measuring for outlet and switch clearances — paneling gets messy fast if you discover conflicts after it’s up.
Editor's notePre-paint slats before install to cut finish time and prevent missed spots at corners.
7. Classic symmetrical sofa + two matching side tables
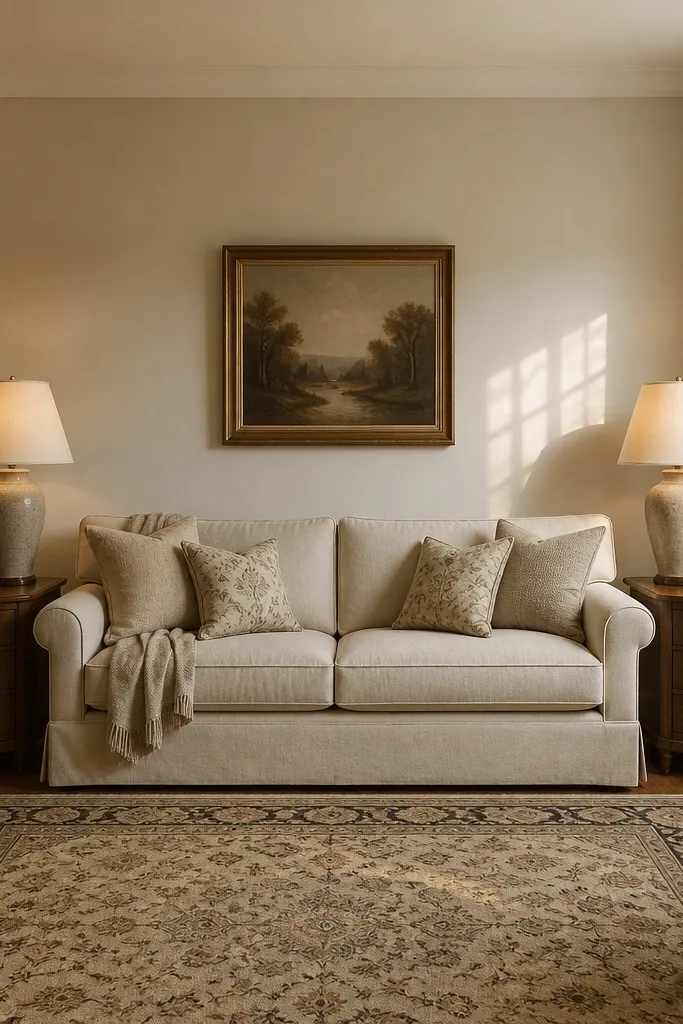
This is classic drawing room design at the furniture scale. Symmetry makes the room feel composed, even if your rug is patterned and your curtains are bold. Use a sofa as the center anchor and keep the two sides visually equal with matching (or at least clearly paired) side tables and lamps. Classic rooms also benefit from a “clear path” behind seating so the room feels formal instead of cramped.
Set your sofa so there’s a clear walkway behind it if you have space, usually 30-36 inches if traffic runs through the room. Place two side tables at the same distance from the sofa arms, then match lamp heights so the light pools feel balanced. Center your main coffee table with the sofa and keep the coffee table height around the top of the sofa cushions for a tidy classic proportion. If your rug is small, swap it for one that extends 8-12 inches past the sofa front to lock the furniture in place.
Use a tape measure for lamp height — eyeballing from the floor is where people end up with lopsided light.
Don’t put two different table heights next to each other and expect it to read “eclectic” — it reads accidental.
8. Modern low-profile seating with a higher coffee table
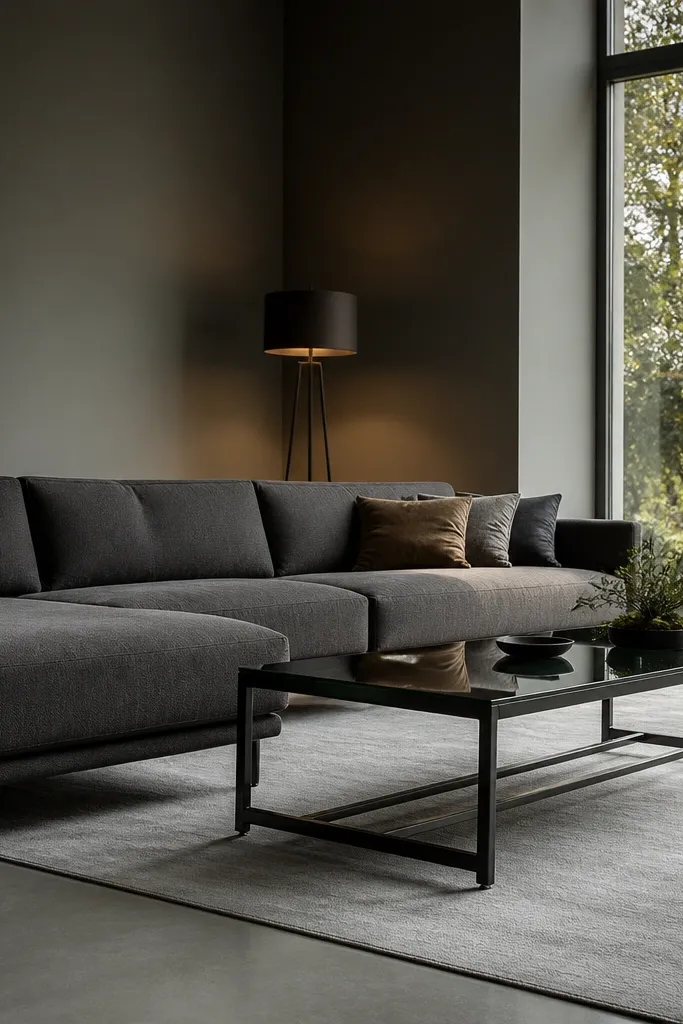
Modern drawing rooms often look wrong when the seating is too bulky for the room’s visual lines. Low-profile sofas and chairs keep the ceiling feeling taller and make the space feel cleaner. Pair that with a coffee table that’s slightly higher than you’d expect, so the room reads intentional rather than “cozy but messy.” This combo also works well if you want to emphasize art and wall features because your furniture doesn’t fight for attention.
Choose seating with a lower seat height and slimmer arms; measure seat height and aim for around 17-19 inches for a modern feel. Pick a coffee table height around 16-18 inches depending on cushion thickness so the top sits near the seat cushions. Keep the coffee table length about 2/3 of the sofa width so it feels grounded, not tiny. Position seating so there’s a clear sightline to your focal wall art or TV.
If your room feels visually top-heavy, reduce the height of floor lamps before you change anything else.
Don’t use a tall, ornate coffee table with low furniture — it breaks the modern proportion instantly.
9. Classic wall-to-wall curtains with a ceiling track
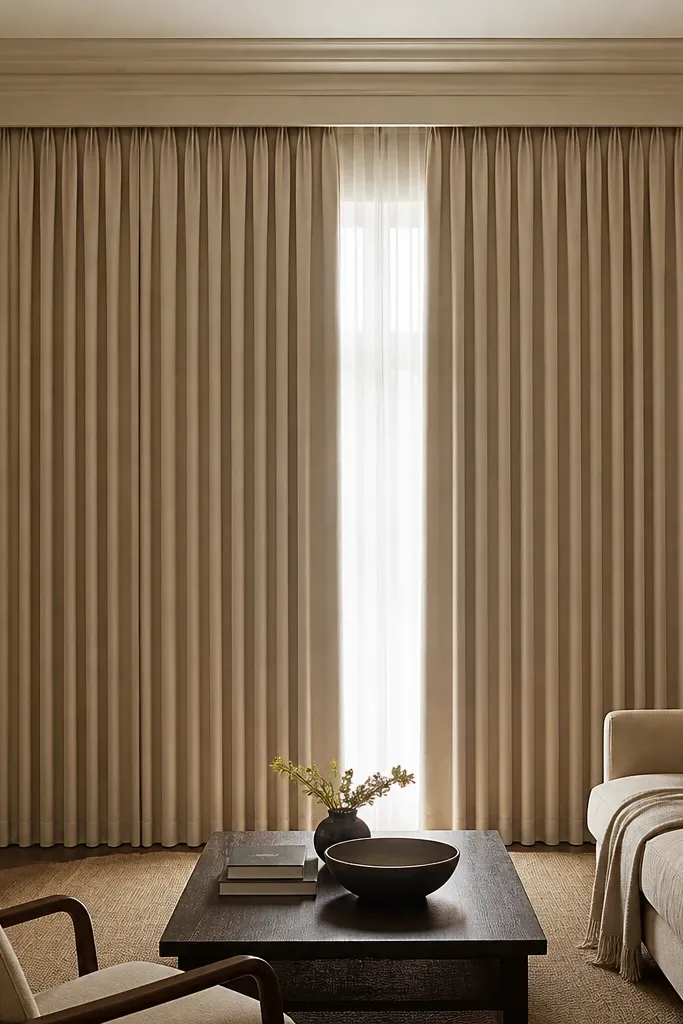
Classic vs modern drawing rooms are both about window framing, but classic usually wants height and fullness. Hanging curtains from a ceiling track pushes the drape up, making the room feel taller and more formal. Choose heavier fabric like linen blend or a cotton sateen so the folds look structured rather than limp. Keep the color warm and consistent with your wall, then add a subtle pattern only if your room already has one strong texture.
Measure the track width: extend 4-8 inches beyond the window on each side so light doesn’t leak through the edges. Hang the track about 2-4 inches from the ceiling (or as high as your hardware allows). Use panels that give you enough fullness: aim for 2-2.5 times the window width in total curtain fabric. Steam or press the curtains before hanging so the first day looks finished.
Use curtain rings or gliders rated for your track so panels glide without snags.
Don’t hang curtains from the window frame — it turns a classic room into a cramped one.
10. Modern roller shades + crisp roman blind accent
Modern drawing rooms can feel too exposed if you go fully bare-window, so this hybrid gives you control without losing the clean look. A roller shade keeps the window line tight and smooth, and a roman blind accent adds softness only where you want it. Keep both treatments in the same neutral family so they don’t look like two unrelated products. This setup is also practical if you need light control during the day for reading or TV.
Install a roller shade inside the window frame if you want a tight modern line, or mount it to the wall if the frame isn’t clean. Choose a blackout or light-filtering fabric depending on your glare needs. For the roman accent, use a second fabric panel with a small scallop or plain weave and attach it to a separate track above the window. Test how the roman blind folds when fully raised so it doesn’t bunch against trim.
Match the hardware finish to your light fixtures — brushed nickel with brushed nickel beats mixing chrome and black.
Don’t choose a busy pattern for the roman blind if your walls and furniture are already patterned.
11. Classic layered lighting with a floor lamp trio
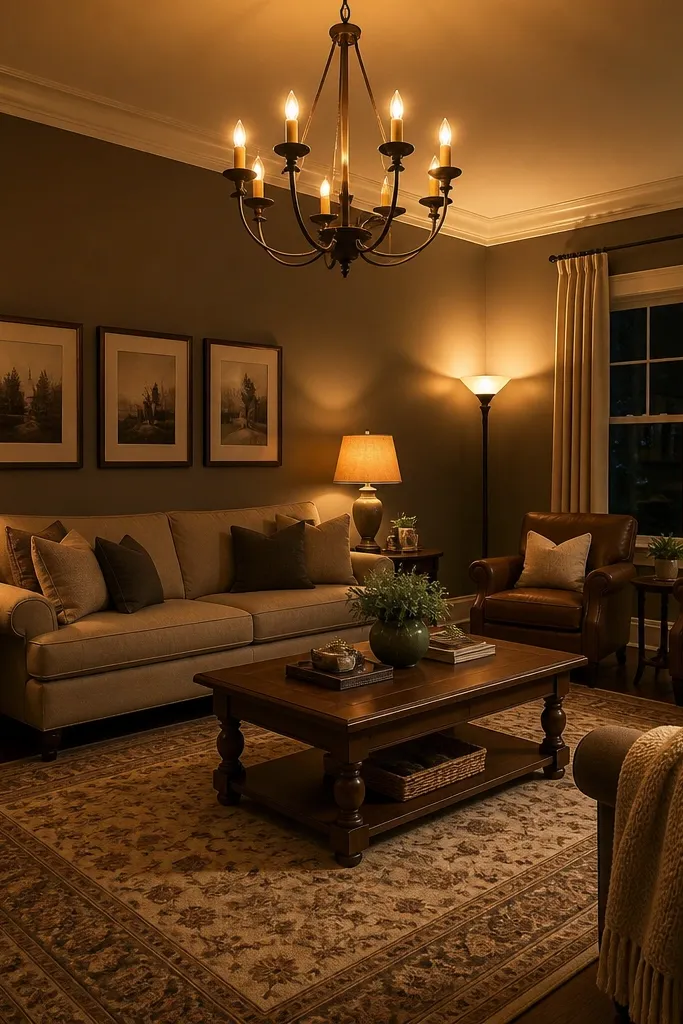
Pick bulb temperature first: use 2700K bulbs for living room warmth. Place one table lamp on each side of the main seating area, then add a floor lamp opposite the brightest window to balance glare. Keep shade sizes proportional: table lamps should be around 10-14 inches diameter, floor lamps slightly larger but not huge. Plug lamps into smart dimmers if you want easy control without changing fixtures.
Classic drawing rooms feel right because light is layered and warm, not because the fixtures are fancy. Use one overhead light for general brightness, then add lamps near seating so the room has depth. A floor lamp in the corner helps the space feel larger because it spreads light upward. Choose warm bulb color around 2700K and avoid cool white bulbs, which make trim and upholstery look dull.
Skip thisDon’t rely on a single ceiling fixture — it flattens the room and kills the classic depth.
Editor's noteUse dimmers — classic rooms look best with light that can drop lower at night.
12. Modern indirect lighting with LED strip channels
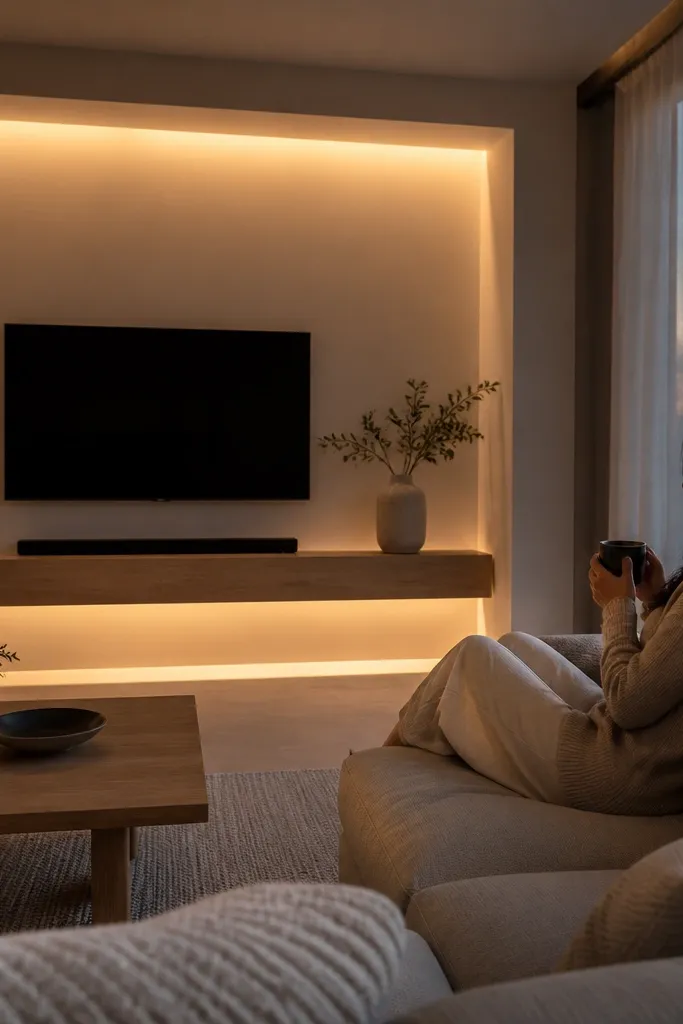
Plan the light line location before you buy anything: aim for a channel under a shelf or along the top edge of a panel so the light bounces off a wall. Use an LED strip rated for indoor use with a diffuser cover, and mount the channel to studs or solid backing. Connect with a driver sized for your strip length, then test before you close up the channel. Paint the surfaces that reflect light in a matte finish so the glow looks soft, not shiny.
Indirect lighting is one of the cleanest ways to make a modern drawing room feel finished. The glow hides bulbs and reduces harsh shadows that make matte walls look patchy. LED strip channels also make the light consistent, which is what modern spaces need — fewer obvious fixtures, more even atmosphere. This works especially well with paneling, a picture ledge, or a low floating shelf.
Skip thisDon’t use bare strips — the visible diode dots scream “DIY” instead of “designed.”
Editor's noteChoose LEDs with a high CRI (look for 90+) so skin tones and art colors don’t look off.
13. Classic wallpaper in the dining-to-drawing transition zone
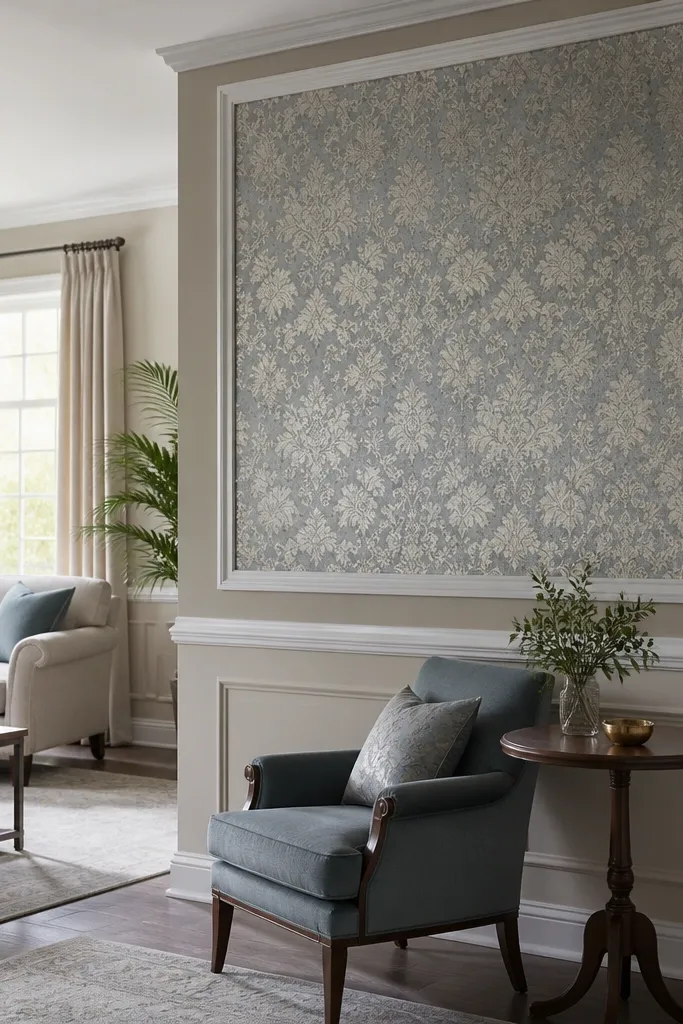
Wallpaper is where classic drawing rooms win, because pattern + trim reads intentional. Use it on one or two walls that you see immediately from the doorway, not everywhere. Pair with a chair rail or picture molding so the pattern looks framed rather than random. Classic wallpaper style works when the rest of the room is controlled: solid curtains, simple sofa fabric, and artwork with a consistent mat color.
Pick wallpaper with a repeat that’s forgiving on your wall height, then calculate extra for matching: add 15-20% waste. Prep walls by smoothing and priming, since texture shows through pattern. Apply paste or use peel-and-stick only if your wall is very smooth and clean; press seams firmly with a seam roller. Install chair rail after wallpaper if you want the pattern to sit behind the trim edge, or install before if you want crisp trim alignment — choose one plan and stick to it.
Use a sharp trimming blade and keep a wet cloth for paste cleanup so edges stay crisp.
Don’t put wallpaper over peeling paint — classic patterns magnify every flaw.
14. Modern bold rug + simple sofa for contrast control
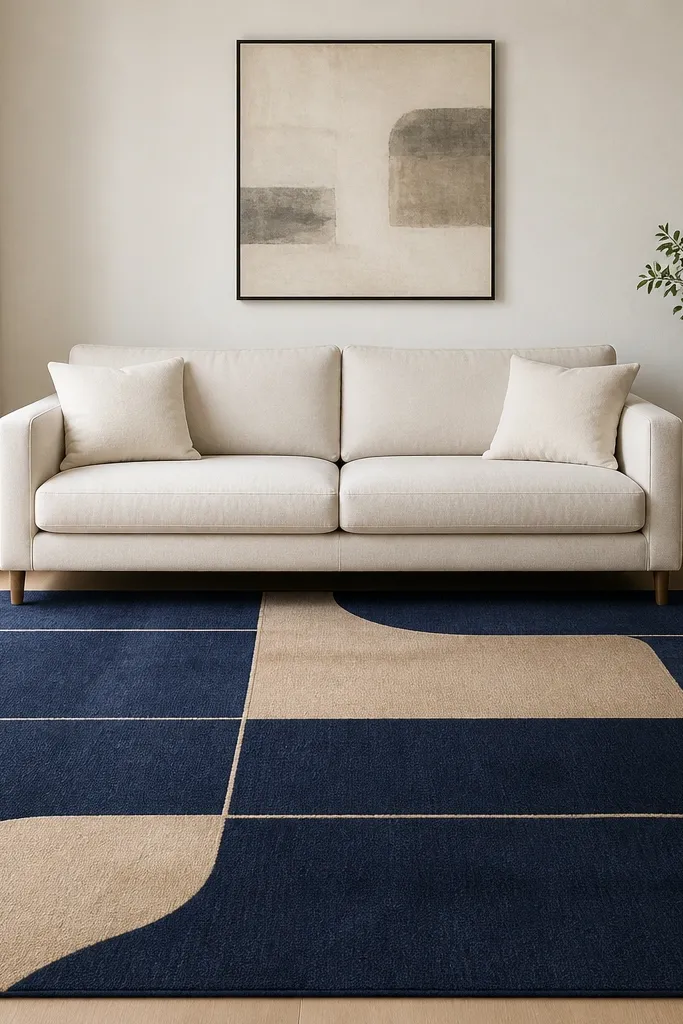
Choose a rug size first: it should extend under the front legs of the sofa and at least a few inches beyond the coffee table edges. Pick a sofa fabric in a solid weave (boucle, linen blend, or smooth performance fabric) without large patterns. Coordinate wall color to the rug’s dominant tone, then keep trim in the same color family to prevent clashing. Vacuum and rotate the rug after install to even out pile wear.
This is a modern drawing room move that avoids the “too much” problem. Let the rug carry the personality and keep the sofa and curtains simple so the room doesn’t feel busy. Modern rugs with geometric lines or low-contrast pattern work well because they align with modern clean edges. The key is contrast control: if your rug is bold, your walls and trim should be calm, otherwise the room turns into visual noise.
Skip thisDon’t pair a bold rug with bold curtains — classic room energy comes from balance, not volume.
Editor's noteUse a non-slip rug pad matched to your flooring so the rug doesn’t creep and ruin your alignment.
15. Classic ceiling cornice look with lightweight trim
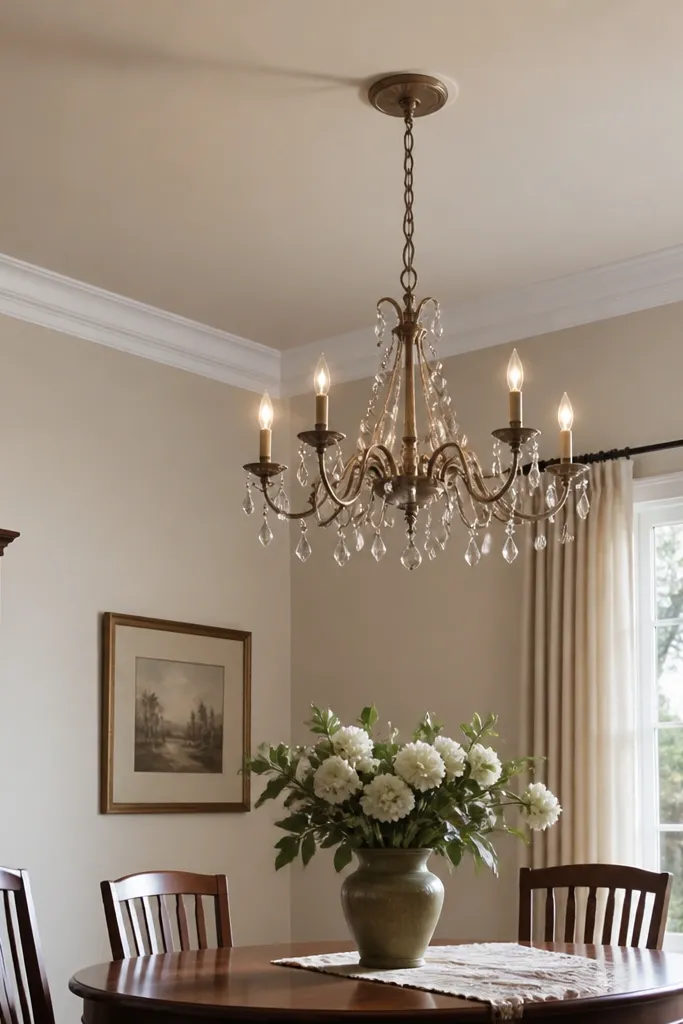
A ceiling cornice instantly pushes the room toward classic drawing room proportions. It creates a gentle “cap” that makes walls look taller and gives the eye a finish line. You don’t need a full elaborate plaster effect; a lightweight trim profile painted the right sheen can read classic without the heavy cost. This also helps if your room feels plain despite good furniture — the ceiling trim fills that gap.
Measure your wall perimeter and buy cornice trim by linear feet, adding 10% for cuts. Use a miter saw for corners and test fit on a scrap section first so your profile matches the ceiling angle. Attach with construction adhesive and finishing nails into studs where possible, then fill nail holes and seams. Caulk the top and bottom edges so you get a smooth line when painted in two coats.
Paint cornice trim before installation if your ceiling is hard to reach and you want cleaner edges.
Don’t skip caulk — any visible seam line makes the trim look temporary.



