
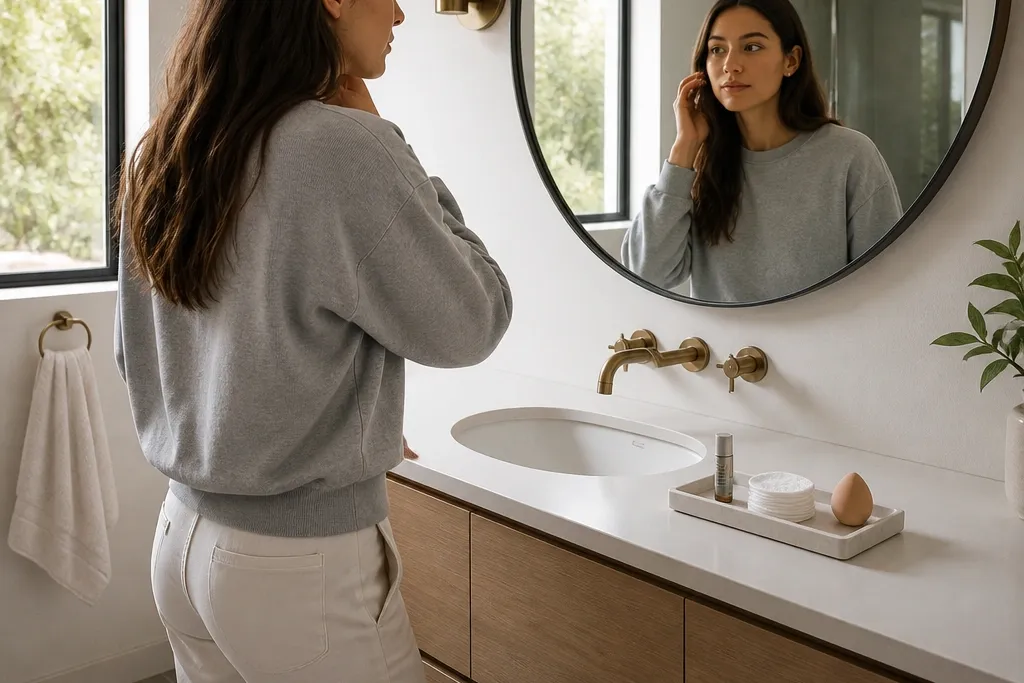

1. Mirrored Catchall Tray + Two Pump Stations
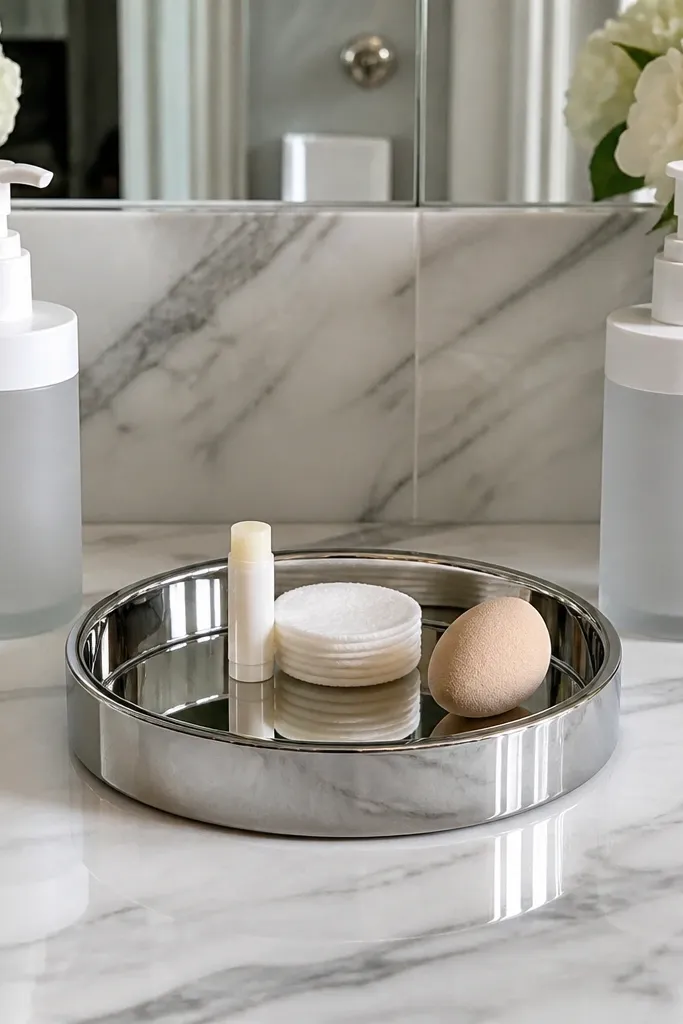
This setup looks expensive because it turns everyday bottles into a matched display. The mirrored catchall tray gives you one clean landing zone for lip balm, cotton rounds, and a makeup sponge, so loose items don’t drift across the counter. Two pump stations keep hand soap and face wash visually aligned, and you get instant symmetry near the sink. It’s best for vanities with a small counter where you want the “clean spa” look without adding a ton of storage furniture. Build it with a tray that has a raised rim so items don’t slide, and choose pump bottle finishes that echo your faucet or hardware.
Start by centering a mirrored tray on the counter, leaving 2-3 inches of breathing room around it. Add two identical pump bottles for your daily liquids, then place a small lidded jar or dish on the tray for cotton rounds and a sponge. Finally, tuck the rest of the items into a drawer or cabinet so the tray stays photo-ready. If your counter is narrow, use a long, shallow tray instead of a wide square one so it doesn’t block the sink edge.
Editor's noteWipe the mirrored surface with a microfiber cloth and glass cleaner before you style — fingerprints show fast on mirror.
Skip thisDon’t mix random bottle shapes; mismatched pumps make the whole thing look like storage, not design.
2. Stacked Acrylic Risers for Daily Skincare
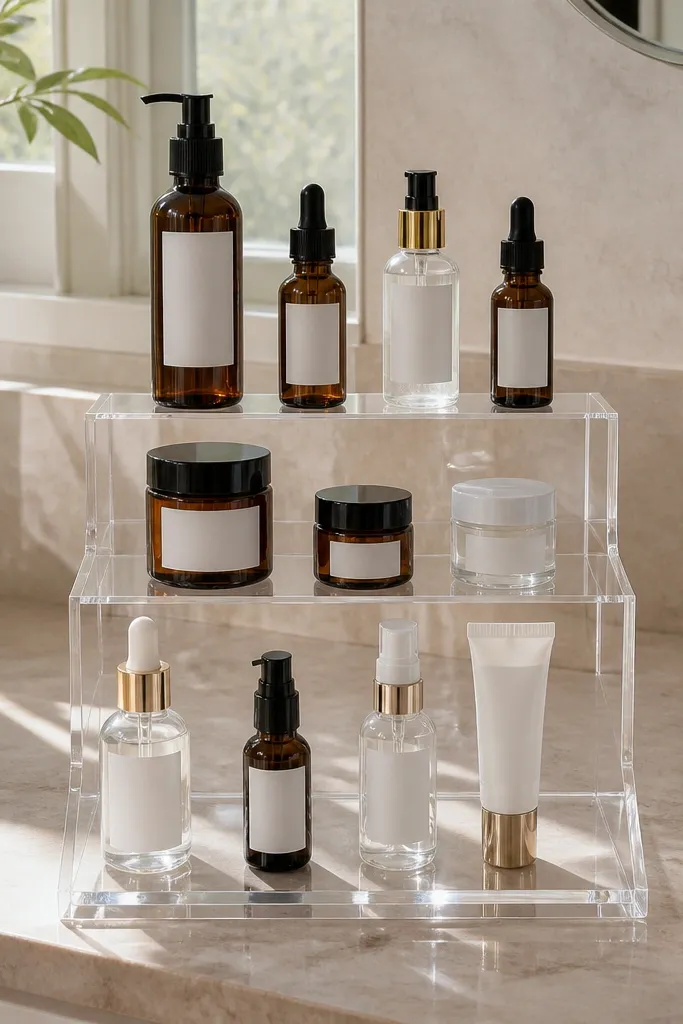
Acrylic risers are one of the fastest ways to make modern vanity organization ideas look curated. You get vertical layering without bulky furniture, and the clear material keeps the counter light instead of heavy. Put your daily skincare in height order so you can see everything at a glance — that reduces “digging” and keeps clutter from spreading. This works especially well for people who use a lot of bottles and jars, because it creates a grid you can maintain. Choose risers with flat tops and clean edges so the setup looks sharp rather than messy.
Measure your counter width and pick risers that fit with at least 1 inch of space from the sink and wall. Stack two levels max: bottom for larger bottles, top for smaller jars and tubes. Place items by routine order — cleanser, treatment, moisturizer, SPF — so the visual flow matches how you work. Finish by adding a small tray at the base for caps, cotton pads, or a mini spatula so loose pieces don’t roll around.
Editor's noteUse sticky museum putty under risers so they don’t slide when you wipe the counter.
Skip thisSkip colored acrylic; it looks trendy for a week and then reads cheap in real bathrooms.
3. Wall-Mounted Rail with Two Matching Baskets
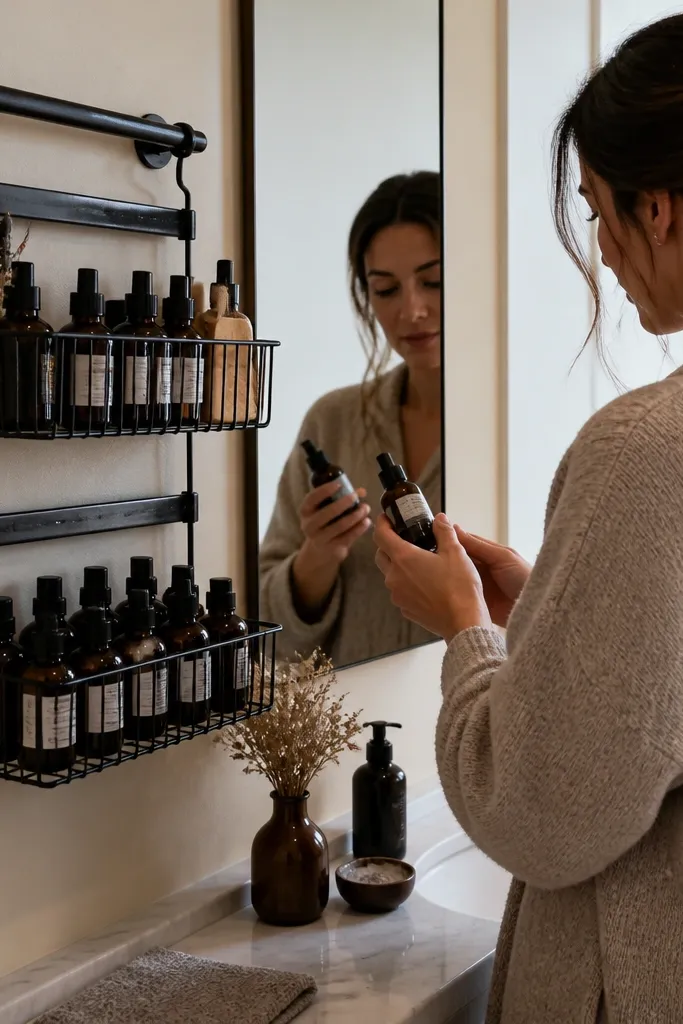
When counter space is tight, a wall rail keeps everything visible but controlled. Two matching baskets look intentional and give you a clear left-right system: one basket for daily items and one for backups. This is also great for bathrooms where the vanity sits close to the mirror, because it adds organization without eating into the sink zone. Choose baskets with straight sides so they sit neatly and don’t warp the look. This design makes your vanity feel modern because it uses vertical storage with clean lines.
Install a metal wall rail with screws into studs or use proper anchors rated for the weight. Hang two baskets so their bottoms sit about 2-3 inches above the counter for easy cleaning. Fill the top basket with daily grab items like face wash, moisturizer, and a small backup of cotton pads. Put backups like extra hand soap refills and spare packs in the lower basket, then keep the counter itself mostly empty.
Editor's noteLine baskets with matching fabric liners so the inside doesn’t show mismatched packaging.
Skip thisDon’t hang baskets too low; you’ll bump them while washing your face and you’ll stop using the system.
4. Lidded Ceramic Canisters for Cotton + Q-Tips
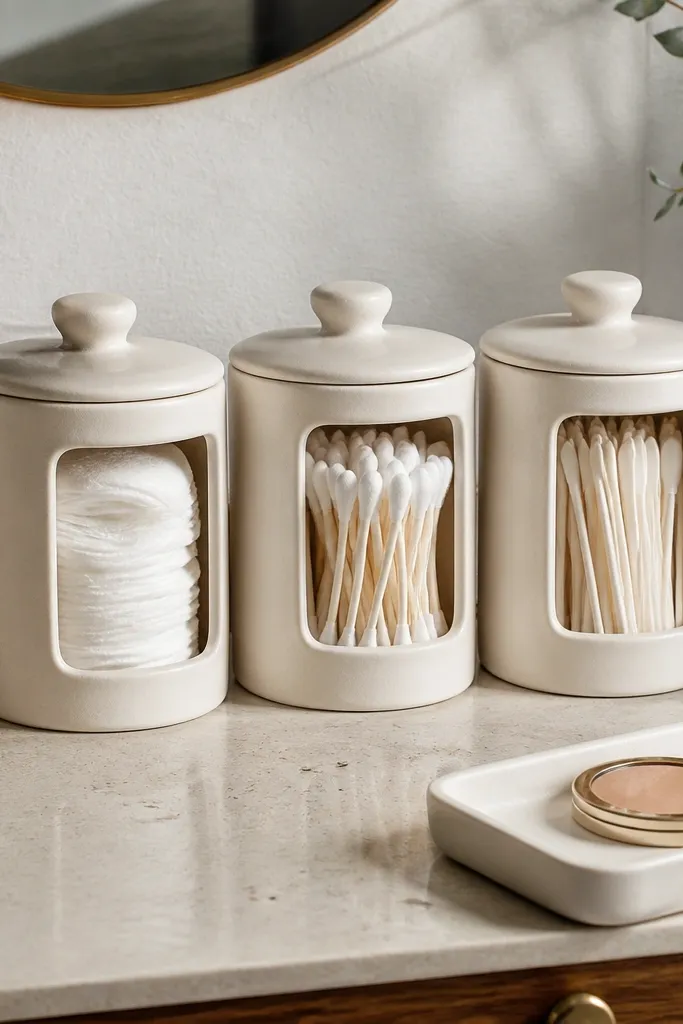
Ceramic canisters make vanity organization look clean because they hide the “messy” items that never look pretty out of a box. Cotton rounds, Q-tips, and disposable applicators look tidy when they’re in matching lidded containers with consistent color. The lids matter — they prevent dust and make the setup feel finished even when the bathroom isn’t spotless. This works best for people who hate clutter but don’t want to store everything in drawers. Pair canisters with one small tray for overflow so you don’t create a second clutter zone.
Choose two or three matching canisters in one finish, like matte white or soft cream. Label the lids with a small sticker or hand label so you don’t mix refills. Place cotton rounds in the largest canister, Q-tips in the medium one, and a compact canister for nail tools or mini cotton pads. Keep the canisters on a tray or in one corner so they don’t spread across the counter.
Editor's noteUse a funnel to refill cotton canisters — it prevents messy edges that look bad in photos.
Skip thisAvoid clear canisters for cotton; they show lint and dust faster.
5. Skinny Drawer Organizer with Color-Matched Dividers
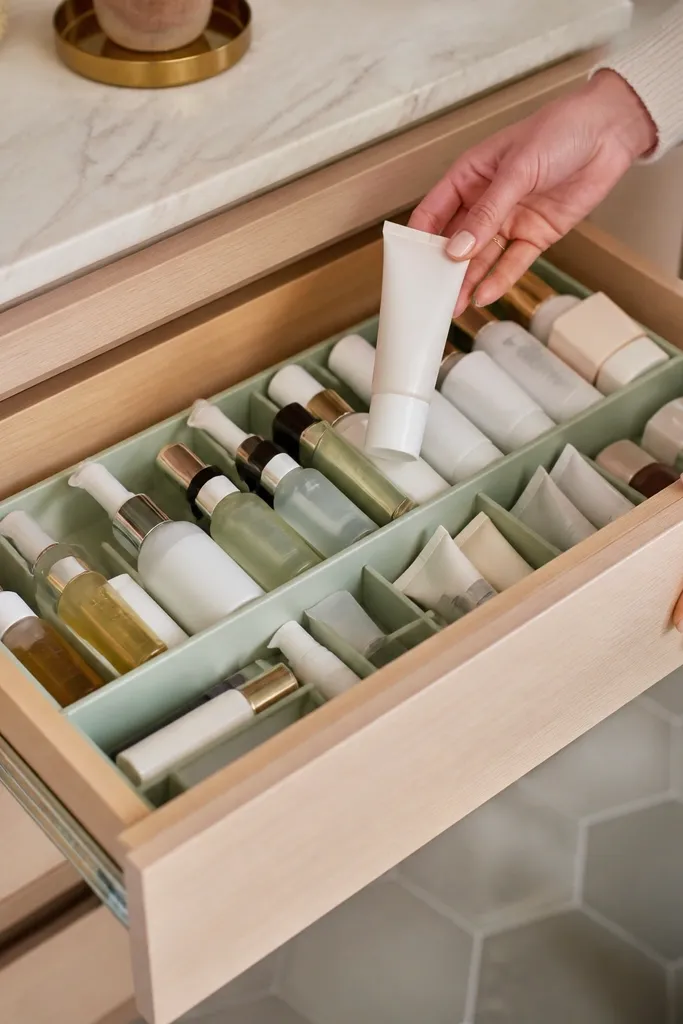
This idea fixes the biggest visual problem: drawers that are stuffed and then forced shut, which makes counter clutter inevitable. A skinny drawer organizer with dividers keeps tubes, minis, and tools in straight rows so you can see what you have. Make it look modern by using one divider color family and keeping the drawer layout consistent. It’s ideal for vanities with a single shallow drawer where makeup and skincare tend to pile up. The look is photogenic because drawers read as clean storage, which makes the counter feel calmer.
Measure the drawer interior and pick organizers that leave 1/2 inch clearance on each side. Install dividers so bottles stand upright; tubes should go into a separate narrow channel so they don’t tip. Group items by type: skincare tubes together, makeup tools together, backups together. Add one small flat tray for loose items like hair ties or tweezers so they don’t disappear in the back.
Put the heaviest items in the back row of the drawer so the front stays neat and easy to grab.
Don’t use one big bin for everything — it turns into a rummage drawer.
6. Two-Tier Counter Shelf with Soft-Edge Bins
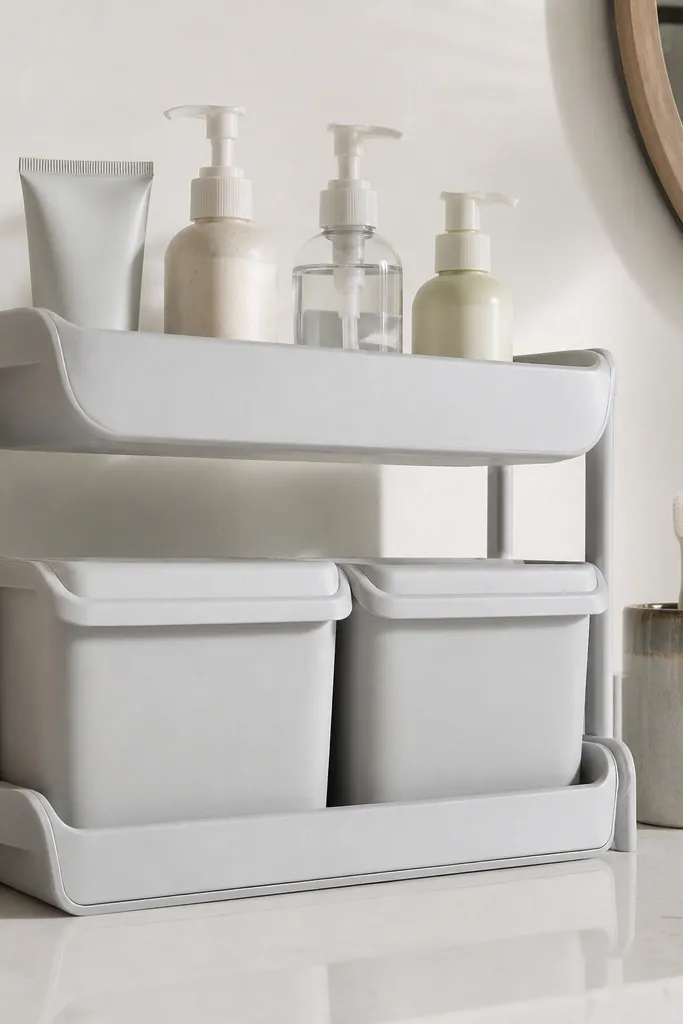
A two-tier shelf makes the vanity look styled because it creates a deliberate “display” layer and a “storage” layer. Rounded bins soften the look and keep the shelf from feeling harsh or industrial. Put daily bottles on the top tier and keep backups in bins below, so your counter doesn’t turn into a refill station. This works well for bathrooms where you want the organization to be visible but still attractive. Choose bins in the same neutral tone as your towels or wall paint for a cohesive modern feel.
Position the shelf near the side that gives you the most clear counter space — not directly in the middle of your sink. Place the daily items on the top tier, then use two bins under it: one for travel-size or minis, one for backups. Secure the shelf if it’s freestanding by using non-slip pads under the feet. Finally, wipe the shelf edges and keep only a few items on each level so the structure looks intentional.
Use non-slip shelf liner on the top tier so glass bottles don’t clink and slide when you set them down.
Don’t overload the top tier; it should look like a curated row, not a pile.
7. Under-Sink Pull-Out for Cleaning Supplies
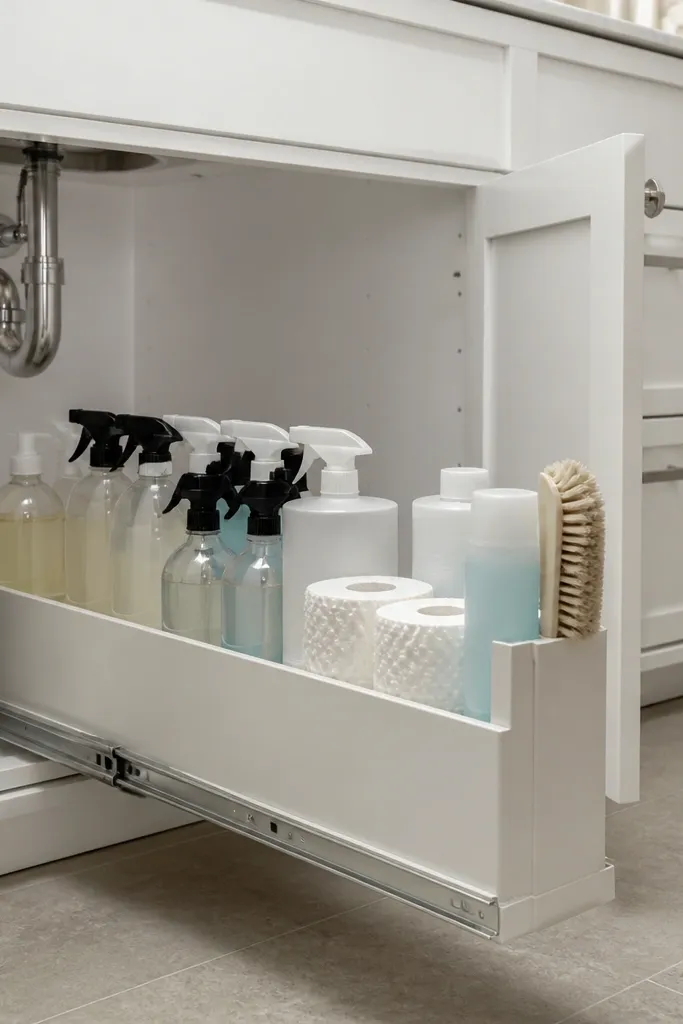
This is the hidden fix that makes the whole vanity look better. Under-sink clutter leaks onto the counter when you can’t find things quickly, and a pull-out organizer prevents that. Keep your cleaning sprays, backups, and paper goods in one slide-out so you don’t stack bottles in a chaotic tower. The look is modern because it’s contained — you don’t see a tangle of labels and caps. It’s a great choice for people with older cabinets where shelves are too deep and items vanish.
Measure the inside width and depth of the cabinet and pick a pull-out organizer that fits under the door clearance. Install the slide so it sits level; then place heavier items on the bottom and lighter bottles on the top shelf. Use waterproof labels for sprays and add a small bin for sponges and brushes. Finally, keep the cabinet door clear of hanging bags so it closes smoothly and stays aligned.
Wrap spray bottles with foam shelf liners if they rattle — it keeps the cabinet quieter and easier to maintain.
Skip loose stacking; one tipped bottle inside a cabinet ruins the whole system.
8. Pegboard Vanity Backdrop with Mini Trays
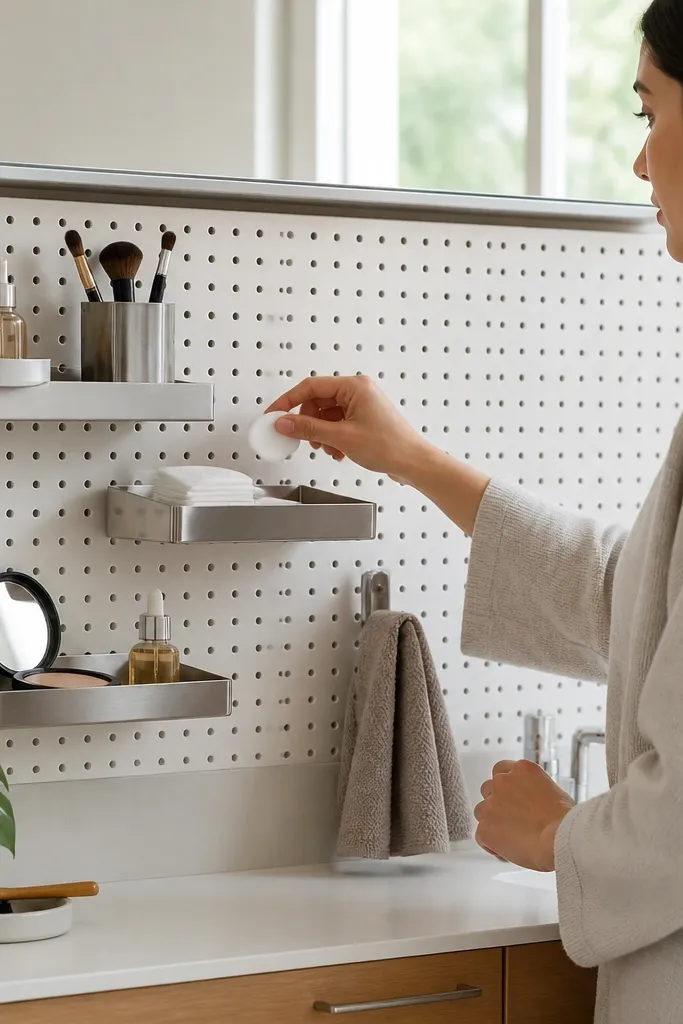
A pegboard behind the vanity is one of the most photogenic organization upgrades because it creates clean, repeatable lines. Mini trays let you store items at eye level so you don’t keep reaching into drawers, and the grid makes the setup look designed. This works best if your vanity backsplash is blank or you can mount a small section without drilling into fragile tile. It’s also a good answer for people who want modern vanity organization ideas that look like a styling wall, not a storage closet.
Pick a pegboard size that covers the area you use most, then mark mounting points for studs or use wall anchors rated for the board weight. Paint the pegboard matte black or a soft neutral to match your hardware. Add mini trays for daily items and keep each tray to one category: hair, skincare, or tools. Finish by placing hooks or clips for items like tweezers and scissors so they don’t sit loose.
Keep tray depth consistent so items don’t stick out at weird angles in photos.
Don’t hang large, bulky bottles on hooks; use trays for anything heavier than a small spray.
9. Magnetic Strip for Metal Tools and Tweezers
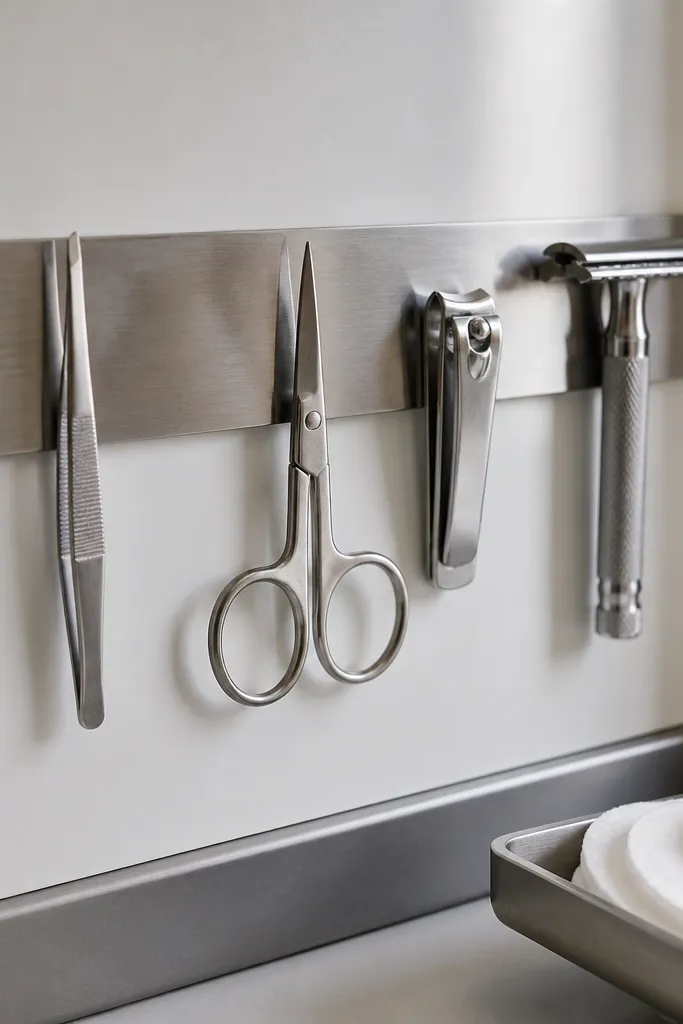
Magnetic storage looks sleek because it turns scattered tools into a clean line. It’s perfect for tweezers, small scissors, nail clippers, and metal face razors — anything that feels “too small” to store in a bin. This organization is also practical: tools don’t disappear, and you don’t have to dig through drawer chaos to find them. Mount the strip inside a cabinet door or on the side wall for a modern, hidden-looking system. It delivers the aesthetic win because the tools are displayed in a tidy row, not dumped into a cup.
Choose a magnetic strip long enough to hold your tools without overlap. Mount it inside a cabinet door or on the side panel with screws so it stays flat. Arrange tools by size — largest in the middle, smallest toward the ends — so they don’t crowd. Add a small labeled tray below for non-magnetic items like cotton pads so everything still has a home.
Editor's noteWipe tools and dry them before placing on the strip to prevent rust spots from moisture.
Skip thisDon’t store plastic-handled tools on the strip; they won’t hold and the layout falls apart.
10. Linen-Color Towel Basket with One Visible Folded Stack
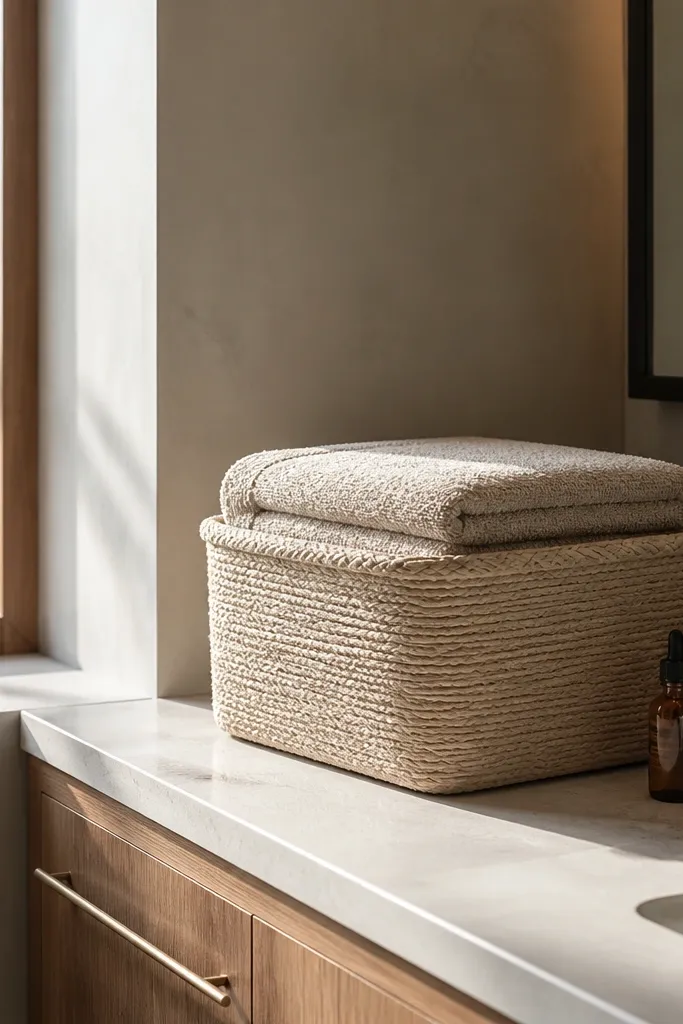
This one is about making the vanity look styled even when you’re not using a lot of products. A towel basket with a single visible folded stack gives you a soft, modern texture without the messy look of loose towels. Keep the rest of the towels hidden inside the basket so you don’t see random colors. It works best in bathrooms with neutral walls and hardware, where texture reads as intentional. If you want modern vanity organization ideas that feel warm instead of purely industrial, this is the move.
Pick a basket that matches your bathroom texture — linen-toned woven works well with matte black or brushed nickel. Fold towels into a consistent rectangle, aiming for the same height each time so they stack cleanly. Place the top visible fold right at the front of the basket, then tuck the rest behind it. Put the basket either next to the vanity or under the mirror so it frames the counter instead of competing with it.
Editor's noteUse a fabric refresher wipe on towels before folding — it reduces musty smell and keeps the color looking fresh.
Skip thisAvoid mixed towel stacks; two different fold sizes make the basket look sloppy fast.
11. Open Counter Tray for Perfume + Labeled Refills in Cabinet
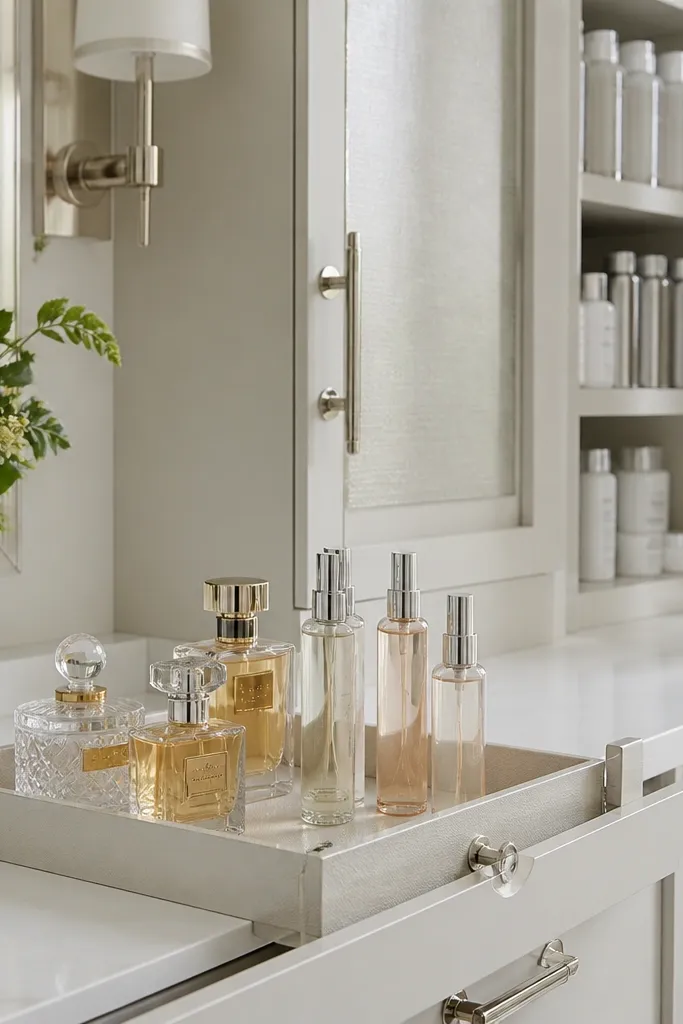
The photo-friendly trick is simple: display only one “pretty category” on the counter and hide everything else. A small tray holds perfume, face mist, and maybe one decorative jar, while all refills live in the cabinet with labels. This keeps the counter from turning into a product graveyard. It’s a strong option for people who have lots of skincare but don’t want it all visible. The look stays modern because the counter has negative space and one consistent container shape.
Choose a tray with a rim and a size that fits your counter corner or side — not the center. Place your most aesthetic items on the tray: perfume bottle, a face mist, one matching canister, and a small dish for rings or clips. In the cabinet below, store backups in identical bins and label them by category. Keep the cabinet door closed unless you’re restocking so the counter stays clean.
Editor's noteUse the same label color across bins so the cabinet reads cohesive even when the door is open.
Skip thisDon’t leave refills on the tray; one extra bottle turns it from styled to cluttered.
12. Peg Hook + Clear Pouch for Hair Tools
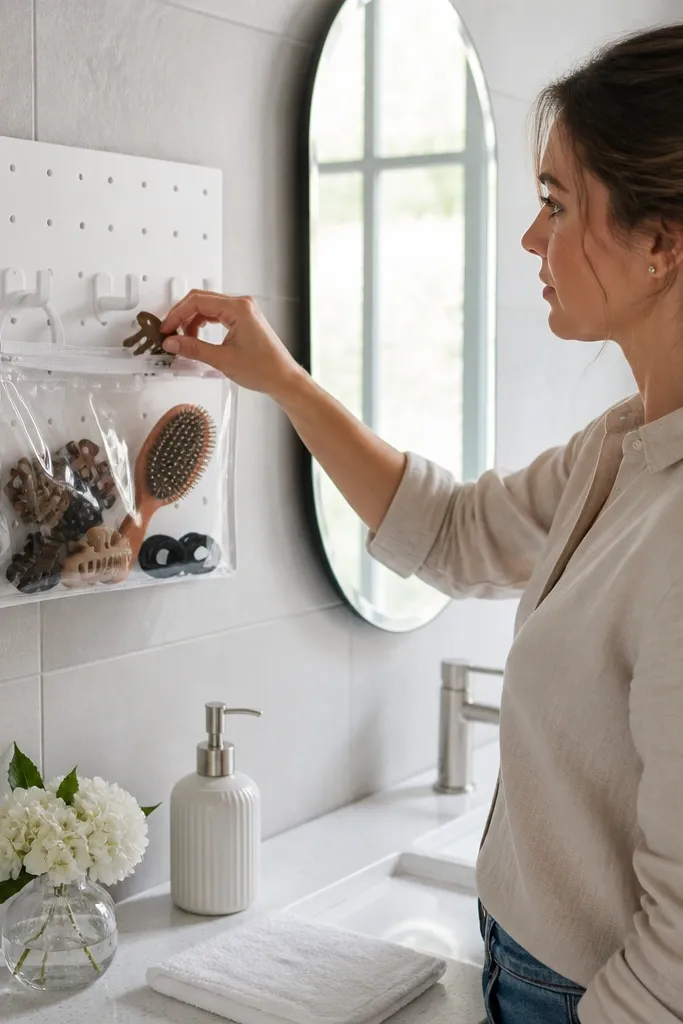
This setup is for hair tools that always end up in a drawer mess: clips, brushes, and small accessories. A clear pouch mounted on hooks keeps items visible enough to grab quickly but contained enough to look tidy. The clear material keeps the system modern and light, and the pouch shape prevents tools from spilling. It works best on a side wall near the vanity or inside a cabinet where you can see it. If you have a lot of small hair stuff, this is a better look than a random cup on the counter.
Mount a small hook rail or a single hook strip where you keep hair tools — side wall or cabinet door. Hang one clear pouch and sort tools inside by type: clips in one section, brush accessories in another. Add a small labeled card or sticker so the pouch doesn’t become a junk pouch. Keep the pouch width narrow enough that it doesn’t block the mirror view.
Editor's noteUse a zip pouch insert for clips so they don’t snag on the clear plastic.
Skip thisAvoid thick, floppy pouches; they sag and look messy even when filled.
13. Corner Lazy Susan for Drawerless Vanities
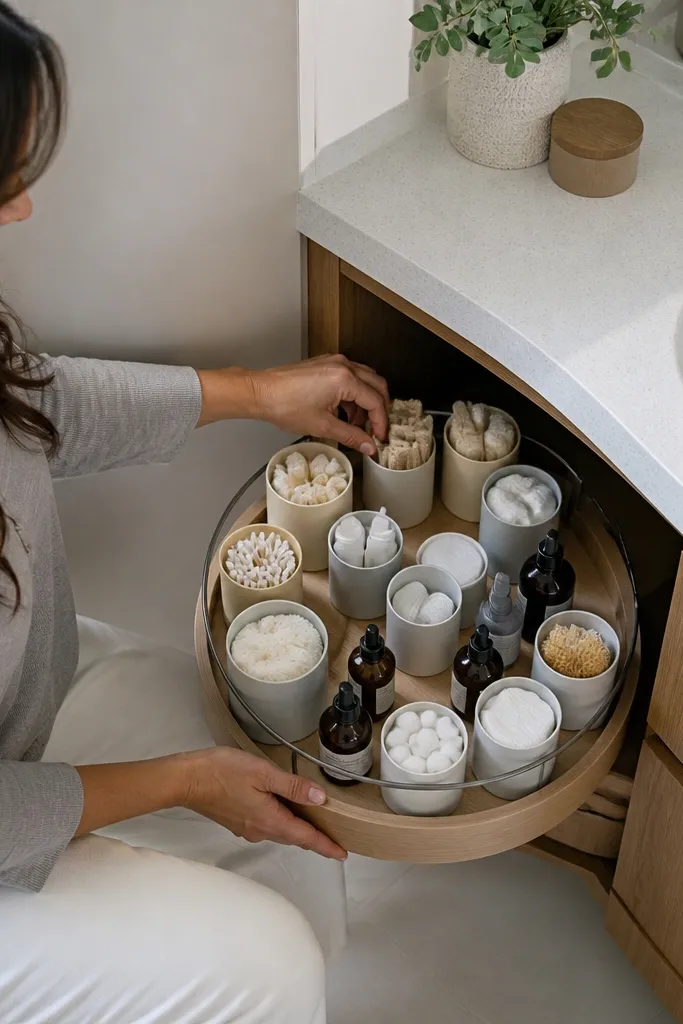
If your vanity has shallow storage and no drawers, a lazy Susan solves the “everything is in the back” problem. It creates a tidy circle of labeled containers so you can find products without digging. This looks modern because the containers sit aligned on a single rotating surface. Use it for backups, bath accessories, or hair care refills. It’s especially good for renters who can’t install complicated organizers, since you can place it on a shelf without permanent mounting.
Measure your cabinet shelf or corner space and choose a lazy Susan diameter that leaves 1 inch of clearance around the edges. Place three containers on the turntable: one for backups, one for tools, and one for daily-use items if you want them visible. Label the containers so you can restock quickly. Rotate it once a month to check expiration dates and keep the arrangement fresh.
Add a thin non-slip mat under the turntable so it doesn’t rotate when you open the cabinet.
Don’t mix tall containers with short ones; it creates an uneven look and makes rotation harder.
14. Clear Shoe-Box Style Bin with Fabric Label Strip
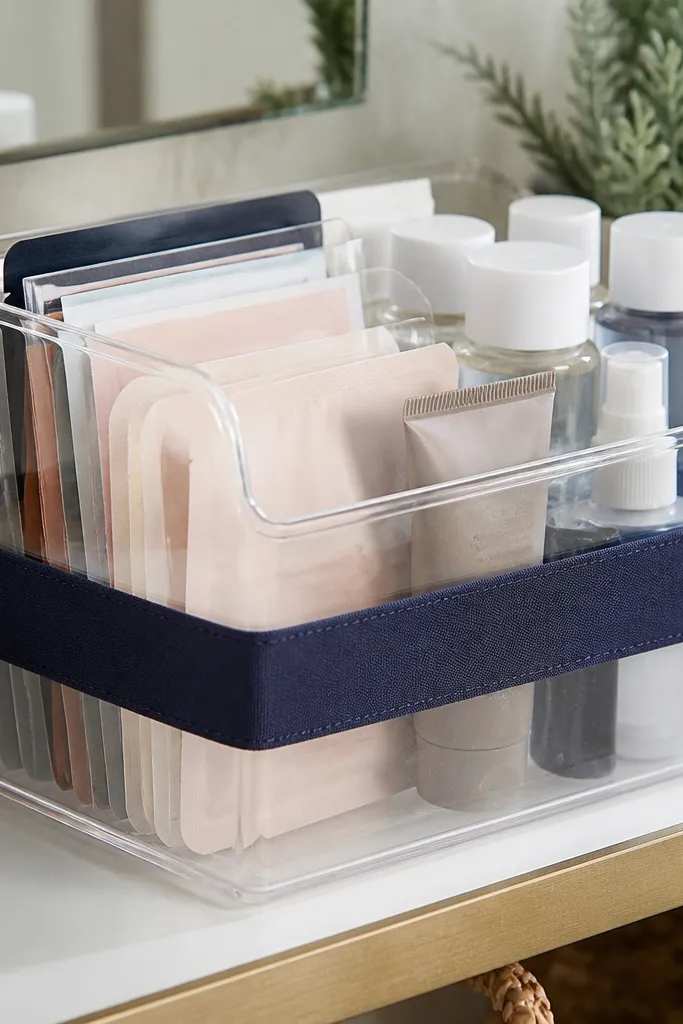
This is a clean, modern way to store backups without making your vanity look like a storage closet. Use a clear bin so you can see what’s inside, but add a fabric label strip in a consistent color to make it look styled. It’s great for travel-size products, extra masks, and spare skincare when you don’t want to hide everything in drawers. The transparent sides keep it easy to find items, while the label strip gives the system a designed feel. It also photographs well because the bin edges and labels create order.
Pick a bin size that fits a cabinet shelf or drawer and holds a single category of items. Add a fabric label strip across the front with a label that matches the bathroom palette. Fill the bin with products standing upright so the label side remains readable. Store one bin per shelf so the layout stays consistent and easy to maintain.
Editor's noteUse color-coded label strips by category — skincare, hair, makeup — so you can scan fast.
Skip thisAvoid clutter inside the bin; if items lean or spill, clear bins show it instantly.
15. Compact Rotating Organizer for Makeup Brushes
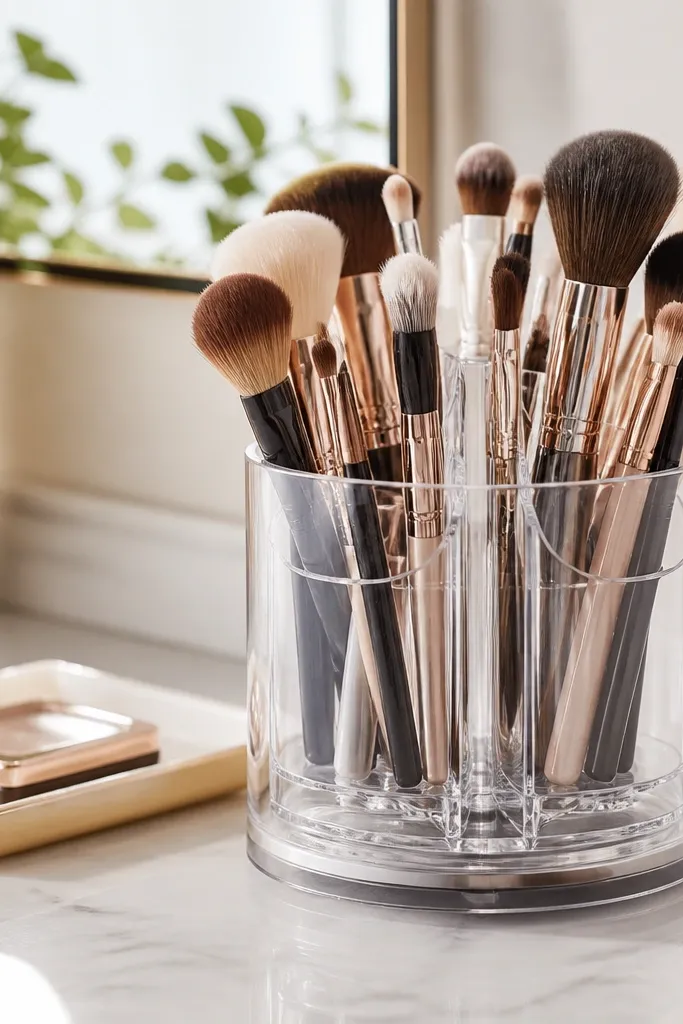
Brushes and tools look messy fast because they’re tall and irregular. A compact rotating organizer keeps them contained and gives you a neat, modern “turn-and-grab” system. Choose a clear or matte container with separate compartments so brushes don’t tangle. This is ideal for people who do makeup at the vanity and want their tools visible but not scattered. It also keeps the counter clean because you don’t need a bunch of cups. The look is photogenic because everything lines up in a single cylindrical unit.
Choose a rotating organizer that fits your counter corner and has compartments for brush sizes. Sort brushes by type and place them upright so handles face the same direction. Add a small compartment for a sponge or a mini spatula so you don’t need extra cups. Keep the organizer near your mirror so you can grab tools without moving items around the counter.
Set a small mat under the organizer to catch stray powder and protect the counter finish.
Don’t store brushes wet; water spots on the container make the whole setup look neglected.
16. Under-Sink Label Wall with Three Stackable Crates
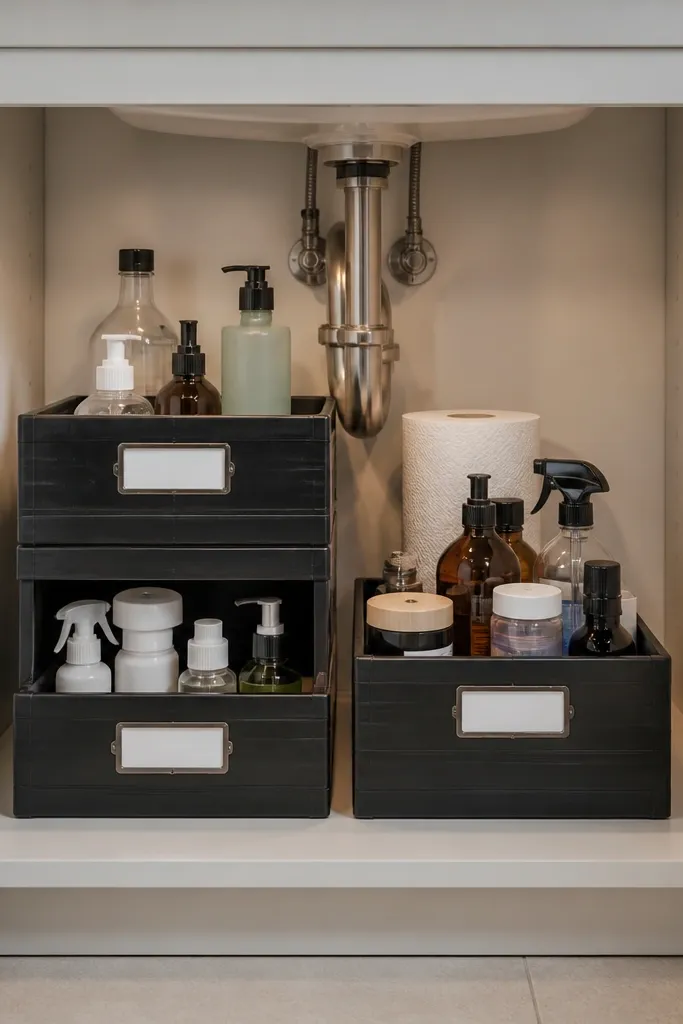
This is for vanities where the cabinet is deep and everything ends up stacked randomly. Stackable crates create a clean internal “wall” so you can see categories at a glance. Labels make restocking faster, and the crates keep bottles from rolling into each other. It’s modern because it’s structured: straight edges, consistent crate sizes, and one color label system. Works best when you have enough vertical space under the sink. The aesthetic payoff is huge because the cabinet looks organized even when you open the door.
Measure the cabinet interior and pick three crate sizes that stack with minimal gaps. Place the largest crate at the bottom for heavy items like extra soap refills, then the medium crate for cleaning cloths, and the smallest crate for backups. Add a label to each crate front and keep the label style consistent. Add a small drip tray or mat under the crates so any leaks don’t damage the cabinet base.
Editor's noteUse waterproof labels or laminate label strips so they survive humidity.
Skip thisSkip loose bottles without crates; one spill turns into a domino mess inside the cabinet.
17. Corner Mirror Shelf with One Lidded Bin
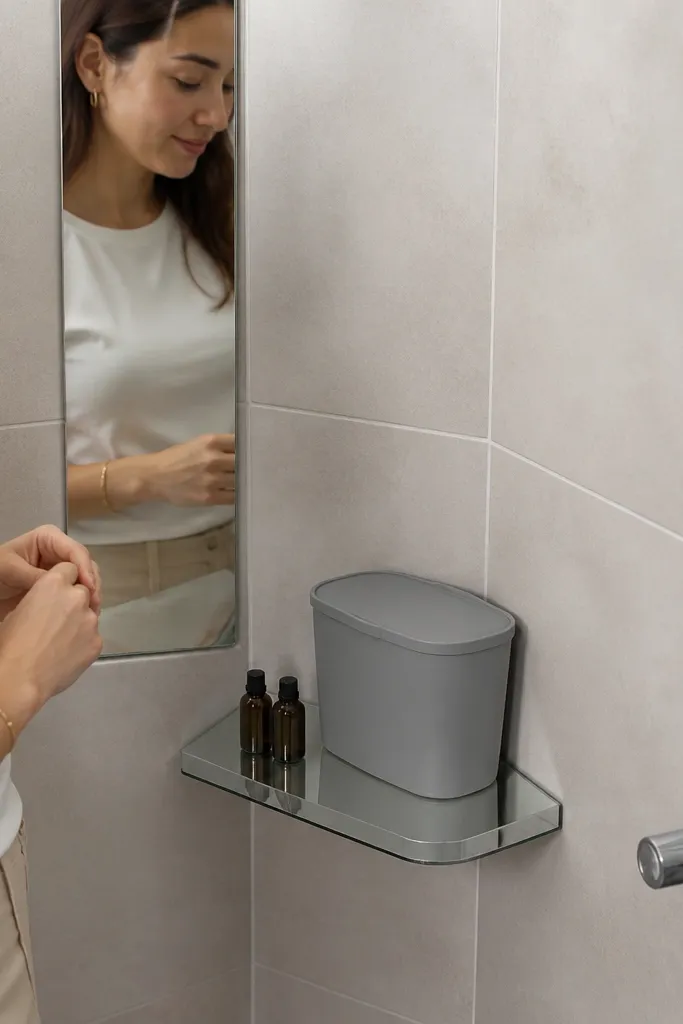
A corner shelf is a sneaky way to add organization without crowding your main counter. One lidded bin keeps backups out of sight, and a couple of small bottles on the open edge look intentional instead of cluttered. This setup looks modern because it uses geometry: corner placement, one bin, and consistent bottle spacing. It works well for small bathrooms where everything needs to stay off the sink area. Keep the shelf narrow so it doesn’t collect dust and so it stays easy to wipe.
Install a narrow corner shelf at a height that doesn’t block your mirror — aim for the top of bottles to sit below your line of sight. Place one lidded bin on the bottom shelf area for backups, then arrange two to four bottles on the top edge with equal spacing. Keep bottle heights similar so the shelf looks tidy. Wipe the shelf lip and use a microfiber cloth before styling so dust doesn’t show.
Use felt pads under the bin and bottle bases to prevent scratching and sliding.
Don’t put open clutter on the shelf; corners amplify mess because everything is visible.
18. Matte Black Tray + Clear Mini Jars for Lip Care
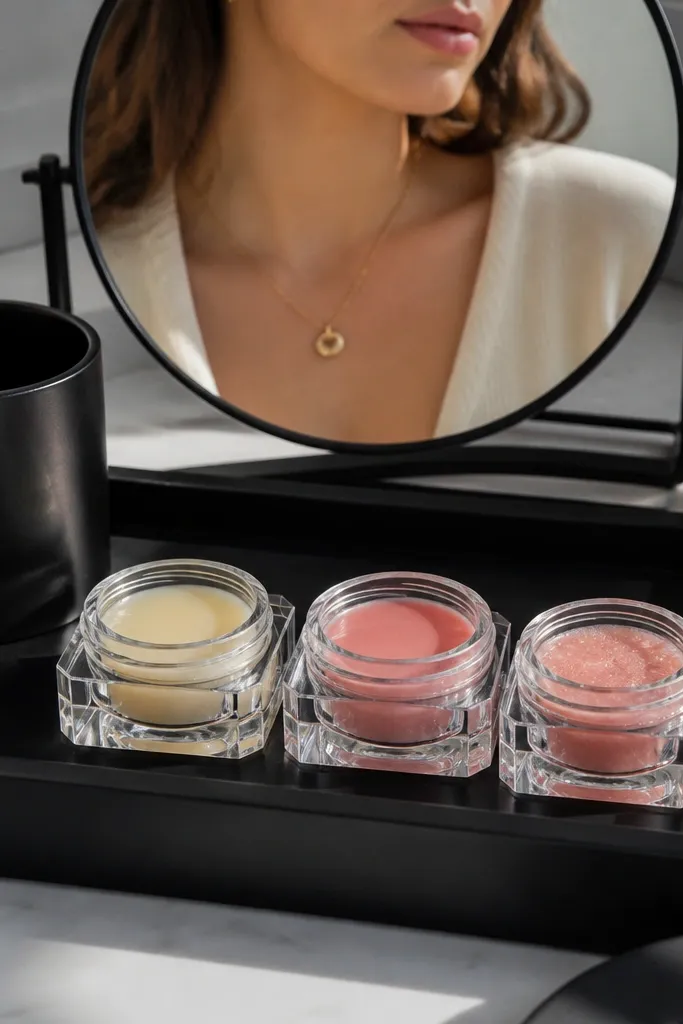
Matte black trays look modern fast because they visually anchor the counter. Clear mini jars for lip care keep the items easy to find while still looking clean, and the contrast between matte and clear reads intentional. This setup is perfect if your vanity has a small makeup area and you’re tired of lip products living in a drawer where you can’t see them. Keep it tight: one tray, a few jars, and a small dish for rings or hair ties. The look stays aesthetic because the black tray creates a defined frame for everything.
Place a matte black tray in the vanity corner where you naturally set lip products. Add two or three clear mini jars with matching lids and fill each jar with one product type. Add a small dish for rings or clips next to the jars. Keep the rest of the counter clear and store extra makeup in a drawer organizer so the tray remains a curated display.
Editor's noteUse the same lid finish across jars so the set reads like one collection.
Skip thisDon’t mix jar sizes wildly; it breaks the clean grid look.
19. Textured Neutral Basket with Labelled Refills Behind
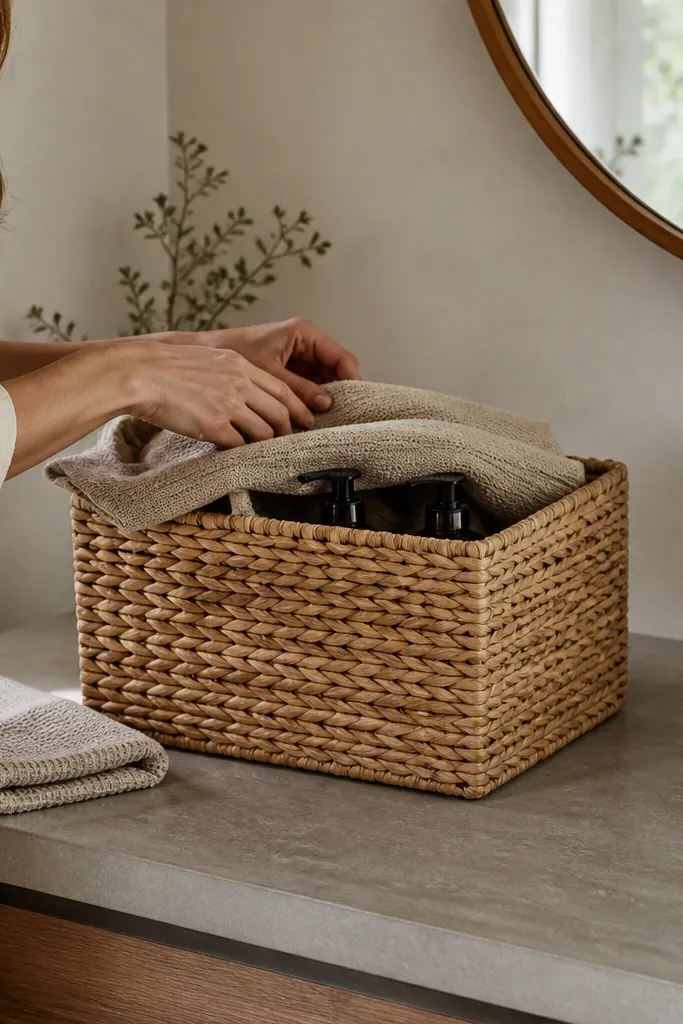
This one blends function with softness. A textured neutral basket hides refills behind a folded towel or cloth so the counter stays calm, but you still get quick access to what you need. Label the refill bottles inside the basket so you don’t have to open everything to find the right one. The basket texture adds warmth and makes modern vanity organization ideas feel less sterile. It’s ideal for bathrooms that lean neutral and warm — think beige, cream, soft gray, and wood tones. Keep the basket in one spot so it acts like a visual container, not a wandering pile.
Choose a basket with a lid or a high front edge so items don’t spill forward. Fold a small towel and place it at the front as a “cover” so refills stay hidden. Put labeled refills behind the towel, grouping by category like hand soap refills and body wash refills. Keep daily bottles elsewhere on the counter or in a tray so the basket stays mostly covered.
Editor's noteUse waterproof labels inside the basket — humidity near sinks ruins paper labels quickly.
Skip thisAvoid low, open baskets; they show the clutter you’re trying to hide.
20. Drawer Insert for Nail Polish with Vertical Display
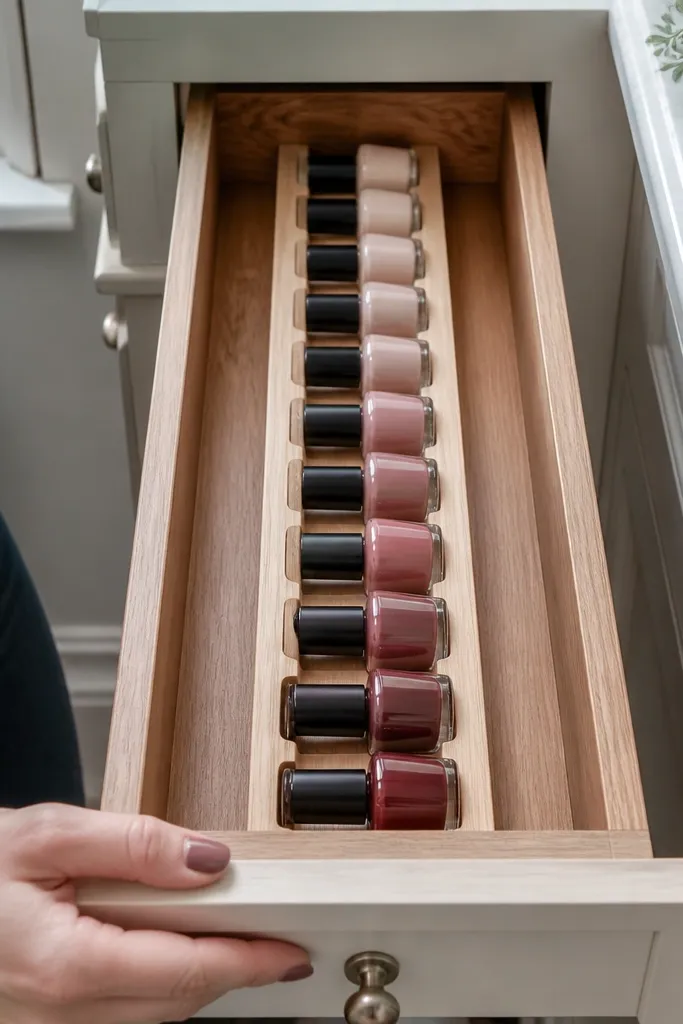
If nail polish and small bottles are scattered, your vanity will never look organized. A vertical drawer insert makes polish look like a tidy collection instead of a random assortment. It’s photogenic because the bottles line up straight, and you can sort by color family or finish. This works best for vanities with a dedicated drawer where you want everything contained. The modern look comes from the vertical layout and consistent spacing, not from expensive decor.
Measure your drawer and choose a vertical insert with individual slots sized to your bottle widths. Arrange bottles upright with labels facing the same direction so the drawer looks clean when opened. Add a small separate section for tools like base coat, top coat, and remover pads. Put the most-used colors in the front row so the drawer stays organized over time.
Editor's noteUse removable labels on the drawer insert so you can reorder colors without redoing everything.
Skip thisDon’t store polishes horizontally; they tip, leak, and make the drawer look dirty.



