
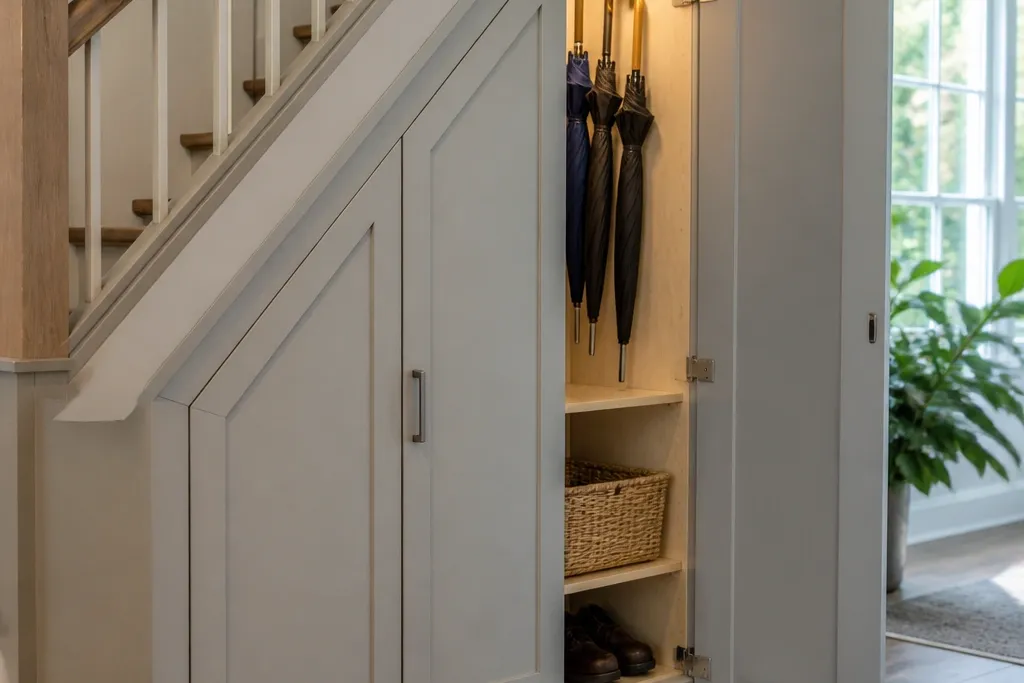
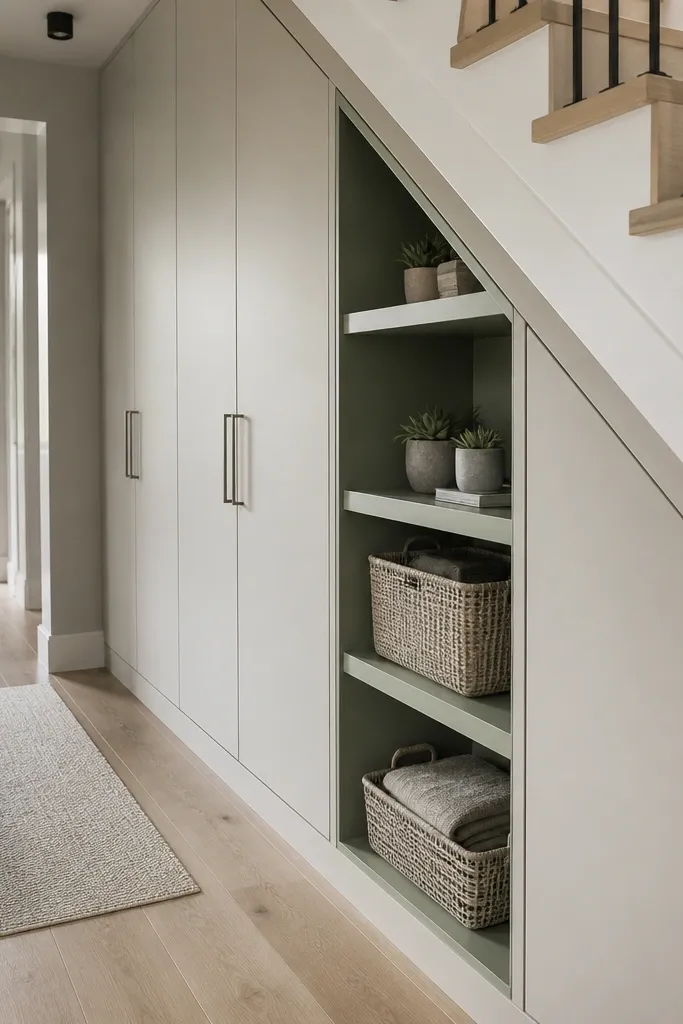
1. Shaker-Style Door Cabinet with Upper Shelf Ledge
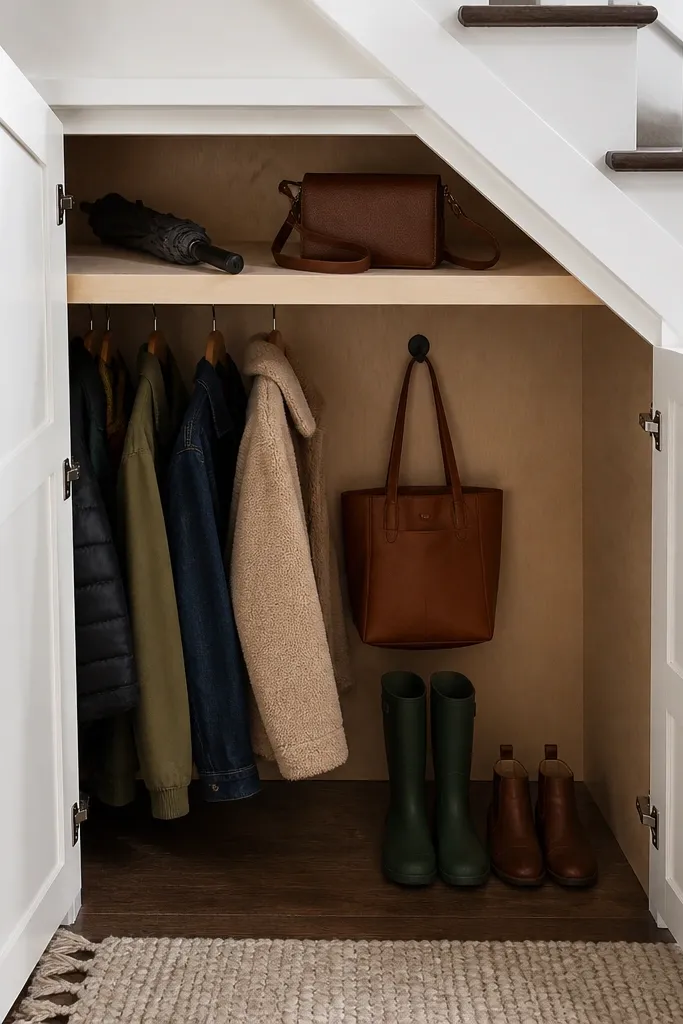
Start by measuring the clear width and the slope so you can build a level cabinet face. Frame the carcass from 3/4-inch plywood using a simple box layout, then add a fixed upper shelf ledge at about 30 to 36 inches from the floor so it sits at comfortable reach. Install one or two Shaker-style door panels on soft-close hinges, keeping a consistent reveal of about 1/8 inch around the door edges. Finish by filling screw holes, sanding to 180 grit, and spraying or rolling a cabinet-grade matte paint for a smooth, furniture-like surface.
This is the cleanest “closet” look for a narrow under-stairs run. The Shaker-style door frames give you a crisp edge that reads like built-in cabinetry, even if the interior is custom plywood. The trick is adding a shallow upper shelf ledge inside the cabinet for items you grab daily, like umbrellas or small bags — you get access without opening the whole space every time. Paint the frame and door the same color as your trim for a match from the hallway. It suits entryways, mudrooms, and any staircase landing where the storage is visible.
Skip thisAvoid leaving the interior unfinished; raw plywood inside makes the cabinet look temporary.
Editor's noteUse a consistent reveal gap with spacers when you hang the door — it makes the whole build look “factory.”
2. Slim Pull-Out Drawer Bank for Shoes and Small Gear
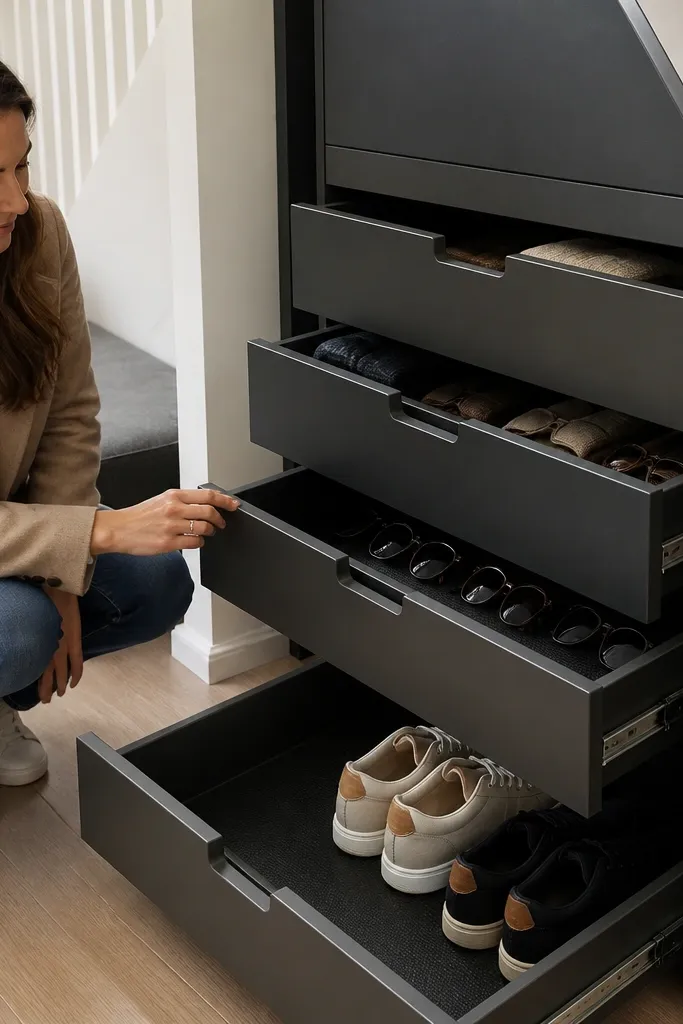
Build a carcass from 3/4-inch plywood and mount full-extension drawer slides on both sides. Set drawer heights to your items: for example, 4-inch-tall drawers for charging cords and 8-inch-tall drawers for folded scarves, then keep the bottom drawer taller at 10 to 12 inches if you store shoes or tall socks. Install drawer boxes with 1/2-inch bottoms so they stay rigid, then test-fit each drawer before attaching fronts. Finish by sanding the drawer fronts, then painting them cabinet matte and sealing with a clear topcoat if you used paint that chips easily.
If your under-stairs space fills up with random small items, a drawer bank fixes it fast. Slim drawers look sharp and stay photogenic because the fronts line up like furniture, not like shelves. For shoes, you can dedicate the top drawers to accessories and the lower drawer to folded items, then use a non-slip liner so things do not slide when you open the drawer. Keep the drawer fronts matte and use hardware that matches your entry door handles. This works best when the underside of the stairs gives you enough headroom to pull drawers without bumping your knees.
Skip thisDo not size drawers by guessing; measure your tallest bin or shoe box and build around that.
Editor's noteAdd a thin rubber bump strip on the drawer stop so the drawer closes quietly and aligns cleanly.
3. Barn Door Sliding Closet with Color-Blocked Interior
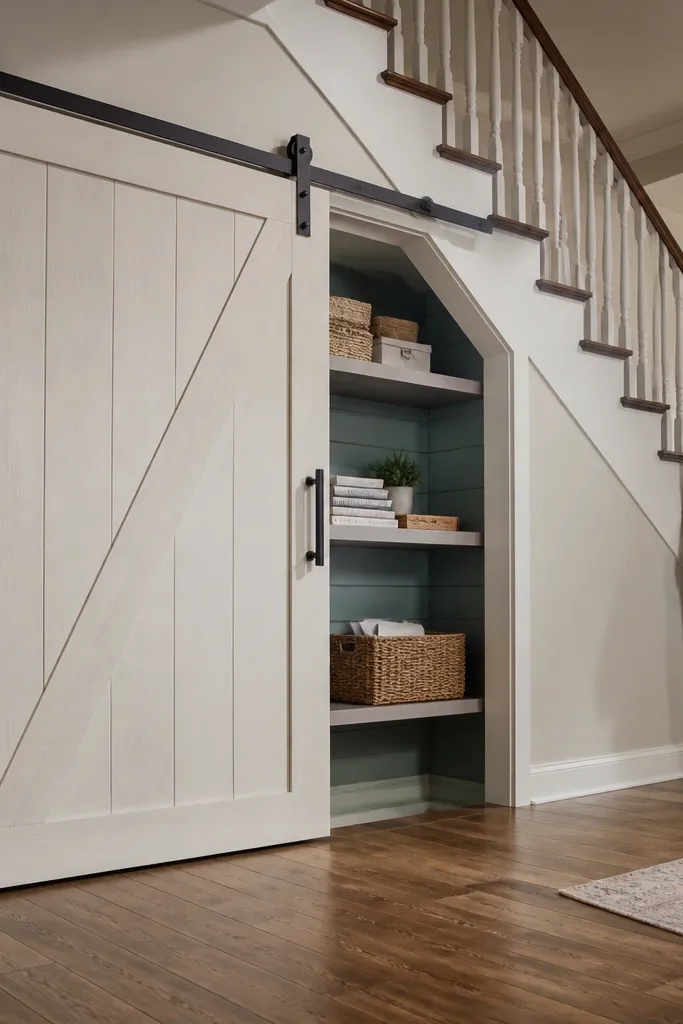
Start by framing the storage cavity with 3/4-inch plywood and ensure the top track area is solid enough for the barn door. Mount a barn door rail with at least two studs engaged, then hang the door so it clears the floor by about 1/2 inch. Build the interior shelves with fixed spacing for bins — 8, 12, and 16-inch heights are easy to standardize — then paint the back panel and shelf faces before assembly. Finish by sealing the shelves with a durable paint or clear coat, then run a pull handle and magnetic catches so the door closes tight.
A barn door instantly makes under-stairs storage look like a real closet instead of a DIY box. The sliding hardware creates a strong horizontal line, which balances the staircase slope. For the inside, color-blocking makes it look intentional in photos: paint the back panel one shade and keep the shelves a lighter tone. Use the color-block for function too — dark back for “hidden” clutter bins, lighter shelves for items you want to see. This is a great choice for entryways that need a statement element without getting bulky.
Skip thisAvoid mounting the track only to drywall; the door will sag and the line will look off.
Editor's noteUse a door with a visible bottom rail; it keeps the look crisp and hides the gap where dust collects.
4. Open-Top Display Shelves with Hidden Bins Below
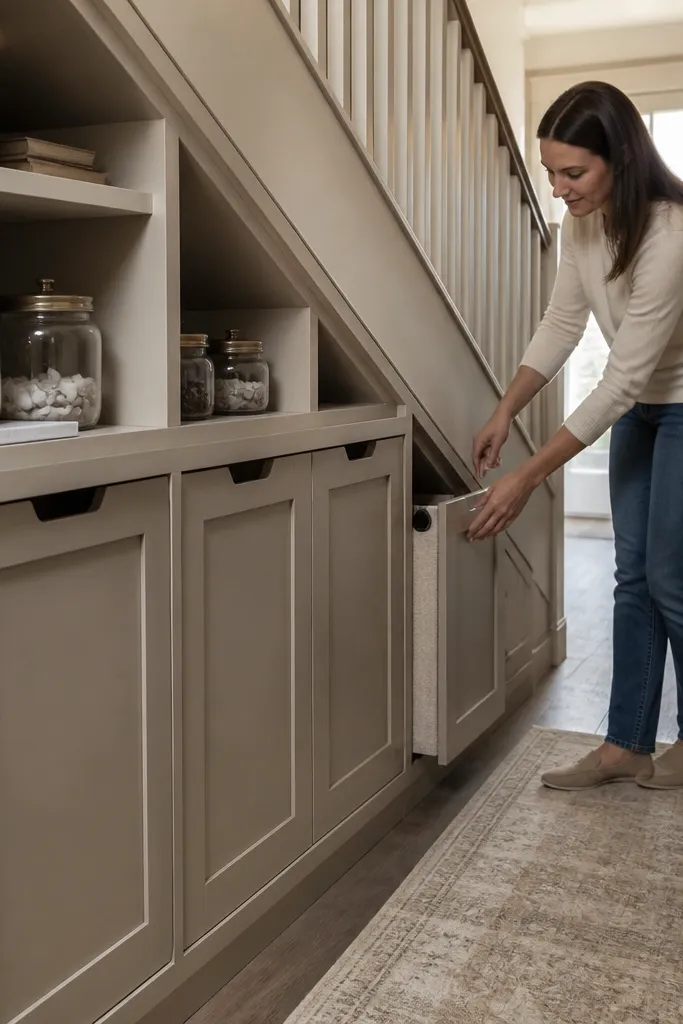
Frame a two-zone interior: an open shelf zone at about 40 to 60 inches from the floor and a lower bin zone below it. Install shelves with a uniform depth — 10 to 12 inches looks balanced under most stair slopes — and add a back panel to keep the open area from looking like unfinished framing. Use a bin size that matches the width between studs, then add a lip or cleat so bins slide in cleanly and do not fall forward. Finish by painting the frame and shelves in matte, then add adhesive felt pads to the cabinet floor where bins rest.
This one is for people who want the under-stairs area to look good even when you’re not actively organizing. Open shelves at eye level let you display baskets, books, or labeled storage jars, while closed bins below kill the clutter. The aesthetic comes from consistent shelf depth and matching bin colors. If you choose a single bin style (same fabric or same plastic shade), the whole space looks designed. It works well in living rooms or hallways where you want storage to feel like part of the decor.
Skip thisAvoid mixing random bin sizes; mismatched bins create visual noise instantly.
Editor's noteLabel bins with small, neat tags on the inside face so the outside stays clean for photos.
5. Ceiling-to-Floor Vertical Pantry with Pull-Handle Doors
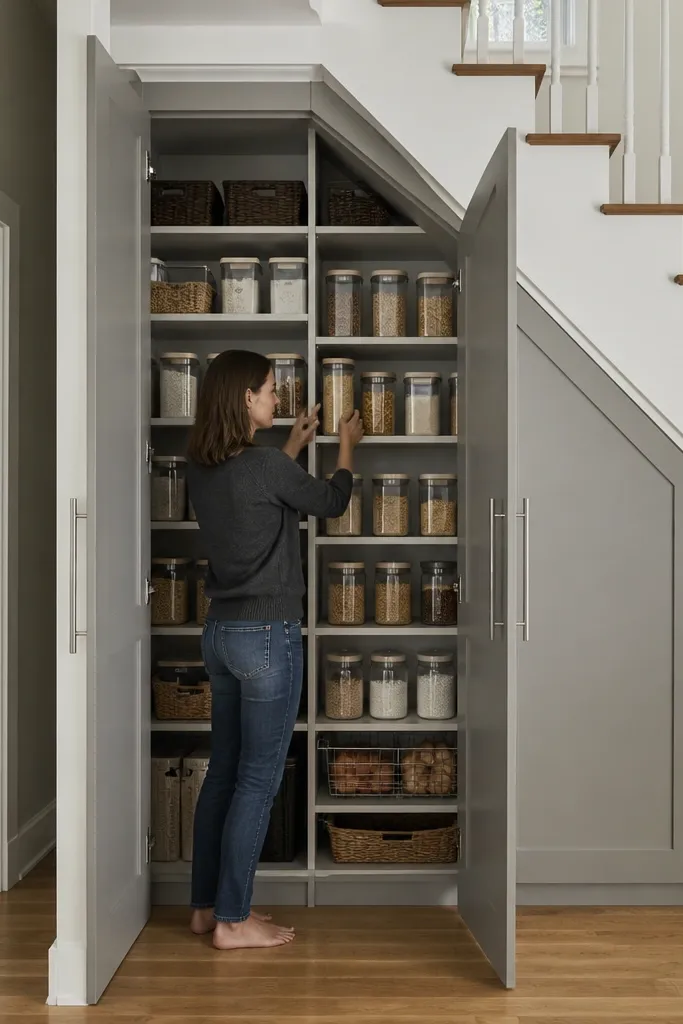
Build the carcass using 3/4-inch plywood and add a vertical back panel so the structure stays square. Install a door frame with long pulls and keep the door width consistent across the run for a clean line. Add adjustable shelf standards and place the first shelf at 12 to 14 inches from the floor, then space the rest based on your bin heights. Finish by painting the door and frame matte and adding soft-close hinges so the doors shut without slamming.
Vertical pantry storage is the move when the under-stairs cavity is narrow but tall. Tall runs make the space feel intentional because you’re not fighting the slope with shallow shelves. Use pull-handle doors instead of small knobs so the doors look sleek and are easy to open with one hand. Inside, add adjustable shelves so the closet adapts as your household changes — cleaning supplies one season, holiday items the next. This looks best in a mudroom or utility entrance where you want a tidy, furniture-like column.
Skip thisAvoid fixed shelves if you’re unsure what you’ll store; one wrong dimension is a pain later.
Editor's noteInstall shelf pins with a consistent hole pattern and mark the shelf positions on the inside — it saves time when you reconfigure.
6. Corner-Locked L-Shaped Shelving Under the Stairs
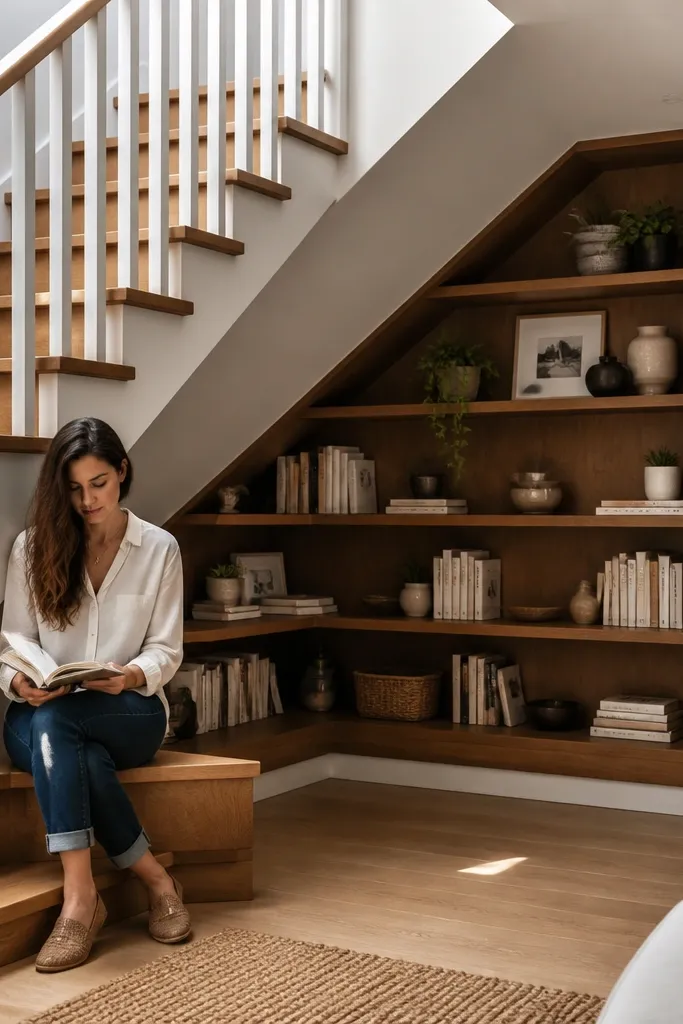
Start by mapping the exact corner lines — use a straight edge and mark the plywood templates directly on the floor. Build two shelf runs from 3/4-inch plywood and connect them with a corner frame piece that hides the joint. Add a back panel for stiffness and to hide the studs, then screw shelves in place with pocket screws so the edges stay clean. Sand the shelf edges smooth, then finish with a matte paint or a clear coat over a wood veneer look.
When your under-stairs shape creates an L or awkward corner, don’t fight it with tiny shelves. L-shaped shelving turns the corner into a feature, and it looks architectural in photos. The aesthetic comes from clean corner framing and matching shelf edges, plus a consistent finish that hides the messy angles. Store books and decorative boxes on the shelves, then add a closed panel section for items you want out of sight. This suits staircases where the storage area wraps around a wall, giving you natural “two directions” to use.
Skip thisAvoid open shelving with no back panel; dust and unfinished framing show through immediately.
Editor's noteUse a single shelf thickness throughout (like 3/4-inch) so the corner reads as intentional, not patched.
7. Drawer + Door Hybrid for One-Side Storage
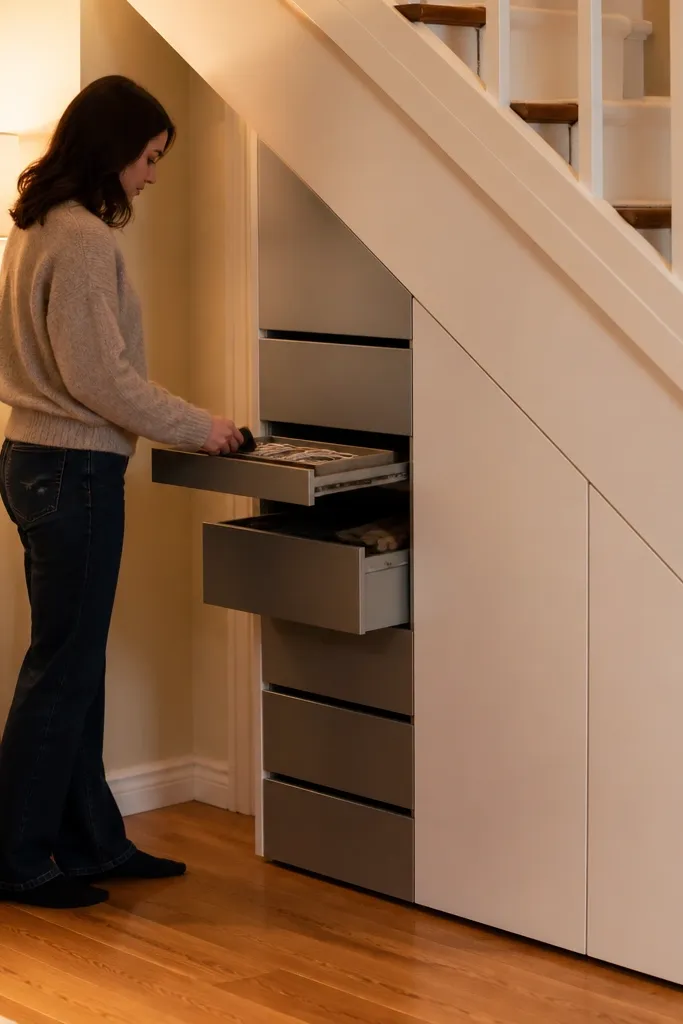
Frame the carcass and split it into two sections: a drawer bay and a door bay. Install drawer slides and build drawer boxes with a matching front height so the drawer fronts align with the door trim. Use a 1/2-inch plywood back panel and add a fixed shelf behind the door bay for bins. Hang the doors with soft-close hinges, then install a single handle style across both doors and drawers so the unit looks cohesive.
A hybrid layout is the fastest way to get both quick access and hidden storage. Put drawers on the side that you’ll use most — keys, charging cables, gloves, pet supplies — and doors on the deeper section for bulk items. The look stays clean because the fronts align and the door panels break up the vertical lines. Choose a consistent hardware style for both drawers and doors so it reads like one piece of furniture. This is a great fit for hallways where the under-stairs area is partially visible and you want it to look organized even on busy weeks.
Skip thisAvoid mixing hinge styles or hardware finishes; it reads sloppy even when the build is solid.
Editor's noteSet the drawer front height so the top drawer lines up with the door top — alignment is what makes it look custom.
8. Laminated Wood Slat Front with Concealed Storage
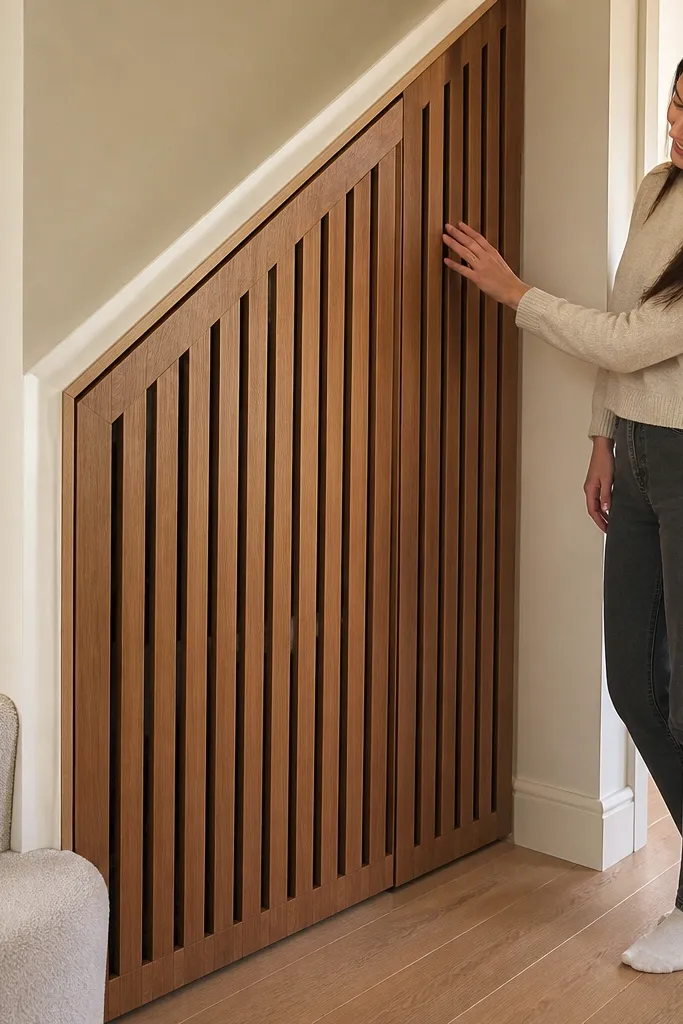
Build a standard cabinet carcass, then frame a slat door panel with 1x2 or 1x3 equivalents cut to match your door size. Space slats evenly (use a spacer block) and attach them to a backing frame so the door stays rigid. Install the door on soft-close hinges and add a latch or magnetic catch so it closes flush. Finish by staining or clear-coating the slats, then paint the cabinet interior matte to keep the slat texture as the star.
Wood slats add texture without looking cluttered, and they make under-stairs storage feel designed. The best version uses slats on a door front while keeping the inside fully closed behind it. That way, you get airflow for items like shoes or bags while still hiding the mess. Keep the slat spacing consistent and use a warm wood finish or a stained veneer look so it blends with your flooring and trim. This is a strong choice for entryways that need a warmer look than plain painted doors.
Skip thisAvoid wide slat gaps if you store small items; they’ll fall through or look messy behind the door.
Editor's noteSand slats to the same grit and apply stain in one direction — uneven sanding shows up fast on textured doors.
9. Textured Pegboard Back Panel with Folding Hooks
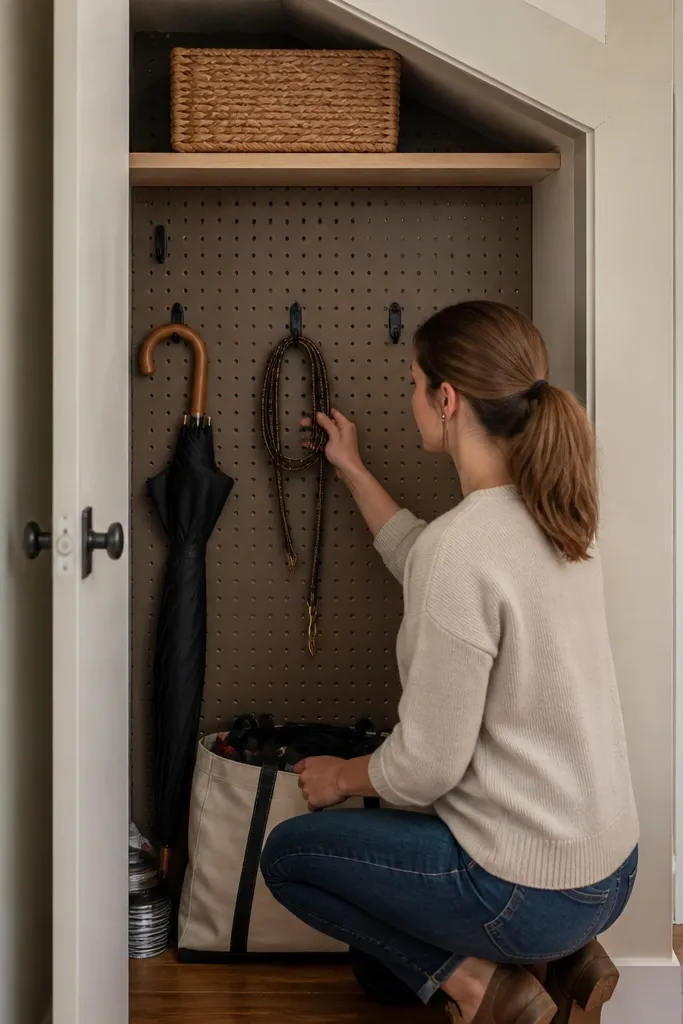
Cut pegboard to fit the inside back panel area, then mount it using furring strips so you have a flat mounting surface. Install the cabinet sides and shelves first, then screw the pegboard on last so you can fine-tune alignment. Add hooks in a grid pattern: place the most-used hooks at about chest height, then add lower hooks for bags and smaller items. Finish the pegboard by painting it matte to match your cabinet color, then seal with a light topcoat if you want it easier to wipe clean.
Pegboard inside under-stairs storage is great for the “grab and go” items that always end up on the floor. A textured pegboard back looks practical, but it also looks good when you keep the rest of the unit clean and color-matched. Add folding hooks or small rail hooks so you can hang umbrellas, leashes, or tote handles without clutter. Pair it with a couple of closed bins for things you do not want visible. This setup works best when the under-stairs area is at a height where you can reach the pegboard comfortably from standing.
Skip thisAvoid mounting pegboard directly over uneven framing; warps show as gaps around the edges.
Editor's noteUse hooks with a smooth curve and finish so bags slide off without snagging fabric.
10. Mirrored Back Panel for a Brighter Hallway Look
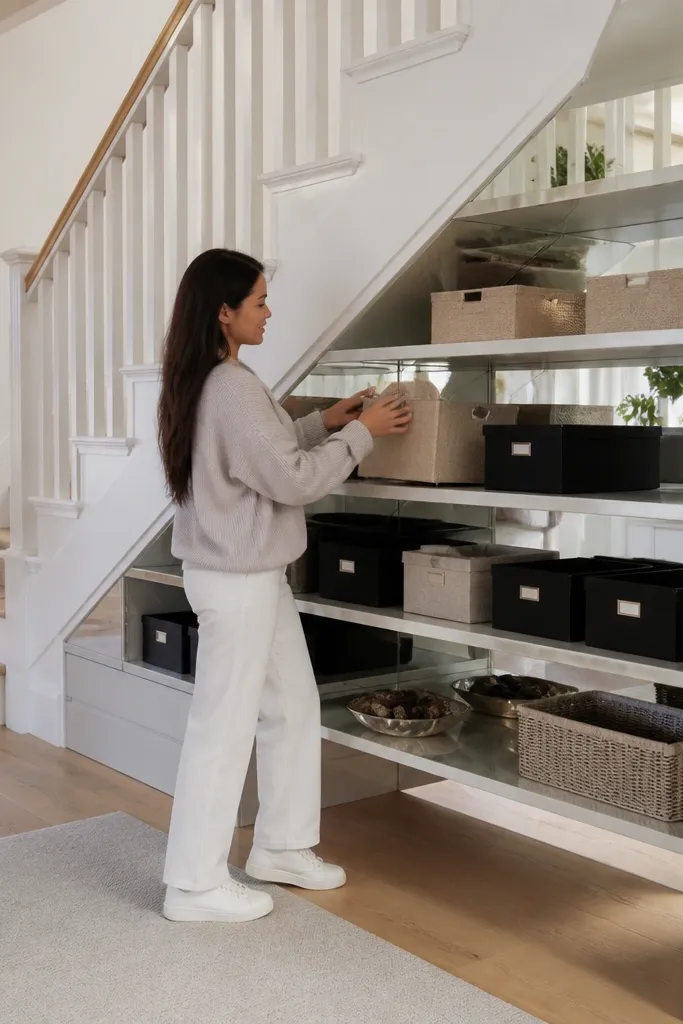
Build the carcass with 3/4-inch plywood, then install a mirror panel on the back using mirror mastic or double-sided mirror tape rated for glass. Use a protective backer so the mirror is supported and does not flex when the cabinet vibrates. If you’re using shelves, keep shelf edges clean and consistent so the reflection looks intentional. Finish with matte paint on the carcass and trim, then add a simple door or open shelving based on how much visibility you want.
A mirrored back panel makes under-stairs storage feel bigger and cleaner, especially in narrow hallways with limited natural light. It also makes the shelves look more styled because reflections add depth. Use it behind open shelves or behind glass-front doors so the mirror catches light and makes the area less heavy visually. Keep the rest of the unit matte so the mirror does not look like a disco panel. This is a smart pick when you want the storage to be photogenic and bright, not dark and tucked away.
Skip thisAvoid placing a mirror where it will get direct sunlight glare; it looks harsh and makes the storage look messy.
Editor's noteChoose a mirror with a thin safety backing film so if it ever chips, it stays contained.
11. Glass-Front Upper Cabinet with Labeled Bins Below
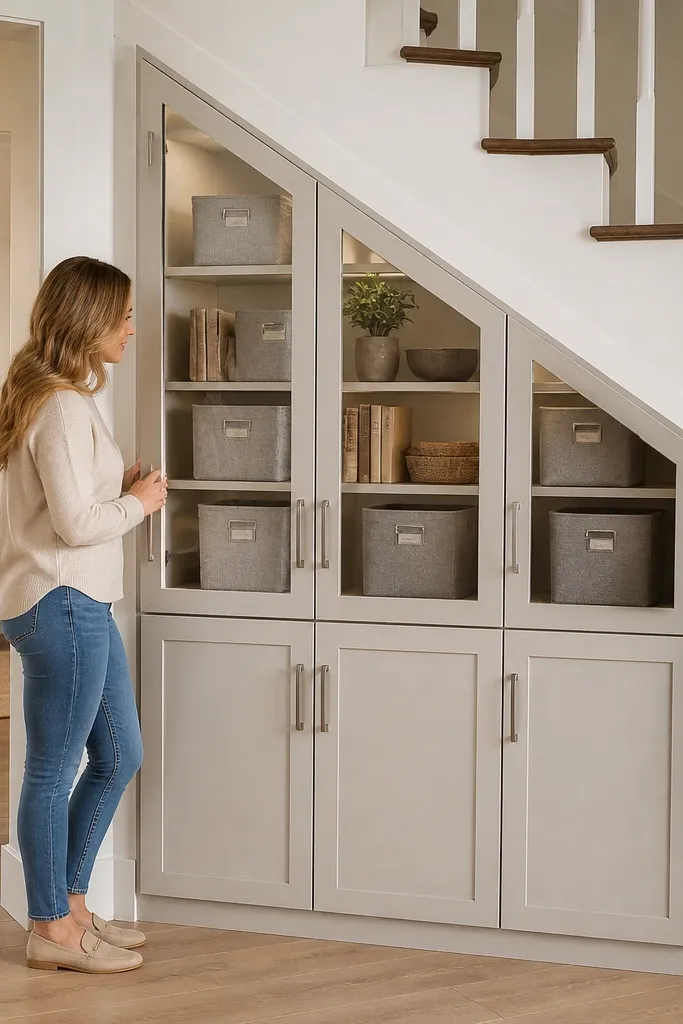
Frame the carcass and split it into upper glass and lower solid sections. Build the glass door frames with a shallow rabbet so the glass sits securely and does not rattle. Add bin shelves behind the glass area that match bin sizes, then label bins with small tags on the front edge. Install the doors with soft-close hinges and use a simple handle that matches your other cabinetry hardware. Finish by painting the cabinet interior matte so the glass reads clean instead of glossy.
Glass-front storage looks polished when you want a tidy, curated feel without leaving everything open. Put glass doors on the upper section so you can see the contents, then hide bulk items behind solid doors below. The look stays clean because you can label bins and stack them neatly, and the glass shows only what you want to display. Use clear or lightly frosted glass based on your tolerance for visible clutter. This works well for pantry-style items, craft supplies, or seasonal decor in a hallway that needs organization.
Skip thisAvoid clear glass if you hate visible organization; it turns small clutter into a visual mess.
Editor's noteUse frosted glass for the sections that hold everyday items; it hides labels and keeps the look calm.
12. Hidden Trash Pull-Out with Slatted Door Facade
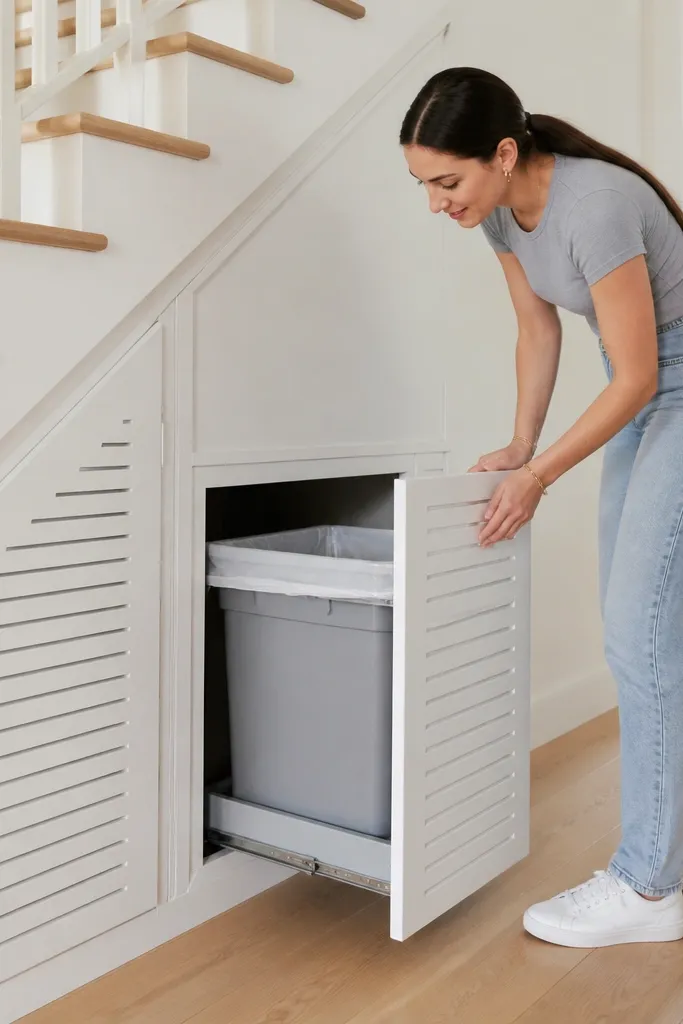
Measure the width and depth for the pull-out bin system, then build a carcass that leaves clearance for the bin wheels or handles. Install a pull-out trash slide kit, then mount a door facade front on hinges so it closes flush. Add a slatted door panel if you want airflow and a more furniture-like look, then paint or stain the facade to match. Test the door swing and pull-out travel fully before you finish the facade, so nothing hits the stairs framing.
This is the under-stairs solution that people notice because it looks clever, not because it’s complicated. A trash pull-out keeps the bins contained, and a slatted or panel facade keeps it from looking like a utility closet. Put it in the side that’s easiest to access and keep the facade style consistent with the rest of your hallway cabinetry. The photogenic part is the uniform front — no gaps, no dangling bin edges. Great for kitchens that have overflow trash needs near an entry, or for mudrooms where the bin always ends up visible.
Skip thisAvoid tight clearances around the slide rails; trash bins get heavy and need smooth travel.
Editor's noteUse a facade that covers the full opening even when the bin is pulled out; it keeps the look clean.
13. Corner Shelf Bench with Storage Under Seat
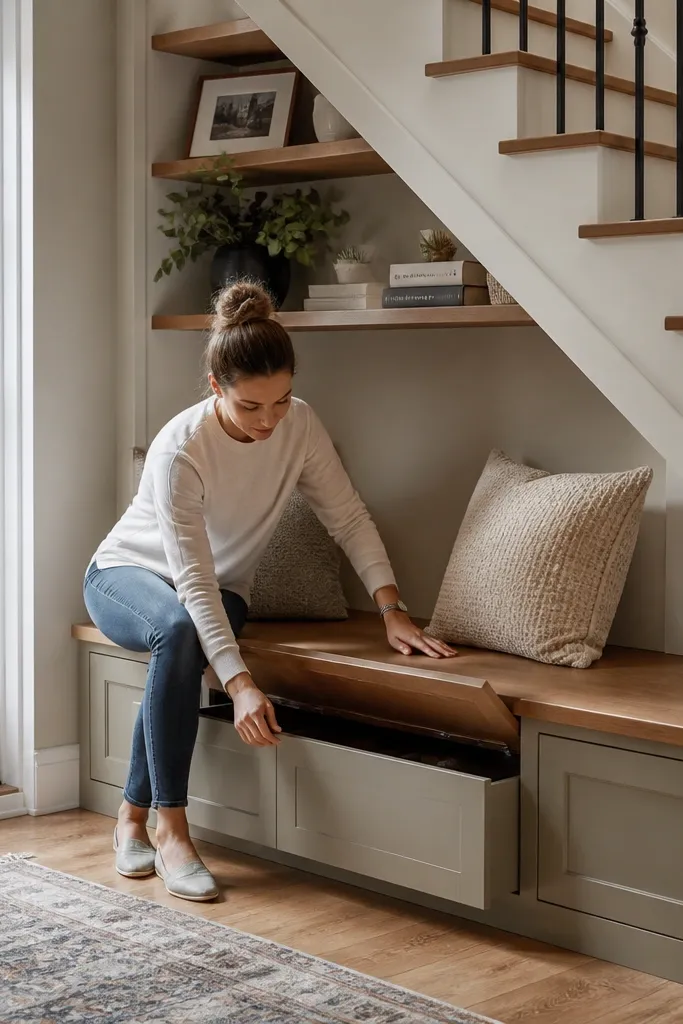
Build a bench frame from 2x2 or 2x3 lumber, then add a plywood seat deck. Install a shelf unit above the storage area, keeping shelf depth consistent so the whole run looks intentional. For the storage under the seat, use lift-up hinges or a hinged panel door depending on headroom, then add a fixed shelf inside for organization. Sand and seal the seat top, then finish the shelves and side panels in matte paint or a matching wood tone.
If your under-stairs space can fit a bench, this turns storage into something you actually use. The shelves above the seat add display space, while the storage under the bench keeps bulk items hidden. The bench top makes the entire area feel like built furniture, not just a closet. Use a durable top finish — laminate or a sealed wood top — because bench tops get scuffs. This is perfect for entryways where you need a spot to sit while putting on shoes and you want the storage to blend in.
Skip thisAvoid thin bench tops; they flex and crack finish around the edges.
Editor's noteAdd a removable tray inside the storage so small items do not fall into the corners under the seat.
14. Hidden Pantry with Removable Bin Carriers
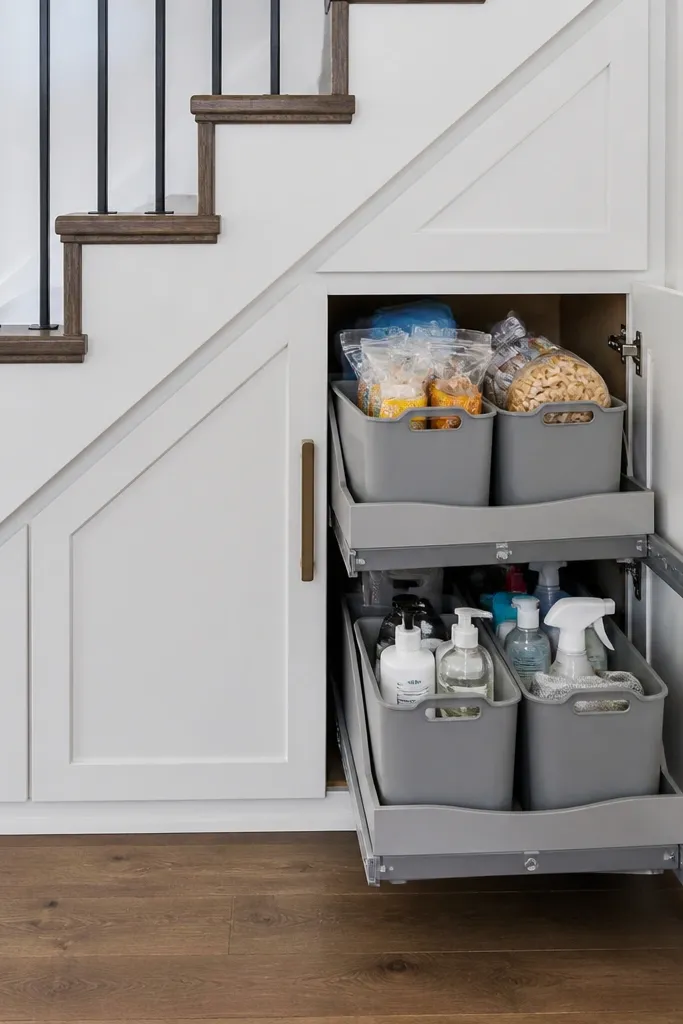
Build the cabinet carcass and install a fixed shelf base at the correct height for your bin carriers. Attach track systems or cleats so the bins slide out smoothly but stop before falling — leave 1/8 to 1/4 inch clearance for friction. Make carriers from plywood frames with 1/2-inch bottoms and use bins that fit snugly into the carrier opening. Install solid doors on soft-close hinges and finish the exterior to match your trim for the built-in look.
Removable bin carriers are a clean way to keep the under-stairs area organized without building a drawer for everything. The inside looks neat because bins sit on tracks or cleats, and the outside looks like a simple cabinet with solid doors. When you need items, you pull the whole carrier out and carry it to the kitchen or laundry. The look is photogenic because you can keep bin colors consistent and wipe the cabinet interior easily. This is best for cleaning supplies, laundry add-ons, or pantry extras that you don’t want scattered around.
Skip thisAvoid carriers that rely on friction alone; heavy bins need mechanical stops.
Editor's noteChoose bins with straight sides so they slide out cleanly; tapered bins snag on tracks.
15. Two-Tone Cabinet with Dark Lower Storage and Light Doors
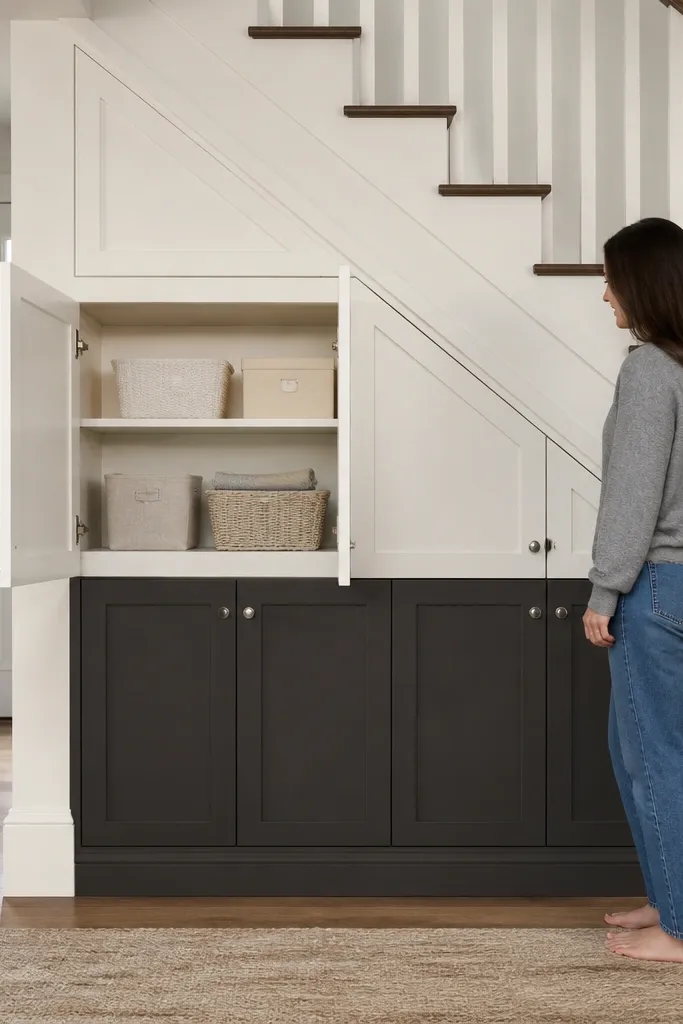
Two-tone color is a fast way to make under-stairs storage look styled instead of plain. Keep the doors and upper trim light to match the hallway brightness, then go darker on the lower storage to hide bulk items visually. The contrast creates a clear boundary line that helps the eye ignore the stair slope. Choose matte paint and keep the sheen consistent; mixed sheen looks messy in photos. This works well when your under-stairs area is visible from multiple angles, like a hallway near the stairs.
Frame the carcass first and decide a clean split line — for example, a horizontal seam at around 40 inches from the floor. Paint the interior backs and shelf areas the lighter color so open areas feel bright, then paint the door fronts and lower panel in the darker shade. Install doors and shelves after painting so you do not chip edges when mounting hardware. Add matching pulls in a single finish and apply a clear topcoat to protect the darker paint from scuffs.
Use painter’s tape to mask the seam line perfectly; press the tape edge firmly to prevent paint bleed.
Avoid using two-tone colors without a sharp seam; blurry lines look DIY.
16. Slim Closet with Recessed Vertical Pull Handles
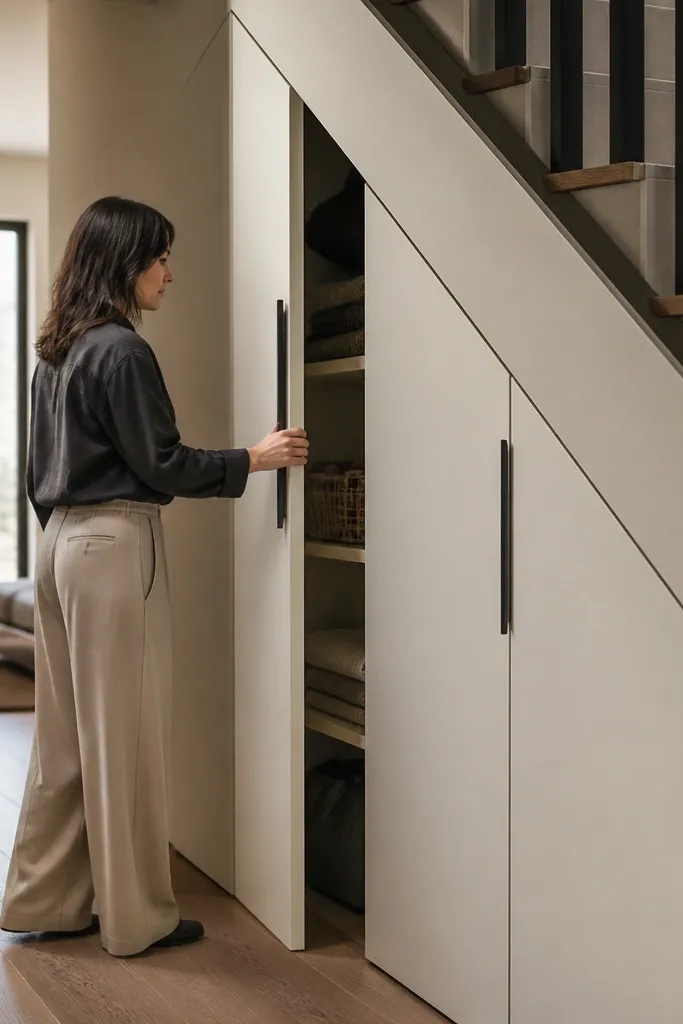
Build the carcass with 3/4-inch plywood and set the door width so it stays flush with trim. Install recessed pull hardware by routing shallow pockets on the door back so pulls sit even and do not protrude. Hang doors with soft-close hinges and keep consistent reveals around the frame. Add shelves inside with adjustable standards at 2-inch increments, then paint the interior matte and seal the door faces for durability.
Recessed vertical pulls make a slim under-stairs closet look premium because the hardware disappears into the door plane. This is the look you want when the space is narrow and you do not want bulky knobs. Pair the recessed pulls with tall, narrow doors that follow the slope visually through consistent trim lines. Inside, use adjustable shelves or a single vertical section for hanging items if you have coats or bags. It’s a clean, modern look that fits contemporary hallways and keeps the storage elegant.
Skip thisAvoid adding hardware after paint touch-ups; mismatched paint around pulls looks obvious.
Editor's noteDry-fit the recessed pulls before paint; alignment errors are much easier to fix on bare wood.
17. Pegboard + Sliding Tray System for Crafts or Tools
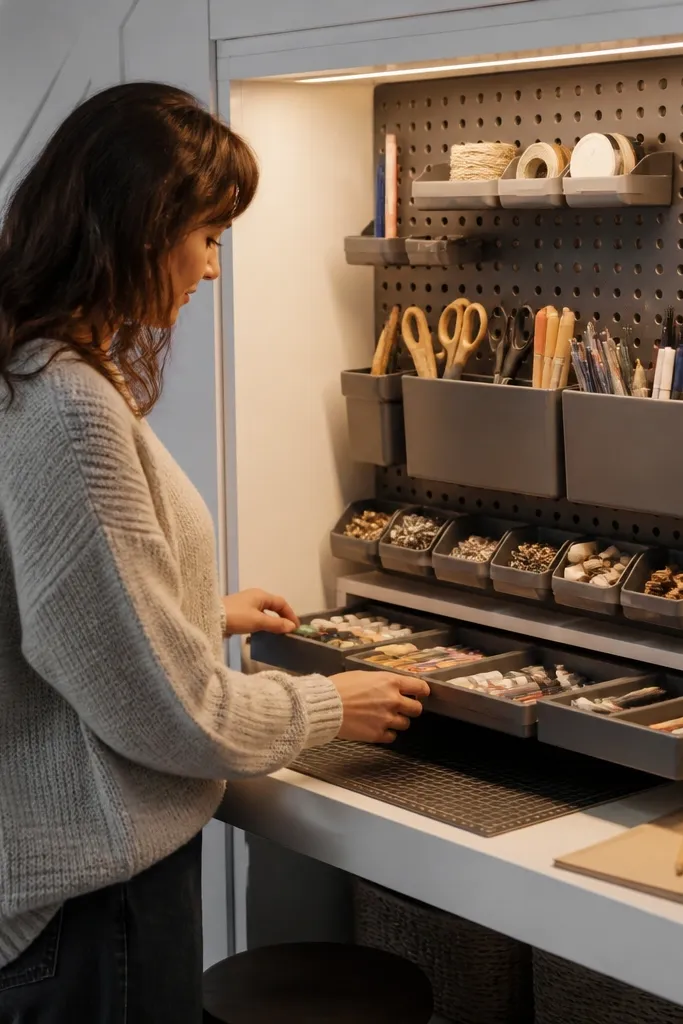
Install the pegboard back panel first on furring strips so it sits flat and stable. Add vertical rails for sliding trays — you can use drawer slides for the trays — and build trays with plywood sides and a thin base. Mount hooks and small organizers on the pegboard, then position the tray heights so the most-used items sit around waist level. Finish by painting the pegboard and frame matte, then add a simple hinged door panel or sliding cover to hide the system.
This is a modern under-stairs storage solution when the space is for hobbies, craft supplies, or light tools. Pegboard gives you flexible mounting, and sliding trays keep small parts contained so they do not scatter when you pull something out. The look stays clean because tray fronts align and bins are labeled with consistent handwriting or labels. Add a solid door facade so the pegboard is hidden when you want a tidy hallway. The aesthetic is industrial-modern without looking messy.
Skip thisAvoid mixing tray heights randomly; uneven trays create a “junk drawer” look.
Editor's noteUse one tray depth across the system so your bins and tools sit consistently.
18. Glass Shelf Inserts with LED Strip Lighting in Base Cabinet
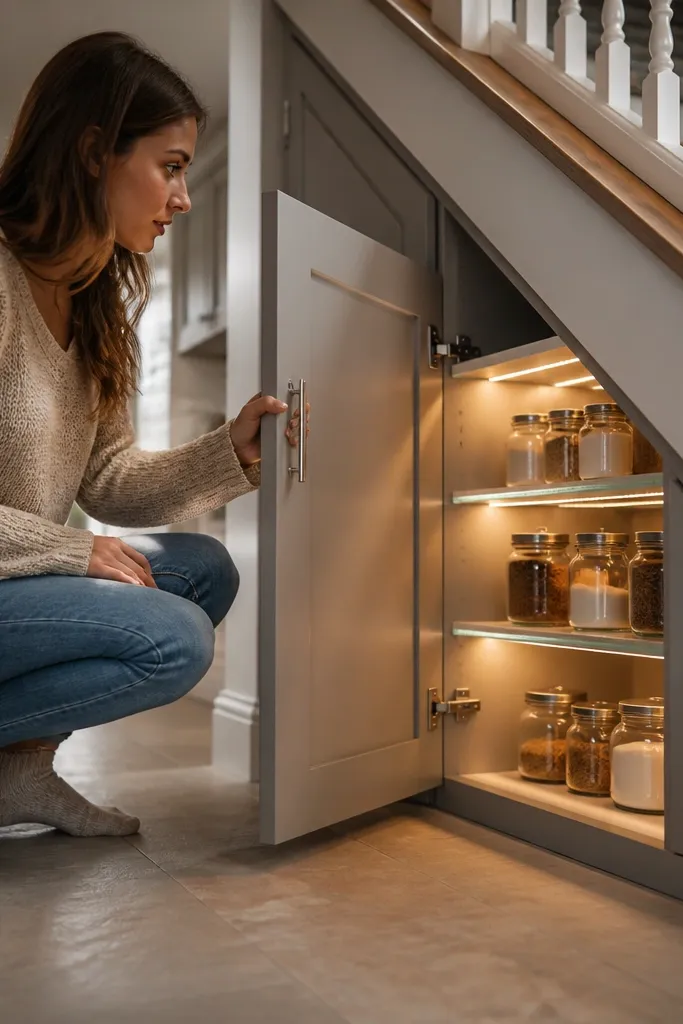
Build the base cabinet carcass and install a back panel so the LED has a clean mounting surface. Fit glass shelf inserts on top of shelf frames, and secure them with glass retainers so they do not shift. Mount an LED strip under the shelf line and wire it to a plug-in driver or a hidden switch — keep all wiring secured with clips. Finish by painting the cabinet interior matte and sealing the shelf frames, then test the LED brightness before closing everything up.
If you want the storage to look like designer built-in cabinetry, add lighting and transparent shelf elements. Glass shelf inserts make the interior feel lighter, and a warm LED strip under shelves gives a soft glow that photographs well. Keep the LED color warm (around 2700K) so it looks inviting, not blue. Use this for display-friendly items like framed photos, small decor, or neatly stacked storage boxes with labels. This one works best where the cabinet is visible at night or in a hallway with a dimmer light.
Skip thisAvoid clear glossy paint inside; it reflects LED glare and makes the shelves look messy.
Editor's noteUse diffuser channels for the LED strip so you do not see bright dots.
19. Raised Platform Shoe Closet with Vent Slits
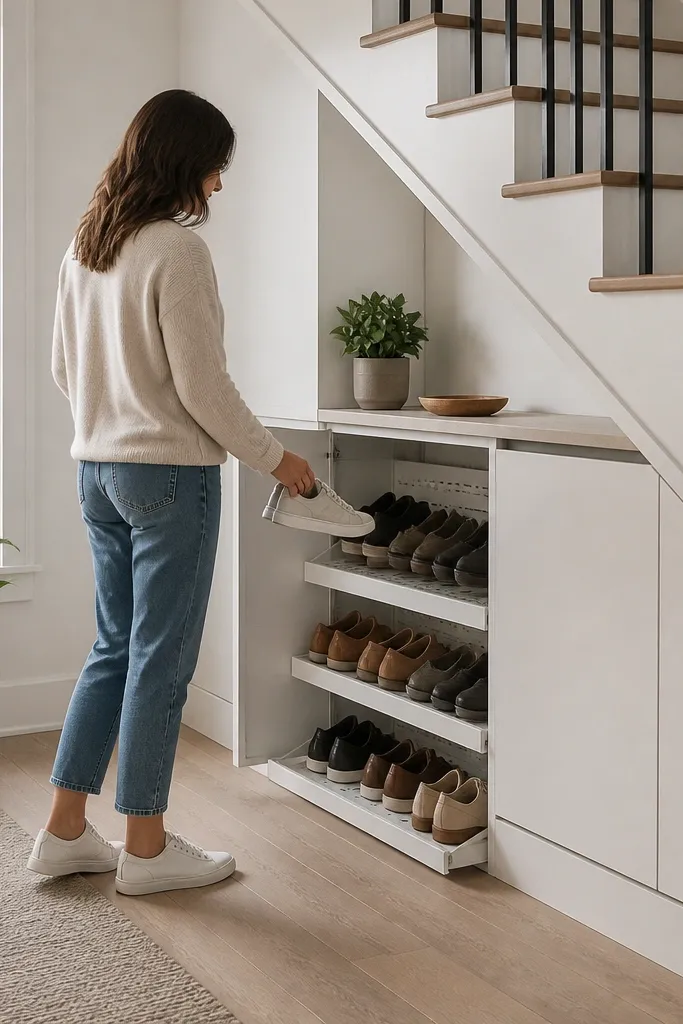
Shoes under stairs get smelly fast, and the solution has to look clean too. A raised platform shoe closet with vent slits keeps airflow moving while maintaining a crisp cabinet front. Build shelves with small gaps or vented panels so shoes dry out without turning the closet into a damp box. The look is photogenic because the cabinet fronts are uniform and the interior stays organized in pairs. This works best in mudrooms or entryways where shoes are the main storage need.
Frame the cabinet and install a raised base deck about 2 to 3 inches off the floor to keep air circulating. Build shoe shelves with a vented back or slatted panel so moisture can escape. Space shelves for shoe sizes by planning for 6 to 8 inches between shelf surfaces, then add a small lip so shoes do not slide forward. Finish the exterior doors or panels in matte paint and seal all interior surfaces that might get scuffed by wet shoes.
Add a removable tray for water drips so you can clean it quickly after rainy days.
Avoid fully sealed interiors; trapped moisture makes the smell linger.
20. Wall-Mounted Floating Shelves with Hidden Side Cabinets
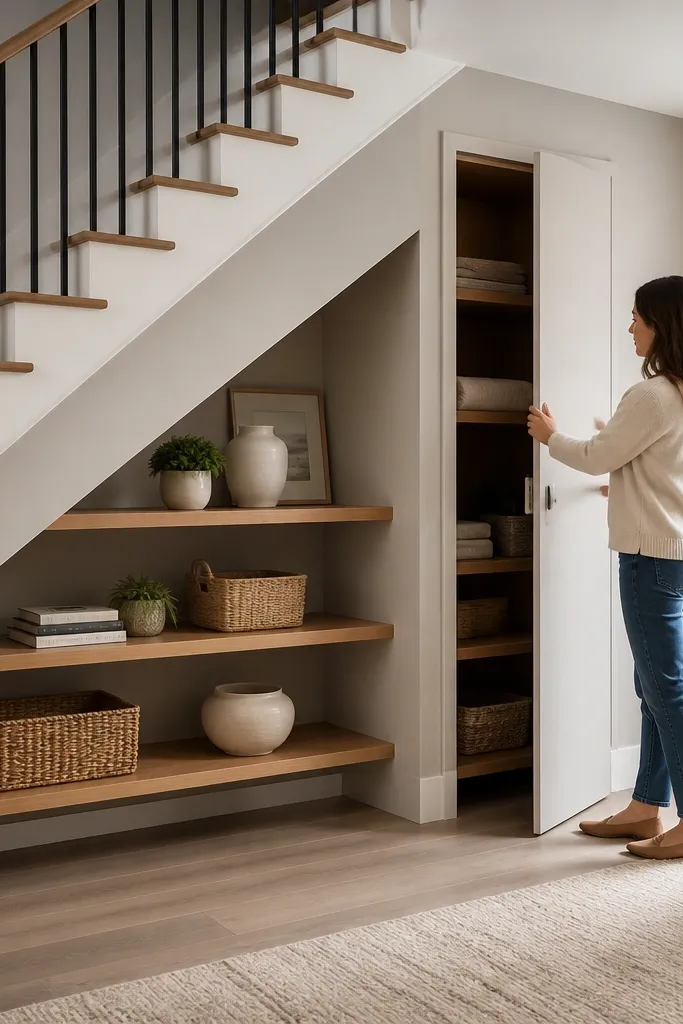
Mark the shelf layout and mount a ledger board into studs for the floating shelves. Build shelf frames from 3/4-inch plywood and anchor them to the ledger so the shelf stays level even if the stair slope is uneven. Create a narrow side cabinet behind a flush door panel, then install the door on concealed hinges for a smooth face. Finish by painting or staining the shelves and door to match, then add a small backer panel behind the shelves to stop dust from showing.
Floating shelves under the stairs look modern and light, and they photograph well because the lines feel airy. To keep the storage effective, pair them with hidden side cabinets behind a flush door panel so the “real storage” stays closed. The shelving gives you a display zone for baskets and decor, while the hidden side cabinet holds bulk items. This style works when the under-stairs area is deep enough to hide a cabinet on the side, not just in the narrow center. It suits modern hallways where you want clean lines instead of a bulky box.
Skip thisAvoid attaching floating shelves only to drywall; use studs or a solid ledger.
Editor's noteUse a laser level or long straight edge to set shelf level; floating shelves show every wobble.



