
1. Honed Limestone Ledger with Warm Gray Grout
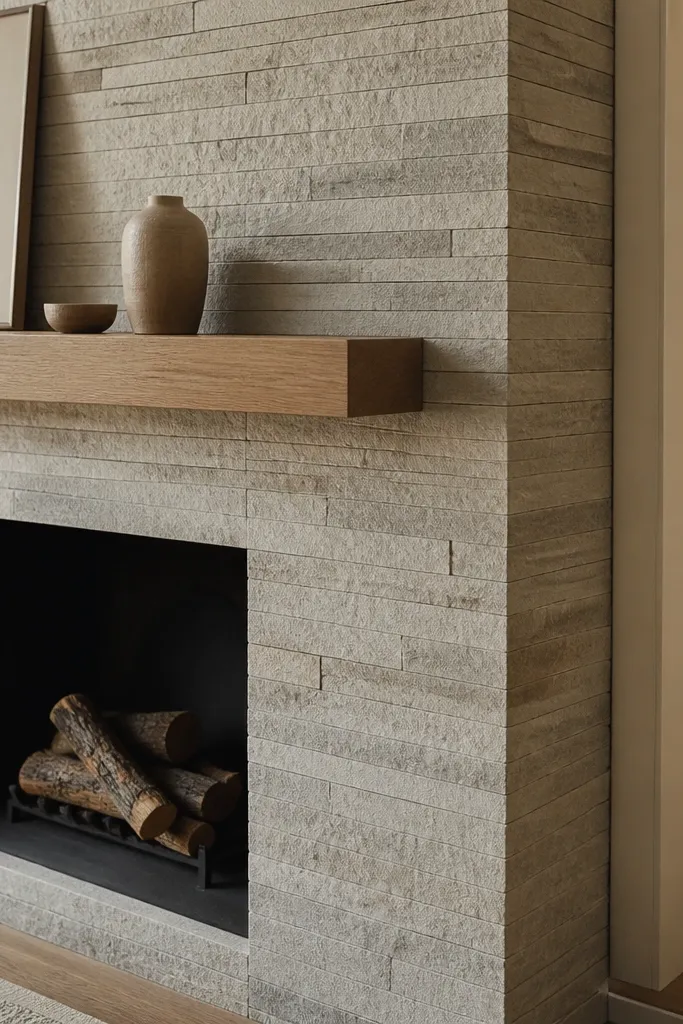
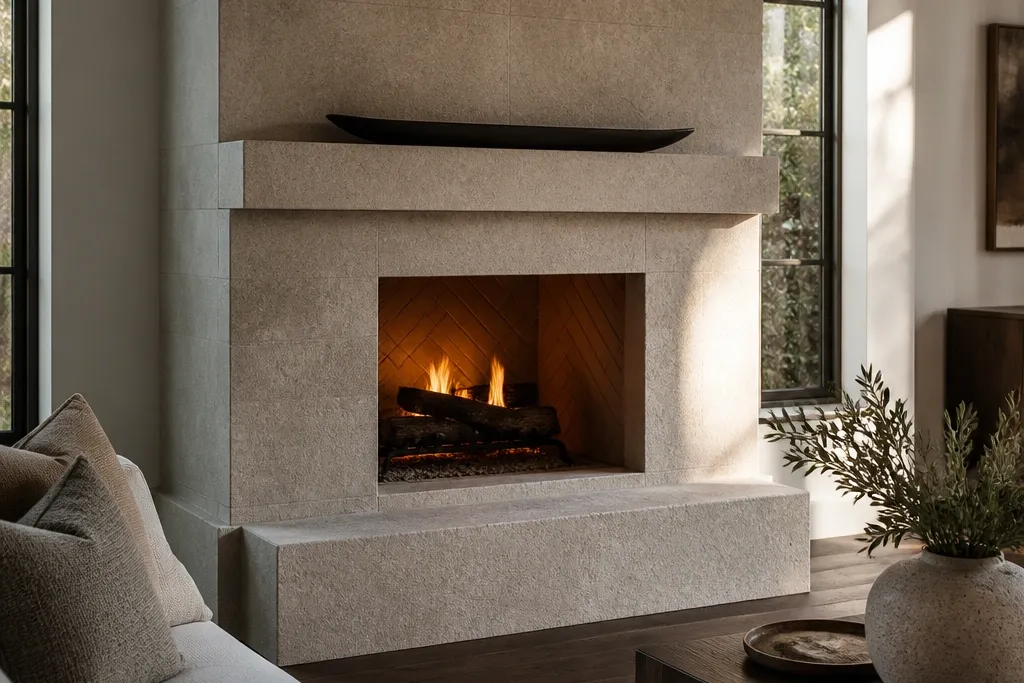
This look turns a fireplace into a soft, modern focal point without losing warmth. Honed limestone has a matte surface that doesn’t glare, and the stacked ledger pattern keeps lines tight so it reads modern from the doorway. Warm gray grout makes the seams look designed instead of harsh, which is what keeps photos feeling cozy. Pair it with a dark mantel (black walnut stain or charcoal-painted wood) so the light stone doesn’t feel washed out.
Start by dry-laying your first course so you can choose a seam pattern that lands centered on the firebox opening. Use a thinset rated for stone and a 1/4 in. Notch trowel, then set ledger pieces from the bottom up, checking level every few rows. Tape a straight level line for the mantel surround border, then finish the corners with cut bullnose trim pieces. After the stone cures, grout with a warm gray mix, wipe immediately, and seal with a matte stone sealer to keep the look low-sheen.
Mix grout in smaller batches so the tone stays consistent across the whole surround.
Don’t use bright white grout — it makes ledger seams look like tiling, not a built-in hearth.
2. Charcoal Tumbled Fieldstone with Blackened Steel Trim
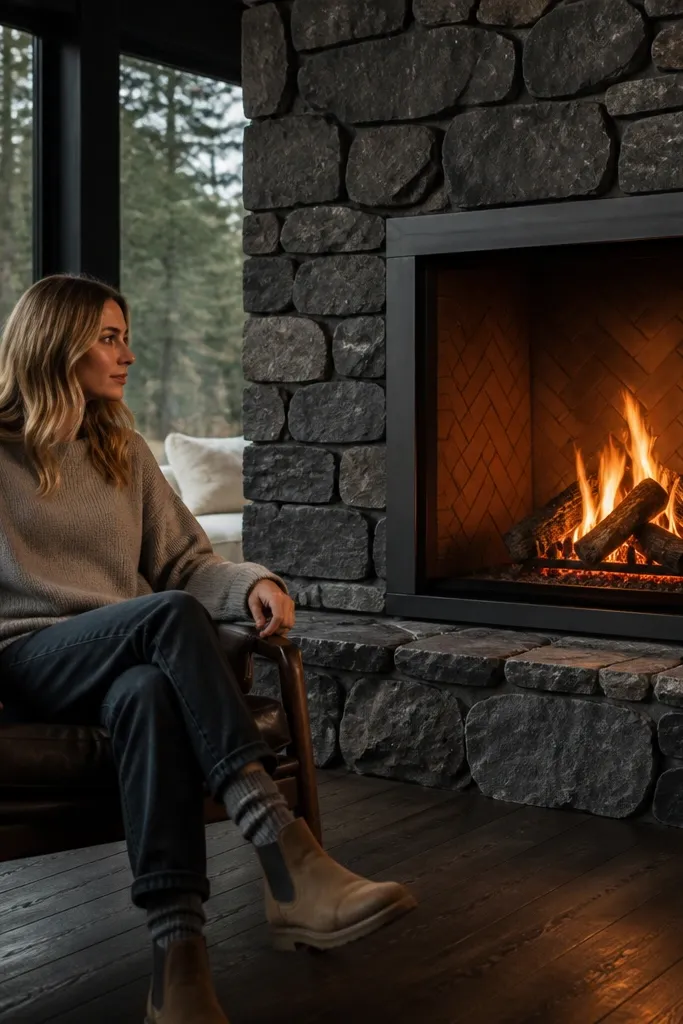
Charcoal tumbled fieldstone feels warm because the stone has natural depth and irregular edges that catch light gently. The modern part is the blackened steel trim — it gives you straight, dark lines that calm the texture. This combo looks great in rooms with black window frames, matte lighting, or dark floors. A simple mantel (light oak or walnut) keeps it from turning into a dark cave.
Build a finished perimeter first: install a metal or cement board backer, then mount a steel trim frame around the firebox opening. Set fieldstone pieces with thinset, leaving consistent space for grout so the irregular shapes don’t look random. Keep the top course aligned and trim the worst outliers at the edges so the steel border stays clean. Grout with a charcoal or near-charcoal color, then apply a dry-brush matte sealer to avoid heavy shine on the bumps.
Lay stone in a spread-out pile and mix pieces by tone before setting so you don’t end up with one darker block.
Skip glossy sealers — they make tumbled texture look wet in daylight.
3. Split-Face Travertine with Light Limewash
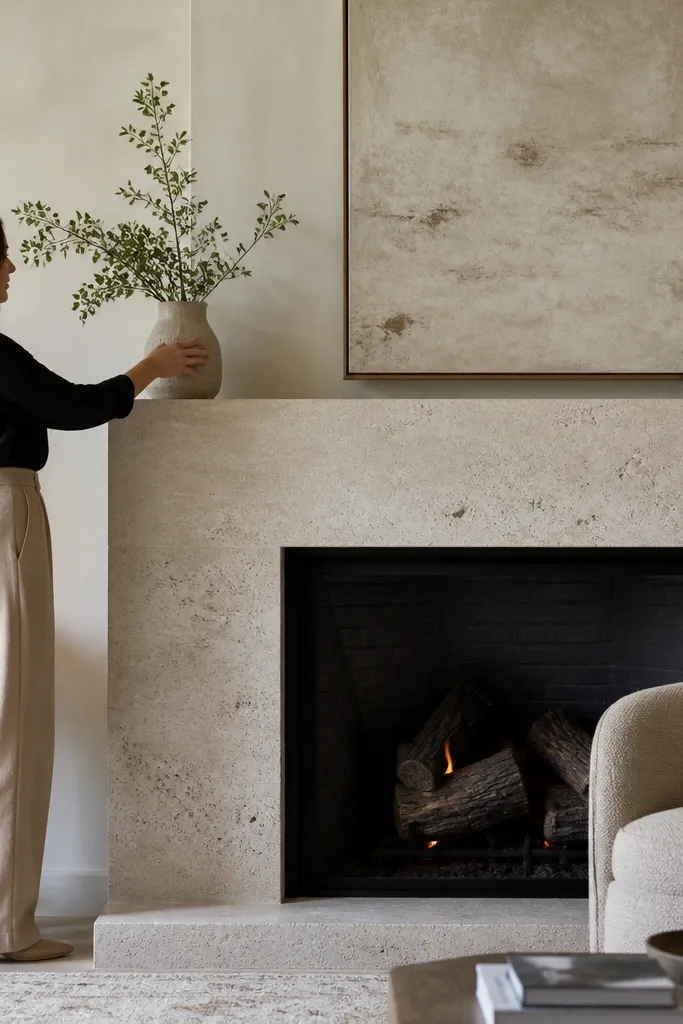
Install a flat cement board base and use a polymer-modified thinset for stone. Set travertine tiles with a slightly staggered pattern so the seams don’t form distracting horizontal bands. After curing, brush on a diluted limewash mixture in thin coats, then wipe back to control how opaque it is. Finish with a breathable stone sealer only if your stone is highly porous; otherwise, keep the limewash matte and skip heavy topcoats.
Split-face travertine has enough texture to read cozy, but it’s still clean enough for modern rooms. The limewash finish is the trick: it softens color variation, gives a slightly dusty matte look, and makes the hearth feel warm even when the room is cool-toned. This is one of the best “modern rustic” options because the base material looks tailored, then the finish makes it forgiving and photo-friendly. Use a light wood mantel to keep the palette bright and inviting.
Skip thisDon’t seal before limewash — it traps the wash and makes patchiness harder to fix.
Editor's noteTest limewash on scrap pieces and let it dry fully — it lightens as it cures.
4. Whitewashed Ledger Stack with Charcoal Grout
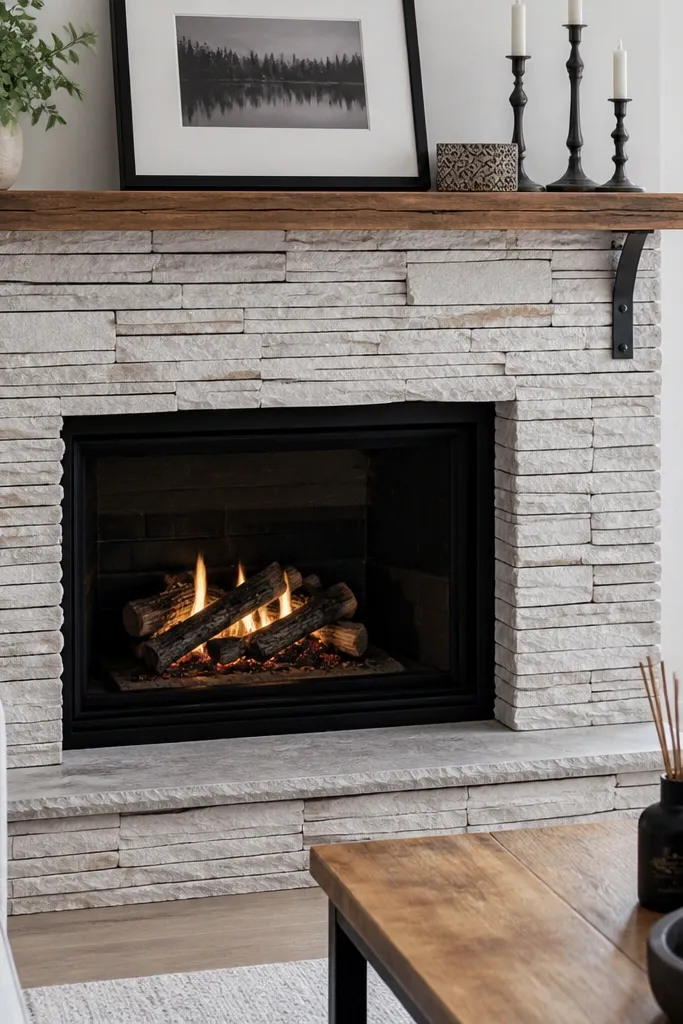
Whitewashed ledger stone reads modern because the pattern is controlled, but the warmth comes from the grainy texture underneath the wash. The key is charcoal grout — it frames the ledger lines and adds contrast that looks sharp in photos. This works especially well in rooms with white walls, black hardware, and warm lighting. Keep the mantel simple and dark so the stone doesn’t look like it belongs in a beach cottage.
Set stacked ledger stone with grout lines you can measure — use spacers if your tiles don’t have built-in lugs. After thinset cures, apply a whitewash using a thick brush and wipe back quickly so you don’t end up with a solid white panel. Grout after the wash is fully dry, using a charcoal grout color and a grout float to pack seams. Seal lightly with a matte sealer so the wash doesn’t turn chalky when you clean it.
Use painter’s tape to protect the mantel and firebox opening while you whitewash the stone face.
Don’t seal too soon — the wash needs time to set or it can smear.
5. Modern Stacked Stone Box Fire Surround with Recessed Shelf
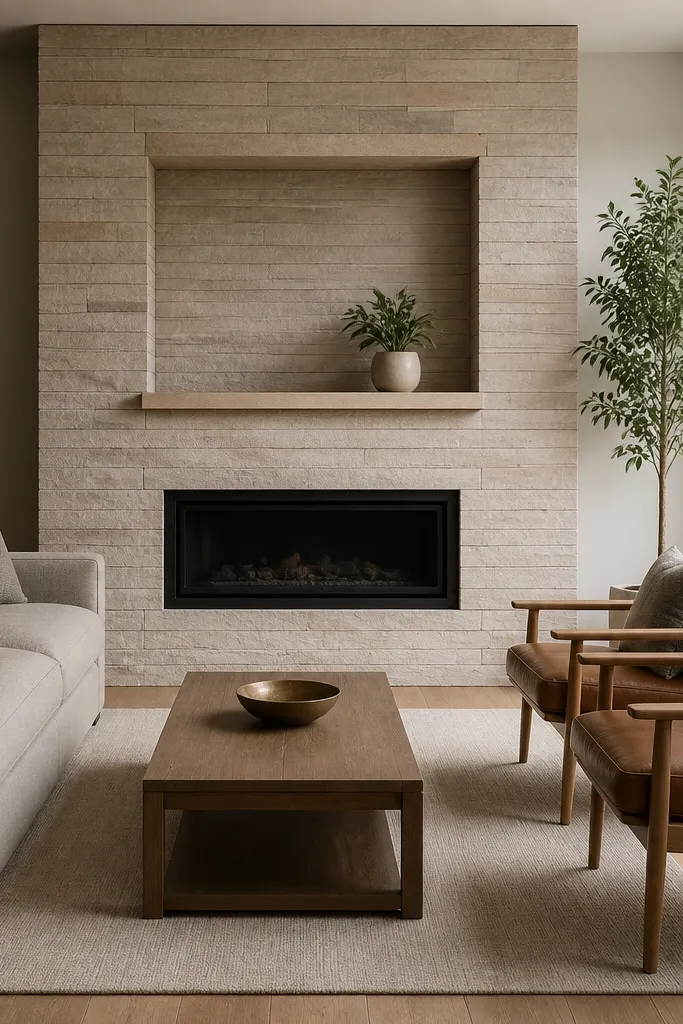
This idea uses a “box” surround to make stone look architectural. The recessed shelf creates a shadow line that reads crisp and modern, while the stone face stays textured and warm. It’s also practical: you get a built-in spot for a candle tray or small plant without cluttering the mantel. The look works best with uniform stacked stone because you want the box edges to feel straight.
Frame the recess first with wood or metal studs, then cover with cement board so the shelf stays flat. Install ledger stone on the vertical faces, then use smaller trim pieces to wrap the shelf edges cleanly. Keep the recess depth around 2-3 in. So the shadow line is visible in daylight. Finish with matching grout and a matte sealer so the shelf doesn’t look glossy and oily.
Plan your shelf height so the top lands roughly at eye level when standing — it looks intentional in photos.
Don’t make the recess too shallow; a 1 in. Recess often reads like a mistake, not a design.
6. Herringbone Accent Band Around the Firebox
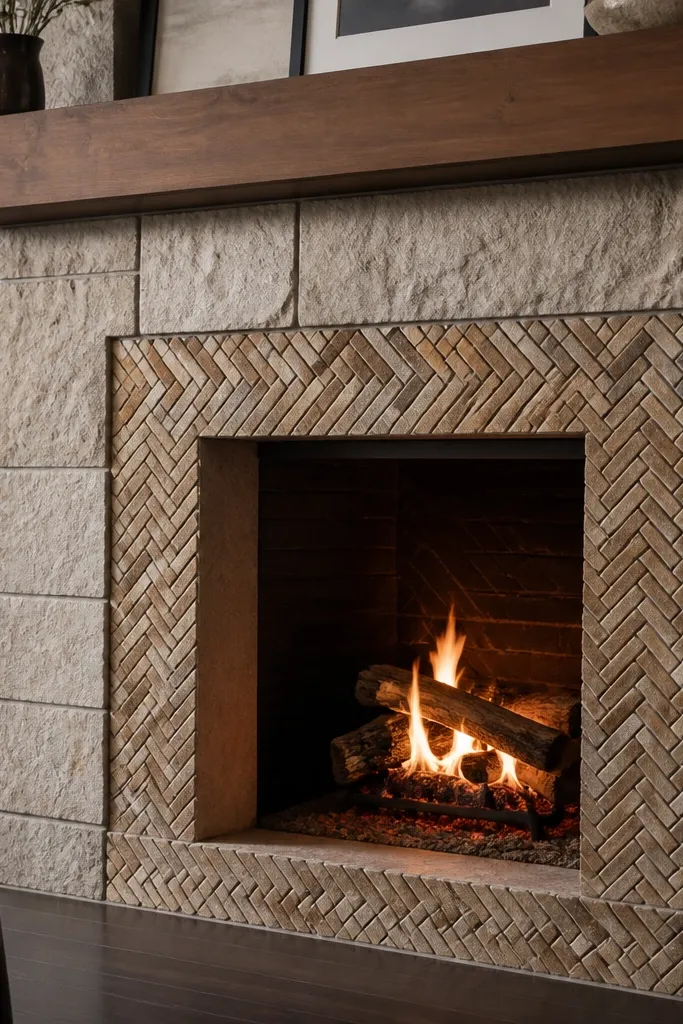
Choose one main stone (ledger or small rectangular) and keep it consistent across the surround. Measure the firebox opening and mark a centered band width, usually 10-14 in. Wide, around the opening. Install the herringbone band using small-format stone mosaics cut to fit, then grout and seal after everything cures. Match grout color to the main stone so the band reads like framing, not a separate project.
If your fireplace is already stone or you’re doing a simple ledger, add a herringbone band to make it feel modern on purpose. The herringbone pattern gives you movement and a tailored edge without covering the whole hearth in busy detail. Warmth comes from keeping the main field stone neutral and letting the accent band be the design moment. This is a great option when you want photos to pop but you don’t want a full remodel.
Skip thisDon’t introduce a second grout color — it makes the accent look like a patch.
Editor's noteUse a laser level to keep the band perfectly centered; crooked framing shows immediately in photos.
7. Thermal Gray Stone with Floating Mantel and Slim Hearth Ledge
A floating mantel makes stone feel modern because it breaks the heavy visual block. Pair thermal gray stone (smooth or lightly honed) with a slim hearth ledge so the lower line feels light and warm. This look works in rooms with modern furniture lines because the mantel reads clean and the stone texture adds comfort. It also photographs well because the mantel underside creates a crisp shadow that separates materials.
Install a stone surround using a smooth-ish stone or thin ledger, keeping the face thickness consistent. Build a mantel support using steel angle brackets inside the surround, not just screws into stone. Leave a 1/2 in. Gap between mantel and stone for an intentional reveal. Add a slim stone or wood hearth ledge at the bottom, then grout and seal so the ledge doesn’t stain.
Paint or powder-coat your bracket color to match the mantel so it disappears in tight photos.
Don’t rely on masonry anchors alone for a floating mantel; use proper bracket support.
8. Stacked Limestone with Vertical Accent Pillars
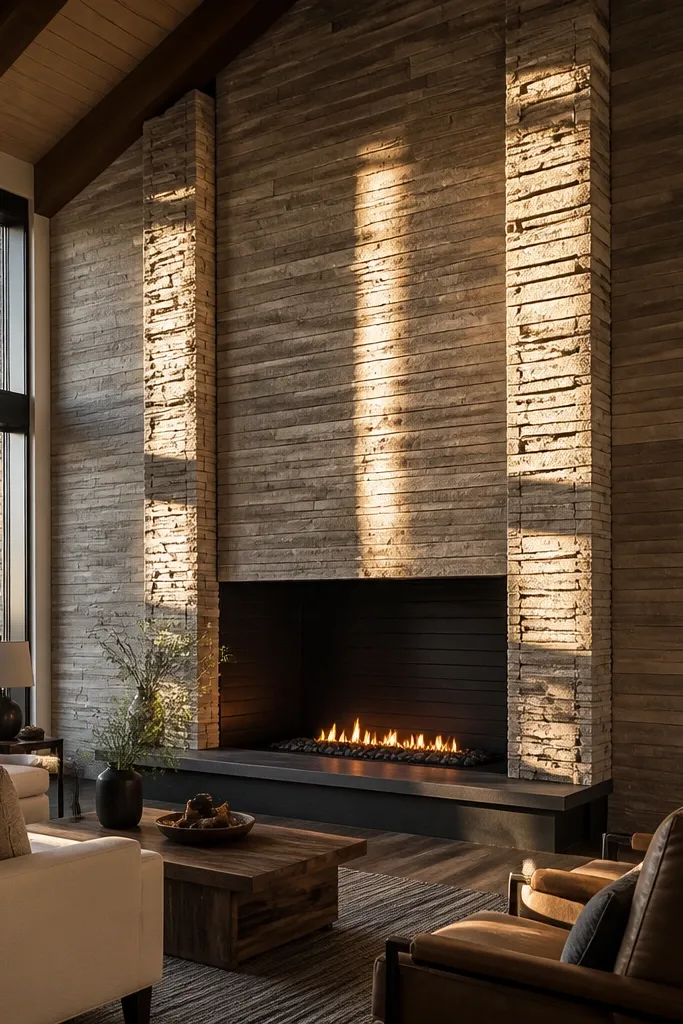
Vertical accent pillars make the fireplace look taller and more modern, especially in rooms with high ceilings. The stacked limestone base stays warm and neutral, while the pillars add structure and frame the opening. It also helps visually if your wall is a little wide for the firebox — the pillars balance the proportions. Choose stone that is similar in tone but slightly different in texture for the pillars so it looks designed, not accidental.
Set the main stacked stone field first, then measure pillar widths based on the firebox center. Install pillar stone pieces with tighter seams so the edges look straight. Use corner trim or metal edge strips on the outside edges of pillars for a crisp line. Finish by grouting with a tone close to the limestone and sealing so the pillars and field have matching sheen.
Keep pillar height consistent with the full surround, not stopping above the hearth — broken pillars look unfinished.
Don’t use wildly different color stones for pillars; it reads like a patchwork wall.
9. Rustic Stone Surround with Smooth Concrete Mantel Shelf
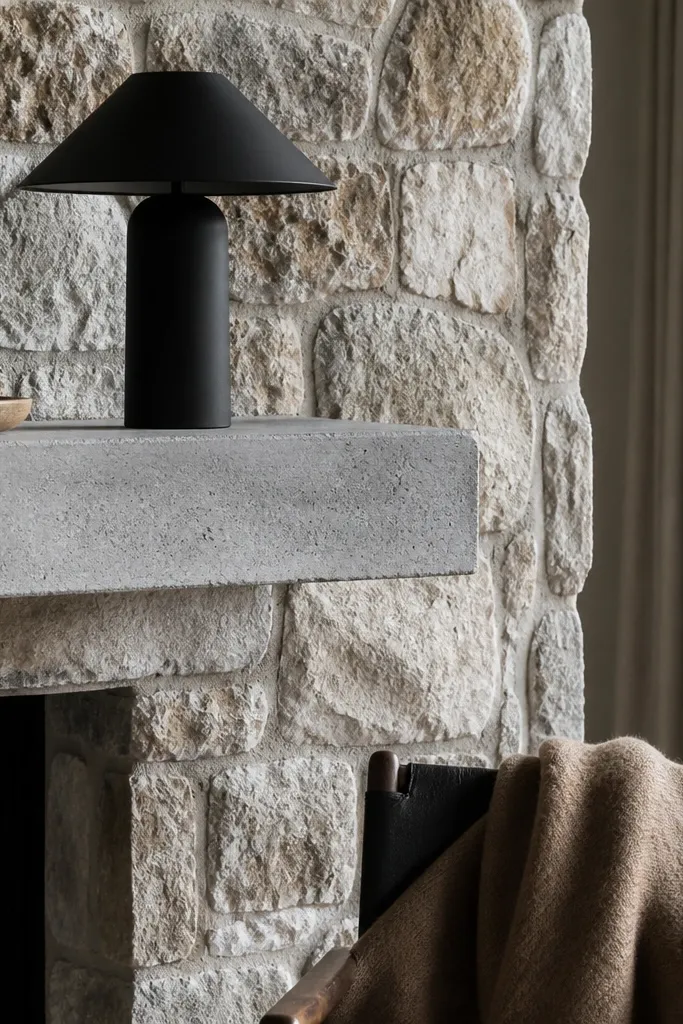
This is a modern trick: pair textured stone with a smooth concrete mantel shelf. The stone face brings warmth through irregular texture, while the concrete shelf looks clean, industrial, and very photogenic. It works best when you keep the stone palette earthy — cream, taupe, or warm gray — and the concrete in a light gray. The result is cozy but not old-fashioned because the mantel has a contemporary material finish.
Install stone on the surround using cement board and thinset, keeping the layout tight around the opening. Build or buy a concrete mantel shelf with a straight edge, then mount it on steel angles rated for the weight. Keep a 1 in. Overhang so the stone feels framed. Seal the concrete with a penetrating sealer and seal the stone matte so both surfaces read intentional under warm bulbs.
Dry-fit the shelf on cardboard first to confirm the overhang clears your firebox trim and any venting.
Don’t use glossy concrete sealers; they create glare streaks in daylight.
10. Sawn-Limestone Panels with Narrow Mortar Lines
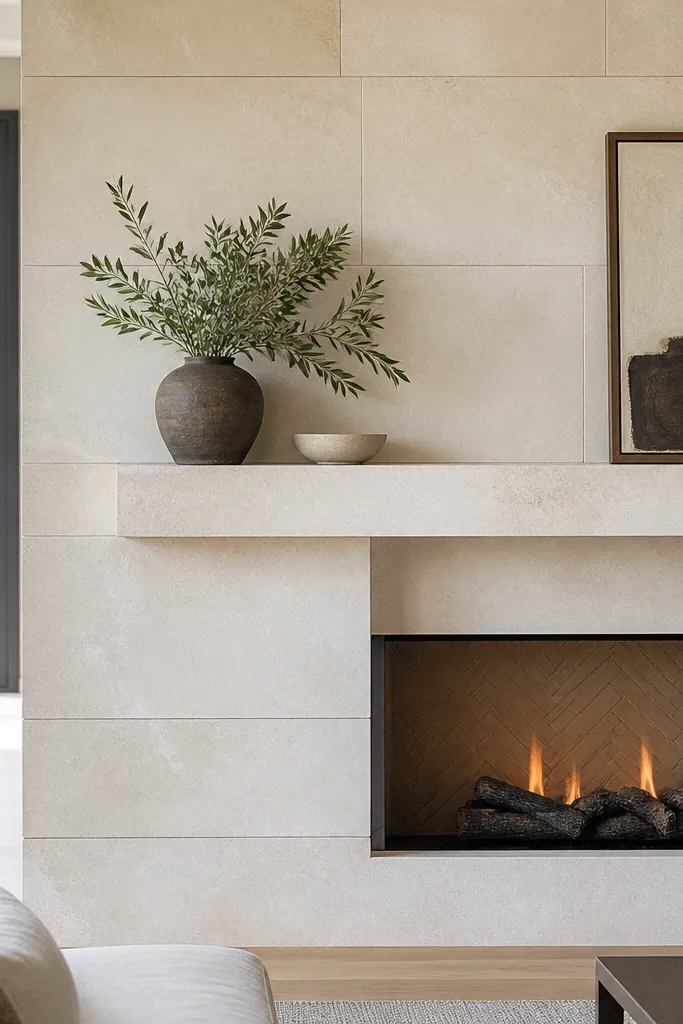
Pick stone panels with similar thickness so you don’t fight height differences. Use a 1/8-3/16 in. Grout joint approach by using spacers and consistent thinset thickness. Start at the center of the opening and build outward so the grid stays symmetrical. After grouting, scrub excess grout with a damp sponge and seal with a matte or satin penetrating sealer.
Sawn-limestone panels look modern because the stone is cut into consistent rectangles, but warmth comes from the natural variations and soft color. Narrow mortar lines make everything feel precise and built-in. This is one of the cleanest options for people who want stone without the “cottage” feel. It also photographs well because the pattern creates straight, calm geometry.
Skip thisDon’t vary joint widths — wide and narrow seams kill the modern look fast.
Editor's noteUse a white or light-gray thinset under light stone so you don’t get shadowing through the joints.
11. Honey Oak Mantel with Walnut-Color Stained Stone Surround
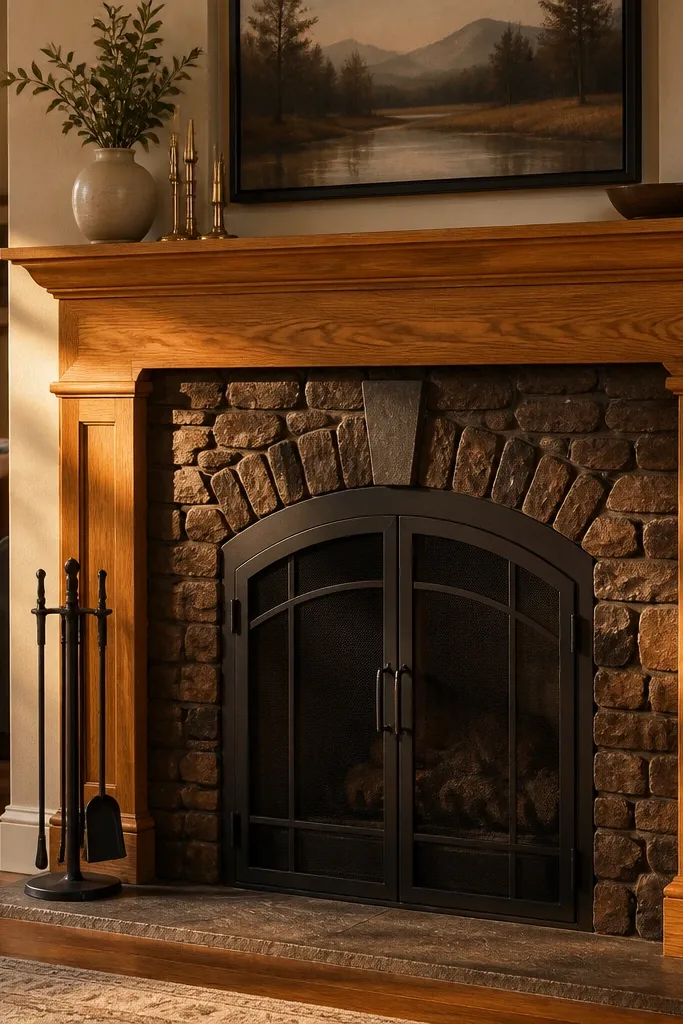
If your stone is already in place but it feels too pale, staining can bring warmth without changing the layout. A walnut-toned stain deepens the stone’s undertones and makes the hearth look cozier in low light. The modern part is the clean mantel pairing: honey oak against darker stone adds contrast and keeps the overall look balanced. Use this when you have a neutral stone (cream limestone, light travertine) and you want it to feel more grounded.
Clean the stone thoroughly and let it dry completely before staining. Apply a penetrating stain in sections with a brush, then wipe back quickly to control how dark it gets. Work from top to bottom so drips don’t create streaks. Once dry, seal with a matte penetrating sealer to lock in the tone and make future cleaning easier.
Tape plastic drop cloths exactly along the grout lines; stain can bleed and tint joints darker than you want.
Don’t skip a test patch — stone porosity varies and you’ll get blotches if you commit blindly.
12. Two-Tone Stone: Light Field with Dark Base Hearth
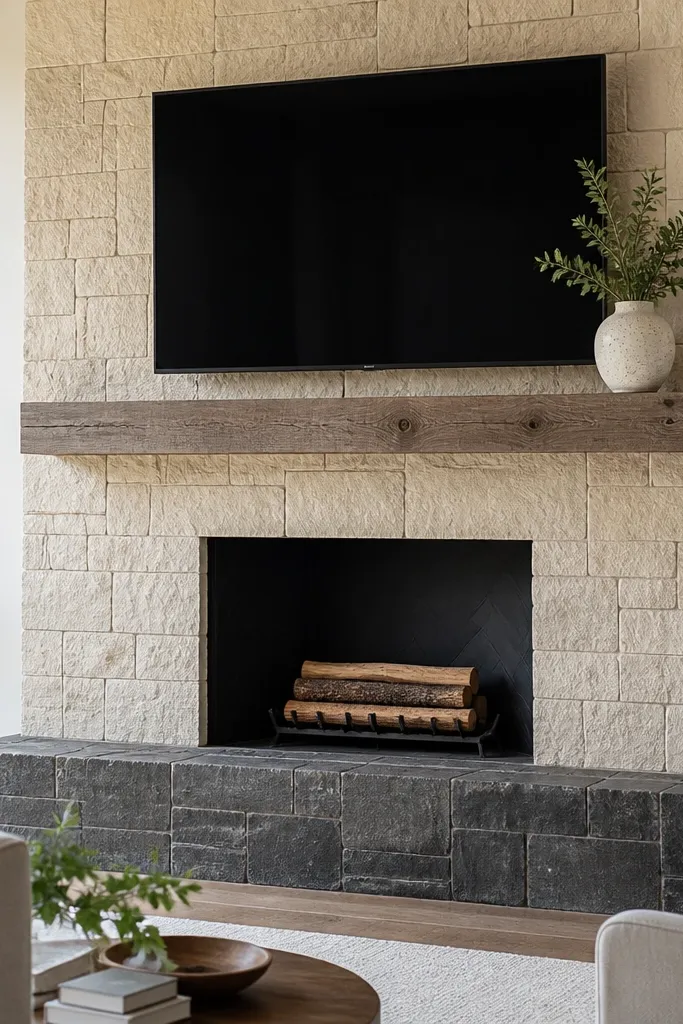
Two-tone stone makes a fireplace look designed, not random. Keep the surround light and warm so it feels cozy, then switch to a darker stone for the base hearth line to anchor the whole look. In photos, the contrast creates a clear visual boundary that reads modern. This also hides scuffs and soot better on the lower area because dark stone disguises wear.
Set your light stone surround first, stopping at a clear line where the hearth base begins. Install a darker stone hearth base with straight, even courses so the transition line stays crisp. Use consistent grout color for the light surround, then use a darker grout mix for the base section. Seal both areas with matte sealer to keep the contrast from looking shiny or artificial.
Choose base stone that has similar thickness to the surround face so the transition line doesn’t step.
Don’t change stone thickness without a plan — it creates a shadowy ledge that looks accidental.
13. Blackened Steel Fire Screen Wall with Thin Stone Face
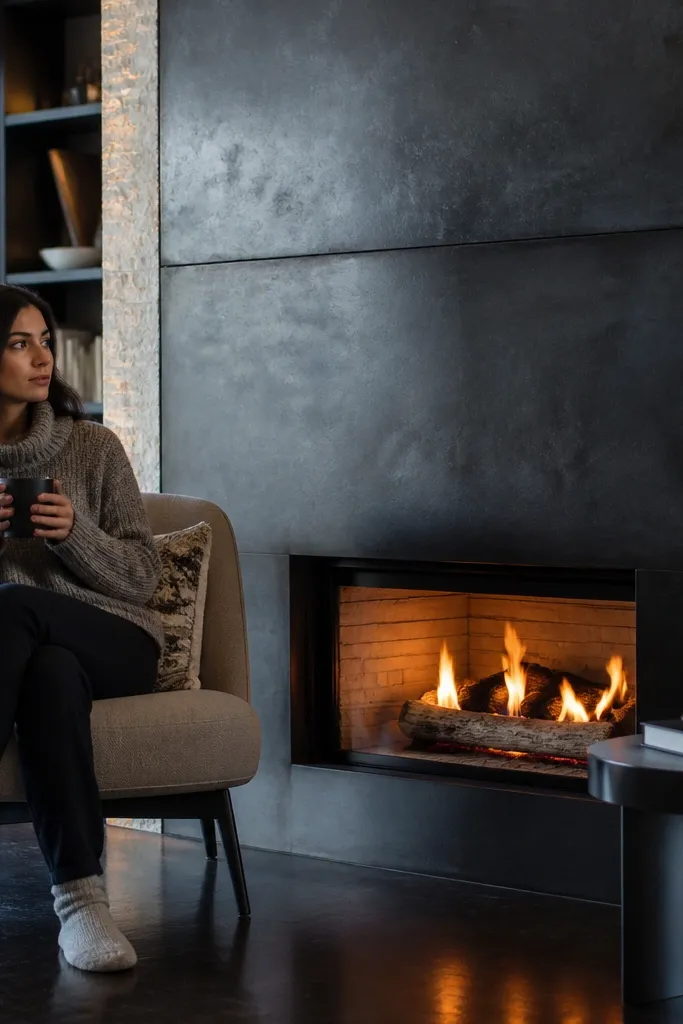
Install a cement board layer on the wall and attach a blackened steel panel behind or around the fire opening according to your fireplace setup. Apply thin stone veneer to the front face only, keeping joints tight and grout minimal. Leave a small reveal between steel and stone so the metal line reads intentional. Seal stone after cure, and use a matte finish so soot marks don’t show as much.
This look leans modern by using blackened steel as the design backdrop while keeping a thin stone face for warmth. The stone doesn’t need to be thick or heavy because the steel panel adds the bold line. It’s great for people who want a clean, contemporary hearth but still want stone texture to soften the room. Finish the mantel in warm wood so the black panel doesn’t dominate.
Skip thisDon’t cover the steel with grout — it blurs the whole modern line.
Editor's noteWhen cutting stone veneer, vacuum dust immediately and dry-fit pieces; clean edges make the steel reveal look sharp.
14. Rustic Stone with Board-and-Batten Mantel Frame
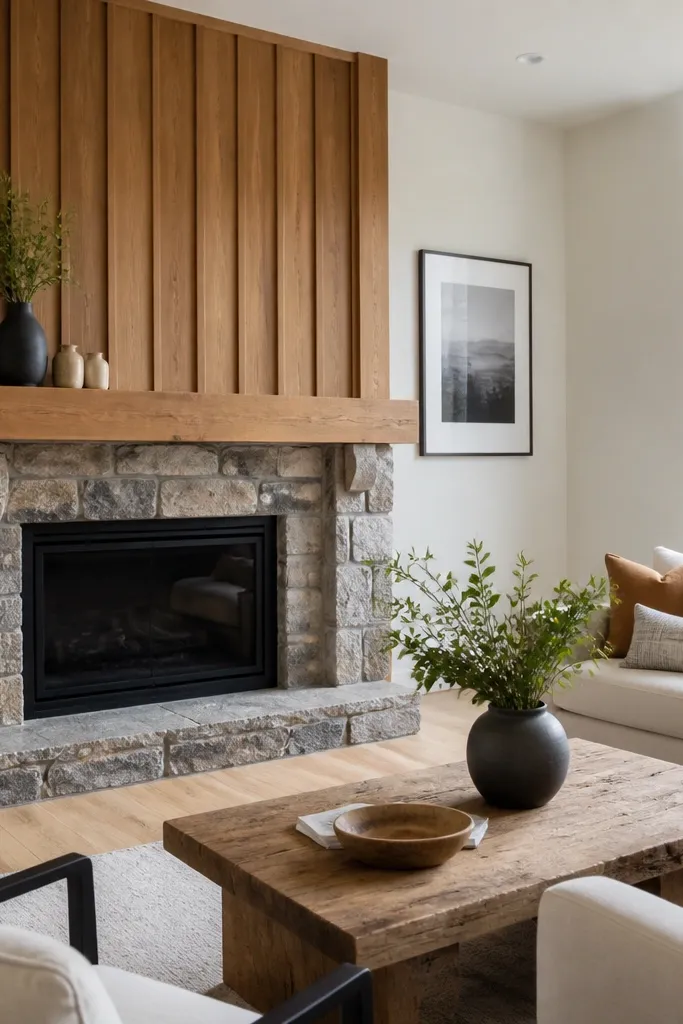
Board-and-batten framing turns a stone fireplace into something that feels intentionally built, not cobbled together. The stone provides texture and warmth; the board-and-batten adds straight vertical rhythm that reads modern enough for newer homes. Use warm, medium-tone wood so it looks cozy rather than cabin-y. This works especially well when you want the fireplace to blend with an accent wall or entry trim.
Frame the mantel surround with vertical battens spaced about 2-3 in. Apart, then cover with paint-grade boards. Mount the frame to studs, not stone, and use a solid backing board where the stone will meet it. Install stone veneer on the firebox surround while keeping the frame edges clean and straight. Caulk the joints between wood and stone with paintable caulk, then paint the wood in a warm white or soft greige.
Dry-brush paint on the battens after the final coat so the wood grain shows but edges stay crisp.
Don’t let stone veneer overlap the battens; the seam should be controlled and visible.
15. Ledge Stone with Chamfered Trim Reveal
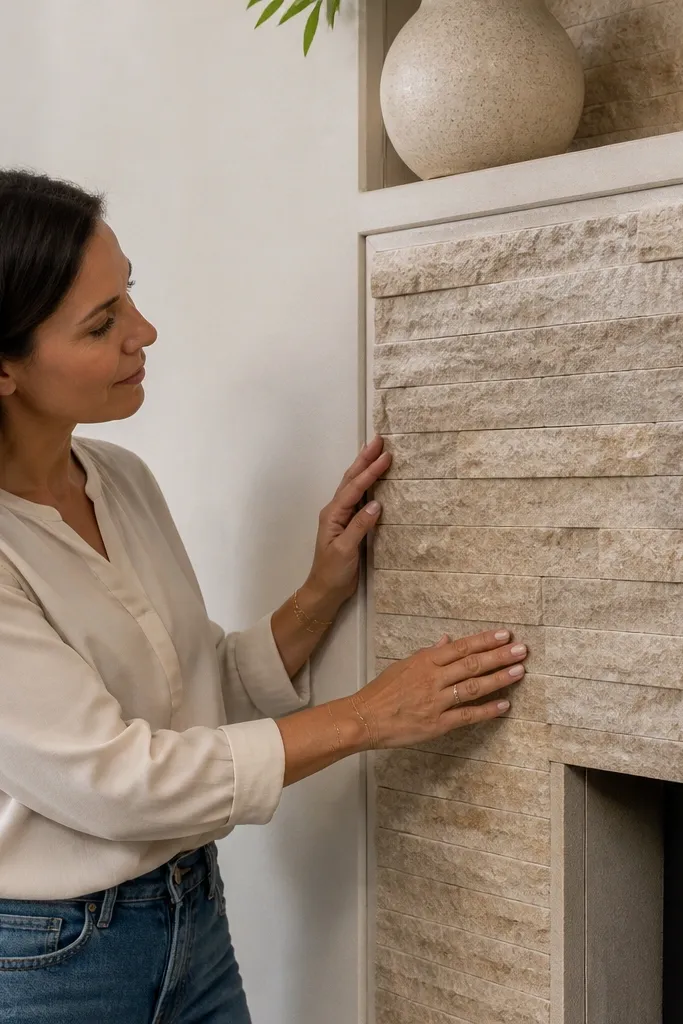
Install a stone underlayment layer and then set ledger stone so the outer edge stays slightly recessed for trim. Use chamfered stone trim or metal corner trim to create a 1/4-1/2 in. Reveal around the stone face. Apply thinset only where the trim contacts and keep pressure consistent. Grout the stone joints after cure, then seal with matte sealer so the trim doesn’t look shiny next to the stone.
A chamfered trim reveal makes ledger stone look built-in and modern because it gives the eye a clean “frame” line. The stone texture stays cozy, but the border feels architectural. This is a smart choice when your wall framing is slightly uneven; the trim hides minor gaps and keeps the look straight in photos. Pair with a warm wood mantel and simple hardware for a grounded, inviting hearth.
Skip thisDon’t skip the reveal; flush edges make ledger stone look like a sheet stuck on a wall.
Editor's noteUse a chalk line to keep the reveal width consistent around corners — it’s what makes photos look “designed.”
16. Tumbled Beige River Rock with Minimal Mortar
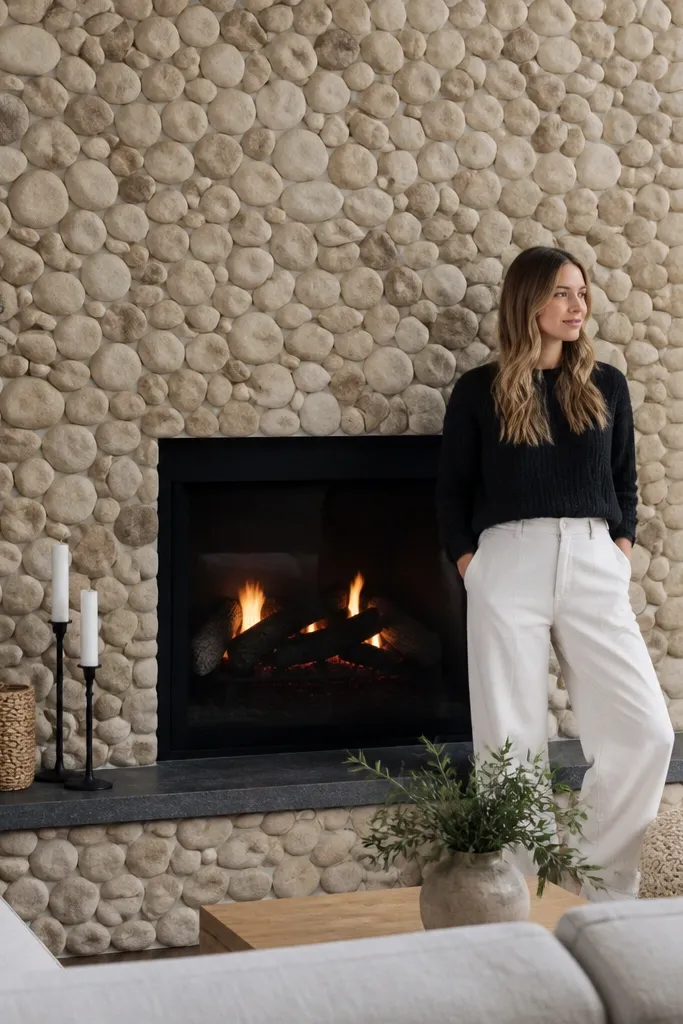
Use a mesh-backed river rock sheet system so you keep spacing consistent and avoid a chaotic finish. Install a flat cement board base and thinset, then press the sheets in place with a straight edge to keep the top course aligned. Use a grout that blends into the rock (sand or light taupe) and apply with a rubber float to fill gaps without flooding the stones. After curing, rinse gently and seal with a matte penetrating sealer.
River rock can look modern when you treat it like a texture panel, not a random pile. Beige tumbled stones warm up the room instantly because the color reads soft and natural. The modern part is the minimal mortar approach: you want tight spacing so the rock looks intentional and the face reads like one cohesive surface. This is perfect for rooms with light floors and warm lighting where you want the hearth to feel welcoming.
Skip thisDon’t over-grout — thick grout ridges turn it into a messy mosaic.
Editor's noteSeal the first time right after grout cures so the rock resists staining from soot and cleaner residue.
17. Ice Gray Slate Fireplace with Walnut Mantel
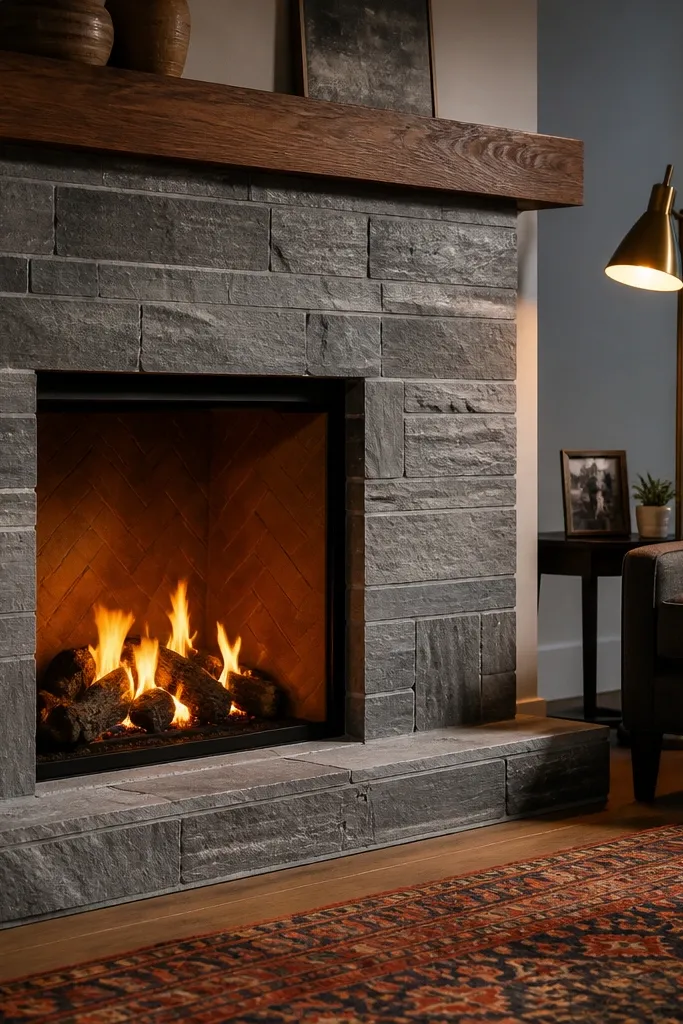
Select slate with consistent thickness and cut pieces for corners so you don’t end up with thick, uneven edges. Install with a thinset designed for natural stone and use spacers to keep grout joints even. Dry-fit the opening surround so slate chips don’t create noticeable gaps. After grouting, seal with a matte natural-stone sealer and avoid glossy top coats.
Slate brings a modern, slightly dramatic look while still feeling warm when you choose the right undertone. Ice gray slate has lighter edges that reflect warm light without looking cold and metallic. Add a walnut mantel to bring back the cozy factor and balance the darker stone. Keep grout lines medium-light so the slate doesn’t look like a dungeon wall.
Skip thisAvoid sealing with high-gloss — slate glare makes grout lines look dirty.
Editor's noteSort slate pieces by tone before install; mixing light and dark too aggressively looks patchy.
18. Cream Marble-Look Tile Accent with Stone Surround
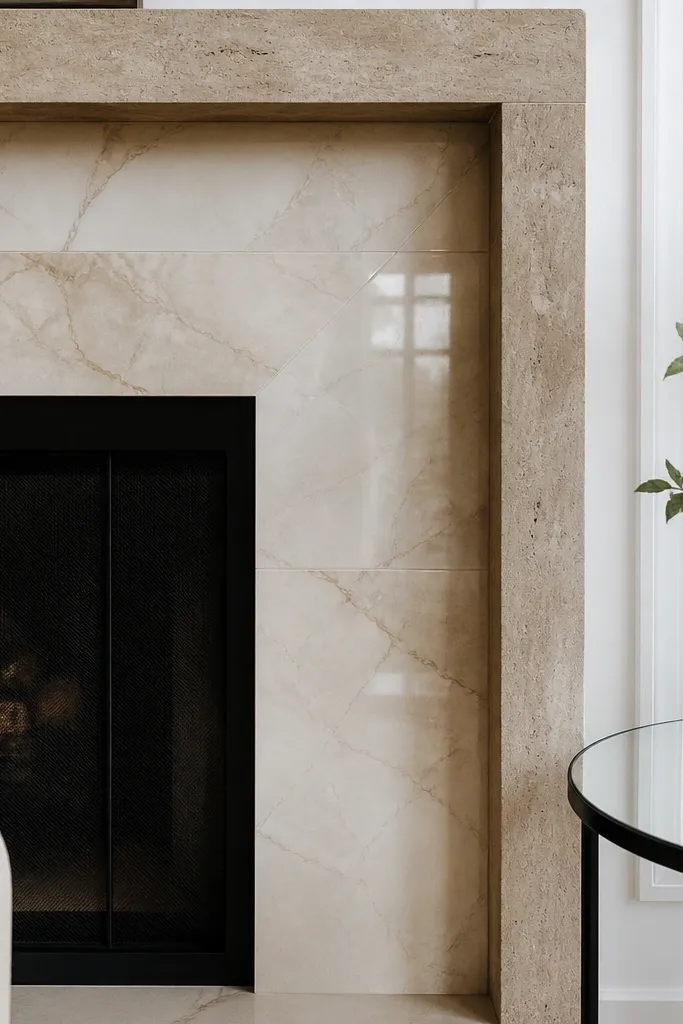
Install your stone surround first, leaving a clean border area where the tile accent will sit. Set marble-look tile pieces using thinset and a straight edge so the accent line stays even. Use a grout that matches the tile veining direction — usually light warm gray — and keep joint widths consistent. Seal the stone matte and seal the tile with an appropriate tile sealer if needed, based on the product instructions.
If you want modern quickly, mix materials in one controlled area. A cream marble-look tile accent around the firebox opening brings a smooth, upscale contrast, while the surrounding stone keeps the hearth warm and grounded. This works well when your room has smooth surfaces like painted walls, glass, or metal lamps. Keep the stone in a warm neutral so the tile doesn’t look too cold for the rest of the room.
Skip thisDon’t add tile everywhere; one accent band is what keeps it modern and not busy.
Editor's noteUse a template for the opening so your tile accent lines land symmetrically on both sides.
19. Oversized Stone Hearth Step with Tall Surround
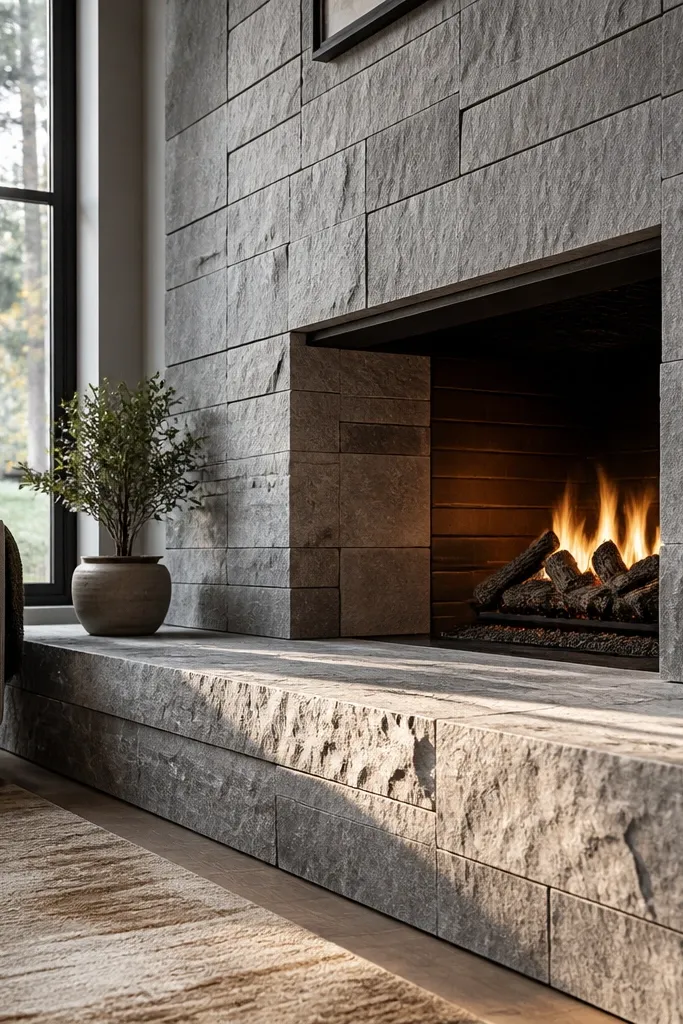
Plan a hearth step that projects 2-4 in. From the wall and matches the stone face thickness. Install cement board and a strong base platform, then set the tall surround stone above it with tight, level courses. Use a straight trim at the hearth top edge so the step line stays crisp. Grout, then seal with matte sealer so the step doesn’t look reflective.
Oversizing the hearth step makes the whole fireplace feel warm because it gives your eye a grounded base. Tall stone surrounds add vertical presence, which reads modern when the stone has a consistent pattern like ledger or sawn panels. This is one of the most photogenic setups because the hearth step catches light at the edges and creates depth. It also helps hide minor wall imperfections by letting the hearth geometry do the heavy lifting visually.
Skip thisDon’t make the hearth step too thin; a thin ledge looks cheap next to thick stone.
Editor's noteUse a laser line for the hearth step top edge; a slight slope is very noticeable in photos.
20. Monochrome Taupe Stone with Black Fireplace Hardware
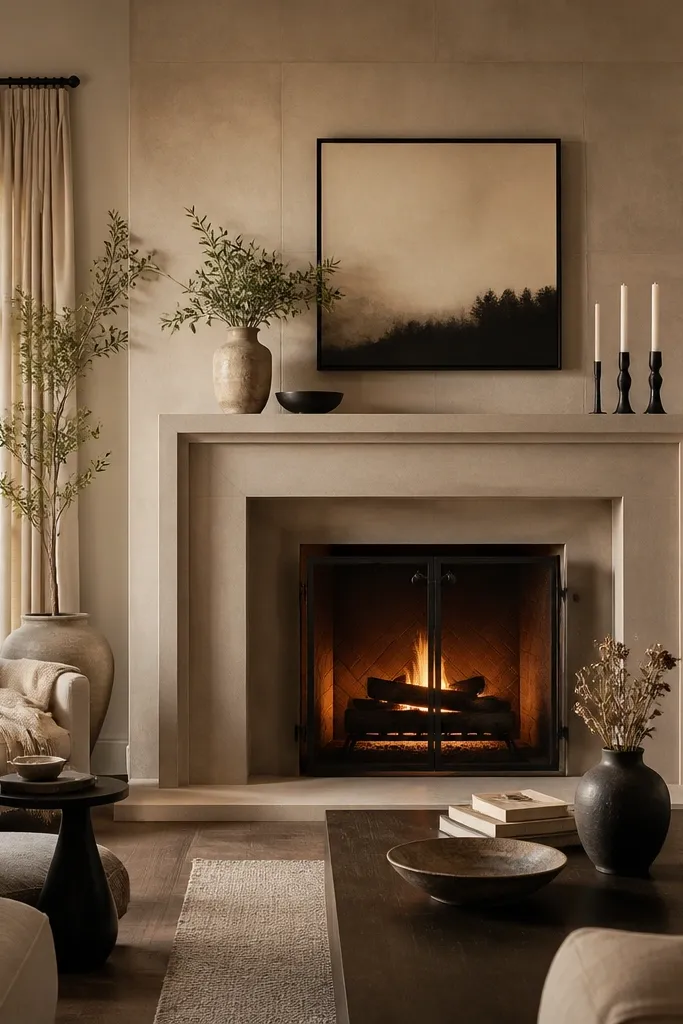
Monochrome taupe stone makes a fireplace feel modern because the color is calm and consistent. Warmth comes from the stone’s texture, not the color drama, and monochrome taupe keeps it soft. Black fireplace hardware pulls the look together and makes it read intentional in daylight and at night. This idea works in almost any room palette because taupe sits between greige and warm beige.
Choose taupe stone with similar tones across the set so you don’t get random color blocks. Install the surround using a consistent ledger or panel layout and grout with a taupe-gray that matches the mid-tone. Add a black fire screen and tool set with simple lines so the hardware doesn’t fight the stone texture. Seal the stone matte and keep the mantel finish in a warm wood or a matte painted color.
Match hardware finish to the lighting hardware in the room (matte black) so the fireplace doesn’t feel like an add-on.
Avoid mixing taupe stone with cool white trim; it can make the whole fireplace feel gray and flat.



