
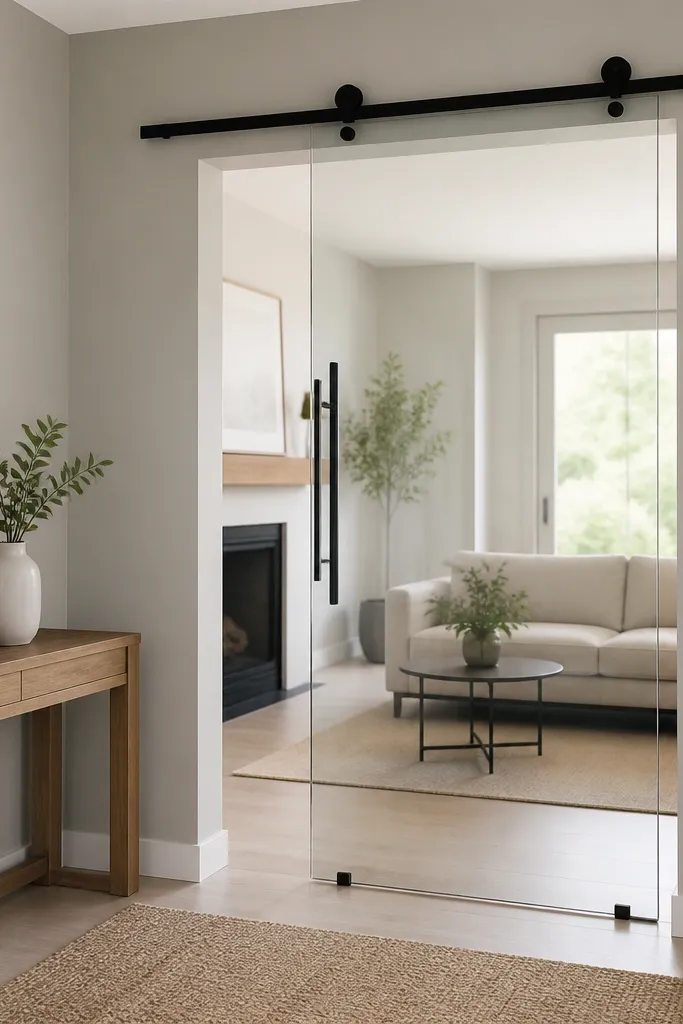
1. Flush wall pocket door with low-iron glass
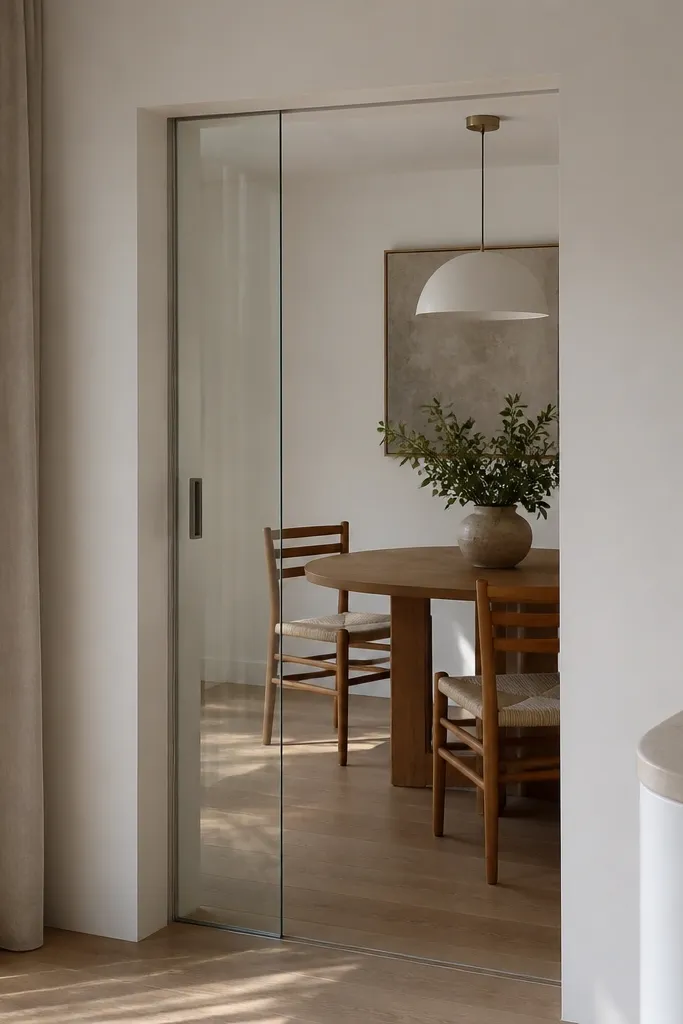
If your goal is modern sliding door design that disappears, a wall pocket is the strongest look. The door slides inside the wall, so you don’t see a track running across the room. Use low-iron clear glass so the opening reads bright and neutral, with minimal tint. Add a slim, flat frame so the glass sits almost flush with the wall line. This is a higher-effort build because you’re working with wall structure, but the payoff is a truly clean silhouette from every angle.
First, confirm you have a wall cavity wide enough for the door panel thickness plus track hardware. Then build or frame the pocket opening to match your door size, and install the track level with long straightedges across the pocket. Finally, set the rollers and test slide before you close the pocket — once drywall goes up, adjustments are slower. Finish by adding a thin trim reveal on both sides so the frame looks deliberate, not unfinished.
Use a long laser level for track alignment; a slightly off line shows up as rubbing within a few weeks.
Don’t hide the track and then leave the pocket opening rough — uneven framing makes the door look “wavy” even if the glass is perfect.
2. Matte black beam track with smoked glass
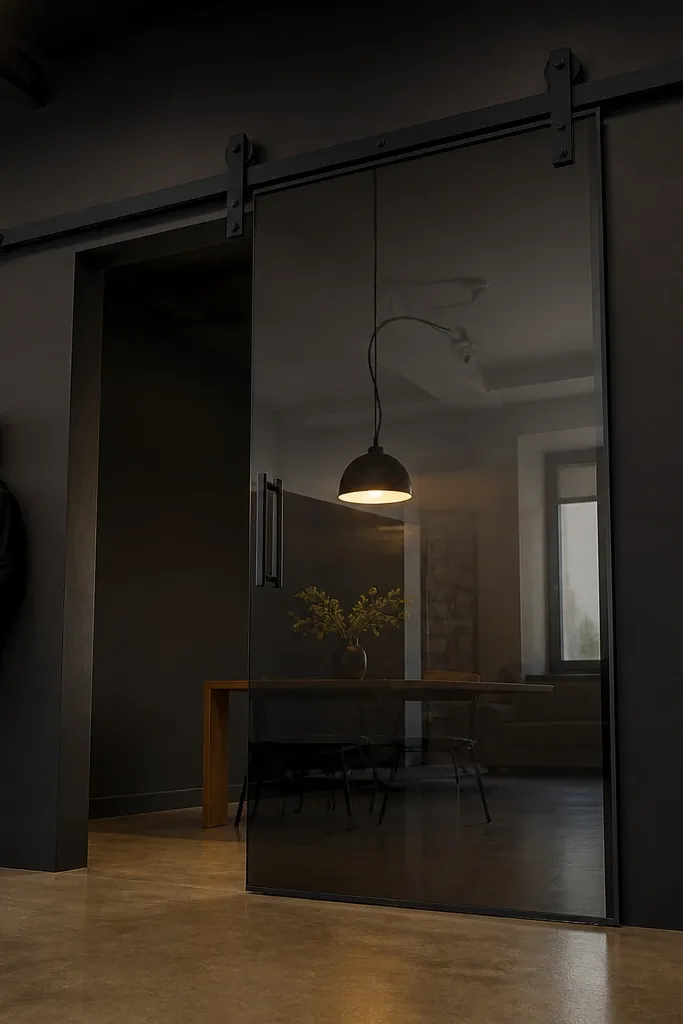
This is the design choice when you want drama without clutter. A matte black beam track reads architectural, and smoked glass adds depth so the door looks like part of the room’s design, not just an opening. Keep the frame slim and use matching black rollers so the movement feels intentional. The darker glass also reduces glare, which makes the door look better in photos and in real life. It’s a great fit for modern living rooms, home offices, and entryways where you want a strong visual line.
Start by selecting a door panel with a compatible top rail and roller system for a beam track. Then mount the beam level, anchoring into studs or a reinforced header — don’t rely on drywall. After that, install smoked glass using gaskets that create a tight, even seal around the perimeter. Finish by installing a simple black pull handle that sits at about 36 inches from the floor for comfortable grip.
Spray-painting track parts looks fine at first; buy powder-coated hardware if you want the finish to stay uniform.
Avoid mixing glossy black track with matte black trim — the sheen mismatch makes the whole system look messy.
3. Brushed brass rail with clear glass and white frame
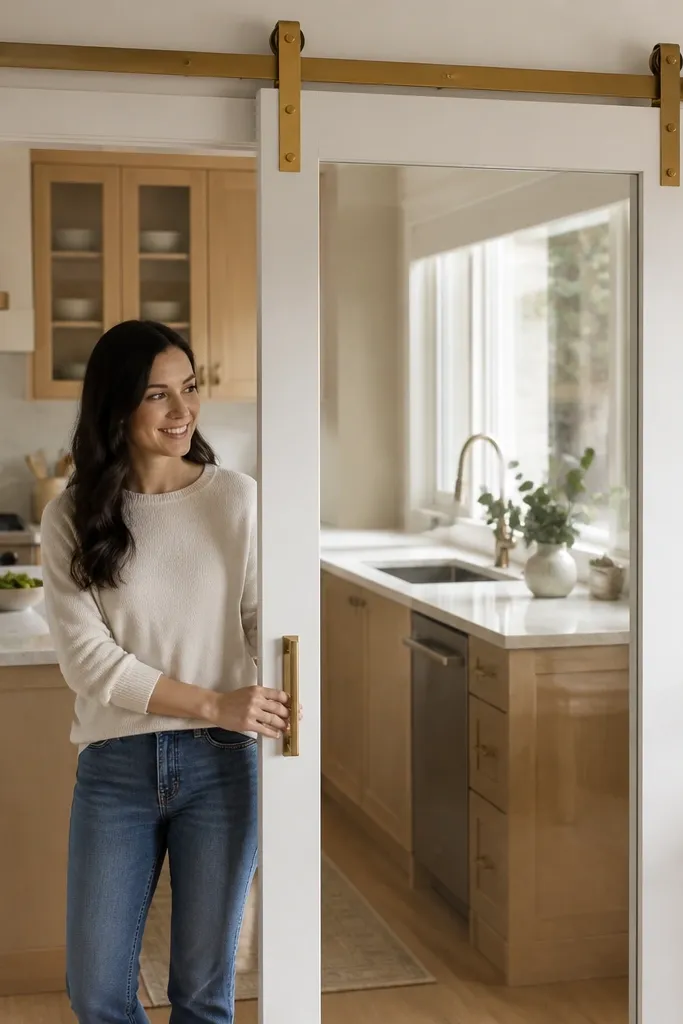
This one is for clean, bright modern sliding door design that still feels warm. A white frame makes the opening look crisp, while brushed brass rail hardware brings a softer, premium tone. Clear glass keeps light moving, and the brass adds a highlight that pops in afternoon sun. The key is keeping everything in the same finish family: rail, roller covers, and pulls. It works especially well in kitchens, dining rooms, and laundry spaces where you want the door to look tidy and inviting.
First, choose a slim white vinyl or aluminum frame system that matches your wall trim width. Then install the brushed brass rail with the correct bracket spacing per the hardware kit so the door doesn’t sag. Next, mount the clear glass panel with uniform gaskets and tighten screws in small increments to avoid uneven pressure. Finish by aligning the handle so it’s centered vertically on the handhold area and doesn’t hit the frame when closed.
Pick brass hardware that’s sealed or lacquered; untreated brass can tarnish unevenly near fingerprints.
Don’t use a thick, chunky frame with brass — the look turns heavy fast.
4. Vertical mullion grid for a gallery-like opening
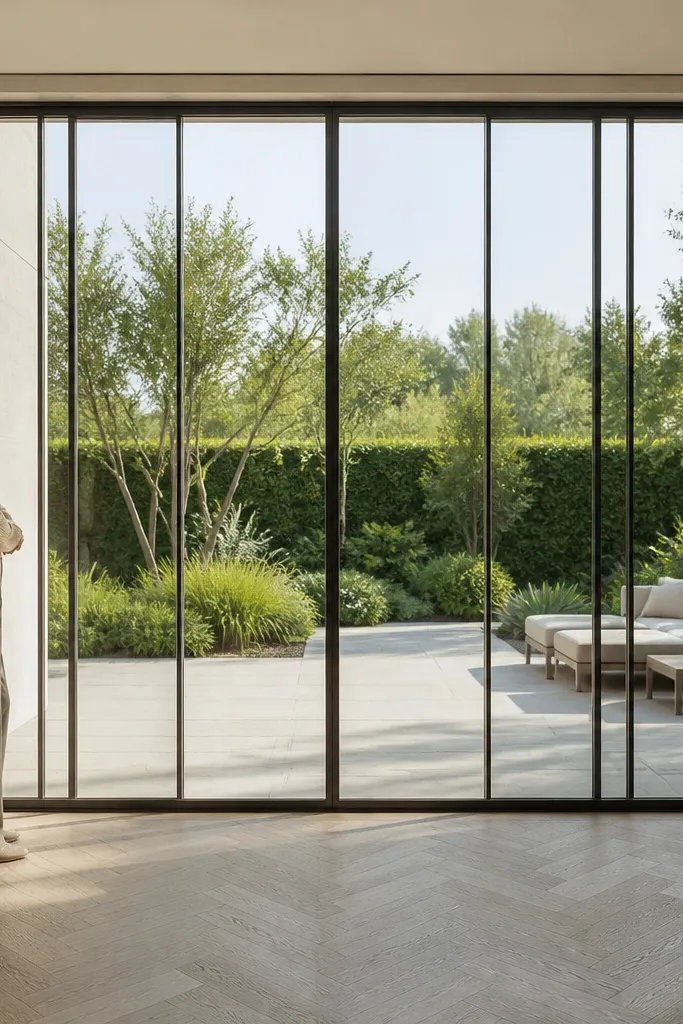
A vertical mullion grid makes a sliding glass door feel designed, not generic. You get a structured, modern sliding door design that frames the view and adds rhythm to the wall. Use slim mullions — think narrow aluminum bars — so the glass stays the star. Pair clear low-iron glass with a matte frame for crisp contrast. This is a strong option when you want privacy through structure rather than heavy tint, and it looks great in hallways and living rooms where the door is seen straight-on.
Start by measuring the door width and dividing it into equal vertical sections so the mullions land symmetrically. Then install mullion bars onto the door frame using a consistent spacing and gasket system so they don’t rattle. Finally, mount the door on a standard track and adjust roller height until the panel sits evenly in the frame. Finish with a simple pull bar or recessed handle so the grid stays visually clean.
Use a fine-tooth blade and test-fit mullion ends dry; tiny gaps show up immediately on a grid pattern.
Avoid wide mullions unless your opening is large — wide bars make small rooms feel chopped.
5. Black-and-white two-tone frame with clear glass
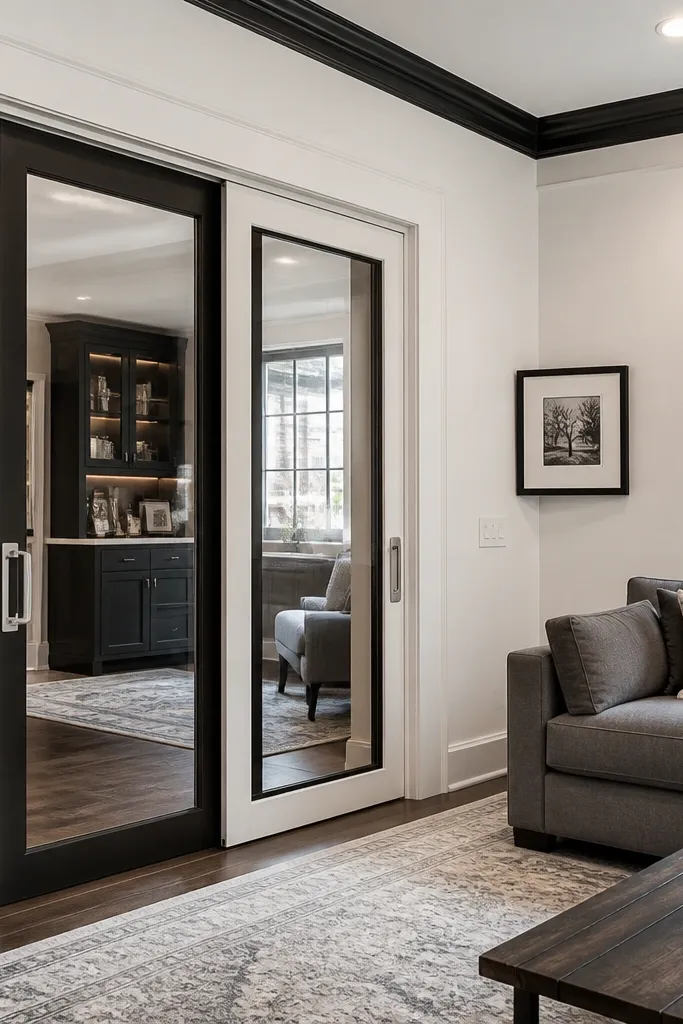
Two-tone framing is how you get a modern sliding door design that looks custom without complex glass work. Use a white outer frame with a black inner face around the glass, or flip it if your room has more black accents. The contrast creates depth, so the door reads as a design object rather than a flat slab. Keep the glass clear so the frame contrast is what you’re seeing. This is perfect for modern kitchens and offices where you already have black hardware or lighting.
First, choose a frame system that lets you add trim pieces to the inner perimeter without interfering with the track. Then install the outer trim flush to the wall line and add the inner black face pieces so the gap around the glass stays even. Finally, set the glass, tighten gaskets, and check the door closes without rubbing the inner trim. Finish by matching the handle finish to the black inner face for a cohesive look.
Cut trim pieces with a single miter angle and keep the same reveal width on every side to avoid a “handmade” wobble.
Don’t paint over glass edges — use proper glazing tape and keep any coating off the gasket contact points.
6. Offset track with reveal shadow gap
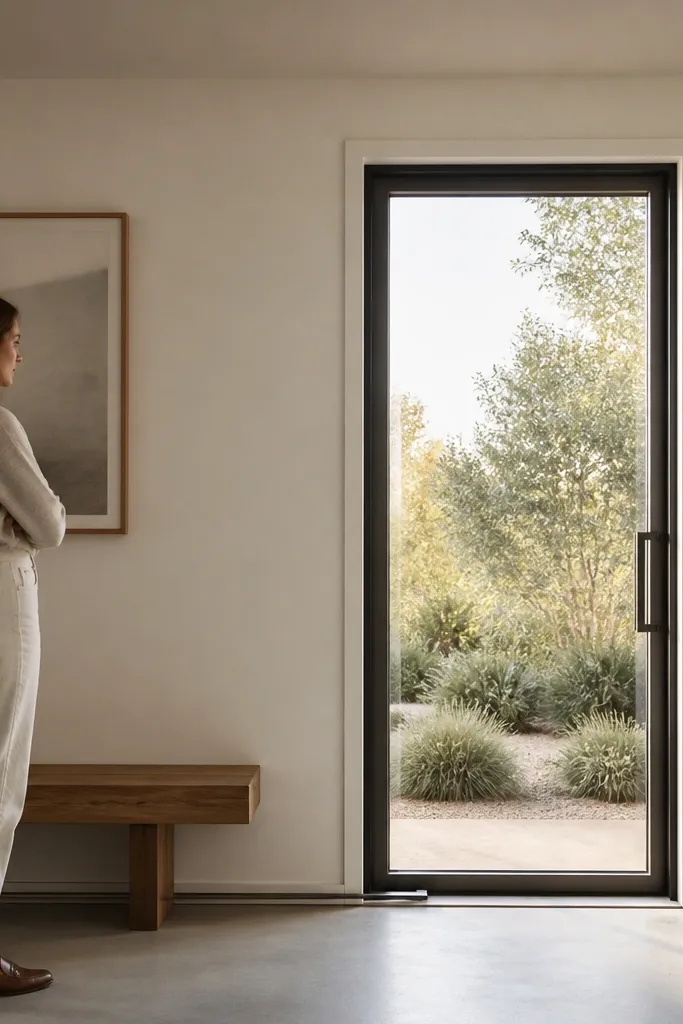
A shadow gap is the cheat code for a modern sliding door design that looks crisp and architectural. By offsetting the track and frame so there’s a consistent 1/4-inch-ish gap around the door perimeter, you create a line of light that makes the door look professionally detailed. Clear glass keeps it bright, and the gap makes the opening feel deeper. This works best when your wall finish is smooth and you can keep edges straight. It’s a great look for living rooms where you want the door to feel like part of the architecture, not a surface-mounted add-on.
Start by planning the reveal width — measure your trim thickness and aim for a uniform gap around the frame. Then mount the track and frame hardware so the door clears the wall surface and lands centered in the opening. Finally, install trim spacers or a casing system that holds the reveal line while you secure the frame. Test the door slide with the trim in place so you don’t accidentally create a rubbing point.
Use setting blocks and spacer shims at the frame corners before you fasten; the gap only stays even if the corners are square.
Don’t rely on caulk to “fix” uneven gaps — it shrinks and makes the shadow line look patchy.
7. Recessed top rail with hidden roller cover
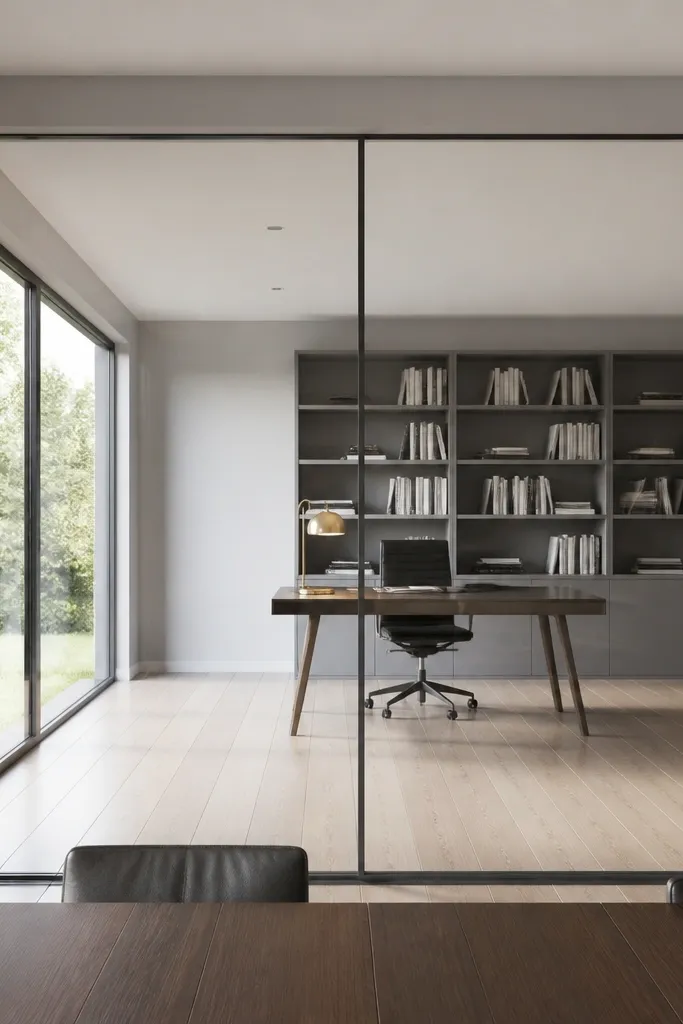
If you like the look of minimal hardware, recessed top rails are the move. The roller cover hides the moving parts, so the door reads as a clean glass wall rather than a track system. Pair clear low-iron glass with a thin aluminum frame and keep the roller cover the same color as the frame. This creates a polished, modern sliding door design that looks great in modern apartments and renovated homes. It’s a good option if you want a “designer” look without going full pocket door.
First, select a recessed rail kit that matches your door panel thickness and roller type. Then install the rail into a furred-out ceiling channel or a header recess so the rail sits flush with the trim plane. Next, attach the roller cover after you’ve leveled the track and confirmed smooth travel. Finish by installing a slim bottom guide or floor track cover so the door doesn’t sway.
Check clearance with the door fully closed and fully open; recessed systems sometimes bind at one end due to bracket tolerances.
Avoid skipping the bottom guide — without it, recessed doors swing and the top cover looks misaligned.
8. Smoked glass with timber side cladding
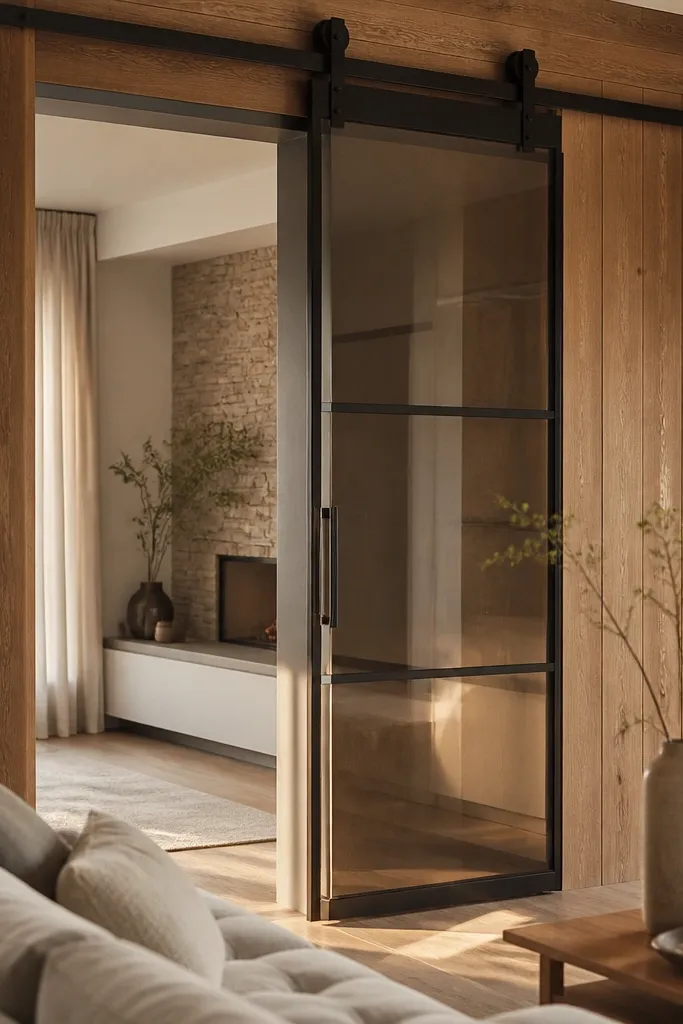
This is modern sliding door design that feels cozy, not cold. Smoked glass gives the sleek look, and timber side cladding adds warmth and texture right where your eye lands. Use a light-to-medium wood like oak or ash with a matte oil finish so it doesn’t glare. Keep hardware black to ground the warmth. The door looks especially good in spaces with wood floors, accent shelves, or a fireplace wall. It also hides fingerprints better than clear glass.
First, build or install timber side jamb cladding around the frame so it overlaps slightly and hides the frame edge. Then mount the sliding door and verify the cladding doesn’t interfere with the glass edge path. Next, add black roller covers and a simple pull handle that matches the hardware. Finish by sealing the timber with a matte clear coat and wiping off any excess before it cures.
Editor's notePre-finish the timber before installation; you’ll get cleaner edges around the glass frame.
Skip thisDon’t use glossy varnish on the cladding — it reflects light and makes the door look less modern.
9. Paper-thin aluminum frame with clear glass
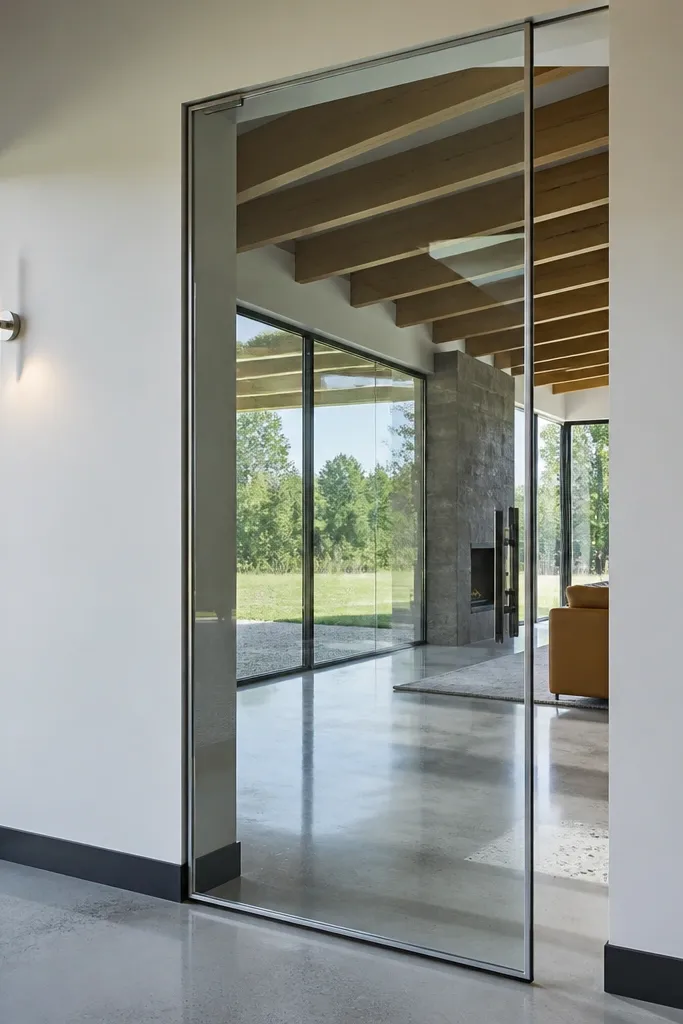
Thin frames are the fastest way to make sliding glass doors look modern. With a paper-thin aluminum frame, the door becomes mostly glass, and the room feels lighter. This look is clean in both bright and dim lighting because the frame lines stay sharp. Choose low-iron clear glass so the edges look crisp and the glass doesn’t have a green tint. This is best for wide openings where the door can read as a continuous sheet of glass. It also looks great in offices and modern dining rooms.
First, pick a frame system designed for slim reveals so you don’t end up with a chunky trim around it. Then install the frame level in the opening and secure it to studs with the manufacturer’s brackets or anchor points. Next, set the glass with gaskets and tighten fasteners evenly to avoid bowing. Finally, add a minimal handle and a bottom guide that keeps the glass panel aligned without adding visual bulk.
Editor's noteMeasure glass thickness and gasket compression before you order; slim frames are unforgiving if the glass spec is off.
Skip thisAvoid mixing a slim frame with a thick wall casing — the mismatch makes it look like parts from different systems.
10. Two-panel sliding door with center seam emphasis
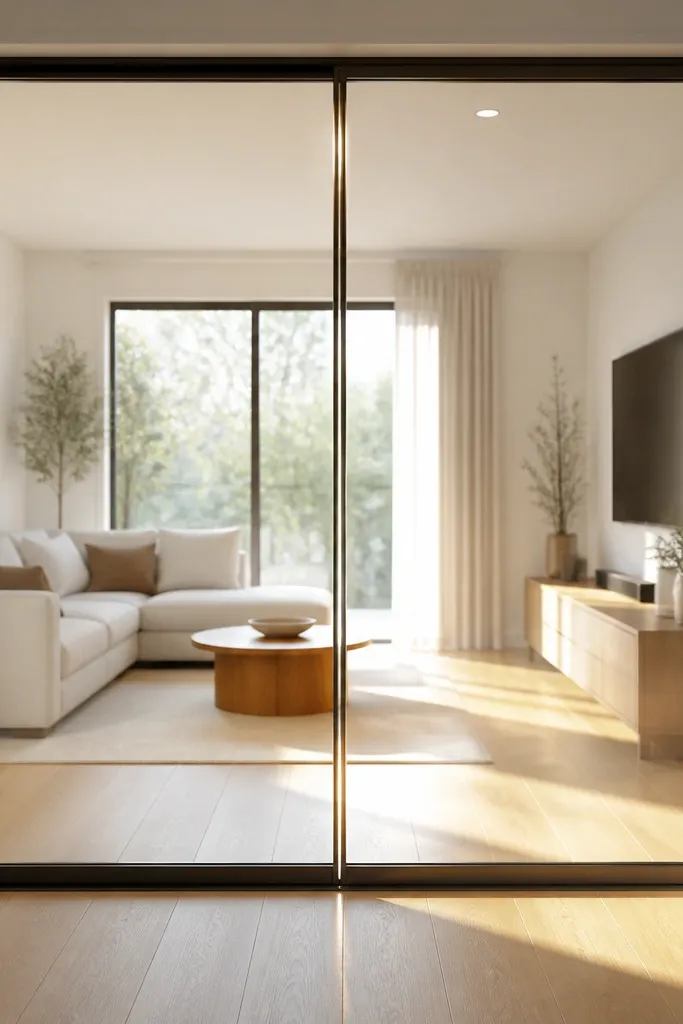
A two-panel sliding setup looks more custom than a single panel because you get control over how the seam lines up. In modern sliding door design, the seam becomes a design detail, especially if both panels have matching thin frames and the same glass type. Use clear glass for a bright, open feel, or tinted glass if you need glare control. This layout also gives you a wider opening when both panels slide past each other, so the room feels more flexible. It suits patios, dining-to-living transitions, and larger offices.
First, choose a two-track system or a double track configuration that matches your wall width and door panel sizes. Then calculate panel overlap so the seam sits where you want it visually when closed. Next, install both tracks with the same level reference line — measure from a single datum point. Finally, mount both panels and adjust roller height until the seam is even and neither panel rubs at the meeting point.
Editor's noteMark the intended seam position on the floor with painter’s tape before you drill — it prevents “almost aligned” frustration.
Skip thisAvoid closing the deal before you test the overlap; small overlap differences create visible light gaps.
11. Frosted privacy strip on the lower third
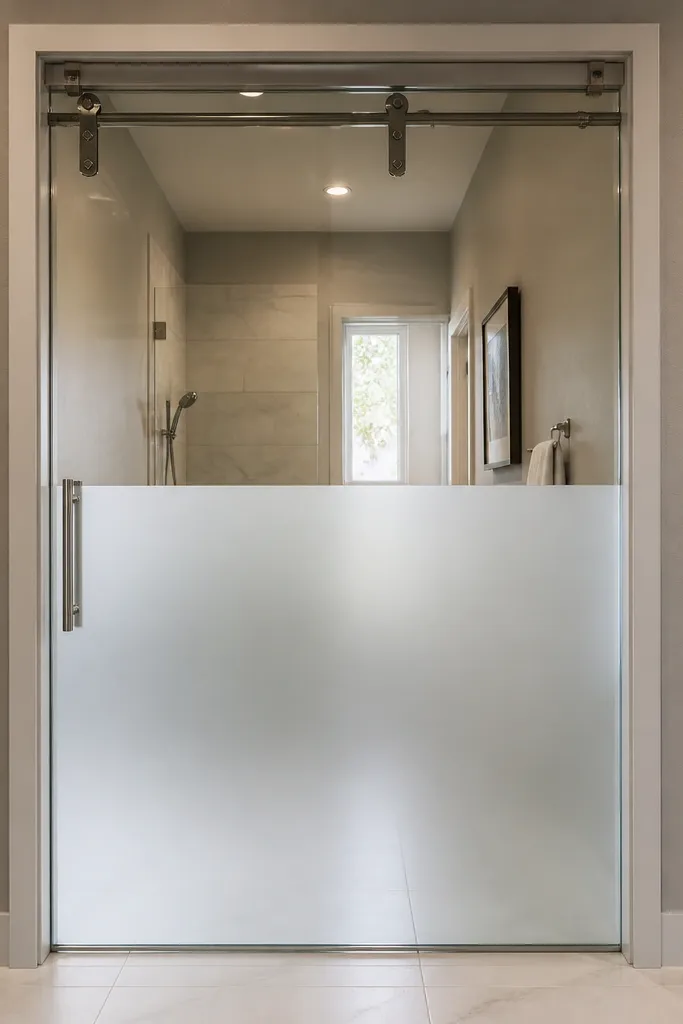
Privacy without killing the light is what makes this look modern. A frosted strip across the lower third keeps people from seeing straight through at eye level, while the upper clear glass stays bright. You get a design line that reads intentional, especially when you align the strip with the door’s frame edges. This idea is perfect for bathrooms, laundry rooms, and home offices near walkways. It also looks great in photos because the contrast is clean and graphic.
First, clean the glass thoroughly and use a level and painter’s tape to mark the strip height — measure from the bottom edge of the glass to keep it consistent. Then apply frosted film or a privacy laminate on the inside face, smoothing from the center outward and trimming with a sharp blade. Finally, install the door and add a handle that doesn’t block the frosted line, then wipe off any residue. Seal edges only if the film system calls for it.
Editor's noteDo the film install in a room with minimal dust; one tiny speck under the film will show forever.
Skip thisAvoid uneven strip height — a crooked line makes the whole door look DIY in a bad way.
12. Art deco inspired glass pattern with slim frame
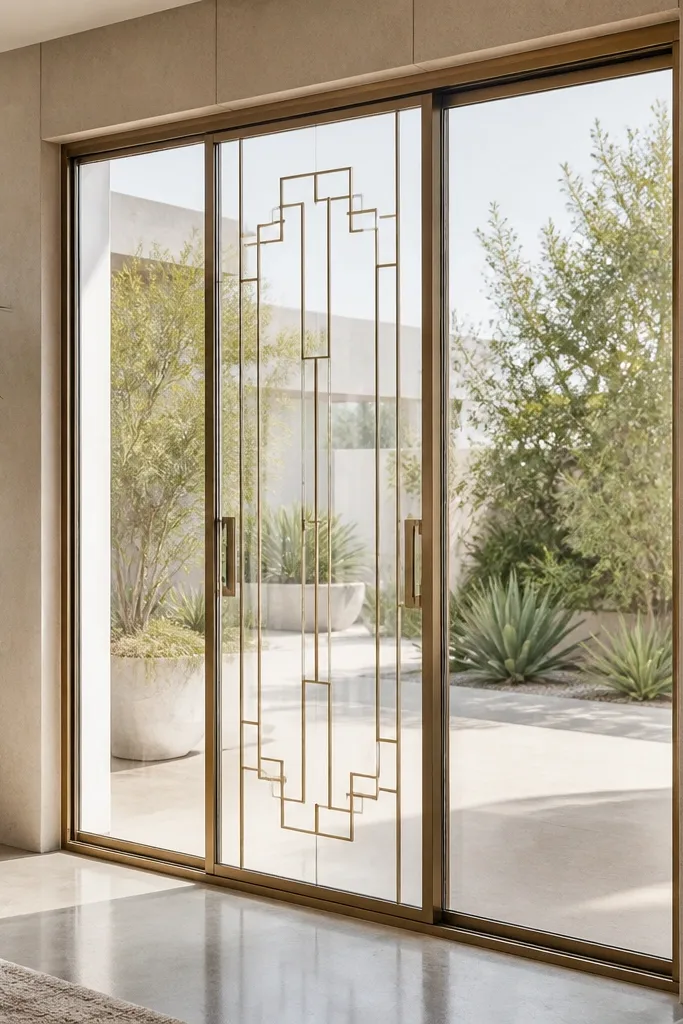
Geometric glass patterning gives you a modern sliding door design with personality, but the frame has to stay slim so it doesn’t look heavy. Choose a geometric pattern that uses straight lines and consistent spacing, like a subtle deco grid or stepped motif. Keep the glass clear around the patterned section so light still moves through. The contrast between pattern and smooth glass reads crisp in daylight and at night with indoor lights. This works in foyers, dining rooms, and any space that needs a focal point without adding extra decor.
First, pick a door panel layout where the patterned glass sits in a controlled band or centered panel. Then order glass or a pre-patterned insert that matches the frame dimensions exactly — don’t stretch patterns. Next, install the panel using proper glazing gaskets and tighten fasteners evenly. Finally, match hardware to the frame color and keep the handle simple so the pattern stays the star.
Use a matte black or matte bronze handle; glossy metal competes with geometric glass.
Avoid busy patterns that change density across the panel — they look cheap once the door moves.
13. Tongue-and-groove track cover for a built-in look
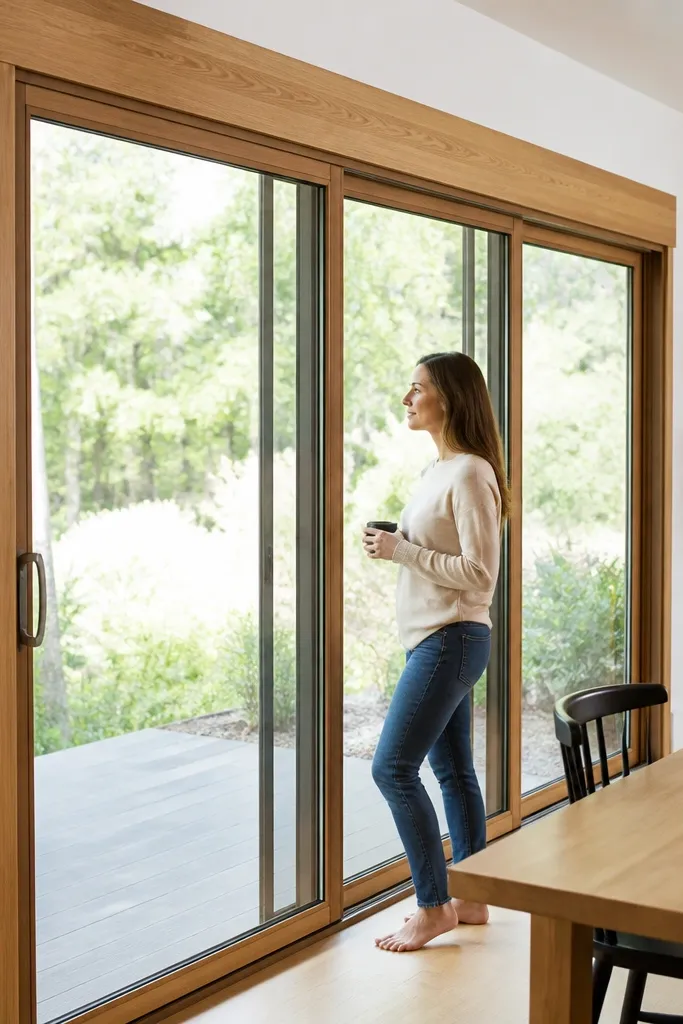
Most sliding doors look “temporary” because the track is visible. A tongue-and-groove wood track cover makes the hardware disappear and turns the top rail into a real architectural element. Use a light stain or natural oak finish so the wood grain reads warm and modern. Pair it with clear glass so the opening stays bright, and use black rollers hidden behind the cover. This is a strong choice for living rooms and hallways where you want the door to look built-in rather than added later.
First, measure the track length and build a cover box that extends a few inches past the door opening on both ends. Then install a backing board to the studs, attach the cover rails, and keep the cover opening wide enough for roller travel. Next, mount the sliding door and confirm the door clears the inside of the cover at full open and full close. Finish by installing tongue-and-groove panels, sanding flush, and sealing with a matte topcoat.
Editor's noteLeave a 1/8-inch service gap at the cover ends so you can access adjustment screws later.
Skip thisDon’t fully enclose the track without checking ventilation; dust and debris build up and the rollers start to sound rough.
14. Herringbone wood interior frame with clear glass
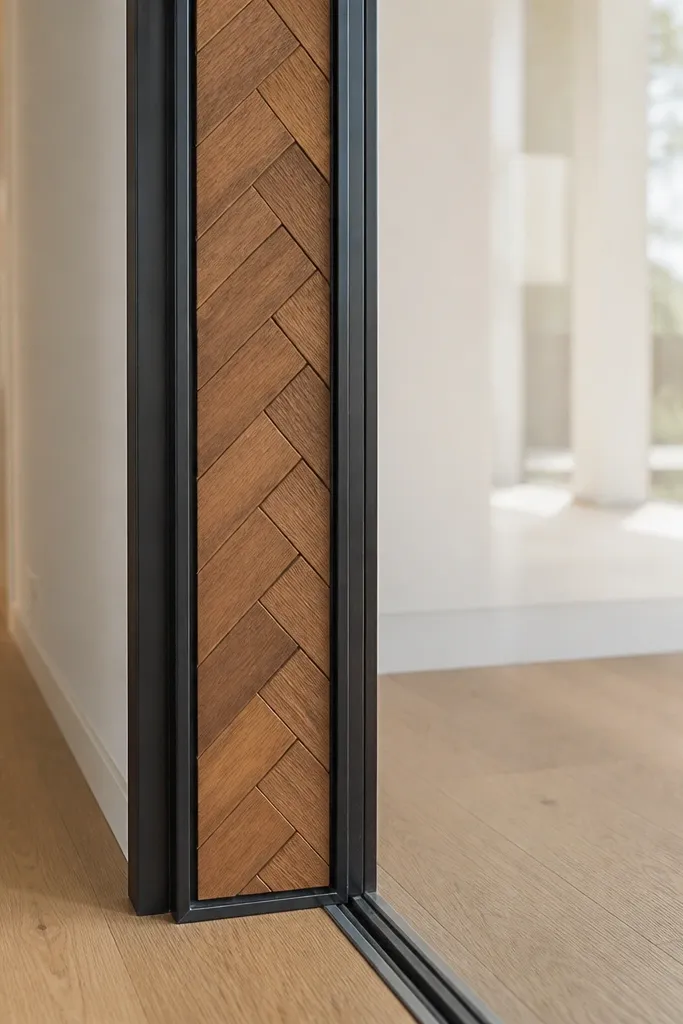
A herringbone frame turns modern sliding door design into a statement piece without covering the glass. The trick is to limit the pattern to the frame, not the entire door — the glass stays clean and bright. Use a small-scale herringbone on the inner frame rail so it reads sharp from a distance. This looks incredible in entryways and dining rooms because it catches light along the wood angles. It’s a little more advanced, but the result is unmistakably “custom.”
First, build the frame rails from straight stock and cut a herringbone inlays that match the inner perimeter. Then glue and pin the inlays with tight spacing, and sand flush so the glass gasket sits flat. Next, assemble the frame, install gaskets, and set the glass panel. Finally, mount the door on a standard track and finish the wood with a matte clear coat that doesn’t create shine on the inlay edges.
Use a guide fence for your cuts so the herringbone angles stay consistent across all rails.
Avoid thick inlays; if the frame edge gets too bulky, the door won’t close cleanly.
15. Black frame with white translucent privacy glass
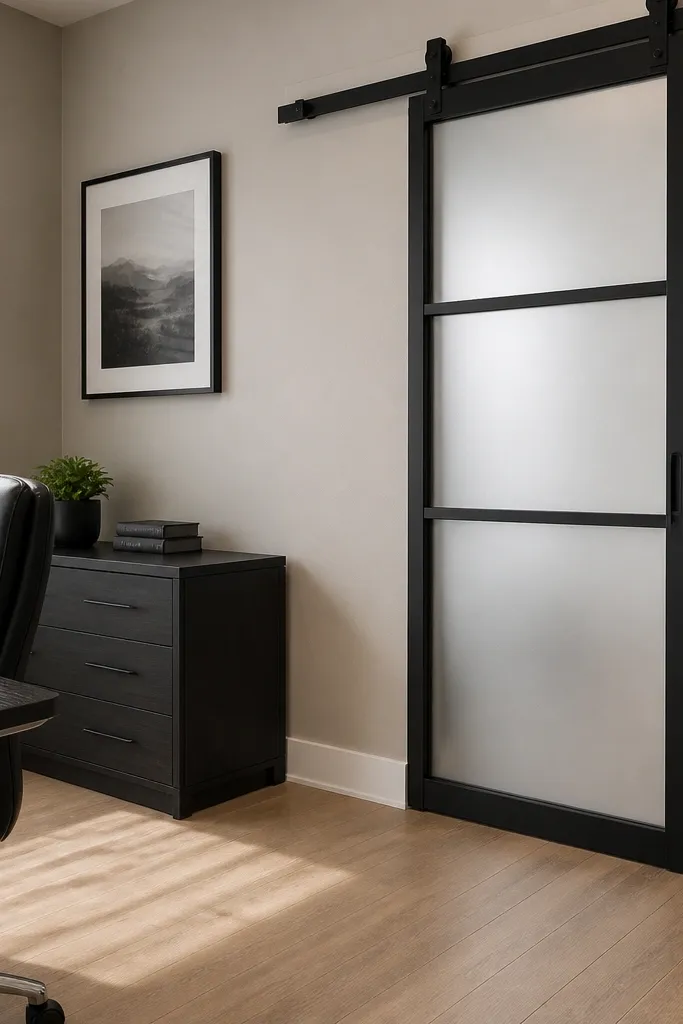
Translucent privacy glass is a modern sliding door design that looks smooth and architectural because it removes the “see-through” mess. A black frame makes the translucent panel look intentional and panel-like, not like a frosted window you forgot to replace. This is perfect for bathrooms, bedrooms, and home offices where you want privacy but still want daylight. It also photographs well because the surface is uniform and reduces glare. Keep the hardware matte black and keep the frame lines crisp.
First, choose a translucent glass panel type with consistent opacity (not patchy). Then install the black frame and mount the panel with gaskets that create a uniform seam around the glass. Next, mount the door on a track system and check that the translucent panel doesn’t touch the frame at any point during travel. Finally, install a simple pull handle aligned with the door center and add a soft-close guide if your kit supports it.
Editor's noteWipe translucent glass with a microfiber and a streak-free cleaner; smudges show more than on clear glass.
Skip thisAvoid using clear glass plus a random frosted film patch — the uneven opacity looks DIY.
16. Clear glass with hidden floor guide and cable pull
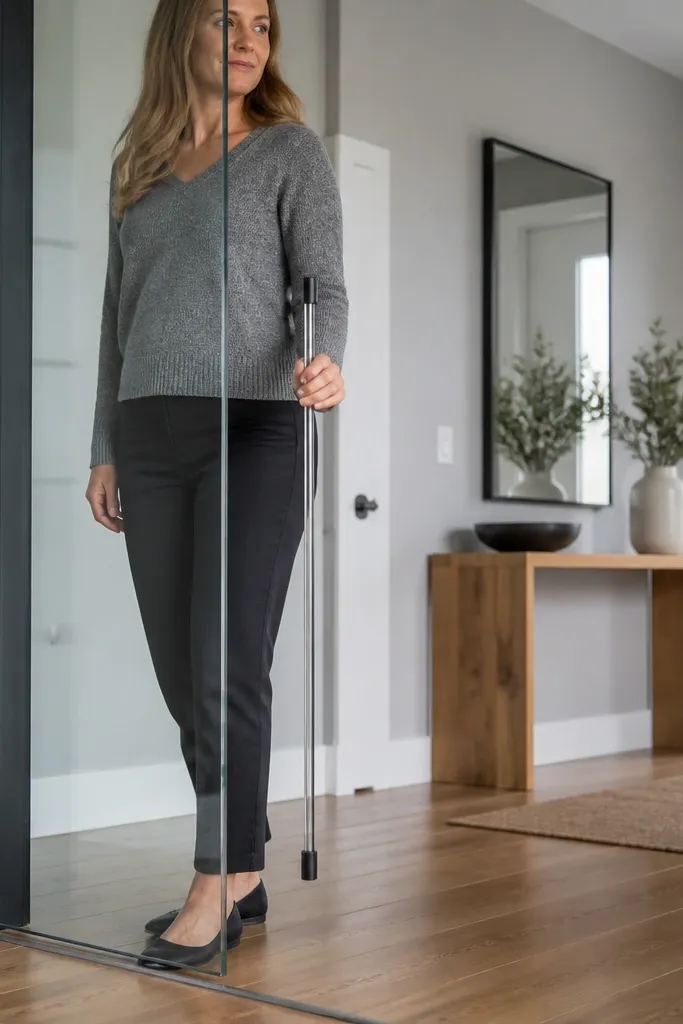
Cable pulls look modern because they’re minimal and they keep your hand in a natural grip zone. Pair that with a hidden floor guide so the bottom hardware doesn’t interrupt the glass wall look. Use clear low-iron glass and a slim frame, and keep the track finish consistent with your room’s hardware. This setup feels clean and functional, and it’s great for spaces where you want the door to look like a continuous panel. It works well in offices, studios, and modern kitchens that need easy access.
First, install the top track and rollers, then install the bottom guide in the correct location so the door stays aligned. Then mount the cable pull hardware through the door rail — confirm the pull doesn’t interfere with the frame when closed. Next, set the glass panel and test the door travel with the cable pull installed. Finally, adjust roller height so the door sits evenly and the cable pull aligns with the frame opening.
Editor's noteUse the manufacturer’s template for cable pull hole spacing; misalignment makes the pull angle look off instantly.
Skip thisDon’t mount the cable pull too low — it looks awkward and makes the door feel “cheap” in use.
17. Matte white frame with warm wood handle beam
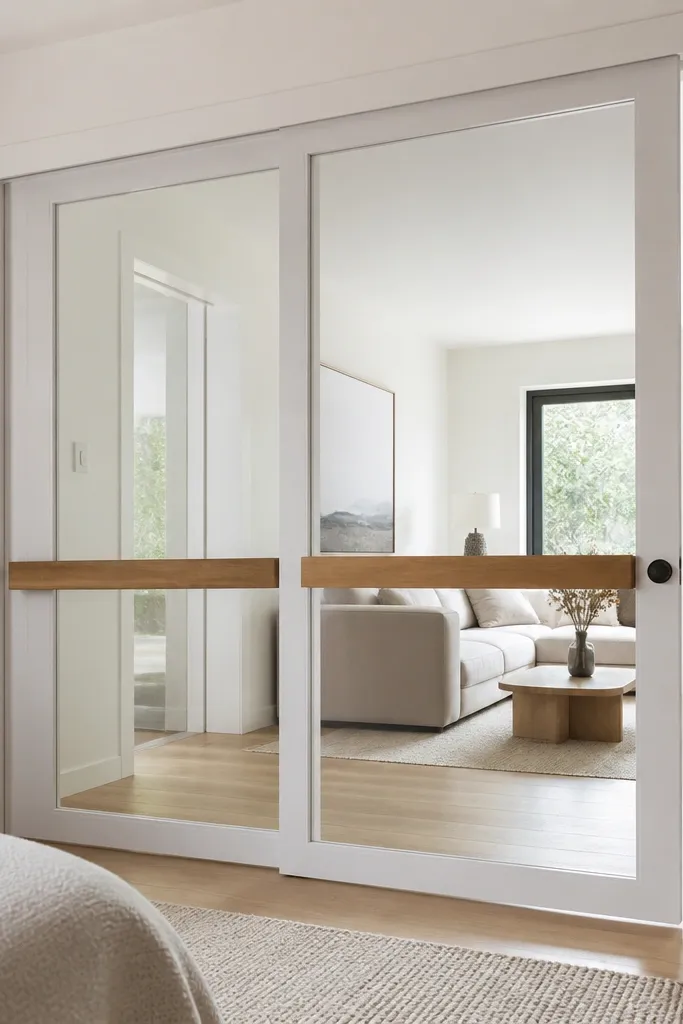
Matte white frames keep modern sliding door design bright and clean, but wood handles add warmth where people touch. This idea pairs a white, low-gloss frame with a warm wood pull beam so the door feels handmade and comfortable. Clear glass maintains openness, and the handle beam gives you a strong horizontal line at arm height. It’s a great fit for homes with light walls, natural wood floors, or Scandinavian-style interiors. The look is photogenic because it’s high contrast without being loud.
First, install the matte white frame and glass panel on a track system with matching white components. Then attach a separate wood handle beam to the door rail using hidden brackets so screws don’t show. Next, sand and seal the wood handle with a matte oil or hardwax so it doesn’t look shiny under light. Finally, check handle clearance at the closed position and add a rubber bumper if your kit doesn’t include one.
Round the handle edges with 1/8-inch radius sandpaper so fingers slide naturally.
Avoid painting the handle — raw or sealed wood looks more modern than coated wood.
18. Stainless hardware with clear glass and minimal frame
Brushed stainless hardware gives a sleek, modern sliding door design that works especially well in spaces with stainless appliances or clean metal accents. Keep the frame minimal and the handle simple so the hardware becomes the highlight rather than a busy mix of finishes. Clear low-iron glass keeps the door looking airy. This is a strong choice for kitchens, workshops, and utility spaces where you want durability and an easy-to-clean look. The stainless also hides minor fingerprints better than mirror chrome.
First, choose a stainless-compatible track kit and confirm the roller type is correct for your door weight. Then mount the track using solid anchors and check level with a long straightedge. Next, install clear glass with gaskets and make sure the stainless trim pieces sit flush without gaps. Finally, adjust rollers so the door glides smoothly and doesn’t clack against the stops.
Editor's noteUse a stainless cleaner wipe on install day; residue from installation can stain if left.
Skip thisDon’t mix stainless hardware with matte black trim unless your room already has both metals intentionally.
19. Sliding door with vertical smoked glass panels (striped look)
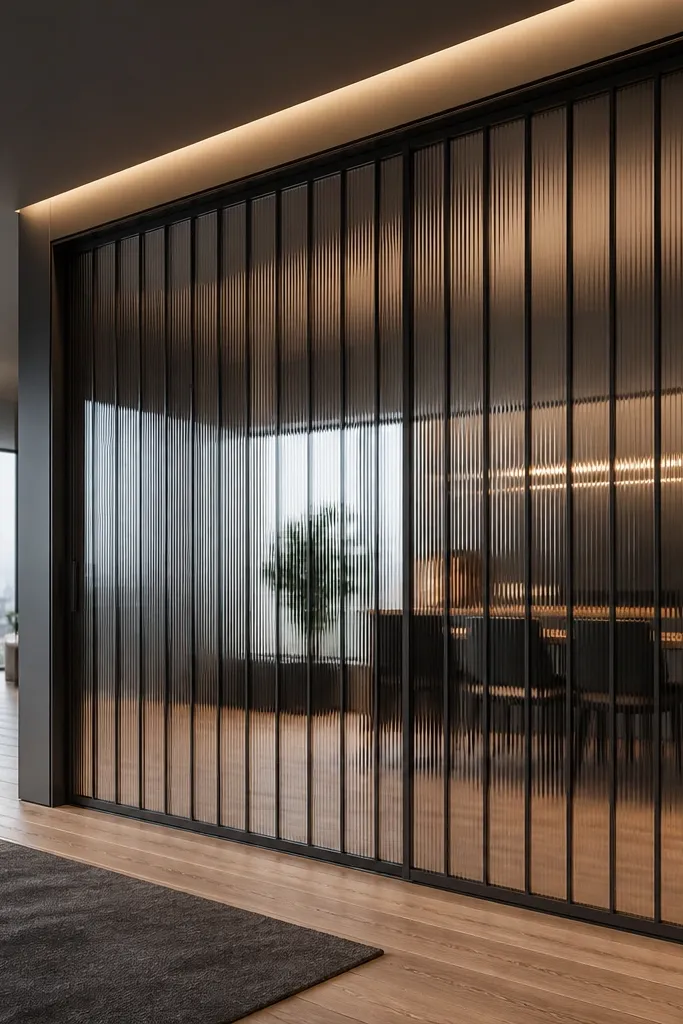
A striped look from vertical smoked panels reads modern because it creates controlled repetition. Instead of one tinted slab, you use multiple narrow smoked segments separated by thin frame lines, so the door has texture even when it’s closed. This design reduces glare and adds privacy without turning the whole opening opaque. It’s visually striking in modern hallways and living rooms where the door is a focal line. Keep the frame slim and the hardware neutral so the glass pattern stays the star.
First, plan a panel layout with equal-width glass segments and matching spacing for the dividers. Then order pre-cut smoked glass segments or build a segmented insert that fits the frame exactly. Next, assemble the frame with dividers, install gaskets, and set the door panel onto the track. Finally, adjust the door so each segment stays aligned and there are no visible steps along the divider edges.
Editor's noteUse identical glass thickness across segments; mismatched thickness makes the seams look uneven once installed.
Skip thisAvoid mixing different smoke tones — the striped look turns patchy fast.
20. Clear glass with interior aluminum channel reveal
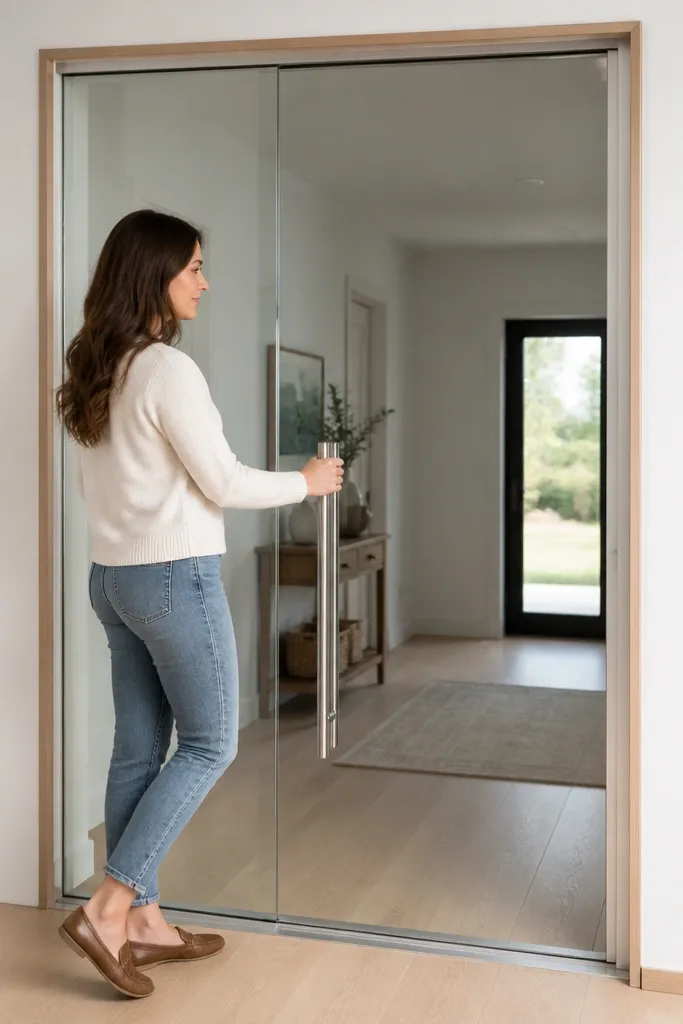
This is modern sliding door design for people who love sharp lines. An interior aluminum channel reveal creates a thin “picture frame” border around the glass, making the opening look engineered. Keep the glass clear and low-iron, and use the same aluminum finish for the channel and handle. The channel adds a crisp depth effect that reads well from across the room. This works in modern living rooms, offices, and any hallway where you want the door to look like part of a built-in system.
First, choose the channel profile and confirm it fits your gasket and glass thickness. Then install the channel around the inner perimeter of the frame, keeping corners perfectly square and spacing consistent. Next, set the glass panel and tighten glazing points evenly. Finally, mount the door and check that the channel doesn’t interfere with the track or bottom guide during travel.
Dry-fit the channel with the gasket in place before you glue or screw; one gasket thickness difference changes everything.
Avoid using a channel that’s too deep — it makes the door look bulky and less modern.



